AirGo Portable Outdoor Speaker System Owners Manual
•
0 j'aime•2,445 vues

The AirGo Outdoor Speaker System owners manual gives you an overview of the portable AirGo Outdoor Speaker System and covers installation, speaker adjustment and care and warranty.

Recommandé
Recommandé
Contenu connexe
Dernier
Dernier (20)
En vedette
En vedette (20)
AirGo Portable Outdoor Speaker System Owners Manual
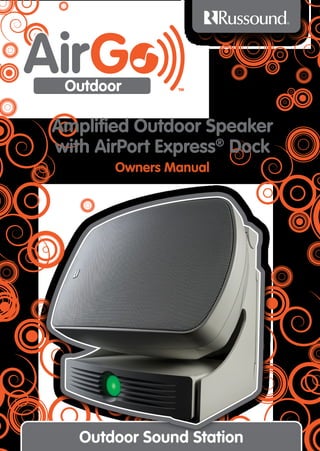
- 1. Amplified Outdoor Speaker with AirPort Express® Dock Owners Manual Outdoor Sound Station
- 2. INTRODUCTION Product Description The AirGo™ Outdoor Sound System is a portable Place it on the deck near the house to cover the deck amplifier/speaker dock for an Apple® AirPort and backyard while having a cookout. Put it on the Express. With the AirGo Outdoor you can stream driveway near the garage when washing the car. music from an AirPlay® compatible device via the Place it on the ground near the front door during Apple AirPort Express. seasonal events to play music and sound effects of your choice to match the occasion! Since the Apple AirPort Express also has the ability to act as a Wi-Fi repeater, you now have the ability to The AirGo Outdoor is easy and fun to use. With the have an outdoor Wi-Fi hotspot and listen to music at Apple AirPort Express installed, stream music from the same time1. A special pocket within the unit, the your iPhone®, iPad®, Mac®, iTunes® or PC2 and surf APX, protects the AirPort Express from the elements. the net from your Internet appliance at the same time. The AirGo Outdoor is fun, sounds great and The AirGo Outdoor is a high performance, quality brings hanging outside to another level. outdoor sound system. A single large stereo speaker provides excellent sound quality and a wide sound stage. 1 Dependant upon AirPort Express configuration 2 Requires iTunes or AirFoil Speaker Ampli er Touch sensitive Mute switch 2
- 3. INSTALLATION Configuration of the AirPort Express® Removing the APX cover The AirPort Express will need to be configured before To begin, unravel the AirGo Outdoor’s main power it is installed in the APX Pocket. Please refer to the cord and remove the APX cover. Use a standard AirPort Express installation manual for complete Phillips screwdriver to remove the two Phillips screws directions. that secure the APX cover in place. Don’t worry about loosing the screws, they’re captive screws so they won’t fall out. Be careful not to dislodge the gasket that is fitted to the APX cover. It is important that it be intact when reinstalling the cover to keep moisture out of the APX Pocket. See figure 2 AirPort Express Status Light APX Cover #2 Phillips #2 Phillips Screw Screw Figure 2 AirGo.russound.com 3
- 4. INSTALLATION Installing the AirPort Express® NOTE: Make sure the APX cover is seated securely in place and fastened tightly in place by the philips into the AirGo Outdoor screws to ensure a proper seal of the compartment. 1. Remove the detachable electrical prongs from the 5. Place the cover back onto the APX Pocket and AirPort Express by sliding the Power Adapter off of the tighten the screws until they are snug. AirPort Express. See Figure 3 6. Plug the Main Power Cord into a grounded 2. Take the 3.5mm audio plug located in the APX electrical outlet. Turn the Power Switch ON and wait for Pocket and insert it into the Audio Output Jack of the the AirPort Express to boot up. AirPort Express. See Figures 4 & 5 NOTE: The status of the AirPort Express and its booting 3. Take the power cord from the APX Pocket and insert process can be observed at the Status Light window it into the Power Input jack of the AirPort Express. located on the AirPort Express Pocket Cover. See Figure 5 See Figure 2 4. Carefully place the AirPort Express and all of the NOTE 2: Never plug the AirGo Outdoor into an connected wires into the APX Pocket. ungrounded electrical outlet, ungrounded electrical cord or use a ground lifting adapter to remove the safety ground. Figure 3 Power Adapter Audio output Jack Figure 4 4
- 5. INSTALLATION AirPort Express Audio plug Power cord for AirPort Express Mains Power Power Cord Figure 5. Installed AirPort Express® AirGo.russound.com 5
- 6. Speaker Adjustment/Care Speaker Angle Adjustment Your Your AirGo Outdoorshipped with the speaker in the downward position. AirGo Outdoor is is shipped with the speaker in the downward position. For optimal sound dispersion, adjust the speaker to the upward position before use. use. For optimal sound dispersion, adjust the speaker to the upward position before Figure 6. Speaker angle adjustment Speaker Angle Adjustment Taking Care of Your AirGo™ Outdoor The AirGo Outdoor Speaker is shipped with the The AirGo Outdoor is made of durable materials speaker in the downward position. For optimal that need very little care. All we recommend is an sound dispersion, adjust the speaker to the upward occasional wiping with a soft, damp cloth. Do not position before use by grasping the speaker on the use any harsh detergents, chemical solvents, or sides and tilting it upward. abrasive materials. Also, do not spray water or other See Figure 6 liquids into the grilles. While the AirGo Outdoor can be left out in the rain it is recommended to bring the product inside when not in use or to expose it to prolonged inclement weather. This will keep the product clean, maximizing its longevity and performance. 6
- 7. REFERENCE Specifications Loudspeaker type: Passive two-way, dual input US: 100-130VAC, 60Hz, 72W MAX Dimensions: Width: 12.9” (32.8cm) Length: 10.2” (25.9cm) Height: 12.6” (32.1cm) Weight: 16.25 lbs, 7.37Kg FCC This device complies with part 15 of the FCC rules. Operation is subject to the following two conditions: (1) This device may not cause harmful interference, and (2) This device must accept any interference received, including interference that may cause undesired operation. This Class B digital apparatus complies with Canadian ICES-003. Cet apparel numérique de la classe B est conforme à la norme NMB-003 du Canada. This product meets our highest standards for eco-friendly products. For more information visit: AirGo.Russound.com AirGo.russound.com 7
- 8. REFERENCE Warranty The Russound AirGo Outdoor Sound System has a 90 days warranty against defects in materials and workmanship. During the warranty period, Russound will replace any defective part and correct any defect in workmanship without charge for either parts or labor. Russound may replace returned speakers with a product of equal value and performance. In such cases, some modifications to the mounting may be necessary and are not Russound’s responsibility. For this warranty to apply, the unit must be utilized according to its written instructions. If repairs are necessary, they must be performed by Russound. The unit must be returned to Russound at the owner’s expense and with prior written permission. Proof of purchase must accompany all claims. Accidental damage and shipping damage are not considered defects, nor is damage resulting from abuse or from servicing performed by an agency or person not specifically authorized in writing by Russound. This warranty does not cover: • Damage caused by abuse, accident, misuse, negligence, or improper operation or installation. • Products that have been altered or modified. • Any product whose identifying number or serial number has been altered, defaced, or removed. • Normal wear and maintenance. To return for repairs, the unit must be shipped to Russound at the owner’s expense, along with a note explaining the nature of service required. Be sure to pack the speaker in the original box or a corrugated container with at least 3 inches of resilient material to protect the unit from damage in transit. Before returning a speaker for repair, call Russound at 603.659.5170 for a Return Authorization number. Write the RA number on the shipping label and ship to: Russound, ATTN: Service, 5 Forbes Road, Newmarket NH 03857. Russound sells products only through authorized channels to ensure that customers obtain proper support and service. Any Russound product purchased from an unauthorized dealer or source, will not be honored or serviced under existing Russound warranty policy. Any sale of products by an unauthorized source or other manner not authorized by Russound shall void the warranty on the applicable product. REGISTER ONLINE TODAY AT: AirGo.Russound.com Scan this code to go direcctly to the page 8
- 9. Russound 5 Forbes Road, Newmarket, NH 03857, USA Ph. (855) MYAIRGO Fx. 603.659.5388 AirGo.Russound.com ©2011 Russound. All rights reserved. All trademarks are property of their respective owners. Specifications are subject to change without notice. Russound is not responsible for typographical errors or omissions. PATENT PENDING AirPlay, AirPort Express, iPad, iPhone, iPod touch, iTunes and Mac are trademarks of Apple Inc. MANUAL r8