FREE Microsoft Windows 7 Quick Reference Guide from Exclaim
•
1 j'aime•1,830 vues

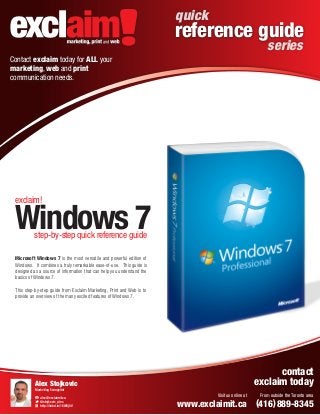
Exclaim marketing, print and web is proud to present this FREE step-by-step reference guide for MIcrosoft Windows 7. Microsoft Windows 7 is the most versatile and powerful edition of Windows. It combines a truly remarkable ease-of-use. This guide is designed as a source of information that can help you understand the basics of Windows 7. This step-by-step guide from Exclaim Marketing, Print and Web is to provide an overview of the many excited features of Windows 7. Download it today!

Recommandé
Recommandé
Contenu connexe
Dernier
Dernier (20)
En vedette
En vedette (20)
FREE Microsoft Windows 7 Quick Reference Guide from Exclaim
- 1. quick reference guide series Contact exclaim today for ALL your marketing, web and print communication needs. marketing, print and web exclaim! Windows 7 step-by-step quick reference guide Microsoft Windows 7 is the most versatile and powerful edition of Windows. It combines a truly remarkable ease-of-use. This guide is designed as a source of information that can help you understand the basics of Windows 7. This step-by-step guide from Exclaim Marketing, Print and Web is to provide an overview of the many excited features of Windows 7. contact exclaim today Alex Stojkovic Marketing Evangelist alex@exclaimit.ca @stojkovic_alex http://linkd.in/16WOj0V Visit us online at From outside the Toronto area www.exclaimit.ca (416) 889-8345
- 2. quick reference guide series Microsoft Windows 7 Desktop screen and layout marketing, print and web Your Microsoft Windows 7 main screen and layout breakdown Address Bar Displays the location of the folder that is currently open. Title bar Click and drag to move the window. Toolbar Displays buttons and menus for common commands. Search Box Enter keywords to search the folder. Navigation Pane Provides quick navigation to folders and files. Browse to favourite locations, libraries, homegroups, computer and the network. Recycle Bin Delete files by placing them into this folder. Program Shortcuts A customizeable quick link to your most frequently used programs and/or files. Details pane Display details about selected files. Show Desktop Button Point or click here to make open windows invisible. Start button Open the Start menu. Program icon Click to open the program. Rearrange icons by clicking and dragging. Window preview Point to the program icon on the taskbar. Click a preview thumbnail to view the window. . Notification area The Action Center, clock and other system icons are located here. contact exclaim! today Further reference guides available at www.exclaim it.ca From the Toronto area, call (416) 889-8345 From outside the Toronto area, 1(866) 645-7088
- 3. Create a New Folder quick reference guide series To S Microsoft Windows 7 Step 1 Step 2 marketing, print and web Step 3 Starting a program and keyboard shortcuts Starting a Windows program Keystroke shortcuts To A Start menu My Computer +E Creat new folder Ctrl + Shift + N Zoom ++ Connect to projector +P Flip 3D + Tab Windows Management Peek File desktop Click on the at thedrop down menu. Next + Space New click the option followed by the Folder option. Type+ name for the aD Show / Hide desktop folder and press <Enter>. Minimize all windows +M Minimize other windows + Home Maximize + Minimize / Restore + Dock to left + Dock to right + Jump to left monitor + Shift + Jump to right monitor + Shift + Show / Hide Preview Pane Bring all gadgets to the front Alt + P +G T th Start To open the St t menu: Taskbar 1. Click the Start Button located in the bottom left SC corner or press CTRL + ESC. ESC. Cycle through icons +T Open new instance shift + click To start a program from the Start menu: Launch program (# corresponds to pin order) + (1-9) . contact exclaim! today Further reference guides available at www.exclaim it.ca To S Ope in th file General 1. Click the Start Button and nd 2. Choose All Programs, and then select a program from the menu. Clic or p From the Toronto area, call (416) 889-8345 From outside the Toronto area, 1(866) 645-7088 Afte list
- 4. quick reference guide series Microsoft Windows 7 marketing, print and web Personalize your windows operating system To personalize Windows 7 Appearances Just like previous versions of Microsoft's Windows operating system, Windows 7 can easily be customized like changing your themes, desktop background, window colours, sounds, screen savers, desktop icons, mouse pointers or transparency settings, to true usability features that make your computer easier to use. To adjust the apperance of your Windows 7, simply right click in an open area on your desktop, next click on the Personalize button at the bottom. Right Click Click Here Desktop Icons Add icons to the desktop, such as Computer and Network. Mouse Pointers Change how the pointer looks and acts, reverse buttons. Themes Change menus, icons, backgrounds and sounds all at once. Desktop Background Choose built-in colours and pictures or use your own photo. Select more than one picture to start a slide show. Window Colour Change window colour and transparency. Windows Sounds Change which sounds play when you perform different tasks. Screen Savers Adjust what it displays and when it appears. . contact exclaim! today Further reference guides available at www.exclaim it.ca From the Toronto area, call (416) 889-8345 From outside the Toronto area, 1(866) 645-7088
- 5. quick reference guide series Microsoft Windows 7 marketing, print and web Working with various File Explorer options Open the Windows File Manager To show alternative menu bar To show/hide the traditional menu bar (File, Edit, etc.): 1. Locate the file manager icon taskbar. on the 2. Click on the icon with the right mouse button and the alternative File Explorer window will open. The Windows File Explorer is the primary tool used to browse, view, and organize files and folders in Microsoft Windows 7. To open Windows File Explorer: 1. Click the Windows Explorer icon located in the Taskbar. 2. For a more detailed view of your computer’s storage and hard drives, click the Start button and click the icon. . contact exclaim! today Further reference guides available at www.exclaim it.ca From the Toronto area, call (416) 889-8345 From outside the Toronto area, 1(866) 645-7088
- 6. quick reference guide series Microsoft Windows 7 Disk Maintenance - Disk Cleanup marketing, print and web To use Disk Cleanup to Free Space on your Hard Drive Step 3 - right click Step 5 Step 4 Step 2 Step 6 Step 1 1. Click the Start button located in the bottom left hand corner 4. Click on the Properties option. 2. Click on Computer. 5. Click on the Disk Cleanup button. 3. Next, right click on your local Hard Drive. 6. Select which files you wante deleted and free up from your . computer’s hard drive. Click OK to continue. contact exclaim! today Further reference guides available at www.exclaim it.ca From the Toronto area, call (416) 889-8345 From outside the Toronto area, 1(866) 645-7088
- 7. quick reference guide series Microsoft Windows 7 Disk Maintenance - Disk Cleanup marketing, print and web Update your Windows 7 1. Click on the Start Button located in the bottom left hand corner. To Defragment your Hard Disk 2. Next click on the Control Panel button located in side panel. 3. Next, please click on the Windows Update. Step 2 4. The Windows Update window will open and look similar to the below. 5. Click on the Install update button (if applicable) Step 1 Open the Computer window (click the Start button and select Computer). Step 5 Step 3 Step 6 Step 4 Next right-click the disk you want to defragment and select Properties from the contextual menu. Click the Tools tab and click the Defragment now button. . contact exclaim! today Further reference guides available at www.exclaim it.ca From the Toronto area, call (416) 889-8345 From outside the Toronto area, 1(866) 645-7088
- 8. quick reference guide series Microsoft Windows 7 Miscellaneous items marketing, print and web Create a New Folder Change How Items are Displayed Step 1 Step 2 Click Here Step 3 Click the Change your view button list arrow on the toolbar and select a view. Change Window Layout Step 4 Step 1 Click on the File drop down menu. Next click the New option followed by the Folder option. Type a name for the folder and press <Enter>. Step 2 Place your computer into sleep mode Step 3 Step 2 Step 3 Step 1 Click on the Start / Windows button, next click on the Shut Down button then Sleep. . Click the Organize button on the toolbar, point to Layout and select a layout option. contact exclaim! today Further reference guides available at www.exclaim it.ca From the Toronto area, call (416) 889-8345 From outside the Toronto area, 1(866) 645-7088