Steam presentation deux 3 d prints from photographs
•
2 j'aime•579 vues

3D Prints from Photographs. This is a presentation I gave to stimulate interest in STEAM (Science, Technology, Engineering, Art and Mathematics).

Recommandé
Contenu connexe
Tendances
Tendances (20)
En vedette
En vedette (11)
Similaire à Steam presentation deux 3 d prints from photographs
Similaire à Steam presentation deux 3 d prints from photographs (20)
Dernier
Dernier (20)
Steam presentation deux 3 d prints from photographs
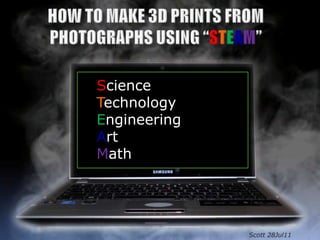
- 1. Science Technology Engineering Art Math Scott 28Jul11
- 2. Objective Stimulate student interest in Science, Technology, Engineering, Art and Math by teaching how to create 3D Additively Manufactured prints from photographs. Engineer‟s Laptop Artist‟s Canvas
- 3. What You will Learn… How take pictures and turn them into like these… 3D Prints like these… …using STEM and ART! Principles… and 3D Printers Image Credits: Edward S. Curtis Courtesy Dubuque Museum of Art http://www.dbqart.com/
- 4. Arts-to-Sciences is a Continuum! We are all Makers- click here: Makers “Artists” “Scientists and Engineers” Creativity and Vision INNOVATION 460 years Flight Leonardo DaVinci 145 years Equality Abraham Lincoln 60 years Cell Phones Chester Gould 54 years World Wide Web Paul Otlet
- 5. Part 1- 2D to 3D Process Overview Perceived versus Real 3D Picture Selection Image Preparation Depth Creation Texture Mapping Frame Features 3D Printing
- 6. Overview- To convert 2D photographs into solid 3D prints: 1. First convert the picture into grayscale where every pixel is assigned a value between 0 and 255- with 0 being pure black and 255 being pure white. 2. Using CAD software, map these pixels as a surface in space using heightfields with the darker pixels being ‘low’ and the lighter pixels being ‘high’. 3. Next, map the original colors back onto the surface and give it thickness. 4. Next, use CAD tools to create a frame and other features. 5. Then, save the model as an .stl file. 6. Finally, print out the .stl file on a 3D color printer.
- 7. Perceived versus Real 3D Phobos Anaglyphs create an illusion- wear your glasses! (Stereopsis is Greek for “Solid Sight”) Phobos Imaged by HiRISE (PSP_007769_9010) Credit: NASA/JPL/University of Arizona
- 8. Perceived versus Real 3D Can you see the shark in the Autostereogram? (Hint: cross your eyes a little to line up the stripes and engage binocular disparity) Source: Wikipedia; Image Credits: Fred Hsu and Xiong Chiamiov
- 9. Picture Selection Choose your subject, any subject. (e.g., Architecture, Art, Babies, Nature, People, Sentiment al, Tattoos, Vintage, X-Rays…)
- 10. Picture Selection- Shadows Beware of shadows, they can create false depth. (Remember, the algorithm interprets dark as “low”)
- 11. Picture Selection- Light Light is just a portion of the electromagnetic spectrum that our eyes are able to detect and our brains are able to interpret. (There‟s so much more out there!) Source: Lawrence Berkley National Laboratory http://www.lbl.gov/MicroWorlds/ALSTool/EMSpec/EMSpec2.html
- 12. Picture Selection- Color Colors in your photo need to be converted to grayscale- which consists of divisions of the diagonal line from K to W in the color cube. (K is „pure black‟ and W is „pure white‟. There are usually 256 divisions in grayscale which, by the way, equals 2^8…hmm)
- 13. Image Preparation Make multiple copies of your photo to highlight certain areas that you wish to accentuate or de-emphasize the height of. (These layer copies will be stacked upon each other in your CAD model to create a net height in the final geometry) Image Credit: Mosa Mohave by Edward S. Curtis Courtesy Dubuque Museum of Art http://www.dbqart.com/
- 14. Depth Creation Akhenaten, Nefertiti and their children When you stack these layers as surfaces, be careful to search for the balance between a bas-relief look and 3D ‘Realism’. (Try to avoid debating the Turing Test- click here: Robot ) Source: Wikipedia; Image Credit: Gerbil from de.wikipedia
- 15. Depth Creation You create the surfaces (meshes) using heightfields generated from the stacked picture layers. (Meshes are essentially a collection of XYZ point coordinates which define a surface. Many CAD software packages can create meshes and heightfields.)
- 16. Texture Mapping Full image size: 748 X 1024 Pixels Using the Texture Map function, superimpose the original jpeg back onto the 3D surface you created. Then, give the surface thickness. (jpeg is a type of file that compresses pixel location information and the CMKY/RGB color values) Image Credit: Mosa Mohave by Edward S. Curtis Courtesy Dubuque Museum of Art http://www.dbqart.com/
- 17. Frame Creation Intersection Union Difference Remember that ‘Set Theory’ stuff you learned in, like, 5’th grade? Mathematicians call these Boolean Operations. (Software uses Boolean math in order to intersect, combine or subtract areas or volumes from CAD generated geometry)
- 18. Frame Creation Here’s an example of a CAD generated Sphere, Box and Pentacone (is that a word?). Actually, it’s a pentagonal pyramid. (Taking the Box and subtracting out the other two volumes using the Boolean Difference operation leaves you with, ehhh…., a rather interesting shape)
- 19. Frame Creation If you create two boxes using CAD software and then Boolean Difference out the smaller one, you get a frame. (Use the same principles to create other features like keyhole hangers. Intersect these with the 3D surfaces you created from your original picture.) Image Credit: Edward S. Curtis Courtesy Dubuque Museum of Art http://www.dbqart.com/
- 20. 3D Printing- .stl files Most 3D Printers recognize a certain type of CAD output file called .stl. (An .stl file contains the coordinate information of the triangular facets from your CAD geometry. This file format allows efficient encoding of the CAD data.)
- 21. 3D Printing- Types Send your .stl file to a 3D printer and Voilà!- you get a physical part in 3D Color. (Actually, there are now many types of Additive Manufacturing machines and processes utilizing a plethora of materials. These are sometimes referred to collectively as 3D Printers.) Watch the following videos to learn more: 3D or 3D Deux or 3D Trois
- 23. Part 2- Arts/Sciences Connections Proportions _______________ Fibonacci Numbers Color and Light _____________ Electromagnetic Spectrum, Waves or Particles? Shadows _________________ Grayscale 3D ______________________ Stereopsis, Rods and Cones Analog Photography _________ Chemistry Digital Photography _________ DLP’s, Telescopes Jpegs ____________________Fast Fourier Transforms Form ____________________ Mathematical Surfaces Drawing _________________ CAD Sculpture ________________ Additive Manufacturing
- 24. e.g.; Fibonacci Numbers What are they? Why do they matter? Click to play Click to play The Golden Ratio is 1.618 to 1 (Digital Cameras have Image Formats in the proportions of… hmm) Source: Wikipedia; Fibonacci Image Credit: Rodhullandemu, Source=Scan from "Mathematical Circus" by Martin Gardner, published 1981
- 25. Part 3- “Hands-on” Exercise 1. Take a photograph of your hand 2. Perform the 2D to 3D conversion 3. Print out the part on a 3D Printer
- 26. Part 4- Photo Mosaics Photo Mosaic created using AndreaMosaic http://www.andreaplanet.com/andreamosaic/
- 27. Resources And there are many, many more, just google 3D Printing.