SlideShare une entreprise Scribd logo
1  sur  9
Télécharger pour lire hors ligne
Issue # 173 - April/May 1999
                                                            GARDEN & YARD
                                                                  The basics of a nontraditional method of
                                                                   gardening that is not only organic, earth
                                                              friendly, and incredibly easy, but will enable
                                                            you to accomplish more, in less time, with less
                                                                                                      work...
                                                                                          by Patricia Lanza
                                                                                ILLUSTRATIONS: ELAYNE SEARS


                                                            If someone told me years ago that he or she
                                                            had found a way to do an end run around the
                                                            sweat equity of traditional gardening, a way
                                                            around digging, weeding, and rototilling, a way
                                                            to produce more regardless of time
                                                            constraints, physical limitations, or power-tool
                                                            ineptness... well, I would have checked that
                                                            person for a head injury. Yet such a system is
                                                            actually possible, though I never would have
                                                            believed it if I hadn't stumbled upon the basics
                                                            myself.

                                                              Lasagna gardening was borne of my own
                                                              frustrations. After my husband retired from the
                                                              U.S. Navy, we began our next period of work
                                                              as innkeepers. When the demands on my time
became so great that I could no longer do all that was required to keep both the business and the garden
going, the garden suffered. I'd plant in the spring, then see the garden go unattended. I needed a way to
do it all.

Just when I was about to give up, it happened: a bountiful harvest with no work. I'd planted, late again
because of a late spring. And again, when the seasonal demands of the business began claiming all of
my time, my plantings were forgotten. In midsummer, I made a much belated foray into the garden. I had
to hack through a jungle of weeds to find the vegetable plants—but what a payoff! I discovered basketfuls
of ripe tomatoes, cucumbers, squash, peppers, and egg plant. True, there were also basketfuls of rotted,
overgrown, and unusable vegetables (the product of neglect), but the abundance was truly amazing.

To gain some measure of control that year, I simply stomped the weeds flat in between rows and put
down cardboard boxes to walk on. The harvest continued, with carrots, onions, garlic, and potatoes
persisting among the weeds. Stout stems of collard greens pushed the plants up to tower above the
mess, despite the native morning glory that tried to hold back growth. Lower-growing Swiss chard also
persevered, though I had to cut out the shriveled leaves and pull a few weeds to get to the good growth.

Flower seeds, planted in a border around the garden in the spring, came up and bloomed. As I poked
about that messy old garden, I found patches of basil, parsley, sage, and thyme that had done battle with
weeds and grass and won. I was suddenly very excited about the possibilities.
And the timing couldn't have been better. The inn had caught
on, making my time in the garden more limited. And, as
much as I hated to admit it, I was getting older and losing
some strength. I was by then living and working alone, so
there was no one to run the tiller. I bought a smaller model
but couldn't cope with cleaning the carburetor and mixing gas
and oil.

Inspired by my no-work harvest, late that fall I began my first
attempt to make and maintain a garden without digging or
tilling. Using no power tools and little more than what was at
hand, I layered for the first time. A neighbor's son had
promised to bring me a load of horse manure in a spreader in
exchange for pizza and sodas for himself and his friends.       The no-work garden: Leave the sod where it lies,
                                                                blanket it with wet newspaper to stifle the grass,
This seemed like a fair exchange to me. I removed all the       then begin layering. Before you can say
cardboard from the paths and gave him access to back the mangiamo, your plot is ready for planting.
spreader right up to the garden. He spread about four to six
inches of fresh manure on the entire plot. I waded in and covered it with a layer of peat moss.

In the spring I had more weeds (smart weed, pig weed, dumb weed) than ever before, but they were easy
to stomp down. I covered the garden paths with cardboard, then set about hand-pulling weeds from the
garden spaces, easily keeping them clear just long enough to plant. Once the plants were in, I mulched
with compost and peat moss. As the plants grew, I mulched with grass clippings and more peat moss. My
garden spaces were smaller with wider paths, and I planted closer. I expected that as the plants grew
they would crowd out the weeds. To plant seeds, I created a weed-free planting space with a mixture of
peat moss, sand, and sifted compost laid on top of the rather untidy garden base.

The business—a country inn and restaurant—was year-round, but from July 4th to Labor Day I danced as
fast as I could to keep up with the heavy seasonal trade. By midsummer, I found myself once again
ignoring the garden. Yet, once again, the garden produced more than I expected, though it was still
weedy and messy.

There was something missing. I knew I could control the weed growth with plastic or landscape material,
but it wasn't what I wanted. I needed a ground cover that would suppress weeds, deteriorate, be easy to
come by, and cost nothing. As I lugged tied bundles to the curb for recycling, I found my answer:
newspaper.


The above shows a sample recipe for a finished lasagna bed, with alternating layers of peat moss and organic materials.


COMMENT: IN SACRAMENTO IT IS BEST TO LEAVE OUT THE LAYER OF WOOD ASHES – MOST SACRAMENTO
SOIL IS ALREADY QUITE ALKALINE.
ALL THE NEWS THAT'S FIT TO LAYER

That fall, I covered the entire garden: the paths with new cardboard and bark chips and the garden
spaces with two or three sheets of wet newspaper and peat moss, layered with grass clippings and
chipped leaves. It was looking good. In fact, it was beautiful-neat and beautiful!

In the spring, I pulled the weedless layers of dark, rich soil aside, right down to the newspaper, and
planted.

I took time to add compost, peat moss, and grass clippings as mulch to the plants. It was some year—a
great harvest, few weeds, and no work to speak of. That's when I began to think about a garden built on
top of the sod, requiring none of the traditional preparation: no lifting the sod, no digging or tilling, just neat
layers of organic ingredients left to decompose over the winter.

Once I found the spot—a level, grassy parking lot near a water source—I drew a sketch of a garden of
herbs and flowers in a formal Williamsburg design. It was all about measuring: two-foot garden spaces
and three-foot paths, all leading to a circle at the center with space for a sundial and thyme garden. While
waiting for my daughter, Melissa, and surveyor son-in-law, Bill, to stake out the lines, I stockpiled the
ingredients: newspapers, flattened cardboard boxes, wood chips, compost, grass clippings, leaves, rotted
barn litter, old hay, horse manure, sand (left over from a building project), and bags of soil amendments
bought on sale at the garden center.

When Bill was through with the survey and gutter nails were tied with bright survey tape at corners, I
connected them with string.

Next, I laid cardboard on the paths and covered the cardboard with bark chips. I then covered the garden
spaces with thick layers of wet newspaper, overlapping the ends, and covered the paper with one to two
inches of peat moss. Then I laid a three- to four-inch layer of dried grass clippings over the peat moss and
added another one or two inches of peat moss. I continued to alternate layers of waste material and peat
moss. Midway through, it struck me that the peat moss was akin to the cheese layer in a real lasagna.

By the time I was finished with all the material I had collected, the garden spaces were 24 or more inches
high, and it was well into November. I worked at the last of it until late in the day and quit only when I felt
snow covering my head and shoulders. Just before walking away, I sprinkled a dusting of wood ashes on
top of the layers. It was like the parmesan cheese you add to the top of a real lasagna just before you put
it in the oven.

This was all done on top of the sod—without lifting, digging , or tilling.

IS IT SOUP YET?

My winters at the inn were long and cold. Snow covered the top of the mountain from November until late
April. When I took the first spring walk in the gardens, I carried a trowel to check on the frost depth. I
poked about in the earth in gardens from the front of the inn to the back by the barn, leaving the layered
garden till last. Eventually I found myself standing in front of the new garden. What had been two feet of
layered soil amendments was now just about six or eight inches high. I pushed the trowel down through
rich, black soil to the paper layer and found most of the sheets gone and another five to six inches of
loose earth below. I could plant anything in this much loose material. The lasagna layering had worked
beautifully!

When the weather finally warmed, I pulled the soil apart in the new garden and planted herbs and flowers.
I continued mulching each time I cut the grass. That's it! No other work—-no weeding, no watering,
nothing! I couldn't believe how the plants thrived and how easy it was. I didn't need to worry about garden
chores during my busy season anymore.

The guests at the inn admired the new garden, and I shared the process. The old vegetable garden,
previously kept hidden, was now a showplace. Folks who admired my gardens could see they were
weed-free. I told everyone about the lasagna method, but I could see that few really got it. They either
didn't believe me or had no grasp of what it all meant. But I knew. It meant I could be a really good
gardener and still be able to keep up with the demands of being an innkeeper. It meant I could put the
rototiller up for sale. Best of all, I stopped worrying about getting older and not being able to keep it all
going by myself. I could have it all!

For those who are in doubt, I suggest you take a walk in the forest and renew your relationship with
Mother Nature. She is the original lasagna gardener, though not as neat as me. In nature, debris drops to
the forest floor, and without any help from man, creates layers of dark, rich humus. Tree and wildflower
seeds fall into the debris-turned-humus, sprout, and grow.

Unless you live in the forest, you probably want a neater, more organized garden. But to have any kind of
garden—neat or otherwise—you first need good soil. Traditionalists would agree on the good soil premise
and either crank up the tiller or get out the cultivator. My neat layers promote good soil without tillers or
cultivators. You take the first step by simply covering the earth, creating a moist dark place where
earthworms will come. Once you see worm activity, you know you're on the right track to having good soil.
All additional layers of organic material encourage and feed the earthworm population. Worms are
nature's rototillers.

But wait: what about the Ruth Stout advocates who say, "So what? It's all been done before." Well,
perhaps I am Ruth Stout reincarnated, only neater, and with some fundamental differences. I don't just
use spoiled hay on top of a garden that has been plowed every year for 30 or 40 years. I layer right on top
of sod, flattened weeds, or between rocks. I don't throw all the refuse back on top of the hay. I tuck
unsightly waste under the paper, both for worm food and to keep it out of sight. Also, I don't have to worry
a whole lot about snakes or rodents. I don't like to share too much of my space with either, and they do
love that loose hay. Last, I never take my clothes off in the garden, no matter how much I would like to.

LASAGNA-MAKING 101

Before you buy the first plant, or lay down the first sheet of wet newspaper, take a look around your
property. Check to see where you get the best light; that's where you'll put your garden. Decide on the
shape and contents of your garden. The size of your plot will determine how much material you need to
make your first lasagna. Your material list will change depending on where you live. Some folks have
more leaves than others, some have seaweed, others ground cornstalks or apple pulp. Some of the lucky
ones have access to animal manure.

There's no hard and fast rules about what to use for your layers, just so long as it's organic and doesn't
contain any protein (fat, meat, or bone).


                         It's easy to turn your existing vegetable or flower plot into a
                         lasagna garden. In fall or late winter, simply stomp down any
                         remaining growth, cover with thick pads of wet newspaper, and
                         start layering.
Before I go any further, let me just say that the basics of making garden lasagnas are simple:


  Don't remove the sod or do any extra work, like removing weeds or rocks.
  Mark the area for your garden using a water hose or a long rope to get the desired shape.
  Cover the area you've marked with wet newspapers, overlapping the edges.
  Cover the paper with one to two inches of peat moss or other organic material.
  Layer several inches of organic material on top of the peat moss.
  Continue to alternate layers of peat moss and organic material, until desired thickness is reached.
  Water until the garden is the consistency of a damp sponge.
  Plant, plant, plant and mulch, mulch, mulch.

You need less loose material to plant in than you might think. In the spring of '98, I layered an area where
a dog pen had stood for years. The property belongs to a 79-year-old man who was upset about his
inability to garden as he once had. Until recently, a 100-year-old white pine tree had occupied the center
of the fenced-in area. But its roots had begun to do real damage to my friend's house and surrounding
properties, and so the tree had to be taken down.

Once the tree was removed, the area was bright and sunny, but, unfortunately, the ground contained 100
years worth of layered pine needles.


                           Easy potato harvest: Use regular digging fork to lift the mulch
                           and move it to another bed. Then just pick up the potatoes.
                           What could be simpler?


First, we covered the area with lime, then laid whole sections of wet newspaper on top of the pine needles
and covered the paper with peat moss. We bought a small truckload of barn litter mixed with our local clay
soil and covered the peat with two inches of this mix and then two more inches of peat moss. Additions of
one to two inches of grass clippings, two inches of peat moss, one to two inches of compost, and more
peat gave us a total of about six to eight inches to plant in.

We pulled the layers apart and planted 31 tomato plants, four squash, six cucumber, four basil, two
rosemary, four parsley, and twelve cosmos. It was a jungle, but with staking, pruning, and tying, the
garden produced so much fruit that the entire neighborhood helped eat the harvest, and the cosmos were
so beautiful they took our breath away.


Once the harvest was finished, I pulled the stems and disturbed the layers for the first time. Pieces of the
paper layer came up with the roots. So, too, did the biggest earthworms you can imagine. The soil was
still probably a bit acidic, but it will get better in time.
To prepare the new garden for another year of planting, we spread the contents of a large composter onto
the space, and the garden took on several inches in height. The last mowing of grass provided enough
clippings to add another few inches. When the fall came, we mowed the leaves for a top dressing of four
inches of chipped leaves. I love an edged garden and so the last thing I did was cut a sharp, clean border
around the sides, throwing the edging material up onto the garden, with grass side down, for another
layer of more good dirt. It looked beautiful!

Close planting and mulching greatly reduced the amount of weeds in the dog pen garden, as they do in all
my gardens. It also meant less watering, since the paper and mulch kept the soil around the root zone
cool. Even though we pushed it a bit by planting 31 tomato plants, the staking, tying, and pruning, in
addition to close planting, created a healthy growing environment, with few garden pests. It was another
test, and the results have left my friend confident that, as he enters his 80th year, he will be able to
continue gardening with the lasagna method.

Indeed, lasagna gardening is so simple that the hardest part may be getting started. I suggest beginning
with that walk around your property to determine what you can do with what you have. If you get lots of
shade, plant a shade garden or cut some tree limbs. Track the light for a couple of days during the spring
and summer. You probably have more light than you think—not sun, but light. Lots of rocks? Try rock
gardening. You might learn to love the wonderful world of small plants that thrive in rocky terrain. Too little
space? Look again. If there's a foot of space, you can plant in it.

There's no such thing as work-free gardening, but the lasagna method is close. Once you train yourself to
think layering, and learn to stockpile your ingredients, you will work less each year.

Following are some of my favorite vegetables, along with tips on how I grow them the lasagna way:

ASPARAGUS

Many gardeners shy away from this tasty crop, mainly because it's difficult to grow through traditional
means. Not so with lasagna gardening. I still remember the first year I planned my asparagus patch.
Turned out to be one of my best vegetable trials yet. For fun, I grew a tray of plants from seed, started
indoors in February. In early spring, I added the small seedlings to the assembly of roots—one, two, and
three years old—that I had accumulated to plant together.

Using a mattock blade, I scraped a shallow opening in a newly made lasagna bed, an inch or two deep. I
combined the roots and seedlings in the opening and covered them with a sifting of soil and peat moss.
Once the roots were planted, I covered the top of the row with a mixture of manure and peat moss.

As the roots sprouted and grew, I added sifted compost and grass clippings. In the fall, I added more
manure and a thick layer of chipped leaves for winter mulch.

During the first spring, I watched the asparagus emerge and grow. I invited inn guests into the garden to
help me cut and eat the first tender stalks. Then I mulched, mulched, then mulched some more.

The second spring, I cut so much asparagus we had some to freeze. It was all so easy: plant, mulch,
harvest, and enjoy.

Site and soil. A heavy feeder, asparagus needs well-drained soil and at least six hours of sun. The fall
before planting, build a lasagna garden on the site you've chosen for your asparagus, using a base of
newspaper topped with 18 to 24 inches of layered organic material. By spring, the lasagna bed will have
composted to ideal soil conditions for asparagus.

Planting and harvest. The time is right when the soil is thawed and crumbles in your hand. Plant in rows
two feet apart in two shallow trenches, with a rise in between. This lets the crowns sit on top of the rise,
with the roots in the trenches. Plants should be 18 inches apart and covered with two to three inches of
soil and compost mixture.
As the plants grow during the summer, continue covering with the compost enriched mixture until crowns
are four inches deep.

In the fall, cover the entire bed with a blanket of eight to ten inches of chopped leaves or other organic
mulch. Each spring, feed the bed compost enriched with manure. In colder regions, pull the mulch back
on half the bed to get an extra early harvest, saving half the bed for later harvesting. Once the harvest is
over, the remaining shoots expand into ferny top growth. When the ferns turn bronze, cut them back.

BEANS

I usually wind up planting many more beans than I actually need. But with so many varieties—all so much
types to grow—who can resist!

Once the last chance of frost is past, plant your favorite bean seeds. Divide your seeds into thirds and
plant every two weeks for a longer harvest.

Once I have a lasagna bed in place, I plant bush bean seeds along the edges. They only need a few
inches, since the plants will lean out over the sides of the garden, leaving room for taller crops.

I plant pole bean seeds around the base of teepees made from six-foot bamboo poles. Plant seeds
around the base of each pole, and when they start to climb, give them a boost up the trailing twine you
have tied from the top.

Site and soil. Beans grow best in well-drained soil that's high in organic matter. A new or established
lasagna bed in full sun works best for all types.

Planting and harvest. Fix supports in place before planting pole bean seeds. For both types, pole and
bush, just push the seeds into loose soil about two inches apart. Cover the seeds and press the soil
around them for direct contact.

Keep the soil evenly moist until seeds emerge, then cover the soil with a good mulch to keep the soil cool,
the leaves clean, and the garden weed-free. To avoid rust, don't work beans when foliage is wet. Once
beans start to appear, keep crop picked to encourage new bloom. Rotate crops every year to avoid pests
and disease.

CUCUMBERS

Bush cucumbers can be grown in small spaces and containers. Climbing cucumbers need strong support,
so plant close to a fence or trellis. I like the climbers and try to see what kind of new supports I can come
up with each year to make the garden more interesting. I loved the string cradles we tied to a stockade
fence one year. The vines grew up strings hanging down into the row, then up the string cradles and onto
the fence.

Site and soil. Cucumbers need good drainage and rich soil. Lasagna gardens are just the thing, when
enriched with fresh manure. However, wait three years before planting in the same place to avoid pests
and disease.

Planting and harvest. Wait until the last frost is past, then plant prestarted seeds covered with floating
row cover in colder regions, and seeds sown directly in the garden in milder climates. Keep mulched and
don't till, as cucumbers are shallow rooted. Maintaining at least six inches of mulch at all times keeps the
roots cool and moist, but they still need an inch of water each week. Pick the fruit when it's small and
most flavorful. Once the harvest starts, don't miss a day, or you'll have candidates for the compost pile
instead of the salad bowl.

GARLIC

If you've never tried growing garlic, you've missed something special. I make a rich lasagna bed, let it
cook for four to six weeks under black plastic, set strings up to keep my rows straight, and push in single
cloves just enough to see they are covered. When the foliage is full and seed heads form, I cut and use
them just as I would cloves. When the foliage turns yellow or brown, it's time to lift the garlic.

Loosen the earth and gently shake off any dirt. Let the cloves cure by hanging them in a dry place. The
individual cloves will each make a head, so you will have plenty to use, as well as to save for next year's
seed.

Site and soil. Good drainage, full sun, and plenty of manure-rich compost are best. A well-built lasagna
bed has the perfect growing conditions to start, then all you have to do is add grass clippings or chipped
leaves for mulch to keep the soil evenly moist and weeds at a minimum.

Planting and harvest. Gardeners in the Northeast and zone 5 and colder climates will get best results
from hard-neck garlic planted in the fall and harvested the next summer. Milder climates can grow soft-
neck; plant in the spring and harvest that same fall.

If you haven't room for an entire bed just for garlic, plant some in groups of three to five cloves in flower or
vegetable beds. Folks who have bug problems swear by the positive effect garlic has on its companions.

LETTUCE

Anyone can grow lettuce. The problem is most folks grow too much at one time. Use a little restraint and
make successive plantings. Mix lettuce seed with sand so you will not have to do so much thinning. I
broadcast a mixture of cut-and-come-again lettuce once a month for the duration of growing time for my
zone.

Site and soil. Lettuce likes it cool and so is ideally suited for spring and fall plantings. I use other taller
plants to shade my lettuce in summer. It's best to prepare a site for lettuce in the fall, adding a high
nitrogen amendment (such as fresh grass clippings) to the top two inches of soil.

Planting and harvest. Lettuce is a fun crop to grow in containers, as borders, and in tiny spaces that
would only go to waste otherwise. There's really no safe place to hide when I start looking for places to
plant. I've planted Ruby Red and Oakleaf lettuce in my herb and edible flower containers and flower
boxes. I interplant herbs and lettuce in the border gardens that surround my antique roses. The Mesclun
mixes are wonderful in big terra cotta saucers that stand alone in part shade.

When guests come for dinner, I give them a colander and a pair of scissors and point them toward the
garden. They come back with an interesting collection of edibles and never forget the experience. Lots of
good gardeners start out by getting their feet dirty in someone else's garden.

POTATOES

No need to dig trenches or to hill up. Build a lasagna bed to eliminate grass and weeds, don't use any
lime or nitrogen rich materials (such as grass clippings), lay down one or two sheets of wet newspaper,
lay seed potatoes on top of the paper, and cover with spoiled hay or compost. You can use pretty much
anything you have that is dried. Chipped leaves are great for covering the tubers. I use hay that is well-
cured and lying next to my potato bed, so I don't have to carry it too far.

Site and soil. Potatoes need full sun, good drainage, and can tolerate acid soil. Preparing a lasagna bed
and adding bone meal or rock sulfate produces a good harvest and large tubers. Avoid planting potatoes
where you have grown them or their relatives (including eggplant, peppers, and tomatoes) for the past
three years.

Planting and harvest. Be ready to plant in early to mid spring and have enough material to cover the bed
with ten inches of mulch. Be prepared to add several inches of cover to the bed as plants grow. The
important thing here is to keep the tubers covered so they will not see the light of day. By the end of the
growing period, the plants will be propped up with hay or other soil amendments.
Slip your hand under the mulch to harvest a few small potatoes when the beans are ready to pick. Let the
rest continue growing until the foliage has yellowed. Don't try to dig! Lift the mulch and pick the clean
tubers up off the newspaper.

Be on the watch for potato bugs. Try to catch them when they are small. Sweep across the foliage with a
broom. They will fall into the mulch and, when small, not be able to find their way back up to the leaves.

TOMATOES

The toughest part of growing tomatoes is choosing the kinds you will
grow. You'll likely want to plant several different varieties each year:
there's early, mid season, and late ones; tiny pear shaped, cherry,
patio, plum, slicing, and cooking varieties; plus, tomatoes for juice and
for stuffing, not to mention new types and heritage.

Site and soil. Tomatoes need full sun, an inch of water per week,
and protection from the wind. Ideal conditions are a lasagna bed that
has been around for at least a year and has not grown any of the            "Up, cukes, up! Good vegetables." It
relatives: potatoes, eggplant, or other tomatoes.                           pays to train your cucumbers to grow
                                                                            up, rather than letting them sprawl.
                                                                            With a bit of encouragement, they'll
I prepare my site by installing water jugs buried up to their shoulders     readily climb strings, putting the fruit at
between where every two plants will be. A pin hole in the sides facing      back-and knee- friendlier heights come
                                                                            harvest time.
the plans should let enough seep out to keep up consistent watering. I
place a tall stick in each jug, its top colored with red paint or nail polish. This helps me find the sticks,
which helps me find the openings to the jugs when all the foliage hides them from view. I fill the jugs with
a funnel and the water hose. You can add liquid plant food to the water if you like.

Planting and harvest. Wait until after the last frost, then plant the seedlings. Create a well of soil around
the stem to help catch any rain. If you have prepared the lasagna bed in advance, all you will have to do
is scrape the soil aside and lay the plant down up to the last four leaves. Press the soil around the plant to
make direct contact and push out any air pockets.

Once the jugs and plants are in place, make a collar of one or two sheets of wet newspaper, place it
around the stem, and cover the paper with mulch. Depending on the type of tomatoes you have chosen,
you will need to stake, tie, prune, and pinch. Keep the water jugs full and check plants regularly for bugs
or disease. Don't get impatient; tomatoes need lots of long hot sunny days and warm nights. Again,
depending on the cultivar you have chosen to grow, you can look forward to your first harvest in 55 to 100
days after you set the plants out.

And, oh, what a delicious harvest! I love tomatoes warm from the garden-standing over the row, biting into
one, the juice running off my chin, dripping from my elbow, the acid tingling my tongue. It just doesn't get
any better than that.

Patricia Lanza is author of Lasagna Gardening, A New Layering System for Bountiful Gardens: No
Digging, No Tilling, No Kidding! (Rodale Press, 1998, $15.95). Just call MOTHER'S Bookshelf at 1800-
888-9098 and ask for book #MEB273. Patricia is currently coproprietor, along with her daughter, of The
Potager, a Wurtsboro, New Yorkbased Dome, garden, and gift center.

Contenu connexe

En vedette

Lasagna Gardening: The Organic Way
Lasagna Gardening: The Organic WayLasagna Gardening: The Organic Way
Lasagna Gardening: The Organic WayFayme4q
 
From Our Roots: Community Action Program of East Central Oregon and Food Banks
From Our Roots: Community Action Program of East Central Oregon and Food BanksFrom Our Roots: Community Action Program of East Central Oregon and Food Banks
From Our Roots: Community Action Program of East Central Oregon and Food BanksFayme4q
 
Developing Local Networks To Tackle Food Poverty
Developing Local Networks To Tackle Food PovertyDeveloping Local Networks To Tackle Food Poverty
Developing Local Networks To Tackle Food PovertyFayme4q
 
Food Sharing Resource List 2 - Our Community Outreach - Portland, Oregon
Food Sharing Resource List 2 - Our Community Outreach - Portland, OregonFood Sharing Resource List 2 - Our Community Outreach - Portland, Oregon
Food Sharing Resource List 2 - Our Community Outreach - Portland, OregonFayme4q
 
Community Gardens and Poverty Elimination
Community Gardens and Poverty EliminationCommunity Gardens and Poverty Elimination
Community Gardens and Poverty EliminationFayme4q
 
Gowing Health: 10 Strategies that Can Create 10 Times the Nutrients in Your F...
Gowing Health: 10 Strategies that Can Create 10 Times the Nutrients in Your F...Gowing Health: 10 Strategies that Can Create 10 Times the Nutrients in Your F...
Gowing Health: 10 Strategies that Can Create 10 Times the Nutrients in Your F...Fayme4q
 
Feeding People In Hard Times: What Does Permaculture Have To Offer
Feeding People In Hard Times: What Does Permaculture Have To OfferFeeding People In Hard Times: What Does Permaculture Have To Offer
Feeding People In Hard Times: What Does Permaculture Have To OfferFayme4q
 
Lasagna Gardening - Green Corps
Lasagna Gardening - Green CorpsLasagna Gardening - Green Corps
Lasagna Gardening - Green CorpsFayme4q
 

En vedette (8)

Lasagna Gardening: The Organic Way
Lasagna Gardening: The Organic WayLasagna Gardening: The Organic Way
Lasagna Gardening: The Organic Way
 
From Our Roots: Community Action Program of East Central Oregon and Food Banks
From Our Roots: Community Action Program of East Central Oregon and Food BanksFrom Our Roots: Community Action Program of East Central Oregon and Food Banks
From Our Roots: Community Action Program of East Central Oregon and Food Banks
 
Developing Local Networks To Tackle Food Poverty
Developing Local Networks To Tackle Food PovertyDeveloping Local Networks To Tackle Food Poverty
Developing Local Networks To Tackle Food Poverty
 
Food Sharing Resource List 2 - Our Community Outreach - Portland, Oregon
Food Sharing Resource List 2 - Our Community Outreach - Portland, OregonFood Sharing Resource List 2 - Our Community Outreach - Portland, Oregon
Food Sharing Resource List 2 - Our Community Outreach - Portland, Oregon
 
Community Gardens and Poverty Elimination
Community Gardens and Poverty EliminationCommunity Gardens and Poverty Elimination
Community Gardens and Poverty Elimination
 
Gowing Health: 10 Strategies that Can Create 10 Times the Nutrients in Your F...
Gowing Health: 10 Strategies that Can Create 10 Times the Nutrients in Your F...Gowing Health: 10 Strategies that Can Create 10 Times the Nutrients in Your F...
Gowing Health: 10 Strategies that Can Create 10 Times the Nutrients in Your F...
 
Feeding People In Hard Times: What Does Permaculture Have To Offer
Feeding People In Hard Times: What Does Permaculture Have To OfferFeeding People In Hard Times: What Does Permaculture Have To Offer
Feeding People In Hard Times: What Does Permaculture Have To Offer
 
Lasagna Gardening - Green Corps
Lasagna Gardening - Green CorpsLasagna Gardening - Green Corps
Lasagna Gardening - Green Corps
 

Similaire à Lasagna Gardening - Mother 2

06 231 Backyard Garden No 2_Layout 2
06 231 Backyard Garden No 2_Layout 206 231 Backyard Garden No 2_Layout 2
06 231 Backyard Garden No 2_Layout 2Anjali Nambissan
 
BlazingSummer2011_v5_pg3-5
BlazingSummer2011_v5_pg3-5BlazingSummer2011_v5_pg3-5
BlazingSummer2011_v5_pg3-5Patricia Baldwin
 
sims176
sims176sims176
sims176R4T3z
 
My Three Sisters - Companion Planting
My Three Sisters - Companion PlantingMy Three Sisters - Companion Planting
My Three Sisters - Companion PlantingFaiga64c
 
Base mapping, sectors and permaculture principles
Base mapping, sectors and permaculture principlesBase mapping, sectors and permaculture principles
Base mapping, sectors and permaculture principlesCady Arruda
 
Companion Planting - Master Gardener, Yavapai County, Arizona
Companion Planting - Master Gardener, Yavapai County, ArizonaCompanion Planting - Master Gardener, Yavapai County, Arizona
Companion Planting - Master Gardener, Yavapai County, ArizonaBakas16w
 
Easy Solutions for Garden Pests
Easy Solutions for Garden PestsEasy Solutions for Garden Pests
Easy Solutions for Garden Pestsantonis3q
 
Xeriscaping with Herbs - Tucson Organic Gardeners
Xeriscaping with Herbs - Tucson Organic GardenersXeriscaping with Herbs - Tucson Organic Gardeners
Xeriscaping with Herbs - Tucson Organic GardenersEric851q
 
Cass City Chronicle News
Cass City Chronicle NewsCass City Chronicle News
Cass City Chronicle NewsTina Pallas
 
Autumn 2015
Autumn 2015Autumn 2015
Autumn 2015louisx20
 
2010 Ks Lawns OCC
2010 Ks Lawns OCC2010 Ks Lawns OCC
2010 Ks Lawns OCCCole McGee
 
The Permaculture Home Garden.
The Permaculture Home Garden.The Permaculture Home Garden.
The Permaculture Home Garden.umer878931
 
Kass’ Xeric Garden Tips and More: for Colorado and the Southwest
Kass’ Xeric Garden Tips and More: for Colorado and the SouthwestKass’ Xeric Garden Tips and More: for Colorado and the Southwest
Kass’ Xeric Garden Tips and More: for Colorado and the SouthwestFawn85w
 

Similaire à Lasagna Gardening - Mother 2 (20)

gardeners (1)
gardeners (1)gardeners (1)
gardeners (1)
 
06 231 Backyard Garden No 2_Layout 2
06 231 Backyard Garden No 2_Layout 206 231 Backyard Garden No 2_Layout 2
06 231 Backyard Garden No 2_Layout 2
 
BlazingSummer2011_v5_pg3-5
BlazingSummer2011_v5_pg3-5BlazingSummer2011_v5_pg3-5
BlazingSummer2011_v5_pg3-5
 
sims176
sims176sims176
sims176
 
Final project design
Final project designFinal project design
Final project design
 
Backyard Adventure
Backyard AdventureBackyard Adventure
Backyard Adventure
 
My Three Sisters - Companion Planting
My Three Sisters - Companion PlantingMy Three Sisters - Companion Planting
My Three Sisters - Companion Planting
 
Base mapping, sectors and permaculture principles
Base mapping, sectors and permaculture principlesBase mapping, sectors and permaculture principles
Base mapping, sectors and permaculture principles
 
Companion Planting - Master Gardener, Yavapai County, Arizona
Companion Planting - Master Gardener, Yavapai County, ArizonaCompanion Planting - Master Gardener, Yavapai County, Arizona
Companion Planting - Master Gardener, Yavapai County, Arizona
 
Easy Solutions for Garden Pests
Easy Solutions for Garden PestsEasy Solutions for Garden Pests
Easy Solutions for Garden Pests
 
Xeriscaping with Herbs - Tucson Organic Gardeners
Xeriscaping with Herbs - Tucson Organic GardenersXeriscaping with Herbs - Tucson Organic Gardeners
Xeriscaping with Herbs - Tucson Organic Gardeners
 
Cass City Chronicle News
Cass City Chronicle NewsCass City Chronicle News
Cass City Chronicle News
 
Autumn 2015
Autumn 2015Autumn 2015
Autumn 2015
 
2010 Ks Lawns OCC
2010 Ks Lawns OCC2010 Ks Lawns OCC
2010 Ks Lawns OCC
 
The Permaculture Home Garden.
The Permaculture Home Garden.The Permaculture Home Garden.
The Permaculture Home Garden.
 
Kass’ Xeric Garden Tips and More: for Colorado and the Southwest
Kass’ Xeric Garden Tips and More: for Colorado and the SouthwestKass’ Xeric Garden Tips and More: for Colorado and the Southwest
Kass’ Xeric Garden Tips and More: for Colorado and the Southwest
 
Grow your Own Vegetables
Grow your Own VegetablesGrow your Own Vegetables
Grow your Own Vegetables
 
Vegie Garden Companion: Gardening in Desert
Vegie Garden Companion: Gardening in DesertVegie Garden Companion: Gardening in Desert
Vegie Garden Companion: Gardening in Desert
 
Placeprofile
PlaceprofilePlaceprofile
Placeprofile
 
Placeprofile
PlaceprofilePlaceprofile
Placeprofile
 

Plus de Fayme4q

Free Gardenig Posters
Free Gardenig PostersFree Gardenig Posters
Free Gardenig PostersFayme4q
 
Plant a Row for the Hungry - Twin Cities, University of Minnesota
Plant a Row for the Hungry - Twin Cities, University of MinnesotaPlant a Row for the Hungry - Twin Cities, University of Minnesota
Plant a Row for the Hungry - Twin Cities, University of MinnesotaFayme4q
 
Plant a Row for the Hungry - Ulster County and Dutchess County , NY
Plant a Row for the Hungry - Ulster County and Dutchess County , NYPlant a Row for the Hungry - Ulster County and Dutchess County , NY
Plant a Row for the Hungry - Ulster County and Dutchess County , NYFayme4q
 
Plant a Row for the Hungry - Ulster County, New York
Plant a Row for the Hungry - Ulster County, New YorkPlant a Row for the Hungry - Ulster County, New York
Plant a Row for the Hungry - Ulster County, New YorkFayme4q
 
Plant a Row for the Hungry - United Way, New Jersey
Plant a Row for the Hungry - United Way, New JerseyPlant a Row for the Hungry - United Way, New Jersey
Plant a Row for the Hungry - United Way, New JerseyFayme4q
 
Plant a Row for the Hungry - University of Delaware
Plant a Row for the Hungry - University of DelawarePlant a Row for the Hungry - University of Delaware
Plant a Row for the Hungry - University of DelawareFayme4q
 
Plant a Row for the Hungry - Vermont and New Hampshire
Plant a Row for the Hungry - Vermont and New HampshirePlant a Row for the Hungry - Vermont and New Hampshire
Plant a Row for the Hungry - Vermont and New HampshireFayme4q
 
Plant a Row for the Hungry - Virginia State University
Plant a Row for the Hungry - Virginia State UniversityPlant a Row for the Hungry - Virginia State University
Plant a Row for the Hungry - Virginia State UniversityFayme4q
 
A Beginner’s Guide to Container Gardening: Helping People Help the Land
A Beginner’s Guide to Container Gardening: Helping People Help the LandA Beginner’s Guide to Container Gardening: Helping People Help the Land
A Beginner’s Guide to Container Gardening: Helping People Help the LandFayme4q
 
Access to Seeds: You Reap What You Sow
Access to Seeds: You Reap What You SowAccess to Seeds: You Reap What You Sow
Access to Seeds: You Reap What You SowFayme4q
 
Edible Arcata, California: A GIS Perspective For A Local Food-Loving Community
Edible Arcata, California: A GIS Perspective For A Local Food-Loving CommunityEdible Arcata, California: A GIS Perspective For A Local Food-Loving Community
Edible Arcata, California: A GIS Perspective For A Local Food-Loving CommunityFayme4q
 
Food Sharing Resource List 1 - Our Community Outreach - Portland, Oregon
Food Sharing Resource List 1 - Our Community Outreach - Portland, OregonFood Sharing Resource List 1 - Our Community Outreach - Portland, Oregon
Food Sharing Resource List 1 - Our Community Outreach - Portland, OregonFayme4q
 
Gowing on the Inside: A Vegetable Garden at an Women's Prison is Changing Lives
Gowing on the Inside: A Vegetable Garden at an Women's Prison is Changing LivesGowing on the Inside: A Vegetable Garden at an Women's Prison is Changing Lives
Gowing on the Inside: A Vegetable Garden at an Women's Prison is Changing LivesFayme4q
 
Grow and Thrive: Strategic Planning for Local a Sustainable Food System - Mul...
Grow and Thrive: Strategic Planning for Local a Sustainable Food System - Mul...Grow and Thrive: Strategic Planning for Local a Sustainable Food System - Mul...
Grow and Thrive: Strategic Planning for Local a Sustainable Food System - Mul...Fayme4q
 
Growing a Healthy New York: Innovative Food Projects that End Hunger and Stre...
Growing a Healthy New York: Innovative Food Projects that End Hunger and Stre...Growing a Healthy New York: Innovative Food Projects that End Hunger and Stre...
Growing a Healthy New York: Innovative Food Projects that End Hunger and Stre...Fayme4q
 
Growing Potatoes Organically: Basics From Seed To Storage
Growing Potatoes Organically: Basics From Seed To StorageGrowing Potatoes Organically: Basics From Seed To Storage
Growing Potatoes Organically: Basics From Seed To StorageFayme4q
 
Rooftop Greenhouses and Gardens: Cultivating Regional Food Security
Rooftop Greenhouses and Gardens: Cultivating Regional Food SecurityRooftop Greenhouses and Gardens: Cultivating Regional Food Security
Rooftop Greenhouses and Gardens: Cultivating Regional Food SecurityFayme4q
 
Soil Remineralization: A Key Technique For Healing The World
Soil Remineralization: A Key Technique For Healing The WorldSoil Remineralization: A Key Technique For Healing The World
Soil Remineralization: A Key Technique For Healing The WorldFayme4q
 
Sowing Seeds, Harvesting Hope
Sowing Seeds, Harvesting HopeSowing Seeds, Harvesting Hope
Sowing Seeds, Harvesting HopeFayme4q
 
Sowing Seeds, Harvesting Hope - Discussion Guide
Sowing Seeds, Harvesting Hope - Discussion GuideSowing Seeds, Harvesting Hope - Discussion Guide
Sowing Seeds, Harvesting Hope - Discussion GuideFayme4q
 

Plus de Fayme4q (20)

Free Gardenig Posters
Free Gardenig PostersFree Gardenig Posters
Free Gardenig Posters
 
Plant a Row for the Hungry - Twin Cities, University of Minnesota
Plant a Row for the Hungry - Twin Cities, University of MinnesotaPlant a Row for the Hungry - Twin Cities, University of Minnesota
Plant a Row for the Hungry - Twin Cities, University of Minnesota
 
Plant a Row for the Hungry - Ulster County and Dutchess County , NY
Plant a Row for the Hungry - Ulster County and Dutchess County , NYPlant a Row for the Hungry - Ulster County and Dutchess County , NY
Plant a Row for the Hungry - Ulster County and Dutchess County , NY
 
Plant a Row for the Hungry - Ulster County, New York
Plant a Row for the Hungry - Ulster County, New YorkPlant a Row for the Hungry - Ulster County, New York
Plant a Row for the Hungry - Ulster County, New York
 
Plant a Row for the Hungry - United Way, New Jersey
Plant a Row for the Hungry - United Way, New JerseyPlant a Row for the Hungry - United Way, New Jersey
Plant a Row for the Hungry - United Way, New Jersey
 
Plant a Row for the Hungry - University of Delaware
Plant a Row for the Hungry - University of DelawarePlant a Row for the Hungry - University of Delaware
Plant a Row for the Hungry - University of Delaware
 
Plant a Row for the Hungry - Vermont and New Hampshire
Plant a Row for the Hungry - Vermont and New HampshirePlant a Row for the Hungry - Vermont and New Hampshire
Plant a Row for the Hungry - Vermont and New Hampshire
 
Plant a Row for the Hungry - Virginia State University
Plant a Row for the Hungry - Virginia State UniversityPlant a Row for the Hungry - Virginia State University
Plant a Row for the Hungry - Virginia State University
 
A Beginner’s Guide to Container Gardening: Helping People Help the Land
A Beginner’s Guide to Container Gardening: Helping People Help the LandA Beginner’s Guide to Container Gardening: Helping People Help the Land
A Beginner’s Guide to Container Gardening: Helping People Help the Land
 
Access to Seeds: You Reap What You Sow
Access to Seeds: You Reap What You SowAccess to Seeds: You Reap What You Sow
Access to Seeds: You Reap What You Sow
 
Edible Arcata, California: A GIS Perspective For A Local Food-Loving Community
Edible Arcata, California: A GIS Perspective For A Local Food-Loving CommunityEdible Arcata, California: A GIS Perspective For A Local Food-Loving Community
Edible Arcata, California: A GIS Perspective For A Local Food-Loving Community
 
Food Sharing Resource List 1 - Our Community Outreach - Portland, Oregon
Food Sharing Resource List 1 - Our Community Outreach - Portland, OregonFood Sharing Resource List 1 - Our Community Outreach - Portland, Oregon
Food Sharing Resource List 1 - Our Community Outreach - Portland, Oregon
 
Gowing on the Inside: A Vegetable Garden at an Women's Prison is Changing Lives
Gowing on the Inside: A Vegetable Garden at an Women's Prison is Changing LivesGowing on the Inside: A Vegetable Garden at an Women's Prison is Changing Lives
Gowing on the Inside: A Vegetable Garden at an Women's Prison is Changing Lives
 
Grow and Thrive: Strategic Planning for Local a Sustainable Food System - Mul...
Grow and Thrive: Strategic Planning for Local a Sustainable Food System - Mul...Grow and Thrive: Strategic Planning for Local a Sustainable Food System - Mul...
Grow and Thrive: Strategic Planning for Local a Sustainable Food System - Mul...
 
Growing a Healthy New York: Innovative Food Projects that End Hunger and Stre...
Growing a Healthy New York: Innovative Food Projects that End Hunger and Stre...Growing a Healthy New York: Innovative Food Projects that End Hunger and Stre...
Growing a Healthy New York: Innovative Food Projects that End Hunger and Stre...
 
Growing Potatoes Organically: Basics From Seed To Storage
Growing Potatoes Organically: Basics From Seed To StorageGrowing Potatoes Organically: Basics From Seed To Storage
Growing Potatoes Organically: Basics From Seed To Storage
 
Rooftop Greenhouses and Gardens: Cultivating Regional Food Security
Rooftop Greenhouses and Gardens: Cultivating Regional Food SecurityRooftop Greenhouses and Gardens: Cultivating Regional Food Security
Rooftop Greenhouses and Gardens: Cultivating Regional Food Security
 
Soil Remineralization: A Key Technique For Healing The World
Soil Remineralization: A Key Technique For Healing The WorldSoil Remineralization: A Key Technique For Healing The World
Soil Remineralization: A Key Technique For Healing The World
 
Sowing Seeds, Harvesting Hope
Sowing Seeds, Harvesting HopeSowing Seeds, Harvesting Hope
Sowing Seeds, Harvesting Hope
 
Sowing Seeds, Harvesting Hope - Discussion Guide
Sowing Seeds, Harvesting Hope - Discussion GuideSowing Seeds, Harvesting Hope - Discussion Guide
Sowing Seeds, Harvesting Hope - Discussion Guide
 

Dernier

ECONOMIC CONTEXT - LONG FORM TV DRAMA - PPT
ECONOMIC CONTEXT - LONG FORM TV DRAMA - PPTECONOMIC CONTEXT - LONG FORM TV DRAMA - PPT
ECONOMIC CONTEXT - LONG FORM TV DRAMA - PPTiammrhaywood
 
Software Engineering Methodologies (overview)
Software Engineering Methodologies (overview)Software Engineering Methodologies (overview)
Software Engineering Methodologies (overview)eniolaolutunde
 
Alper Gobel In Media Res Media Component
Alper Gobel In Media Res Media ComponentAlper Gobel In Media Res Media Component
Alper Gobel In Media Res Media ComponentInMediaRes1
 
The Most Excellent Way | 1 Corinthians 13
The Most Excellent Way | 1 Corinthians 13The Most Excellent Way | 1 Corinthians 13
The Most Excellent Way | 1 Corinthians 13Steve Thomason
 
EPANDING THE CONTENT OF AN OUTLINE using notes.pptx
EPANDING THE CONTENT OF AN OUTLINE using notes.pptxEPANDING THE CONTENT OF AN OUTLINE using notes.pptx
EPANDING THE CONTENT OF AN OUTLINE using notes.pptxRaymartEstabillo3
 
Pharmacognosy Flower 3. Compositae 2023.pdf
Pharmacognosy Flower 3. Compositae 2023.pdfPharmacognosy Flower 3. Compositae 2023.pdf
Pharmacognosy Flower 3. Compositae 2023.pdfMahmoud M. Sallam
 
How to Configure Email Server in Odoo 17
How to Configure Email Server in Odoo 17How to Configure Email Server in Odoo 17
How to Configure Email Server in Odoo 17Celine George
 
How to Make a Pirate ship Primary Education.pptx
How to Make a Pirate ship Primary Education.pptxHow to Make a Pirate ship Primary Education.pptx
How to Make a Pirate ship Primary Education.pptxmanuelaromero2013
 
Solving Puzzles Benefits Everyone (English).pptx
Solving Puzzles Benefits Everyone (English).pptxSolving Puzzles Benefits Everyone (English).pptx
Solving Puzzles Benefits Everyone (English).pptxOH TEIK BIN
 
Final demo Grade 9 for demo Plan dessert.pptx
Final demo Grade 9 for demo Plan dessert.pptxFinal demo Grade 9 for demo Plan dessert.pptx
Final demo Grade 9 for demo Plan dessert.pptxAvyJaneVismanos
 
Mastering the Unannounced Regulatory Inspection
Mastering the Unannounced Regulatory InspectionMastering the Unannounced Regulatory Inspection
Mastering the Unannounced Regulatory InspectionSafetyChain Software
 
Blooming Together_ Growing a Community Garden Worksheet.docx
Blooming Together_ Growing a Community Garden Worksheet.docxBlooming Together_ Growing a Community Garden Worksheet.docx
Blooming Together_ Growing a Community Garden Worksheet.docxUnboundStockton
 
Class 11 Legal Studies Ch-1 Concept of State .pdf
Class 11 Legal Studies Ch-1 Concept of State .pdfClass 11 Legal Studies Ch-1 Concept of State .pdf
Class 11 Legal Studies Ch-1 Concept of State .pdfakmcokerachita
 
A Critique of the Proposed National Education Policy Reform
A Critique of the Proposed National Education Policy ReformA Critique of the Proposed National Education Policy Reform
A Critique of the Proposed National Education Policy ReformChameera Dedduwage
 
_Math 4-Q4 Week 5.pptx Steps in Collecting Data
_Math 4-Q4 Week 5.pptx Steps in Collecting Data_Math 4-Q4 Week 5.pptx Steps in Collecting Data
_Math 4-Q4 Week 5.pptx Steps in Collecting DataJhengPantaleon
 
“Oh GOSH! Reflecting on Hackteria's Collaborative Practices in a Global Do-It...
“Oh GOSH! Reflecting on Hackteria's Collaborative Practices in a Global Do-It...“Oh GOSH! Reflecting on Hackteria's Collaborative Practices in a Global Do-It...
“Oh GOSH! Reflecting on Hackteria's Collaborative Practices in a Global Do-It...Marc Dusseiller Dusjagr
 
POINT- BIOCHEMISTRY SEM 2 ENZYMES UNIT 5.pptx
POINT- BIOCHEMISTRY SEM 2 ENZYMES UNIT 5.pptxPOINT- BIOCHEMISTRY SEM 2 ENZYMES UNIT 5.pptx
POINT- BIOCHEMISTRY SEM 2 ENZYMES UNIT 5.pptxSayali Powar
 
Hybridoma Technology ( Production , Purification , and Application )
Hybridoma Technology  ( Production , Purification , and Application  ) Hybridoma Technology  ( Production , Purification , and Application  )
Hybridoma Technology ( Production , Purification , and Application ) Sakshi Ghasle
 

Dernier (20)

ECONOMIC CONTEXT - LONG FORM TV DRAMA - PPT
ECONOMIC CONTEXT - LONG FORM TV DRAMA - PPTECONOMIC CONTEXT - LONG FORM TV DRAMA - PPT
ECONOMIC CONTEXT - LONG FORM TV DRAMA - PPT
 
Software Engineering Methodologies (overview)
Software Engineering Methodologies (overview)Software Engineering Methodologies (overview)
Software Engineering Methodologies (overview)
 
Alper Gobel In Media Res Media Component
Alper Gobel In Media Res Media ComponentAlper Gobel In Media Res Media Component
Alper Gobel In Media Res Media Component
 
The Most Excellent Way | 1 Corinthians 13
The Most Excellent Way | 1 Corinthians 13The Most Excellent Way | 1 Corinthians 13
The Most Excellent Way | 1 Corinthians 13
 
EPANDING THE CONTENT OF AN OUTLINE using notes.pptx
EPANDING THE CONTENT OF AN OUTLINE using notes.pptxEPANDING THE CONTENT OF AN OUTLINE using notes.pptx
EPANDING THE CONTENT OF AN OUTLINE using notes.pptx
 
Pharmacognosy Flower 3. Compositae 2023.pdf
Pharmacognosy Flower 3. Compositae 2023.pdfPharmacognosy Flower 3. Compositae 2023.pdf
Pharmacognosy Flower 3. Compositae 2023.pdf
 
How to Configure Email Server in Odoo 17
How to Configure Email Server in Odoo 17How to Configure Email Server in Odoo 17
How to Configure Email Server in Odoo 17
 
How to Make a Pirate ship Primary Education.pptx
How to Make a Pirate ship Primary Education.pptxHow to Make a Pirate ship Primary Education.pptx
How to Make a Pirate ship Primary Education.pptx
 
Solving Puzzles Benefits Everyone (English).pptx
Solving Puzzles Benefits Everyone (English).pptxSolving Puzzles Benefits Everyone (English).pptx
Solving Puzzles Benefits Everyone (English).pptx
 
Final demo Grade 9 for demo Plan dessert.pptx
Final demo Grade 9 for demo Plan dessert.pptxFinal demo Grade 9 for demo Plan dessert.pptx
Final demo Grade 9 for demo Plan dessert.pptx
 
Mastering the Unannounced Regulatory Inspection
Mastering the Unannounced Regulatory InspectionMastering the Unannounced Regulatory Inspection
Mastering the Unannounced Regulatory Inspection
 
Blooming Together_ Growing a Community Garden Worksheet.docx
Blooming Together_ Growing a Community Garden Worksheet.docxBlooming Together_ Growing a Community Garden Worksheet.docx
Blooming Together_ Growing a Community Garden Worksheet.docx
 
Class 11 Legal Studies Ch-1 Concept of State .pdf
Class 11 Legal Studies Ch-1 Concept of State .pdfClass 11 Legal Studies Ch-1 Concept of State .pdf
Class 11 Legal Studies Ch-1 Concept of State .pdf
 
Model Call Girl in Bikash Puri Delhi reach out to us at 🔝9953056974🔝
Model Call Girl in Bikash Puri  Delhi reach out to us at 🔝9953056974🔝Model Call Girl in Bikash Puri  Delhi reach out to us at 🔝9953056974🔝
Model Call Girl in Bikash Puri Delhi reach out to us at 🔝9953056974🔝
 
A Critique of the Proposed National Education Policy Reform
A Critique of the Proposed National Education Policy ReformA Critique of the Proposed National Education Policy Reform
A Critique of the Proposed National Education Policy Reform
 
_Math 4-Q4 Week 5.pptx Steps in Collecting Data
_Math 4-Q4 Week 5.pptx Steps in Collecting Data_Math 4-Q4 Week 5.pptx Steps in Collecting Data
_Math 4-Q4 Week 5.pptx Steps in Collecting Data
 
“Oh GOSH! Reflecting on Hackteria's Collaborative Practices in a Global Do-It...
“Oh GOSH! Reflecting on Hackteria's Collaborative Practices in a Global Do-It...“Oh GOSH! Reflecting on Hackteria's Collaborative Practices in a Global Do-It...
“Oh GOSH! Reflecting on Hackteria's Collaborative Practices in a Global Do-It...
 
POINT- BIOCHEMISTRY SEM 2 ENZYMES UNIT 5.pptx
POINT- BIOCHEMISTRY SEM 2 ENZYMES UNIT 5.pptxPOINT- BIOCHEMISTRY SEM 2 ENZYMES UNIT 5.pptx
POINT- BIOCHEMISTRY SEM 2 ENZYMES UNIT 5.pptx
 
Hybridoma Technology ( Production , Purification , and Application )
Hybridoma Technology  ( Production , Purification , and Application  ) Hybridoma Technology  ( Production , Purification , and Application  )
Hybridoma Technology ( Production , Purification , and Application )
 
Model Call Girl in Tilak Nagar Delhi reach out to us at 🔝9953056974🔝
Model Call Girl in Tilak Nagar Delhi reach out to us at 🔝9953056974🔝Model Call Girl in Tilak Nagar Delhi reach out to us at 🔝9953056974🔝
Model Call Girl in Tilak Nagar Delhi reach out to us at 🔝9953056974🔝
 

Lasagna Gardening - Mother 2

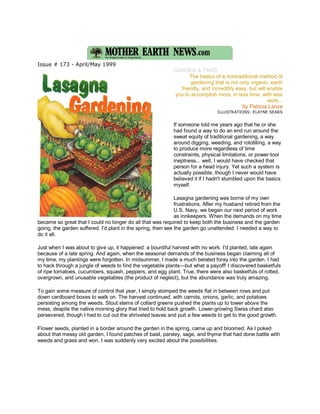
  • 1. Issue # 173 - April/May 1999 GARDEN & YARD The basics of a nontraditional method of gardening that is not only organic, earth friendly, and incredibly easy, but will enable you to accomplish more, in less time, with less work... by Patricia Lanza ILLUSTRATIONS: ELAYNE SEARS If someone told me years ago that he or she had found a way to do an end run around the sweat equity of traditional gardening, a way around digging, weeding, and rototilling, a way to produce more regardless of time constraints, physical limitations, or power-tool ineptness... well, I would have checked that person for a head injury. Yet such a system is actually possible, though I never would have believed it if I hadn't stumbled upon the basics myself. Lasagna gardening was borne of my own frustrations. After my husband retired from the U.S. Navy, we began our next period of work as innkeepers. When the demands on my time became so great that I could no longer do all that was required to keep both the business and the garden going, the garden suffered. I'd plant in the spring, then see the garden go unattended. I needed a way to do it all. Just when I was about to give up, it happened: a bountiful harvest with no work. I'd planted, late again because of a late spring. And again, when the seasonal demands of the business began claiming all of my time, my plantings were forgotten. In midsummer, I made a much belated foray into the garden. I had to hack through a jungle of weeds to find the vegetable plants—but what a payoff! I discovered basketfuls of ripe tomatoes, cucumbers, squash, peppers, and egg plant. True, there were also basketfuls of rotted, overgrown, and unusable vegetables (the product of neglect), but the abundance was truly amazing. To gain some measure of control that year, I simply stomped the weeds flat in between rows and put down cardboard boxes to walk on. The harvest continued, with carrots, onions, garlic, and potatoes persisting among the weeds. Stout stems of collard greens pushed the plants up to tower above the mess, despite the native morning glory that tried to hold back growth. Lower-growing Swiss chard also persevered, though I had to cut out the shriveled leaves and pull a few weeds to get to the good growth. Flower seeds, planted in a border around the garden in the spring, came up and bloomed. As I poked about that messy old garden, I found patches of basil, parsley, sage, and thyme that had done battle with weeds and grass and won. I was suddenly very excited about the possibilities.
  • 2. And the timing couldn't have been better. The inn had caught on, making my time in the garden more limited. And, as much as I hated to admit it, I was getting older and losing some strength. I was by then living and working alone, so there was no one to run the tiller. I bought a smaller model but couldn't cope with cleaning the carburetor and mixing gas and oil. Inspired by my no-work harvest, late that fall I began my first attempt to make and maintain a garden without digging or tilling. Using no power tools and little more than what was at hand, I layered for the first time. A neighbor's son had promised to bring me a load of horse manure in a spreader in exchange for pizza and sodas for himself and his friends. The no-work garden: Leave the sod where it lies, blanket it with wet newspaper to stifle the grass, This seemed like a fair exchange to me. I removed all the then begin layering. Before you can say cardboard from the paths and gave him access to back the mangiamo, your plot is ready for planting. spreader right up to the garden. He spread about four to six inches of fresh manure on the entire plot. I waded in and covered it with a layer of peat moss. In the spring I had more weeds (smart weed, pig weed, dumb weed) than ever before, but they were easy to stomp down. I covered the garden paths with cardboard, then set about hand-pulling weeds from the garden spaces, easily keeping them clear just long enough to plant. Once the plants were in, I mulched with compost and peat moss. As the plants grew, I mulched with grass clippings and more peat moss. My garden spaces were smaller with wider paths, and I planted closer. I expected that as the plants grew they would crowd out the weeds. To plant seeds, I created a weed-free planting space with a mixture of peat moss, sand, and sifted compost laid on top of the rather untidy garden base. The business—a country inn and restaurant—was year-round, but from July 4th to Labor Day I danced as fast as I could to keep up with the heavy seasonal trade. By midsummer, I found myself once again ignoring the garden. Yet, once again, the garden produced more than I expected, though it was still weedy and messy. There was something missing. I knew I could control the weed growth with plastic or landscape material, but it wasn't what I wanted. I needed a ground cover that would suppress weeds, deteriorate, be easy to come by, and cost nothing. As I lugged tied bundles to the curb for recycling, I found my answer: newspaper. The above shows a sample recipe for a finished lasagna bed, with alternating layers of peat moss and organic materials. COMMENT: IN SACRAMENTO IT IS BEST TO LEAVE OUT THE LAYER OF WOOD ASHES – MOST SACRAMENTO SOIL IS ALREADY QUITE ALKALINE.
  • 3. ALL THE NEWS THAT'S FIT TO LAYER That fall, I covered the entire garden: the paths with new cardboard and bark chips and the garden spaces with two or three sheets of wet newspaper and peat moss, layered with grass clippings and chipped leaves. It was looking good. In fact, it was beautiful-neat and beautiful! In the spring, I pulled the weedless layers of dark, rich soil aside, right down to the newspaper, and planted. I took time to add compost, peat moss, and grass clippings as mulch to the plants. It was some year—a great harvest, few weeds, and no work to speak of. That's when I began to think about a garden built on top of the sod, requiring none of the traditional preparation: no lifting the sod, no digging or tilling, just neat layers of organic ingredients left to decompose over the winter. Once I found the spot—a level, grassy parking lot near a water source—I drew a sketch of a garden of herbs and flowers in a formal Williamsburg design. It was all about measuring: two-foot garden spaces and three-foot paths, all leading to a circle at the center with space for a sundial and thyme garden. While waiting for my daughter, Melissa, and surveyor son-in-law, Bill, to stake out the lines, I stockpiled the ingredients: newspapers, flattened cardboard boxes, wood chips, compost, grass clippings, leaves, rotted barn litter, old hay, horse manure, sand (left over from a building project), and bags of soil amendments bought on sale at the garden center. When Bill was through with the survey and gutter nails were tied with bright survey tape at corners, I connected them with string. Next, I laid cardboard on the paths and covered the cardboard with bark chips. I then covered the garden spaces with thick layers of wet newspaper, overlapping the ends, and covered the paper with one to two inches of peat moss. Then I laid a three- to four-inch layer of dried grass clippings over the peat moss and added another one or two inches of peat moss. I continued to alternate layers of waste material and peat moss. Midway through, it struck me that the peat moss was akin to the cheese layer in a real lasagna. By the time I was finished with all the material I had collected, the garden spaces were 24 or more inches high, and it was well into November. I worked at the last of it until late in the day and quit only when I felt snow covering my head and shoulders. Just before walking away, I sprinkled a dusting of wood ashes on top of the layers. It was like the parmesan cheese you add to the top of a real lasagna just before you put it in the oven. This was all done on top of the sod—without lifting, digging , or tilling. IS IT SOUP YET? My winters at the inn were long and cold. Snow covered the top of the mountain from November until late April. When I took the first spring walk in the gardens, I carried a trowel to check on the frost depth. I poked about in the earth in gardens from the front of the inn to the back by the barn, leaving the layered garden till last. Eventually I found myself standing in front of the new garden. What had been two feet of layered soil amendments was now just about six or eight inches high. I pushed the trowel down through rich, black soil to the paper layer and found most of the sheets gone and another five to six inches of loose earth below. I could plant anything in this much loose material. The lasagna layering had worked beautifully! When the weather finally warmed, I pulled the soil apart in the new garden and planted herbs and flowers. I continued mulching each time I cut the grass. That's it! No other work—-no weeding, no watering, nothing! I couldn't believe how the plants thrived and how easy it was. I didn't need to worry about garden chores during my busy season anymore. The guests at the inn admired the new garden, and I shared the process. The old vegetable garden,
  • 4. previously kept hidden, was now a showplace. Folks who admired my gardens could see they were weed-free. I told everyone about the lasagna method, but I could see that few really got it. They either didn't believe me or had no grasp of what it all meant. But I knew. It meant I could be a really good gardener and still be able to keep up with the demands of being an innkeeper. It meant I could put the rototiller up for sale. Best of all, I stopped worrying about getting older and not being able to keep it all going by myself. I could have it all! For those who are in doubt, I suggest you take a walk in the forest and renew your relationship with Mother Nature. She is the original lasagna gardener, though not as neat as me. In nature, debris drops to the forest floor, and without any help from man, creates layers of dark, rich humus. Tree and wildflower seeds fall into the debris-turned-humus, sprout, and grow. Unless you live in the forest, you probably want a neater, more organized garden. But to have any kind of garden—neat or otherwise—you first need good soil. Traditionalists would agree on the good soil premise and either crank up the tiller or get out the cultivator. My neat layers promote good soil without tillers or cultivators. You take the first step by simply covering the earth, creating a moist dark place where earthworms will come. Once you see worm activity, you know you're on the right track to having good soil. All additional layers of organic material encourage and feed the earthworm population. Worms are nature's rototillers. But wait: what about the Ruth Stout advocates who say, "So what? It's all been done before." Well, perhaps I am Ruth Stout reincarnated, only neater, and with some fundamental differences. I don't just use spoiled hay on top of a garden that has been plowed every year for 30 or 40 years. I layer right on top of sod, flattened weeds, or between rocks. I don't throw all the refuse back on top of the hay. I tuck unsightly waste under the paper, both for worm food and to keep it out of sight. Also, I don't have to worry a whole lot about snakes or rodents. I don't like to share too much of my space with either, and they do love that loose hay. Last, I never take my clothes off in the garden, no matter how much I would like to. LASAGNA-MAKING 101 Before you buy the first plant, or lay down the first sheet of wet newspaper, take a look around your property. Check to see where you get the best light; that's where you'll put your garden. Decide on the shape and contents of your garden. The size of your plot will determine how much material you need to make your first lasagna. Your material list will change depending on where you live. Some folks have more leaves than others, some have seaweed, others ground cornstalks or apple pulp. Some of the lucky ones have access to animal manure. There's no hard and fast rules about what to use for your layers, just so long as it's organic and doesn't contain any protein (fat, meat, or bone). It's easy to turn your existing vegetable or flower plot into a lasagna garden. In fall or late winter, simply stomp down any remaining growth, cover with thick pads of wet newspaper, and start layering.
  • 5. Before I go any further, let me just say that the basics of making garden lasagnas are simple: Don't remove the sod or do any extra work, like removing weeds or rocks. Mark the area for your garden using a water hose or a long rope to get the desired shape. Cover the area you've marked with wet newspapers, overlapping the edges. Cover the paper with one to two inches of peat moss or other organic material. Layer several inches of organic material on top of the peat moss. Continue to alternate layers of peat moss and organic material, until desired thickness is reached. Water until the garden is the consistency of a damp sponge. Plant, plant, plant and mulch, mulch, mulch. You need less loose material to plant in than you might think. In the spring of '98, I layered an area where a dog pen had stood for years. The property belongs to a 79-year-old man who was upset about his inability to garden as he once had. Until recently, a 100-year-old white pine tree had occupied the center of the fenced-in area. But its roots had begun to do real damage to my friend's house and surrounding properties, and so the tree had to be taken down. Once the tree was removed, the area was bright and sunny, but, unfortunately, the ground contained 100 years worth of layered pine needles. Easy potato harvest: Use regular digging fork to lift the mulch and move it to another bed. Then just pick up the potatoes. What could be simpler? First, we covered the area with lime, then laid whole sections of wet newspaper on top of the pine needles and covered the paper with peat moss. We bought a small truckload of barn litter mixed with our local clay soil and covered the peat with two inches of this mix and then two more inches of peat moss. Additions of one to two inches of grass clippings, two inches of peat moss, one to two inches of compost, and more peat gave us a total of about six to eight inches to plant in. We pulled the layers apart and planted 31 tomato plants, four squash, six cucumber, four basil, two rosemary, four parsley, and twelve cosmos. It was a jungle, but with staking, pruning, and tying, the garden produced so much fruit that the entire neighborhood helped eat the harvest, and the cosmos were so beautiful they took our breath away. Once the harvest was finished, I pulled the stems and disturbed the layers for the first time. Pieces of the paper layer came up with the roots. So, too, did the biggest earthworms you can imagine. The soil was still probably a bit acidic, but it will get better in time.
  • 6. To prepare the new garden for another year of planting, we spread the contents of a large composter onto the space, and the garden took on several inches in height. The last mowing of grass provided enough clippings to add another few inches. When the fall came, we mowed the leaves for a top dressing of four inches of chipped leaves. I love an edged garden and so the last thing I did was cut a sharp, clean border around the sides, throwing the edging material up onto the garden, with grass side down, for another layer of more good dirt. It looked beautiful! Close planting and mulching greatly reduced the amount of weeds in the dog pen garden, as they do in all my gardens. It also meant less watering, since the paper and mulch kept the soil around the root zone cool. Even though we pushed it a bit by planting 31 tomato plants, the staking, tying, and pruning, in addition to close planting, created a healthy growing environment, with few garden pests. It was another test, and the results have left my friend confident that, as he enters his 80th year, he will be able to continue gardening with the lasagna method. Indeed, lasagna gardening is so simple that the hardest part may be getting started. I suggest beginning with that walk around your property to determine what you can do with what you have. If you get lots of shade, plant a shade garden or cut some tree limbs. Track the light for a couple of days during the spring and summer. You probably have more light than you think—not sun, but light. Lots of rocks? Try rock gardening. You might learn to love the wonderful world of small plants that thrive in rocky terrain. Too little space? Look again. If there's a foot of space, you can plant in it. There's no such thing as work-free gardening, but the lasagna method is close. Once you train yourself to think layering, and learn to stockpile your ingredients, you will work less each year. Following are some of my favorite vegetables, along with tips on how I grow them the lasagna way: ASPARAGUS Many gardeners shy away from this tasty crop, mainly because it's difficult to grow through traditional means. Not so with lasagna gardening. I still remember the first year I planned my asparagus patch. Turned out to be one of my best vegetable trials yet. For fun, I grew a tray of plants from seed, started indoors in February. In early spring, I added the small seedlings to the assembly of roots—one, two, and three years old—that I had accumulated to plant together. Using a mattock blade, I scraped a shallow opening in a newly made lasagna bed, an inch or two deep. I combined the roots and seedlings in the opening and covered them with a sifting of soil and peat moss. Once the roots were planted, I covered the top of the row with a mixture of manure and peat moss. As the roots sprouted and grew, I added sifted compost and grass clippings. In the fall, I added more manure and a thick layer of chipped leaves for winter mulch. During the first spring, I watched the asparagus emerge and grow. I invited inn guests into the garden to help me cut and eat the first tender stalks. Then I mulched, mulched, then mulched some more. The second spring, I cut so much asparagus we had some to freeze. It was all so easy: plant, mulch, harvest, and enjoy. Site and soil. A heavy feeder, asparagus needs well-drained soil and at least six hours of sun. The fall before planting, build a lasagna garden on the site you've chosen for your asparagus, using a base of newspaper topped with 18 to 24 inches of layered organic material. By spring, the lasagna bed will have composted to ideal soil conditions for asparagus. Planting and harvest. The time is right when the soil is thawed and crumbles in your hand. Plant in rows two feet apart in two shallow trenches, with a rise in between. This lets the crowns sit on top of the rise, with the roots in the trenches. Plants should be 18 inches apart and covered with two to three inches of soil and compost mixture.
  • 7. As the plants grow during the summer, continue covering with the compost enriched mixture until crowns are four inches deep. In the fall, cover the entire bed with a blanket of eight to ten inches of chopped leaves or other organic mulch. Each spring, feed the bed compost enriched with manure. In colder regions, pull the mulch back on half the bed to get an extra early harvest, saving half the bed for later harvesting. Once the harvest is over, the remaining shoots expand into ferny top growth. When the ferns turn bronze, cut them back. BEANS I usually wind up planting many more beans than I actually need. But with so many varieties—all so much types to grow—who can resist! Once the last chance of frost is past, plant your favorite bean seeds. Divide your seeds into thirds and plant every two weeks for a longer harvest. Once I have a lasagna bed in place, I plant bush bean seeds along the edges. They only need a few inches, since the plants will lean out over the sides of the garden, leaving room for taller crops. I plant pole bean seeds around the base of teepees made from six-foot bamboo poles. Plant seeds around the base of each pole, and when they start to climb, give them a boost up the trailing twine you have tied from the top. Site and soil. Beans grow best in well-drained soil that's high in organic matter. A new or established lasagna bed in full sun works best for all types. Planting and harvest. Fix supports in place before planting pole bean seeds. For both types, pole and bush, just push the seeds into loose soil about two inches apart. Cover the seeds and press the soil around them for direct contact. Keep the soil evenly moist until seeds emerge, then cover the soil with a good mulch to keep the soil cool, the leaves clean, and the garden weed-free. To avoid rust, don't work beans when foliage is wet. Once beans start to appear, keep crop picked to encourage new bloom. Rotate crops every year to avoid pests and disease. CUCUMBERS Bush cucumbers can be grown in small spaces and containers. Climbing cucumbers need strong support, so plant close to a fence or trellis. I like the climbers and try to see what kind of new supports I can come up with each year to make the garden more interesting. I loved the string cradles we tied to a stockade fence one year. The vines grew up strings hanging down into the row, then up the string cradles and onto the fence. Site and soil. Cucumbers need good drainage and rich soil. Lasagna gardens are just the thing, when enriched with fresh manure. However, wait three years before planting in the same place to avoid pests and disease. Planting and harvest. Wait until the last frost is past, then plant prestarted seeds covered with floating row cover in colder regions, and seeds sown directly in the garden in milder climates. Keep mulched and don't till, as cucumbers are shallow rooted. Maintaining at least six inches of mulch at all times keeps the roots cool and moist, but they still need an inch of water each week. Pick the fruit when it's small and most flavorful. Once the harvest starts, don't miss a day, or you'll have candidates for the compost pile instead of the salad bowl. GARLIC If you've never tried growing garlic, you've missed something special. I make a rich lasagna bed, let it
  • 8. cook for four to six weeks under black plastic, set strings up to keep my rows straight, and push in single cloves just enough to see they are covered. When the foliage is full and seed heads form, I cut and use them just as I would cloves. When the foliage turns yellow or brown, it's time to lift the garlic. Loosen the earth and gently shake off any dirt. Let the cloves cure by hanging them in a dry place. The individual cloves will each make a head, so you will have plenty to use, as well as to save for next year's seed. Site and soil. Good drainage, full sun, and plenty of manure-rich compost are best. A well-built lasagna bed has the perfect growing conditions to start, then all you have to do is add grass clippings or chipped leaves for mulch to keep the soil evenly moist and weeds at a minimum. Planting and harvest. Gardeners in the Northeast and zone 5 and colder climates will get best results from hard-neck garlic planted in the fall and harvested the next summer. Milder climates can grow soft- neck; plant in the spring and harvest that same fall. If you haven't room for an entire bed just for garlic, plant some in groups of three to five cloves in flower or vegetable beds. Folks who have bug problems swear by the positive effect garlic has on its companions. LETTUCE Anyone can grow lettuce. The problem is most folks grow too much at one time. Use a little restraint and make successive plantings. Mix lettuce seed with sand so you will not have to do so much thinning. I broadcast a mixture of cut-and-come-again lettuce once a month for the duration of growing time for my zone. Site and soil. Lettuce likes it cool and so is ideally suited for spring and fall plantings. I use other taller plants to shade my lettuce in summer. It's best to prepare a site for lettuce in the fall, adding a high nitrogen amendment (such as fresh grass clippings) to the top two inches of soil. Planting and harvest. Lettuce is a fun crop to grow in containers, as borders, and in tiny spaces that would only go to waste otherwise. There's really no safe place to hide when I start looking for places to plant. I've planted Ruby Red and Oakleaf lettuce in my herb and edible flower containers and flower boxes. I interplant herbs and lettuce in the border gardens that surround my antique roses. The Mesclun mixes are wonderful in big terra cotta saucers that stand alone in part shade. When guests come for dinner, I give them a colander and a pair of scissors and point them toward the garden. They come back with an interesting collection of edibles and never forget the experience. Lots of good gardeners start out by getting their feet dirty in someone else's garden. POTATOES No need to dig trenches or to hill up. Build a lasagna bed to eliminate grass and weeds, don't use any lime or nitrogen rich materials (such as grass clippings), lay down one or two sheets of wet newspaper, lay seed potatoes on top of the paper, and cover with spoiled hay or compost. You can use pretty much anything you have that is dried. Chipped leaves are great for covering the tubers. I use hay that is well- cured and lying next to my potato bed, so I don't have to carry it too far. Site and soil. Potatoes need full sun, good drainage, and can tolerate acid soil. Preparing a lasagna bed and adding bone meal or rock sulfate produces a good harvest and large tubers. Avoid planting potatoes where you have grown them or their relatives (including eggplant, peppers, and tomatoes) for the past three years. Planting and harvest. Be ready to plant in early to mid spring and have enough material to cover the bed with ten inches of mulch. Be prepared to add several inches of cover to the bed as plants grow. The important thing here is to keep the tubers covered so they will not see the light of day. By the end of the growing period, the plants will be propped up with hay or other soil amendments.
  • 9. Slip your hand under the mulch to harvest a few small potatoes when the beans are ready to pick. Let the rest continue growing until the foliage has yellowed. Don't try to dig! Lift the mulch and pick the clean tubers up off the newspaper. Be on the watch for potato bugs. Try to catch them when they are small. Sweep across the foliage with a broom. They will fall into the mulch and, when small, not be able to find their way back up to the leaves. TOMATOES The toughest part of growing tomatoes is choosing the kinds you will grow. You'll likely want to plant several different varieties each year: there's early, mid season, and late ones; tiny pear shaped, cherry, patio, plum, slicing, and cooking varieties; plus, tomatoes for juice and for stuffing, not to mention new types and heritage. Site and soil. Tomatoes need full sun, an inch of water per week, and protection from the wind. Ideal conditions are a lasagna bed that has been around for at least a year and has not grown any of the "Up, cukes, up! Good vegetables." It relatives: potatoes, eggplant, or other tomatoes. pays to train your cucumbers to grow up, rather than letting them sprawl. With a bit of encouragement, they'll I prepare my site by installing water jugs buried up to their shoulders readily climb strings, putting the fruit at between where every two plants will be. A pin hole in the sides facing back-and knee- friendlier heights come harvest time. the plans should let enough seep out to keep up consistent watering. I place a tall stick in each jug, its top colored with red paint or nail polish. This helps me find the sticks, which helps me find the openings to the jugs when all the foliage hides them from view. I fill the jugs with a funnel and the water hose. You can add liquid plant food to the water if you like. Planting and harvest. Wait until after the last frost, then plant the seedlings. Create a well of soil around the stem to help catch any rain. If you have prepared the lasagna bed in advance, all you will have to do is scrape the soil aside and lay the plant down up to the last four leaves. Press the soil around the plant to make direct contact and push out any air pockets. Once the jugs and plants are in place, make a collar of one or two sheets of wet newspaper, place it around the stem, and cover the paper with mulch. Depending on the type of tomatoes you have chosen, you will need to stake, tie, prune, and pinch. Keep the water jugs full and check plants regularly for bugs or disease. Don't get impatient; tomatoes need lots of long hot sunny days and warm nights. Again, depending on the cultivar you have chosen to grow, you can look forward to your first harvest in 55 to 100 days after you set the plants out. And, oh, what a delicious harvest! I love tomatoes warm from the garden-standing over the row, biting into one, the juice running off my chin, dripping from my elbow, the acid tingling my tongue. It just doesn't get any better than that. Patricia Lanza is author of Lasagna Gardening, A New Layering System for Bountiful Gardens: No Digging, No Tilling, No Kidding! (Rodale Press, 1998, $15.95). Just call MOTHER'S Bookshelf at 1800- 888-9098 and ask for book #MEB273. Patricia is currently coproprietor, along with her daughter, of The Potager, a Wurtsboro, New Yorkbased Dome, garden, and gift center.