SlideShare a Scribd company logo
1 of 57
Download to read offline
a-
d
A GUIDE To MANUFACTlJfWG AND INSTALLATION
USEOFHYDRAULICRAMS
IN NEPAL
A GUIDE TO MifdUFACTURINGAND INSTALLATION
I_
BY
MITCHELL SILVER
UNICEF (United Nations Children's Fund)
Box 1187, Kathmandu, Nepal
September 1977
This book is available free
of charge from UNICEF
Box 1187
Kathmandu, Nepal
TABLE OF CONTENTS
page
List of Tables and Drawings ........................
hbbrevititions .....................................
Acknowledgements and Credits .....................
Tntroduction ......................................
Survey alnd Preliminary Design .....................
How the Pump Works ..............................
Intake Tati ......................................
Pump Size ............ ..r....; ...................
Drive Pipe .......................................
Delivery Pipe ....................................
General Notes on Pump Installation ................
Reservoir Tank ..................................
Starting the Pump ................................
Ming the Pump .................................
Two or MtJre Hydrams ............................
Maintemce .....................................
Trouble Shooting
...
.................................
Building a Hydraulic Ram Fro= Local Materials. ....
An Alternative Type Hydram ......................
The Impulse Valve ...............................
The Delivery Valve. ..............................
Making The Air Chamber .........................
Mounting the Ram ................................
Bibliography .....................................
Conversion Table ................................
..
i:’
V
vi
1
8
10
12
13
16
18
20
21
21
22
24
25
27
29
31
35
39
41
42
44
Table # 1
Table # 2
Table # 3
Table # 4
Table # 5
Table # 6
Drawings
1.
3d.
3.
4.
5.
6.
7.
8.
9.
LIST OF TABLES AND DRAWINGS
Minimum and maximum qjantiiies of
intake water . . . . . . . . . . . . . . . . . ..*....... 13
Delivery pipe diameter according to
the amount of water pumped per day . . . . . I6
Different conditions of vertical fall and
lift and the percentage of &ater used
which the ram will deliver . . . . . . . . . . . . . . 17
The cost of hydrams made from locally
available parts . . . . . . . . . . . . . . . . . . . . . . . . 29
Dimensions for different sizes of impulse
valves . . . . . . . . . . . . . . . . . . . . . . . . . . . . . . . . 34
Dimensions for delivery swing check
valve (2” a) . ..*...................... 39
Vertical fall and lift, and drive pipe
and delivery pipe lengths . . . . . . . . . . . . . 2
Use of an open standpipe to regulate
drivepipe length . . . . . . . . . . . . . . . . ...*. 2
Use of an oil drum as sediment coLlection/
drivepipe supply tank . . . . . . . . . . . . . . . . 2
Hydram incorporated in a gravity flow
breakpressure chamber . . . . . . . . . . . . . . 7
How the pump works (4 panels) . . . . . . . . 9
A mountainous installation using a canal
from a river to supply the hydram . . . . . 11
A schematic diagram d a hydraulic
ram installation . . . . . . . . . . . . ..*...... 19
A multiple hydram installation . . . . . . . . 23
A hydram’s waste water being used
to power another hydram . . . . . . . . . . . . . 23
ii
page
10.1 A hydraulic ram built from local
materials . . . . . . . . . . . . . . . . . . . . . . . . . 28
10.2 An alternative type hydram . . . . . . . . . 30
ll- The impulse valve (4 panels). . . . . . . . 32
12. The delivery valve (4 panels). . . . . . . . 36
12.5 An alternative delivery valve.. . . . . . . 38
13. A hydram with an inner tube
instead of an air valve . . . . . . . . . . . . . 40
...
ill
TERMS
GI =
HDP =
PVC =
BPC =
LDD =
Q =
Dwg# =
HGL =
UNITS
mm
cm
m
kg
1
bm
lpa
km
i set
11
f%l
ABBREVIATIONS
galvanized iron
high density polyethylene
p olyvinyl chloride
break pressure chamber
Local Development Department of His Majesty’s
Government of Nepal
flow
drawing number
hydratiic grade line
millimeter
centimeter
meter
kilogram
liter
liters per minute
liters per day
kilometer
seconds
in = inches
square
1 =
yds =
mi =
gal =
gpm =
gpd =
min =
lbs =
hr =
/ =
91 =
ft = foot
yards
miles
gallons (US)
gallons per minute
gallons per day
minutes
pounds
hours
Per
diameter
ACKNOWLEDGEMENTSAND CREDITS
This work would not have been possible without the
valuable aid of the Local Development Department of the
Home Panchayat Ministry, Department of Drinking Water
of the Water and Power Ministry and UNICEF. Thanks
also to those who helped at Balaju Yantra Shala. The main
sources for this book are the publicatiox by S. B. Watt,
E . W. Kindell, and Rife, all of which are c ited in the
Bibliography. Illustrations: Naren Basnet and Mani Joshi
of Continental Design and Art Studio.
INTRQIHJCTION *
The ‘hydraulic ram pump can be used. with great effective-
ness in mountain villages which are located at a higher
elevation than their source of water. The hydram pump uses
the:power of falling water to pump a small portion of that
water uphill. It requires absolutely no fuel or electricity,
only water pressure. The pump was developed about 200
;P’ears ago, and the beauty of the hydram lies in its simplicity.
There are o&y two mrxring parts which are lubricated by the
water itself. This maalerahopes to show that anyon with a
minimal amount of mechanical aptitude can survey, desigrn
and build a hydraulic ram from locally available parts, and
do any necessary maintenance.
Whether for domestic purposes or irrigation, a hydram
can be used to great advantage in many diverse situations.
The source of water could be a r.xzz ~3,, B &spring, an irri-
gation canal,an artesian well, or ev:~~,*it-5m.fsti vig g:r::vity
flow water system. In the mountainon Legions of &>ijal,
and other areas of similar topography, there are many
thousands of places where, if a hydram were installed,
much time spent hauling water could be used for other pur-
poses. Formerly unproductive or unused land could be
made suitable for gardens and orchards, and field crops
could give increased yields. Wide&ale usage would benefit
many thousands of people.
Because this simple pump works 24 hours per day, for
many years (many working installations are over 50 years
old) and requires little attention, it is suitable for areas
vi
,r. ,
where people have little technical expertise. B.ycause hydraulic
ram installations are ine-xpensive and quickly in$talled, they
are well suited for remote areas where there are extreme
transportation difficulties, as well as for sparsely populated
villages which often make gravity flow water supply system
financially unfeasible. The ability to incorporate a hydram
in an existing gravity flow water supply system has also proved
very useful.
It is hoped that this short manual provides the necessary
information to stimulate interest in hydraulic rams SOthat
some of the many thousands of people that stand to gain will
be benefited, by having their drcudgery eased and their
economic situation improved.
vii
-10
SURVEY AND PRELIMINARY DESIGN
A hydraulic ram survey must be done while considering
the design. Before a design can be done it is essential to
know:
1. Vertical fall from source to pump.
2. Vertical lift from pump to delivery site.
3. Amount of water available to power the pump (Q input
or source flow).
4. Minimum daily quantity of water required.
5. Drivepipe length from source to pump.
6. Delivery pipe length from pump to delivery site.
Initially one must measure the distance from the potential
pump site to the delivery point and the difference in vertical
elevation (see dwg. # 1). Except in a few cases, hydraulic
rams cannot pump higher than 100 meters - and in order to
avoid using long lengths of galvanized iron (GI) pipe one
shouId try not to exceed the pressure limits of the HDP pipe.
One must also measure the available fall from the source
to a spot below where the pump will be placed. The supply
head should be between 1 to 20 meters, remembering that
-2-
I
- .--
mnected to
‘
-30
output varies directly with increased supply head. The
length of the drive pipe will be roughly 4 times the supply
head. This is discussed in greater detail in the section on
pump design.
The flow of source water must be accurately measured.
Careful site investigations must ‘be made, including ques-
tioning of the villagers about water quality, the possible
change of fiow at different times of the year, and whether or
not there is a sediment problem. While surveying, consider
the following: .
a. Where is a suitable site for in-take that considers
possible flood conditions, laidslides or soil erosion?
b, Where will the pump be located? Can a small house
be built around the pump? Where will the unused
water from the pump go?
c. Where will the pipes be laid, and can they be buried?
After calculating these initial measurements using the
formtia:
Q Qoutput)rper day = vertical fall x source flow (lpd) x0.6”
vertical lift
you can estimate the amount of water will be delivered per
day. Compare this figure with the amount of water required
daily. (Forty-five liters per person per <dayis considered
adequate for domestic use in Nepal’s mountain villages).
If the pump’s calculated output is too small, then it may
not be feasible to use a hydram. If there is sufficient water,
then calculate the village needs for water regarding domestic
use, animal use, and possible small scale irrigation for
fruit trees or vegetable gardens. Let this figure be your
desired output and then calculate how much intake floi is
necessary using the following formula:
* For the variables of fall and lift be consistent in which
units you use. Either use meters or feet but don’t mix the
two. The flow should be lpd or gpd. If lpm or gpm are
used and you desire the daily flow then multiply by 1440.
-40
(Q intake) Flow = vertical lift x output (Q)
vertical fall x 0.6
Example 1
Assuming the foIlowing conditions, what will be the
e-xpected quantity of water pumped per day?
Source. flow = 30gpm = 113.6 lpm
Vertical fall = 30 feet = 9,l meters
Vertical lift =200 feet = 61 meters
Population of village: 200 people
Estimated pqulation in 15 years at 25% increase = 200 +
25 x 200 = 250
100
Demand (250 people at 45 liters pzr day) = 11,250 lpd
= 2,972 gpd
Q output = vertical fall x flow x 0.6
vertical lift
= 30’ x 30gpm x 0.6 x (1440 min. ) = 3850 gpm
200’ (1 day) = 14,716 lpm
Example 2
Under certain conditions how much source flow (Q intake)
is necessary to meet the daily demand.
I
Vertical lift (always measured from the pump, and not
the source) 45.7m (150’) . Vertical fall 7.6m (25’) -
Demand
a. for 600 villagers assuming a 25% increase in 15 years
600 + (25 + 600) 1 725
100
725 x 45 lpd per person = 32,625 lpd
-5-
b. for 300 animals x 6 @d = 18,000 Ipd
total = 50,625 lpd
knowing that Q Intake = vertical lift x Q output and
that 1 day = 1440 min. vertical fall x 0.6
then Q Intake = 45.7m x 50,625 lpd x 1 day
7.6m x 0.6 1440min
= 352.3 lpm (93 gpm)
This figure of 352.3 lpm is the minimum source flow required
to meet the dally demand. If the source flow exceeds this
figure then it will be possible to exceed the daily demand.
In cases where excess water can be provided, encourage
villagers to use the water for other types of development
work such as a vegetable gar&n, fruit orchard, a tree
nursery, a fish pond, and latrines.
By increasing the vertical fall or decreasing the vertical
lift the output will be proportionately increased. One tech-
nique for increasing the vertical fall, when it is too small,
is to take an intake pipe (or canal) from the source and run
it to another point downstream where there would be a bigger
difference in elevation to the pump (see dwg # 1 & 6). The
initial intake pipe can be HDP, but the pipe attached to the
pump must be GI or steel. The junction of the two pipes
can be an open standpipe if the HDP pipe 13 a size larger
than the dri- e pipe, or there can be a small tank that would
have intake, outlet, washout and overflow pipes. (See dwg
# 2 & 3). This intermediate tank is especially useful if the
water is sediment laden. The function of an open stand-
pipe or small overflowing tank is to insure that there is
absolutely no air in the drivepipe. The use of the open
standpipe is primarily for installations where the intake
tank and the ram location are limited by the surrounding
topography, which could prevent the drivepipe from being
straight or make it unnecessarily long or not steep enough.
(See the section on The Drivepipe for designing the proper
-60
length);.“ By using an open standpipe the length and angle of
the drivepipe will be determined by the standpipe location-
In the event that the system is meant to be incowrated
in an existing gravity flow system, a breakpressure chamber
@PC) is the ideal place to install the ram, as this will
eliminate any waste water0 TO allow any air trapped in the
pipeline to escape, it is advisable to connect a pipe up from
the BPC% intake to a small holding tank (thus eliminating
the air problem) from which the drivepipe runs down to the
pump sitting within the BPC.
The pump cannot be submerged in water, so care must
be taken to prevent this. (See dwg # 4). The valve serves
to regulate the flow up to the tank which must at least equal
or slightly exceed the pump% consumption of the drive water.
This manual is intended to be a guide for the use of hyd-
raul ic rams, but it must be emphasized that is only a guide
in the sense that every installation/situation will vary con-
siderably and specific design and techniques suited to the
particular site are necessary in order to create the most
appropriate water system. There is much room for creativity
as olily a few hydrams have been installed in Nepal and
precedents and standard procedures have not been firmly
established.
Often, constraints such as money and transportation will
have effects on the design. As there is no one correct
design for a site, but rather several alternatives, each
having advantages and disadvantages, it is essential to be
highly flexible. It must be remembered that the design must
consider possible conditions of at least 15 years in the future;;
this period in keeping with LDD design criteria for gravity 1
water supplies. This requires careful calculation regarding [
the environmental effects including landscape; erosion; i
population growth, possible detrimental effects, suitability j
for maintenance; durability, and any objections from others j
L,
Hydraulic ram Incorporated
5 existing gravity flow
woter supply system
Supply pipe to Drive pipe
-8- '.
concerning the water usage or installation. Wherever
possible consult with the villagers concerned on aspects of
design that concern them. Often local techniques and mate-
rials are the most appropriate solution for a given problem.
HOW THE PUMP WORKS
’
There are certain conditions that must be fulfilled in order
for the pump to work. There must be sufficient water in the
drivepipe falling from a minimal height in order to create
enough pressure to close the impulse valve. There must be
a certain minimal height of water in .the delivery pipe(about
two times the fall) in order to sustain the pressure in the air
chamber. It should be remembered that a small amount of
water with plenty of fall will pump as much as a situation
with plenty of water having only a small fall. The higher
the delivery head, the less water will be pumped, other
things remaining equal.
The water starts to flow through the drivepipe and escapes
out the impulse valve (dwg # 5.1). As the water accelerates
its pressure overcomes the weight of the impulse valve,
causing it to close suddenly (dwg # 5.2). The water pressure
suddenly’&oIped causes a very high pressure called “water
ham-mer? Some of the water is forced through the delivery
valve into the air chamber, compressing the air until the
water pressure is depleted. The compressed air acts like
a spring, which closes the delivery valve and forces the
water up the delivery pipe (dwg # 5.3). When the delivery
valve closes suddenly, it creates a pressure surge going up
the drivepipe which takes the pressure off the impulse valve,
allowing it to fall open due to its own weight (dwg # 5.4).
The water again flows out the impulse valve as the cycle
repeats itself. When the water enters the air chamber a bit
of water is wasted through the air valve, but on the closing
of the delivery valve a bit of air enters thrl;rrgh the air valve
due to the partial vacuum that is created by the water
rebounding up the drivepipe.
beningand closing of the valves
cycle
and 1
of a
Dwg.#5.4
r 1
‘~tw&l~; of water during one pumpin<
.
-
- 10 -
.,j..~.++.
I NTAKE TANK
The intake tank will vary with the individual site, but
basic differences are found depending on the nature of the
water source. Springs, streams, c :I::ped gravity
flow systems, and artesian wells al rfferent require-
merits. Techniques of intake tank de nd construction
are found in other books but a few general principals must
be remembered. If the source is to be used for drinking
water then contamination must be avoided. Stream and canal
source designs must carefully consider the problems of
flooding, torrents and erosion. Because sources are usually
sediment laden, this initial tank should be equipped with a
washout valve, and also permit easy access for m,a.intenance.
In some cases the drivepipe to the pump will come directly
from the intake tank. Dwg # 6 shows a canal from a stream
supplying the hydram. Otherwise there will be a pipeline to
another small tank (used oil drums with welded int.aBe, out-
put, washout, and overflow sockets have proved very useful
in remote areas.especially when the water is sediment laden),
which should be overflowing slightly to insure a constant
level of water above the mouth of the drivepipe. (See dwg
# 1 & 3). (TL -‘I:the hydram to consume as much water as
possible is usually determined by having a minimal overflow
from this intermediate supply tank). In some cases this
middle tank is not necessary, and instead an open standpipe
can be used. (See dwg # 2). Proper placement of this
intermediate tank or standpipe will determine the length and
angle of the drivepipe; and should insure that the drivepipe
is straight.
A mountainous instalbtion using a canal from a river to supply water to the
hydraulic ram. The waste water goes back into the river and the pumped
water goes tip to a reservoir tank to supply the village.
- 12 -
This supply pipe (which can be HDP or PVC) must be at
least one size larger than the GI or steel drivepipe. In the
case, of an open standpipe the supply a.nd drivepipe are joined
by a tee joint into which is fitted an open steel or GI stand-
pipe which is two sizes larger than the drivepipe, This
standpipe should rise a few inches above the hydraulic
gradient. The hydraulic grade line (HGL) isa representation
of the height to which water flowing in a pipe would- rise were
it not constricted by that pipe. If an open ended pipe were
inserted in a pipeline, the height of the water’s rise defines
the’ HGL. Water in a pipe with no static head and which is
subject only to atmospheric pressure will not rise in the
open tube, therefor the HGL in this case is aI the water’s
surface. Carl JoFmson’s book, sited i&he bibliography,
gives a more detailed analysis at the principals of the hyd-
raulic ‘gradient. ,
In many cases this technique of using an intermediate
tank or standpipe !s necessary to maximize the fall from
source to pump and still be able to have the drivepipe of the
proper length. It is necessary to screen both the supply pipe
and the drivepipe to avoid getting debris, frogs, etc. in the
PUIIP. These screens must be checked often (in some cases
daily) to ensure that the water is flowing at a maximum rate.
PUMP SIZE
The size of the hydraulic ram is determined by the output
desired, or limited to the available supply of water to drive.
the pump. Rough estimates for maximum and minimum
quantities of driving water are given below. These figures
vary widely from one pump to a.noth& depending on the nature
of the impulse valve.
*,,
‘ii,
Table # 1
- 13 -
Minimum and Maximum Quantities of Intake Water
for Specific Sizes of Hydrams.
QIoframbody minimum intake
inches/millimeters @m(US)/lpm
maximum intake
gpm (US)/lpm
1 (25)
1.5 (3’7)
2 (51)
2.5 (63.5)
3 (76)
4 (102) _
2 V-6)
4 (15.1)
8 (30.3)
15 (56.8)
25 .(94.6)
40 (151.4) L
10 (37.9)
15 (56.8)
25 (94.6)
40 (151.4)
70 (265)
100 (378.5)
If you are making your own pump, you can affect the
minimum and maximum qua&& of water by making a spare
impulse valve bolt/washer assembly of a slightly larger or
smaller diameter. (See the section on impulse valves)
DRIVE PIPE
The drivepipe is an important consideration in the overall
design. Every commercial manufacturer of hydrams has
a different tedhnique for calculating drivepipe diameter and
length, aid in many instances the results of two different
methods will produce -different answers. Fortunately the
drivepipe will work satisfactorily over a wide range of
lengths and diameters. After approximating the location of
the intake tank, supply line and pump site in order to mcaxi-
mize the vertical fall and flow, calculate the diameter of the
drivepipe using Table # 1 which gives a rough apprfiximation
of the capacity of different size rams. Commercial pumps
of similar sizes have different capacities, as do the pumps
described in this booklet, depending on the individual
impulse valve dimensions.
Be sure to consider the seasonal changes of the sou&e%
flow as some springs and streims change dramatically
during different times of the year.
- 14 -
After choosing the appropriate size pump, pick a matchin?
drivepipe diameter if the vertical fall is less than 16’ 5 meters).
If the vertical fall is more than 16’ it is permissible to pick
a ,drivepipe diameter one size smaller (that means 0.5”
smaller), for 1.5” pumps and up, especially if the installation
cost must be minimized.
Choose a drivepipe length that is six times the vertical
fall for falls less than 16’ (4.8m); for 16* to 25’ (7.6m) 4 times
the fall; and for 25’ to 50’ (15m) 3 times. It is often convenient
to choose the length of commercially available GI pipe. A
second technique for calculating the drivepipe length is to take
the ratio of length (L) to diameter (D) to be equal to 500 (L/D
= 500). This is a median range as any ratio of between 150 to 10
1000 will work (15O<L/D(lOOO). Longer drivepipes do not
tend to increase efficiency but rather permit the pump to
operate at less strokes per minute, which in turn means less
valve wear, and longer operating life.
Example 1
Vertical fall 30’ = (9.14m)
Maximum intake flow 38gpm = (143.8 lpm)
Manimum intake flow 20gpm = ( 75.7 lpm)
According to the Table # 1 the maximum and minimum
intake flows are in the range of a 2.5” (63.5mm) pump.
Because the fall is more than 25’ (7.6m) it is feasible to use
a 2” @drivepipe and to calculate the length to be three times
the fall. Three times the vertical fall is 90’ (27.4m). By
checking the L/D ration: 901/211x (12*‘/1’) = 540 which is
suitable. After taking into consideration the best location
for the drivepipe, intake, and the pump site, any length of
2” Q( (63.5mm) GI pipe between 80’ (24,4m) to 100’ (30.5m)
will be suitable.
/I -<,
- 15 -
Example 2
Vertical fall Id?’ =( 3.2m )
Minimum intake flow 1Ogpm = (37.9 Zpti)
Maximum intake flop 20gpm = (75.7 lpm)
According to the Table #I 1 use a 2” 0 pump, and due to the
fall being less than 16’ use a 2” @drivepipe. Six times the
vertical fall is 6x12’ = 72’. L/D = 72’/2” x (12”/1’) = 432.
Alternatively if we let L/D = 50.0aqd D = 2” then L = 83’. In
this case a drivepipe length between 72’ to 83’ is suitable. It
might be most convenient to use four lengths of 20’ pipe or a
total length of 80 feet.
DELIVERY PIPE
The HDP pipe currently available in Nepal is series III and
series IV. The former will withstand a pressure head of 60
meters (196’) and the latter 100 meters (327’). Be sure not
to use any of the low quality HDP pipe available in the bazar
which is often low priced but will not withstand much pressure.
An initial length of GI pipe for the delivery line connected
to the pump would give additional stru&ural support to the
pump, but this is not essential. If in fact your vertical lift
exceeds the pipe’s pressure specifications, then the lower
portion of the delivery pipe must be GI pipe.
Table # 2
Delivery pipe diameter according to the amount of pumped
water per day.
Gallons/day 800 2400 3700 6000 14500 23800 35500
Liters/day 3000 9000 1400.023000 55000 90000 135000
0 inches 0.5 0.75 1.0‘ 1.25 1.5 2.0 3,0
@mm 20 25 32 40 50 63 90
If there is a series of hydraulic rams, they must have
separate drive pipes, but they can use a common delivery
pipe. (See dwg # g-j
Remember that the minimum vertical lift is about two times
the vertical fall, and the maximum vertical lift is about twenty
times the vertical fall.
If the delivery pipe has any high points in the pipeline
where air might becoma trapped, an air valve or its equivaleret
will be necessary. A threat&d brass screw in HDP pipe is
often sufficient, if it is used with care.
:
.
C
:
.
m
1
:
.
C
::
;
.
C
a
.
c
C
.
C
C
;
.
h
.
C
' I
B '
-. -,
'i
c
.
C
2
:
.
C
1
P
.
C
.
b
c
.
CF
.
0
t
.
0
tr
n
;
e,
.
- 18 -
G.ENERAL NOTES ON PUMP INSTALLATION
I
The pump should be as level as possible to ensure the
weighted-‘impulse value falls straight down without any un-
necessary friction. This is sometimes a problem as the
drive pipe is iuclined and sharp bends must be avoided.
Sometimes the drivepipe will have enough flex to accomodate
this bend, so that the pump is level. It might be necessary
to slightly bend a section of the drivepipe on the site with the
assistance of several strong villagers ‘and possibly a large
tree. Be very careful not to overbend or kink the pipe. If
you can premake a short piece of pipe with the angle tailored
to your installation, this will be ideal.
The drivepipe and delivery pipe should be connected to the
pump with a union joint and a gate valve. The schematic
diagram of a hydraulic ram installation (dwg # 7) will help
you decide what fittings you need for the installation. All
threaded joints should be wrapped with fine jute thread and
then coated with a pipe sealant compound or enamel paint to
prevent leaks in the joints.
The foundation of the pumphouae and how to stabilize the
pump deserves your careful attention. If the pumphouse floor
will be concrete, then bury in a cement base with two to four
threaded bolts. Weld legs or a mild steel plate to the bottom
of the pump with holes to accomodate these bolts. If this is
not possible,consider using galvanized stay wire, tightly
securing the pump to an immoveable object. This technique is
not nearly as strong as a concrete base and should be used
only when there aren’t any better alternatives. The drivepipe
should also be well buried and anchored,as this will prevent
the pump% vibration from causing pump and gipes to slide
downhill, or causing leaks in the joints.
Be sure that the-pump and pipes are well protected from
freezing temperatures, &hich is often a problem at elevations
.I,
L
SCHEMATIC DIAGRAM OF A HYDRAtiLlC RAM 1
1
INSTALLATION
KEY
;If
Tank Wed w Ohintake,overflow,
cl
4 GA. pipe. with cap or plug
washout an service pipes.
-D]D- G.I./ HDP flanged joint *
Vertlcol ‘flow non return valve
(delivei y vOb83
+ 6.1. Union m lniake gttofnet
-Da- Gate valve
@ Tap valve
h Reducing fitting
. Brass or wire screen (easily accesible
and replaceable)
Supply tonk
for drivepipe
- 20 -
above 8,000 ft. (2,400m). The pump and pipes, if not in
operation, should be drained of water to prevent freezing
temperatures from bursting the pipe. Villagers must under-
stand the importance of this point. If the water is flowing and
the pump is pumping there won’t be any problem. I
When buying pipe fittings check the quality of the threads
and castings, and if possible get sockets, reducers, etc.
with small raised rtgrips’T on the outside surface as it facilitates
tightening and loosening the fittings with a pipe wrench.
RESERVOIR TANK
After you have calculated daily water dem=andand designed
the pump to meet this demand, the size of reservoir tank must
be determined. Usually it will equal the capacity that will be
pumped in twelve hours. In this way the tank will fill during
the hours when there is no demand.
If the water is used for more than just drinking water e.g.,
small irrigation system for a vegetable garden or fruit orchard,
then the system must be designed to handle this and the tank
she-uld be -proportionately larger.
The tank must have a washout pipe, inlet, service pipes,
and an overflo-N pipe. The overflow should be designed to
lead the water to a pond for animals or fish or irrigation,
and avoid causing any erosion problems.
If the system is used only for irrigation, then a pond may
replace the need for a tank. AS the water in the pipe entering
the reservoir tank is under pressure, it might be occasionally
desirable to attach another pipe to this delivery pipe end
(inside the tank) to raise water to a point above the reservoir
tank. If this is to be done, be sure that the delivery pipe’s
pressure limit is not exceeded. It is helpful to include a
socket or flange on this end of the pipe inside the tank.
- 21 -
STARTING THE PUMP
The gate valve on the delivery pipe should be closed while
the drive pipe gate valve should be fully open. Check to see
that there is no air coming out of the top end of the drivepipe.
If there are air bubbles rising, wait until the air has been
depleted. Manually opcsnthe impulse valve (this is where one
gets wet) several times until it falls open by itself. After the
pump has operated on its own for 12 to 15 strokes, slowly
open the delivery gate valve. The pump can not operate
automatically unless .there is some head in the delivery pipe
(a column of water twice the height of the drivepipe fall is
usually needed} and the initially closed gate valve temporarily
replaces the need for this head. See that there are no leaks
in the pipelines or pump, and tune the ram as necessary.
TUNING THE PUMP
The hydram should be tuned to maximize output, which is
to use the supply water most efficiently. It is a matter of
increasing or decreasing the weight on the impulse valve bolt
stem and/or shortening or lengthening the valve stroke -
regulated by moving the lock nuts up or down the bolt. Length-
ening the stroke and increasing the weight decreases the
strokes per minute, but increases the consumption of water,
increases the pressure with which the valve closes, and
increases the delivery water. Higher delivery heads often
require a longer stroke, which increases the pressure of the
“water hammer” effect upon closing. Often various settings
of weight and stroke will give the same output. Try various
adjustments, measuring the quantity delivered, until you are
satisfied with the result. The output (Q) should roughly
correspond with the formula
Q output = vertical fall x intake flow x 0.6
‘vertical9 lift
,/. “I ,-
.,
- 22 -
TWO OR MORE HYDRAMS
If the ram installation is not large enough to meetthe water
requirements, or a very large ram is not available, then it
may be desira.ble to have a series of two or more rams.
Each hydram requires a separate drivepipe, but they can have
a eommon delivery pipe. A ram series would be very useful
in a system where the minimum yearly flow might be enough
to power only one ram and the maximum flo-w was sufficient
to run two or three pumps. (See dwg # 8)
Although I have not seen a ram installation according to
the following description, there is no reason why it should
not work. In a case where the water is sufficient to power
only one hydram, but the output does not quite meet the req-
uirements the waste water (usually between 80995%) from
the initial ram could be channelled into another small tank
from which the drive-&e descends to aaother pump. The
lower pump’s delivery pipe should then connect to the upper
pump’s delivery pipe with a tee-joint unless they are meant to
supply two different places. (See dwg # 4) At this junction
check valves are recommended
-Multiple hydrcam installation-Multiple hydrcam installation
with seperote drive pipeswith seperote drive pipes
and common deiivery pipeand common deiivery pipe
.
I
Lower pump powered
by upper pump’s woste
water
NU
MAINTENANCE
(“The pump doWt work %ause the vandals took the handles”).
As long as the pump is working trouble free, then it is only
necessary to inspect it every three or four months, tightening
fittings, nuts and bolts as required, possibly cleaning the in-
side of the pump of accumulated sediment, and checking the
valves for leakage and/or wear. Gate valves should be oiled
twice a year, the pump and other exposed GI parts painted
once a year; screens and other places where sediment or
debris will accumulate should be inspected as required.
There should be at least two people trained to maintain the
pump and the rest of the system,their training being done at
the time of installation. If possible, arrange for some
incentive for them to do conscientious work; suggest that the
village pay these workers for their responsibility. It is im-
perative that some tools be left with these maintenance workers.
A basic list might include; two pipe wrenches, two adjustable’
wrenches, screwdriver, heating plate, some spare replace-
ment pipe, paint and brush, extra brass screening material,
rubber for making washers, jute, pipe joining compound, a
round and flat file, a pliers and a hack-saw with spare blades.
If available, instead of one of the adjustable wrenches, use
an adjustable “vice-grip” type wrench. If aa innertube is
used in the air chamber then a tire repair kit and a spare
inntertube will be needed.
If the pump is installed in an area where freezing tempe-
ratures occur, then care should be taken that the pump is
always operating (moving water will not freeze inside the
pump or pipes), or if the pump is stopped, water must be
drained from theGmp and pipes. Insure that the pipes are
,
4
- 25 -
buried below the frost line and that the pump house provides
adequate protection from extreme cold.
The pump house, reservoir tank, and other places where
damage could occur should be secured and locked. The ease
of maintenance is a function of good design. The pump house
should be large enough to permit the rotation of the large pipe
wrenches as well .as being able to accomodate one or two
maintenance people.
If the pump is located very near other houses, the pump
house roof should not be corrugated GI sheet as this amplifies
the noise of the pump. A slate or masonry roof will minimize
the sound.
TROUBLE SHOOTING
There are a few things that can cause the ram to stop or
malfunction. The symptom of malfunction usually indicates
the source of the prcblem.
1. Loud, metallic banging noise coming from the pump and/
or intense vibration with each stroke in the delivery pipe
These two symptoms mean that there is no air in the air
chamber and this should be corrected immediately to eliminate
the possibility of damage to pump or pipes. The pump should
be stopped and the air chamber drained of water. To restart
the pump, close the valve on the delivery pipe for the first
10 to 15 strokes and then slowly open the valve fully. Make
sure that air valve is not clogged, and open it a little more,
to all0 w more air to pass. If necessary, check to see that
the air hole is on the opposite side to the delivery pipe, for
if it isn’t, then the air may be pumped up with the delivery
water instead of filling the air chamber. Check that there
are no air leaks in the air chamber due to loose fitting joints.
If an innertube is used, check its condition and make sure
there is air in the tube.
- 26 -
,.“*r-
=L
2. The impulse valve does not work, but r&aim closed
af= repeated openings by hand
Check to see that there is enough weight on the bolt stem.
Check that the delivery valve is not blocked by d&ris, and is
functioning properly. Check the impulse valve seating on
the valve plate, it should not leak when held closed and should
move freely without interference from the inside walls of the
pipe nipple.
3. The impulse valve works for a few strokes by itself
and then stops
This usually indicates that there is air in the drive pipe.
Check that the supply of water is sufficient and the drive
pipe% mouth is submerged by at least 30om. of water. By
holding the valve closed for a few minutes the air bubbles
will rise to the top of the drivepips. If there is sufficient
water hold the valve open for several seconds - this will also
help drain any trapped air. Check that all the pipe joints are
free from leakage.
4. Pump is operating, but there is no water being delivered
Check to see that the delivery gate valve is open, there is
no obstruction in the deliver-- pipe including air blockage,
and the delivery valve is holding the pressure, so that no
water is leaking out below the air chamber. (This last con-
dition can be tested by filling the delivery pipe with water and
checking to see that the water level does not fall). Check the
valve for wear and proper seating.
5 The Impulse valve stays open
This indicates that there is ~&sufficient water in the drive
pipe, or the impulse valve weight is excessivly heavy, or
the delivery valve is not tictioning.
6. Hydram Pumps With Uneven Strokes of Fluttering Sound
This indicates air in the drive pipe, or a leak in the drive
pipe, or insufficient water above the mouth of the drive pipe.
Special care should be taken to insure that the village
maintenance workers take good care of the tools and pump,
fully understand the principals of operating, and know the
possible sources of malfunction and their solution. Special
care should be taken to grip all rmts and bolts with the correct
wrench, which is carefully fitted to the metal surfaces so that
the corners are not rounded off, rendering the nuts and bolts
useless. In any case, bring several spare nuts and bolts
and xashers for replacement. Fittings should be water tight
and air tight, but not excessively tight. Some villagers don’t
know their own strength, let alone the limits of their tools
aQd fittings.
BUILDING A HYDRAULIC RAM FROM LOCAL MATERIALS
Most of the information in this section is adapted from
ZVITA and ITDG publications. It must be emphasized that this
is only a guide - how you make the valves described below
will be determined by your ingenuity, th,e machinist, and his
tools. If the machinist knows how a hydram works and what
it should look like, it will help in adding refinements to the
pump. Dwg # 10 shows the basic fittings of a “homemade ram”.
By making a hydraulic ram yourself, you will better under- *
stand the pump and its maintenance well as saving a good deal
of money. Homemade pumps cost less then one-tenth(P/lO)
of an equivalent commercial pump. At the date of printing
this booklet the sizes below cost in Nepalese rupees: (US$ l=
12.45 Nepalese rupees).
Dwg.*lO*l'
I
I
Gate VOW ’
w”
--
-
<
-
Air chamber
-. .
Air valve
/ Weights
Delivery flow- -7
Delivery volvej
assembly
WastmJt,
PM
CT Joint 1 Flow from’
A HYDRAULIC RAM BUiLf FROM LOCAL MATERIALS.
Table # 4
- 29 -
The cost of several hydrams made from loca’lly available
parts (in Nepalese rupees)
Pump size Labor Materials Total--
1.5”(38mm) 50/- 220/- 270/-
2”(51mm) 66/- 254/- 320/-
2.5”(63mm) 70/-* 437/- 507/-
4”(102mm) 113/w* 1055/- 1168/-
,
-The above costs dd not include the gate valves on the drive
pipe and on the deliverpiipe. The equipment used was: a
lathe, a grinding wheel, a drill press, welding equipment,
and assorted metal working hand tools.
;iN ALTERNATIVE TYPE HYDRAM
,
Dwg #lb. 2 shows another hydraulic ram built from locally
available materials, in which this fittings are arranged
differently. This style hydram must use an inner-tube or
perhaps tennis balls in the air chamber, to prevent the air
from escaping out the delivery pipe. Although extensive
tests have not yet been done, initial trials worked very well.
The Impulse valve for this pump can be the same as described
previously, but the delivery valve, because it is horizontal
rather than vertical,,may require some changes. A commer-
cial valve will work provided it is designed to operate horizon-
tally. The valves shown in d wg # 12.1 and 12.4 will also
work fine. The delivery valve shown in dwg # 12.3 may be
troublesome depending on how much friction is produced by
the bolt moving within the guide, while in the horizontal
position.
* The 2.5” and 4” pump built h&se used commerciany available
vertical delivery valves which made the total cost more expensive
than a pump with a tthomemadet’ delivery valve, but not by any
means better or more efficient.
AN ALTERNATIVE TYPE HYDRAM
USlNG A DIFFERENT ARRANGEMENT
OF FITTINGS AND VALVES
HOP Delivery pipe
,HDP/G. I*
Flange sst
ktte valve
b- Unionjofnt
I
Union
joint
I I
Non-return Afr chamber
I
delivery valve
Innertube
or tennis ba
- 31 -
THE IMPULSE VALVE
There are several different types of valves, suitable for
hydrams, that are not discussed here as they are more com-
plex to make or more difficult for village maintenance. The
weighted-bolt-impulse valve described here is simple and
durable, easy to maint@n, and its mechanical principals are
the easiest for villagers to understand. The basic principal
of this impulse valve is: the more weight on the bolt stem, the
more water it takes to close the valve, the slower the strokes
per minute the more water is pump.ed. Less weight means:
less water is required, quicker strokespeed, and less water
pumped. Longer stroke length has the same effect as more
weight, and shorter stroke length the same as less weight.
Two alternative impulse valves are described here as shown
in dwg 11.1 and 11.3. Type A allows the water to pass with
less friction, but results in more valve wear when the rubber
washer closes. Type F will have a longer washer life due to
more equally distributed pressure, and the valve guide is
easier to make.
Experience has shown that the most durable locally available
material for the washer is a piece of rubber cut from old tires.
Tractor tires are especially thick, and most shoe makers and
leather workers have the material and will cut and shape the
piece for a very small fee.
It has been suggested that it is not necessary to use a rubber
washer as the steel washer is cushioned by the flow of water,
which prevents excessive wear,, If you can get the steel washer
and valve seat machined accurately enough to prevent leakage
upon closure, this technique is very good.
,
Make sure that you make several weights that in combination
or alone will allow you to vary the pressure necessary to
close the valve under different quantities of water from the
source,
-
- 32 -
- 33 -
It is necessary that the steel plate welded to the nipple is
sufficiently strong to withstand the savage pounding the ram
experiences. All welds should be checked for their strength
and durability. Although it costs slightly more, gas welding
using brass rods is best for finer work.
The following materials are required in order to make the
impulse valve: a hex nipple or straight nipple, a mild steel
plate (3-4mm thick) a threaded bolt with two nuts to fit, a
steel washer and thick rubber washer of the same diameter,
some scrap metal (205mm thick) ‘to. form the guide post and
weights, and possibly a hex nut to fit the nipple.
Take the nipple and grind the inside surface smooth if it
is rough. The hex nipples have very thick walls and by
machining 1 or 2 millimeters off the inside walls, on a lathe,
the inside diameter is enlarged. Cut the mild steel plate to
a square to fit over the nipple, and drill the hole or holes as
spseified in the chart. If a type B valve is being made,
scratch the outside diameter (C) circle on a lathe (after
center punching the p.late) so you know that the small holes
must fit within this circle. Drill the center hole and then
the other holes,making sure that the holes do not intersect
so that the plate remains structurally strong. If the valve is
type A, cut the hole on a lathe and round off the inside edge
of the hole so that the point of contact with the rubber washer
is smooth. On both type valves the plate should be ground
smooth on the side that contacts the rubber washer. Weld
the plate to the hex nipple (or hexnut if a straight nipple is
to be used) being certain that the holes are dead center with
relation to the nipple. This weld must be very strong and
absolutely water tight. Make sure that the bolt guide hole is
dead center with the plate hole. For Type A valve use a piece
of HDP pipe that fits onto the bolt with no more than a space
of a few millimeters. This will. prevent the bolt’s threads
from becoming damaged by constant abrasfon on the bolt
guide. A brass bushing is also fine. This plastic or brass
sleeve should fit within a short metal tube or guide designed
to accomodate the bolt with a few millimeters play.
Table # 5 Dimensions for Different Sizes
of Impulse Valves
a. Nipple inside
QI 37 37
b. Rubber washer
outside 0 1 30 37
c. Outside (8 of
plate hole or.
holes I 22 30
d. Bolt hole @ ! - 9
e. Small holes i
QI 1-4
f. # of small
. holes
I
- 28
g. Mild steel 1
plate min. i
thickness I 3 3
h. Bolt length 1150150
2”*51
A B
42 42
35 3.6
25 3@
- 12
4
- 28
:I ./
. .
42 49
,35 42 48 60
12 12
24
5 5 6 6 8 8
165 165 175175 190 19c
3"76 P102
A B !I B
78 78
61 67
LO6 106
85 98
66 80
20
9
20 44
9
* Hex nipples found in this siae in Kathmandu. Note bolt dia-
meter should be a few mm. smaller than dimension d.
Make sure that surface of the rubber washer is as smooth
as possible - especially the side that contacts the valve seat.
It will probably be necessary to trim the washer’s edges to
match the steel washer (which is welded to the bolt) on a
grinding wheel. The rubber washer can be the same size or
slightly larger than the steel washer, The rubber washer
should be epoxied on to the metal washer after a small hole
is cut in the washer center to accomodate the bolt with a few
milliteters play.
- 35 -
An alternative to epoxy (the locally available brand of
epoxy is call Araldite) is to put a small washer on top of the
rubber, which is held in place by a cotter-pin which fits
through a small hole in the bolt. This alternative is only
suitable for the type A impulse valve. On type B impulse
valve nothing can come between the rubber aQdi the steel plate
with holes or else there will be leakage. After securing the
washer to the bolt, make sure it seats well and will not leak
when it is closed. It is worthwhile to try making different
size washer-bolt combinations which change the maximum
and minimum amount of water that ‘the pump will consume.
C&e should be taken in welding the steel washer to bolt.
It should well centered and perpendicular. If necessary,
after welding, grind smooth the steel washer’s surface where
the rubber washer sits.
It may be necessary to cut more threads on the bolt stem
to allow for m‘aximum adjustment. When the bolt-washer
assembly is fully closed against the valve seat, the threafis
must extend down to the bolt guide hole. The bolt must be
long enough to accomodate at least 2 nuts, some weights, and
still have enough free play to move at least 15m-m.
THE DELIVERY VALVE
A delivery valve is commercially available in some
Kathmandu hardware stores. A dependable valve that can be
made quite easily is described below (see d.wg # 12.1). Using
a nipple the same diameter as the impulse valve, weld or
braze a cut and drilled steel plate as indicated in dwg # 12.2
If the plate is welded slightly recessed inside the nipple, make
sure the surface is clean after the welding or brazing is
completed If the plate is welded on the top edge of the nipple,
you might have to file the lead threads of the pipe nipple if
they have been damaged during-the welding or brazing. If
the rubber washer does not sit flat on the plate or if the nipple%
threads are damaged, have the machinist regrind the plate
to ensure smoothness and/or recut the threads on a lathe.
! - 36 -
-1Dwg.#12 Dwg.#122
Lock nuti
rubber WClfher
rf-ir Bent mletal I
I 5mm$. hole
Rubber washer
I Metal washer
I
I
Flexible
I I I . rubber washer
Iair vdve
Delivery volvc
,oyg.3y2-3 Dwg.#12-4
- 37 -
On top of the delivery valve plate attach a rubber washer with
a brass nut and bolt and a small metal washer bent to acco-
modate the rubber washer% movement (see dwg # 12.1 and
12.4). The rubber must be flexible enough to allow water to
pass, and firm enough to hold the water pressure from the
air chamber and delivery pipe head. Below the valve it is
necessary to make an air valve which will ensure that during
the normal course of operation, the air in the air chamber is
not depleted by the moving water. Lack of the air cushion in
the air chamber results in violent pounding which can even b
tually damage the pump or pipes. Although other sources
recommend a copper wire, I do not think it will last as long
as a small screw and nut combination that fits a hole of a
slightly larger diameter (see dwgs # 12.1, 12.3, 12.4). If
the nippYle is a hex nipple drill the hole through one of the flat
sides but be sure when turning the nipple with a wrench, not
to grab the side with the screw or wire. An alternative to the
air valve is to put a partially filled rubber innertube inside
the air chamber (see dwg # 13). For small pumps a partially
filled bicycle inner tube will work well. Large pumps would
require filling a tube with more air. A hand pump and tire
patch kit are necessary accessories, and a spare innertube
is recommended. Dwg # 12.5 illustrates another delivery
valve (a swing check valve) which can be used on either model
hydram - whether horizontal or vertical. If installed hori-
zontally, try to have the hinged portion of the valve be located
in the up position. This valve requires slightly more care
in construction, but it has the advantage of having the least
amount of friction compared to the other valves discussed
here. The valve plate should be made from mild steel or
brass. The rubber washer should be cut from an old tire and
then trimmed round and flat. The steel washer that is bolted
to the rubber washer (use a small brass nut and bolt set),can
be mild steel. This steel washer which is a few millimeters
larger in diameter than the larg& hole in the valve plate will
px-event the rubber from collapsing through the hole under
high pressure. The small hole in the valve plate is threaded,
and with the use of a brass nut, bolt, and washer set
steel yasher
WILD STEEL PLATE
nrith off-centre hole
7-- nut.&bolt
mild steel plate
AN ALTERNATIVE DELIVERY VALVE
(A ONE-WAY SWING CHECK VALVE)
STEEL WASHER
t--- d ---/
THICK RUSBER WASJ4ER
- 39 -
this will act as the pivot on which the rubber will naturally
flex during each opening and closing of the valve. Care must
be taken so the welding does not interfere with the seating of
the rubber washer.
Although pipe nipples come in various sizes, within each
size the inside diameter will vary by a few millimeters. As
a guide the dimensions according to the dwg # 12.5 are given
below for a 2” (51mm) @ hex nipple. Based on this information
you should be able to design and build your own valve of an.y
size with nnly minor modifications.-
DimenSiO3s for a delivery swing check valve to fit a 2” 0 nipple.
(Table # 6)
----
a. nipple inside (8 and valve plate
outside (8 42m.m 53/32”
b. valve plate large hole 0 24m.m 15/16”
c. rubber washer outside QI 35mm 45/32”
d. steel washer outside (8 26mm 33/32”
e. valve plate small threaded
hole (8 4mm 5/32”
f. maximum distance from valve
plate edge to large hol& edge 12mm 15/32”
g. minimum distance from valve
plate edge to large hole’s edge 6mm 8’
h. distance from small threaded
hole% center to edge on valve
plate 6&mm 2’
MAKING THE AIR CHAMBER
There is no maximum limit to the size of the air chamber.
One source suggests an air chamber volume equal to 100
times the delivered output in one stroke cycle. A one &eter
length of pipe of equal diameter to the impulse and delivery
valves sealed with a cap will work well. An equivelent
volume of a larger diameter and shorter length of pipe fitted
with the appropriate reducers is also suitable. Just below the
Hydrom with
inner tube inside the
air :chamber as an
alternative to on air
VOIWE
air chamber and above the delivery valve is a tee which is
, reduced in the middle to fit the delivery pipe.
B
MOUNTING THE RAM
The drive pipe and delivery pipe should each be connected
to the ram via union joints and gate valves, which greatly
facilitates maintenance. Depending on the individual Jnstallation
one mig& want to weld on to the ram- a set of mounting legs to
insure pump stability fro.m the constant vibration. If possible,
holes‘should be drilled in the bottom of the mounting legs to
fit bol$ that should be securely sunk in the concrete floor
with tlie threaded ends exposed. Lock nuts will fasten the
pump to the base. An alternative to this is to use strong gal-
vanized stay wire securing the pump to a fixed object based
on your subjective judgement during installation, but a ‘solid
concrete base with mounting bolts is much stronger and
preferable.
_-
; ” .
- 42 -
BIBLIOGRAPHY
Calve& N. G. “Drive Pipe of Hydraulic Ram*‘. The
ENGINEER. Vol 206, No: 5370,December 26, 1959, P. 1001.
Calvert, N. G. “‘The Hydraulic Ram”. the ENGINEER, Vol.
203, No: 5282 April 19, 1957, pp. 597-600.
Iverson, H. W. IcAn Analysis- of the Hydraulic Ram? A.S.
M.E. paper no: 750FE-F 1975. (This kticie was also
printed in the Journal of Fluid Engineering).
Johnson, Carl. Standards and Procedures for the Design
of Water Systems in Rural Areas of Nepal and Bhutan.
UNICEF Box 1187, Kathmandu, Nepal (Appendix E. in Third
Revised Edition entitled, “Feasibility Survey for Hydraulic
Ram” by M. Silver).
Kindel, Ersal W. A Hydraulic Ram For Village Use.
Volunteers in Technical Assistance (VITA) 1970. (VITA,
Inc. Volunteers in Technical Assistance, ML Ranier Md.,
3706 Rhode Island Ave., 20822 - USA )
Kroll, S. “The Automatic Hydraulic Ram? Proc. I. Mech,
E.. 1951. Vol. 164 pp. 103. (Same author - title found in
“Institution of Mechanical Engineering Proceedings, Vol.
165, No: 64, 1951 pp. 53-73.
Landsford, W.M. and Dugan, W.G. “An Analytical and
Experimental Study of the Hydraulic Ram”, University of
Illinois Bulletin, Vol. 38, Jan. 21, 1941, No: 22 (Engineering
Experimental Station Bull., Series No: 326. pp. l-68).
O’Brian, M. P. and Gosline, S. E., “The Hydraulic Ra.m”,
Univ. of Calif. Publications in Engineering, Vol. 3, No:
1,Jan. 24, 1933, pp. l-58.
- 43 -
Portala Institute. Energy Primer Solar, Water, Wind, and
Biofiels. Menlo Park, CA, Portola Inst. 1974.
Rife Hydraulic Engine Manufacturing Compa’ny. Manual of
Information, Rife l&&au&-Water Rams. Milburn, N. J.
USA 1975,
Shuttleworth, John, ed. Handbook of Homemade Power.
N.Y., Baxitam: 1974.
Stoner, Carol Hupping. _Producing Your Own Power. N. Y. ,
Rodale Press. 1974.
VITA. Village Technology Handbook. Mt. Ranier, Md.,
VITA 1963. (1975 revised)
Watt, S. B. A Manual 0%the Hydraulic Ram For Pumping
Water. Intermediate Technology Publication Ltd. London,
1975. (Available from ITDG, 9-King St., Lo.ndon WCZE
SHN England (US$3.90 air mail/US$2.75 sea mail).
Wulften palthe, B.U. Waterrammen (in Dutch). TOOL,
Postbus 525, Eindhoven, Netherlands. 1976.
-
I
318Vl NOISkI3AN03
- PP -
‘b.
E
t:
iif II II II II II
n
/
,’
8 II
.
Use of Hydraulic Rams in Nepal

More Related Content

What's hot

Home-Made Hydraulic Ram Pump - Clemson University
Home-Made Hydraulic Ram Pump - Clemson UniversityHome-Made Hydraulic Ram Pump - Clemson University
Home-Made Hydraulic Ram Pump - Clemson UniversityFatin62c
 
Hydraulic Ram Pumps and Sling Pumps - ZetaTalk
Hydraulic Ram Pumps and Sling Pumps - ZetaTalkHydraulic Ram Pumps and Sling Pumps - ZetaTalk
Hydraulic Ram Pumps and Sling Pumps - ZetaTalkFatin62c
 
Possibilities for Locally Fabricated Hydraulic Ram Pumps
Possibilities for Locally Fabricated Hydraulic Ram PumpsPossibilities for Locally Fabricated Hydraulic Ram Pumps
Possibilities for Locally Fabricated Hydraulic Ram PumpsAnnie Thompson
 
A Manual on the Hydraulic Ram for Pumping VVater; by S. B. Watt
A Manual on the Hydraulic Ram for Pumping VVater; by S. B. WattA Manual on the Hydraulic Ram for Pumping VVater; by S. B. Watt
A Manual on the Hydraulic Ram for Pumping VVater; by S. B. WattFatin62c
 
Drinking Water and Ram Pumps
Drinking Water and Ram PumpsDrinking Water and Ram Pumps
Drinking Water and Ram PumpsFatin62c
 
Tom's Hydraulic Ram Pump
Tom's Hydraulic Ram PumpTom's Hydraulic Ram Pump
Tom's Hydraulic Ram PumpFifi62z
 
Hydraulic Ram Pump Mini-Project Report - Agriculture and Rural Development, A...
Hydraulic Ram Pump Mini-Project Report - Agriculture and Rural Development, A...Hydraulic Ram Pump Mini-Project Report - Agriculture and Rural Development, A...
Hydraulic Ram Pump Mini-Project Report - Agriculture and Rural Development, A...Fatin62c
 
The Basic’s of Hydraulic Ram Pumps - Rain Tree Foundation
The Basic’s of Hydraulic Ram Pumps - Rain Tree FoundationThe Basic’s of Hydraulic Ram Pumps - Rain Tree Foundation
The Basic’s of Hydraulic Ram Pumps - Rain Tree FoundationFifi62z
 
How a Hydraulic Ram Pump Works - Clemson University
How a Hydraulic Ram Pump Works - Clemson UniversityHow a Hydraulic Ram Pump Works - Clemson University
How a Hydraulic Ram Pump Works - Clemson UniversityFatin62c
 
Theory and Application of Hydraulic Ram Pumps (Hydrams) - S Hazarika
Theory and Application of Hydraulic Ram Pumps (Hydrams) - S HazarikaTheory and Application of Hydraulic Ram Pumps (Hydrams) - S Hazarika
Theory and Application of Hydraulic Ram Pumps (Hydrams) - S HazarikaFifi62z
 
The Glockemann Ram Pump: Site and Installation Guide
The Glockemann Ram Pump: Site and Installation GuideThe Glockemann Ram Pump: Site and Installation Guide
The Glockemann Ram Pump: Site and Installation GuideFifi62z
 
Full report of hydraulic ramp pump
Full report of hydraulic ramp pumpFull report of hydraulic ramp pump
Full report of hydraulic ramp pumpniravdon
 

What's hot (20)

Home-Made Hydraulic Ram Pump - Clemson University
Home-Made Hydraulic Ram Pump - Clemson UniversityHome-Made Hydraulic Ram Pump - Clemson University
Home-Made Hydraulic Ram Pump - Clemson University
 
Hydraulic Ram Pumps and Sling Pumps - ZetaTalk
Hydraulic Ram Pumps and Sling Pumps - ZetaTalkHydraulic Ram Pumps and Sling Pumps - ZetaTalk
Hydraulic Ram Pumps and Sling Pumps - ZetaTalk
 
Possibilities for Locally Fabricated Hydraulic Ram Pumps
Possibilities for Locally Fabricated Hydraulic Ram PumpsPossibilities for Locally Fabricated Hydraulic Ram Pumps
Possibilities for Locally Fabricated Hydraulic Ram Pumps
 
A Manual on the Hydraulic Ram for Pumping VVater; by S. B. Watt
A Manual on the Hydraulic Ram for Pumping VVater; by S. B. WattA Manual on the Hydraulic Ram for Pumping VVater; by S. B. Watt
A Manual on the Hydraulic Ram for Pumping VVater; by S. B. Watt
 
Home Made Hydraulic Ram Pump - Part 1
Home Made Hydraulic Ram Pump - Part 1Home Made Hydraulic Ram Pump - Part 1
Home Made Hydraulic Ram Pump - Part 1
 
Drinking Water and Ram Pumps
Drinking Water and Ram PumpsDrinking Water and Ram Pumps
Drinking Water and Ram Pumps
 
Tom's Hydraulic Ram Pump
Tom's Hydraulic Ram PumpTom's Hydraulic Ram Pump
Tom's Hydraulic Ram Pump
 
Hydraulic Ram Pump Mini-Project Report - Agriculture and Rural Development, A...
Hydraulic Ram Pump Mini-Project Report - Agriculture and Rural Development, A...Hydraulic Ram Pump Mini-Project Report - Agriculture and Rural Development, A...
Hydraulic Ram Pump Mini-Project Report - Agriculture and Rural Development, A...
 
An Experimental Prototype for Low Head Small Hydro Power Generation Using Hydram
An Experimental Prototype for Low Head Small Hydro Power Generation Using HydramAn Experimental Prototype for Low Head Small Hydro Power Generation Using Hydram
An Experimental Prototype for Low Head Small Hydro Power Generation Using Hydram
 
A Manual on the Hydraulic Ram for Pumping VVater
A Manual on the Hydraulic Ram for Pumping VVaterA Manual on the Hydraulic Ram for Pumping VVater
A Manual on the Hydraulic Ram for Pumping VVater
 
The Basic’s of Hydraulic Ram Pumps - Rain Tree Foundation
The Basic’s of Hydraulic Ram Pumps - Rain Tree FoundationThe Basic’s of Hydraulic Ram Pumps - Rain Tree Foundation
The Basic’s of Hydraulic Ram Pumps - Rain Tree Foundation
 
How a Hydraulic Ram Pump Works - Clemson University
How a Hydraulic Ram Pump Works - Clemson UniversityHow a Hydraulic Ram Pump Works - Clemson University
How a Hydraulic Ram Pump Works - Clemson University
 
Theory and Application of Hydraulic Ram Pumps (Hydrams) - S Hazarika
Theory and Application of Hydraulic Ram Pumps (Hydrams) - S HazarikaTheory and Application of Hydraulic Ram Pumps (Hydrams) - S Hazarika
Theory and Application of Hydraulic Ram Pumps (Hydrams) - S Hazarika
 
Hydraulic Ram Pumps and Sling Pumps
Hydraulic Ram Pumps and Sling PumpsHydraulic Ram Pumps and Sling Pumps
Hydraulic Ram Pumps and Sling Pumps
 
Home Built Hydraulic Ram Pumps
Home Built Hydraulic Ram PumpsHome Built Hydraulic Ram Pumps
Home Built Hydraulic Ram Pumps
 
The Glockemann Ram Pump: Site and Installation Guide
The Glockemann Ram Pump: Site and Installation GuideThe Glockemann Ram Pump: Site and Installation Guide
The Glockemann Ram Pump: Site and Installation Guide
 
Hydraulic Ram Pump
Hydraulic Ram PumpHydraulic Ram Pump
Hydraulic Ram Pump
 
Hydraulic ram pumps
Hydraulic ram pumpsHydraulic ram pumps
Hydraulic ram pumps
 
Full report of hydraulic ramp pump
Full report of hydraulic ramp pumpFull report of hydraulic ramp pump
Full report of hydraulic ramp pump
 
Hydraulic Ram project
Hydraulic Ram project Hydraulic Ram project
Hydraulic Ram project
 

Similar to Use of Hydraulic Rams in Nepal

Hydram Pumps - Chapter 1: Introduction
Hydram Pumps - Chapter 1: IntroductionHydram Pumps - Chapter 1: Introduction
Hydram Pumps - Chapter 1: IntroductionFatin62c
 
Hydromissions Ram Pump Schematic - Hawke's Bay Survival
Hydromissions Ram Pump Schematic - Hawke's Bay SurvivalHydromissions Ram Pump Schematic - Hawke's Bay Survival
Hydromissions Ram Pump Schematic - Hawke's Bay SurvivalFatin62c
 
Rainwater harvesting tirupur - Version 1
Rainwater harvesting tirupur - Version 1Rainwater harvesting tirupur - Version 1
Rainwater harvesting tirupur - Version 1biomeshubha
 
Hydro_scout_guide_ET_may10.pdf
Hydro_scout_guide_ET_may10.pdfHydro_scout_guide_ET_may10.pdf
Hydro_scout_guide_ET_may10.pdfttaulo
 
Force Main Design Guide for PVC Pipe
Force Main Design Guide for PVC PipeForce Main Design Guide for PVC Pipe
Force Main Design Guide for PVC PipePVC Pipe Association
 
Uni Bell force main design guide for pvc pipe.pptx
Uni Bell force main design guide for pvc pipe.pptxUni Bell force main design guide for pvc pipe.pptx
Uni Bell force main design guide for pvc pipe.pptxManishPatel169454
 
Rainwater harvesting
Rainwater harvestingRainwater harvesting
Rainwater harvestingrahul_5587
 
water supply Project theory
water supply Project theorywater supply Project theory
water supply Project theoryMadhav Parajuli
 
Design and Construction of a Hydraulic Ram Pump; by Shuaibu Ndache MOHAMMED
Design and Construction of a Hydraulic Ram Pump; by Shuaibu Ndache MOHAMMEDDesign and Construction of a Hydraulic Ram Pump; by Shuaibu Ndache MOHAMMED
Design and Construction of a Hydraulic Ram Pump; by Shuaibu Ndache MOHAMMEDFatin62c
 
Senior design final
Senior design finalSenior design final
Senior design finalkaloveG18
 
Senior design final
Senior design finalSenior design final
Senior design finalAlston Loper
 
SSPMA Sump & Sewage Pump Sizing
SSPMA Sump & Sewage Pump SizingSSPMA Sump & Sewage Pump Sizing
SSPMA Sump & Sewage Pump SizingBuildingMech
 
An Analytical and Experimental Study of the Hydraulic Ram - University of Ill...
An Analytical and Experimental Study of the Hydraulic Ram - University of Ill...An Analytical and Experimental Study of the Hydraulic Ram - University of Ill...
An Analytical and Experimental Study of the Hydraulic Ram - University of Ill...Fatin62c
 
Group Project to Design Water Infrastructure for a Theoretical Small Town.
Group Project to Design Water Infrastructure for a Theoretical Small Town.Group Project to Design Water Infrastructure for a Theoretical Small Town.
Group Project to Design Water Infrastructure for a Theoretical Small Town.Jonathan Damora
 
130618_ CF_rainwater harvest_report_issue 2
130618_ CF_rainwater harvest_report_issue 2130618_ CF_rainwater harvest_report_issue 2
130618_ CF_rainwater harvest_report_issue 2Gordon Hirst
 
Mekelle university design treadle
Mekelle university design   treadleMekelle university design   treadle
Mekelle university design treadleDejen Tesfamaryam
 

Similar to Use of Hydraulic Rams in Nepal (20)

Design and Construction of a Hydraulic Ram Pump
Design and Construction of a Hydraulic Ram PumpDesign and Construction of a Hydraulic Ram Pump
Design and Construction of a Hydraulic Ram Pump
 
Hydram Pumps - Chapter 1: Introduction
Hydram Pumps - Chapter 1: IntroductionHydram Pumps - Chapter 1: Introduction
Hydram Pumps - Chapter 1: Introduction
 
Hydromissions Ram Pump Schematic - Hawke's Bay Survival
Hydromissions Ram Pump Schematic - Hawke's Bay SurvivalHydromissions Ram Pump Schematic - Hawke's Bay Survival
Hydromissions Ram Pump Schematic - Hawke's Bay Survival
 
Rainwater harvesting tirupur - Version 1
Rainwater harvesting tirupur - Version 1Rainwater harvesting tirupur - Version 1
Rainwater harvesting tirupur - Version 1
 
Hydro_scout_guide_ET_may10.pdf
Hydro_scout_guide_ET_may10.pdfHydro_scout_guide_ET_may10.pdf
Hydro_scout_guide_ET_may10.pdf
 
Force Main Design Guide for PVC Pipe
Force Main Design Guide for PVC PipeForce Main Design Guide for PVC Pipe
Force Main Design Guide for PVC Pipe
 
Uni Bell force main design guide for pvc pipe.pptx
Uni Bell force main design guide for pvc pipe.pptxUni Bell force main design guide for pvc pipe.pptx
Uni Bell force main design guide for pvc pipe.pptx
 
Rainwater harvesting
Rainwater harvestingRainwater harvesting
Rainwater harvesting
 
water supply Project theory
water supply Project theorywater supply Project theory
water supply Project theory
 
Design and Construction of a Hydraulic Ram Pump; by Shuaibu Ndache MOHAMMED
Design and Construction of a Hydraulic Ram Pump; by Shuaibu Ndache MOHAMMEDDesign and Construction of a Hydraulic Ram Pump; by Shuaibu Ndache MOHAMMED
Design and Construction of a Hydraulic Ram Pump; by Shuaibu Ndache MOHAMMED
 
Senior design final
Senior design finalSenior design final
Senior design final
 
Senior design final
Senior design finalSenior design final
Senior design final
 
Using a Hydraulic Ram to Pump Livestock Water - British Columbia
Using a Hydraulic Ram to Pump Livestock Water - British ColumbiaUsing a Hydraulic Ram to Pump Livestock Water - British Columbia
Using a Hydraulic Ram to Pump Livestock Water - British Columbia
 
Che 2 quantity &amp; quality of water
Che 2 quantity &amp; quality of waterChe 2 quantity &amp; quality of water
Che 2 quantity &amp; quality of water
 
SSPMA Sump & Sewage Pump Sizing
SSPMA Sump & Sewage Pump SizingSSPMA Sump & Sewage Pump Sizing
SSPMA Sump & Sewage Pump Sizing
 
An Analytical and Experimental Study of the Hydraulic Ram - University of Ill...
An Analytical and Experimental Study of the Hydraulic Ram - University of Ill...An Analytical and Experimental Study of the Hydraulic Ram - University of Ill...
An Analytical and Experimental Study of the Hydraulic Ram - University of Ill...
 
GWHMODULE5.pptx
GWHMODULE5.pptxGWHMODULE5.pptx
GWHMODULE5.pptx
 
Group Project to Design Water Infrastructure for a Theoretical Small Town.
Group Project to Design Water Infrastructure for a Theoretical Small Town.Group Project to Design Water Infrastructure for a Theoretical Small Town.
Group Project to Design Water Infrastructure for a Theoretical Small Town.
 
130618_ CF_rainwater harvest_report_issue 2
130618_ CF_rainwater harvest_report_issue 2130618_ CF_rainwater harvest_report_issue 2
130618_ CF_rainwater harvest_report_issue 2
 
Mekelle university design treadle
Mekelle university design   treadleMekelle university design   treadle
Mekelle university design treadle
 

More from Fifi62z

Selecting and Installing the Hydraulic Pump
Selecting and Installing the Hydraulic PumpSelecting and Installing the Hydraulic Pump
Selecting and Installing the Hydraulic PumpFifi62z
 
Pengadaan Air Bersih System Hydraulic Ram Pump Desa Penglatan
Pengadaan Air Bersih System Hydraulic Ram Pump Desa PenglatanPengadaan Air Bersih System Hydraulic Ram Pump Desa Penglatan
Pengadaan Air Bersih System Hydraulic Ram Pump Desa PenglatanFifi62z
 
Poblaki Ram Pump Equipment List
Poblaki Ram Pump Equipment ListPoblaki Ram Pump Equipment List
Poblaki Ram Pump Equipment ListFifi62z
 
Poblaki Ram Pump Installation Report - Border Green Energy Team
Poblaki Ram Pump Installation Report - Border Green Energy TeamPoblaki Ram Pump Installation Report - Border Green Energy Team
Poblaki Ram Pump Installation Report - Border Green Energy TeamFifi62z
 
Proceedings of a Workshop on Hydraulic Ram Pump Technology - International De...
Proceedings of a Workshop on Hydraulic Ram Pump Technology - International De...Proceedings of a Workshop on Hydraulic Ram Pump Technology - International De...
Proceedings of a Workshop on Hydraulic Ram Pump Technology - International De...Fifi62z
 
Ram Pump: Design, Sizing, Construction and Maintenance of Gravity-Fed System ...
Ram Pump: Design, Sizing, Construction and Maintenance of Gravity-Fed System ...Ram Pump: Design, Sizing, Construction and Maintenance of Gravity-Fed System ...
Ram Pump: Design, Sizing, Construction and Maintenance of Gravity-Fed System ...Fifi62z
 
Ram Pump and Solar Pump Training - Border Green Energy Team
Ram Pump and Solar Pump Training - Border Green Energy TeamRam Pump and Solar Pump Training - Border Green Energy Team
Ram Pump and Solar Pump Training - Border Green Energy TeamFifi62z
 
Running Water Uphill with a Ram Pump - AgriCultures Network
Running Water Uphill with a Ram Pump - AgriCultures NetworkRunning Water Uphill with a Ram Pump - AgriCultures Network
Running Water Uphill with a Ram Pump - AgriCultures NetworkFifi62z
 
Selecting and Installing the Hydraulic Pump
Selecting and Installing the Hydraulic PumpSelecting and Installing the Hydraulic Pump
Selecting and Installing the Hydraulic PumpFifi62z
 
Transfering Hydraulic Ram pump technology from the Philippines to Colombia - ...
Transfering Hydraulic Ram pump technology from the Philippines to Colombia - ...Transfering Hydraulic Ram pump technology from the Philippines to Colombia - ...
Transfering Hydraulic Ram pump technology from the Philippines to Colombia - ...Fifi62z
 
Uses of Hydraulic Rams in Hill Area - Dharam Singh
Uses of Hydraulic Rams in Hill Area - Dharam SinghUses of Hydraulic Rams in Hill Area - Dharam Singh
Uses of Hydraulic Rams in Hill Area - Dharam SinghFifi62z
 
Using A Hydraulic Ram to Pump Livestock Water
Using A Hydraulic Ram to Pump Livestock WaterUsing A Hydraulic Ram to Pump Livestock Water
Using A Hydraulic Ram to Pump Livestock WaterFifi62z
 
Using A Modified Hydraulic Ram to Pump Livestock Wate
Using A Modified Hydraulic Ram to Pump Livestock WateUsing A Modified Hydraulic Ram to Pump Livestock Wate
Using A Modified Hydraulic Ram to Pump Livestock WateFifi62z
 
Water-Powered Water Pumping Systems for Livestock Watering
Water-Powered Water Pumping Systems for Livestock WateringWater-Powered Water Pumping Systems for Livestock Watering
Water-Powered Water Pumping Systems for Livestock WateringFifi62z
 
Willett Ram Pump Brochure
Willett Ram Pump BrochureWillett Ram Pump Brochure
Willett Ram Pump BrochureFifi62z
 
Hydraulic Ram Pump
Hydraulic Ram Pump Hydraulic Ram Pump
Hydraulic Ram Pump Fifi62z
 

More from Fifi62z (16)

Selecting and Installing the Hydraulic Pump
Selecting and Installing the Hydraulic PumpSelecting and Installing the Hydraulic Pump
Selecting and Installing the Hydraulic Pump
 
Pengadaan Air Bersih System Hydraulic Ram Pump Desa Penglatan
Pengadaan Air Bersih System Hydraulic Ram Pump Desa PenglatanPengadaan Air Bersih System Hydraulic Ram Pump Desa Penglatan
Pengadaan Air Bersih System Hydraulic Ram Pump Desa Penglatan
 
Poblaki Ram Pump Equipment List
Poblaki Ram Pump Equipment ListPoblaki Ram Pump Equipment List
Poblaki Ram Pump Equipment List
 
Poblaki Ram Pump Installation Report - Border Green Energy Team
Poblaki Ram Pump Installation Report - Border Green Energy TeamPoblaki Ram Pump Installation Report - Border Green Energy Team
Poblaki Ram Pump Installation Report - Border Green Energy Team
 
Proceedings of a Workshop on Hydraulic Ram Pump Technology - International De...
Proceedings of a Workshop on Hydraulic Ram Pump Technology - International De...Proceedings of a Workshop on Hydraulic Ram Pump Technology - International De...
Proceedings of a Workshop on Hydraulic Ram Pump Technology - International De...
 
Ram Pump: Design, Sizing, Construction and Maintenance of Gravity-Fed System ...
Ram Pump: Design, Sizing, Construction and Maintenance of Gravity-Fed System ...Ram Pump: Design, Sizing, Construction and Maintenance of Gravity-Fed System ...
Ram Pump: Design, Sizing, Construction and Maintenance of Gravity-Fed System ...
 
Ram Pump and Solar Pump Training - Border Green Energy Team
Ram Pump and Solar Pump Training - Border Green Energy TeamRam Pump and Solar Pump Training - Border Green Energy Team
Ram Pump and Solar Pump Training - Border Green Energy Team
 
Running Water Uphill with a Ram Pump - AgriCultures Network
Running Water Uphill with a Ram Pump - AgriCultures NetworkRunning Water Uphill with a Ram Pump - AgriCultures Network
Running Water Uphill with a Ram Pump - AgriCultures Network
 
Selecting and Installing the Hydraulic Pump
Selecting and Installing the Hydraulic PumpSelecting and Installing the Hydraulic Pump
Selecting and Installing the Hydraulic Pump
 
Transfering Hydraulic Ram pump technology from the Philippines to Colombia - ...
Transfering Hydraulic Ram pump technology from the Philippines to Colombia - ...Transfering Hydraulic Ram pump technology from the Philippines to Colombia - ...
Transfering Hydraulic Ram pump technology from the Philippines to Colombia - ...
 
Uses of Hydraulic Rams in Hill Area - Dharam Singh
Uses of Hydraulic Rams in Hill Area - Dharam SinghUses of Hydraulic Rams in Hill Area - Dharam Singh
Uses of Hydraulic Rams in Hill Area - Dharam Singh
 
Using A Hydraulic Ram to Pump Livestock Water
Using A Hydraulic Ram to Pump Livestock WaterUsing A Hydraulic Ram to Pump Livestock Water
Using A Hydraulic Ram to Pump Livestock Water
 
Using A Modified Hydraulic Ram to Pump Livestock Wate
Using A Modified Hydraulic Ram to Pump Livestock WateUsing A Modified Hydraulic Ram to Pump Livestock Wate
Using A Modified Hydraulic Ram to Pump Livestock Wate
 
Water-Powered Water Pumping Systems for Livestock Watering
Water-Powered Water Pumping Systems for Livestock WateringWater-Powered Water Pumping Systems for Livestock Watering
Water-Powered Water Pumping Systems for Livestock Watering
 
Willett Ram Pump Brochure
Willett Ram Pump BrochureWillett Ram Pump Brochure
Willett Ram Pump Brochure
 
Hydraulic Ram Pump
Hydraulic Ram Pump Hydraulic Ram Pump
Hydraulic Ram Pump
 

Recently uploaded

1029 - Danh muc Sach Giao Khoa 10 . pdf
1029 -  Danh muc Sach Giao Khoa 10 . pdf1029 -  Danh muc Sach Giao Khoa 10 . pdf
1029 - Danh muc Sach Giao Khoa 10 . pdfQucHHunhnh
 
Hybridoma Technology ( Production , Purification , and Application )
Hybridoma Technology  ( Production , Purification , and Application  ) Hybridoma Technology  ( Production , Purification , and Application  )
Hybridoma Technology ( Production , Purification , and Application ) Sakshi Ghasle
 
Sanyam Choudhary Chemistry practical.pdf
Sanyam Choudhary Chemistry practical.pdfSanyam Choudhary Chemistry practical.pdf
Sanyam Choudhary Chemistry practical.pdfsanyamsingh5019
 
URLs and Routing in the Odoo 17 Website App
URLs and Routing in the Odoo 17 Website AppURLs and Routing in the Odoo 17 Website App
URLs and Routing in the Odoo 17 Website AppCeline George
 
Accessible design: Minimum effort, maximum impact
Accessible design: Minimum effort, maximum impactAccessible design: Minimum effort, maximum impact
Accessible design: Minimum effort, maximum impactdawncurless
 
Q4-W6-Restating Informational Text Grade 3
Q4-W6-Restating Informational Text Grade 3Q4-W6-Restating Informational Text Grade 3
Q4-W6-Restating Informational Text Grade 3JemimahLaneBuaron
 
Privatization and Disinvestment - Meaning, Objectives, Advantages and Disadva...
Privatization and Disinvestment - Meaning, Objectives, Advantages and Disadva...Privatization and Disinvestment - Meaning, Objectives, Advantages and Disadva...
Privatization and Disinvestment - Meaning, Objectives, Advantages and Disadva...RKavithamani
 
Separation of Lanthanides/ Lanthanides and Actinides
Separation of Lanthanides/ Lanthanides and ActinidesSeparation of Lanthanides/ Lanthanides and Actinides
Separation of Lanthanides/ Lanthanides and ActinidesFatimaKhan178732
 
Industrial Policy - 1948, 1956, 1973, 1977, 1980, 1991
Industrial Policy - 1948, 1956, 1973, 1977, 1980, 1991Industrial Policy - 1948, 1956, 1973, 1977, 1980, 1991
Industrial Policy - 1948, 1956, 1973, 1977, 1980, 1991RKavithamani
 
Software Engineering Methodologies (overview)
Software Engineering Methodologies (overview)Software Engineering Methodologies (overview)
Software Engineering Methodologies (overview)eniolaolutunde
 
Z Score,T Score, Percential Rank and Box Plot Graph
Z Score,T Score, Percential Rank and Box Plot GraphZ Score,T Score, Percential Rank and Box Plot Graph
Z Score,T Score, Percential Rank and Box Plot GraphThiyagu K
 
Nutritional Needs Presentation - HLTH 104
Nutritional Needs Presentation - HLTH 104Nutritional Needs Presentation - HLTH 104
Nutritional Needs Presentation - HLTH 104misteraugie
 
mini mental status format.docx
mini    mental       status     format.docxmini    mental       status     format.docx
mini mental status format.docxPoojaSen20
 
A Critique of the Proposed National Education Policy Reform
A Critique of the Proposed National Education Policy ReformA Critique of the Proposed National Education Policy Reform
A Critique of the Proposed National Education Policy ReformChameera Dedduwage
 
18-04-UA_REPORT_MEDIALITERAСY_INDEX-DM_23-1-final-eng.pdf
18-04-UA_REPORT_MEDIALITERAСY_INDEX-DM_23-1-final-eng.pdf18-04-UA_REPORT_MEDIALITERAСY_INDEX-DM_23-1-final-eng.pdf
18-04-UA_REPORT_MEDIALITERAСY_INDEX-DM_23-1-final-eng.pdfssuser54595a
 
POINT- BIOCHEMISTRY SEM 2 ENZYMES UNIT 5.pptx
POINT- BIOCHEMISTRY SEM 2 ENZYMES UNIT 5.pptxPOINT- BIOCHEMISTRY SEM 2 ENZYMES UNIT 5.pptx
POINT- BIOCHEMISTRY SEM 2 ENZYMES UNIT 5.pptxSayali Powar
 
How to Make a Pirate ship Primary Education.pptx
How to Make a Pirate ship Primary Education.pptxHow to Make a Pirate ship Primary Education.pptx
How to Make a Pirate ship Primary Education.pptxmanuelaromero2013
 

Recently uploaded (20)

1029 - Danh muc Sach Giao Khoa 10 . pdf
1029 -  Danh muc Sach Giao Khoa 10 . pdf1029 -  Danh muc Sach Giao Khoa 10 . pdf
1029 - Danh muc Sach Giao Khoa 10 . pdf
 
Hybridoma Technology ( Production , Purification , and Application )
Hybridoma Technology  ( Production , Purification , and Application  ) Hybridoma Technology  ( Production , Purification , and Application  )
Hybridoma Technology ( Production , Purification , and Application )
 
Sanyam Choudhary Chemistry practical.pdf
Sanyam Choudhary Chemistry practical.pdfSanyam Choudhary Chemistry practical.pdf
Sanyam Choudhary Chemistry practical.pdf
 
URLs and Routing in the Odoo 17 Website App
URLs and Routing in the Odoo 17 Website AppURLs and Routing in the Odoo 17 Website App
URLs and Routing in the Odoo 17 Website App
 
Accessible design: Minimum effort, maximum impact
Accessible design: Minimum effort, maximum impactAccessible design: Minimum effort, maximum impact
Accessible design: Minimum effort, maximum impact
 
Q4-W6-Restating Informational Text Grade 3
Q4-W6-Restating Informational Text Grade 3Q4-W6-Restating Informational Text Grade 3
Q4-W6-Restating Informational Text Grade 3
 
Privatization and Disinvestment - Meaning, Objectives, Advantages and Disadva...
Privatization and Disinvestment - Meaning, Objectives, Advantages and Disadva...Privatization and Disinvestment - Meaning, Objectives, Advantages and Disadva...
Privatization and Disinvestment - Meaning, Objectives, Advantages and Disadva...
 
Staff of Color (SOC) Retention Efforts DDSD
Staff of Color (SOC) Retention Efforts DDSDStaff of Color (SOC) Retention Efforts DDSD
Staff of Color (SOC) Retention Efforts DDSD
 
Separation of Lanthanides/ Lanthanides and Actinides
Separation of Lanthanides/ Lanthanides and ActinidesSeparation of Lanthanides/ Lanthanides and Actinides
Separation of Lanthanides/ Lanthanides and Actinides
 
Industrial Policy - 1948, 1956, 1973, 1977, 1980, 1991
Industrial Policy - 1948, 1956, 1973, 1977, 1980, 1991Industrial Policy - 1948, 1956, 1973, 1977, 1980, 1991
Industrial Policy - 1948, 1956, 1973, 1977, 1980, 1991
 
Software Engineering Methodologies (overview)
Software Engineering Methodologies (overview)Software Engineering Methodologies (overview)
Software Engineering Methodologies (overview)
 
Z Score,T Score, Percential Rank and Box Plot Graph
Z Score,T Score, Percential Rank and Box Plot GraphZ Score,T Score, Percential Rank and Box Plot Graph
Z Score,T Score, Percential Rank and Box Plot Graph
 
Nutritional Needs Presentation - HLTH 104
Nutritional Needs Presentation - HLTH 104Nutritional Needs Presentation - HLTH 104
Nutritional Needs Presentation - HLTH 104
 
mini mental status format.docx
mini    mental       status     format.docxmini    mental       status     format.docx
mini mental status format.docx
 
A Critique of the Proposed National Education Policy Reform
A Critique of the Proposed National Education Policy ReformA Critique of the Proposed National Education Policy Reform
A Critique of the Proposed National Education Policy Reform
 
18-04-UA_REPORT_MEDIALITERAСY_INDEX-DM_23-1-final-eng.pdf
18-04-UA_REPORT_MEDIALITERAСY_INDEX-DM_23-1-final-eng.pdf18-04-UA_REPORT_MEDIALITERAСY_INDEX-DM_23-1-final-eng.pdf
18-04-UA_REPORT_MEDIALITERAСY_INDEX-DM_23-1-final-eng.pdf
 
Código Creativo y Arte de Software | Unidad 1
Código Creativo y Arte de Software | Unidad 1Código Creativo y Arte de Software | Unidad 1
Código Creativo y Arte de Software | Unidad 1
 
POINT- BIOCHEMISTRY SEM 2 ENZYMES UNIT 5.pptx
POINT- BIOCHEMISTRY SEM 2 ENZYMES UNIT 5.pptxPOINT- BIOCHEMISTRY SEM 2 ENZYMES UNIT 5.pptx
POINT- BIOCHEMISTRY SEM 2 ENZYMES UNIT 5.pptx
 
Mattingly "AI & Prompt Design: The Basics of Prompt Design"
Mattingly "AI & Prompt Design: The Basics of Prompt Design"Mattingly "AI & Prompt Design: The Basics of Prompt Design"
Mattingly "AI & Prompt Design: The Basics of Prompt Design"
 
How to Make a Pirate ship Primary Education.pptx
How to Make a Pirate ship Primary Education.pptxHow to Make a Pirate ship Primary Education.pptx
How to Make a Pirate ship Primary Education.pptx
 

Use of Hydraulic Rams in Nepal

  • 1. a- d A GUIDE To MANUFACTlJfWG AND INSTALLATION
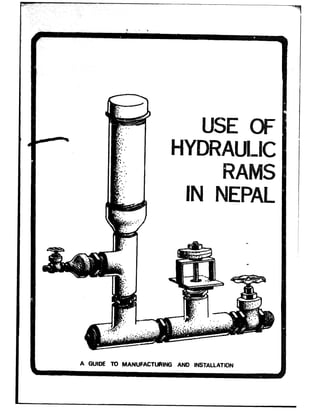
  • 2. USEOFHYDRAULICRAMS IN NEPAL A GUIDE TO MifdUFACTURINGAND INSTALLATION I_ BY MITCHELL SILVER UNICEF (United Nations Children's Fund) Box 1187, Kathmandu, Nepal
  • 3. September 1977 This book is available free of charge from UNICEF Box 1187 Kathmandu, Nepal
  • 4. TABLE OF CONTENTS page List of Tables and Drawings ........................ hbbrevititions ..................................... Acknowledgements and Credits ..................... Tntroduction ...................................... Survey alnd Preliminary Design ..................... How the Pump Works .............................. Intake Tati ...................................... Pump Size ............ ..r....; ................... Drive Pipe ....................................... Delivery Pipe .................................... General Notes on Pump Installation ................ Reservoir Tank .................................. Starting the Pump ................................ Ming the Pump ................................. Two or MtJre Hydrams ............................ Maintemce ..................................... Trouble Shooting ... ................................. Building a Hydraulic Ram Fro= Local Materials. .... An Alternative Type Hydram ...................... The Impulse Valve ............................... The Delivery Valve. .............................. Making The Air Chamber ......................... Mounting the Ram ................................ Bibliography ..................................... Conversion Table ................................ .. i:’ V vi 1 8 10 12 13 16 18 20 21 21 22 24 25 27 29 31 35 39 41 42 44
  • 5. Table # 1 Table # 2 Table # 3 Table # 4 Table # 5 Table # 6 Drawings 1. 3d. 3. 4. 5. 6. 7. 8. 9. LIST OF TABLES AND DRAWINGS Minimum and maximum qjantiiies of intake water . . . . . . . . . . . . . . . . . ..*....... 13 Delivery pipe diameter according to the amount of water pumped per day . . . . . I6 Different conditions of vertical fall and lift and the percentage of &ater used which the ram will deliver . . . . . . . . . . . . . . 17 The cost of hydrams made from locally available parts . . . . . . . . . . . . . . . . . . . . . . . . 29 Dimensions for different sizes of impulse valves . . . . . . . . . . . . . . . . . . . . . . . . . . . . . . . . 34 Dimensions for delivery swing check valve (2” a) . ..*...................... 39 Vertical fall and lift, and drive pipe and delivery pipe lengths . . . . . . . . . . . . . 2 Use of an open standpipe to regulate drivepipe length . . . . . . . . . . . . . . . . ...*. 2 Use of an oil drum as sediment coLlection/ drivepipe supply tank . . . . . . . . . . . . . . . . 2 Hydram incorporated in a gravity flow breakpressure chamber . . . . . . . . . . . . . . 7 How the pump works (4 panels) . . . . . . . . 9 A mountainous installation using a canal from a river to supply the hydram . . . . . 11 A schematic diagram d a hydraulic ram installation . . . . . . . . . . . . ..*...... 19 A multiple hydram installation . . . . . . . . 23 A hydram’s waste water being used to power another hydram . . . . . . . . . . . . . 23 ii
  • 6. page 10.1 A hydraulic ram built from local materials . . . . . . . . . . . . . . . . . . . . . . . . . 28 10.2 An alternative type hydram . . . . . . . . . 30 ll- The impulse valve (4 panels). . . . . . . . 32 12. The delivery valve (4 panels). . . . . . . . 36 12.5 An alternative delivery valve.. . . . . . . 38 13. A hydram with an inner tube instead of an air valve . . . . . . . . . . . . . 40 ... ill
  • 7. TERMS GI = HDP = PVC = BPC = LDD = Q = Dwg# = HGL = UNITS mm cm m kg 1 bm lpa km i set 11 f%l ABBREVIATIONS galvanized iron high density polyethylene p olyvinyl chloride break pressure chamber Local Development Department of His Majesty’s Government of Nepal flow drawing number hydratiic grade line millimeter centimeter meter kilogram liter liters per minute liters per day kilometer seconds in = inches square 1 = yds = mi = gal = gpm = gpd = min = lbs = hr = / = 91 = ft = foot yards miles gallons (US) gallons per minute gallons per day minutes pounds hours Per diameter
  • 8. ACKNOWLEDGEMENTSAND CREDITS This work would not have been possible without the valuable aid of the Local Development Department of the Home Panchayat Ministry, Department of Drinking Water of the Water and Power Ministry and UNICEF. Thanks also to those who helped at Balaju Yantra Shala. The main sources for this book are the publicatiox by S. B. Watt, E . W. Kindell, and Rife, all of which are c ited in the Bibliography. Illustrations: Naren Basnet and Mani Joshi of Continental Design and Art Studio.
  • 9. INTRQIHJCTION * The ‘hydraulic ram pump can be used. with great effective- ness in mountain villages which are located at a higher elevation than their source of water. The hydram pump uses the:power of falling water to pump a small portion of that water uphill. It requires absolutely no fuel or electricity, only water pressure. The pump was developed about 200 ;P’ears ago, and the beauty of the hydram lies in its simplicity. There are o&y two mrxring parts which are lubricated by the water itself. This maalerahopes to show that anyon with a minimal amount of mechanical aptitude can survey, desigrn and build a hydraulic ram from locally available parts, and do any necessary maintenance. Whether for domestic purposes or irrigation, a hydram can be used to great advantage in many diverse situations. The source of water could be a r.xzz ~3,, B &spring, an irri- gation canal,an artesian well, or ev:~~,*it-5m.fsti vig g:r::vity flow water system. In the mountainon Legions of &>ijal, and other areas of similar topography, there are many thousands of places where, if a hydram were installed, much time spent hauling water could be used for other pur- poses. Formerly unproductive or unused land could be made suitable for gardens and orchards, and field crops could give increased yields. Wide&ale usage would benefit many thousands of people. Because this simple pump works 24 hours per day, for many years (many working installations are over 50 years old) and requires little attention, it is suitable for areas vi
  • 10. ,r. , where people have little technical expertise. B.ycause hydraulic ram installations are ine-xpensive and quickly in$talled, they are well suited for remote areas where there are extreme transportation difficulties, as well as for sparsely populated villages which often make gravity flow water supply system financially unfeasible. The ability to incorporate a hydram in an existing gravity flow water supply system has also proved very useful. It is hoped that this short manual provides the necessary information to stimulate interest in hydraulic rams SOthat some of the many thousands of people that stand to gain will be benefited, by having their drcudgery eased and their economic situation improved. vii
  • 11. -10 SURVEY AND PRELIMINARY DESIGN A hydraulic ram survey must be done while considering the design. Before a design can be done it is essential to know: 1. Vertical fall from source to pump. 2. Vertical lift from pump to delivery site. 3. Amount of water available to power the pump (Q input or source flow). 4. Minimum daily quantity of water required. 5. Drivepipe length from source to pump. 6. Delivery pipe length from pump to delivery site. Initially one must measure the distance from the potential pump site to the delivery point and the difference in vertical elevation (see dwg. # 1). Except in a few cases, hydraulic rams cannot pump higher than 100 meters - and in order to avoid using long lengths of galvanized iron (GI) pipe one shouId try not to exceed the pressure limits of the HDP pipe. One must also measure the available fall from the source to a spot below where the pump will be placed. The supply head should be between 1 to 20 meters, remembering that
  • 13. ‘ -30 output varies directly with increased supply head. The length of the drive pipe will be roughly 4 times the supply head. This is discussed in greater detail in the section on pump design. The flow of source water must be accurately measured. Careful site investigations must ‘be made, including ques- tioning of the villagers about water quality, the possible change of fiow at different times of the year, and whether or not there is a sediment problem. While surveying, consider the following: . a. Where is a suitable site for in-take that considers possible flood conditions, laidslides or soil erosion? b, Where will the pump be located? Can a small house be built around the pump? Where will the unused water from the pump go? c. Where will the pipes be laid, and can they be buried? After calculating these initial measurements using the formtia: Q Qoutput)rper day = vertical fall x source flow (lpd) x0.6” vertical lift you can estimate the amount of water will be delivered per day. Compare this figure with the amount of water required daily. (Forty-five liters per person per <dayis considered adequate for domestic use in Nepal’s mountain villages). If the pump’s calculated output is too small, then it may not be feasible to use a hydram. If there is sufficient water, then calculate the village needs for water regarding domestic use, animal use, and possible small scale irrigation for fruit trees or vegetable gardens. Let this figure be your desired output and then calculate how much intake floi is necessary using the following formula: * For the variables of fall and lift be consistent in which units you use. Either use meters or feet but don’t mix the two. The flow should be lpd or gpd. If lpm or gpm are used and you desire the daily flow then multiply by 1440.
  • 14. -40 (Q intake) Flow = vertical lift x output (Q) vertical fall x 0.6 Example 1 Assuming the foIlowing conditions, what will be the e-xpected quantity of water pumped per day? Source. flow = 30gpm = 113.6 lpm Vertical fall = 30 feet = 9,l meters Vertical lift =200 feet = 61 meters Population of village: 200 people Estimated pqulation in 15 years at 25% increase = 200 + 25 x 200 = 250 100 Demand (250 people at 45 liters pzr day) = 11,250 lpd = 2,972 gpd Q output = vertical fall x flow x 0.6 vertical lift = 30’ x 30gpm x 0.6 x (1440 min. ) = 3850 gpm 200’ (1 day) = 14,716 lpm Example 2 Under certain conditions how much source flow (Q intake) is necessary to meet the daily demand. I Vertical lift (always measured from the pump, and not the source) 45.7m (150’) . Vertical fall 7.6m (25’) - Demand a. for 600 villagers assuming a 25% increase in 15 years 600 + (25 + 600) 1 725 100 725 x 45 lpd per person = 32,625 lpd
  • 15. -5- b. for 300 animals x 6 @d = 18,000 Ipd total = 50,625 lpd knowing that Q Intake = vertical lift x Q output and that 1 day = 1440 min. vertical fall x 0.6 then Q Intake = 45.7m x 50,625 lpd x 1 day 7.6m x 0.6 1440min = 352.3 lpm (93 gpm) This figure of 352.3 lpm is the minimum source flow required to meet the dally demand. If the source flow exceeds this figure then it will be possible to exceed the daily demand. In cases where excess water can be provided, encourage villagers to use the water for other types of development work such as a vegetable gar&n, fruit orchard, a tree nursery, a fish pond, and latrines. By increasing the vertical fall or decreasing the vertical lift the output will be proportionately increased. One tech- nique for increasing the vertical fall, when it is too small, is to take an intake pipe (or canal) from the source and run it to another point downstream where there would be a bigger difference in elevation to the pump (see dwg # 1 & 6). The initial intake pipe can be HDP, but the pipe attached to the pump must be GI or steel. The junction of the two pipes can be an open standpipe if the HDP pipe 13 a size larger than the dri- e pipe, or there can be a small tank that would have intake, outlet, washout and overflow pipes. (See dwg # 2 & 3). This intermediate tank is especially useful if the water is sediment laden. The function of an open stand- pipe or small overflowing tank is to insure that there is absolutely no air in the drivepipe. The use of the open standpipe is primarily for installations where the intake tank and the ram location are limited by the surrounding topography, which could prevent the drivepipe from being straight or make it unnecessarily long or not steep enough. (See the section on The Drivepipe for designing the proper
  • 16. -60 length);.“ By using an open standpipe the length and angle of the drivepipe will be determined by the standpipe location- In the event that the system is meant to be incowrated in an existing gravity flow system, a breakpressure chamber @PC) is the ideal place to install the ram, as this will eliminate any waste water0 TO allow any air trapped in the pipeline to escape, it is advisable to connect a pipe up from the BPC% intake to a small holding tank (thus eliminating the air problem) from which the drivepipe runs down to the pump sitting within the BPC. The pump cannot be submerged in water, so care must be taken to prevent this. (See dwg # 4). The valve serves to regulate the flow up to the tank which must at least equal or slightly exceed the pump% consumption of the drive water. This manual is intended to be a guide for the use of hyd- raul ic rams, but it must be emphasized that is only a guide in the sense that every installation/situation will vary con- siderably and specific design and techniques suited to the particular site are necessary in order to create the most appropriate water system. There is much room for creativity as olily a few hydrams have been installed in Nepal and precedents and standard procedures have not been firmly established. Often, constraints such as money and transportation will have effects on the design. As there is no one correct design for a site, but rather several alternatives, each having advantages and disadvantages, it is essential to be highly flexible. It must be remembered that the design must consider possible conditions of at least 15 years in the future;; this period in keeping with LDD design criteria for gravity 1 water supplies. This requires careful calculation regarding [ the environmental effects including landscape; erosion; i population growth, possible detrimental effects, suitability j for maintenance; durability, and any objections from others j L,
  • 17. Hydraulic ram Incorporated 5 existing gravity flow woter supply system Supply pipe to Drive pipe
  • 18. -8- '. concerning the water usage or installation. Wherever possible consult with the villagers concerned on aspects of design that concern them. Often local techniques and mate- rials are the most appropriate solution for a given problem. HOW THE PUMP WORKS ’ There are certain conditions that must be fulfilled in order for the pump to work. There must be sufficient water in the drivepipe falling from a minimal height in order to create enough pressure to close the impulse valve. There must be a certain minimal height of water in .the delivery pipe(about two times the fall) in order to sustain the pressure in the air chamber. It should be remembered that a small amount of water with plenty of fall will pump as much as a situation with plenty of water having only a small fall. The higher the delivery head, the less water will be pumped, other things remaining equal. The water starts to flow through the drivepipe and escapes out the impulse valve (dwg # 5.1). As the water accelerates its pressure overcomes the weight of the impulse valve, causing it to close suddenly (dwg # 5.2). The water pressure suddenly’&oIped causes a very high pressure called “water ham-mer? Some of the water is forced through the delivery valve into the air chamber, compressing the air until the water pressure is depleted. The compressed air acts like a spring, which closes the delivery valve and forces the water up the delivery pipe (dwg # 5.3). When the delivery valve closes suddenly, it creates a pressure surge going up the drivepipe which takes the pressure off the impulse valve, allowing it to fall open due to its own weight (dwg # 5.4). The water again flows out the impulse valve as the cycle repeats itself. When the water enters the air chamber a bit of water is wasted through the air valve, but on the closing of the delivery valve a bit of air enters thrl;rrgh the air valve due to the partial vacuum that is created by the water rebounding up the drivepipe.
  • 19. beningand closing of the valves cycle and 1 of a Dwg.#5.4 r 1 ‘~tw&l~; of water during one pumpin< .
  • 20. - - 10 - .,j..~.++. I NTAKE TANK The intake tank will vary with the individual site, but basic differences are found depending on the nature of the water source. Springs, streams, c :I::ped gravity flow systems, and artesian wells al rfferent require- merits. Techniques of intake tank de nd construction are found in other books but a few general principals must be remembered. If the source is to be used for drinking water then contamination must be avoided. Stream and canal source designs must carefully consider the problems of flooding, torrents and erosion. Because sources are usually sediment laden, this initial tank should be equipped with a washout valve, and also permit easy access for m,a.intenance. In some cases the drivepipe to the pump will come directly from the intake tank. Dwg # 6 shows a canal from a stream supplying the hydram. Otherwise there will be a pipeline to another small tank (used oil drums with welded int.aBe, out- put, washout, and overflow sockets have proved very useful in remote areas.especially when the water is sediment laden), which should be overflowing slightly to insure a constant level of water above the mouth of the drivepipe. (See dwg # 1 & 3). (TL -‘I:the hydram to consume as much water as possible is usually determined by having a minimal overflow from this intermediate supply tank). In some cases this middle tank is not necessary, and instead an open standpipe can be used. (See dwg # 2). Proper placement of this intermediate tank or standpipe will determine the length and angle of the drivepipe; and should insure that the drivepipe is straight. A mountainous instalbtion using a canal from a river to supply water to the hydraulic ram. The waste water goes back into the river and the pumped water goes tip to a reservoir tank to supply the village.
  • 21.
  • 22. - 12 - This supply pipe (which can be HDP or PVC) must be at least one size larger than the GI or steel drivepipe. In the case, of an open standpipe the supply a.nd drivepipe are joined by a tee joint into which is fitted an open steel or GI stand- pipe which is two sizes larger than the drivepipe, This standpipe should rise a few inches above the hydraulic gradient. The hydraulic grade line (HGL) isa representation of the height to which water flowing in a pipe would- rise were it not constricted by that pipe. If an open ended pipe were inserted in a pipeline, the height of the water’s rise defines the’ HGL. Water in a pipe with no static head and which is subject only to atmospheric pressure will not rise in the open tube, therefor the HGL in this case is aI the water’s surface. Carl JoFmson’s book, sited i&he bibliography, gives a more detailed analysis at the principals of the hyd- raulic ‘gradient. , In many cases this technique of using an intermediate tank or standpipe !s necessary to maximize the fall from source to pump and still be able to have the drivepipe of the proper length. It is necessary to screen both the supply pipe and the drivepipe to avoid getting debris, frogs, etc. in the PUIIP. These screens must be checked often (in some cases daily) to ensure that the water is flowing at a maximum rate. PUMP SIZE The size of the hydraulic ram is determined by the output desired, or limited to the available supply of water to drive. the pump. Rough estimates for maximum and minimum quantities of driving water are given below. These figures vary widely from one pump to a.noth& depending on the nature of the impulse valve. *,, ‘ii,
  • 23. Table # 1 - 13 - Minimum and Maximum Quantities of Intake Water for Specific Sizes of Hydrams. QIoframbody minimum intake inches/millimeters @m(US)/lpm maximum intake gpm (US)/lpm 1 (25) 1.5 (3’7) 2 (51) 2.5 (63.5) 3 (76) 4 (102) _ 2 V-6) 4 (15.1) 8 (30.3) 15 (56.8) 25 .(94.6) 40 (151.4) L 10 (37.9) 15 (56.8) 25 (94.6) 40 (151.4) 70 (265) 100 (378.5) If you are making your own pump, you can affect the minimum and maximum qua&& of water by making a spare impulse valve bolt/washer assembly of a slightly larger or smaller diameter. (See the section on impulse valves) DRIVE PIPE The drivepipe is an important consideration in the overall design. Every commercial manufacturer of hydrams has a different tedhnique for calculating drivepipe diameter and length, aid in many instances the results of two different methods will produce -different answers. Fortunately the drivepipe will work satisfactorily over a wide range of lengths and diameters. After approximating the location of the intake tank, supply line and pump site in order to mcaxi- mize the vertical fall and flow, calculate the diameter of the drivepipe using Table # 1 which gives a rough apprfiximation of the capacity of different size rams. Commercial pumps of similar sizes have different capacities, as do the pumps described in this booklet, depending on the individual impulse valve dimensions. Be sure to consider the seasonal changes of the sou&e% flow as some springs and streims change dramatically during different times of the year.
  • 24. - 14 - After choosing the appropriate size pump, pick a matchin? drivepipe diameter if the vertical fall is less than 16’ 5 meters). If the vertical fall is more than 16’ it is permissible to pick a ,drivepipe diameter one size smaller (that means 0.5” smaller), for 1.5” pumps and up, especially if the installation cost must be minimized. Choose a drivepipe length that is six times the vertical fall for falls less than 16’ (4.8m); for 16* to 25’ (7.6m) 4 times the fall; and for 25’ to 50’ (15m) 3 times. It is often convenient to choose the length of commercially available GI pipe. A second technique for calculating the drivepipe length is to take the ratio of length (L) to diameter (D) to be equal to 500 (L/D = 500). This is a median range as any ratio of between 150 to 10 1000 will work (15O<L/D(lOOO). Longer drivepipes do not tend to increase efficiency but rather permit the pump to operate at less strokes per minute, which in turn means less valve wear, and longer operating life. Example 1 Vertical fall 30’ = (9.14m) Maximum intake flow 38gpm = (143.8 lpm) Manimum intake flow 20gpm = ( 75.7 lpm) According to the Table # 1 the maximum and minimum intake flows are in the range of a 2.5” (63.5mm) pump. Because the fall is more than 25’ (7.6m) it is feasible to use a 2” @drivepipe and to calculate the length to be three times the fall. Three times the vertical fall is 90’ (27.4m). By checking the L/D ration: 901/211x (12*‘/1’) = 540 which is suitable. After taking into consideration the best location for the drivepipe, intake, and the pump site, any length of 2” Q( (63.5mm) GI pipe between 80’ (24,4m) to 100’ (30.5m) will be suitable.
  • 25. /I -<, - 15 - Example 2 Vertical fall Id?’ =( 3.2m ) Minimum intake flow 1Ogpm = (37.9 Zpti) Maximum intake flop 20gpm = (75.7 lpm) According to the Table #I 1 use a 2” 0 pump, and due to the fall being less than 16’ use a 2” @drivepipe. Six times the vertical fall is 6x12’ = 72’. L/D = 72’/2” x (12”/1’) = 432. Alternatively if we let L/D = 50.0aqd D = 2” then L = 83’. In this case a drivepipe length between 72’ to 83’ is suitable. It might be most convenient to use four lengths of 20’ pipe or a total length of 80 feet.
  • 26. DELIVERY PIPE The HDP pipe currently available in Nepal is series III and series IV. The former will withstand a pressure head of 60 meters (196’) and the latter 100 meters (327’). Be sure not to use any of the low quality HDP pipe available in the bazar which is often low priced but will not withstand much pressure. An initial length of GI pipe for the delivery line connected to the pump would give additional stru&ural support to the pump, but this is not essential. If in fact your vertical lift exceeds the pipe’s pressure specifications, then the lower portion of the delivery pipe must be GI pipe. Table # 2 Delivery pipe diameter according to the amount of pumped water per day. Gallons/day 800 2400 3700 6000 14500 23800 35500 Liters/day 3000 9000 1400.023000 55000 90000 135000 0 inches 0.5 0.75 1.0‘ 1.25 1.5 2.0 3,0 @mm 20 25 32 40 50 63 90 If there is a series of hydraulic rams, they must have separate drive pipes, but they can use a common delivery pipe. (See dwg # g-j Remember that the minimum vertical lift is about two times the vertical fall, and the maximum vertical lift is about twenty times the vertical fall. If the delivery pipe has any high points in the pipeline where air might becoma trapped, an air valve or its equivaleret will be necessary. A threat&d brass screw in HDP pipe is often sufficient, if it is used with care.
  • 27. : . C : . m 1 : . C :: ; . C a . c C . C C ; . h . C ' I B ' -. -, 'i c . C 2 : . C 1 P . C . b c . CF . 0 t . 0 tr n ; e, .
  • 28. - 18 - G.ENERAL NOTES ON PUMP INSTALLATION I The pump should be as level as possible to ensure the weighted-‘impulse value falls straight down without any un- necessary friction. This is sometimes a problem as the drive pipe is iuclined and sharp bends must be avoided. Sometimes the drivepipe will have enough flex to accomodate this bend, so that the pump is level. It might be necessary to slightly bend a section of the drivepipe on the site with the assistance of several strong villagers ‘and possibly a large tree. Be very careful not to overbend or kink the pipe. If you can premake a short piece of pipe with the angle tailored to your installation, this will be ideal. The drivepipe and delivery pipe should be connected to the pump with a union joint and a gate valve. The schematic diagram of a hydraulic ram installation (dwg # 7) will help you decide what fittings you need for the installation. All threaded joints should be wrapped with fine jute thread and then coated with a pipe sealant compound or enamel paint to prevent leaks in the joints. The foundation of the pumphouae and how to stabilize the pump deserves your careful attention. If the pumphouse floor will be concrete, then bury in a cement base with two to four threaded bolts. Weld legs or a mild steel plate to the bottom of the pump with holes to accomodate these bolts. If this is not possible,consider using galvanized stay wire, tightly securing the pump to an immoveable object. This technique is not nearly as strong as a concrete base and should be used only when there aren’t any better alternatives. The drivepipe should also be well buried and anchored,as this will prevent the pump% vibration from causing pump and gipes to slide downhill, or causing leaks in the joints. Be sure that the-pump and pipes are well protected from freezing temperatures, &hich is often a problem at elevations
  • 29. .I, L SCHEMATIC DIAGRAM OF A HYDRAtiLlC RAM 1 1 INSTALLATION KEY ;If Tank Wed w Ohintake,overflow, cl 4 GA. pipe. with cap or plug washout an service pipes. -D]D- G.I./ HDP flanged joint * Vertlcol ‘flow non return valve (delivei y vOb83 + 6.1. Union m lniake gttofnet -Da- Gate valve @ Tap valve h Reducing fitting . Brass or wire screen (easily accesible and replaceable) Supply tonk for drivepipe
  • 30. - 20 - above 8,000 ft. (2,400m). The pump and pipes, if not in operation, should be drained of water to prevent freezing temperatures from bursting the pipe. Villagers must under- stand the importance of this point. If the water is flowing and the pump is pumping there won’t be any problem. I When buying pipe fittings check the quality of the threads and castings, and if possible get sockets, reducers, etc. with small raised rtgrips’T on the outside surface as it facilitates tightening and loosening the fittings with a pipe wrench. RESERVOIR TANK After you have calculated daily water dem=andand designed the pump to meet this demand, the size of reservoir tank must be determined. Usually it will equal the capacity that will be pumped in twelve hours. In this way the tank will fill during the hours when there is no demand. If the water is used for more than just drinking water e.g., small irrigation system for a vegetable garden or fruit orchard, then the system must be designed to handle this and the tank she-uld be -proportionately larger. The tank must have a washout pipe, inlet, service pipes, and an overflo-N pipe. The overflow should be designed to lead the water to a pond for animals or fish or irrigation, and avoid causing any erosion problems. If the system is used only for irrigation, then a pond may replace the need for a tank. AS the water in the pipe entering the reservoir tank is under pressure, it might be occasionally desirable to attach another pipe to this delivery pipe end (inside the tank) to raise water to a point above the reservoir tank. If this is to be done, be sure that the delivery pipe’s pressure limit is not exceeded. It is helpful to include a socket or flange on this end of the pipe inside the tank.
  • 31. - 21 - STARTING THE PUMP The gate valve on the delivery pipe should be closed while the drive pipe gate valve should be fully open. Check to see that there is no air coming out of the top end of the drivepipe. If there are air bubbles rising, wait until the air has been depleted. Manually opcsnthe impulse valve (this is where one gets wet) several times until it falls open by itself. After the pump has operated on its own for 12 to 15 strokes, slowly open the delivery gate valve. The pump can not operate automatically unless .there is some head in the delivery pipe (a column of water twice the height of the drivepipe fall is usually needed} and the initially closed gate valve temporarily replaces the need for this head. See that there are no leaks in the pipelines or pump, and tune the ram as necessary. TUNING THE PUMP The hydram should be tuned to maximize output, which is to use the supply water most efficiently. It is a matter of increasing or decreasing the weight on the impulse valve bolt stem and/or shortening or lengthening the valve stroke - regulated by moving the lock nuts up or down the bolt. Length- ening the stroke and increasing the weight decreases the strokes per minute, but increases the consumption of water, increases the pressure with which the valve closes, and increases the delivery water. Higher delivery heads often require a longer stroke, which increases the pressure of the “water hammer” effect upon closing. Often various settings of weight and stroke will give the same output. Try various adjustments, measuring the quantity delivered, until you are satisfied with the result. The output (Q) should roughly correspond with the formula Q output = vertical fall x intake flow x 0.6 ‘vertical9 lift
  • 32. ,/. “I ,- ., - 22 - TWO OR MORE HYDRAMS If the ram installation is not large enough to meetthe water requirements, or a very large ram is not available, then it may be desira.ble to have a series of two or more rams. Each hydram requires a separate drivepipe, but they can have a eommon delivery pipe. A ram series would be very useful in a system where the minimum yearly flow might be enough to power only one ram and the maximum flo-w was sufficient to run two or three pumps. (See dwg # 8) Although I have not seen a ram installation according to the following description, there is no reason why it should not work. In a case where the water is sufficient to power only one hydram, but the output does not quite meet the req- uirements the waste water (usually between 80995%) from the initial ram could be channelled into another small tank from which the drive-&e descends to aaother pump. The lower pump’s delivery pipe should then connect to the upper pump’s delivery pipe with a tee-joint unless they are meant to supply two different places. (See dwg # 4) At this junction check valves are recommended
  • 33. -Multiple hydrcam installation-Multiple hydrcam installation with seperote drive pipeswith seperote drive pipes and common deiivery pipeand common deiivery pipe . I Lower pump powered by upper pump’s woste water NU
  • 34. MAINTENANCE (“The pump doWt work %ause the vandals took the handles”). As long as the pump is working trouble free, then it is only necessary to inspect it every three or four months, tightening fittings, nuts and bolts as required, possibly cleaning the in- side of the pump of accumulated sediment, and checking the valves for leakage and/or wear. Gate valves should be oiled twice a year, the pump and other exposed GI parts painted once a year; screens and other places where sediment or debris will accumulate should be inspected as required. There should be at least two people trained to maintain the pump and the rest of the system,their training being done at the time of installation. If possible, arrange for some incentive for them to do conscientious work; suggest that the village pay these workers for their responsibility. It is im- perative that some tools be left with these maintenance workers. A basic list might include; two pipe wrenches, two adjustable’ wrenches, screwdriver, heating plate, some spare replace- ment pipe, paint and brush, extra brass screening material, rubber for making washers, jute, pipe joining compound, a round and flat file, a pliers and a hack-saw with spare blades. If available, instead of one of the adjustable wrenches, use an adjustable “vice-grip” type wrench. If aa innertube is used in the air chamber then a tire repair kit and a spare inntertube will be needed. If the pump is installed in an area where freezing tempe- ratures occur, then care should be taken that the pump is always operating (moving water will not freeze inside the pump or pipes), or if the pump is stopped, water must be drained from theGmp and pipes. Insure that the pipes are ,
  • 35. 4 - 25 - buried below the frost line and that the pump house provides adequate protection from extreme cold. The pump house, reservoir tank, and other places where damage could occur should be secured and locked. The ease of maintenance is a function of good design. The pump house should be large enough to permit the rotation of the large pipe wrenches as well .as being able to accomodate one or two maintenance people. If the pump is located very near other houses, the pump house roof should not be corrugated GI sheet as this amplifies the noise of the pump. A slate or masonry roof will minimize the sound. TROUBLE SHOOTING There are a few things that can cause the ram to stop or malfunction. The symptom of malfunction usually indicates the source of the prcblem. 1. Loud, metallic banging noise coming from the pump and/ or intense vibration with each stroke in the delivery pipe These two symptoms mean that there is no air in the air chamber and this should be corrected immediately to eliminate the possibility of damage to pump or pipes. The pump should be stopped and the air chamber drained of water. To restart the pump, close the valve on the delivery pipe for the first 10 to 15 strokes and then slowly open the valve fully. Make sure that air valve is not clogged, and open it a little more, to all0 w more air to pass. If necessary, check to see that the air hole is on the opposite side to the delivery pipe, for if it isn’t, then the air may be pumped up with the delivery water instead of filling the air chamber. Check that there are no air leaks in the air chamber due to loose fitting joints. If an innertube is used, check its condition and make sure there is air in the tube.
  • 36. - 26 - ,.“*r- =L 2. The impulse valve does not work, but r&aim closed af= repeated openings by hand Check to see that there is enough weight on the bolt stem. Check that the delivery valve is not blocked by d&ris, and is functioning properly. Check the impulse valve seating on the valve plate, it should not leak when held closed and should move freely without interference from the inside walls of the pipe nipple. 3. The impulse valve works for a few strokes by itself and then stops This usually indicates that there is air in the drive pipe. Check that the supply of water is sufficient and the drive pipe% mouth is submerged by at least 30om. of water. By holding the valve closed for a few minutes the air bubbles will rise to the top of the drivepips. If there is sufficient water hold the valve open for several seconds - this will also help drain any trapped air. Check that all the pipe joints are free from leakage. 4. Pump is operating, but there is no water being delivered Check to see that the delivery gate valve is open, there is no obstruction in the deliver-- pipe including air blockage, and the delivery valve is holding the pressure, so that no water is leaking out below the air chamber. (This last con- dition can be tested by filling the delivery pipe with water and checking to see that the water level does not fall). Check the valve for wear and proper seating. 5 The Impulse valve stays open This indicates that there is ~&sufficient water in the drive pipe, or the impulse valve weight is excessivly heavy, or the delivery valve is not tictioning.
  • 37. 6. Hydram Pumps With Uneven Strokes of Fluttering Sound This indicates air in the drive pipe, or a leak in the drive pipe, or insufficient water above the mouth of the drive pipe. Special care should be taken to insure that the village maintenance workers take good care of the tools and pump, fully understand the principals of operating, and know the possible sources of malfunction and their solution. Special care should be taken to grip all rmts and bolts with the correct wrench, which is carefully fitted to the metal surfaces so that the corners are not rounded off, rendering the nuts and bolts useless. In any case, bring several spare nuts and bolts and xashers for replacement. Fittings should be water tight and air tight, but not excessively tight. Some villagers don’t know their own strength, let alone the limits of their tools aQd fittings. BUILDING A HYDRAULIC RAM FROM LOCAL MATERIALS Most of the information in this section is adapted from ZVITA and ITDG publications. It must be emphasized that this is only a guide - how you make the valves described below will be determined by your ingenuity, th,e machinist, and his tools. If the machinist knows how a hydram works and what it should look like, it will help in adding refinements to the pump. Dwg # 10 shows the basic fittings of a “homemade ram”. By making a hydraulic ram yourself, you will better under- * stand the pump and its maintenance well as saving a good deal of money. Homemade pumps cost less then one-tenth(P/lO) of an equivalent commercial pump. At the date of printing this booklet the sizes below cost in Nepalese rupees: (US$ l= 12.45 Nepalese rupees).
  • 38. Dwg.*lO*l' I I Gate VOW ’ w” -- - < - Air chamber -. . Air valve / Weights Delivery flow- -7 Delivery volvej assembly WastmJt, PM CT Joint 1 Flow from’ A HYDRAULIC RAM BUiLf FROM LOCAL MATERIALS.
  • 39. Table # 4 - 29 - The cost of several hydrams made from loca’lly available parts (in Nepalese rupees) Pump size Labor Materials Total-- 1.5”(38mm) 50/- 220/- 270/- 2”(51mm) 66/- 254/- 320/- 2.5”(63mm) 70/-* 437/- 507/- 4”(102mm) 113/w* 1055/- 1168/- , -The above costs dd not include the gate valves on the drive pipe and on the deliverpiipe. The equipment used was: a lathe, a grinding wheel, a drill press, welding equipment, and assorted metal working hand tools. ;iN ALTERNATIVE TYPE HYDRAM , Dwg #lb. 2 shows another hydraulic ram built from locally available materials, in which this fittings are arranged differently. This style hydram must use an inner-tube or perhaps tennis balls in the air chamber, to prevent the air from escaping out the delivery pipe. Although extensive tests have not yet been done, initial trials worked very well. The Impulse valve for this pump can be the same as described previously, but the delivery valve, because it is horizontal rather than vertical,,may require some changes. A commer- cial valve will work provided it is designed to operate horizon- tally. The valves shown in d wg # 12.1 and 12.4 will also work fine. The delivery valve shown in dwg # 12.3 may be troublesome depending on how much friction is produced by the bolt moving within the guide, while in the horizontal position. * The 2.5” and 4” pump built h&se used commerciany available vertical delivery valves which made the total cost more expensive than a pump with a tthomemadet’ delivery valve, but not by any means better or more efficient.
  • 40. AN ALTERNATIVE TYPE HYDRAM USlNG A DIFFERENT ARRANGEMENT OF FITTINGS AND VALVES HOP Delivery pipe ,HDP/G. I* Flange sst ktte valve b- Unionjofnt I Union joint I I Non-return Afr chamber I delivery valve Innertube or tennis ba
  • 41. - 31 - THE IMPULSE VALVE There are several different types of valves, suitable for hydrams, that are not discussed here as they are more com- plex to make or more difficult for village maintenance. The weighted-bolt-impulse valve described here is simple and durable, easy to maint@n, and its mechanical principals are the easiest for villagers to understand. The basic principal of this impulse valve is: the more weight on the bolt stem, the more water it takes to close the valve, the slower the strokes per minute the more water is pump.ed. Less weight means: less water is required, quicker strokespeed, and less water pumped. Longer stroke length has the same effect as more weight, and shorter stroke length the same as less weight. Two alternative impulse valves are described here as shown in dwg 11.1 and 11.3. Type A allows the water to pass with less friction, but results in more valve wear when the rubber washer closes. Type F will have a longer washer life due to more equally distributed pressure, and the valve guide is easier to make. Experience has shown that the most durable locally available material for the washer is a piece of rubber cut from old tires. Tractor tires are especially thick, and most shoe makers and leather workers have the material and will cut and shape the piece for a very small fee. It has been suggested that it is not necessary to use a rubber washer as the steel washer is cushioned by the flow of water, which prevents excessive wear,, If you can get the steel washer and valve seat machined accurately enough to prevent leakage upon closure, this technique is very good. , Make sure that you make several weights that in combination or alone will allow you to vary the pressure necessary to close the valve under different quantities of water from the source,
  • 43. - 33 - It is necessary that the steel plate welded to the nipple is sufficiently strong to withstand the savage pounding the ram experiences. All welds should be checked for their strength and durability. Although it costs slightly more, gas welding using brass rods is best for finer work. The following materials are required in order to make the impulse valve: a hex nipple or straight nipple, a mild steel plate (3-4mm thick) a threaded bolt with two nuts to fit, a steel washer and thick rubber washer of the same diameter, some scrap metal (205mm thick) ‘to. form the guide post and weights, and possibly a hex nut to fit the nipple. Take the nipple and grind the inside surface smooth if it is rough. The hex nipples have very thick walls and by machining 1 or 2 millimeters off the inside walls, on a lathe, the inside diameter is enlarged. Cut the mild steel plate to a square to fit over the nipple, and drill the hole or holes as spseified in the chart. If a type B valve is being made, scratch the outside diameter (C) circle on a lathe (after center punching the p.late) so you know that the small holes must fit within this circle. Drill the center hole and then the other holes,making sure that the holes do not intersect so that the plate remains structurally strong. If the valve is type A, cut the hole on a lathe and round off the inside edge of the hole so that the point of contact with the rubber washer is smooth. On both type valves the plate should be ground smooth on the side that contacts the rubber washer. Weld the plate to the hex nipple (or hexnut if a straight nipple is to be used) being certain that the holes are dead center with relation to the nipple. This weld must be very strong and absolutely water tight. Make sure that the bolt guide hole is dead center with the plate hole. For Type A valve use a piece of HDP pipe that fits onto the bolt with no more than a space of a few millimeters. This will. prevent the bolt’s threads from becoming damaged by constant abrasfon on the bolt guide. A brass bushing is also fine. This plastic or brass
  • 44. sleeve should fit within a short metal tube or guide designed to accomodate the bolt with a few millimeters play. Table # 5 Dimensions for Different Sizes of Impulse Valves a. Nipple inside QI 37 37 b. Rubber washer outside 0 1 30 37 c. Outside (8 of plate hole or. holes I 22 30 d. Bolt hole @ ! - 9 e. Small holes i QI 1-4 f. # of small . holes I - 28 g. Mild steel 1 plate min. i thickness I 3 3 h. Bolt length 1150150 2”*51 A B 42 42 35 3.6 25 3@ - 12 4 - 28 :I ./ . . 42 49 ,35 42 48 60 12 12 24 5 5 6 6 8 8 165 165 175175 190 19c 3"76 P102 A B !I B 78 78 61 67 LO6 106 85 98 66 80 20 9 20 44 9 * Hex nipples found in this siae in Kathmandu. Note bolt dia- meter should be a few mm. smaller than dimension d. Make sure that surface of the rubber washer is as smooth as possible - especially the side that contacts the valve seat. It will probably be necessary to trim the washer’s edges to match the steel washer (which is welded to the bolt) on a grinding wheel. The rubber washer can be the same size or slightly larger than the steel washer, The rubber washer should be epoxied on to the metal washer after a small hole is cut in the washer center to accomodate the bolt with a few milliteters play.
  • 45. - 35 - An alternative to epoxy (the locally available brand of epoxy is call Araldite) is to put a small washer on top of the rubber, which is held in place by a cotter-pin which fits through a small hole in the bolt. This alternative is only suitable for the type A impulse valve. On type B impulse valve nothing can come between the rubber aQdi the steel plate with holes or else there will be leakage. After securing the washer to the bolt, make sure it seats well and will not leak when it is closed. It is worthwhile to try making different size washer-bolt combinations which change the maximum and minimum amount of water that ‘the pump will consume. C&e should be taken in welding the steel washer to bolt. It should well centered and perpendicular. If necessary, after welding, grind smooth the steel washer’s surface where the rubber washer sits. It may be necessary to cut more threads on the bolt stem to allow for m‘aximum adjustment. When the bolt-washer assembly is fully closed against the valve seat, the threafis must extend down to the bolt guide hole. The bolt must be long enough to accomodate at least 2 nuts, some weights, and still have enough free play to move at least 15m-m. THE DELIVERY VALVE A delivery valve is commercially available in some Kathmandu hardware stores. A dependable valve that can be made quite easily is described below (see d.wg # 12.1). Using a nipple the same diameter as the impulse valve, weld or braze a cut and drilled steel plate as indicated in dwg # 12.2 If the plate is welded slightly recessed inside the nipple, make sure the surface is clean after the welding or brazing is completed If the plate is welded on the top edge of the nipple, you might have to file the lead threads of the pipe nipple if they have been damaged during-the welding or brazing. If the rubber washer does not sit flat on the plate or if the nipple% threads are damaged, have the machinist regrind the plate to ensure smoothness and/or recut the threads on a lathe.
  • 46. ! - 36 - -1Dwg.#12 Dwg.#122 Lock nuti rubber WClfher rf-ir Bent mletal I I 5mm$. hole Rubber washer I Metal washer I I Flexible I I I . rubber washer Iair vdve Delivery volvc ,oyg.3y2-3 Dwg.#12-4
  • 47. - 37 - On top of the delivery valve plate attach a rubber washer with a brass nut and bolt and a small metal washer bent to acco- modate the rubber washer% movement (see dwg # 12.1 and 12.4). The rubber must be flexible enough to allow water to pass, and firm enough to hold the water pressure from the air chamber and delivery pipe head. Below the valve it is necessary to make an air valve which will ensure that during the normal course of operation, the air in the air chamber is not depleted by the moving water. Lack of the air cushion in the air chamber results in violent pounding which can even b tually damage the pump or pipes. Although other sources recommend a copper wire, I do not think it will last as long as a small screw and nut combination that fits a hole of a slightly larger diameter (see dwgs # 12.1, 12.3, 12.4). If the nippYle is a hex nipple drill the hole through one of the flat sides but be sure when turning the nipple with a wrench, not to grab the side with the screw or wire. An alternative to the air valve is to put a partially filled rubber innertube inside the air chamber (see dwg # 13). For small pumps a partially filled bicycle inner tube will work well. Large pumps would require filling a tube with more air. A hand pump and tire patch kit are necessary accessories, and a spare innertube is recommended. Dwg # 12.5 illustrates another delivery valve (a swing check valve) which can be used on either model hydram - whether horizontal or vertical. If installed hori- zontally, try to have the hinged portion of the valve be located in the up position. This valve requires slightly more care in construction, but it has the advantage of having the least amount of friction compared to the other valves discussed here. The valve plate should be made from mild steel or brass. The rubber washer should be cut from an old tire and then trimmed round and flat. The steel washer that is bolted to the rubber washer (use a small brass nut and bolt set),can be mild steel. This steel washer which is a few millimeters larger in diameter than the larg& hole in the valve plate will px-event the rubber from collapsing through the hole under high pressure. The small hole in the valve plate is threaded, and with the use of a brass nut, bolt, and washer set
  • 48. steel yasher WILD STEEL PLATE nrith off-centre hole 7-- nut.&bolt mild steel plate AN ALTERNATIVE DELIVERY VALVE (A ONE-WAY SWING CHECK VALVE) STEEL WASHER t--- d ---/ THICK RUSBER WASJ4ER
  • 49. - 39 - this will act as the pivot on which the rubber will naturally flex during each opening and closing of the valve. Care must be taken so the welding does not interfere with the seating of the rubber washer. Although pipe nipples come in various sizes, within each size the inside diameter will vary by a few millimeters. As a guide the dimensions according to the dwg # 12.5 are given below for a 2” (51mm) @ hex nipple. Based on this information you should be able to design and build your own valve of an.y size with nnly minor modifications.- DimenSiO3s for a delivery swing check valve to fit a 2” 0 nipple. (Table # 6) ---- a. nipple inside (8 and valve plate outside (8 42m.m 53/32” b. valve plate large hole 0 24m.m 15/16” c. rubber washer outside QI 35mm 45/32” d. steel washer outside (8 26mm 33/32” e. valve plate small threaded hole (8 4mm 5/32” f. maximum distance from valve plate edge to large hol& edge 12mm 15/32” g. minimum distance from valve plate edge to large hole’s edge 6mm 8’ h. distance from small threaded hole% center to edge on valve plate 6&mm 2’ MAKING THE AIR CHAMBER There is no maximum limit to the size of the air chamber. One source suggests an air chamber volume equal to 100 times the delivered output in one stroke cycle. A one &eter length of pipe of equal diameter to the impulse and delivery valves sealed with a cap will work well. An equivelent volume of a larger diameter and shorter length of pipe fitted with the appropriate reducers is also suitable. Just below the
  • 50. Hydrom with inner tube inside the air :chamber as an alternative to on air VOIWE
  • 51. air chamber and above the delivery valve is a tee which is , reduced in the middle to fit the delivery pipe. B MOUNTING THE RAM The drive pipe and delivery pipe should each be connected to the ram via union joints and gate valves, which greatly facilitates maintenance. Depending on the individual Jnstallation one mig& want to weld on to the ram- a set of mounting legs to insure pump stability fro.m the constant vibration. If possible, holes‘should be drilled in the bottom of the mounting legs to fit bol$ that should be securely sunk in the concrete floor with tlie threaded ends exposed. Lock nuts will fasten the pump to the base. An alternative to this is to use strong gal- vanized stay wire securing the pump to a fixed object based on your subjective judgement during installation, but a ‘solid concrete base with mounting bolts is much stronger and preferable.
  • 52. _- ; ” . - 42 - BIBLIOGRAPHY Calve& N. G. “Drive Pipe of Hydraulic Ram*‘. The ENGINEER. Vol 206, No: 5370,December 26, 1959, P. 1001. Calvert, N. G. “‘The Hydraulic Ram”. the ENGINEER, Vol. 203, No: 5282 April 19, 1957, pp. 597-600. Iverson, H. W. IcAn Analysis- of the Hydraulic Ram? A.S. M.E. paper no: 750FE-F 1975. (This kticie was also printed in the Journal of Fluid Engineering). Johnson, Carl. Standards and Procedures for the Design of Water Systems in Rural Areas of Nepal and Bhutan. UNICEF Box 1187, Kathmandu, Nepal (Appendix E. in Third Revised Edition entitled, “Feasibility Survey for Hydraulic Ram” by M. Silver). Kindel, Ersal W. A Hydraulic Ram For Village Use. Volunteers in Technical Assistance (VITA) 1970. (VITA, Inc. Volunteers in Technical Assistance, ML Ranier Md., 3706 Rhode Island Ave., 20822 - USA ) Kroll, S. “The Automatic Hydraulic Ram? Proc. I. Mech, E.. 1951. Vol. 164 pp. 103. (Same author - title found in “Institution of Mechanical Engineering Proceedings, Vol. 165, No: 64, 1951 pp. 53-73. Landsford, W.M. and Dugan, W.G. “An Analytical and Experimental Study of the Hydraulic Ram”, University of Illinois Bulletin, Vol. 38, Jan. 21, 1941, No: 22 (Engineering Experimental Station Bull., Series No: 326. pp. l-68). O’Brian, M. P. and Gosline, S. E., “The Hydraulic Ra.m”, Univ. of Calif. Publications in Engineering, Vol. 3, No: 1,Jan. 24, 1933, pp. l-58.
  • 53. - 43 - Portala Institute. Energy Primer Solar, Water, Wind, and Biofiels. Menlo Park, CA, Portola Inst. 1974. Rife Hydraulic Engine Manufacturing Compa’ny. Manual of Information, Rife l&&au&-Water Rams. Milburn, N. J. USA 1975, Shuttleworth, John, ed. Handbook of Homemade Power. N.Y., Baxitam: 1974. Stoner, Carol Hupping. _Producing Your Own Power. N. Y. , Rodale Press. 1974. VITA. Village Technology Handbook. Mt. Ranier, Md., VITA 1963. (1975 revised) Watt, S. B. A Manual 0%the Hydraulic Ram For Pumping Water. Intermediate Technology Publication Ltd. London, 1975. (Available from ITDG, 9-King St., Lo.ndon WCZE SHN England (US$3.90 air mail/US$2.75 sea mail). Wulften palthe, B.U. Waterrammen (in Dutch). TOOL, Postbus 525, Eindhoven, Netherlands. 1976.
  • 55. ‘b. E t: iif II II II II II n / ,’