
Recommandé
Contenu connexe
Dernier
Dernier (20)
En vedette
En vedette (20)
Creative Folio
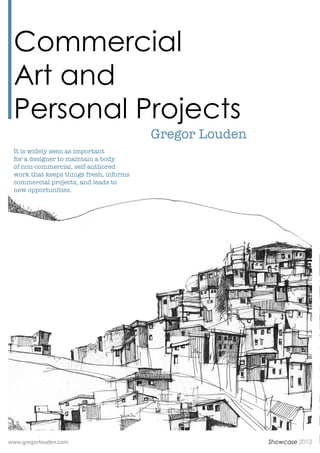
- 1. Commercial Art and Personal Projects Gregor Louden It is widely seen as important for a designer to maintain a body of non-commercial, self-authored work that keeps things fresh, informs commercial projects, and leads to new opportunities. www.gregorlouden.com Showcase 2012
- 2. Gregor Louden Showcase 2012 Publications Workthrough Gregor Louden Showcase 2012 Gregor graduated from Manchester Metropolitan University in 1999 with a BA hons in Illustration with Animation. He has since gone on to establish himself as a freelance artist/illustrator choosing to express himself through his enthiusiasm for drawing. While primarily an illustrator, he also enjoys painting and sculpture and maintains a keen appreciation of graphic design and the methods that may be adopted within that field. He has recently exhibited in Philadelphia(twice), Berlin and Glasgow. More recently, he released his first publication, a book of illustrations. In order to help promote the book, a book launch was held at the Recoat Gallery in Glasgow in October last year. The book is now in its second edition. Gregor Louden now lives and works in Florida, USA. www.gregorlouden.com Showcase 2012
- 3. Publications 02 03 01 04 Early in 2009, I began creating illustrations of various buildings 01 and structures which were to be eventually compiled in my first Lost and Found, structures book publication which I named “Lost and found, structures”. Illustration from book In late October, in order to help promote the book, I held a book 02 launch at Recoat gallery in Glasgow where I also exhibited the China Town Illustration from book original illustrations on the night. 03 New York juxtapose Illustration from book 04 Bird on a wire Illustration from book www.gregorlouden.com Showcase 2012
- 4. 01 Lend me ten pounds, I’ll buy you a drink Pencil illustration. Part of a series of five seperate illustrations which were eventually presented in small square box frames. 02 New York from above Pen illustration. Originally produced for inclusion in the book “Lost and Found, structures”. 01 02 www.gregorlouden.com Showcase 2012
- 5. 03 03 Torre Apponale Rooftops 04 NYC 05 Building Ball 06 Building Ball Detail 07 Barcelona 08 Glasgow 16 www.gregorlouden.com Showcase 2012
- 6. 05 06 07 08 www.gregorlouden.com Showcase 2012
- 7. 09 09 Wacom Concept 10 Wacom concept(detail) 10 www.gregorlouden.com Showcase 2012
- 8. 11 12 14 13 These particular illustrations 11 15 were made in order to Rampage on Broad Street Long walk home experiment with using different elements in one 12 16 composition. I have been The Busker Never on a school night trying to research how succesfull it is to use photographic backgrounds 13 17 with illustrations used in the Road rage on Broadway Ulcer scales the rooftops foreground. 14 Deadbeat Hunter www.gregorlouden.com Showcase 2012
- 9. 15 16 17 www.gregorlouden.com Showcase 2012
- 10. 18 18 Northern Liberties 19 Ho Cunto to the bar 20 Hanoi 2 19 20 21 Sau Paulo 22 Trainwreck 21 22 www.gregorlouden.com Showcase 2012
- 11. 23 24 23 Four Stages of Tommy 24 Rupert on the Ropes 25 Godard 1930 25 www.gregorlouden.com Showcase 2012
- 12. 26 26 Sprawling Metropolis 27 New York 27 28 28 Sprawling Metroplolis 2 29 Hanoi 29 www.gregorlouden.com Showcase 2012
- 13. 30 20th Century All-stars, Bob Dylan www.gregorlouden.com Showcase 2012
- 14. 23 20th Century All-stars, Hunter S. Thompson www.gregorlouden.com Showcase 2012
- 15. 01 01 A thousand miles not longer than one Philadelphia, USA, 2008 02 Live paint Session Berlin, Germany, 2007 03 Third in a one horse race Edinburgh, Scotland, 2006 04 Intoxicated Demons Berlin, Germany, 2007 02 03 04 www.gregorlouden.com Showcase 2012
- 16. Workthrough Combining photographic elements with traditional hand drawn images can be a challenge but with a little help from photoshop, the results can come out quite well. Over the next few pages, I’ll try and show you the process that I went through in order to create this composition. This particular piece was part of a personal project which is still very much on-going. Originally starting out as an experiment to see how well different forms of media can work together, the eventual aim is now to take the project into animation. www.gregorlouden.com Showcase 2012
- 17. Workthrough 01 So, I started by scanning the 02 Then I duplicated the layer. I done 03 What I wanted to do here was to original drawing into photoshop. this by clicking the layer called get rid of all the white areas so that all I Remember, the larger the better! I "Background" and dragging it to the was left with was the black lines from never scan in an image any smaller ‘new layer’ icon(circled) at the bottom of the drawing. This was done by than 200 Resolution. 300 is best. the layer window. destaturating the image and increasing the tone by using the curves option. 04 By holding down command and 05 After inverting the selection(to 06 I then-whilst making sure I was clicking on the channels pallete, I was select the black areas), I created a new working on the new layer-filled the able to select all the white areas of the layer. selected areas with black. I named this illustration. layer “line art”. 07 Finally, I created two new layers. 08 Working on the ‘line art’ layer, I 09 Now I was ready to add colour to Filled one with white and one with a used the Eraser Tool to get rid of any the visual. light shade of blue. I renamed these unnecessary lines or marks. layers ‘white backing’ and This was just to help the lines to be ‘blue backing’. I dragged both of these more clear. layers under the "line art" layer. www.gregorlouden.com Showcase 2012
- 18. Workthrough 10 I created a fill layer for each 11 The colour picker box was then 12 I then renamed this layer as the colour for the figure. This is done by revealed. After selecting the desired section I wanted to colour, In this clicking on the icon above. colour, I then clicked on OK. instance, it was ‘skint-tone’. 13 Working on this layer, I then 14 I selected white, selected the 15 It was then just a matter of filled it with black which ensures that paint brush tool, and started painting in repeating this process for all the the colour is temporarily hidden. the areas I wanted. colours I wanted to add. If the colour I was adding was too close to white, I would then use the light blue backing layer. 16 If at any stage I wanted to 17 Now I had all my colours, 18 It was now time to create the change one of the colours, then it was it was now important to start making shadows on the figure. Like before just a matter of double clicking on the the illustration come to life. where I added the flat colours, I clicked fill layer and reselecting an alternative on the icon above. Only this time, I colour. clicked on hue/saturation. www.gregorlouden.com Showcase 2012
- 19. Workthrough 19 I moved the saturation slider to 20 Then I had to clip this layer to 21 I could then add the shadows by the right and the lightness to the left. the appropriate colour layer by creating filling the layer with black, selecting This can always be re-adjusted later a clipping mask(hold down “alt” and white, selecting the paint brush, on. hover the cursor between both layers lowering the opacity and then painting the click). in the areas desired. This takes a bit of practice. 22 Adding the highlights is almost 23 I now had my figure pretty much 24 Once I had added it to the an identical process to adding the complete. It was now a matter of background, I duplicated the layer. shadows. Only this time, after selecting adding the photograph to the I made sure that the layer with the the hue/saturation fill layer, you must background. I’d had this one in mind figure(now flattened to one layer) was move the stauration to the left and the from the beginning which I had taken in between them both. lightness to the right. Philadelphia. 25 On the duplicate layer of the 26 Using the same process for 27 And there it is. This process photograph, I then masked out rendering that I’d used on the figure, I takes a bit of patience and practice but everything in the photograph except added a few objects to the background it can produce some pretty cool results the street light. This helped to give the to add to the chaos of it all. if you’re willing to invest a little bit of impression that the figure was within time. the photograph. www.gregorlouden.com Showcase 2012