
Recommandé
Contenu connexe
En vedette
Similaire à Hcm one expense
Similaire à Hcm one expense (20)
Dernier
Dernier (20)
Hcm one expense
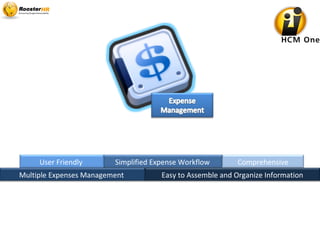
- 1. Simplified Expense Workflow Comprehensive Easy to Assemble and Organize Information User Friendly Multiple Expenses Management
- 2. •Records Multiple Expenses and search expenses •Multi-Project support •Multiple approvers •Raise multiple request at a time •Expense raised based on Expense type •Faster than legacy manual processes Benefits of Using Expense Management Module
- 3. Expense Menu New Expense Request For Approval Approved Rejected Review Expense History Flow Chart of the Expense Management Module Accounts Payable
- 4. • To create an expense request , click New Expense Request • Enter the Add Form with Expense Date, select the Project Name and Expense type. • Enter the Expense Amount to be reimbursed • Add Note and Description if required • Click Add Expense Detail the expense details are displayed • Edit /Delete details by clicking Edit and Delete buttons. • Click Submit to raise the request. New Expense Request –Employee Login
- 5. Attach Files • Attach expense file by clicking Upload expense attachment. • Click Browse , select file, click File Upload New Expense Request – Employee Login
- 6. For Approval – Expense Approver Login • For Approval tab is available to an Expense Approver only after an assigned employee raises an expense request. • To view raised expense click For Approval. • List of expenses for approval is displayed Approved – Approver Login • To approve raised expense select the expense details by selecting Employee name • Click Approve and Submit to Account to approve the expense. Mail is sent to the Employee and all the Expense Approvers and the Accountant Approver. The expense details are moved to Approved tab.
- 7. Rejected – Expense Approver Login To reject a raised expense, select expense details by selecting Employee name. • Enter notes for rejecting the raised expense. • Expense rejected mail is sent to the Employee and all the Expense Approvers. • Rejected expense details are moved to Rejected tab.
- 8. Review – Expense Approver Login To review the requested expense, select the expense details by selecting Employee name. • Click Review button to review the expense. • Expense reviewed mail is sent to Employee and all the Expense Approvers. • After the Approver clicks on review button the expense details are moved to Review tab. • My Review is available to Employee only after an expense approver reviews the expense raised by the employee. • To view the expense reviewed click My Review tab My Review – Employee Login
- 9. My Review – Employee Login • Click Edit to review the expense and to request again. • The expense details are displayed. If the employee wants to change only the amount , this can be changed and click Submit For Approval • Update expense details and click Update • Click Submit For Approval. • Mail notification is sent to Employee and all the Expense Approvers
- 10. For Accounts Payable – Expense Accountant Approver Login • After Approval from the Expense Approver, the raised expense is viewed by Expense Accountant Approver. • To reimburse requested amount by the employee select For Accounts Payable Tab • List of expense for accounts payable is displayed • Select the Employee name to reimburse, expense details appear with approver details • Enter the Reimbursement Amount, date for reimburse and Accounting Notes if required. • Click Reimburse button. • Reimbursed Mail is sent to Employee and all the Expense Approvers and to the Accountant Approver.
- 11. Expense History – Expense Approver Login To Search Expense history select Employee Name, Start date and End date and click Submit. An expense approver can search the expenses raised by him/his assigned employees. For more details click Approval History to view the history of expense