[Webinar] SpiraTest - Setting New Standards in Quality Assurance
Mahara
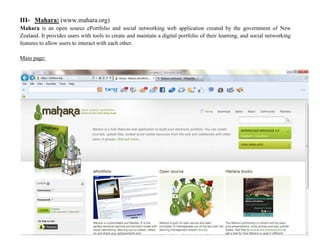
1. III- Mahara: (www.mahara.org)
Mahara is an open source ePortfolio and social networking web application created by the government of New
Zealand. It provides users with tools to create and maintain a digital portfolio of their learning, and social networking
features to allow users to interact with each other.
Main page:
2. Download MAHARA 1.6:
It's mainly targeted at the main platform on which people will install it, though Mahara can be installed on other platforms.
Mahara is a web application. This means it's not just an executable file you can download and run. You need a server to put it
on (you can use your desktop as a server if you're just trialing it). You'll need to install other software for it to run too - such as
the Apache web server and PostgreSQL database system. Another alternative is to use shared hosting.
Trial version for 40 days.
Which version you
want to download?
3. View Demo site:
This site is to try “Mahara” it’s an online trial version but will reset itself every day, if you want to keep anything
before the reset, you have to export your portfolio to be able to import it into another Mahara later on.
Login or register for
the demo account:
4. To register on this site you just have to click on the word “Register” at the left of the main page, in the login area and fill in the
blanks on the” registration page”:
6. An email will be sent to you after clicking on the address given in the email this page will appear:
Fill in the blanks and click “submit”.
7. Home page:
ePortfolio, open source, and MAHARA books tell us about what Mahara can provide us. There are no links, on the 2 first but
on MAHARA books we have a link to MAHARA ePortfolio which is a book that you can buy for beginners to learn more on
MAHARA.
8.
9. Navigation tool on the left of the home page: Dashboard:
The dashboard contains the “latest pages ”where we can found other pages that can be attached to a subject we are searching
for, and “my pages” where we can found the pages that we created, we also have the inbox messages, and the topics you are
following to see the messages from these topics.
11. Enter your first and last name, your ID, your display name that means what you want your name in this site, and write an
introduction about you or anything you want to say you can change the font style, the font size, format, bold just like word, and
click on ”save profile”. And in every page we can see the online users.
12. If you click on the picture you can upload any picture that you want to be your profile picture.
Click on “browse” to search for the picture, rename it by filling the “image title” space, and click upload, you can delete your
pictures by clicking on “delete selected profile pictures”, and “set default” is to put an original avatar created by Mahara.
13. This is the page of your contact informations, fill in the blanks by your email, your address, phone number…. Then click on
“save profile”.
14. In this page, write your accounts names, your Skype account, MSN….. and then click on “save profile”
16. The profile picture is like we said before, click on “browse” to search for the picture, rename it by filling the “image title”
space, and click upload, you can delete your pictures by clicking on “delete selected profile pictures”, and “set default” is to put
an original avatar created by Mahara.
17. Upload your images, documents or other files for inclusion in pages. You can select multiple files to upload them at once. We
have to click on the square next to “Upload file” to be able to browse for files and download it. We have a maximum upload
size 4.4MB. To create a folder write the name of the folder and then click on “create folder”, drag and drop the icons to move
files between folders.
19. For a new one click on “new entry”:
Write your journal, the title, tags, you can also attach files to your journal, you can save it as a draft so no one can see it, you
can choose by allowing comments or no, and click on “save entry” to save it or “cancel” to cancel it.
20. To enter the settings of the journal click on “settings”:
21. Settings:
You can write the title of the journal that you want to change the settings, add a description, change tags, and to save it click on
“save settings” to cancel you click on “cancel”.
22. In the resume you can write everything about yourself, you can put a cover letter, then personal informations.
30. You can search the pages u have, you also have a link to the dashboard page, and the profile page and other pages you may
have. You can edit the content of the page by clicking on the pen.
31. You can create a new collection or copy collections from others.
33. To copy collections click on “copy a collection”:
Choose the page you want and then click “copy page” or “copy collection”.
34. Here where you can share your files you edit the access and put to every file its own URL.
35. You can export all your data; select some pages, with or without the feedbacks. You have to choose what format you want first.
36.
37. You can view the groups; leave the one you don’t want anymore.
38. You can search and join groups you want to join. There are two kinds of requests the groups that need confirmations you have
to send a request and the groups you can join directly,” by clicking on join the group”.
41. If you are a member of any institutions, they will be listed here. You may also request membership of institutions and accept or
decline pending membership invitations.
43. Search by topics which make searching easier, see all the posts about the same topics.
44.
45. The settings where you can change your password, your user name, the URL, and change the account settings and options like
friends, pages …..
46. You can choose where you want your notifications to be on the email address or sending you an email at MAHARA.
And the institution membership is the same as in groups.