
Recommandé
Contenu connexe
Tendances
Tendances (18)
En vedette
En vedette (16)
Similaire à Imagevine trial-ceremony
Similaire à Imagevine trial-ceremony (20)
Dernier
Dernier (20)
Imagevine trial-ceremony
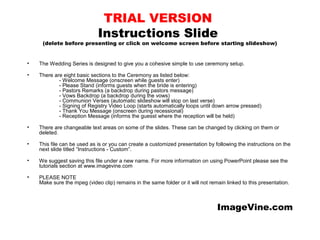
- 1. TRIAL VERSION Instructions Slide (delete before presenting or click on welcome screen before starting slideshow) • The Wedding Series is designed to give you a cohesive simple to use ceremony setup. • There are eight basic sections to the Ceremony as listed below: - Welcome Message (onscreen while guests enter) - Please Stand (informs guests when the bride is entering) - Pastors Remarks (a backdrop during pastors message) - Vows Backdrop (a backdrop during the vows) - Communion Verses (automatic slideshow will stop on last verse) - Signing of Registry Video Loop (starts automatically loops until down arrow pressed) - Thank You Message (onscreen during recessional) - Reception Message (informs the guesst where the reception will be held) • There are changeable text areas on some of the slides. These can be changed by clicking on them or deleted. • This file can be used as is or you can create a customized presentation by following the instructions on the next slide titled “Instructions - Custom”. • We suggest saving this file under a new name. For more information on using PowerPoint please see the tutorials section at www.imagevine.com • PLEASE NOTE Make sure the mpeg (video clip) remains in the same folder or it will not remain linked to this presentation. ImageVine.com
- 2. Custom Presentation Instructions Slide (delete before presenting or click on welcome screen before starting slideshow • The Wedding Series is fully customizable: backgrounds can be mixed and matched from the 4 styles (eg you can use a welcome screen in another style); no-text versions of all titled slides are provided so you can create your own customized welcome etc.; you could even use this template as a base and change it to create a custom reception presentation (photo slideshows, toast to the bride messages etc…). • Insert the supplied jpeg backgrounds. - Click on the slide you wish to change the background for. - From the upper menus choose “Format” and then “Backgrounds” - Click on the down arrow and choose “Fill Effect” - On the upper tabs choose “Picture” then “Select Picture” - Browse to the folder (ImageVineWedding etc…) and choose a background, click “Insert” then “ok” On the next panel you would typically choose “Apply”, which only changes the current slide’s background (“Apply to all” will change every slide). • - For a graphical tutorial on how to insert backgrounds please see the tutorials section of ImageVine. • You can also insert a photo slideshow by using the “slides from files” command (make sure you check the keep source formatting box) Set up the photo slideshow separately before inserting it into the ceremony file. • We suggest saving this file under a new name. For more information on using PowerPoint please see the tutorials section at www.imagevine.com • PLEASE NOTE Make sure the mpeg (video clip) remains in the same folder or it will not remain linked to this presentation. ImageVine.com
- 3. Ryan Ray Smith & Tina Tan Jones
- 23. Reception Address line 1 Address line 2 Time: 0:00am
Notes de l'éditeur
- Blank
- Blank
- Blank
- Blank
- Verses This animation is design to be shown during communion or the signing of the registry. DEFAULT The Slides are set to 10 seconds per slide. At this setting it takes 2:20 minutes before the slide show starts looping. For more information on how to use these PowerPoint files see please see the tutorial/recourses section at www.imagevine.com
- Blank
- Blank
- Blank
- Blank