Crystal Structure analysis and detailed information pptx
40107338 vw-golf-ivl
1. 1
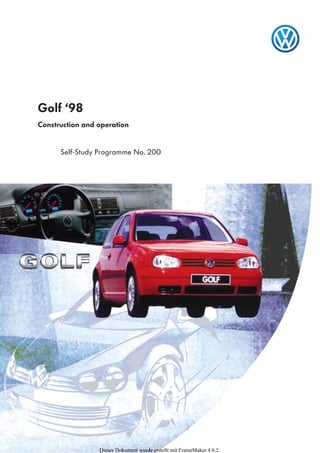
Golf ‘98
Construction and operation
Self-Study Programme No. 200
Dieses Dokument wurde erstellt mit FrameMaker 4.0.2.
2. 2
Dear Reader,
The Self-Study Programme series has been kee-
ping you informed about the construction and
operation of Volkswagen and Audi technol-
ogy for the past 24 years .
In conjunction with the launch of the new Golf,
we have taken the opportunity to revise slightly
the layout of our Self-Study Programme.
for ALL?
We hope that the Self-Study Programme will
provide you with useful information and assist-
ance in your daily work.
You can find your new
Golf in the middle of
the Self-Study Pro-
gramme.
•
The contents are based on the workshop
manuals.
•
The chapter entitled “Servicing” informs you
about changes in our servicing procedures.
•
In keeping with the times, the style of our
Self-Study Programmes is now friendlier and
more easily distinguishable.
This Self-Study Programme is
not a Workshop Manual.
Please refer to the relevant Service
literature for all inspection,
adjustment and repair instructions.
ONE
New Important
Note
ALL for ONE!
With kind regards of your Self-Study Pro-
gramme Team K-VK-12
3. 3
At a glance
An all-new Golf............................................................
News
Vehicle dimensions
Environmental protection, recycling
Occupant protection, anti-theft measures
Body ..............................................................................
Fully galvanised body
High-strength panels
Bumpers
Engines ..........................................................................
Engine-gearbox combination
Engine
Cruise control
Power transmission .....................................................
Manual gearbox
Automatic gearbox
Running gear ................................................................
Steering
Front axle/rear axle
Braking system
Wheels/tyres
Electrical system ..........................................................
Vehicle electrical system
Convenience system
Headlights
Rain sensor
Heating, air-conditioning system ..............................
Heating
Manual air-conditioning system
Climatronic
Service ...........................................................................
Body
New special tools
4
18
23
38
40
49
57
60
4. 4
NEWS •NEWS • NEWS • NEWS • NEWS • NEWS • NEWS • NEW
4
An all-new Golf
GOLF
Since 1974,
the GOLF . . .
. . . with its distinctive de-
sign has established a rep-
utation as a highly
charismatic vehicle.
Red-and-blue instruments
red-and-blue Instrument lighting
- available in three versions
- has self-diagnostic capability
Safety . . .
The occupants are pro-
tected by a modern sys-
tem featuring belt
tensioners and belt force
limiters, two
full-size airbags and side
airbags in the front seat
backrests.
New
headlights
The oval headlights derived
from the original round
headlights are highly dist-
inctive and show their
complex inner work-
ings.
Body . . .
12-year
warranty
The
second legend
of Volkswagen
On March 2, 1974
the successor
to the Beetle
first rolled off
the production line.
High trim level
in the entry-level version.
Seat with
memory
Golfed
The fourth
generation
4
5. 5
WS • NEWS • NEWS •NEWS • NEWS •
1
4
7
C
2
5
8
0
3
6
9
Q
PRINT
V.A.G
- EIGE
NDIA
GNO
SE
HELP
01 - Moto
relek
tronik
HELP
Safe
WOB - VK 12
looks like a
Golf and again
sets new stand-
ards.
It is the evolutionary development
of the classless Golf design.
It reflects a high technical standard
and is therefore superior to the
competition.
The new model
. . . Safety
The safety structure of the new Golf has
been specially optimised against side im-
pact and in the driver footwell area.
For the sake of
the environment:
Over 90% of the new
Golf is recyclable at the
end of its long useful
life, thus conserving
valuable resources for
the benefit of genera-
tions to come.
Conven-
ience sys-
tem
The convenience
system has a decen-
tralised layout.
The fully galvanised body of the Golf
saves about 4 kg of PVC underseal and
extends the useful life of the vehicle by
30%.
6. 6
NEWS • NEWS • NEWS • NEWS • NEWS • NEWS • NEWS •
6
An all-new Golf
The engines are
modern and powerful.
Based on a harmonised
fuel-efficient concept,
they achieve low emis-
sions and offer a high lev-
el of driving comfort.
The steering
The power steering as
well as the adjustment of
the fore-and-aft steering
column provide added
comfort.
The running gear
The interaction of the run-
ning gear components
gives a good level of driv-
ing comfort.
The front axle
The rear axle
The gearboxes
in the Golf are the proven
automatic and manual
gearboxes.
Anti-theft measures
A number of measures
have been taken to pro-
vide more effective theft
protection.
Air conditioning
Choose between heater,
manual air-conditioning
system and CLIMAtronic.
The Golf is Volkswagen
7. 7
+ 34 mm
1005 mm
+ 35 mm
+16mm
+ 40 mm
+ 131 mm
+ 39 mm
SSP 200/066
Vehicle dimensions
Width
the “+ dimensions“ in the drawing are comparative
values with the predecessor model
1735 mm
Height 1439 mm
Track width, front 1513 mm
Length 4149 mm
Wheelbase 2511 mm
Rear track width 1494 mm
Through-loading
width
1005 mm
Aerodyna-
mic
drag
=
Drag
coefficient x
Frontal area,
projected
surface area
cd A m2x
0.65 m2 = 0.31 x 2.1 m2
Tank capacity 55 litres
8. 8
SSP 200/008
An all-new Golf
Environmen-
tal protection
The Volkswagen Group is
making eco-efficient,
progressive technologies
available world-wide.
It employs these technologies
throughout the life cycle of its
products and beyond.
The overview below shows what materials
are used in the Golf:
Glass
Rubber
Insulating materials
Plastics
Paint
Light alloys
Electrics/cable
Non-ferrous metals
Petroleum/oil/grease
Miscellaneous
Steel/iron
3.1%
4.0%
1.1%
16.0%
0.9%
2.5%
1.3%
1.6%
5.3%
0.2%
64.0%
34 kg
44 kg
12 kg
174 kg
10 kg
27 kg
14 kg
17 kg
58 kg
2 kg
696 kg
1088 kg Total weight
Recycling at a high level
In stripping centres the parts removed from
scrap cars are sorted into clean material streams
according to type and then recycled. In many
cases, plastics, metals and insulating materials
can even be made into the original product
again.
On the following pages we will explain
to you our eco-friendly policy on raw materials
using insulating materials as an example.
9. 9
SSP 200/009
9
Recycled insulating materials
Renewable raw materials are used every vehi-
cle. Their recyclability is a major factor. The
raw materials which are made into components
are processed and recycled.
1.5 kg wood fibre
moulding material
in the doors and side
panels
0.5 kg flax fibre -
moulding material
used for the tailgate
trim
2.1 kg flax fibre moulding
material used for the wheel-
house trim
Recycling
For example, the ccccoooottttttttoooonnnn ffffiiiibbbbrrrreeee fffflllleeeeeeeecccceeee
used in insulating mats is a recyclate of garment
cuttings.
Waste fibre recovery is industry’s contribution
to reducing the burden on waste disposal sites.
FFFFllllaaaaxxxx ffffiiiibbbbrrrreeee mmmmoooouuuullllddddiiiinnnngggg mmmmaaaatttteeeerrrriiiiaaaallll is contained in
trim panels and covers.
The straw left over from the linseed harvest was
burnt for many years. However, approximately
25% of fibre component can be used as a basic
material for fibre mouldings. The quality of the
fibres need not meet the high standards of the
textile industry, but it does satisfy the high qual-
ity standards for trim panels.
Flax fibres are highly workable and have excel-
lent material properties.
Principle:
• Avoidance comes before
reduction
• Reduction comes before recovery
• Recovery comes before disposal
Trims and covers made from renew-
able materials
0.8 kg flax fibre -
moulding material
for seat backrest
cover
Cotton fibre fleece
in insulating mats
and luggage com-
partment floor
coverings
WWWWoooooooodddd ffffiiiibbbbrrrreeee mmmmoooouuuullllddddiiiinnnngggg mmmmaaaatttteeeerrrriiiiaaaallll is used for trim
panels. The basis of wood fibre moulding mate-
rials are the pine woodchips left over from the
production of wooden beams and boards in
sawmills.
Wood fibre moulding material meets the
requirements of the automobile industry.
These include: low weight, low emissions, high
strength and non-splintering properties.
10. 10
SSP 200/013
SSP 200/12
SSP 200/014
SSP 200/011
An all-new Golf
Occupant protection
There is more to occupant protection than the
airbag, belt tensioner and stable side protection.
Most of the impact energy is absorbed by the
car body.
Achieving such a high standard of safety means
paying special attention to detail.
The full-size airbags
for the driver and front passenger sides are
almost twice the size they were before.
12 litres
The side airbags
for the driver and front passenger.
The front seat belts
have two pyrotechnical belt tensioners which operate
according to the same principle as the rotary-piston
engine.
A 3-point seat belt
and a 3rd head restraint
You can read about the design and
function of this seat belt tensioner in
Self-Study Programme No. 192.
120 litres64 litres
are available for the rear middle seat.
The rear seat belts do not have belt tensioners.
11. 11
SSP 200/015
SSP 200/016
SSP 200/018
SSP 200/017
The paddings
The four lashing eyes in the luggage compart-
ment enable luggage to be secured safely.
The child safety seat fastening system
The fuel tank
is now located in front of the rear axle for
added safety in a rear collision.
Lashing eyes
are integrated in the door and side trims. They
protect the pelvis and rib areas of occupants
during a side impact.
Welded on the vehicle body are retaining eyelets to which
child safety seats equipped with the ISOFIX fastening sys-
tem can be easily secured.
12. 12
SSP 200/076
SSP 200/077 SSP 200/078
-
-
-
-
-
An all-new Golf
Anti-theft measures
The door lock is encapsulated and there is a
metal reinforcement around the door lock.
These measures prevent would-be thieves pierc-
ing a hole through the bodyshell in this area and
levering open the door handle.
A number of measures have been taken to pro-
vide more effective theft protection.
The bonnet lock cover makes breaking open the
bonnet more difficult.
Bonnet lock cover
Immobiliser
Anti-theft alarm
Lock cylinder freewheel in
outer door handle
Encapsulated internal door
lock with central locking and
SAFE feature
Lock cylinder freewheel in
tailgate lock
Inner-profile key
Lock cylinder freewheel
for steering wheel lock
Slip clutch on steering
column
13. 13
SSP 200/073
SSP 200/074
Anti-theft measures
The striker pin of the ignition lock engages in
the oblong holes of the bush when the ignition
key is removed from the ignition. If an attempt
is made to turn the steering wheel by applying a
force of approx. 150 Nm, the corrugated tube
will be friction-locked between the steering col-
umn and bush.
It is not possible to steer the vehicle or shear off
the locking pin.
Inserting the ignition key in the ignition with-
draws the striker pin from the oblong holes of
the bush.
The vehicle can again be steered since the corru-
gated tube and the bush now rotate with the
steering column.
A corrugated tube is located on the steer-
ing column. A bush with oblong holes is
press-fitted on it. The steering column
and the bush joined by an interference fit
via the corrugated tube.
This is how it works:
Corrugated tube
Bush
Steering column
Striker pin
Striker pin
Bush
Corru-
gated tube
Steering
column
The striker pin of the ignition lock can no
longer be sheared off. This makes it impossible
to steer the vehicle.
Striker pin
The steering system
14. 14
SSP200/108
SSP 200/131
Freewheel sleeve
Sliding ring
Clutch
Lock cylinder
Locking plate
Door operating linkage
Lock cylinder housing
An all-new Golf
The lock cylinder freewheel
The lock-cylinder unit comprises the
following components:
Anti-theft measures
When the key is not inserted in the
ignition, the locking plates engage
in the freewheel sleeve.
is integrated in the front doors, tailgate and igni-
tion lock.
It prevents these locks being forced and limits
the damage caused by an attempted break-in.
Function of door lock cylinder freewheel shown
below using a door lock as an example
Freewheel
sleeve
Locking plate
Lock cylinder
15. 15
SSP 200/132
SSP 200/133
If the wrong ignition key is used or
another tool, the locking plates
remain in the freewheel sleeve.
When the lock cylinder is turned,
the freewheel sleeve is also rotated.
The freewheel sleeve and the slid-
ing ring are moved by two cams
inside the lock cylinder housing. In
the process, the lock cylinder is
disconnected from the sliding ring.
The lock cylinder turns without the
sliding ring or the door operating
linkage. The door lock is not
opened.
The lock cylinder freewheel and the encapsu-
lated internal door lock minimise damage
caused by an attempted break-in.
Inserting the matching key in the
ignition draws the locking plates
into the lock cylinder. When the
ignition key is turned, the lock cyl-
inder in the freewheel sleeve rota-
tes and opens the door lock via
the sliding ring and the door oper-
ating linkage.
Freewheel
sleeve
Lock cylinder
Door lock
Door operating
linkage
Key
Sliding ring
Freewheel
sleeve
Locking plate
Door lock
Door operating
linkage
Cam inside
lock cylinder housing
Sliding ring
16. 16
SSP 200/064
•
•
Anti-theft measures
Immobiliser
The differences between the 2nd generation
immobiliser and the previous generation are as
follows:
If these arithmetic operations produce identical
results, the vehicle key is recognised as the cor-
rect one. As before, a check is performed to see
if the self-varying code of the engine immobi-
liser control unit and the engine control unit
match. If they match, the vehicle is ready to
operate.
The advantage of these secret arithmetic opera-
tions is that the calculated self-varying code
cannot be decoded. In addition, the vehicle igni-
tion keys cannot be copied.
This is an electronic theft deterrent. It is acti-
vated when the ignition is turned on. The
immobiliser prevents unauthorised persons from
operating the car by intervening in the engine
control unit.
The immobiliser control unit is integrated in
the dash panel insert.
In addition to the fixed code, the engine
immobiliser control unit transmits a self-var-
ying code to the transponder integrated in the
vehicle ignition key.
After the ignition is turned on, the transponder
sends a fixed code to the engine immobiliser
control unit. If this code is correct, a self-vary-
ing code is generated in the engine immobiliser
control unit by a random generator. The self-
varying code is transmitted to the transponder
inside the vehicle ignition key. This starts a
series of secret arithmetic operations in the
transponder and the engine immobiliser control
unit.
Engine control unit
Engine immobiliser control unit
integrated in dash panel insert
Ignition key with
transponder
Reader coil on ignition lock
An all-new Golf
17. 17
WOB - VK 12
SSP 200/112
Anti-theft alarm
If the vehicle is broken into in one of the monito-
red areas, a signal is sent to the control unit and
the alarm is tripped. The alarm is reproduced
audibly by activating the signal horn for the anti-
theft alarm and visually by activating all the indi-
cator lights.
Depending on the car’s specification, the self-
diagnosis can be performed using
- address word 35 in the central locking con-
trol unit or
- address word 46 in the convenience system
central module.
Anti-theft measures
Microswitch
in tailgate lock
Microswitch in
door locks
Indicator lamp for central
locking/SAFE locking
system
Microswitch in
door locks
Ignition lock
Central control unit for convenience system
or central locking control unit
Signal horn for anti-theft alarm
Microswitch in
bonnet lock
The anti-theft alarm is switched on when the
vehicle is locked once with the ignition key.
To lock the vehicle without switching the anti-
theft alarm on, the vehicle must be locked twice
within a period of 5 seconds.
This monitors the doors, the bonnet, the tailgate
and the ignition lock.
Indicator lights
The function can be integrated in two different
control units:
In the central locking control unit
on vehicles without electric windows
In the central control unit for the convenience system
on vehicles with electric windows
18. 18
SSP 200/019
Body
The fully galvanised body
The new Golf has a fully galvanised body and
therefore offers greater protection against
corrosion (12-year anti-corrosion perforation
warranty).
In the past, only body areas of the Golf prone to
corrosion were galvanised.
Now, for the first time, all body parts are either
hot-dip galvanised or electrolytically
galvanised.
electrolyti-
cally
galvanised
hot-dip
galvanised
SSP 200/019
All parts which are externally
visible are hot-dip galvanised.
Rough surface
Zinc coating approx. 10µm thick
Does not change shape easily.
All outer skin panels are
electrolytically galvanised
Smooth surface
Zinc coating approx. 8µm thick
Changes shape easily.
19. 19
SSP 200/020
The paintwork structure
The paintwork is specifically structured to
increase body corrosion protection even more.
The electrolytic zinc coating provides a good
basis for the upper paintwork layers.
Vehicle paintwork structure
approx. 100µm thick
Sheet steel
Zinc coating
Zinc phosphate
coating
EC primer dip
coating
Filler
Top coat
Clear coat
Coating system
20. 20
170° C
SSP 200/021
SSP 200/022
They are specially alloyed thin panels which
achieve high strength as a result of subsequent
heat treatment.
Therefore, it is possible to use panels which
High-strength panels
High-strength panels
This is a welcome “side-effect” of the stove
enamelling process during which the body is
heated to approximately 170°C anyway.
The advantage of this effect is that the body
panels, made of a relatively soft material, only
achieve their ultimate strength once the shaping
process has been completed.
Thermal post-treatment
Body
are thinner than deep-drawn panels yet they
are just as strong. A great deal of weight is
saved in this way.
Interior B-pillar
Spare wheel well
reinforcement
Roof cross
brace
Cover plate for
side member
Support brak-
ket for engine
support
Plenum cham-
ber
reinforcement
21. 21
SSP 200/023
SSP 200/123
In a frontal collision at speeds of up to approx.
15 kph, the bumper together with the cross
member absorb enough energy to prevent the
side members from being damaged.
Front bumper
Rear bumper
The rear bumper has been enlarged.
As a result, a low-speed rear collision does not
cause damage to the body side section.
These measures will reduce repair costs.
Cross member
Bumpers
Side member
22. 22
Technical platform
Engines
Like the Audi A3 and the Skoda Octavia,
the new Golf is based on the A-platform.
The platform components are therefore almost
identical from a technical aspect.
Running gear
Braking system
Electrical system
Heating/
air-conditioning sys-
tem
24. 24
x
x
x
x
x
x
x
x
x
German emissions standard
In Germany, a new emissions standard has been
in force since July 1997. This standard, referred
to as Emission Stage D3, specifies lower emis-
sion limits.
The table below shows the relationships between the engines and the D3 emissions standard as well as EU II.
Software update
manual
Bosch Motronic 3.8.5
Engine Engine code Gearbox
D3 EU II
Measures Engine
management
1.4-ltr.
55kW
AHW
AKQ Primary catalytic converter
Magneti Marelli 4AV
x
manual
manual
1.6-ltr.
74kW
AEH
AKL
Software update
Two primary catalytic
converters
Simos 2
x
1.8-ltr.
92kW AGN
manual
manual
automatic
1.8-ltr.
110kW
AGU
Trimetallic catalytic
converter
Bosch Motronic 3.8.3
2.3-ltr.
110kW
AGZ Secondary air injection Bosch Motronic 3.8.3
1.9-ltr.
SDI
50kW
AGP Bosch Electronic
Diesel Control
manual
1.9-ltr.
TDI
66kW
ALH
AGR
Bosch Electronic
Diesel Control
manual
1.9-ltr.
TDI
81kW
AHF Bosch Electronic
Diesel Control
Variable turbine geometry
Enlarged oxidation catalytic
converter
Cooler for exhaust gas recir-
culation (auto gearbox only)
automatic
Emission Stage
Engines
Customers driving a vehicle which meets this
emissions standard are eligible for government
tax benefits.
x
x
automatic
automatic
automatic
automatic
manual
automatic
manual
automatic
manual
Software update
25. 25
1000 3000 5000
0
40 120
14050
60
30
20
10
70
160
100
80
60
40
0
80
180
200
2000 4000 6000
1.4-ltr. 4V engine (55 kW)
The 1.4-ltr. 4V engine is a new development and
has the following special features:
Output
kW
Torque
Nm
Engine speed rpm
SSP 200/053
You can find more detailed informa-
tion on this engine in Self-Study
Programme No. 196.
Displacement:
Compression ratio:
Output:
Torque:
Engine management:
Fuel:
1390 cm3
10.5 : 1
55 kW at 5000 rpm
128 Nm at 3300 rpm
Magneti Marelli 4AV
Premium unleaded (95
RON)
The engine may also be run on regular unleaded
fuel (91 RON), but with reduced max. power.
SSP 200/054
Aluminium engine block
Static high-voltage distributor
•
•
26. 26
2000 4000 6000
0
48 125
15060
72
36
24
12
84
175
100
75
50
0
200
0
96 220
SSP 200/046
SSP 200/045
•
•
•
•
•
•
1.6-ltr. engine (74 kW)
Aluminium engine block with
internal vent pipe
Press-fitted cast iron cylinders
Plastic twin-path intake manifold
Static high-voltage distributor
Pressure switch for power steering
Clutch pedal switch
1595 cm3
10.2 : 1
74 kW at 5600 rpm
145 Nm at 3800 rpm
Simos 2
Premium unleaded (95
RON)
The engine may also be run on regular unleaded
fuel (91 RON), but with reduced max. power.
The 1.6-ltr. 4-cylinder in-line engine has the fol-
lowing special features:
Displacement:
Compression ratio:
Output:
Torque:
Engine management:
Fuel:
Engines
Output
kW
Torque
Nm
Engine speed rpm
27. 27
2000 4000 6000
0
48 125
15060
72
36
24
12
84
175
100
75
50
0
200
0
96 220
SSP 200/055
SSP 200/061
•
•
•
•
•
•
Displacement:
Compression ratio:
Output:
Torque:
Engine management:
Fuel:
1.8-ltr. 5V engine (92 kW)
Output
kW
Torque
Nm
Engine speed rpm
1781 cm3
10.3 : 1
92 kW at 6000 rpm
170 Nm at 4200 rpm
Motronic 3.8.5
Premium unleaded (95
RON)
The engine may also be run on regular unleaded
fuel (91 RON), but with reduced max. power.
Variable valve timing
Plastic twin-path intake manifold
Static high-voltage distributor
Hot film air mass meter with reverse flow
detection
Pressure switch for power steering
Clutch pedal switch
The 1.8-ltr. 4-cylinder in-line engine with five
valves per cylinder has the following special
features:
28. 28
2000 4000 6000
0
80 125
150100
120
60
40
20
140
175
100
75
50
0
200
0
160 220
SSP 200/063
SSP 200/062
•
•
•
1.8-ltr. 5V turbo engine (110 kW)
Output
kW
Torque
Nm
Engine speed rpm
1781 cm3
9.5 : 1
110 kW at 5700 rpm
210 Nm at 1750 rpm
Motronic 3.8.3
Premium unleaded (95
RON)
The engine may also be run on regular unleaded
fuel (91 RON), but with reduced max. power.
Static high-voltage distributor with
individual ignition coils
Pressure switch for power steering
Clutch pedal switch
The 1.8-ltr. 4-cylinder in-line engine with five
valves per cylinder and turbocharger has the fol-
lowing special features:
Displacement:
Compression ratio:
Output:
Torque:
Engine management:
Fuel:
Engines
29. 29
1500 3500 5500
0
80 140
160100
120
60
40
20
140
180
120
100
80
60
500
160
200
220
2500 4500 6500
SSP 200/052
SSP 200/050
•
•
•
•
•
2.3-ltr. V5 engine (110 kW)
Output
kW
Torque
Nm
Engine speed rpm
2326 cm3
10.0 : 1
110 kW at 6000 rpm
205 Nm at 3200 rpm
Motronic 3.8.3
Premium unleaded (95
RON)
The engine may also be run on regular unleaded
fuel (91 RON), but with reduced max. power.
Twin-path intake manifold
Hot film air mass meter with reverse flow
detection
Static high-voltage distributor with
5 individual ignition coils
Pressure switch for power steering
Clutch pedal switch
The 2.3-ltr. 5-cylinder V-engine is a derivative
of the VR6 engine in terms of its design. It has
the following special features:
The construction and function of this
engine are described in Self-Study
Programme No. 195.
Displacement:
Compression ratio:
Output:
Torque:
Engine management:
Fuel:
30. 30
1000 3000 5000
0
40 130
14050
60
30
20
10
70
150
120
110
100
0
0
80
160
170
2000 4000
SSP 200/059
SSP 200/065
•
•
•
•
Displacement:
Compression ratio:
Output:
Torque:
Mixture preparation
Fuel:
1.9-ltr. SDI engine (50 kW)
Output
kW
Torque
Nm
Engine speed rpm
1896 cm3
19.5 : 1
50 kW at 4000 rpm
130 Nm at 2200 rpm
Direct injection with
electronicallycontrolled
distributor injection
pump
45 CN diesel
The engine may also be run on biodiesel.
Two-stage EGR valve
Electrically controlled intake manifold flap
Preset injection pump with
adjustable rib belt wheel
Vertical oil filter
The 1.9-ltr. 4-cylinder in-line engine is a
naturally aspirated diesel with direct injection.
It has the following special features:
Engines
31. 31
1000 3000 5000
0
40 200
22550
60
30
20
10
70
250
175
150
100
0
0
80
275
300
SSP 200/057
SSP 200/051
•
•
•
•
Displacement:
Compression ratio:
Output:
Torque:
Mixture preparation
Fuel:
1.9-ltr. TDI engine (66 kW)
Output
kW
Torque
Nm
Engine speed rpm
1896 cm3
19.5 : 1
66 kW at 3750 rpm
210 Nm at 1900 rpm
Direct injection with
electronicallycontrolled
distributor injection
pump
45 CN diesel
The engine may also be run on biodiesel.
Preset injection pump with
adjustable rib belt wheel
Lightweight valve gear
Vertical oil filter with replaceable paper
insert
Intake manifold flap
The 1.9-ltr. turbocharged diesel engine with
intercooler has the following special features:
32. 32
1000 3000 5000
10
50 200
22560
70
40
30
20
80
250
175
150
100
0
0
90
275
300
SSP 200/058
SSP 200/051
1.9-ltr. TDI Engine (81 kW)
Output
kW
Torque
Nm
Engine speed rpm
This 1.9-ltr. TDI engine has a higher power output
than the 1.9-ltr. TDI engine developing
66 kW because of its variable turbine geometry.
Displacement:
Compression ratio:
Output:
Torque:
Mixture preparation
Fuel:
1896 cm3
19.5 : 1
81 kW at 4150 rpm
235 Nm at 1900 rpm
Direct injection with
electronicallycontrolled
distributor injection
pump
45 CN diesel
The engine may also be run on biodiesel.
Engines
33. 33
SSP 200/113
SSP 200/114
The intake manifold flap shuts off the air supply
when the engine is switched off. This minimises
the quantity of air compressed and ensures the
engine runs out smoothly.
In the 1.9-ltr. TDI engine, a flap is integrated in
the intake manifold. This flap stops engine
vibrations when it is turned off.
The intake manifold flap
This is how it works:
Intake manifold
Intake manifold flap
Vacuum box
Intake air
Intake manifold flap
change-over valve
Ignition lock
Engine control unit
Diesel engines have a high compression ratio.
They tend to vibrate when turned off due to the
high compression pressure of the intake air.
When the engine turned off, the engine control
unit sends a signal to the intake manifold flap
change-over valve. The change-over valve then
switches the partial pressure for the vacuum box,
and the vacuum box closes the intake man-
ifold flap.
34. 34
SSP 200/098
SSP 200/099
Some engines have a hot-film air mass meter
with reverse flow detection. An optimal mixture
composition is essential for low exhaust emis-
sions and high engine power output, both of
which are heavily dependent on metering the
intake air mass accurately.
The opening and closing action of the valves
produces a reverse flow in the intake air mass
inside the intake manifold. The hot-film air
mass meter with reverse flow detection detects
the returning air mass. It then generates a signal
and sends it to the engine control unit. This
ensures highly accurate air mass metering.
The design
The electric circuit and the sensor element of the
air mass meter are accommodated in a compact
plastic housing.
Located at the bottom end of the housing is a
metering duct into which the sensor element
protrudes. The metering duct extracts part of the
intake and return air flows and routes this partial
flow past the sensor element. The signal which the
sensor element generates is processed by the
electric circuit and sent to the engine control unit.
You can find detailed information in Self-
Study Programme No. 195.
The hot-film air mass meter with
reverse flow detection
Air mass meter
Intake manifold
Reverse flow
Intake air
Metering duct
Housing cover
Electric circuit
Sensor element
Housing
Partial air flow
Engines
35. 35
SSP 200/096
•
•
SSP200/115
The clutch pedal switch
is located at the foot controls. It supplies the
“Clutch operated” signal to the engine control
unit.
The clutch pedal switch informs the engine con-
trol unit when the clutch is operated. The engine
control unit then disables the throttle closing
damper function.
The throttle valve closes more quickly and this
prevents a short-term increase in revs caused by
excess air.
Engine control unit
Throttle valve
control unit
Clutch pedal
switch
Signal utilisation when clutch is operated:
In vehicles equipped with a TDI or SDI
engine, the quantity of fuel injected is
reduced. This prevents engine vibrations
when a gearshift is performed.
In vehicles with a cruise control system, the
cruise control function is disabled.
In petrol-engined vehicles
(upwards of 74 kW), the throttle clo-
sing damper function is disabled.
This is how it works:
36. 36
SSP 200/095
SSP 200/118
This is located on the vane pump. It informs the
engine control unit when the vane pump is
under a heavy load.
Pressure switch for
power steering
The vane pump is driven by the engine by the rib-
bed V-belt.
At full steering lock the vane pump is required
to produce a high pressure. A greater load is also
placed on the engine, and idling speed may drop
sharply. Using the signal sent by the pressure
switch, the engine control unit is able to recog-
nise the engine load state in good time and
adjust the engine idling speed accordingly.
This is how it works:
The engine control unit activates the throttle
valve positioner which opens the throttle valve
by a certain angle. Engine idling speed is
maintained.
Engine control unit
Throttle valve con-
trol unit
Pressure switch for
power steering
The pressure switch for the power steering
informs the engine control unit when there is a
high pressure inside the vane pump.
Engines
37. 37
SSP 200/097
Cruise control system
The cruise control system is now controlled by
the engine control unit. The throttle valve is
actuated by the throttle valve control unit.
Switching the cruise control system ON tells the
engine control unit to maintain the current road
speed. The engine control unit then activates the
electric motor of the throttle valve gear and
actuates the throttle valve according to
the vehicle’s current speed.
To regulate the cruising speed, the engine con-
trol unit requires the sensor signals shown in the
diagram above.
Cruise control switch
ON/OFF signal
Signals to engine control unit
Engine speed signal
Road speed
Brake operated
Clutch operated
Feedback of
throttle valve position
Engine control unit
Throttle valve control unit
Operation of throttle
valve positioner
This is how it works:
You can find detailed information in
Self-Study Programme No. 195.
This controls the road speed according to the
driver’s wishes without the driver actually hav-
ing to operate the accelerator pedal. The cruise
control system (CCS) was previously controlled
by an independent control unit and the throttle
valve was actuated by a vacuum box.
38. 38
SSP 200/071
SSP 200/070
Power transmission
5-speed manual gearbox 02J
5-speed manual gearbox 02K
Two manual gearboxes and one automatic gear-
box are used in the new Golf.
All gearboxes have a pendulum support and are
attached to the engine oil sump by bolts. This
reduces the transmission of vibrations from
is an advanced development of the
5-speed manual gearbox 02A.
is an advanced development of the
5-speed manual gearbox 020.
The gearbox
the engine-gearbox assembly to the body.
The manual gearboxes have hydraulic clutch
control.
39. 39
SSP 200/072
SSP 200/106
SSP 200/124
The 4-speed
automatic gearbox 01M
CAN databus
Tripod roller joint shafts
The tripod roller joint shafts prevent vibrations
and noise from being transmitted from the
engine-gearbox assembly to the body.
In the new Golf, the engine control unit, auto-
matic gearbox control unit and ABS control unit
are linked by CAN data lines.
Automatic gearbox
control unit
Engine
control unit
ABS
control unit
This is now networked with a CAN databus.
Final drive is via two tripod roller joint shafts.
You can find detailed information on
the CAN databus in Self-Study Pro-
gramme No. 186.
CAN data line
40. 40
SSP 200/047
Running gear
The following features will be explained to you
on the next pages:
The running gear, which comprises a suspen-
sion strut axle, double wishbones and a tor-
sion beam rear axle, is based on the same
principle as the predecessor model.
- The steering
- The front axle
- The torsion beam rear axle
- The braking system
- The front and rear brakes
- The ULW tyres
- The light-alloy wheel.
The interaction of the running gear components,
for example, the newly designed front and rear
axles with large wheels and power steering,
results in a comfortable ride.
All the wheel hubs have a five-hole pattern for
securing the wheels.
41. 41
SSP 200/044
SSP 200/33 a,c-e
The steering column can be adjusted manually by 50 mm fore and aft.
The upper end of the steering column is attached to the central tube by
two 8 mm hexagon bolts. Shear pins are no longer needed. The lower
end is attached to the steering gear by a universal joint.
The deformation distance of the steering system during a crash is
250 mm. The steering column angle is 24°. The direction in which the
airbag inflates is therefore better matched to the driver’s position.
The mechanical anti-theft device on the steering assembly
prevents the striker pin from shearing off at the steering wheel lock.
The steering Power steering is fitted as standard. The steering
assembly is rigidly attached to the subframe and
locked in place to prevent the steering gear from
slipping on the subframe. Both track rods are
adjustable.
Reach adjustment
The steering column can be adjusted by 44mm in height.
Rake adjustment
The steering column attachments
The crash concept
Steering system anti-theft device
50 mm
44mm
42. 42
SSP 200/042
SSP 200/036 a-c
Running gear
The standard power steering permits a larger caster.
This improves directional stability.
The self-locking effect is eliminated by modifying the conical shape of
the track rod end. To slacken the nut, use a hexagon socket wrench to
counter-hold the track rod end.
The suspension strut is mounted in the wheel bearing housing and
clamped with a bolt. A special tool is required to remove the suspension
strut (Spreader 3424)
The front axle This is based on the proven principle of the sus-
pension strut axle with double wishbones. It has
been optimised and adapted to the new Golf.
The single bolt clamp
The caster
The track rod end
43. 43
SSP 200/037 a-c
SSP 200/043
25°
The large-size rear axle mountings are positioned at an angle of 25° to
the transverse axis of the vehicle. This reduces the self-steering effect of
the rear axle.
The double ball bearings of the rear axle require no adjustment. The axial
play is determined by the tightening torque of the axle nut.
The shock absorbers and springs are located separately, giving a through-
loading width of over one metre. There is less tyre noise in the interior
because the dampers are secured by bolts in the wheel housing.
It is a torsion beam axle with anti-roll bar.The rear axle
Separate spring and shock absorber mountings
Rear axle mountings
Wheel bearings
44. 44
SSP 200/029
prevents the wheels from locking when braking.
This means that the driver can retain vehicle
maneouvrability even in extreme situations.
Running gear
The braking system
The new Golf has disc brakes at the front and
rear; the front disc brakes are ventilated.
allocates brake pressure to the front and rear
wheels by means of solenoid valves in the ABS
unit. The operating range of the EBPD ends at
the ABS cut-in point.
is an automatic starting control system. The
EDL automatically brakes wheels which spin
when setting off on slippery surfaces. The dif-
ferential transfers the input torque to the wheel
which is gripping the road. The EDL is effective
up to 80kph.
prevents the driven wheels from lock up on slip-
pery surfaces when the driver lifts his foot off the
accelerator pedal quickly. The ABS sensor
recognises when the driven wheels are on the
verge of locking up. The ABS control unit then
sends a command to the engine control unit over
the CAN databus. The engine control unit
increases engine speed momentarily to enable
the wheels to rotate freely again. This retains
vehicle maneouvrability.
The EBC operates across the entire engine speed
range.
EBC is only available on the 66kW TDI and the
81kW TDI models.
Electrical wires
Hydraulic pipes
The new Golf is equipped with the Mark 20 IE
anti-lock braking system and electronic brake
pressure distribution (EBPD) as standard. It has
a diagonally-split dual-circuit design.
The anti-lock braking system
Electronic brake pressure distribution
TTTThhhheeee eeeelllleeeeccccttttrrrroooonnnniiiicccc ddddiiiiffffffffeeeerrrreeeennnnttttiiiiaaaallll lllloooocccckkkk
The engine braking control
45. 45
WOB VK-12
55 KW
50 KW-SDI
74 KW
110 KW
66 KW-TDI
81 KW- TDI
92 KW
SSP 200/025
ø 256 x 22 mm
SSP 200/026
ø 280 x 22 mm
SSP 200/027
ø 288 x 25 mm
SSP 200/028
WOB VK-12
ø 232 x 9 mm
Front brake Rear brake
Brake servo: left-hand drive vehicles (ø 10“ )
Since there is less space in right-hand drive vehi-
cles, a tandem brake servo (ø 7“/ 8“) is used.
46. 46
SSP 200/030
SSP 200/032
SSP 200/031
Running gear
Brake hoses
and brake pipes
are made of precision-bent steel pipes. They are
protected against corrosion by several coatings.
link up the moving parts of the braking system.
The brake fluid absorbs the bulk of the water
through these hoses. Brake hoses are made of
four layers. The innermost layer is now made of
a special synthetic material which reduces
water absorption.
Special synthetic
material
Oil and petroleum resistant
plastic
Viscose fibres
Polyamide
Chromate
Aluminium
Nickel
Cu-plated steel
All exterior bolts in the braking system are dac-
rometised. This coating, which contains zinc-
aluminium powder, protects the bolts against
corrosion.
The brake hoses
The brake pipes
Dacrometised bolts
You can find further information in
Self-Study Programme No. 160.
47. 47
SSP 200/080
SSP 200/105
The low weight of the ULW tyre means that
fewer unsprung masses have to be moved. This
saves fuel and reduces pollutant emissions. The
control frequency of the ABS system is higher,
because the rotating wheel masses are small. A
shorter stopping distance can then be achieved
on road surfaces with a low friction coefficient.
The ULW tyre is manufactured from pure crude
oil products which can be sorted into clean
material streams for recycling. The use of ara-
mid makes the tyres better suited to retreading.
This is because aramid is a non-corrosive
material.
Instead of the steel inlays used in steel cord
tyres, ULW tyres have aramid inlays. Aramid is
a synthetic material which weighs six times less
but has 10 times more tensile strength than steel.
The outer wall thickness of the ULW tyre is
10% less than that of a steel cord tyre.
The result is a weight saving of 3 kg compared
to conventional steel cord tyres.
Steel cord concept
Aramid inlaysSteel inlays
Wall thickness
-10%
Aramid beadSteel bead
ULW concept
Advantages of ULW tyres
Tyre design
Aramid ply
Aramid cord
1st and 2nd
layers
UUUUltra LLLLight WWWWeight tyres
The new Golf is only equipped with Dunlop
ULW tyres in combination with light alloy rims
and tyres of size 175/80 R 14 88 H.
Aramid bead
48. 48
-3 kg
SSP 200/090
In the development departments of the automo-
bile industry, the top priority is to reduce the
weight of conventional components. The tradi-
tional material of steel is gradually being
replaced by alternative materials such as alu-
minium, magnesium and synthetic materials.
Running gear
The light alloy rim
The new Golf has light alloy rims in combina-
tion with size 175/80 R14 ULW tyres.
These rims consist of an aluminium-magne-
sium-manganese alloy. The alloy can be cold-
formed, is corrosion resistant and lightweight.
The alloy rim is approx. 3 kg lighter than
the steel rim through the use of this material.
Steel rim Light alloy rim
49. 49
WOB - VK 12
SSP 200/086
CCCController AAAArea NNNNetwork databus
If it wasn’t for the CAN databus, a separate wire
would be required to convey every item of infor-
mation between each of the control units. To
keep the electrics/electronics as simple and
compact as possible, Volkswagen uses the
Bosch CAN databus.
The demands on vehicle safety, ride comfort,
exhaust emissions and fuel economy are con-
stantly rising. To meet these demands, a large
volume of data has to be exchanged between the
control units. The CAN databus can transmit
large data streams within the shortest possible
space of time.
You can find detailed information
in Self-Study Programme No. 186.
CAN in the convenience system between
the central control unit and the door con-
trol units
CAN in the drive train area between the
control units for the engine, ABS/EDL and
automatic gearbox on the 1.6-ltr. ver-
sion and upwards.
Electrical system
50. 50
SSP 200/085
WOB - VK 12
Electrical system
The vehicle electrical system
Use Wiring Harness Repair System
VAS 1978 to carry out repair work on
the wiring harness.
The wiring harness is dependent on the vehicle
specifications. It is custom-made according to
the vehicle identification number (VIN).
Coupling station, A-pillar
Coupling station, B-pillar
Main fuse box
Coupling station, A-pillar
Coupling station, B-pillar
Fuse carrier
Coupling station, plenum
chamber
Relay board with auxiliary
relay carrier
Relay carrier, engine
compartment
has a decentralised layout, i.e. the component
parts of the system are situated at different fit-
ting locations within the vehicle. This is
The fitting locations for the component parts are
shown in the drawing below.
necessary due to the increase in the amount of
electrics/electronics used in the new Golf.
51. 51
SSP 200/119 a-f
The components of the
decentralised vehicle electrical sys-
tem
Coupling station in plenum chamber
Main fuse box
Relay board with auxiliary relay carrier
Fuse box
Relay carrier in engine compartment
Coupling stations, A and B pillars
These fuses prevent overloading of the main consumers
connected directly behind the battery, e.g. alternator,
engine control unit, passenger compartment and cooling
fan 2nd stage.
Integrated in the coupling station in the plenum chamber
are the plug connectors between the passenger compart-
ment and the engine compartment.
Located on the relay board are the relays for the basic
equipment and three fuses for optional extras. For instal-
ling optional extras, there are additional relays and fuses
on the auxiliary relay carrier.
These fuses protect the individual electric circuits against
overload.
The relays for low and high heating output for TDI diesel
engines are arranged on this relay carrier.
Integrated in these coupling stations are the plug and
socket combinations for the electrical components in the
doors.
52. 52
1
4
7
C
2
5
8
0
3
6
9
Q
PRINT
V.A.G - EIGENDIAGNOSE HELP
01 - Motorelektronik
HELP
1
4
7
C
2
5
8
0
3
6
9
Q
PRINT
V.A.G - EIGENDIAGNOSE HELP
01 - Motorelektronik
HELP
Safe
SSP 200/088
Electrical system
The convenience system
Central locking
Tailgate lock
assumes the functions shown in the diagram
below. It has a decentralised layout, which
means that the individual functions are shared
among several control units.
Interior lighting control
Radio wave remote control
Tilting/sliding roof
• Convenience locking
• Enable
Anti-theft alarm system
Self-diagnosis
Address word 46
Interface to vehicle electrical
system
Functions of the central control unit
Functions of the door control units
Central locking the doors
with SAFE feature
Electric windows with
excess power limitation
Electrically adjustable and
heated exterior rear view
mirrors
Self-diagnosis
Address word 46
53. 53
WOB - VK 12
SSP 200/079
The convenience system
Self-diagnosis can be performed by
using address word 46.
The central control unit is inte-
grated in the dash panel insert
behind the rotary light switch.
is only available in combination with electric
windows. To optimise their operation, the cen-
tral control unit and the door control units are
connected via the CAN databus.
Self-diagnosis
Convenience system with central control unit
and four door control units
The door control units are
located on the front and
rear electric window
motors.
If the convenience system fails, each door can
be locked and unlocked mechanically.
You can find detailed information
in Self-Study Programme No. 193.
54. 54
SSP 200/087
Electrical system
The new headlights
have a different design. The cover glasses are
transparent and the new shape of the reflectors
ensures better light dispersion.
SSP 200/087
When changing from driving on the right to
driving on the left, the headlight beams must be
adapted using masking tape. Please refer to the
relevant Service Literature for detailed
information.
Dipped beam
Fog lightMain beam
Indicator light
Side light
55. 55
SSP 200/093
SSP200/082
The adjustable wiper interval
Four wiper intervals can be preset using a prese-
lector switch.
Each setting is automatically adapted to the road
speed. The higher the road speed, the shorter the
wiper interval.
Wiper interval =
Time to wipe window + pause
The rain sensor
As a result, less light is reflected by the wind-
screen surface. Light refraction is dependent on
rainfall intensity. The rain sensor sends a signal
to the relay for the automatic intermittent wash/
wipe system and the windscreen washers are
switched on.
The rain sensor emits a light beam through
LEDs. When the windscreen is dry, the entire
light beam is reflected by the windscreen sur-
face. If the windscreen is wet, the light beam
emitted by the rain sensor is refracted
differently.
is located at the base of the interior rear-view
mirror. It detects rainfall and automatically
switches the wiper on in the intermittent setting.
LED
Windscreen surface
Photodiode
LED
Windscreen dry = strong light reflection Windscreen wet = minimal light reflection
56. 56
SSP 200/081
Electrical system
The automatic anti-dazzle
interior mirror
This is how it works
The anti-dazzle interior mirror consists of a mir-
ror element and an electronic control unit with
two photosensors.
The applied voltage changes the colour of the
electrolyte. The higher the voltage, the darker
the electrolyte. Incident light is no longer
reflected so strongly.
When reverse gear is engaged, the mirror dim-
ming function is deactivated. The mirror can
now be used to, say, reverse out of a dark garage
into the light.
Silver reflective
coating
Glass pane
Electrolytic coating
Glass pane
Photosensor
Photosensor
The electronic control unit detects incident light
from the front and rear by means of the photo-
sensors. If the light incidence on the side of the
mirror facing the rear is greater than from the
front, the electronic control unit applies a volt-
age to the conductive coating.
has a continuous dimming function which pre-
vents the driver from being dazzled by
vehicles behind.
Electronic
control unit
Conductive coatings
57. 57
SSP 200/038
SSP 200/039
Heating, air-conditioning system
Three alternative heating and air-conditioning
packages are available for the Golf: Heater only
Manually-operated heater and air conditioner
Electronically-operated heater and air condi-
tioner (CLIMAtronic)
•
•
•
Heating
In contrast to the predecessor model, a fresh air/
air recirculation mode is possible in the new
Golf. The main shut-off flap is therefore no
longer required.
Actuator
Fresh air/air recir-
culation flap
Air recirculation mode
The fresh air / air recirculation flap is operated
by an actuator. All other flaps are adjusted by
Bowden cables.
In defrost mode, the air recirculation mode is
deactivated mechanically. This also prevents
moist air inside the vehicle from condensing on
the windscreen.
58. 58
SSP 200/040
SSP 200/041
Fresh air /air
recirculation
flap
Fresh air/air
recirculation flap
Backpressure flap
The manual air-conditioning system
If a manual air-conditioning system is fitted, the
climate inside the vehicle is controlled by the
driver.
The fresh air / air recirculation flap is now oper-
ated by an electric motor. All other flaps are
adjusted by Bowden cables.
CLIMAtronic
When CLIMAtronic is fitted, the climate inside
the vehicle is controlled automatically.
CLIMAtronic is controlled in the same way as
the system fitted in the Passat 97.
Temperature and air flow rate control have been
adapted to the interior dimensions of the Golf.
The fresh air / air recirculation flap together
with the backpressure flap are driven by a com-
mon electric motor.
Heating, air-conditioning system
59. 59
SSP 200/034
SSP 200/035
Wool Activated charcoal granulate
Wool
When defrost mode is activated, the central flap
closes. A small air flow is ducted to the side air
outlets through the opening in the central flap.
At the same time, the middle air outlets are
closed.
In this way, the side windows inside the passen-
ger compartment are demisted quickly.
Activated charcoal
dust and pollen filter
Air distribution box and central
flap
The air distribution box distributes the air flow
to the middle and side air outlets. It is located
directly behind the central flap and is fitted in
combination with the heater and the air
conditioner.
The newly developed filter differs from previ-
ous dust and pollen filters in that it now
comprises a combination of wool and an acti-
vated charcoal granulate layer.
The wool filters out dust and pollen particles,
while the activated charcoal reduces odour and
gaseous pollutants. The surface of the activated
charcoal binds or changes the chemical compo-
sition of gaseous substances to make them safe.
The large part of the harmful substance of
ozone, for example, is converted into harmless
oxygen.
DDDDeeeeffffrrrroooosssstttt mmmmooooddddeeee
To the side air
outlets
Central flap
60. 60
SSP 200/109
SSP 200/111
SSP 200/110
ca. 200°C
Service
When removing one of the front seats, the side
airbag can be triggered by anybody who is elec-
trostatically charged. Therefore, before
unplugging the connectors briefly touch the door
striker pin or the vehicle body panel to get rid of
any electrostatic charge.
Body
After a panel has been beaten to remove a dent,
it has a greater rigidity against dents. The panel
is more resilient and greater force is required.
The material may fracture if subjected to exces-
sive stress.
Removing seats
Repairing high-strength panels
After unplugging the connectors below the seat,
plug in the adapter to re-close the earth circuit of
the airbag system.
Adapter for side airbag VAS 5061
If the material is heated too rapidly and to an
excessively high temperature (approx. 200°C)
with a drying radiator during a partial respray,
the panel will deform.
61. 61
SSP 200/134a-e
3320/2
3320
The new special tools and
workshop equipment are shown below.
3320/2
Socket insert
T 10006
Disengaging tool
Tool number
and designation
Use
For adjusting the door
For disengaging the brake
servo linkage from the brake
pedal
T 10010
Socket wrench
For fitting the positioning
element of the central lok-
king system in the tailgate
T 10011
Socket wrench
For fitting the door lock
VAS 5056/2
Adapter cable set
For airbag auxiliary tester
VAS 5056
63. 63
16
1
20
2
7
7
7
12
11
11
17
18
18
8
10
16
15
9
4
3
19
19
6
5
14
13
14
are to be shaped. To do this, pull the tread down-
wards over an edge (e.g. table edge) before joining
the wheel halves is order to soften the cardboard so it
is easier to shape. Now coat the inner surfaces of the
wheel halves with glue, allow the glue to set slightly
and glue on the tread around the outer circumference
of the wheel. Use the serrations on each side of the
tread to affix the tread. Now glue the wheels on the
axle, making sure that the centre of the wheel coin-
cides with the axle marking.
The tyres (parts 17, 18)
To assemble the body, cut out small triangles
between roof and body side section on each side at
the front and rear. Then fold these triangles inwards
and use them as tabs for gluing the roof and body
side section.
The body (part 1)
Once the rear end has been glued together for a few
minutes, coat the outer ends of the indicator lights,
fold them and press them into the desired position.
You can shape adjustments in this way.
The rear end parts 5,6)
Glue the windscreen. Glue the bonnet from
the inside to the lower side section of the winds-
creen. Then glue the bonnet to the side sections of
the body.
The front section (parts 3, 4)
Glue the anti-roll bar level with the central roof pil-
lar. Press the outer sides firmly against the anti-roll
bar to help maintain the basic shape of the model.
Now place the model on a level surface to see if all
parts have been inserted straight. Any unevenness
can now be corrected by pulling parts apart at the
adhesive bond or by applying light pressure.
The anti-roll bar (part 2)
Glue the floorpan sections to the underside of the
body to stabilise the model.
The floorpan sections (part 7)
Bend slightly and glue in place as shown in the
drawing.
The front section reinforcements
(parts 8,9)
Glue the axles on the
The axles (parts 11)
Now you can glue the entire floorpan assembly into
the model from below.
Floorpan (part 12).
should also be folded beforehand and glued on the
Now assemble the bumpers.
must be folded beforehand and glued on the
The rear bumper (part 13)
After allowing the glue to evaporate, glue the
bumper together with the side sections on the body.
Using a cutter; now carefully press the upper edge of
the bumper upwards so that it finally takes shape.
Side sections (parts 14)
The front bumper (part 15)
Then glue the bumper on the body.
side sections (parts 16).
Precut the mirrors to roughly the correct shape
beforehand, then fold them along the marking and
glue as shown in the drawing. Now cut out the mir-
ror contour. Using a sharp cutter, carefully cut a slot
at the marking in the black triangle on the side win-
dow. Now glue the mirror in this slot.
The mirrors (parts 19)
Also attach the roof aerial to the model.
The roof aerial (part 20)
fold
slit slightly
cut out
cut
in direction of arrow
bend cardboard
cut off projections after gluing together
Assembly instructions for VW GOLF 98
General notes:
Slightly slit all fold lines on the flat section using a blunt cutter,
fold them up and then coat with adhesive.
It is better to cut out all parts in the order in which they are fitted.
Carefully coat all folds with adhesive and allow them to set slightly. Then
press the parts together firmly between thumb and index finger.