
Recommandé
Contenu connexe
Tendances
Tendances (18)
Similaire à Bridgething2
Similaire à Bridgething2 (20)
Dernier
Dernier (20)
Bridgething2
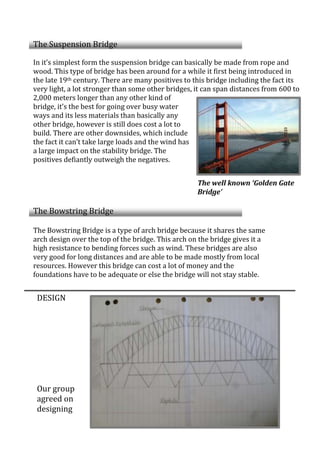
- 1. The Suspension Bridge In it’s simplest form the suspension bridge can basically be made from rope and wood. This type of bridge has been around for a while it first being introduced in the late 19th century. There are many positives to this bridge including the fact its very light, a lot stronger than some other bridges, it can span distances from 600 to 2,000 meters longer than any other kind of bridge, it’s the best for going over busy water ways and its less materials than basically any other bridge, however is still does cost a lot to build. There are other downsides, which include the fact it can’t take large loads and the wind has a large impact on the stability bridge. The positives defiantly outweigh the negatives. The Bowstring Bridge The Bowstring Bridge is a type of arch bridge because it shares the same arch design over the top of the bridge. This arch on the bridge gives it a high resistance to bending forces such as wind. These bridges are also very good for long distances and are able to be made mostly from local resources. However this bridge can cost a lot of money and the foundations have to be adequate or else the bridge will not stay stable. DESIGN Our group agreed on designing The well known ‘Golden Gate Bridge’
- 2. our bridge as an Arch Bridge. We chose this design because it allows the stress of the weight being placed on it to be distributed evenly along to length of the bridge, which ultimately means it can hold more weight, and is overall stronger. Another reason we chose this design is because it looked challenging, which proved to be true. METHOD 1. Move two tables approximately 20cm apart. Once you have this gap do not change it 2. To begin constructing an arch bridge, start by constructing a beam bridge by simply cutting into shape a piece (or multiple stuck together for strength) into shape. 3. Build the arch by connecting straws and bending it over connecting each end to an end of the bridge lengthways. Do this the same on both sides 4. Cut straws into the sizes need to reach from the bridge to the arch about a centimeter apart and stick them on with a hot glue gun. 5. Construct a base for it by making pop sticks into a support structure as seen in the picture below and connect it to the bottom of your bridge using a hot glue gun. 6. Add 50g masses beginning at the center of your bridge until the bridge breaks or falls. RESULTS What a your finished product should resemble
- 3. Or bridge was quite successful and was able to hold a lot of weight and took one of the group members standing on it to actually break it although the bridge was lop- sided and became more so the more weights we put onto it. When the bridge did break it was the support beam underneath that had failed. They collapsed sideways and led to the failure of the whole bridge. DISSCUSSION Our bridge ultimately faired quite well, it held a lot of weight. Our bridge was so strong because the actual beam part of the bridge had multiple layers and in- between these layers were pop sticks laid out in patterns to keep the beam part from snapping in the middle when under stress. Another factor that made our bridge so strong was the support beams we made out of pop sticks and put underneath. Even this was an after thought and not originally in the plans we added it and it proved to be a great improvement. Despite its strength our bridge finally collapsed under the weight of one of our group members, this is when the support beams gave way and made the bridge fail. The only thing about our bridge that changed once we started putting more weights on was that it started going lop-sided as seen in the picture to the right. The more weights we added the more it leant over although it did not collapse sideways while we were putting the weights on because we made sure to distribute them evenly all over the bridge. As you can also see in the picture to the right, at each end of the bridge the weights were pushed right up against the edge so they could all fit on but this caused the edges to weaken and the weights almost started falling off. They had to be steadied for most of the time, constantly needing readjusting. The weights were applied evenly along the bridge so the whole bridge took the same amount of pressure although the bridge was mostly affected on the edges, as they were Picture shows how the support beams collapsed The lean in the bridge
- 4. weaker with less support underneath however the middle stayed strong and didn’t snap. Despite the fact the bridge was strong and held all the weights I would change the design slightly in the future by adding extra pop sticks as more support in the bottom part to stop it collapsing sideways the way it did. This experiment differs drastically to real life due to our limited supplies, only having access to materials such as pop sticks, straws, cardboard and other such inferior materials out of which there is no way somebody could make an actual bridge. Real bridges are commonly made of wood, stone, concrete and steel but we did not have access to any materials of this sort. As far as I can recall we did not make any mistakes that affected our final product. It failed in the end purely because of design flaws. CONCLUSION The final outcome of our experiment was that we have designed and built a pretty strong bridge. Our design, along with the added extra was a great success. It was such a success because we made the beam multi-layered and added the extra support. The only thing that hindered the full success of the bridge was that it leant when weights were put on it. Overall I would say we did pretty well and learnt a lot about the structure and design of bridges. BIBLIOGRAPHY http://www.historyworld.net/wrldhis/plaintexthistories.asp?historyid=ab97 http://www.brighthubengineering.com/structural-engineering/65074- characteristics-of-beam-bridges/#imgn_0 http://www.wisegeek.org/what-is-an-arch-bridge.htm The weights being applied to the bridge