SlideShare une entreprise Scribd logo
1  sur  4
Monochromizer TM Quick Start Guide<br />OPENING AN IMAGE FILE<br />Open an image file by clicking on the Image Open tool strip button.    Select the file using the Select Image File dialog box.<br />Color Selection<br />Make sure the Color Selection tab is selected.  The color image file will appear to the right of the window.  The corresponding black and white image is to the left.  The edges may appear jagged because, depending on the size of your image file, it may be enlarged.  At the far left is a group box for the first color.  The default color is black (red, green and blue components all zero).  Black is the default Mono Color, that is, the monochrome color (black or gray) to which a color from the color image is converted.  Gray is created in the monochrome image by dithering, which is, alternating black and white pixels.  Any color in the color image not explicitly assigned to black or gray will appear as white in the monochrome image.  Move your cursor inside the color image.  The red, green, and blue components of the color at the cursor appear in a box by the cursor.  When you click on the color image, the values of the red, green, and blue components of the color at the cursor are transferred into the numeric up down controls in the selected (or only) color group box. <br />Adjust the Tolerance numeric up down to make other colors from the color image that are close to the selected color the same Mono Color.  The maximum tolerance value is 128.  The tolerance value is applied to red, blue, and green. <br />Click on the Add Color Tool strip button to add another color from the color image.  <br />Select the desired Mono Color, select the color from the color image, and adjust the tolerance as before.<br />Image Alignment<br />Select the Image Alignment tab.  The monochrome image is shown to the right.  The border around the image shows the selected display size and allows you to select the alignment of the image on the display.  The display size for the target device can be entered in the text boxes in the upper left.  A page holds 8 vertical pixels.  When the first image file is opened, the values for the display size are set to the minimum needed to contain the monochrome image.  The values for the display size must be large enough to accommodate the image file.  After entering the values, click the Update Display Size button.  <br />If the target display height in pages is more than needed for the monochrome image, the Vertical Alignment group box is enabled and you may use its controls to adjust the vertical position of the monochrome image on the target display.  If the Custom radio button is selected, the Pixels Above numeric up down is enabled and may be used to specify the vertical position on the target display.<br />If the target display width in pixels is more than needed for the monochrome image, the Horizontal Alignment group box is enabled and you may use its controls to adjust the horizontal position of the monochrome image on the target display.<br />Create Output File<br />To create your output file with a C array of your display bit pattern data, click on the MonochromizerTM tool strip button.    The Select Monochromizer Output File dialog box appears.  Select the folder where the file goes and type in the desired file name.  This will typically be a C or C++ file.  Click the Save button.  Edit the file to replace the comment with the desired array variable name.  You may use the file directly in your embedded project or copy and paste the contents of the file into another file.<br />const unsigned char /* Enter array name here */ =    { 0x00, 0x00, 0x00, 0x00, 0x00, 0x00, 0x00, 0x00, 0x00, 0x00,      0x00, 0x00, 0x00, 0x00, 0x00, 0x00, 0x00, 0x00, 0x00, 0x00,      0x00, 0x00, 0x00, 0x00, 0x00, 0x00, 0x00, 0x00, 0x00, 0x00,      0x00, 0x00, 0x00, 0x00, 0x00, 0x00, 0x00, 0x00, 0x00, 0x00,      0x00, 0x00, 0x00, 0x00, 0x00, 0x00, 0x00, 0x00, 0x00, 0x00,      0x00, 0x00, 0x00, 0x00, 0x00, 0x80, 0x40, 0xA8, 0x54, 0xAA,      0x55, 0xAA, 0x54, 0xA0, 0x00, 0x00, 0x00, 0x00, 0x00, 0x00,      0x00, 0x00, 0x00, 0x00, 0x00, 0x00, 0x00, 0x00, 0x00, 0x00,      0x00, 0x00, 0x00, 0x00, 0x00, 0x00, 0x00, 0x00, 0x00, 0x00,      0x00, 0x00, 0x00, 0x00, 0x00, 0x00, 0x00, 0x00, 0x00, 0x00,      0x00, 0x00, 0x00, 0x00, 0x00, 0x00, 0x00, 0x00, 0x00, 0x00,      0x00, 0x00, 0x00, 0x00, 0x00, 0x00, 0x00, 0x00, 0x00, 0x00,      0x00, 0x00, 0x00, 0x00, 0x00, 0x00, 0x00, 0x00, 0x00, 0x00,      0x00, 0x00, 0x00, 0x00, 0x00, 0x00, 0x00, 0x00, 0x00, 0x00,      0x00, 0x00, 0x00, 0x00, 0x00, 0x00, 0x00, 0x00, 0x00, 0x00,      0x00, 0x00, 0x00, 0x00, 0x00, 0x00, 0x00, 0x00, 0x00, 0x00,      0x00, 0x00, 0x00, 0x00, 0x00, 0x00, 0x00, 0x00, 0x00, 0x00,      0x00, 0x00, 0x00, 0xA0, 0x54, 0xAA, 0x55, 0xAA, 0x55, 0xAA,      0x55, 0xAA, 0x55, 0xAA, 0x55, 0xAA, 0x50, 0x80, 0x00, 0x00,      0x00, 0x00, 0x00, 0x00, 0x00, 0x00, 0x00, 0x00, 0x00, 0x00,      0x00, 0x00, 0x00, 0x00, 0x00, 0x00, 0x00, 0x00, 0x00, 0x00,      0x00, 0x00, 0x00, 0x00, 0x00, 0x00, 0x00, 0x00, 0x00, 0x00,      0x00, 0x00, 0x00, 0x00, 0x00, 0x00, 0x00, 0x00, 0x00, 0x00,      0x00, 0x00, 0x00, 0x00, 0x00, 0x00, 0x00, 0x00, 0x00, 0x00,      0x00, 0x00, 0x00, 0x00, 0x00, 0x00, 0x00, 0x00, 0x00, 0x00,      0x00, 0x00, 0x00, 0x00, 0x00, 0x00, 0x00, 0x00, 0x00, 0x00,      0x00, 0x00, 0x00, 0x80, 0x00, 0x80, 0x00, 0x80, 0x00, 0x80,      0x40, 0x80, 0x40, 0x80, 0x40, 0x80, 0x40, 0x80, 0x40, 0x80,      0x40, 0x80, 0x40, 0x80, 0x40, 0x80, 0x40, 0x80, 0x40, 0x80,      0x50, 0xAA, 0x55, 0xAA, 0x55, 0xAA, 0x55, 0xAA, 0x55, 0xAA,      0x55, 0xAA, 0x55, 0xAA, 0x55, 0xAA, 0x55, 0xAA, 0x54, 0xA0,      0x40, 0x80, 0x40, 0x80, 0x40, 0x80, 0x40, 0x80, 0x40, 0x80,      0x40, 0x80, 0x40, 0x80, 0x40, 0x80, 0x40, 0x80, 0x40, 0x80,      0x00, 0x80, 0x00, 0x80, 0x00, 0x80, 0x00, 0x80, 0x00, 0x00,      0x00, 0x00, 0x00, 0x00, 0x00, 0x00, 0x00, 0x00, 0x00, 0x00,      0x00, 0x00, 0x00, 0x00, 0x00, 0x00, 0x00, 0x00, 0x00, 0x00,<br />
Monochromizer (TM)  Quick Start Guide

Contenu connexe

Similaire à Monochromizer (TM) Quick Start Guide

Human heart medical images for power point 2
Human heart medical images for power point 2Human heart medical images for power point 2
Human heart medical images for power point 2
Medical_PPT_Images
 
How To Create A Custom Brush In Adobe
How To Create A Custom Brush In AdobeHow To Create A Custom Brush In Adobe
How To Create A Custom Brush In Adobe
Christine Knight
 
36x48 horizontal templatev12
36x48 horizontal templatev1236x48 horizontal templatev12
36x48 horizontal templatev12
Jay Buckley
 
Les16 Working With Pictures
Les16  Working With  PicturesLes16  Working With  Pictures
Les16 Working With Pictures
guevarra_2000
 
Photoshop Basics - Review of All Tools
Photoshop Basics - Review of All ToolsPhotoshop Basics - Review of All Tools
Photoshop Basics - Review of All Tools
nombre thera
 
217 quick guide to photoshop cs6
217 quick guide to photoshop cs6217 quick guide to photoshop cs6
217 quick guide to photoshop cs6
Rodel Morales
 
White blood cells medical images for power point
White blood cells  medical images for power pointWhite blood cells  medical images for power point
White blood cells medical images for power point
Medical_PPT_Images
 
Photoshop intro to basics
Photoshop intro to basicsPhotoshop intro to basics
Photoshop intro to basics
Natalie Hurd
 
Photoshop Tutorial Booklet
Photoshop Tutorial BookletPhotoshop Tutorial Booklet
Photoshop Tutorial Booklet
Graveney School
 

Similaire à Monochromizer (TM) Quick Start Guide (20)

Ms Paint Tutorial
Ms Paint TutorialMs Paint Tutorial
Ms Paint Tutorial
 
Using Clicker 5
Using Clicker 5Using Clicker 5
Using Clicker 5
 
Human heart medical images for power point 2
Human heart medical images for power point 2Human heart medical images for power point 2
Human heart medical images for power point 2
 
Basic tutorials
Basic tutorialsBasic tutorials
Basic tutorials
 
Basic tutorials
Basic tutorialsBasic tutorials
Basic tutorials
 
teacherinset.pptx
teacherinset.pptxteacherinset.pptx
teacherinset.pptx
 
Power Point for the Novice
Power Point for the NovicePower Point for the Novice
Power Point for the Novice
 
How To Create A Custom Brush In Adobe
How To Create A Custom Brush In AdobeHow To Create A Custom Brush In Adobe
How To Create A Custom Brush In Adobe
 
Tutorials blog
Tutorials blogTutorials blog
Tutorials blog
 
36x48 horizontal templatev12
36x48 horizontal templatev1236x48 horizontal templatev12
36x48 horizontal templatev12
 
Les16 Working With Pictures
Les16  Working With  PicturesLes16  Working With  Pictures
Les16 Working With Pictures
 
Photoshop Basics - Review of All Tools
Photoshop Basics - Review of All ToolsPhotoshop Basics - Review of All Tools
Photoshop Basics - Review of All Tools
 
217 quick guide to photoshop cs6
217 quick guide to photoshop cs6217 quick guide to photoshop cs6
217 quick guide to photoshop cs6
 
White blood cells medical images for power point
White blood cells  medical images for power pointWhite blood cells  medical images for power point
White blood cells medical images for power point
 
Writing de materials11
Writing de materials11Writing de materials11
Writing de materials11
 
Photoshop intro to basics
Photoshop intro to basicsPhotoshop intro to basics
Photoshop intro to basics
 
Formatting in MS Excel
Formatting in MS ExcelFormatting in MS Excel
Formatting in MS Excel
 
Photoshop Tutorial Booklet
Photoshop Tutorial BookletPhotoshop Tutorial Booklet
Photoshop Tutorial Booklet
 
photoshopbasics.pdf
photoshopbasics.pdfphotoshopbasics.pdf
photoshopbasics.pdf
 
Microsoft Paint
Microsoft PaintMicrosoft Paint
Microsoft Paint
 

Monochromizer (TM) Quick Start Guide

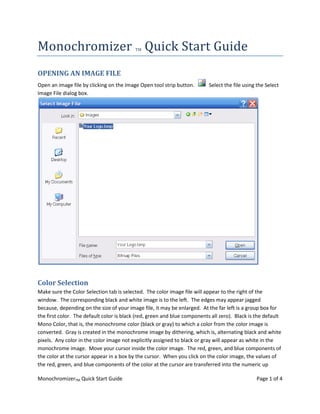
  • 1. Monochromizer TM Quick Start Guide<br />OPENING AN IMAGE FILE<br />Open an image file by clicking on the Image Open tool strip button. Select the file using the Select Image File dialog box.<br />Color Selection<br />Make sure the Color Selection tab is selected. The color image file will appear to the right of the window. The corresponding black and white image is to the left. The edges may appear jagged because, depending on the size of your image file, it may be enlarged. At the far left is a group box for the first color. The default color is black (red, green and blue components all zero). Black is the default Mono Color, that is, the monochrome color (black or gray) to which a color from the color image is converted. Gray is created in the monochrome image by dithering, which is, alternating black and white pixels. Any color in the color image not explicitly assigned to black or gray will appear as white in the monochrome image. Move your cursor inside the color image. The red, green, and blue components of the color at the cursor appear in a box by the cursor. When you click on the color image, the values of the red, green, and blue components of the color at the cursor are transferred into the numeric up down controls in the selected (or only) color group box. <br />Adjust the Tolerance numeric up down to make other colors from the color image that are close to the selected color the same Mono Color. The maximum tolerance value is 128. The tolerance value is applied to red, blue, and green. <br />Click on the Add Color Tool strip button to add another color from the color image. <br />Select the desired Mono Color, select the color from the color image, and adjust the tolerance as before.<br />Image Alignment<br />Select the Image Alignment tab. The monochrome image is shown to the right. The border around the image shows the selected display size and allows you to select the alignment of the image on the display. The display size for the target device can be entered in the text boxes in the upper left. A page holds 8 vertical pixels. When the first image file is opened, the values for the display size are set to the minimum needed to contain the monochrome image. The values for the display size must be large enough to accommodate the image file. After entering the values, click the Update Display Size button. <br />If the target display height in pages is more than needed for the monochrome image, the Vertical Alignment group box is enabled and you may use its controls to adjust the vertical position of the monochrome image on the target display. If the Custom radio button is selected, the Pixels Above numeric up down is enabled and may be used to specify the vertical position on the target display.<br />If the target display width in pixels is more than needed for the monochrome image, the Horizontal Alignment group box is enabled and you may use its controls to adjust the horizontal position of the monochrome image on the target display.<br />Create Output File<br />To create your output file with a C array of your display bit pattern data, click on the MonochromizerTM tool strip button. The Select Monochromizer Output File dialog box appears. Select the folder where the file goes and type in the desired file name. This will typically be a C or C++ file. Click the Save button. Edit the file to replace the comment with the desired array variable name. You may use the file directly in your embedded project or copy and paste the contents of the file into another file.<br />const unsigned char /* Enter array name here */ = { 0x00, 0x00, 0x00, 0x00, 0x00, 0x00, 0x00, 0x00, 0x00, 0x00, 0x00, 0x00, 0x00, 0x00, 0x00, 0x00, 0x00, 0x00, 0x00, 0x00, 0x00, 0x00, 0x00, 0x00, 0x00, 0x00, 0x00, 0x00, 0x00, 0x00, 0x00, 0x00, 0x00, 0x00, 0x00, 0x00, 0x00, 0x00, 0x00, 0x00, 0x00, 0x00, 0x00, 0x00, 0x00, 0x00, 0x00, 0x00, 0x00, 0x00, 0x00, 0x00, 0x00, 0x00, 0x00, 0x80, 0x40, 0xA8, 0x54, 0xAA, 0x55, 0xAA, 0x54, 0xA0, 0x00, 0x00, 0x00, 0x00, 0x00, 0x00, 0x00, 0x00, 0x00, 0x00, 0x00, 0x00, 0x00, 0x00, 0x00, 0x00, 0x00, 0x00, 0x00, 0x00, 0x00, 0x00, 0x00, 0x00, 0x00, 0x00, 0x00, 0x00, 0x00, 0x00, 0x00, 0x00, 0x00, 0x00, 0x00, 0x00, 0x00, 0x00, 0x00, 0x00, 0x00, 0x00, 0x00, 0x00, 0x00, 0x00, 0x00, 0x00, 0x00, 0x00, 0x00, 0x00, 0x00, 0x00, 0x00, 0x00, 0x00, 0x00, 0x00, 0x00, 0x00, 0x00, 0x00, 0x00, 0x00, 0x00, 0x00, 0x00, 0x00, 0x00, 0x00, 0x00, 0x00, 0x00, 0x00, 0x00, 0x00, 0x00, 0x00, 0x00, 0x00, 0x00, 0x00, 0x00, 0x00, 0x00, 0x00, 0x00, 0x00, 0x00, 0x00, 0x00, 0x00, 0x00, 0x00, 0x00, 0x00, 0x00, 0x00, 0x00, 0x00, 0x00, 0x00, 0x00, 0x00, 0x00, 0x00, 0x00, 0x00, 0xA0, 0x54, 0xAA, 0x55, 0xAA, 0x55, 0xAA, 0x55, 0xAA, 0x55, 0xAA, 0x55, 0xAA, 0x50, 0x80, 0x00, 0x00, 0x00, 0x00, 0x00, 0x00, 0x00, 0x00, 0x00, 0x00, 0x00, 0x00, 0x00, 0x00, 0x00, 0x00, 0x00, 0x00, 0x00, 0x00, 0x00, 0x00, 0x00, 0x00, 0x00, 0x00, 0x00, 0x00, 0x00, 0x00, 0x00, 0x00, 0x00, 0x00, 0x00, 0x00, 0x00, 0x00, 0x00, 0x00, 0x00, 0x00, 0x00, 0x00, 0x00, 0x00, 0x00, 0x00, 0x00, 0x00, 0x00, 0x00, 0x00, 0x00, 0x00, 0x00, 0x00, 0x00, 0x00, 0x00, 0x00, 0x00, 0x00, 0x00, 0x00, 0x00, 0x00, 0x00, 0x00, 0x00, 0x00, 0x00, 0x00, 0x00, 0x00, 0x80, 0x00, 0x80, 0x00, 0x80, 0x00, 0x80, 0x40, 0x80, 0x40, 0x80, 0x40, 0x80, 0x40, 0x80, 0x40, 0x80, 0x40, 0x80, 0x40, 0x80, 0x40, 0x80, 0x40, 0x80, 0x40, 0x80, 0x50, 0xAA, 0x55, 0xAA, 0x55, 0xAA, 0x55, 0xAA, 0x55, 0xAA, 0x55, 0xAA, 0x55, 0xAA, 0x55, 0xAA, 0x55, 0xAA, 0x54, 0xA0, 0x40, 0x80, 0x40, 0x80, 0x40, 0x80, 0x40, 0x80, 0x40, 0x80, 0x40, 0x80, 0x40, 0x80, 0x40, 0x80, 0x40, 0x80, 0x40, 0x80, 0x00, 0x80, 0x00, 0x80, 0x00, 0x80, 0x00, 0x80, 0x00, 0x00, 0x00, 0x00, 0x00, 0x00, 0x00, 0x00, 0x00, 0x00, 0x00, 0x00, 0x00, 0x00, 0x00, 0x00, 0x00, 0x00, 0x00, 0x00, 0x00, 0x00,<br />