Catalog EAW Scope Mounts | Optics Trade | 2014
•
2 j'aime•4,924 vues

Catalog EAW | Optics Trade | 2014 http://www.optics-trade.eu/shop/en/shopby/manufacturer-eaw.html

Recommandé
Contenu connexe
Tendances
Tendances (19)
En vedette
En vedette (20)
Similaire à Catalog EAW Scope Mounts | Optics Trade | 2014
Similaire à Catalog EAW Scope Mounts | Optics Trade | 2014 (20)
Plus de Optics-Trade
Plus de Optics-Trade (20)
Catalog EAW Scope Mounts | Optics Trade | 2014
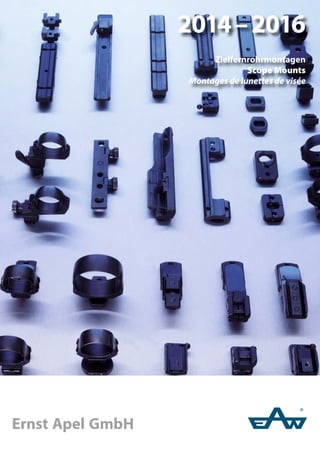
- 1. 2014–2016 Zielfernrohrmontagen Scope Mounts Montages de lunettes de visée ®
- 2. 2 Allgemeines General Idéesgénérales Herausgeber/editor/éditeur Ernst Apel GmbH Am Kirschberg 3 • 97218 Gerbrunn Deutschland/Germany/Allemagne Tel. +49(0)931.707191 +49(0)931.705620 Fax +49(0)931.707192 E-Mail info@eaw.de Web http://www.eaw.de Gedruckt in Deutschland. Alle Abbildungen und An- gaben sind ohne Gewähr. Änderungen sowie alle Rechte vorbehalten. Die Vervielfältigung oder Re- produktion des Kataloges oder von Auszügen daraus ist ohne schriftliche Genehmigung der ERNST APEL GmbH nicht gestattet. Printed in Germany. Illustrations and specifications are without engagement and subject to change. All rights reserved. Reproduction of this catalogue or any portion of its contents is not allowed with- out the specific written consent of ERNST APEL GmbH. Imprimé en Allemagne. Toutes les illustrations et don- nées techniques dans ce catalogue sont fournies sans engagement de notre part et sous réserve de modifi- cation. Tous droits réservés. Reproduction, même par extraits, soumise à l’autorisation préalable de la part de la société ERNST APEL GmbH.
- 3. 3 Allgemeines General Idéesgénérales EAW ist seit 90 Jahren an einem interessiert: am Kunden. Daher stehen kundenorientierte Beratung und bester Service bei uns im Vordergrund. Und daher haben wir den Anspruch, zum einen höchste Präzision und Qualität in der technischen Umsetzung zu realisieren und zum anderen unsere durchdachte Produktpalette ständig durch Weiter- und Neuentwicklung zu verbessern. Innovation, das Beschreiten neuer Wege, ist deshalb seit jeher Triebfeder bei EAW und elementarer Bestandteil der Firmenphilosophie. Das beste Beispiel hierfür sind die große Zahl von GebrauchsmusternundPatentenimIn-und Ausland, die im EAW-Montagenprogramm Eingang gefunden haben. For more than 90 years EAW’s main interest have been the customers. The customer-orientated advisory service and after-sales service are given priority. And for this reason we are eager to not only put highest precision and quality into the technical realization of our mounts, but to also continuously improve our well-engineered mount programme by further developing our products and introducing new ones. Innovation, which means following new paths, therefore has always motivated EAW and has been an essential factor in the company’s philosophy. The best exampleisthegreatnumberofproducts patented in Germany and abroad and the products with registered design which are included in the EAW mount programme. Depuis plus de 90 ans, l‘intérêt principal d‘EAW est dirigé vers le client. C‘est la raison pour laquelle la consultation des clients et le meilleur service sont mis au premier plan. Et voilà pourquoi nous nous mettons en devoir non seulement de réaliser la fabrication de nos montages de meilleure qualité avec la plus haute précision, mais aussi d‘améliorer continuellement notre gamme de produits bien réfléchie par le perfectionnement des produits existants et le développement de nouveautés. Pour cette raison, l‘innovation, c‘est-à-dire suivre de nouveaux chemins, a toujours été le mobile d‘EAW dès le début, c‘est un élément important de sa philosophie. Les exemples les plus convaincants en sont nombre de produits brevetés et modèles déposés en Allemagne et à l‘étranger. Das Beste für Sie The Best for You Le meilleur pour vous
- 4. 4 Allgemeines General Idéesgénérales Allgemeines Das Beste für Sie 3 Überblick Komplettmontagen, waffenspezifische Einzelteile, Waffenkennziffern 10 Wofür wir stehen 14 Schwenkmontagen Die EAW-Schwenkmontage ist für alle gängigen Repetierbüchsen erhältlich. Das Zielfernrohr lässt sich problemlos beliebig oft auf- und abnehmen, ohne dass sich die Trefferlage verändert – auch bei Verwendung eines Zweitglases. Sie ist im Allgemeinen einfach zu montieren und ermöglicht eine spannungsfreie Lagerung des Zielfernrohres. Nach Einschwenken des Glases rastet der Verschluss der Montage automatisch ein. Für besonders starke Kaliber in Verbindung mit sehr schweren Gläsern ist die XS-Ausführung zu empfehlen. Ideal für Kipplaufwaffen bzw. mehrläufige Gewehre ist die Hebelschwenkmontage. Dank ihrer niedrigen Bauhöhe fügt sie sich unauffällig in die Waffe ein. Nach dem Abnehmen des Zielfernrohres ist Zielen über Kimme und Korn problemlos möglich. Der Verschlußhebel wird nach dem Einschwenken des Glases manuell umgelegt, wobei die Verschlußsicherung automatisch einrastet. Passende Modelle sind für Waffen mit integrierter Prismen-Schiene, Blindplatten oder voller Schiene erhältlich. Neu ist ein stufenlos einstellbarer Hebel. Allgemeines 16 Besonderheiten bei Hebelschwenkmontagen 17 Montageanleitung für Schwenkmontagen mit Ringen 18 Montageanleitung für Schwenkmontagen – für Zielfernrohre mit Montageschiene 20 EAW-Baukastensystem 26 Wann passt welche Schwenkmontage? 27 Komplette Schwenkmontagen Schwenkmontagen mit Ringen Ø 1“/26 mm 28 Schwenkmontagen mit Ringen Ø 30 mm 36 Schwenkmontagen mit Ringen Ø 34 mm 44 Schwenkmontagen mit Ringen Ø 36 mm 48 Schwenkmontagen für Zielfernrohre mit Schiene 52 Hebelschwenkmontage (komplett) 60 Einteilige Montage, ohne Gelenk 62 Einteilige Schwenkmontage, mit Gelenk 66 Einzelteile Vorderplatten für Kipplaufwaffen 67 Vorderplatten für Repetierer 68 Schlösschen und Hinterplatten für Repetierer 71 Hinterplatten für Hebelschwenkmontagen für mehrläufige Waffen 74 Vorderfüße mit Ring 75 Vorderfüße mit Ring, ohne Gelenk 77 Vorderfüße für Zielfernrohre mit Schiene 78 Hinterfüße mit Ring 80 Hinterfüße für Zielfernrohre mit Schiene 81 Hinterfuß-Oberteile 82 Hinterfuß-Unterteile 84 Aufschub- und Aufkippmontagen Speziell geeignet für LG und KK-Büchsen, aber auch für alle Jagdwaffen mit integrierten zylindrischen oder konischen Montagenprismen, sowie mit Prismenplatten für die gängigsten Repetierer. Auch bei dieser Modellreihe ist das Abnehmen und Wiederaufsetzen des Zielfenrohres problemlos möglich. Diese kostengünstige Montage wird selbstverständlich mit derselben Präzision gefertig wie das Spitzenmodell, die Schwenkmontage. Ein- und zweiteilige Ausführungen erhältlich. Allgemeines 86 Montageanleitung für einteilige Aufschub- und Aufkippmontagen 87 Montageanleitung für zweiteilige Aufschub- und Aufkippmontagen 88 Übersicht 90 Komplettmontagen Sportflex-Montage 91 Aufkippmontagen mit Ringen, für 11 mm-Prisma 92 Aufkippmontagen für Zielfernrohre mit Schiene, für 11 mm-Prisma 93 Inhalt Index Table des matières
- 5. 5 Allgemeines General Idéesgénérales Aufschubmontagen für KK und Luftgewehre 94 Aufkippmontagen und Anschlagblocks 95 Aufkippmontagen für BRNO-Repetierer 96 Einteilige Aufschubmontagen für 14,5 mm-Prismen 97 Einteilige Aufschubmontagen 98 Aufschubmontagen für Sako 99 Aufkippmontagen ohne Fußplatten 100 Aufkippmontage für Weaver/Picatinny-Prisma mit einstellbaren Hebeln 104 Seitliche Aufschubmontagen 105 Aufkippmontagen mit Fußplatten, mit Ringen Ø 1“/26 mm 106 Aufkippmontagen mit Fußplatten, mit Ringen Ø 30 mm 110 Aufkippmontagen mit Fußplatten, mit Ringen Ø 34 mm 114 Aufkippmontagen mit Fußplatten, für Zielfernrohre mit Schiene 118 Montagen für Blaser 130 Einzelteile Anschlagblocks 95 Sockelpaare mit Anschlag 122 Schienen mit 11 mm-Prisma und Anschlag 123 Schienen mit 21 mm-Weaver-Prisma 124 Schienen mit Picatinny-Taktung 127 Unterteile für Aufkippmontagen 128 Formringe und Prismen-Oberteile zum Austauschen 129 Montagen für Blaser Repetierer (Einzelteile) 131 Einhakmontagen Liebhaber traditioneller Waffen bevorzugen häufig diesen klassischen Montagetyp. Von einem erfahrenen Büchsenmacher montiert, besitzt die Einhakmontage eine sehr gute Trefferlage und Wiederholgenauigkeit. Der Verschluß rastet automatisch ein. Meistens kann kein Zweitglas verwendet werden. Allgemeines 134 Umrüsten auf eine EAW-Hebelschwenkmontage 134 Einzelteile Schieneneinsätze, Laufsockel und Laufringe zum Löten 136 Vorderplatten und Schlösschen 137 Vorderfüße mit Ring und Durchsicht 138 Vorderfüße mit Ring ohne Durchsicht 138 Vorderfüße für Zielfernrohre mit Schiene 139 Hinterfüße mit Ring und Durchsicht 140 Hinterfüße für Zielfernrohre mit Schiene, mit Durchsicht 141 Hinterfuß-Oberteile 82 Hinterfüße für Steyr Mannlicher Schönauer GK 142 Einteilige Einhakmontagen (Einzelteile) 63 Einzelteile, Spezialteile und Werkzeuge Adapter für Rotpunkt-Visierungen 144 Ersatzteile für (Hebel-)Schwenkmontagen 145 Ersatzteile für Aufkipp- und Aufschubmontagen 146 Ersatzteile für Einhakmontagen 147 Schrauben 148 Werkzeuge 149 Abkürzungen 151
- 6. 6 Allgemeines General Idéesgénérales General The Best for You 3 Overview: Complete Mounts, Special Single Parts, Reference Numbers of Rifles 10 What We Stand for 14 Pivot Mounts The EAW pivot mounts are available for all common bolt action rifles. Various adjustment possibilities guarantee a tension-free fit of the scope, which makes it possible to mount and dismount the scope – or a second scope – as often as you like without any change in zero. The lock snaps in automatically. The XS version is recommendable for heavy calibres when used with heavy scopes. The EAW pivot mount with lever is optimal for break-open rifles and multiple-barrel guns. Due to its low height, it blends perfectly with the rifle. When the scope has been removed, it is possible to use the open sights without any problems. The locking lever is put down manually. Models suited for rifles with integrated rail, blind plates, and solid rail are available. For an easier mounting, the new version is equipped with a steplessly adjustable lever. General Information 16 Special Features of Pivot Mounts with Lever 17 Mounting Instructions for Pivot Mounts with Rings 18 Mounting Instructions for Pivot Mounts – for Scopes with Mounting Rail 22 EAW Building Block System 26 Which Pivot Mount to Use? 27 Complete Pivot Mounts Pivot Mounts with Rings Ø 1“/26 mm 28 Pivot Mounts with Rings Ø 30 mm 36 Pivot Mounts with Rings Ø 34 mm 44 Pivot Mounts with Rings Ø 36 mm 48 Pivot Mounts for Scopes with Rail 52 Pivot Mounts with Lever (Complete) 60 One-piece Mount, without Joint 62 One-piece Pivot Mount, with Joint 66 Single Parts Front Plates for Break-open Rifles 67 Front Bases for Bolt Action Rifles 68 Rear Bases and Plates for Bolt Action Rifles 71 Rear Plates for Pivot Mounts with Lever for Multi-barreled Arms 74 Front Feet with Ring 75 Front Feet with Ring, without Joint 77 Front Feet for Scopes with Rail 78 Rear Feet with Ring 80 Rear Feet for Scopes with Rail 81 Rear Foot Tops 82 Rear Foot Sub-bases 84 Slide-on and Roll-off Mounts The ideal solution for small calibre rifles and airguns, but also for all hunting guns with integrated dovetail. The scope can easily be removed and put on again. These inexpensive mounts are of course manufactured with the same precision as the top model – the pivot mounts. Available are one-piece or two-piece types. General Information 86 Mounting Instructions for 1-piece Slide-on and Roll-off Mounts 87 Mounting Instructions for 2-piece Slide-on and Roll-off Mounts 88 Table 90 Complete Mounts The Sportflex Mount 91 Roll-off Mounts with Rings, for 11 mm Dovetail 92 Roll-off Mounts for Scopes with Rail, for 11 mm Dovetail 93 Slide-on Mounts for Small Calibre Rifles and Airguns 94 Roll-off Mounts and Stop Blocks 95 Roll-off Mounts for BRNO Bolt Action Rifles 96 One-piece Slide-on Mounts, for 14.5 mm Dovetail 97 One-piece Slide-on Mounts 98 Inhalt Index Table des matières
- 7. 7 Allgemeines General Idéesgénérales Slide-on Mounts for Sako 99 Roll-off Mounts without Foot Plates 100 Roll-off Mount for Weaver/Picatinny Rails, with Adjustable Levers 104 Lateral Slide-on Mounts 105 Roll-off Mounts with Foot Plates, with Rings Ø 1“/26 mm 106 Roll-off Mounts with Foot Plates, with Rings Ø 30 mm 110 Roll-off Mounts with Foot Plates, with Rings Ø 34 mm 114 Roll-off Mounts with Foot Plates, for Scopes with Rail 118 Mounts for Blaser 130 Single Parts Stop Blocks 95 Pairs of Sockets with Recoil Stop 122 Rails with 11 mm Dovetail and Recoil Stop 123 Weaver Rails (21 mm) 124 Picatinny Rails (21 mm) 127 Sub-bases for Roll-off Mounts 128 Form Rings and Tops for Scopes with Rail, Interchangeable 129 Mounts for Blaser (Single Parts) 131 Claw Mounts Collectors of traditional weapons often prefer this classical type of mount. If the claw mount is fitted by an experienced gunsmith, it guarantees a constant point of impact and optimal repeatability of zero. The lock snaps in automatically. In most cases a second scope cannot be used. General Information 134 Conversion into an EAW Pivot Mount with Lever 134 Single Parts Rib Inserts, Barrel Sockets and Barrel Rings to Solder on136 Front Bases and Rear Bases 137 Front Feet with Ring, with Open Sight 138 Front Feet with Ring, without Open Sight 138 Front Feet for Scopes with Rail 139 Rear Feet with Ring, with Open Sight 140 Rear Feet for Scopes with Rail, with Open Sight 141 Rear Foot Tops 82 Rear Feet for Steyr Mannlicher Schönauer GK 142 One-piece Claw Mounts (Single Parts) 63 Special Parts, Spare Parts, and Tools Adapters for Red Dot Sights 144 Spare Parts for Pivot Mounts (with Lever) 145 Spare Parts for Roll-off and Slide-on Mounts 146 Spare Parts for Claw Mounts 147 Screws 148 Tools 149 Abbreviations 151
- 8. 8 Allgemeines General Idéesgénérales Idées générales Le meilleur pour vous 3 Aperçu: Montages complets et pièces détachées particulières, numéros correspondant aux armes 10 14 Montages pivotants Le montage pivotant EAW est disponible pour toutes les carabines à répétition usuelles et se monte facilement. Les possibilités d‘ajustage variées permettent de placer la lunette sans aucune tension, de sorte que celle-ci – ou une lunette secondaire – peut être montée et démontée autant de fois que l‘on veut, et ceci sans changement de l‘impact. Le verrouillage se fait automatiquement. La version XS est recommandée en cas d‘un calibre puissant en combinaison avec une lunette lourde. Le montage pivotant à levier EAW est idéal pour des carabines à canon basculant ou à plusieurs canons. Grâce à sa faible hauteur, il s‘insère le plus discrètement possible sur la carabine. Après l‘enlèvement de la lunette, la visée par hausse et guidon est possible. Le levier de verrouillage est actionné manuellement. Il y en a des modèles appropriés aux carabines avec rail intégré, embases aveugles ou rail solide. La nouvelle version est équipée d‘un levier à réglage continu pour une installation plus facile. Idées générales 16 Montages pivotants à levier: particularités 17 Instructions de montage pour montages pivotants, à colliers 18 Instructions de montage pour montages pivotants, pour lunettes avec rail de montage 24 Montages pivotants EAW – un système modulaire 26 Quel montage pivotant choisir? 27 Montages pivotants complets Montages pivotants, à colliers Ø 1“/26 mm 28 Montages pivotants, à colliers Ø 30 mm 36 Montages pivotants, à colliers Ø 34 mm 44 Montages pivotants, à colliers Ø 36 mm 48 Montages pivotants pour lunettes de visée avec rail 52 Montages pivotants à levier (complets) 60 Montage pivotant en une pièce, sans jointure 62 Montage pivotant en une pièce, avec jointure 64 Pièces détachées Embases avant pour carabines à canon basculant 67 Embases avant pour carabines à répétition 68 Serrures et embases-socles arrière pour carabines à répétition 71 Embases-socles arrière pour montages pivotants à levier, pour armes à plusieurs canons 74 Pieds avant à collier 75 Pieds avant à collier, sans jointure 77 Pieds avant pour lunettes de visée avec rail 78 Pieds arrière à collier 80 Pieds arrière pour lunettes de visée avec rail 81 Parties supérieures de pied arrière 82 Parties inférieures de pied arrière 84 Montages à glissière et montages basculants Ces modèles bon marché sont appropriés surtout aux armes de petits calibres ou aux fusils à air comprimé, mais aussi à toutes les armes de chasse usuelles avec rail intégré ou embases-socles. L’enlèvement de la lunette est très facile. Ce type de montage est fabriqué avec la même précision que le montage pivotant. Disponibles sont des montages en une pièce ou en deux pièces. Idées générales 86 Instructions de montage pour montages basculants en une pièce 87 Instructions de montages pour montages basculants en deux pièces 88 Tableau 90 Montages complets Le montage Sportflex 91 Montages basculants à colliers, pour queue d‘aronde de 11 mm 86 Montages basculants pour lunettes avec rail, pour queue d‘aronde de 11 mm 93 Montages à glissière pour armes de petit calibre et fusils à air comprimé 94 Montages basculants et cales 95 Montages basculants pour carabines à répétition BRNO 96 Inhalt Index Table des matières
- 9. 9 Allgemeines General Idéesgénérales Montages à glissière en une pièce, pour queue d‘aronde de 14,5 mm 97 Montages à glissière en une pièce 98 Montages à glissière pour Sako 99 Montages basculants sans embases-socles 100 Montage basculant pour rails Weaver/Picatinny, avec leviers ajustables 104 Montages latéraux à glissière 105 Montages basculants avec embases-socles, à colliers Ø 26 mm 106 Montages basculants avec embases-socles, à colliers Ø 30 mm 110 Montages basculants avec embases-socles, à colliers Ø 34 mm 114 Montages basculants avec embases-socles, pour lunettes de visée avec rail 118 Montages pour Blaser 130 Pièces detachées Cales 95 Paires de socles avec arrêt de recul 122 Rails à queue d‘aronde de 11 mm avec arrêt de recul 123 Rails Weaver (21 mm) 124 Rails Picatinny (21 mm) 127 Parties inférieures pour montages basculants 128 Colliers profilés et parties supérieures interchangeables 129 Montages pour Blaser (pièces détachées) 131 Montages à crochets Les amateurs de carabines traditionnelles préfèrent souvent ce type de montage classique. Si monté par un armurier expert, ce montage présente une précision au tir excellente et constante. Le verrouillage se fait de façon automatique. Dans la plupart des cas, une lunette secondaire ne peut pas être utilisée. Idées générales 134 Conversion en montage pivotant à levier EAW 134 Pièces detachées Socles et socles annulaires à souder 136 Embases avant et serrures 137 Pieds avant à collier, avec tunnel de visée 138 Pieds avant à collier, sans tunnel de visée 138 Pieds avant pour lunettes de visée avec rail 139 Pieds arrière à collier, avec tunnel de visée 140 Pieds arrière pour lunettes de visée avec rail, avec tunnel de visée 141 Parties supérieures de pieds arrière 82 Pieds arrière pour Steyr Mannlicher Schönauer GK 142 Montages à crochets en 1 pièce (pièces détachées) 63 Pièces spéciales, pièces de rechange et outils Adaptateurs pour points rouges 144 Pièces de rechange pour montages pivotants (à levier) 145 Pièces de rechange pour montages basculants/à glissière 146 Pièces de rechange pour montages à crochets 147 Vis 148 Outils 148 Abréviations 151
- 10. e s c #Seite/page/page Seite/page/page Seite/page/page 1“/2630 34 36 Pr. 1“/26 30 34 Pr. 11mm-Waffenprisma/11mm dovetail/queue d’aronde de 11mm - 92 - 95 84, 124, 126 000 12mm-Waffenprisma/12mm dovetail/queue d’aronde de 12mm - 68, 128 148 14,5 mm-Waffenprisma/14.5 mm dovetail/queue d’aronde de 14,5 mm - 100 - 103 84, 124, 126, 144 056 16mm-Waffenprisma/16mm dovetail/queue d’aronde de16mm - 100 - 103 84 21 mm-Waffenprisma/21 mm dovetail/queue d’aronde de 21 mm (Weaver/Picatinny) - 95, 100 - 104 128, 144 800 Alle KK mit 11 mm-Prisma, mit metrischen Schrauben/all small calibre rifles with 11 mm dovetail, screws having metric thread/ toute arme de petit calibre à queue d’aronde de 11 mm, avec vis à filetage métrique 28 36 44 48 52 68, 71 001 Anschütz KK u.a. mit 11 mm-Pr., mit zolligen Schrauben/An- schütz KK and others with 11mm dovetail, screws having inch thread/KK Anschütz et autres à queue d’aronde de 11mm, avec vis à filetage au pouce 28 36 44 48 52 91 68, 71, 137, 146 026 Anschütz Luftgewehr/airgun/fusil à air comprimé - 94 95 050 1780 28 36 44 48 52 68, 71, 124 222 1727 F 28 26 44 48 52 68, 71 228 A Square Repetierer/bolt action rifle/répét. 416 Rigby 28 36 44 48 52 68, 71 158 Beeman 95 054 Benelli Argo, Argo Special 28 36 44 48 52 66 106 110 114 118 68, 71, 124, 127 272 M 1, M 3 124 172 Beretta Silver Sable II 60 68, 71 147 Bettinsoli Express BDB/over/under shotgun/fusil superposé 67 213 Blaser R 93 130 130, 131, 144 152 R8 130 130, 131, 144 352 BBF A 046 BRNO ZKM, Fox, CZ 527, Hornet Prisma 16,5 mm 28 36 44 48 52 94, 95, 100 -103 68, 71, 144 041 ZKK, 600, 601, 602, CZ 550, CZ 537, Repetierer mit Prisma/bolt action rifle/répét. 19 mm 60 94, 96 68, 84, 144 047 BBF, ZH, 500, Super, Tatra, ZK 99, ZPK 10 97 124, 126, 137 042 Browning BAR I, BAR II, CBL, Acera, Long/Short Trac 28 36 44 48 52 62 106 110 114 118 68,71,107,122-124,127 137 003 BLR, CLR 81, Lightning 28 36 44 48 52 106 110 114 118 68,71,107,122-124,127 103 BAR Longtrac Linkssystem/left-handed version/ version gaucher 28 36 44 48 52 68, 71, 122 - 124 203 Browning Mauser Sniper 28 36 44 48 52 106 110 114 118 68, 71, 107, 137 004 A-bolt, Eurobolt, Utah, Takedown 28 36 44 48 52 66 106 110 114 118 68, 71, 107, 122, 124 002 A-bolt Mountain, WSSM 28 36 44 48 52 68, 71 167 A-bolt cal .222, 223, KK 28 36 44 48 52 68, 71, 124 196 T-bolt 28 36 44 48 52 68, 71, 124 221 X-bolt, E = 73,73 mm 62 68, 71, 124, 120 212 X-bolt, E = 93,84 mm 62 68, 71, 124, 127 312 X-bolt, E = 71,73 mm 62 68, 71, 124 412 European 28 36 44 48 52 106 110 114 118 68, 71, 107, 122, 137 143 Erice 97 124, 126 242 Carl Gustaf 1900, 1896, ohne Wulst/without bulb/sans œilleton 28 36 44 48 52 106 110 114 118 68,71,105,107,122,124 005 1900, 1896, mit Wulst/with bulb/avec œilleton 28 36 44 48 52 106 110 114 118 68, 71, 107, 122-124 105 2000 28 36 44 48 52 106 110 114 118 68, 71, 107, 124, 127 194 3000 28 36 44 48 52 106 110 114 118 68, 71, 124 215 4000 28 36 44 48 52 106 110 114 118 68, 71, 124 259 Chapuis Gévaudan 2000 28 36 44 48 52 106 110 114 118 68, 71, 107 250 Express 60 67, 71, 137 150 Churchill Highlander 28 36 44 48 52 68, 71 123 Contender 123 100 CZ siehe/see/voir BRNO Diana Luftgewehr/airgun/fusil à air comprimé 95 051 Enfield No. 4 Mark 2 104 230 Erma M 1 104 035 Fabarm Iris 28 36 44 48 52 67, 71, 127 220 Fair Express 67, 71 182 e Schwenkmontagen/pivot mounts/montages pivotants s Aufschub-/Aufkippmontagen/slide-on and roll-off mounts/montages à glissière et montages basculants c Waffenspezifische Einzelteile/single parts/pièces détachées # Waffenkennziffer/reference Nos. of rifles/numéros correspond. aux armes A Hebelschwenkmontagen aus Einzelteilen/pivot mounts with lever assembled from single parts/montages pivotants à levier en pièces détachées KK: Kleinkaliberwaffen/small calibre rifles/armes de petit calibre BBF: Bockbüchsflinten/mixed barrel guns/fusils mixtes superposés BDB: Bockdoppelbüchsen/over/under rifles/carabines superposées 10 Allgemeines General Idéesgénérales Überblick: Komplettmontagen, waffenspezifische Einzelteile, Overview: Complete Mounts, Special Single Parts, Reference Aperçu: Montages complets et pièces détachées particulières,
- 11. e s c #Seite/page/page Seite/page/page Seite/page/page 1“/2630 34 36 Pr. 1“/26 30 34 Pr. Feinwerkbau Luftgewehr/airgun/fusil à air comprimé 91 055 Fias Churchill 28 36 44 48 52 68, 71 112 Grünig & Elmiger Repetierer/bolt action rifle/répét. 28 36 44 48 52 106 110 114 118 68, 71, 107, 122 089 Haenel Jaeger 10 28 36 44 48 52 68, 71, 127 225 Heckler & Koch SL 7 und andere/and others/et autres 28 36 44 48 52 60 68, 71 087 SLB 2000 28 36 44 48 52 68, 71, 120, 122, 127 187 KK 123 102 Heym SR 20 28 36 44 48 52 106 110 114 118 68, 71 107, 122, 137 060 SR 21 mit Bohrungen auf Hülsenbrücke/ with bore holes in the rear of the receiver/ avec alésages à l‘arrière de boîte de culasse 28 36 44 48 52 106 110 114 118 68,71,107,122,124, 126, 127 306 SR 30 mit Bohrungen auf Hülsenbrücke/ with bore holes in the rear of the receiver/ avec alésages à l‘arrière de boîte de culasse 28 36 44 48 52 106 110 114 118 68,71,107,122,124, 127, 137 206 SR 21/30 mit Prisma auf Hülsenbrücke/ with dovetail in the rear of the receiver/ à queue d‘aronde à l‘arrière de boîte de culasse 60 68 406 SR 40 28 36 44 48 52 106 110 114 118 68, 71, 107 108 B 26 98 190 Express 28 36 44 48 52 68, 71 120 Express Repetierer/bolt action rifle/répét. 28 36 44 48 52 320 BBF 22 S 2 A 98 67 157 HOWA 1500 S 28 36 44 48 52 68, 71, 124 218 Kettner Repetierer/bolt action rifle/répét. L 83 30 38 45 49 54 106 110 114 118 68, 71, 107, 122 149 BDB A 71 179 Kind Hubertus B M 113 Rep./bolt action rifle/répét. 30 38 45 49 54 68, 71 142 Kongsberg Repetierer/bolt action rifle/répét. 393 30 38 45 49 54 68, 71 239 Krico 700, 900, 902 Deluxe 30 38 45 49 54 106 110 114 118 68,71,107,122,124,127 006 300, 400 30 38 45 49 54 68, 71 066 600 30 38 45 49 54 106 110 114 118 68, 72, 107, 122 106 Krieghoff Drilling A 71, 138, 137 133 Semprio 30 38 45 49 54 68, 72, 127 191 Luger Repetierer/bolt action rifle/répét. 30 38 45 49 54 106 110 114 118 68, 72, 107 205 Mini 30 38 45 49 54 68, 72, 122 207 04 30 38 45 49 54 68, 72 173 Marlin 94, 336, 444 CL, Nr. 9, AS 30, 922, 45, 1895 30 38 45 49 54 106 110 114 118 68,72,107,123,124,127 036 455 30 38 45 49 54 106 110 114 118 69, 72, 107, 122 111 39 123 064 MR 7 30 38 45 49 54 106 110 114 118 69, 107 169 XLR, MXLR 30 38 45 49 54 68,72, 124 136 Marocchi 512 Finn Classic 98, 124 193 Mauser 2000, 3000 30 38 45 49 54 106 110 114 118 63, 72, 107 007 4000 30 38 45 49 54 106 110 114 118 69, 103 008 66 30 38 45 49 54 69, 72, 137 009 K 98 ohne Wulst/without bulb/sans œilleton 30 38 45 49 54 62 66 106 110 114 118 69, 72, 105, 107, 122, 124, 126, 127, 137 010 K 98 mit Wulst/with bulb/avec œilleton 30 38 45 49 54 62 106 110 114 118 69,72,105,107, 120-124, 127 110 M 98 30 38 45 49 54 106 110 114 118 69, 72, 107, 124, 137 098 77 30 38 45 49 54 69, 72, 124 063 226 Titan 30 38 45 49 54 69, 72 122 225 Titan 30 38 45 49 54 106 110 114 118 68, 72, 107 145 201 KK 30 38 45 49 54 69, 72 126 86 30 38 45 49 54 69, 72 129 M 94, 96 bis Seriennr./up to serial No./jusqu’au no de série 96011999 30 38 45 49 54 106 110 114 118 68,72,107,122,124,127 156 M 96 ab Seriennr./from serial No./à partir du no de série 960112000, M 97 30 38 45 49 54 106 110 114 118 68, 72, 107, 122 256 McMillan M 88 - hinterer Lochabstand/rear distance between bore holes/distance entre les alésages AR 21,9 mm 30 38 45 49 54 68, 72 144 11 Allgemeines General Idéesgénérales e, Waffenkennziffern e Numbers of Rifles , numéros correspondant aux armes
- 12. e s c #Seite/page/page Seite/page/page Seite/page/page 1“/2630 34 36 Pr. 1“/26 30 34 Pr. M 88 - hinterer Lochabstand/rear distance between bore holes/distance entre les alésages AR 15,4 mm 30 38 45 49 54 68, 72 146 Mercury 870 69, 72, 122, 124 204 Merkel SR 1 30 38 45 49 54 106 110 114 118 69, 72, 124, 125, 127 186 Mosin Nagant 105 054 Mossberg 100 ATR 30 38 45 49 54 69,72, 124 219 Musgrave M 83, 90, 94 30 38 45 49 54 106 110 114 118 69, 72, 107, 122 124 K 98 30 38 45 49 54 106 110 114 118 69, 72, 122 184 Parker Hale Safari 1200 30 38 45 49 54 106 110 114 118 69, 72, 107 011 Midland 30 38 45 49 54 69, 72 062 Remington 700, 78 32 40 46 50 56 66 108 112 116 120 69,72,107,122,126,127 012 710 32 40 46 50 56 108 112 116 120 69, 72, 124 710 730, 732, 760 32 40 46 50 56 108 112 116 120 69,72,107,122,124 013 600, 660, Mohawk 32 40 46 50 56 108 112 116 120 68, 72, 107, 124, 127 032 4/7300, 6/7600 32 40 46 50 56 66 108 112 116 120 69,72,107,122,124,127 073 Seven 32 40 46 50 56 108 112 116 120 68, 72, 107, 124 078 40-XB 32 40 46 50 56 108 112 116 120 69, 72 079 541 T 122 119 770 cal. .300 32 40 46 50 56 69, 72, 124 217 750 Woodmaster 32 40 46 50 56 69, 72, 124 211 XR 100 32 40 46 50 56 69, 72 188 Rizzini Express mit Schiene/with rib/avec bande de 10 mm 67, 72 181 Express mit Schiene/with rib/avec bande de 7 mm 67, 72 282 Rößler Titan 6 32 40 46 50 56 108 112 116 120 95 69,72,107,122,124,127 459 Titan 16 32 40 46 50 56 95 69, 72, 127, 127 356 Ruger 44 Magnum 32 40 46 50 56 69, 72 028 No.1 mit Laufschiene/with barrel rib/avec bande 32 40 46 50 56 92 69 071 M 77 Hülse mit Rundungen/round top/boîtier rond, Prisma/dovetail/queue d‘aronde de 12 mm 32 40 46 50 56 60 92 69 080 Mini 14 105 065 KK 10/22 123, 124, 127 095 RWS M 89 („Sicherheitsbüchse“) 32 40 46 50 56 108 112 116 120 68, 72, 107, 122 223 Sabatti Rover Repetierer/bolt action rifle/répét. 32 40 46 50 56 108 112 116 120 109 155 Sako 75 Vixen, L 461, S 491, A l 32 40 46 50 56 99 68, 72 114 75 Forester, Varmint, L 579, M 591, A II 32 40 46 50 56 62 99 69, 72 214 75 Finnbear, L 61 R, L691, M 995, A III/IV/V 32 40 46 50 56 98 69, 72 314 85 M 32 40 46 50 56 99 69, 107 414 TRG 21/41, 22/42 32 40 46 50 56 66 95, 100-104 69, 72, 125 238 A7 M, S 32 40 46 50 56 69, 72 232 SAN Swiss Arms SHR 970, bitte angeben: 4 o. 6 Bohrungen/pls indicate number of bore holes/indiquer nombre d‘alésages, s.v.p. 32 40 46 50 56 108 112 116 120 69,72,109,122,125,127 175 Santa Barbara Repetierer/bolt action rifle/répét. 32 40 46 50 56 108 112 116 120 69, 72, 109, 138 044 Sauer 80, 90, 92, SSG 2000 32 40 46 50 56 108 112 116 120 69, 72, 109, 127, 138 015 SR 200 32 40 46 50 56 66 108 112 116 120 69,63,109,122,125,138 059 202 Magnum 32 40 46 50 56 66 108 112 116 120 69, 72, 109, 122, 125-127 659 202 Medium 32 40 46 50 56 66 108 112 116 120 6972109125-127 759 STR 60 69, 97 959 Drilling 3000 A 67, 71, 138, 137 130 303 60 69, 72, 146 195 SSG 3000 97, 127 359 Savage 110, 112, 116 32 40 46 50 56 108 112 116 120 69 ,72, 109, 122, 125 016 110 Accu Trigger 32 40 46 50 56 122 164 24 V 123 101 BBF M 24 123 040 Mod. 10 127 231 Saxonia Sniper 32 40 46 50 56 69, 72 189 Schweizer Karabiner/Swiss Carbine/Carabine Suisse K 31 32 40 46 50 56 105 69, 73, 105, 129 072 Schultz & Larsen Mod. K 98 32 40 46 50 56 108 112 116 120 70, 73, 109 084 68 DL, M 100 32 40 46 50 56 108 112 116 120 70, 73, 109 099 97 DL 32 40 46 50 56 108 112 116 120 70, 73, 109, 125 199 e Schwenkmontagen/pivot mounts/montages pivotants s Aufschub-/Aufkippmontagen/slide-on and roll-off mounts/montages à glissière et montages basculants c Waffenspezifische Einzelteile/single parts/pièces détachées # Waffenkennziffer/reference Nos. of rifles/numéros correspond. aux armes A Hebelschwenkmontagen aus Einzelteilen/pivot mounts with lever assembled from single parts/montages pivotants à levier en pièces détachées KK: Kleinkaliberwaffen/small calibre rifles/armes de petit calibre BBF: Bockbüchsflinten/mixed barrel guns/fusils mixtes superposés BDB: Bockdoppelbüchsen/over/under rifles/carabines superposées 12 Allgemeines General Idéesgénérales Überblick: Komplettmontagen, waffenspezifische Einzelteile, Overview: Complete Mounts, Special Single Parts, Reference Aperçu: Montages complets et pièces détachées particulières,
- 13. e s c #Seite/page/page Seite/page/page Seite/page/page 1“/2630 34 36 Pr. 1“/26 30 34 Pr. Smith & Wesson 1500 32 40 46 50 56 108 112 116 120 70, 73, 109 091 Mod. 586 u.ähnl./and similar models/et similaires 123, 125 703 Steyr Mannlicher SL 32 40 46 50 56 108 112 116 120 70,73,109,122-125,127 017 Mannlicher S, Jagdmatch L/SL, SBS 96 32 40 46 50 56 108 112 116 120 70,73,109,122,125,127 018 Mannlicher Schönauer 71 32 40 46 50 56 70, 73 019 SSG, Sporter (Prisma/dovetail/queue d‘aronde de 18 mm) 32 40 46 50 56 100 70, 73 033 Mannlicher M, Luxus L, M, S 32 40 46 50 56 108 112 116 120 70,73,109,122,125,127 086 Mannlicher L 32 40 46 50 56 108 112 116 120 7073109122125 093 Mannlicher Schönauer GK 60 105 70,73,105,137,142,147 034 SBS 96 CSP L/M, Pro Hunter L/M 32 40 46 50 56 62 108 112 116 120 70, 73, 109, 122-125, 124, 127 202 SBS 96 CSP S Pro Hunter S 32 40 46 50 56 108 112 116 120 70, 73, 109 302 SBS 96 Export Classic Mannlicher SL 32 40 46 50 56 70, 73 402 Scout 32 40 46 50 56 60 70, 73 176 Suhler Drilling 70, 137 116 Thompson Center TCR 83 70, 123 113 22 Classic 34 42 47 51 58 70, 73, 123, 125 185 Tikka M 76, M/LS 65, M/LS 55 34 42 47 51 58 94,95,100-103 70, 73 038 BBF Prisma 12 mm 98 73 048 558, 590, 658, 690, Pupular, Continental 34 42 47 51 58 95, 100-103 70, 73 138 M 595 34 42 47 51 58 95, 100-103 70, 73 538 M 695 34 42 47 51 58 95, 100-103 70, 73 638 BBF 412S, BDB 512, Italia A 98 168 T3 siehe/see/voir Sako TRG 21/41, 22/42 238 Unique Mod. T.G.C 34 42 47 51 58 70, 73 135 US M 1 Carbine 105 067 Valmet 412 S, Petra 34 42 47 51 58 98 068 Varberger M 717, 757, 777, Luxus 34 42 47 51 58 108 112 116 120 70, 73 154 Verney-Carron Impact Auto 34 42 47 51 58 108 112 116 120 70, 73, 125 405 Express 71 171 LA 34 42 47 51 58 70, 73, 124, 127 226 Voere 2140, Titan I 34 42 47 51 58 70, 73, 137 020 2165 Kufstein, 2155 34 42 47 51 58 108 112 116 120 70, 73 021 2145, Titan II 34 42 47 51 58 108 112 116 120 70, 73, 122, 125, 137 045 Titan Menor 34 42 47 51 58 70, 73 061 2185 Automat 34 42 47 51 58 70, 73, 125 141 VEC 91 34 42 47 51 58 108 112 116 120 134 LBW 34 42 47 51 58 70, 73, 122 264 Tirolerin 60 70, 73 216 Waldberg DB 70, 73 170 Weatherby Mark V, Europa, 300, Vanguard 34 42 47 51 58 108 112 116 120 70,73,109,122,125,127 023 Junior 34 42 47 51 58 70, 73, 122 058 Weihrauch HW 60 KK, 66 34 42 47 51 58 70, 73, 122 153 LG 11 mm-Prisma/dovetail/queue d‘aronde 94 95 053 LG 13 mm-Prisma/dovetail/queue d‘aronde 94 95 052 Match mit Prisma/dovetail/queue d‘aronde 001 Winchester 70 Standard, 770, Target, Lochabst.-/dist. betw. bore holes/distance entre les alésages 21,9 mm 34 42 47 51 58 108 112 116 120 70, 73, 109, 122, 125 024 88, 100 34 42 47 51 58 70, 73, 125 025 70 Magn. - hinterer Lochabstand/rear dist. betw. bore holes/dist. entre les alésages AR 11 mm 34 42 47 51 58 108 112 116 120 70, 73, 109 029 XTR, 70 Magn. - hint. Lochabst./rear dist. betw. bore holes/dist. entre les alésages AR 8,3 mm 34 42 47 51 58 62 108 112 116 120 70, 73, 109, 122, 125 085 94 Unterhebel/underlever/à levier de sous-garde 108 112 116 120 105, 109 030 777 34 42 47 51 58 108 112 116 120 70, 73 071 70 Super Shadow 223 WSSM 34 42 47 51 58 108 112 116 120 70 117 XS 3 Vulkan => Browning BAR (# 003) 34 42 47 51 58 62 66 108 112 116 120 68,71,106,122-124,138 Zastava 70 34 42 47 51 58 108 112 116 120 70, 73, 122 049 Mini Mauser 34 42 47 51 58 70, 73, 122 107 Zoli, Antonio 1900 34 42 47 51 58 108 112 116 120 70, 71, 73, 109, 125 305 BBF SP 90-95 A 98 125 092 Drilling A 67, 71 132 13 Allgemeines General Idéesgénérales e, Waffenkennziffern e Numbers of Rifles , numéros correspondant aux armes
- 14. Die Zielfernrohrmontage ist für die Schuss- leistung entscheidend, denn sie verbindet Waffe und Zieloptik zu einer Einheit. Schussfestigkeit Zwei Faktoren sind dabei wesentlich: zum einen die mechanische Stabilität aller Mon- tageteile (immerhin zerren beim Schuss am Zielfernrohr schon bei mittelschwe- rer Ausrüstung zwischen 300 und 600 kg), zum anderen absolute Spannungsfreiheit an der Montage als Voraussetzung für eine konstante Schussleistung. EAW-Präzisions-Zielfernrohrmontagen er- füllen diese Anforderungen. Beste Materi- alien, höchste Präzision in der Fertigung und nicht zuletzt ausgereifte Konstrukti- onen mit vielen Einstellmöglichkeiten, die ein einfaches Montieren ermöglichen, ma- chen sie zu unnachahmlich zuverlässigen und komfortablen Produkten, die sich in allen Situationen bestens bewähren. Nicht allein die EAW-Schwenkmontagen, sondern auch viele unserer Aufschub- und Aufkippmontagen erlauben es, die Zieloptik beliebig oft ohne jegliche Treff- punktverlagerung abzunehmen. Dank des Baukastensystemes lassen sich Zweitmon- tagen zur Verwendung mehrerer Zielge- räte auf einer Waffe problemlos realisieren. „Stainless Look” Für Liebhaber von Stainless-Waffen sind alle Montagen gegen Aufpreis in einer hochwertig vernickelten Ausführung („Stainless Look“) erhätlich. 30 Jahre Garantie Von der Qualität unserer Produkte„made in Germany“ sind wir selbst so überzeugt, daß wir auf alle Montagen und -teile eine Garantie von 30 Jahren gewähren (ge- mäß unserer Garantiebedingungen). Da- für steht unser Logo auf allen relevanten Montagenkomponenten. Umweltschutz Gerade so wie dem Jäger die Bewahrung von Flora und Fauna am Herzen liegt, möchten auch wir unseren Beitrag zum Erhalt einer intakten Umwelt leisten: so sind unsere extrem langlebigen Produkte noch nach Jahrzehnten problemlos erwei- terbar. Selbstverständlich sorgen wir, auch im Interesse unserer Mitarbeiter, für be- ste Produktionsbedingungen, verwenden umweltverträgliche Materialien und Be- triebsstoffe und führen alle Abfälle einer verantwortungsvollen Verwertung oder Entsorgung zu. The scope mount is vital for the shooting performance, because it makes one entity out of rifle and scope. Shooting Stability Therefore, all components of the mount needtobeofoptimummechanicalstability, asbetween300and600kilogrammestear at the scope when a shot is fired, even in caseofamedium-sizedrifleandscope.And only complete absence of tension in the mount will ensure a constant centre point. EAW scope mounts meet all these requirementsthankstopremiummaterials, high-precision manufacturing, and well- engineered constructions with many possibilities for adjustment, allowing for an easy mounting. These reliable and convenient products are up to any challenge. Using EAW pivot mounts or certain EAW slide-on or roll-off mounts, the shooter may take the scope off the rifle and put it on again at will without any loss of zero. Modular secondary mounts make it possible to fit one rifle with several scopes or sights. “Stainless Look” Those who favour stainless rifles can have allmountsandpartsfurnishedwithahigh- quality nickel coating (“stainless look”) at an extra charge. 30 Years’ Guarantee Being utterly convinced of the product quality “made in Germany”, we give a 30 years’ warranty on all mounts and parts (according to our terms of warranty). The EAW logo, that is applied to all essential mountingcomponents,standsforourcom- mitment. Environment Protection We join forces with hunters, who are dedicated to the preservation of nature, byprovidingdurableproductsthatmaybe complementedwithoutanyproblemeven decadesafterpurchase.Itisunderstoodthat we do, first and foremost to the benefit of ourstaff,seetobestproductionconditions, use environmentally sound materials and utilities, and have all wastes recycled or disposed of with reasonable care. C’est le montage de lunette de visée qui est crucial pour la performance de tir, car il relie carabine et lunette de manière à en créer un ensemble puissant. Haute stabilité lors du tir Les deux facteurs décisifs en sont d’abord l’excellente stabilité mécanique de tous les composants de montage, vu qu’ environ 300 et 600 kilos agissent sur la lunette à la suite du tir, même en cas de carabine et lunette pas très lourdes, et puis l’absence absolue de tension dans le montage comme condition indispensable d’une précision au tir constante. Les montages de précision EAW remplissent bien à ces exigences grâce à de matériaux de toute première qualité, fabrication précise, et constructionsbienréfléchiesquioffrentmaintes possibilités d’ajustage et sont faciles à monter. Singulièrement fiables et confortables, ils sont à la hauteur de tout challenge. Non seulement les montages pivotants, mais aussi certains montages basculants ou à glissière EAW permettent au tireur d’enlever et remettre la lunette à volonté sans aucun changement d’impact. Pour des optiques additionnelles, de montages secondaires sont faisables sans problème à partir du système modulaire EAW. «Aspect inoxydable» Comme souhaité par les amateurs des armes inox, tout montage est livrable aussi en version nickelée de première qualité («aspect inox») sur demande, moyennant un supplément. Garantie de 30 ans Absolument convaincus de la qualité de nos produits en provenance d’Allemagne, nous accordons une garantie de 30 ans sur notre gamme entière (conformément aux conditions de garantie EAW). Le logo EAW, qui se trouve sur toutes les pièces principales, en fait signe. Protection de l’environnement Tout comme les chasseurs, nous aussi nous engageons pour la protection de l’environnement, en fournissant des produits extrêmement durables et qui se laissent compléter sans problème encore des décennies après l’achat. Bien entendu, nous maintenons, tout d’abord dans l’intérêt de notre personnel, des conditions de production optimales, nous servons de matières premières et consommables non- polluantes, et assurons le recyclage ou l’élimination adéquats des déchets. 14 Allgemeines General Idéesgénérales Wofür wir stehen What We Stand for L’essentiel en point de mire
- 16. All types of EAW mounts are well- engineered and of highest quality. Nevertheless, we offer solutions which meet all the diverse requirements of our customers. More than 40 years ago EAW designed the first pivot mount and have been working steadily on its further development ever since. Numerous advances have made it the most successful mount of this type, which has also been adopted by other manufacturers. The EAW pivot mounts and pivot mounts with lever are designed in such a way as to always guarantee absolute shooting precision of the rifle, even under hardest conditions. Some Advantages: • Easy mounting and dismounting of the scope with one hand, because the sub-base of the rear foot snaps into the lock automatically. When using a pivot mount with lever, you only have to turn the lever • Adjustable fit of front foot and rear foot • Large shear cross-section of the front foot (approx. 3 times larger than that of the claw mount), which prevents jamming • Horizontal adjustment by means of the EAW pulling-down support • Vertical adjustment by exchange of the rear sub-base (available in height steps of 0.5 mm) • Adjustment of vertical tolerances by means of a joint in the front foot • Constant centre point due to totally tension-free fit of the scope, even if it is taken off the rifle an put on again frequently • Ideal for secondary scopes TouslestypesdemontagesEAWsontbien réfléchis et de meilleure qualité. Cependant, nous offrons des solutions satisfaisant aux exigences les plus divers de nos clients. Il y a plus de 40 ans, EAW avait construit le premier montage pivotant, et l’a développé continuellement dès lors. Ce sont les nombreux avantages qui l’ont fait le type de montage le plus populaire, aussi adapté par d’autres fabricants. Les montages pivotants et montages pivotants à levier EAW sont conçus de telle manière qu’ils garantissent toujours une précision au tir parfaite de l’arme, même dans des conditions très difficiles. Quelques avantages: • la lunette peut être montée et démontée facilement d’une seule main, puisque la partie inférieure du pied arrière du montage pivotant s’enclenche automatiquement dans la serrure; pour le montage pivotant à levier, il n’y a qu’actionner le levier • piedsavantetarrièreréglablesetajustables • grande section de cisaillement du pied avant(environletripledecelledumontage à crochets), qui empêche un calage • réglage horizontal à l’aide du support arrière (avec serrage sur chanfrein EAW) • hauteurvariablegrâceàl’interchangeabilité de la partie inférieure du pied arrière (disponible dans des pas de 0,5 mm) • compensation des tolérances verticales grâce à la jointure dans le pied avant • l’installation de la lunette sans aucune tension garantit une précision au tir constante, même après montage et démontage répétés de la lunette • idéal pour des lunettes secondaires Alle Montagetypen von EAW sind gut durchdacht und von höchster Qualität. Dennoch stellen wir für die unterschied- lichen Ansprüche unserer Kunden Lö- sungen bereit. So konstruierte EAW bereits vor 50 Jahren die erste Schwenkmontage und entwi- ckelt sie stetig weiter. Ihre vielen Vorteile haben sie zum beliebtesten Montagetyp gemacht, der auch gerne von anderen Her- stellern übernommen wurde. Die EAW- Schwenk- und -Hebelschwenkmontagen sind so ausgelegt, dass sie auch unter här- testen Belastungen stets absolute Treffer- genauigkeit der Waffe gewährleisten. Einige der Vorteile: • Zielfernrohr mit einer Hand leicht auf- setz- und abnehmbar, da bei unserer Schwenkmontage der Hinterfuß selb- ständig in das Schlösschen einrastet; bei unserer Hebelschwenkmontage ist lediglich ein Hebelchen umzulegen • Vorder- und Hinterfußpassung ein- und nachstellbar • Großer Scherquerschnitt des Vorder- fußes (ca. 3-fach gegenüber Einhak- montage); dadurch wird ein Verkanten verhindert • Horizontale Verstellung mittels EAW-Nie- derzugsupport • Vertikale Verstellung durch einfaches Auswechseln des Hinterfuß-Unterteiles in Stufen 0,5 mm möglich • Vertikaler Toleranzausgleich bei evtl. vor- handenenToleranzen an derWaffe durch verstellbaren Vorderfuß • Gleichbleibende Trefferlage durch ab- solute Spannungsfreiheit des Zielfern- rohres auch nach wiederholtem Auf- und Absetzen • Ideal für Zweitgläser 16 Schwenkmontagen PivotMounts Montagespivotants Allgemeines zu EAW-Schwenkmontagen General Information on EAW Pivot Mounts Montages pivotants EAW: idées générales
- 17. EAW entwickelte die Hebelschwenk- montage speziell für Kipplaufwaffen. Der Montagenverschluss sitzt nicht auf der Waffe, sondern ist am Zielfernrohr ange- bracht. Damit ist eine niedrige Montage- höhe gewährleistet. Einige Vorteile: • Stabile, zuverlässige Bauweise für opti- male Wiederholgenauigkeit beim Wie- deraufsetzen des Zielfernrohres (die DEVA stellte bereits 1979 unter Beweis, dass dieser Montage-Typ größten Belas- tungen standhält : 10.000 Schuss erga- ben 100-%-ige Trefferlage nach wieder- holtem Aufsetzen und Abnehmen des Glases) • Niedrigste Anordnung der Montageplat- ten bis Laufschienenhöhe ermöglichen Zielen über die offene Visierung • Hinterfüße mit Support • Austauschbare Hinterfuß-Ober- und Un- terteile in verschiedenen Bauhöhen • Waffen mit Einhakmontagen können einfach auf eine Hebelschwenkmon- tage umgerüstet werden, wobei an der Waffe keine oder nur geringe Änderungen vorgenommen werden müssen (siehe S. 135) • Einzelteile für Zweitmontage erhältlich • Kein Festschießen des Verschlusses • Elegantes Erscheinungsbild Einstellbarer Hebel Um die Toleranzen der Waffenprismen aus- zugleichen, besitzen ab sofort alle Hebel- verschlüsse der Hebelschwenkmontage einen stufenlos einstellbaren Hebel (Aus- nahme: Verschlüsse für Ruger). Er lässt sich auch einstellen, wenn die Montage bereits montiert ist. Lieferbar für 11 mm-, 14,5 mm-, 16 mm und 19 mm-Waffenprisma. Hebel in Offen-Stellung lever in unlocking position levier en position «ouvert» Hebel in Verschlussstellung lever in locking position levier en position «fermé» EAW have developed the pivot mount with lever for break-open rifles. Its lock is not installed on the rifle but is fixed at the scope, so that the foot plates are flush with the barrel rib. Some Advantages: • Reliable and stable design which guarantees optimal repeatability of zero when the scope is being re- placed repeatedly (the DEVA [Ger- man Research Institute for Hunting and Sporting Arms] already proved in 1979 that this type of mount has the best resistance to recoil at 10,000 shots, and repeated mounting and dismounting of the scope caused no loss of the rifle’s zero) • Due to the low arrangement of the foot plates the open sights can be used after removal of the scope • Rear feet with windage adjustment (support) • Interchangeable rear tops and rear sub-bases in various heights • Claw mounts can be converted into pivot mounts with lever very easily and with few or no alterations to the rifle at all (see p. 135) • Single parts for secondary scopes are available • No jamming of the lock • Elegant overall appearance Steplessly Adjustable Lever The dovetails of the rifles often show considerable differences with regard to their width. For this reason, EAW have developed the steplessly variable lock lever (not available for Ruger rifles) which can be adjusted to the dovetail accurately, even if the mount has already been fitted. Availablefordovetailsof11mm,14.5mm, 16 mm, and 19 mm. EAW a développé le montage pivotant à levier pour les carabines à canon basculant. Son verrou n’est pas situé sur la carabine, mais fixé à la lunette de visée, ce qui permet un placement très bas des embases, qui peuvent être abaissées jusqu’au niveau de la bande du canon. Quelques avantages: • construction solide garantissant une précision au tir optimum après la remise en place de la lunette de visée (le DEVA [centre d’essai allemand pour des armes de chasse et de tir] a prouvé déjà en 1979 quecetypedemontagerésisteauxcharges les plus grandes: 10.000 coups n’ont causé aucun changement d’impact même après montage et démontage fréquents de la lunette) • grâce au placement bas des embases, la visée par hausse et guidon est possible après l’enlèvement de la lunette • pieds arrière avec réglage latéral (support) • parties supérieures et parties inférieures de pieds arrière interchangeables, disponibles en différentes hauteurs. • des montages à crochets peuvent être convertis en montages pivotants facilement et sans modifications importantes sur la carabine (voir p. 135) • pour des lunettes secondaires, des pièces détachées sont disponibles • pas de coincement du verrou • apparence élégante Verrouillage à levier continu Les queues d’aronde montrent souvent des tolérances considérables en ce qui concerne leur largeur. Pour cette raison, EAW a développé le verrouillage à levier continu qui permet d’adapter le verrou exactement à l’arme (non disponible pour les carabines Ruger). Cette adaptation est aussi possible aucasoùlemontageauraitdéjàétéinstallé. Disponible pour queues d’aronde de 11 mm, 14,5 mm, 16 mm et 19 mm. 17 Schwenkmontagen PivotMounts Montagespivotants Besonderheiten bei Hebelschwenkmontagen Special Features of Pivot Mounts with Lever Montagespivotantsàlevier:particularités
- 18. für Schwenkmontagen mit verstellbaren EAW-Systemen, mit Ringen for pivot mounts with the adjustable EAW systems, with rings pour montages pivotants EAW avec dispositifs réglables, à colliers A Die Brünierrückstände aus allen Montage- teilen sorgfältig entfernen. Falls vorhanden, die Brünierung an der waagrechten Anlagefläche (Drehkranz) des Pivotzapfens entfernen (ideal hierfür ist der Polisher, EAW-Nr. 22300). Die Brü- nierung an den Klebeflächen der Platten und Waffe entfernen und diese entfetten, die Platten vormontieren (Vorderplatte erforderlichenfalls um 180° verdrehen) und ausrichten. B Vor dem Einsetzen des Pivotfußes in die Vorderplatte die entsprechenden Gleitflächen mit einem (dickflüssigen) Öl versehen. (Spä- ter von Zeit zu Zeit regelmäßig wiederholen.) Vorderfuß in 6 einsetzen und durch Verdrehen der Justierschraube 7 die Passung des Vorder- fußes einstellen und mittels Konterschraube 71 sichern. Bei Kipplaufwaffen ist der Drehkranz vorsichtig abzuschleifen. Die Gelenkschrauben 14 herausschrauben. Die Brünierung an den An- lageflächen der Schraubenköpfe entfernen und die Gelenkschrauben mit Gleitöl oder Gleitfett, z.B. Molykote, einfetten. Die Gelenkschrauben leicht anziehen. C Beide Platten wieder entfernen, Kontaktflä- chen nochmals gut entfetten und erneut auf- schrauben. Durch zusätzliches Kleben oder Lö- ten der Fußplatten die Schrauben 1 entlasten. Die schraffierte Fläche„X“ derVorderplatte nicht verkleben – siehe Zeichnung! D Hinterfuß in 8 so einsetzen, daß seine Un- terseite parallel zur Plattenoberseite und der T-Zapfen in Nute 8 axial vermittelt ist. In dieser PositionVerschlussbolzenhebel 13 ca. 70˚ nach oben stellen und durch Verdrehen des Stellbol- zens 10 nach links (gegen den Uhrzeigersinn) festklemmen. E Ringoberteile 12 abnehmen, Zielfernrohr einlegen, grob ausrichten, wieder abnehmen, die Klemmflächen und die Innenseiten der Ringe entfetten. Die unteren Ringhälften mit Klebstoff versehen, Zielfernrohr endgültig einlegen und während des Festschraubens ausrichten. Eine gute Hilfe hierfür ist die EAW-Ausrichtvorrich- tung (Bestell-Nr. 22100, S. 149). Die Schrauben bitte maßvoll festziehen, so dass der Rohrkörper nicht deformiert wird (max. 200 Ncm)! F Gelenkschrauben 14 festziehen, Stellbolzen 10 langsam so weit zurückdrehen, bis der wäh- renddessen nach unten gleitende Verschluss- bolzenhebel 13 ca. 1 mm vor seiner Endlage stehen bleibt. In dieser Position den Stellbolzen 10 durch Festziehen der Konterschraube 11 si- chern. A Carefully remove all residues of blueing from all mounting parts. Remove blueing from the plane contact surface of the pivot pin (our polisher, EAW ref. No. 22300, is ideal for this purpose), and equally from contact surfaces of bases and weapon. Degrease contact faces, mount bases provisionally (if necessary, turn front base by 180°) and adjust them. B Furnishthecontactsurfaceswithahighly viscous oil before inserting the pivot pin into the front base. (Repeat this procedure regularly during use of the mount.) Insert front foot into 6. Adjust the fit of the front footbyturningadjustingscrew7andsecure it by tightening lock screw 71. In case of a bolt action rifle, the plane contact surface of the pivot has to be abraded carefully. Take out swing bolts 14, remove blueing from contact faces of the bolt heads and grease swing bolts with sliding oil or grease, e. g. molykote. Tighten them slightly. C Remove both bases again, degrease contact faces thoroughly and screw bases on again. Relieve screws No. 1 by additio- nal pasting or soldering of the plates. Do not paste or solder surface “X“ of the front base (see hatched surface in the drawing)! D Insert rear foot into 8 and take care that its bottom side comes parallel to the top face of the base and the T-pin into the middle of slot 8. In this position turn breechblock lever 13 by approx. 70˚ upwards and clamp it by turning set bolt 10 to the left (counter-clockwise). E Remove rings tops 12, attach scope, adjust it roughly. Remove scope again, degrease clamp faces and insides of the rings. Furnish the lower ring halves with adhesive. Fit the scope for good and align it whilst tightening 17. For an easy and exact alignment the EAW aligning device, ref. No. 22100 (page 149), is ideal. Please tighten the screws carefully, in order to avoid a deformation of the tube (200 Ncm at most)! F Tighten swing bolts 14. Carefully turn set bolt 10 to the right until breechblock lever 13, which meanwhile is sliding down- wards, stops approx. 1 mm before its final position. In this position secure set bolt 10 by tightening lock screw 11. G Train and examine the fit of the feet by pivoting the scope several times; on this A Soigneusement éliminer tous les reliquats de bronzage de toutes les pièces de montage. Eliminer le bronzage de la face de contact plane du pivot (pour cela, notre polissoir, n° de référence EAW 22300, est l‘outil idéal), ainsi que des faces de contact des embases et de l‘arme. Dégraisser les faces de contact, monter les embases provisoirement (si nécessaire, tourner l‘embase avant de 180°) et les aligner. B Avant d’insérer le pivot dans l’embase avant, garnir d’huile de viscosité les faces de contact correspondantes. (Répéter cette action régulièrement pendant l’usage du montage.) Loger le pied avant dans 6. Régler l‘ajustage du pied avant en tournant la vis d‘ajustage 7, et consolider l‘ajustement par la vis de blocage 71. En cas d‘une carabine à canon basculant, il faut meuler doucement la face de contact plane du pivot. Enlever les vis d‘articulation 14. Eliminer le bronzage des faces de contact des têtes de vis et lubrifier les vis d‘articulation par huile ou graisse de glissement, p. ex. molykote. Les serrer doucement. C Enleverlesdeuxembases,dégraisserencore unefoislesfacesdecontactetvisserlesembases de nouveau. Décharger les vis 1 en collant ou soudant les embases. Ne pas garnir de colle la face «X» de l‘embase avant – voir la partie hachurée dans le dessin! D Loger le pied avant dans 8 de manière à ce que sa face inférieure soit parallèle à la face supérieure de l’embase et que le tenon en T soit centré axialement dans l’encoche 8. Faire basculer le levier 13 d‘environ 70˚ vers le haut et le bloquer dans cette position en tournant la goupillederéglage10àgauche(ensensinverse des aiguilles d’une montre). E Enlever les parties supérieures des colliers 12, placer la lunette et l’ajuster provisoirement. Retirerlalunette,dégraisserlesfacesdeserrage et les faces inférieures des colliers. Garnir de colle les parties inférieures des colliers, placer définitivement la lunette et l’ajuster en vissant 17.Pourl’alignementexactetsimpleledispositif d’alignement EAW réf. 22100 (page 149) est idéal.Serrerdoucementlesvisafind’évitertoute déformation du tube (200 Ncm au maximum)! F Serrer les vis 14. Desserrer par la suite doucement la goupille de réglage 10 jusqu’à ce que le levier 13 se rabatte. Faire stopper le levier 13 environ 1 mm avant la fin de course et bloquer la goupille de réglage 10 dans cette position en serrant la vis de blocage 11. Montageanleitung Mounting Instructions Instructions de montage 18 Schwenkmontagen PivotMounts Montagespivotants
- 19. Screws and spare parts for model 300 are listed on page 145. 1–4 set screws as per list of screws, depending on the type of weapon 7 adjusting screw 71 lock screw 10 set bolt 11 lock screw 13 breechblock - lever - spring 14 swing bolt 17 ring clamping screw (Allen) Schrauben und Er- satzteile für Modell 300 siehe Seite 145 1 Befestigungsschrau- ben gem. Schrauben liste je nach Waffe 7 Justierschraube 71 Konterschraube 10 Stellbolzen 11 Konterschraube 13 Verschlussbolzen - Hebel - Feder 14 Gelenkschraube 17 Ringklemmschraube mit Innensechskant Vis et pièces de rechange pour modèle 300 sont listées à la page 145. 1–4 vis de fixation, en fonction de l’arme utilisée, voir chapitre «vis» 7 vis d’ajustage 71 vis de blocage 10 goupille de réglage 11 vis de blocage 13 goupille de verrouillage - levier - ressort 14 vis d’articulation 17 vis de serrage de collier (Allen) G Durch mehrmaliges Aus- und Einschwenken des Zielfernrohres die Fußpassungen gangbar machen und dabei die Passung des Vorderfuß- zapfens nochmals überprüfen bzw. mittels Ju- stierschraube 7 genau einstellen und mit Kon- terschraube 71 sichern. Das Zielfernrohr muss sich ohne Kraftaufwand spannnungsfrei bewe- gen und der Verschluss mit dem rechten Zeige- finger zum Ausschwenken öffnen lassen. Beim Einschwenken des Hinterfußes muss sich derVer- schluss selbsttätig öffnen und schließen. Sollte der Hebel 13 ganz nach unten gleiten, erneut Stellbolzen 10 gegen den Uhrzeigersinn nach- stellen. H Alle Schrauben nochmals auf festen Sitz überprüfen und die Passstellen leicht einfetten. Klebungen gut aushärten lassen. Nach den er- sten Probeschüssen kontrollieren, ob Hebel 13 noch 0,5–1 mm vor der Endlage stehen bleibt. Erforderlichenfalls nachjustieren. BITTE BEACHTEN: Um eine einwandfreie Funk- tion der EAW-Montage zu gewährleisten, muss sich das Zielfernrohr ohne großen Kraftaufwand einschwenken lassen. Der Hinterfuß soll zügig ins Drehbolzenschlösschen eingeschwenkt werden, wobei sich durch die Technik des EAW-Drehbol- zenverschlusses ein kleiner Lichtspalt zwischen Hinterfuß und Schlossoberfläche ergibt (im Ge- gensatz zur Einhakmontage). Die Montage muß absolut spannungsfrei sitzen! Nur so ist eine gute Schussleistung zu erwarten. Wir empfehlen, das Montieren von einem Büchsenmacher vornehmen zu lassen. occasion check once again the fit of the pin of the front foot, resp. adjust it exactly by means of adjusting screw 7 and secure it with lock screw 71. The scope must be movable tensionfree without any force, and for the purpose of pivoting, it must be possible to open the breechblock with the right forefinger. When the rear foot clicks into place, the breechblock must open and close automatically. Should lever 13 slide completely downwards, once again adjust set bolt 10 counter-clockwise. H Examine if all screws fit tightly. Lightly lubricate the moving parts. Adhesive must be well-hardened. After the first trial shots check whether lever 13 still stops approx. 0.5 to 1 mm before its final position. If ne- cessary, adjust it again. Please note: To guarantee a faultless functioning of the EAW mount, it must be possible to swivel the scope without exerting any force. The rear foot should be pivoted easily into the breechblock. Due to the technical features of the EAW breechblock there is a small light gap between the rear foot and the upper surface of the rear base (contrary to the claw mount).The mount must fit absolutely tensionfree! Only then a good shooting performance can be expected. We recommend that the mount is fitted by a professional gunsmith. G Rendre souples les ajustages des pieds en pivotant la lunette plusieurs fois, vérifier l’ajustage du pivot du pied avant et, le cas échéant, le réajuster par la vis d’ajustage 7 et consolider l’ajustement par la vis de blocage 71. Le pivotement de la lunette doit se faire en souplesse et sans aucune de tension. Servez- vousdel’indexdroitpourouvrirleverrouetfaites pivoter la lunette. Lors de l’enclenchement du pied arrière, le verrou doit s‘ouvrir et se fermer automatiquement. Si le levier 13 descend jusqu’au fond, il faut réajuster la goupille 10 enlatournantensensinversedesaiguillesd’une montre. H Vérifier le serrage des vis et lubrifier légèrement les pièces d’ajustage. Faire durcir la colle appliquée. Après avoir tiré les premiers coups, vérifier si le levier 13 s’arrête toujours 0,5 à 1 mm avant la fin de course. Le réajuster, si nécessaire. Attention:Lebonfonctionnementdumontage EAW n’est assuré que si la lunette se fait pivoter avec souplesse. Faites enclencher rapidement le pied arrière dans la serrure. Contrairement au montage à crochets, il reste une petite fente lumineuse entre la face supérieure de l’embase arrière et le pied arrière - la technique du système de verrouillage EAW étant la cause de ce phénomène. L’absence absolue de tension est indispensable pour obtenir une précision de tir optimale. Recommendation: Le montage doit être effectué par un armurier professionnel. Drehbolzenverschluss rear base with breechblock serrure à goupille de verrouillage Vorderplatte front base embase avant Type A Type B Vorderfuß front foot pied avant 7 6 6 1 71 7 X 8 1 71 12 14 1711 13 3 4 10 Type A Type BType A Type B 77 66 66 11 7171 77 XX 88 11 7171 1212 1414 17171111 1313 33 44 1010 19 Schwenkmontagen PivotMounts Montagespivotants
- 20. Standardprisma D Querschrauben 9 herausnehmen, Montageschiene des Zielfernrohres in das Prisma des Vorderfußes einpassen. Die- sen wieder in die Vorderplatte einsetzen und Zielfernrohr in den bestmöglichen Augenabstand bringen. Die Montage- schiene an der Position der Schrauben- bohrungen 9 mittels eines Spiralbohrers Ø 3,5 mm durchbohren (bitte nicht bis in das Gewinde des Montageprismas!) und Querschrauben 9 hindurchschrauben. Für einfacheres Durchbohren empfeh- len wir unseren Bohrhalter, EAW-Nr. 22000. E Hinterfuß auf Mittelrohrschiene aufpassen und an die richtige Stelle bringen, d. h. der T-Zapfen muss in der Nute 8 axial vermittelt sein. In dieser Position bohren und verschrauben wie bei D. Darauf achten, dass die Hinterfuß- Unterseite parallel zur Schlösschen- Oberseite zu liegen kommt. für Schwenkmontagen mit verstellbaren EAW-Systemen – für Zielfernrohre mit Montageschiene Zeiss VM/ZM, Docter Ausführung mit geradem Vorderfuß D Den Vorderfuß nach Entfernen der Gelenkschrauben 14 zerlegen. Die Keil- muttern 16 in die Zielfernrohrschiene ein- setzen und das Oberteil mit den Schrau- ben 19 so befestigen, dass dieses noch verschiebbar ist. Den Vorderfuß wieder zusammensetzen und die Gelenkschrau- ben 14 leicht anziehen. Ausführung mit gekröpftem Vorderfuß D Die Keilmuttern 16 in die Zielfernrohr- schiene einsetzen und den Vorderfuß mit den Schrauben 19 so befestigen, dass die- ser noch verschiebbar ist. Den Vorderfuß in die Vorderplatte ein- setzen und das Zielfernrohr in den best- möglichen Augenabstand schieben. Ohne das Zielfernrohr zu verschieben, dieses mit dem Vorderfuß abnehmen. Die Schrauben 19 mit 10 Nm anziehen (ein gerader Vor- derfuß muss dazu nochmals auseinander genommen werden). E Den Hinterfuß an die richtige Stelle bringen, d.h. der T-Zapfen muss in in der Nute 8 axial vermittelt sein. Ohne den Hin- terfuß zu verschieben, das Zielfernrohr ab- nehmen und Schraube 19 festziehen. Da- rauf achten, dass die Hinterfuß-Unterseite möglichst parallel zur Plattenoberfläche liegt. Vorderfuß 9 14 Vorderfuß 16 19 14 Allgemeine Informationen A Die Brünierrückstände aus allen Montageteilen sorgfältig entfernen. Falls vorhanden, die Brünierung an der waagrechten Anlagefläche (Drehkranz) des Pivotzapfens entfernen (ideal hierfür ist der Polisher, EAW-Nr. 22300). Die Brünierung an den Klebeflächen der Platten und Waffe entfernen und diese entfetten, die Platten vormontieren (Vorderplatte erforderlichenfalls um 180° verdrehen) und ausrichten. B Vor dem Einsetzen des Pivotfußes in die Vorderplatte die entsprechenden Gleit- flächen mit einem (dickflüssigen) Öl verse- hen. (Später von Zeit zu Zeit regelmäßig wiederholen.) Vorderfuß in 6 einsetzen und durch Verdrehen der Justierschraube 7 die Passung des Vorderfußes einstellen und mittels Konterschraube 71 sichern. Bei Kipplaufwaffen ist der Drehkranz vorsich- tig abzuschleifen. Die Gelenkschrauben 14 herausschrauben. Die Brünierung an den Anlageflächen der Schraubenköpfe entfer- nen und die Gelenkschrauben mit Gleitöl oder Gleitfett, z.B. Molykote, einfetten. Die Gelenkschrauben leicht anziehen. C Beide Platten wieder entfernen, Kon- taktflächen nochmals gut entfetten und erneut aufschrauben. Durch zusätzliches Kleben oder Löten der Fußplatten die Schrauben 1 entlasten. Die schraffierte Fläche „X“ der Vorderplatte nicht verkle- ben – siehe Zeichnung! Schlösschen mit einstellbarem Drehbolzenverschluss 1 10 8 11 12 20 einstellbare Vorderplatten Montageanleitung Mounting Instructions Instructions de montage X 7 1 6 6 71 Typ A Typ B 20 Schwenkmontagen PivotMounts Montagespivotants
- 21. Swarovski SR Ausführung mit geradem Vorderfuß D DenVorderfuß nach Entfernen der Ge- lenkschrauben 14 zerlegen. Die Keilmut- tern 17 in die Zielfernrohrschiene einset- zen. Den Vorderfuß mit einer Gelenkschrau- be 14 montieren, in die Vorderplatte einschwenken und das Zielfernrohr im richtigen Augenabstand aufsetzen. Im Vorderfuß muss die verzahnte Platte ein- gesetzt sein. Ohne das Zielfernrohr zu verschieben, dieses mit dem Vorderfuß abnehmen und die hintere Keilmutter fest- schrauben. Das Oberteil abschrauben und die zweite Keilmutter festschrauben. Den Vorderfuß wieder zusammensetzen und Gelenkschrauben 14 leicht anziehen. Ausführung mit gekröpftem Vorderfuß D Die Keilmuttern 17 in die Zielfern- rohrschiene einsetzen und das Zielfern- rohr im richtigen Augenabstand aufsetzen. Im Vorderfuß muss die verzahnte Platte eingesetzt sein. Ohne das Zielfernrohr zu verschieben, dieses mit dem Vorderfuß abnehmen und beide Keilmuttern fest- ziehen. E Den Hinterfuß an die richtige Stelle bringen, d.h. der T-Zapfen muss in in der Nute 8 axial vermittelt sein. Ohne den Hin- terfuß zu verschieben, das Zielfernrohr ab- nehmen und Schraube 19 festziehen. Da- rauf achten, dass die Hinterfuß-Unterseite möglichst parallel zur Plattenoberfläche liegt. Schmidt & Bender Convex Hinweis: Im Vorderfuß ist eine Passfeder eingebaut. Diese kann ggf. zum Ausrichten des Zielfernrohres entfernt werden. Ausführung mit geradem Vorderfuß D Den Vorderfuß nach Entfernen der Gelenkschrauben 14 zerlegen. Die Keilmuttern 18 in die Zielfernrohrschiene einsetzen und das Oberteil mit den Schrauben 19 so festschrauben, dass dieses noch verschiebbar ist. Den Vorderfuß mit einer Gelenkschrau- be 14 montieren und einsetzen. Das Ziel- fernrohr in den richtigen Augenabstand schieben. Ohne das Zielfernrohr zu ver- schieben, dieses mit dem Vorderfuß ab- nehmen. Das Oberteil wieder abschrauben. Die Schrauben 19 mit 10 Nm anziehen. Den Vorderfuß wieder zusammensetzen und Gelenkschrauben 14 leicht anziehen. Ausführung mit gekröpftem Vorderfuß D Die Keilmuttern 18 in die Zielfernrohr- schiene einsetzen und den Vorderfuß mit den Schrauben 19 so festschrauben, dass dieser verschiebbar ist. Den Vorderfuß in die Vorderplatte einsetzen und das Ziel- fernrohr in den richtigen Augenabstand schieben. Ohne das Zielfernrohr zu ver- schieben, dieses mit Vorderfuß abnehmen. Die Schrauben 19 mit 10 Nm anziehen. E Den Hinterfuß an die richtige Stelle bringen, d.h. der T-Zapfen muss in in der Nute 8 axial vermittelt sein. Ohne den Hin- terfuß zu verschieben, das Zielfernrohr ab- nehmen und Schraube 19 festziehen. Da- rauf achten, dass die Hinterfuß-Unterseite möglichst parallel zur Plattenoberfläche liegt. F Das Zielfernrohr wieder einschwen- ken, den Verschlussbolzenhebel 12 ca. 70° nach oben stellen und durch Verdrehen des Stellbolzens 10 nach links (gegen den Uhrzeigersinn) festklemmen. Danach die Gelenkschrauben 14 festziehen (Kleben ist nicht erforderlich) und den Stellbolzen 10 langsam so weit zurückdrehen, bis der währenddessen nach unten gleitende Ver- schlussbolzenhebel 12 ca. 1 mm vor seiner Endlage stehen bleibt. In dieser Position den Stellbolzen 10 durch Festziehen der Konterschraube 11 sichern. G Das Zielfernrohr mittels Support- schrauben 20 ausrichten und beide Sup- portschrauben anziehen. Kontrolle Durch mehrmaliges Aus- und Einschwenken des Zielfernrohres die Fuß- passungen gangbar machen und dabei die Passung des Vorderfußzapfens nochmals überprüfen bzw. mittels Justierschraube 7 genau einstellen und mit Konterschraube 71 sichern. Das Zielfernrohr muss sich ohne Kraft- aufwand spannungsfrei bewegen und der Verschluss mit dem rechten Zeigefinger zum Ausschwenken öffnen lassen. Beim Einschwenken des Hinterfußes muß sich der Verschluss selbsttätig öffnen und schließen. Sollte der Hebel 12 ganz nach unten gleiten, erneut Stellbolzen 10 gegen den Uhrzeigersinn nachstellen. Alle Schrauben nochmals auf festen Sitz überprüfen und die Passstellen leicht einfetten. Die Klebungen gut aushärten lassen. Nach den ersten Probeschüssen kontrollieren,obHebel12noch0,5-1 mm vor der Endlage stehen bleibt. Gegebenenfalls nachjustieren. Bitte beachten: Um eine einwandfreie Funktion der EAW-Montage zu gewährleisten, muss sich das Zielfernrohr ohne großen Kraftaufwand einschwenken lassen. Der Hinterfuß soll zügig ins Drehbolzenschlösschen eingeschwenkt werden, wobei sich durch die Technik des EAW-Drehbolzenverschlusses ein kleiner Lichtspalt zwischen Hinterfuß und Schlossoberfläche ergibt (im Gegensatz zur Einhakmontage). Die Montage muss absolut spannungsfrei sitzen! Das manuelle Herunterdrücken des Hebels 12 kann die Schussleistung verschlechtern. Vorderfuß 17 19 14 Vorderfuß 18 19 14 21 Schwenkmontagen PivotMounts Montagespivotants
- 22. Standard Rail D Take out cross screws 9, fit mounting rail of the scope into top of front foot. Insert front foot into front base and ad- just scope to the best possible eye relief. Drill mounting rail at the locations of screw holes 9 by means of a Ø 3.5 mm twist drill (do not drill through to the mounting rail thread), put screws 9 back in and tighten them. For an easy drilling, we recommend our drilling rack, EAW ref. No. 22000. E Fit rear foot onto middle tube rail and move it to a position that the T-pin comes axially into the middle of slot 8. In this position drill mounting rail and insert screw 9 as described under D. Ensure that the bottom side of the rear foot comes parallel to the upper side of the rear base (lock). Zeiss VM/ZM, Docter with straight front foot: D Take out swing bolts 14 and dis- assemble front foot. Insert clamping blocks 16 into rail of scope and fix top of front foot by means of screws 19 in a way that it can still be moved. Assemble front foot again and tighten swing bolts 14 slightly. with extended front foot: D Insert clamping blocks 16 into rail of scope and fix front foot by means of screws 19 in a way that it can still be moved. Insert front foot into front base and adjust scope to the best possible eye relief. Take off scope together with the front foot without shifting it. Tighten screws 19 with 10 Nm (for this purpose, a straight front foot has to be disassem- bled again). E Move rear foot to a position that the T-pin comes axially into the middle of slot 8. Take off scope without shifting rear foot, and tighten screw 19. Ensure that the bottom side of the rear foot comes parallel to the upper side of the rear base (lock). for pivot mounts with the adjustable EAW systems – for scopes with mounting rail front foot 9 14 front foot 16 19 14 General Information A Carefully remove all residues of blueingfromallmountingparts.Remove blueing from the plane contact surface of the pivot pin (our polisher, EAW ref. No. 22300, is ideal for this purpose), and equally from contact surfaces of bases and weapon. Degrease contact faces, mount bases provisionally (if necessary, turn front base by 180°) and adjust them. B Furnish the contact surfaces with a highly viscous oil before inserting the pivot pin into the front base. (Repeat this procedure regularly during use of the mount.)Insertfrontfootinto6.Adjustthe fit of the front foot by turning adjusting screw 7 and secure it by tightening lock screw 71. In case of a bolt action rifle, the plane contact surface of the pivot has to beabradedcarefully.Takeoutswingbolts 14, remove blueing from contact faces of the bolt heads and grease swing bolts with sliding oil or grease, e. g. molykote. Tighten them slightly. C Remove both bases again, degrease contact faces thoroughly and screw bases on again. Relieve screws No. 1 by additional pasting or soldering of the plates. Do not paste or solder surface “X“ of the front base (see hatched surface in the drawing)! adjustable front bases type A type B rear base with adjustable breechblock X 7 1 6 6 71 1 10 8 11 12 20 Montageanleitung Mounting Instructions Instructions de montage 22 Schwenkmontagen PivotMounts Montagespivotants
- 23. Swarovski SR with straight front foot: D Take out swing bolts 14 and dis- assemble front foot. Insert clamping blocks 17 into rail of scope. Mount front foot by means of one swing bolt 14, insert it into front base and adjust scope to the best possible eye relief. The toothed plate must have been inserted into the front foot. Take off scope together with the front foot without shifting it, and tighten rear clamping block. Remove top of front foot and tighten second clamping block. Assemble front foot again and tighten swing bolts 14 slightly. with extended front foot: D Insert clamping blocks 17 into rail of scope and adjust scope to the best possible eye relief. The toothed plate must have been inserted into the front foot. Take off scope together with the front foot without shifting it, and tighten both clamping blocks with 10 Nm. E Move rear foot to a position that the T-pin comes axially into the middle of slot 8. Take off scope without shifting rear foot, and tighten screw 19. Ensure that the bottom side of the rear foot comes parallel to the upper side of the rear base (lock). Schmidt & Bender Convex Please note:The feather key which has been inserted into the front foot can be removed for the purpose of aligning the scope, if necessary. with straight front foot: D Take out swing bolts 14 and disassemble front foot. Insert clamping blocks 18 into rail of scope and fix top of front foot by means of screws 19 in a way that it can still be moved. Mount front foot by means of one swingbolt14,insertitintothefrontbase and adjust scope to the best possible eye relief. Take off scope together with the front foot without shifting it. Remove top of front foot and tighten screws 19 with 10 Nm. Assemble front foot again and tighten swing bolts 14 slightly. with extended front foot: D Insert clamping blocks 18 into rail of scope and fix front foot by means of screws 19 in a way that it can still be moved. Insert front foot into front base and adjust scope to the best possible eye relief. Take off scope together with front foot without shifting it. Tighten screws 19 with 10 Nm. E Move rear foot to a position that the T-pin comes axially into the middle of slot 8. Take off scope without shifting rear foot, and tighten screw 19. Ensure that the bottom side of the rear foot comes parallel to the upper side of the rear base (lock). F Set up scope again, turn breechblock lever 12 by approx. 70° upwards and clamp it tightly by turning set bolt 10 to the left (counter-clockwise). Tighten swing bolts 14 (pasting is not necessary!). Carefully turn set bolt 10 to the right until breechblock lever 12, which meanwhile is sliding downwards, stops approx. 1 mm before its final position. In this position secure set bolt 10 by tightening lock screw 11. G Align scope by means of support screws 20 and tighten both of them. Train and examine the fit of the feet by pivoting the scope several times; on this occasion once again check the fit of the pin of the front foot, resp. adjust it exactly by means of adjusting screw7 and secure it with lock screw 71. The scope must be movable tension- free without any force, and for the pur- pose of pivoting, it must be possible to open the breechblock with the right forefinger.When the rear foot clicks into place, the breechblock must open and close automatically. Should lever 12 slide completely downwards, once again adjust set bolt 10 counter-clockwise. Examine if all screws fit tightly. Light- ly lubricate the moving parts. Adhesive must be well-hardened. After the first trial shots check whether lever 12 still stops approx. 0.5 to 1 mm before its fi- nal position. If necessary, adjust it again. Please Note: To guarantee a faultless functioning of the EAW mount, it must be possible to swivel the scope without exerting any force.The rear foot should be pivoted easily into the breechblock. Due to the technical features of the EAW breechblock, there is a small light gap between the rear foot and the upper surface of the rear base (lock) – contrary to the claw mount. The mount must fit absolutely tensionfree! Pressing down lever 12 manually might have a negative effect on the shooting performance. front foot 17 19 14 front foot 18 19 14 23 Schwenkmontagen PivotMounts Montagespivotants
- 24. pour montages pivotants EAW avec dispositifs de réglage – pour lunettes avec rail de montage Informations générales A Soigneusementéliminertouslesreliquats de bronzage de toutes les pièces de montage. Eliminer le bronzage de la face de contact plane du pivot (pour cela, notre polissoir, n° de référence EAW 22300, est l‘outil idéal), si nécessaire, ainsi que des faces de contact des embases et de l‘arme. Dégraisser les faces de contact, monter les embases provisoirement (sinécessaire,tournerl‘embaseavantde180°) et les aligner. B Avant d’insérer le pivot dans l’embase avant, garnir d’huile de viscosité les faces de contactcorrespondantes.(Répétercetteaction régulièrement pendant l’usage du montage.) Logerlepiedavantdans6.Réglerl‘ajustagedu pied avant en tournant la vis d‘ajustage 7, et consolider l‘ajustement par la vis de blocage 71. En cas d‘une carabine à canon basculant, il faut meuler doucement la face de contact planedupivot.Enleverlesvisd‘articulation14. Eliminer le bronzage des faces de contact des têtesdevisetlubrifierlesvisd‘articulationpar huileougraissedeglissement,p.ex.molykote. Les serrer doucement. C Enlever les deux embases, dégraisser encore une fois les faces de contact et visser les embases de nouveau. Décharger les vis 1 en collant ou soudant les embases. Ne pas garnir de colle la face «X» de l‘embase avant – voir la partie hachurée dans le dessin! Rail standard D Enlever les vis transversales 9, placer le rail de la lunette de visée dans la partie supérieure de pied avant. Loger le pied avant dans l‘embase avant et faire glisser la lunette à la meilleure distance œil-oculaire. Percer le rail de montage à la position des perçages pour les vis 9 au moyen d‘un foret hélicoïdal Ø 3,5 mm (ne pas percer jusqu‘au filet de montage) et insérer les vis 9. Pour un perçage aisé du rail de montage, nous recommanderions l‘affût de perçage réf. 22000. E Placer le pied arrière sur le rail de la tube centrale de manière à ce que le tenon en T soit centré axialement dans l‘encoche 8. Dans cette position, percer et insérer la vis 9 comme décrit sous D. Faire attention à ce que la face inférieure du pied arrière soit parallèle à la face supérieure de l‘embase arrière (serrure). Zeiss VM/ZM, Docter En cas du modèle ayant un pied avant droit: D Enleverlapartiesupérieuredupiedavant après avoir desserré les vis d‘articulation 14. Loger les cales de serrage 16 dans le rail de la lunette de visée et fixer la partie supérieure en serrant les vis 19 de façon qu‘elle soit encore déplaçable. Assembler le pied avant de nouveau et serrer les vis d‘articulation 14 doucement. En cas du modèle ayant un pied avant coudé: D Loger les cales de serrage 16 dans le rail de la lunette de visée et fixer le pied avant en serrant les vis 19 de façon qu‘il soit encore déplaçable. Loger le pied avant dans l‘embase avant et faire glisser la lunette à la meilleure distance œil-oculaire. Retirer la lunette et le pied avant ensemble sans en changer la position. Serrer les vis 19 d‘une force de 10 Nm. En cas du modèle ayant un pied avant droit, il faut enlever la partie supérieure de nouveau pour serrer les vis 19. E Placer le pied arrière de manière à ce que le tenon en T soit centré axialement dans l‘encoche 8. Retirer la lunette sans changer la position du pied arrière et serrer la vis 19. Faire attention à que la face inférieure du pied arrière soit parallèle à la face supérieure de l‘embase arrière (serrure). pied avant 9 14 pied avant 16 19 14 embases avant réglables type A type B serrure à goupille de verrouillage réglable 1 10 8 11 12 20 Montageanleitung Mounting Instructions Instructions de montage X 7 1 6 6 71 24 Schwenkmontagen PivotMounts Montagespivotants
- 25. Swarovski SR En cas du modèle ayant un pied avant droit: D Enleverlapartiesupérieuredupiedavant après avoir desserré les vis d‘articulation 14. Loger les cales de serrage 17 dans le rail de la lunette de visée. Monter le pied avant par une des vis d‘articulation 14, le loger dans l‘embase avant et faire glisser la lunette à la meilleure distance œil-oculaire. La plaque dentée doit se trouver dans le pied avant. Retirer la lunette et le pied avant ensemble sans en changer la position, et visser la cale arrière. Enlever la partie supérieure du pied avant et visser l‘autre cale. Assembler le pied avant de nouveau et serrer les vis d‘articulation 14 doucement. En cas du modèle ayant un pied avant coudé: D Loger les cales 17 dans le rail de la lunette de visée et faire glisser la lunette à la meilleure distance œil-oculaire. La plaque dentée doit se trouver dans le pied avant. Retirer la lunette et le pied avant ensemble sans en changer la position, et visser tous les deux cales d‘une force de 10 Nm. E Placer le pied arrière de manière à ce que le tenon en T soit centré axialement dans l‘encoche 8. Retirer la lunette sans changer la position du pied arrière et serrer la vis 19. Faire attention à ce que la face inférieure du pied arrière soit parallèle à la face supérieure de l‘embase arrière (serrure). Schmidt & Bender Convex Attention: Si nécessaire, enlever la clavette qui se trouve dans le pied avant pour l‘alignement de la lunette de visée. En cas du modèle ayant un pied avant droit: D Enleverlapartiesupérieuredupiedavant après avoir desserré les vis d‘articulation 14. Loger les cales 18 dans le rail de la lunette de visée et fixer la partie supérieure en serrant les vis 19 de façon qu‘elle soit encore déplaçable. Monter le pied avant par une des vis d‘articulation 14, le loger dans l‘embase avant et faire glisser la lunette à la meilleure distance œil-oculaire. Retirer la lunette et le pied avant ensemble sans en changer la position. Enlever la partie supérieure du pied avant et serrer les vis 19 d‘une force de 10 Nm. Assembler le pied avant de nouveau et serrer les vis d‘articulation 14 doucement. En cas du modèle ayant un pied avant coudé: D Loger les cales18 dans le rail de la lunette de visée et fixer le pied avant par les vis 19 de façon qu‘il soit encore déplaçable. Le loger dans l‘embase avant et faire glisser la lunette à la meilleure distance œil-oculaire. Retirer la lunette et le pied avant ensemble sans en changer la position. Serrer les vis 19 d‘une force de 10 Nm. E Placer le pied arrière de manière à ce que le tenon en T soit centré axialement dans l‘encoche 8. Retirer la lunette sans changer la position du pied arrière et serrer la vis 19. Faire attention à ce que la face inférieure du pied arrière soit parallèle à la face supérieure de l‘embase arrière (serrure). F Replacer la lunette. Faire basculer le levier 12 d‘environ 70° vers le haut et le bloquer dans cette position en tournant la goupille de réglage 10 en sens inverse des aiguilles d‘une montre. Après cela, serrer les vis d‘articulation 14 (coller n‘est pas nécessaire). Desserrer doucement la goupille de réglage 10 jusqu‘à ce que le levier 12 se rabatte. Faire stopper le levier 12 environ 1 mm avant la fin de course et bloquer la goupille de réglage 10 dans cette position en serrant la vis de blocage 11. G Aligner la lunette par les vis de support 20 et les serrer toutes les deux. Contrôle Rendre souples les ajustages des pieds en pivotant la lunette plusieurs fois, vérifier l‘ajustage du pivot du pied avant et, le cas échéant, le réajuster par la vis d‘ajustage 7 et consolider l‘ajustement par la vis de blocage 71. Le pivotement de la lunette doit se faire en souplesse et sans aucune tension. Servez-vous de l‘index droit pour ouvrir le verrou et faites pivoter la lunette. Lors de l‘enclenchement du pied arrière, le verrou doit s‘ouvrir et se fermer automatiquement. Si le levier 12 descend jusqu‘au fond, il faut réajuster la goupille de réglage 10 en la tournant en sens inverse des aiguilles d‘une montre. Vérifier le serrage des vis et lubrifier légèrement les pièces d‘ajustage. Faire durcir la colle appliquée. Après avoir tiré les premiers coups, vérifier si le levier 12 s‘arrête toujours 0,5 à 1 mm avant la fin de course. Le réajuster, si nécessaire. Attention: Le bon fonctionnement du montage EAW n‘est assuré que si la lunette se fait pivoter avec souplesse. Faites enclencher rapidement le pied arrière dans la serrure. Contrairement au montage à crochets, il reste une petite fente lumineuse entre la face supérieure de l‘embase arrière et le pied arrière – la technique du système de verrouillage EAW étant la cause de ce phénomène. L‘absence absolue de tension est indispensable pour obtenir une précision de tir optimale. Pousser le levier 12 vers le bas manuellement pourrait produire un effet négatif sur la performance de tir. Pied avant 17 19 14 Pied avant 18 19 14 25 Schwenkmontagen PivotMounts Montagespivotants
- 26. 26 Schwenkmontagen PivotMounts Montagespivotants EAW-Schwenkmontagen – Ein Baukastensystem EAW Pivot Mounts – A Building Block System Montages pivotants EAW – un système modulaire WT S./pg./pg. 84 Hinterfuß-Unterteil/rear foot sub-base/partie inférieure de pied arrière Hebelverschluss lever lock verrouillage à levier WT S./pg./pg. 84 WT S./pg./pg. 72–74 WT S./pg./pg. 71-74 Schlösschen/rear base/ serrure Hinterplatte/rear plate/ embase-socle arrière WT = Waffentyp/weapon type/type d’arme Repetierer/bolt action rifles/ carabines à répétition Kipplaufwaffen/break-open rifles/carabines à canon basculant Die EAW-Schwenk- und Hebelschwenk- montagen sind ein durchdachtes System aus Einzelkomponenten, die sich für jeden Einsatzzweck perfekt zusammenstellen lassen. Dem Schaubild können Sie entnehmen, welche Teile Sie wo im Katalog finden. Sollten Sie einen Repetierer bestücken wollen, können Sie eine Komplettmon- tage aus einer Liste nach Ihren Anforde- rungen auswählen. Da sich Kipplaufwaf- fen nicht so leicht kategorisieren lassen, werden hierfür die Montagen immer aus Einzelteilen zusammengestellt. The EAW pivot mounts and pivot mountswithlever are a well-engineered system composed of single parts which can be assembled depending on the application. From the table you will see where to find these parts in the catalogue. If you require a mount for a bolt action rifle, you can easily choose a complete mount from a table according to make and model of the rifle. Since it is not so easy to categorize break-open rifles, the mounts for these rifles have to be ordered as single parts. Les montages pivotants et montages pivotants à levier EAW représentent un système bien réfléchi composé de pièces détachéeslesquellespeuventêtreassemblées selon l’emploi. Veuillez consulter les tableaux pour savoir sur quelle page se trouvent les pièces adéquates. Si vous êtes intéressé par un montage pour une carabine à répétition, vous pouvez choisir d‘une liste un montage complet selon vos exigences. Etant donné qu‘il n‘est pas si facile de catégoriser les carabines à répétition, il faut commander des pièces détachées pour celles-ci. WT S./pg./pg. 68–70 WT S./pg./pg. 67 Vorderplatte/front base/embase avant Vorderplatte/front plate/embase avant Vorderfuß/front foot/pied avant WT S./pg./pg 75–79 Hinterfuß/rear foot/ pied arrière WT S./pg./pg 80–81 WT S./pg./pg 82–83 Hinterfuß-Oberteil/rear foot top/partie supé- rieure de pied arrière ! auchfürEinhakmontagen also for claw mounts adaptésauxmontagesà crochets Komplettmontage/complete mount/ montage complet WT S./pg./pg 28-62 60-61 Vorderfuß/Vorderfuß/ footfoot
- 27. 27 Schwenkmontagen PivotMounts Montagespivotants mit Ringen with rings à colliers für Zielfernrohre mit Schiene for scopes with rail pour lunettes avec rail Standard Zeiss VM/ZM Swarovski SR S & B Convex 300 303 304 305 306 307 400 403 1400 1403 2400 2403 3400 3403 gekröpft extended coudé x x x x x x x BH mm Standard 17 17 19 19 22 22 17 17 17 17 17 17 17 17 Magnum 17 17 19 19 22 22 - - - - - - - - XS 18 18 20 - - - 18 18 18 18 18 18 18 18 Objektivrohr-Ø (außen) Ø objective tube (outside) 1 Ø tube objectif (extérieur) mm < 57 58 – 64 alle/all/toutes Mittelrohr-Ø Ø middle tube 2 Ø tube central Seite/ page/ page 28 – 35 (Ø 1"/26 mm) 36 – 43 (Ø 30 mm) 44 – 47 (Ø 34 mm) 48 – 51 (Ø 36 mm) 52–59 Empfehlung: Magnum-Ausführung bei dünnwandigen Gläsern oder Kalibern ab 8 mm Magnum. XS-Ausführung ab Kaliber 9.3 in Verbindung mit schweren Gläsern; mit Swarovski LRS immer. Recommendation: Magnum version for scopes with thin walled tube or for rifle calibres 8 mm Magnum or larger. XS version for rifle calibres 9.3 or larger when used with heavy scopes. With Swarovski LRS scope absolutely necessary! Recommandation : Version Magnum pour lunettes avec tube à paroi mince ou pour carabines de calibre 8 mm Magnum ou plus puissant. Version XS pour carabines de calibre 9,3 mm ou plus puissant en combinaison avec des lunettes lourdes. Absolument nécessaire pour lunettes Swarovski LRS. Wann passt welche Schwenkmontage? Which Pivot Mount to Use? Quel montage pivotant choisir? Die folgende Tabelle gibt einen Über- blick über die verschiedenen Modelle der Schwenkmontagen. Die Angaben sind nur als Richtwerte zu sehen, da die Waffen und Zielfernrohre zu unterschiedlich sind. Die EAW-Nummern entnehmen Sie bitte den folgenden Seiten. Auf einigen Repetierern lassen sich nur Hebelschwenkmontagen verwenden. Diese sind ebenfalls als Komplettmontagen lieferbar. Sie finden sie auf der nächsten Seite. The following table gives an overview of the various models of pivot mounts.The specifications are only standard values, because the weapons and scopes are far too different. The EAW numbers can be found on the following pages. On some bolt action rifles only pivot mounts with lever can be used. These are likewise available as complete mounts. You will find them on the next page. Le tableau suivant vous donne une vue globale des différents modèles de montages pivotants. Les données sont des valeurs indicatives. Malheureusement, il n‘est pas possible de fournir des valeurs obligatoires parce que les armes et les lunettes de visée sont trop divergentes. Sur quelques carabines à répétition on ne peut utiliser que des montages pivotants à levier, lesquels sont aussi disponibles comme montages complets. Vous les trouverez à la page suivante. Objektivrohr-Ø (außen) Ø objective tube (outside) Ø tube objectif (extérieur) 1 2 Mittelrohr-Ø Ø middle tube Ø tube central 1 2
- 28. 28 Schwenkmontagen PivotMounts Montagespivotants A Hebelschwenkmontage aus Einzelteilen / pivot mount with lever assembled from single parts / montage pivotant à levier en pièces détachées a Hebelschwenkmontage / pivot mount with lever / montage pivotant à levier KK: Kleinkaliber / small calibre rifle / arme de petit calibre BBF: Bockbüchsflinte / mixed barrel gun / fusil mixte superposé BDB: Bockdoppelbüchse / over/under rifle / carabine superposée Mod. 300 300 Magnum 300 XS (1) 303 303 Magnum BH 17 mm 17 mm 18 mm 17 mm 17 mm EAW-Nr. EAW-Nr. EAW-Nr. EAW-Nr. EAW-Nr. Alle KK mit 11 mm-Prisma/all small calibre rifles with 11 mm dovetail/toute arme de petit calibre à queue d’aronde de 11 mm mit metrischen Schrauben/screws having metric thread/avec vis à filetage métrique 300-00001 - - 303-00001 - Anschütz KK und andere mit 11 mm-Pr./Anschütz KK and others with 11 mm dovetail/KK Anschütz et autres à queue d’aronde de 11 mit zolligen Schrauben/screws having inch thread/avec vis à filetage au pouce 300-00026 - - 303-00026 - Anschütz 1780 300-00222 300-10222 300-30222 303-00222 303-10222 1727 F 300-00228 300-10228 - 303-00228 303-10228 A Square Repetierer/bolt action rifle/répét. 416 Rigby - - 300-30158 - - Benelli Argo, Argo Special 300-00273 300-10273 300-30273 303-00273 303-10273 Beretta Silver Sable II siehe S. 60/see p. 60/voir p. 60 BRNO ZKM, Fox, CZ 527, Hornet Prisma 16,5 mm 300-00041 - - 303-00041 - ZKK, 600, 601, 602, CZ 550, CZ 537, Repetierer mit Prisma 19 mm/bolt action rifle/répét. siehe S. 60/see p. 60/voir p. 60 Browning BAR I, BAR II, CBL, Acera, Long/Short Trac 300-00003 300-10003 300-30003 303-00003 303-10003 BLR, CLR 81, Lightning 300-00103 300-10103 300-30103 303-00103 303-10103 BAR Longtrac Linkssystem/left-handed version/ version gaucher 300-00203 300-10203 - 303-00203 303-10203 Browning Mauser Sniper 300-00004 300-10004 300-30004 303-00004 303-10004 A-bolt, Eurobolt, Utah, Takedown 300-00002 300-10002 300-30002 303-00002 303-10002 A-bolt Mountain/WSSM 300-00167 300-10167 300-30167 303-00167 303-10167 A-bolt cal. .222, 223 KK 300-00196 300-10196 300-30196 303-00196 303-10196 T-bolt 300-00221 300-10221 300-30221 303-00221 303-10221 X-bolt siehe S. 60/see p. 60/voir p. 60 European 300-00143 300-10143 300-30143 303-00143 303-10143 Carl Gustaf 1900, 1896, ohne Wulst/without bulb/sans œilleton 300-00005 300-10005 300-30005 303-00005 303-10005 1900, 1896, mit Wulst/with bulb/avec œilleton 300-00105 300-10105 300-30105 303-00105 303-10105 2000 300-00194 300-10194 300-30194 303-00194 303-10194 3000 300-00215 300-10215 300-30215 303-00215 303-10215 4000 300-00259 300-10259 300-30259 303-00259 303-10259 Chapuis Gévaudan 2000 300-00250 300-10250 - 303-00250 303-10250 Express siehe S. 60/see p. 60/voir p. 60 Churchill Highlander 300-00123 300-10123 300-30123 303-00123 303-10123 CZ siehe/see/voir „BRNO“ - - - - Fabarm Iris 300-00220 300-10220 300-30220 303-00220 303-10220 Fias Churchill 300-00112 300-10112 300-30112 303-00112 303-10112 Grünig & Elmiger Repetierer/bolt action rifle/répét. 300-00089 300-10089 300-30089 303-00089 303-10089 Haenel Jaeger 10 300-00225 300-10225 300-30225 303-00225 303-10225 Heckler & Koch SL 7 und andere/and others/et autres 300-00087 - - 303-00087 303-10087 SLB 2000 300-00187 300-10187 300-30187 303-00187 303-10187 Heym SR 20 300-00060 300-10060 300-30060 303-00060 303-10060 SR 21 mit Bohrungen auf Hülsenbrücke/ with bore holes in the rear of the receiver/ avec alésages à l‘arrière de boîte de culasse 300-00306 300-10306 300-30306 303-00306 303-10306 SR 30 mit Bohrungen auf Hülsenbrücke/ with bore holes in the rear of the receiver/ avec alésages à l‘arrière de boîte de culasse 300-00206 300-10206 300-30206 303-00206 303-10206 SR 21/30 mit Prisma auf Hülsenbrücke/ with dovetail in the rear of the receiver/ à queue d‘aronde à l‘arrière de boîte de culasse siehe S. 60/see p. 60/voir p. 60 SR 40 300-00108 - - 303-00108 - Express 300-00120 300-10120 300-30120 303-00120 303-10120 Express Repetierer/bolt action rifle/répét. 300-00320 300-10320 300-30320 303-00320 303-10320 BBF 22 S 2, 25 A HOWA 1500 S 300-00218 300-10218 300-30218 303-00218 303-10218 1" 26 mm Bauhöhe über Hülsenkopf height above receiver head hauteur au-dessus de tête de boîtier de culasse Schwenkmontagen mit Ringen Pivot Mounts with Rings Montages pivotants à colliers