SlideShare une entreprise Scribd logo
1  sur  18
Télécharger pour lire hors ligne
APRIL 2015
A PRINCIPLED TECHNOLOGIES REPORT
Commissioned by Dell Inc.
IMPROVING PERFORMANCE WITH IN-MEMORY SQL SERVER 2014
DATABASE FEATURES ON THE DELL POWEREDGE R930
Your fastest path to a truly modern datacenter with maximized database
performance is to upgrade to the latest and greatest hardware and software. The
combination of the Dell PowerEdge R930, powered by the Intel Xeon processor E7-8800
v3 family, and Microsoft SQL Server 2014 with the new In-memory OLTP feature, works
to help you achieve this goal.
In the Principled Technologies datacenter, we tested the four-socket Dell
PowerEdge R930 server running virtualized instances of SQL Server 2014 and compared
its performance to that of a legacy Dell PowerEdge R910 server running virtualized
instances of SQL Server 2008 R2. Thanks to the new in-memory OLTP feature in SQL
Server 2014 and upgraded hardware of the Dell PowerEdge R930, the new solution
delivered 4.23 times the performance of the legacy server on similar benchmarks.
Replacing older servers running older software versions with new servers and software
should mean a better experience for users, because the applications they use will be
able to get more transactions and work done in the same amount of time.
A Principled Technologies report 2Improving performance with in-memory SQL Server 2014
database features on the Dell PowerEdge R930
DELL POWEREDGE R930 AND IN-MEMORY OLTP ACCELERATE YOUR
WORKLOAD
The Dell PowerEdge R930 is a 4U, four-socket server that features the latest
Intel Xeon processor E7-8800 v3 and E7-4800 v3 series. The Dell PowerEdge R930
features several upgrades to the Dell PowerEdge R910: a jump to 96 DIMM slots, eight
extra drive bays, PCIe SSD NVMe drives, 12Gb/s SAS backplane for 12Gb/s SSDs, and the
latest DDR4 memory.
SQL Server 2014 has new features that allow you to get better performance out
of your OLTP applications. In-Memory OLTP, or In-Memory Optimization, is a
technology integrated into the latest release of SQL Server that stores specified
database tables directly in your server’s memory for lower latency and faster
transaction processing. The increased memory capability of the Dell PowerEdge R930 in
particular, in its greater number of available DIMM slots, faster DDR4 speeds, and
greater overall capacity potential, provides plenty of hardware resources to work with
this new feature. This new feature is important to support larger data sets and reduces
latency by keeping the data closer to compute.
To show the OLTP database performance improvements that the 13th
generation Dell PowerEdge R930 solution can provide over older hardware, we
compared this solution to a legacy 4U, four-socket Dell PowerEdge R910. We ran two
similar OLTP workloads in four virtual machines (VMs) on each solution: the Dell
PowerEdge R910 server ran four SQL Server 2008 R2 VMs, each with an OLTP workload
derived from TPC-C, and the Dell PowerEdge R930 ran four upgraded VMs, each with a
similar OLTP workload derived from TPC-C designed to use the SQL Server 2014 In-
Memory Optimization feature. In-memory OLTP has specific constraints and
requirements. Because an organization would update applications during the upgrade
cycle, we used two toolsets, one for SQL Server 2008 R2, and one designed for SQL
Server 2014 In-Memory OLTP. While the toolsets are different, the business goals of the
workloads were the same.
For information about the Dell PowerEdge R930 and our other test components,
see Appendix A. For detailed system configuration, see Appendix B. For step-by-step
testing details, see Appendix C.
A Principled Technologies report 3Improving performance with in-memory SQL Server 2014
database features on the Dell PowerEdge R930
WHAT WE FOUND
The Dell PowerEdge R930 server and optimized OLTP workload delivered 4.23
times the database performance from the In-Memory OLTP toolset as compared to the
legacy solution running SQL Server 2008 R2 and using the non In-Memory toolset. (See
Figure 1.)
Figure 1: The Dell PowerEdge
R930 delivered 4.23x the
database performance of the
legacy server and software
combination.
The results we report above are the median results of three runs. Figure 2
shows the database results, by VM, for the two solutions. Each in-memory optimized
OLTP database VM on the Dell PowerEdge R930 supported a sustained workload of
nearly 1 million transactions per minute, as reported by the Microsoft benchmark
driver. This means that by upgrading to the Dell PowerEdge R930 solution and using SQL
Server 2014 In-Memory Optimization, you can get four times the performance in the
same amount of rack server space, which can help you save on space-related costs as
your business grows. This can mean consolidating the work of four legacy servers into
one Dell PowerEdge R930.
Dell PowerEdge R930 Legacy server
VM1 1,004,526 246,479
VM2 1,027,880 248,843
VM3 989,731 250,655
VM4 1,059,328 218,552
Total 4,081,465 964,529
Figure 2: Transactions per minute breakdown by VM, as reported by Benchmark Factory for the legacy server and as
reported by the Microsoft benchmark driver for the Dell PowerEdge R930.
We used two different benchmark tools for testing: Benchmark Factory on the
legacy server as a representative traditional disk-based workload derived from TPC-C
A Principled Technologies report 4Improving performance with in-memory SQL Server 2014
database features on the Dell PowerEdge R930
database, and a Microsoft-provided internal only benchmark tool with a similar OLTP
database that uses In-Memory Optimization for the Dell PowerEdge R930. We kept
parameters as comparable as possible; for both configurations, we ran 500 warehouses,
100 users, and 0 ms think time.
CONCLUSION
By utilizing the Intel Xeon processor E7-8800 v3 family, more memory slots,
additional drive bays, and upgraded drive possibilities, the Dell PowerEdge R930 has
ample hardware resources ready to handle the latest features of SQL Server 2014 for
your next database upgrade. Using SQL Server 2014 with In-Memory Optimization, the
Dell PowerEdge R930 solution we tested delivered over 4 million transactions per
minute, quadrupling the TPM of the legacy server running disk-based OLTP databases.
By replacing your old servers with more powerful Dell PowerEdge R930 servers,
you can avoid expanding your datacenter to store, rack, cable, power, cool, and manage
increasing workloads with less-efficient solutions. The Dell PowerEdge R930 solution
helps ensure you get both top-of-the-line performance with the latest features,
maximizing existing datacenter space. When applications using OLTP database back-
ends demand the fastest possible transaction speeds, you can unleash database
performance by migrating your tables to use SQL Server 2014 In-Memory Optimization
along with the new and expanded hardware capabilities of the Dell PowerEdge R930
with Intel Xeon processors E7-8890 v3.
A Principled Technologies report 5Improving performance with in-memory SQL Server 2014
database features on the Dell PowerEdge R930
APPENDIX A – ABOUT THE COMPONENTS
About the Dell PowerEdge R930
The Dell PowerEdge R930 is part of Dell’s 13G offerings and is currently the fastest four-socket 4U server.
Designed to provide expanding scalable performance for large enterprises, it supports up to:
 96 DIMMs of DDR4 memory
 24 internal drives with the option for 8 PCIe® Express Flash drives (with the optional PCIe backplane)
 12Gb/s SAS drives
It also offers Dual PERC option, PERC9 (H730P), Fluid Cache for SAN capability, and a number of built-in RAS
features for high reliability, such as Fault Resilient memory and Intel Run Sure technology. To learn more about the
PowerEdge R930, visit www.dell.com/learn/us/en/04/campaigns/poweredge-13g-server.
About the Intel Xeon processor E7-8800 v3 and E7-4800 v3 families
Intel designed the new Intel Xeon processor E7-8800 v3 and E7-4800 v3 families to support mission-critical, high-
performance workloads by featuring up to 18 cores and 36 threads per socket to provide significant jumps in
performance from previous releases. The Intel Xeon processor E7-8800 v3 and E7-4800 v3 families supports up to 1.5TB
DDR4 memory per socket, supports up to 24 DDR4 DIMMs per socket, and supports up to 2,133MHz DDR4 speeds to
improve performance and increase scalability.
The Intel Xeon processor E7-8800 v3 and E7-4800 v3 families supports all the previous reliability, availability, and
serviceability features of previous processor releases to support critical workloads. With Intel Run Sure technology,
these processors add new RAS features, including eMCA Gen 2, MCA Recovery – Execution Path, MCA IO, and PCIe Live
Error Recovery. For more information about the Intel Xeon processor E7 v3 product family, visit www.intel.com.
About Microsoft SQL Server 2014
This latest iteration of the Microsoft SQL Server family is a next-generation data platform that includes many
new features oriented to enterprise users focused on transactional performance and speed, time-to-insight, business
analytics, high availability, and integration of their data streams into public and private cloud environments. Microsoft
highlights the following key features:
Support for in-memory OLTP, via a memory and OLTP-optimized database engine integrated into the platform’s
data engine, and enhancements to the in-memory column store already present in Microsoft SQL 2012.
Ease of integration with Microsoft Azure, making SQL Server 2014 a platform for hybrid cloud, supporting
scenarios such as cloud backup and cloud disaster recovery.
Better redundancy with AlwaysOn Availability Groups, allowing up to eight secondary replicas to be placed in
different locations for high availability, read-access efficiency, and backup and data recovery.
For more information about Microsoft SQL Server 2014, visit www.microsoft.com/en-us/sqlserver/default.aspx.
About Benchmark Factory
Benchmark Factory for Databases is a database performance testing tool that allows you to conduct database
workload replay, industry-standard benchmark testing, and scalability testing. Using the incorporated load testing tools,
you can make changes to your database environment while mitigating the risks of unavoidable database changes such as
patches and upgrades, operating system migrations, and adjustments to virtual machine configurations. In addition, its
A Principled Technologies report 6Improving performance with in-memory SQL Server 2014
database features on the Dell PowerEdge R930
proprietary workload capture and replay supports Oracle and SQL Server database. For this study, we used the
Benchmark Factory TPC-C workload. The Benchmark Factory TPC-C workload is derived from TPC-C, and as such is not
comparable to published TPC-C results.
Learn more at www.software.dell.com/products/benchmark-factory/.
About the Microsoft-provided benchmark
The Microsoft benchmark driver is an internal Microsoft tool designed specifically to test and stress the In-
Memory Optimized OLTP feature in SQL Server 2014. The benchmark driver creates and loads a database to scale, and
then runs a transactional workload against the database. The workload is derived from TPC-C, and as such is not
comparable to published TPC-C results.
A Principled Technologies report 7Improving performance with in-memory SQL Server 2014
database features on the Dell PowerEdge R930
APPENDIX B – SYSTEM CONFIGURATION INFORMATION
Figure 3 provides detailed configuration information for the test systems.
System Dell PowerEdge R930 Dell PowerEdge R910
Power supplies
Total number 4 4
Vendor and model number Dell 0GDPF3 Dell 0TCVRRA00
Wattage of each (W) 1,100 1,100
Cooling fans
Total number 6 6
Vendor and model number Nidec® UltraFlo V12C12BS1M3 Delta Electronics PFC1212DE
Dimensions (h × w) of each 5″ × 5″ 5.25″ × 5.25″
Volts 12 12
Amps 2.31 4.80
General
Number of processor packages 4 4
Number of cores per processor 18 8
Number of hardware threads per
core
2 2
System power management policy Balanced Balanced
CPU
Vendor Intel Intel
Name Xeon Xeon
Model number E7-8890 v3 X7560
Socket type LGA2001-1 LGA1567
Core frequency (GHz) 2.50 2.27
Bus frequency 9.6 GT/s 6.4 GT/s
L1 cache 32 KB + 32 KB (per core) 32 KB + 32 KB (per core)
L2 cache 256 KB (per core) 256 KB (per core)
L3 cache 45 MB 24 MB
Platform
Vendor and model number Dell PowerEdge R930 Dell PowerEdge R910
Motherboard model number 0Y4CNCX19 0JRJM9
BIOS name and version 0.0.23 2.10.0
BIOS settings Default Default
Memory module(s)
Total RAM in system (GB) 512 128
Vendor and model number Samsung® M393A1G43DB0-CPB Samsung M393B1K70BH1-CH9
Type PC4-2133 PC3-10600
Speed (MHz) 2,133 1,333
Speed running in the system (MHz) 2,133 1,067
Timing/Latency (tCL-tRCD-tRP-
tRASmin)
15-15-15-33 9-9-9-36
Size (GB) 8 8
Number of RAM module(s) 64 16
A Principled Technologies report 8Improving performance with in-memory SQL Server 2014
database features on the Dell PowerEdge R930
System Dell PowerEdge R930 Dell PowerEdge R910
Chip organization Double-sided Double-sided
Rank Dual Dual
Operating system
Name
Microsoft Windows Server 2012 R2
Datacenter Edition
Microsoft Windows Server 2008 R2
Datacenter Edition
Build number 9600 7601
File system NTFS NTFS
Language English English
RAID controller
Vendor and model number PERC H730P PERC H700 Integrated
Firmware version 25.2.1.0037 12.10.6-0001
Driver version 6.600.21.08 4.31.1.64
Cache size (MB) 2,048 512
Solid-state drives
Vendor and model number Dell SXKTK Dell 6R5R8
Number of drives 12 8
Size (GB) 200 200
Type SAS SAS
Hard drives #1
Vendor and model number Seagate® ST9900805SS Dell 5R6CX
Number of drives 4 2
Size (GB) 900 600
RPM 10k 10k
Type SAS SAS
Hard drives #2
Vendor and model number Seagate ST9300653SS Dell 0PGHJG
Number of drives 8 6
Size (GB) 300 300
RPM 15k 10k
Type SAS SAS
Ethernet adapters
Vendor and model number Intel Gigabit 4P i350-t rNDC Broadcom® BCM5709C
Type Gigabit Ethernet Gigabit Ethernet
Driver 12.11.97.9900 2/12/2015 7.12.2.0 11/20/2014
Figure 3: System configuration information for the test systems.
A Principled Technologies report 9Improving performance with in-memory SQL Server 2014
database features on the Dell PowerEdge R930
APPENDIX C – HOW WE TESTED
Configuring the Dell PowerEdge R930
We used the Dell PERC H730P to create three RAID 10 volumes on the server: 4x 900GB HDD, 12x 200GB SSD, 8x
300GB HDD. We turned the PERC caching off for the SSD volume and fully initialized all volumes.
Installing Microsoft Windows Server 2012 R2 Datacenter
1. Insert the installation media into the CD/DVD drive, and restart the server.
2. When the option appears, press F11 to enter the Boot Manager.
3. Select BIOS Boot Menu.
4. Select SATA Optical Drive, and press Enter.
5. Press any key when prompted to boot from DVD.
6. When the installation screen appears, click My language is English (United States).
7. Leave language, time/currency format, and input method as default, and click Next.
8. Click Install now.
9. When the installation prompts you, enter the product key.
10. Select Windows Server 2012 Datacenter (Server with a GUI), and click Next.
11. Check I accept the license terms, and click Next.
12. Click Custom: Install Windows only (advanced).
13. Select Drive 0 Unallocated Space, and click Next, at which point Windows Updates begins and restarts
automatically after completing.
14. When the Settings page appears, fill in the Password and Reenter Password fields with the same password.
15. Log in with the password you set up previously.
16. Ensure that the OS HDD volume is labeled C:, the Data SSD volume is labeled E:, and that the Logs HDD volume is
labeled F:.
Configuring Windows Update
1. In the left pane of the Server Manager window, click Local Server.
2. In the main frame, next to Windows Update, click Not configured.
3. In the main pane of the Windows Update window, click Let me choose my settings.
4. Under Important updates, select Never check for updates (not recommended), and click OK.
5. In the left pane, click Check for updates, and install all available updates.
6. Close the Windows Update window.
Installing the Hyper-V® role on the system under test
1. Open Server Manager, and click ManageAdd Roles and Features.
2. At the Before You Begin screen, click Next.
3. At the Installation Type screen, click Next.
4. At the Server Selection screen, select one of the servers in the failover cluster.
5. At the Server Roles screen, check the Hyper-V checkbox. At the prerequisite pop-up, click Add Features. Click
Next.
6. At the Features screen, click Next.
7. At the Hyper-V screen, click Next.
8. At the Virtual Switches screen, click Next.
9. At the Migration screen, click Next.
A Principled Technologies report 10Improving performance with in-memory SQL Server 2014
database features on the Dell PowerEdge R930
10. At the Default Stores screen, click Next.
11. At the Confirmation screen, check to automatically restart the server after installation, and click Install.
Creating the virtual switch
1. Click Start, type Hyper-V Manager and press Enter.
2. In the right pane, click Virtual Switch Manager.
3. Select New virtual network switch, select External, and click Create Virtual Switch.
4. Give the virtual switch a name, and select the adapter that corresponds to the testing network.
5. Click OK.
Creating the VHDs
1. Click Start, type Hyper-V Manager and press Enter.
2. In the right pane, click NewHard Disk.
3. At the Before You Begin screen, click Next.
4. At the Choose Disk Format screen, select VHDX, and click Next.
5. At the Choose Disk Type screen, select Fixed Size, and click Next.
6. At the Specify Name and Location screen, give the hard disk a name and location, and click Next.
a. For the OS VHD, select a location on the C: drive.
b. For the Data VHD, select a location on the E: drive.
c. For the Logs VHD, select a location on the F: drive.
7. At the Configure Disk screen, select Create a new blank virtual hard disk. Enter a size, and click Finish.
a. For the OS VHD, enter 80GB
b. For the Data VHD, enter 220GB
c. For the Logs VHD, enter 220GB
Creating the base VM
1. Click Start, type Hyper-V Manager and press Enter.
2. In the right pane, click Virtual MachinesNew Virtual Machine.
3. Select a node on which to install the VM, and click OK.
4. At the Before You Begin screen, click Next.
5. At the Specify Name and Location screen, give the VM a name, and click Next.
6. At the Assign Memory screen, type 65536 MB and click Next.
7. At the Configure Networking screen, use the drop-down menu to select the virtual switch, and click Next.
8. At the Connect Virtual Hard Disk screen, select Use an existing virtual hard disk, and browse to the OS VHD
created in the previous section.
9. At the Summary screen, click Finish.
Configuring the base VM
1. Right-click the newly created VM, and click Settings.
2. Give the VM 16 virtual processors.
3. Select Add Hardware and SCSI Controller, and click Add.
4. Select the new SCSI Controller, select Hard Drive, and click Add.
5. Select Use an existing virtual hard disk, and browse to the Data VHD.
6. Click Apply.
7. Add a new SCSI Controller, and connect the Logs VHD.
A Principled Technologies report 11Improving performance with in-memory SQL Server 2014
database features on the Dell PowerEdge R930
8. Click OK.
Installing the VM operating system on the base VM
1. Use the steps above to install Microsoft Windows Server 2012 R2 on the VM.
2. Use Server Manager to install the .NET Framework 3.5 feature.
3. Set up networking:
a. Click StartControl Panel, right-click Network Connections, and choose Open.
b. Right-click the NIC connected to the test network, and choose Properties.
c. Select TCP/IP (v4), and choose Properties.
d. Assign the VM a static IP address.
Installing Microsoft SQL Server 2014
1. Attach the installation media to the server.
2. Launch setup.exe from the installation media.
3. Choose the Installation section on the left, and click New SQL Server stand-alone installation or add features to
an existing installation.
4. At the Product Key screen, select Evaluation, and click Next.
5. At the License Terms screen, check the I accept the license terms box, and click Next.
6. At the Global Rules screen, allow the Global Rules check to finish, and click Next.
7. At the Microsoft Update screen, check the use Microsoft Update to check for updates (recommended) box, and
click Next.
8. Once the updates have been downloaded and installed, click Next.
9. At the Install Setup Files screen, allow the setup files to install, and click Next.
10. At the Install Rules screen, allow the Install Rules check to run, and click Next.
11. At the Setup Role screen, select the SQL Server Feature Installation radio button, and click Next.
12. At the Feature Selection screen, select the features required for your installation. We selected Database Engine
Services, Full-Text and Semantic Extractions for Search, Client Tools Connectivity, Client Tool Backwards
Compatibility, Management Tools - Basic, and Management Tools - Complete.
13. At the Feature Rules screen, allow the Feature Rules check to run, and click Next.
14. At the Instance Configuration screen, click Next to use the default instance named MSSQLSERVER.
15. At the Server Configuration screen, click Next.
16. At the Database Engine Configuration screen, select the radio button for Mixed Mode (SQL Server
authentication and Windows authentication), and enter a password for the SQL Server system administrator (sa)
account.
17. Click the Add Current User button.
18. In the Data Directories tab, enter the directories to be used for SQL data and logs. We used E: and F:,
respectively, to place the data and logs on their appropriate VHDs. Click Next.
19. At the Feature Configuration Rules screen, allow the Feature Configuration Rules check to finish, and click Next.
20. At the Ready to Install screen, click Install.
21. After the installation has completed, close the wizard.
Installing the Microsoft SQL Server In-Memory TPC-C Benchmark Kit
1. Extract the contents of the package to a directory on the SQL Server VM. We extracted to the root directory.
A Principled Technologies report 12Improving performance with in-memory SQL Server 2014
database features on the Dell PowerEdge R930
2. Open a command prompt window, and run the following command to load the database into the local SQL
instance:
C:TPCC_For_HKMSTPCC.469.HKSETUPsetup.cmd /S:”” /U:sa /P:<password for
sa> /W:500 /D:scale_down /H:true
3. When the database creation finishes, create a backup of the database. We used the backup to restore a fresh
copy of the database before each run.
4. Run C:TPCC_For_HKEXESsetup2330C.exe and follow the steps in the installation wizard to install
the Microsoft benchmark driver utility.
5. Click StartMicrosoft Benchmark Driver to start the benchmark utility.
6. In the Drivers tab, right-click the empty space, and click New.
7. Apply the following parameters and leave the rest at their default settings:
a. Name: DRIVER1
b. Parameter Set: ~Default
c. Machine Name: <VM IP address>
d. Log File Name: C:log
e. Connect Rate: 50
f. Start Rate: 50
8. In the Users tab, right-click the empty space, and click New.
9. Apply the following parameters and leave the rest at their default settings:
a. Select the ODBC radio button.
b. From the Engine Name drop-down menu, select DRIVER1.
c. Range From: 1
d. Range To: 500
e. Min: 1
f. Max: 1
g. Select the Float radio button.
h. User Count: 100
i. Check the Scale Down Database checkbox.
j. SQL Server: <VM IP address>
k. Database: tpcc
l. User: sa
m. Password: <password for sa>
10. In the Params tab, right-click the ~Default parameter set, and click Modify.
11. Change all the values to zero, and then set the Txn Weights as follows:
a. New Order: 10
b. Payment: 10
c. Delivery: 1
d. Stock Level: 1
e. Order Status: 1
12. Click the Save icon to save the profile.
A Principled Technologies report 13Improving performance with in-memory SQL Server 2014
database features on the Dell PowerEdge R930
Cloning the Windows Server 2012 R2 VMs
1. Shut down the base VM.
2. Navigate to each VHD directory, and create copies of each VHD.
3. Using Hyper-V Manager, create a new VM and attach the copied VHDs. Add SCSI controllers as needed to reflect
the configuration of the base VM.
4. Configure the memory, virtual processor count, and networking adapters to reflect the configuration of the base
VM.
5. Repeat these steps to create a total of four VMs.
6. Update the IP addresses on each new VM.
Configuring the Dell PowerEdge R910
We used the Dell PERC H700 to create three RAID 10 volumes on the server: 2x 600GB HDD for the host OS and
guest OS VHDs, 8x 800GB SSD for the guest Data VHDs, 6x 300GB HDD for the guest Logs VHDs. We turned the PERC
caching off for the SSD volume and fully initialized all volumes.
Installing Microsoft Windows Server 2008 R2 Datacenter
1. Insert the installation DVD for Windows Server 2008 R2 into the DVD drive.
2. Choose the language, time and currency, and keyboard input. Click Next.
3. Click Install Now.
4. Choose Windows Server 2008 R2 Datacenter (Full Installation) and click Next.
5. Accept the license terms, and click Next.
6. Click Custom.
7. Click the Disk, and click Drive options (advanced).
8. Click NewApplyFormat, and click Next.
9. After the installation completes, click OK to set the administrator password.
10. Enter the administrator password twice, and click OK.
11. Connect the machine to the Internet, and install all available Windows updates. Restart as necessary.
12. Enable remote desktop access.
Adding the Hyper-V role on the legacy system under test
1. Open Server Manager, and click Roles.
2. Click Add Roles.
3. On the Before You Begin page, check the Skip this page by default box, and click Next.
4. Select Hyper-V, and click Next.
5. On the Hyper-V Introduction page, click Next.
6. On the Create Virtual Networks page, click Next.
7. Confirm installation selections, and click Install.
8. Once the installation is complete, click Close.
9. When the system prompts a restart, click Yes.
10. Allow the system to fully reboot, and log in using the administrator credentials.
11. Once the desktop loads, the Hyper-V Installation Results window will finish the installation.
12. Click Close. The Hyper-V role will now be available in Server Manager under Roles.
A Principled Technologies report 14Improving performance with in-memory SQL Server 2014
database features on the Dell PowerEdge R930
Creating the virtual switch
1. In Hyper-V Manager, on the left side of Hyper-V, right-click the server name in the list, and choose Virtual
Network Manager…
2. Choose External, and click Add.
3. Name the Virtual Network, and choose the appropriate NIC for your test bed network from the drop-down
menu.
4. Click OK.
Creating the base VM
1. Click ActionNewVirtual Machine.
2. On the Before You Begin window, click Next.
3. Enter the name of the VM, and click Next.
4. Assign 30GB of memory, and click Next.
5. Choose the virtual network you created from the drop-down menu, and click Next.
6. Choose to attach a virtual hard drive later.
7. Click Finish.
8. Create the following fixed size VHDs by choosing ActionNewVirtual Hard Drive:
a. 80GB for the OS VHD placed on the C: volume.
b. 100GB for the Data VHD placed on the E: volume.
c. 50GB for the Logs VHD placed on the F: volume.
9. Right-click the VM, and choose Settings.
10. Add the OS VHD to the IDE controller.
11. Add a new SCSI Controller, and connect the Data VHD.
12. Add a new SCSI Controller, and connect the Logs VHD.
13. Click Processors, and adjust the number of virtual processors to 4.
14. Start the VM.
15. Attach the Windows Server 2008 R2 SP1 ISO image to the VM, and install Windows Server 2008 R2 on your VM.
Installing SQL Server 2008 R2 Datacenter
1. Open the Hyper-V console for the VM.
2. Log into the virtual machine.
3. Attach the Microsoft SQL Server 2008 R2 installation media to the VM.
4. Click Run SETUP.EXE. If Autoplay does not begin the installation, navigate to the SQL Server 2008 R2 DVD and
double-click.
5. If the installer prompts you with a .NET installation prompt, click Yes to enable the .NET Framework Core role.
6. In the left pane, click Installation.
7. Click New installation or add features to an existing installation.
8. At the Setup Support Rules screen, wait for the check to complete. If there are no failures or relevant warnings,
click OK.
9. Select Evaluation mode. Click Next.
10. Click the checkbox to accept the license terms, and click Next.
11. To install the setup support files, click Install.
12. If there are no failures displayed, click Next.
13. At the Setup Role screen, choose SQL Server Feature Installation.
A Principled Technologies report 15Improving performance with in-memory SQL Server 2014
database features on the Dell PowerEdge R930
14. At the Feature Selection screen, select Database Engine Services, Full-Text Search, Client Tools Connectivity,
Client Tools Backwards Compatibility, Management Tools –Basic, and Management Tools – Complete. Click Next.
15. At the Installation Rules screen, after the check completes, click Next.
16. At the Instance configuration screen, leave the default selection of default instance, and click Next.
17. At the Disk space requirements screen, click Next.
18. At the Server configuration screen, choose NT AUTHORITYSYSTEM for SQL Server Agent, and choose NT
AUTHORITYSYSTEM for SQL Server Database Engine. Click Next.
19. At the Database Engine Configuration screen, select Mixed Mode.
20. Enter and confirm a password for the system administrator account.
21. Click Add Current user. This may take several seconds.
22. In the Data Directories tab, enter the directories to be used for SQL data and logs. We used E: and F:,
respectively, to place the data and logs on their appropriate VHDs. Click Next.
23. At the Error and usage reporting screen, click Next.
24. At the Installation Configuration rules screen, check that there are no failures or relevant warnings, and click
Next.
25. At the Ready to Install screen, click Install.
26. After installation completes, click Next.
27. Click Close.
Installing Benchmark Factory 7.1
1. Connect to the Microsoft Windows Server 2008 R2 VM.
2. Download the Benchmark Factory Trial 7.1 installer to the VM.
3. Run the Benchmark Factory Trial 7.1 installer.
4. At the welcome screen, click Next.
5. At the License Agreement screen, select the I accept the terms in the license agreement radio button, and click
Next.
6. At the Destination Folder screen, leave the default installation location, and click Next.
7. At the Ready to Install the Program, ensure the install the default, service based, repository database checkbox
is checked, and click Install.
8. When the installation completes, click Finish to close the window.
Configuring Benchmark Factory 7.1
1. Open SQL Server Management Studio, and connect to the local instance.
2. Right-click Databases, and click New Database.
3. Enter a name for the database (we used bf500), and click OK.
4. Click StartBenchmark Factory Trial to start Benchmark Factory.
5. If this is the first time running Benchmark Factory, select the No, thank you radio button, and click OK.
6. When Benchmark Factory is first opened, the New Job Wizard will automatically open. If not, open the New Job
Wizard manually by clicking New.
7. In the Database Under Test section, click New.
8. From the drop-down menu, choose Microsoft SQL Server (ODBC).
9. Click Add DSN.
10. Select the User Data Source radio button, and click Next.
A Principled Technologies report 16Improving performance with in-memory SQL Server 2014
database features on the Dell PowerEdge R930
11. Select the SQL Server driver, and click Next.
12. Click Finish.
13. Give the new data source a name and description. In the Server field, enter the IP address of the current VM.
Click Next.
14. Select the With SQL Server authentication using a login ID and password entered by the user radio button, and
enter the SQL Server credentials for the sa user. Click Next.
15. Check the Change the default database to checkbox, and select bf500 from the drop-down menu. Click Next.
16. Click Finish.
17. Click Test Data Source to ensure that the connection is working properly, and click OK.
18. Select the newly created data source in the Data Source Name drop-down menu, and enter the credentials for
the sa user.
19. Give the connection a name, and click Create Connection.
20. Click Add Workload.
21. Select Industry Standard Benchmark Test from the drop-down menu, and select the TPC-C radio button.
22. Click Add Test.
23. Under the Test Options tab, navigate to the Scale sub-tab, and change the Benchmark Scale to 500.
24. In the left pane, click TPC-C Transaction Mix.
25. In the Test Options tab, navigate to the Transactions sub-tab and edit each transaction have 0ms Keying Time
and 0ms Think Time. Set the transaction weights as follows:
a. New Order: 10
b. Payment: 10
c. Order-Status: 1
d. Delivery: 1
e. Stock-Level: 1
26. Navigate to the User Load sub-tab, and click Delete All. Add a single user load of 100.
27. Navigate to the Timing sub-tab, and change the Total Iteration Length to 10 minutes.
28. In the left-hand pane, click Agent.
29. Check the checkbox for the local server, and click Save/Close.
30. Click EditSettings.
31. In the left-hand pane, click TPC-C.
32. Change the default Benchmark Scale to 500.
33. Close and re-open Benchmark Factory Trial.
34. Right-click the newly created TPC-C Job, and click Copy.
35. Right-click the Jobs View pane, and click Paste.
36. Delete the TPC-C Transaction Mix component from the first job, and delete the Create Objects for TPC-C
component from the second job. Save both jobs.
37. Select the job that still contains the Create Objects for TPC-C, and click Run Job. This will build the Benchmark
Factory target database.
38. Once the database creation is complete, create a backup of the database and place the backup file on the OS
drive.
A Principled Technologies report 17Improving performance with in-memory SQL Server 2014
database features on the Dell PowerEdge R930
Cloning the Windows Server 2008 R2 VMs
1. Shut down the base VM.
2. Navigate to each VHD directory, and create copies of each VHD.
3. Using Hyper-V Manager, create a new VM and attach the copied VHDs. Add SCSI controllers as needed to reflect
the configuration of the base VM.
4. Configure the memory, virtual processor count, and networking adapters to reflect the configuration of the base
VM.
5. Repeat these steps to create a total of four VMs.
6. Update the IP addresses on each new VM.
Running the benchmarks
For both Benchmark Factory and Microsoft benchmark driver, we used the utility to create a 500-warehouse
scale database with 100 users and 0ms think time. We then created a backup of the database that we used to restore a
fresh copy before each test run.
Before each test run, we restored the database and then shut down every VM. We rebooted the host, started
the VMs, and allowed the server to reach a steady idle state.
We ran each benchmark for ten minutes and reported the average transactions-per-minute for the last minute
of the test run.
A Principled Technologies report 18Improving performance with in-memory SQL Server 2014
database features on the Dell PowerEdge R930
ABOUT PRINCIPLED TECHNOLOGIES
Principled Technologies, Inc.
1007 Slater Road, Suite 300
Durham, NC, 27703
www.principledtechnologies.com
We provide industry-leading technology assessment and fact-based
marketing services. We bring to every assignment extensive experience
with and expertise in all aspects of technology testing and analysis, from
researching new technologies, to developing new methodologies, to
testing with existing and new tools.
When the assessment is complete, we know how to present the results to
a broad range of target audiences. We provide our clients with the
materials they need, from market-focused data to use in their own
collateral to custom sales aids, such as test reports, performance
assessments, and white papers. Every document reflects the results of
our trusted independent analysis.
We provide customized services that focus on our clients’ individual
requirements. Whether the technology involves hardware, software, Web
sites, or services, we offer the experience, expertise, and tools to help our
clients assess how it will fare against its competition, its performance, its
market readiness, and its quality and reliability.
Our founders, Mark L. Van Name and Bill Catchings, have worked
together in technology assessment for over 20 years. As journalists, they
published over a thousand articles on a wide array of technology subjects.
They created and led the Ziff-Davis Benchmark Operation, which
developed such industry-standard benchmarks as Ziff Davis Media’s
Winstone and WebBench. They founded and led eTesting Labs, and after
the acquisition of that company by Lionbridge Technologies were the
head and CTO of VeriTest.
Principled Technologies is a registered trademark of Principled Technologies, Inc.
All other product names are the trademarks of their respective owners.
Disclaimer of Warranties; Limitation of Liability:
PRINCIPLED TECHNOLOGIES, INC. HAS MADE REASONABLE EFFORTS TO ENSURE THE ACCURACY AND VALIDITY OF ITS TESTING, HOWEVER,
PRINCIPLED TECHNOLOGIES, INC. SPECIFICALLY DISCLAIMS ANY WARRANTY, EXPRESSED OR IMPLIED, RELATING TO THE TEST RESULTS AND
ANALYSIS, THEIR ACCURACY, COMPLETENESS OR QUALITY, INCLUDING ANY IMPLIED WARRANTY OF FITNESS FOR ANY PARTICULAR PURPOSE.
ALL PERSONS OR ENTITIES RELYING ON THE RESULTS OF ANY TESTING DO SO AT THEIR OWN RISK, AND AGREE THAT PRINCIPLED
TECHNOLOGIES, INC., ITS EMPLOYEES AND ITS SUBCONTRACTORS SHALL HAVE NO LIABILITY WHATSOEVER FROM ANY CLAIM OF LOSS OR
DAMAGE ON ACCOUNT OF ANY ALLEGED ERROR OR DEFECT IN ANY TESTING PROCEDURE OR RESULT.
IN NO EVENT SHALL PRINCIPLED TECHNOLOGIES, INC. BE LIABLE FOR INDIRECT, SPECIAL, INCIDENTAL, OR CONSEQUENTIAL DAMAGES IN
CONNECTION WITH ITS TESTING, EVEN IF ADVISED OF THE POSSIBILITY OF SUCH DAMAGES. IN NO EVENT SHALL PRINCIPLED TECHNOLOGIES,
INC.’S LIABILITY, INCLUDING FOR DIRECT DAMAGES, EXCEED THE AMOUNTS PAID IN CONNECTION WITH PRINCIPLED TECHNOLOGIES, INC.’S
TESTING. CUSTOMER’S SOLE AND EXCLUSIVE REMEDIES ARE AS SET FORTH HEREIN.

Contenu connexe

Plus de Principled Technologies

Increase security, sustainability, and efficiency with robust Dell server man...
Increase security, sustainability, and efficiency with robust Dell server man...Increase security, sustainability, and efficiency with robust Dell server man...
Increase security, sustainability, and efficiency with robust Dell server man...
Principled Technologies
 
Increase security, sustainability, and efficiency with robust Dell server man...
Increase security, sustainability, and efficiency with robust Dell server man...Increase security, sustainability, and efficiency with robust Dell server man...
Increase security, sustainability, and efficiency with robust Dell server man...
Principled Technologies
 
Build an Azure OpenAI application using your own enterprise data
Build an Azure OpenAI application using your own enterprise dataBuild an Azure OpenAI application using your own enterprise data
Build an Azure OpenAI application using your own enterprise data
Principled Technologies
 

Plus de Principled Technologies (20)

Deploy with confidence: VMware Cloud Foundation 5.1 on next gen Dell PowerEdg...
Deploy with confidence: VMware Cloud Foundation 5.1 on next gen Dell PowerEdg...Deploy with confidence: VMware Cloud Foundation 5.1 on next gen Dell PowerEdg...
Deploy with confidence: VMware Cloud Foundation 5.1 on next gen Dell PowerEdg...
 
Upgrade your cloud infrastructure with Dell PowerEdge R760 servers and VMware...
Upgrade your cloud infrastructure with Dell PowerEdge R760 servers and VMware...Upgrade your cloud infrastructure with Dell PowerEdge R760 servers and VMware...
Upgrade your cloud infrastructure with Dell PowerEdge R760 servers and VMware...
 
A comparison of security features in Dell, HP, and Lenovo PC systems
A comparison of security features in Dell, HP, and Lenovo PC systemsA comparison of security features in Dell, HP, and Lenovo PC systems
A comparison of security features in Dell, HP, and Lenovo PC systems
 
Increase security, sustainability, and efficiency with robust Dell server man...
Increase security, sustainability, and efficiency with robust Dell server man...Increase security, sustainability, and efficiency with robust Dell server man...
Increase security, sustainability, and efficiency with robust Dell server man...
 
Increase security, sustainability, and efficiency with robust Dell server man...
Increase security, sustainability, and efficiency with robust Dell server man...Increase security, sustainability, and efficiency with robust Dell server man...
Increase security, sustainability, and efficiency with robust Dell server man...
 
Scale up your storage with higher-performing Dell APEX Block Storage for AWS ...
Scale up your storage with higher-performing Dell APEX Block Storage for AWS ...Scale up your storage with higher-performing Dell APEX Block Storage for AWS ...
Scale up your storage with higher-performing Dell APEX Block Storage for AWS ...
 
Scale up your storage with higher-performing Dell APEX Block Storage for AWS
Scale up your storage with higher-performing Dell APEX Block Storage for AWSScale up your storage with higher-performing Dell APEX Block Storage for AWS
Scale up your storage with higher-performing Dell APEX Block Storage for AWS
 
Get in and stay in the productivity zone with the HP Z2 G9 Tower Workstation
Get in and stay in the productivity zone with the HP Z2 G9 Tower WorkstationGet in and stay in the productivity zone with the HP Z2 G9 Tower Workstation
Get in and stay in the productivity zone with the HP Z2 G9 Tower Workstation
 
Open up new possibilities with higher transactional database performance from...
Open up new possibilities with higher transactional database performance from...Open up new possibilities with higher transactional database performance from...
Open up new possibilities with higher transactional database performance from...
 
Improving database performance and value with an easy migration to Azure Data...
Improving database performance and value with an easy migration to Azure Data...Improving database performance and value with an easy migration to Azure Data...
Improving database performance and value with an easy migration to Azure Data...
 
Realize better value and performance migrating from Azure Database for Postgr...
Realize better value and performance migrating from Azure Database for Postgr...Realize better value and performance migrating from Azure Database for Postgr...
Realize better value and performance migrating from Azure Database for Postgr...
 
Realize better value and performance migrating from Azure Database for Postgr...
Realize better value and performance migrating from Azure Database for Postgr...Realize better value and performance migrating from Azure Database for Postgr...
Realize better value and performance migrating from Azure Database for Postgr...
 
Set up students and teachers to excel now and in the future with Intel proces...
Set up students and teachers to excel now and in the future with Intel proces...Set up students and teachers to excel now and in the future with Intel proces...
Set up students and teachers to excel now and in the future with Intel proces...
 
Finding the path to AI success with the Dell AI portfolio - Summary
Finding the path to AI success with the Dell AI portfolio - SummaryFinding the path to AI success with the Dell AI portfolio - Summary
Finding the path to AI success with the Dell AI portfolio - Summary
 
Finding the path to AI success with the Dell AI portfolio
Finding the path to AI success with the Dell AI portfolioFinding the path to AI success with the Dell AI portfolio
Finding the path to AI success with the Dell AI portfolio
 
Achieve strong performance and value on Azure SQL Database Hyperscale
Achieve strong performance and value on Azure SQL Database HyperscaleAchieve strong performance and value on Azure SQL Database Hyperscale
Achieve strong performance and value on Azure SQL Database Hyperscale
 
Improve backup and recovery outcomes by combining Dell APEX Data Storage Serv...
Improve backup and recovery outcomes by combining Dell APEX Data Storage Serv...Improve backup and recovery outcomes by combining Dell APEX Data Storage Serv...
Improve backup and recovery outcomes by combining Dell APEX Data Storage Serv...
 
Improve backup and recovery outcomes by combining Dell APEX Data Storage Serv...
Improve backup and recovery outcomes by combining Dell APEX Data Storage Serv...Improve backup and recovery outcomes by combining Dell APEX Data Storage Serv...
Improve backup and recovery outcomes by combining Dell APEX Data Storage Serv...
 
Utilizing Azure Cosmos DB for intelligent AI‑powered applications
Utilizing Azure Cosmos DB for intelligent AI‑powered applicationsUtilizing Azure Cosmos DB for intelligent AI‑powered applications
Utilizing Azure Cosmos DB for intelligent AI‑powered applications
 
Build an Azure OpenAI application using your own enterprise data
Build an Azure OpenAI application using your own enterprise dataBuild an Azure OpenAI application using your own enterprise data
Build an Azure OpenAI application using your own enterprise data
 

Dernier

Artificial Intelligence: Facts and Myths
Artificial Intelligence: Facts and MythsArtificial Intelligence: Facts and Myths
Artificial Intelligence: Facts and Myths
Joaquim Jorge
 
+971581248768>> SAFE AND ORIGINAL ABORTION PILLS FOR SALE IN DUBAI AND ABUDHA...
+971581248768>> SAFE AND ORIGINAL ABORTION PILLS FOR SALE IN DUBAI AND ABUDHA...+971581248768>> SAFE AND ORIGINAL ABORTION PILLS FOR SALE IN DUBAI AND ABUDHA...
+971581248768>> SAFE AND ORIGINAL ABORTION PILLS FOR SALE IN DUBAI AND ABUDHA...
?#DUbAI#??##{{(☎️+971_581248768%)**%*]'#abortion pills for sale in dubai@
 

Dernier (20)

How to Troubleshoot Apps for the Modern Connected Worker
How to Troubleshoot Apps for the Modern Connected WorkerHow to Troubleshoot Apps for the Modern Connected Worker
How to Troubleshoot Apps for the Modern Connected Worker
 
Artificial Intelligence: Facts and Myths
Artificial Intelligence: Facts and MythsArtificial Intelligence: Facts and Myths
Artificial Intelligence: Facts and Myths
 
Apidays New York 2024 - The value of a flexible API Management solution for O...
Apidays New York 2024 - The value of a flexible API Management solution for O...Apidays New York 2024 - The value of a flexible API Management solution for O...
Apidays New York 2024 - The value of a flexible API Management solution for O...
 
Powerful Google developer tools for immediate impact! (2023-24 C)
Powerful Google developer tools for immediate impact! (2023-24 C)Powerful Google developer tools for immediate impact! (2023-24 C)
Powerful Google developer tools for immediate impact! (2023-24 C)
 
Finology Group – Insurtech Innovation Award 2024
Finology Group – Insurtech Innovation Award 2024Finology Group – Insurtech Innovation Award 2024
Finology Group – Insurtech Innovation Award 2024
 
Workshop - Best of Both Worlds_ Combine KG and Vector search for enhanced R...
Workshop - Best of Both Worlds_ Combine  KG and Vector search for  enhanced R...Workshop - Best of Both Worlds_ Combine  KG and Vector search for  enhanced R...
Workshop - Best of Both Worlds_ Combine KG and Vector search for enhanced R...
 
Handwritten Text Recognition for manuscripts and early printed texts
Handwritten Text Recognition for manuscripts and early printed textsHandwritten Text Recognition for manuscripts and early printed texts
Handwritten Text Recognition for manuscripts and early printed texts
 
04-2024-HHUG-Sales-and-Marketing-Alignment.pptx
04-2024-HHUG-Sales-and-Marketing-Alignment.pptx04-2024-HHUG-Sales-and-Marketing-Alignment.pptx
04-2024-HHUG-Sales-and-Marketing-Alignment.pptx
 
Tata AIG General Insurance Company - Insurer Innovation Award 2024
Tata AIG General Insurance Company - Insurer Innovation Award 2024Tata AIG General Insurance Company - Insurer Innovation Award 2024
Tata AIG General Insurance Company - Insurer Innovation Award 2024
 
Tech Trends Report 2024 Future Today Institute.pdf
Tech Trends Report 2024 Future Today Institute.pdfTech Trends Report 2024 Future Today Institute.pdf
Tech Trends Report 2024 Future Today Institute.pdf
 
Apidays New York 2024 - Scaling API-first by Ian Reasor and Radu Cotescu, Adobe
Apidays New York 2024 - Scaling API-first by Ian Reasor and Radu Cotescu, AdobeApidays New York 2024 - Scaling API-first by Ian Reasor and Radu Cotescu, Adobe
Apidays New York 2024 - Scaling API-first by Ian Reasor and Radu Cotescu, Adobe
 
+971581248768>> SAFE AND ORIGINAL ABORTION PILLS FOR SALE IN DUBAI AND ABUDHA...
+971581248768>> SAFE AND ORIGINAL ABORTION PILLS FOR SALE IN DUBAI AND ABUDHA...+971581248768>> SAFE AND ORIGINAL ABORTION PILLS FOR SALE IN DUBAI AND ABUDHA...
+971581248768>> SAFE AND ORIGINAL ABORTION PILLS FOR SALE IN DUBAI AND ABUDHA...
 
[2024]Digital Global Overview Report 2024 Meltwater.pdf
[2024]Digital Global Overview Report 2024 Meltwater.pdf[2024]Digital Global Overview Report 2024 Meltwater.pdf
[2024]Digital Global Overview Report 2024 Meltwater.pdf
 
🐬 The future of MySQL is Postgres 🐘
🐬  The future of MySQL is Postgres   🐘🐬  The future of MySQL is Postgres   🐘
🐬 The future of MySQL is Postgres 🐘
 
2024: Domino Containers - The Next Step. News from the Domino Container commu...
2024: Domino Containers - The Next Step. News from the Domino Container commu...2024: Domino Containers - The Next Step. News from the Domino Container commu...
2024: Domino Containers - The Next Step. News from the Domino Container commu...
 
Strategies for Unlocking Knowledge Management in Microsoft 365 in the Copilot...
Strategies for Unlocking Knowledge Management in Microsoft 365 in the Copilot...Strategies for Unlocking Knowledge Management in Microsoft 365 in the Copilot...
Strategies for Unlocking Knowledge Management in Microsoft 365 in the Copilot...
 
HTML Injection Attacks: Impact and Mitigation Strategies
HTML Injection Attacks: Impact and Mitigation StrategiesHTML Injection Attacks: Impact and Mitigation Strategies
HTML Injection Attacks: Impact and Mitigation Strategies
 
How to Troubleshoot Apps for the Modern Connected Worker
How to Troubleshoot Apps for the Modern Connected WorkerHow to Troubleshoot Apps for the Modern Connected Worker
How to Troubleshoot Apps for the Modern Connected Worker
 
AWS Community Day CPH - Three problems of Terraform
AWS Community Day CPH - Three problems of TerraformAWS Community Day CPH - Three problems of Terraform
AWS Community Day CPH - Three problems of Terraform
 
Data Cloud, More than a CDP by Matt Robison
Data Cloud, More than a CDP by Matt RobisonData Cloud, More than a CDP by Matt Robison
Data Cloud, More than a CDP by Matt Robison
 

Improving performance with in-memory SQL Server 2014 database features on the Dell PowerEdge R930

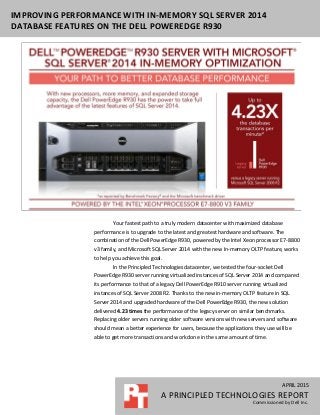
  • 1. APRIL 2015 A PRINCIPLED TECHNOLOGIES REPORT Commissioned by Dell Inc. IMPROVING PERFORMANCE WITH IN-MEMORY SQL SERVER 2014 DATABASE FEATURES ON THE DELL POWEREDGE R930 Your fastest path to a truly modern datacenter with maximized database performance is to upgrade to the latest and greatest hardware and software. The combination of the Dell PowerEdge R930, powered by the Intel Xeon processor E7-8800 v3 family, and Microsoft SQL Server 2014 with the new In-memory OLTP feature, works to help you achieve this goal. In the Principled Technologies datacenter, we tested the four-socket Dell PowerEdge R930 server running virtualized instances of SQL Server 2014 and compared its performance to that of a legacy Dell PowerEdge R910 server running virtualized instances of SQL Server 2008 R2. Thanks to the new in-memory OLTP feature in SQL Server 2014 and upgraded hardware of the Dell PowerEdge R930, the new solution delivered 4.23 times the performance of the legacy server on similar benchmarks. Replacing older servers running older software versions with new servers and software should mean a better experience for users, because the applications they use will be able to get more transactions and work done in the same amount of time.
  • 2. A Principled Technologies report 2Improving performance with in-memory SQL Server 2014 database features on the Dell PowerEdge R930 DELL POWEREDGE R930 AND IN-MEMORY OLTP ACCELERATE YOUR WORKLOAD The Dell PowerEdge R930 is a 4U, four-socket server that features the latest Intel Xeon processor E7-8800 v3 and E7-4800 v3 series. The Dell PowerEdge R930 features several upgrades to the Dell PowerEdge R910: a jump to 96 DIMM slots, eight extra drive bays, PCIe SSD NVMe drives, 12Gb/s SAS backplane for 12Gb/s SSDs, and the latest DDR4 memory. SQL Server 2014 has new features that allow you to get better performance out of your OLTP applications. In-Memory OLTP, or In-Memory Optimization, is a technology integrated into the latest release of SQL Server that stores specified database tables directly in your server’s memory for lower latency and faster transaction processing. The increased memory capability of the Dell PowerEdge R930 in particular, in its greater number of available DIMM slots, faster DDR4 speeds, and greater overall capacity potential, provides plenty of hardware resources to work with this new feature. This new feature is important to support larger data sets and reduces latency by keeping the data closer to compute. To show the OLTP database performance improvements that the 13th generation Dell PowerEdge R930 solution can provide over older hardware, we compared this solution to a legacy 4U, four-socket Dell PowerEdge R910. We ran two similar OLTP workloads in four virtual machines (VMs) on each solution: the Dell PowerEdge R910 server ran four SQL Server 2008 R2 VMs, each with an OLTP workload derived from TPC-C, and the Dell PowerEdge R930 ran four upgraded VMs, each with a similar OLTP workload derived from TPC-C designed to use the SQL Server 2014 In- Memory Optimization feature. In-memory OLTP has specific constraints and requirements. Because an organization would update applications during the upgrade cycle, we used two toolsets, one for SQL Server 2008 R2, and one designed for SQL Server 2014 In-Memory OLTP. While the toolsets are different, the business goals of the workloads were the same. For information about the Dell PowerEdge R930 and our other test components, see Appendix A. For detailed system configuration, see Appendix B. For step-by-step testing details, see Appendix C.
  • 3. A Principled Technologies report 3Improving performance with in-memory SQL Server 2014 database features on the Dell PowerEdge R930 WHAT WE FOUND The Dell PowerEdge R930 server and optimized OLTP workload delivered 4.23 times the database performance from the In-Memory OLTP toolset as compared to the legacy solution running SQL Server 2008 R2 and using the non In-Memory toolset. (See Figure 1.) Figure 1: The Dell PowerEdge R930 delivered 4.23x the database performance of the legacy server and software combination. The results we report above are the median results of three runs. Figure 2 shows the database results, by VM, for the two solutions. Each in-memory optimized OLTP database VM on the Dell PowerEdge R930 supported a sustained workload of nearly 1 million transactions per minute, as reported by the Microsoft benchmark driver. This means that by upgrading to the Dell PowerEdge R930 solution and using SQL Server 2014 In-Memory Optimization, you can get four times the performance in the same amount of rack server space, which can help you save on space-related costs as your business grows. This can mean consolidating the work of four legacy servers into one Dell PowerEdge R930. Dell PowerEdge R930 Legacy server VM1 1,004,526 246,479 VM2 1,027,880 248,843 VM3 989,731 250,655 VM4 1,059,328 218,552 Total 4,081,465 964,529 Figure 2: Transactions per minute breakdown by VM, as reported by Benchmark Factory for the legacy server and as reported by the Microsoft benchmark driver for the Dell PowerEdge R930. We used two different benchmark tools for testing: Benchmark Factory on the legacy server as a representative traditional disk-based workload derived from TPC-C
  • 4. A Principled Technologies report 4Improving performance with in-memory SQL Server 2014 database features on the Dell PowerEdge R930 database, and a Microsoft-provided internal only benchmark tool with a similar OLTP database that uses In-Memory Optimization for the Dell PowerEdge R930. We kept parameters as comparable as possible; for both configurations, we ran 500 warehouses, 100 users, and 0 ms think time. CONCLUSION By utilizing the Intel Xeon processor E7-8800 v3 family, more memory slots, additional drive bays, and upgraded drive possibilities, the Dell PowerEdge R930 has ample hardware resources ready to handle the latest features of SQL Server 2014 for your next database upgrade. Using SQL Server 2014 with In-Memory Optimization, the Dell PowerEdge R930 solution we tested delivered over 4 million transactions per minute, quadrupling the TPM of the legacy server running disk-based OLTP databases. By replacing your old servers with more powerful Dell PowerEdge R930 servers, you can avoid expanding your datacenter to store, rack, cable, power, cool, and manage increasing workloads with less-efficient solutions. The Dell PowerEdge R930 solution helps ensure you get both top-of-the-line performance with the latest features, maximizing existing datacenter space. When applications using OLTP database back- ends demand the fastest possible transaction speeds, you can unleash database performance by migrating your tables to use SQL Server 2014 In-Memory Optimization along with the new and expanded hardware capabilities of the Dell PowerEdge R930 with Intel Xeon processors E7-8890 v3.
  • 5. A Principled Technologies report 5Improving performance with in-memory SQL Server 2014 database features on the Dell PowerEdge R930 APPENDIX A – ABOUT THE COMPONENTS About the Dell PowerEdge R930 The Dell PowerEdge R930 is part of Dell’s 13G offerings and is currently the fastest four-socket 4U server. Designed to provide expanding scalable performance for large enterprises, it supports up to:  96 DIMMs of DDR4 memory  24 internal drives with the option for 8 PCIe® Express Flash drives (with the optional PCIe backplane)  12Gb/s SAS drives It also offers Dual PERC option, PERC9 (H730P), Fluid Cache for SAN capability, and a number of built-in RAS features for high reliability, such as Fault Resilient memory and Intel Run Sure technology. To learn more about the PowerEdge R930, visit www.dell.com/learn/us/en/04/campaigns/poweredge-13g-server. About the Intel Xeon processor E7-8800 v3 and E7-4800 v3 families Intel designed the new Intel Xeon processor E7-8800 v3 and E7-4800 v3 families to support mission-critical, high- performance workloads by featuring up to 18 cores and 36 threads per socket to provide significant jumps in performance from previous releases. The Intel Xeon processor E7-8800 v3 and E7-4800 v3 families supports up to 1.5TB DDR4 memory per socket, supports up to 24 DDR4 DIMMs per socket, and supports up to 2,133MHz DDR4 speeds to improve performance and increase scalability. The Intel Xeon processor E7-8800 v3 and E7-4800 v3 families supports all the previous reliability, availability, and serviceability features of previous processor releases to support critical workloads. With Intel Run Sure technology, these processors add new RAS features, including eMCA Gen 2, MCA Recovery – Execution Path, MCA IO, and PCIe Live Error Recovery. For more information about the Intel Xeon processor E7 v3 product family, visit www.intel.com. About Microsoft SQL Server 2014 This latest iteration of the Microsoft SQL Server family is a next-generation data platform that includes many new features oriented to enterprise users focused on transactional performance and speed, time-to-insight, business analytics, high availability, and integration of their data streams into public and private cloud environments. Microsoft highlights the following key features: Support for in-memory OLTP, via a memory and OLTP-optimized database engine integrated into the platform’s data engine, and enhancements to the in-memory column store already present in Microsoft SQL 2012. Ease of integration with Microsoft Azure, making SQL Server 2014 a platform for hybrid cloud, supporting scenarios such as cloud backup and cloud disaster recovery. Better redundancy with AlwaysOn Availability Groups, allowing up to eight secondary replicas to be placed in different locations for high availability, read-access efficiency, and backup and data recovery. For more information about Microsoft SQL Server 2014, visit www.microsoft.com/en-us/sqlserver/default.aspx. About Benchmark Factory Benchmark Factory for Databases is a database performance testing tool that allows you to conduct database workload replay, industry-standard benchmark testing, and scalability testing. Using the incorporated load testing tools, you can make changes to your database environment while mitigating the risks of unavoidable database changes such as patches and upgrades, operating system migrations, and adjustments to virtual machine configurations. In addition, its
  • 6. A Principled Technologies report 6Improving performance with in-memory SQL Server 2014 database features on the Dell PowerEdge R930 proprietary workload capture and replay supports Oracle and SQL Server database. For this study, we used the Benchmark Factory TPC-C workload. The Benchmark Factory TPC-C workload is derived from TPC-C, and as such is not comparable to published TPC-C results. Learn more at www.software.dell.com/products/benchmark-factory/. About the Microsoft-provided benchmark The Microsoft benchmark driver is an internal Microsoft tool designed specifically to test and stress the In- Memory Optimized OLTP feature in SQL Server 2014. The benchmark driver creates and loads a database to scale, and then runs a transactional workload against the database. The workload is derived from TPC-C, and as such is not comparable to published TPC-C results.
  • 7. A Principled Technologies report 7Improving performance with in-memory SQL Server 2014 database features on the Dell PowerEdge R930 APPENDIX B – SYSTEM CONFIGURATION INFORMATION Figure 3 provides detailed configuration information for the test systems. System Dell PowerEdge R930 Dell PowerEdge R910 Power supplies Total number 4 4 Vendor and model number Dell 0GDPF3 Dell 0TCVRRA00 Wattage of each (W) 1,100 1,100 Cooling fans Total number 6 6 Vendor and model number Nidec® UltraFlo V12C12BS1M3 Delta Electronics PFC1212DE Dimensions (h × w) of each 5″ × 5″ 5.25″ × 5.25″ Volts 12 12 Amps 2.31 4.80 General Number of processor packages 4 4 Number of cores per processor 18 8 Number of hardware threads per core 2 2 System power management policy Balanced Balanced CPU Vendor Intel Intel Name Xeon Xeon Model number E7-8890 v3 X7560 Socket type LGA2001-1 LGA1567 Core frequency (GHz) 2.50 2.27 Bus frequency 9.6 GT/s 6.4 GT/s L1 cache 32 KB + 32 KB (per core) 32 KB + 32 KB (per core) L2 cache 256 KB (per core) 256 KB (per core) L3 cache 45 MB 24 MB Platform Vendor and model number Dell PowerEdge R930 Dell PowerEdge R910 Motherboard model number 0Y4CNCX19 0JRJM9 BIOS name and version 0.0.23 2.10.0 BIOS settings Default Default Memory module(s) Total RAM in system (GB) 512 128 Vendor and model number Samsung® M393A1G43DB0-CPB Samsung M393B1K70BH1-CH9 Type PC4-2133 PC3-10600 Speed (MHz) 2,133 1,333 Speed running in the system (MHz) 2,133 1,067 Timing/Latency (tCL-tRCD-tRP- tRASmin) 15-15-15-33 9-9-9-36 Size (GB) 8 8 Number of RAM module(s) 64 16
  • 8. A Principled Technologies report 8Improving performance with in-memory SQL Server 2014 database features on the Dell PowerEdge R930 System Dell PowerEdge R930 Dell PowerEdge R910 Chip organization Double-sided Double-sided Rank Dual Dual Operating system Name Microsoft Windows Server 2012 R2 Datacenter Edition Microsoft Windows Server 2008 R2 Datacenter Edition Build number 9600 7601 File system NTFS NTFS Language English English RAID controller Vendor and model number PERC H730P PERC H700 Integrated Firmware version 25.2.1.0037 12.10.6-0001 Driver version 6.600.21.08 4.31.1.64 Cache size (MB) 2,048 512 Solid-state drives Vendor and model number Dell SXKTK Dell 6R5R8 Number of drives 12 8 Size (GB) 200 200 Type SAS SAS Hard drives #1 Vendor and model number Seagate® ST9900805SS Dell 5R6CX Number of drives 4 2 Size (GB) 900 600 RPM 10k 10k Type SAS SAS Hard drives #2 Vendor and model number Seagate ST9300653SS Dell 0PGHJG Number of drives 8 6 Size (GB) 300 300 RPM 15k 10k Type SAS SAS Ethernet adapters Vendor and model number Intel Gigabit 4P i350-t rNDC Broadcom® BCM5709C Type Gigabit Ethernet Gigabit Ethernet Driver 12.11.97.9900 2/12/2015 7.12.2.0 11/20/2014 Figure 3: System configuration information for the test systems.
  • 9. A Principled Technologies report 9Improving performance with in-memory SQL Server 2014 database features on the Dell PowerEdge R930 APPENDIX C – HOW WE TESTED Configuring the Dell PowerEdge R930 We used the Dell PERC H730P to create three RAID 10 volumes on the server: 4x 900GB HDD, 12x 200GB SSD, 8x 300GB HDD. We turned the PERC caching off for the SSD volume and fully initialized all volumes. Installing Microsoft Windows Server 2012 R2 Datacenter 1. Insert the installation media into the CD/DVD drive, and restart the server. 2. When the option appears, press F11 to enter the Boot Manager. 3. Select BIOS Boot Menu. 4. Select SATA Optical Drive, and press Enter. 5. Press any key when prompted to boot from DVD. 6. When the installation screen appears, click My language is English (United States). 7. Leave language, time/currency format, and input method as default, and click Next. 8. Click Install now. 9. When the installation prompts you, enter the product key. 10. Select Windows Server 2012 Datacenter (Server with a GUI), and click Next. 11. Check I accept the license terms, and click Next. 12. Click Custom: Install Windows only (advanced). 13. Select Drive 0 Unallocated Space, and click Next, at which point Windows Updates begins and restarts automatically after completing. 14. When the Settings page appears, fill in the Password and Reenter Password fields with the same password. 15. Log in with the password you set up previously. 16. Ensure that the OS HDD volume is labeled C:, the Data SSD volume is labeled E:, and that the Logs HDD volume is labeled F:. Configuring Windows Update 1. In the left pane of the Server Manager window, click Local Server. 2. In the main frame, next to Windows Update, click Not configured. 3. In the main pane of the Windows Update window, click Let me choose my settings. 4. Under Important updates, select Never check for updates (not recommended), and click OK. 5. In the left pane, click Check for updates, and install all available updates. 6. Close the Windows Update window. Installing the Hyper-V® role on the system under test 1. Open Server Manager, and click ManageAdd Roles and Features. 2. At the Before You Begin screen, click Next. 3. At the Installation Type screen, click Next. 4. At the Server Selection screen, select one of the servers in the failover cluster. 5. At the Server Roles screen, check the Hyper-V checkbox. At the prerequisite pop-up, click Add Features. Click Next. 6. At the Features screen, click Next. 7. At the Hyper-V screen, click Next. 8. At the Virtual Switches screen, click Next. 9. At the Migration screen, click Next.
  • 10. A Principled Technologies report 10Improving performance with in-memory SQL Server 2014 database features on the Dell PowerEdge R930 10. At the Default Stores screen, click Next. 11. At the Confirmation screen, check to automatically restart the server after installation, and click Install. Creating the virtual switch 1. Click Start, type Hyper-V Manager and press Enter. 2. In the right pane, click Virtual Switch Manager. 3. Select New virtual network switch, select External, and click Create Virtual Switch. 4. Give the virtual switch a name, and select the adapter that corresponds to the testing network. 5. Click OK. Creating the VHDs 1. Click Start, type Hyper-V Manager and press Enter. 2. In the right pane, click NewHard Disk. 3. At the Before You Begin screen, click Next. 4. At the Choose Disk Format screen, select VHDX, and click Next. 5. At the Choose Disk Type screen, select Fixed Size, and click Next. 6. At the Specify Name and Location screen, give the hard disk a name and location, and click Next. a. For the OS VHD, select a location on the C: drive. b. For the Data VHD, select a location on the E: drive. c. For the Logs VHD, select a location on the F: drive. 7. At the Configure Disk screen, select Create a new blank virtual hard disk. Enter a size, and click Finish. a. For the OS VHD, enter 80GB b. For the Data VHD, enter 220GB c. For the Logs VHD, enter 220GB Creating the base VM 1. Click Start, type Hyper-V Manager and press Enter. 2. In the right pane, click Virtual MachinesNew Virtual Machine. 3. Select a node on which to install the VM, and click OK. 4. At the Before You Begin screen, click Next. 5. At the Specify Name and Location screen, give the VM a name, and click Next. 6. At the Assign Memory screen, type 65536 MB and click Next. 7. At the Configure Networking screen, use the drop-down menu to select the virtual switch, and click Next. 8. At the Connect Virtual Hard Disk screen, select Use an existing virtual hard disk, and browse to the OS VHD created in the previous section. 9. At the Summary screen, click Finish. Configuring the base VM 1. Right-click the newly created VM, and click Settings. 2. Give the VM 16 virtual processors. 3. Select Add Hardware and SCSI Controller, and click Add. 4. Select the new SCSI Controller, select Hard Drive, and click Add. 5. Select Use an existing virtual hard disk, and browse to the Data VHD. 6. Click Apply. 7. Add a new SCSI Controller, and connect the Logs VHD.
  • 11. A Principled Technologies report 11Improving performance with in-memory SQL Server 2014 database features on the Dell PowerEdge R930 8. Click OK. Installing the VM operating system on the base VM 1. Use the steps above to install Microsoft Windows Server 2012 R2 on the VM. 2. Use Server Manager to install the .NET Framework 3.5 feature. 3. Set up networking: a. Click StartControl Panel, right-click Network Connections, and choose Open. b. Right-click the NIC connected to the test network, and choose Properties. c. Select TCP/IP (v4), and choose Properties. d. Assign the VM a static IP address. Installing Microsoft SQL Server 2014 1. Attach the installation media to the server. 2. Launch setup.exe from the installation media. 3. Choose the Installation section on the left, and click New SQL Server stand-alone installation or add features to an existing installation. 4. At the Product Key screen, select Evaluation, and click Next. 5. At the License Terms screen, check the I accept the license terms box, and click Next. 6. At the Global Rules screen, allow the Global Rules check to finish, and click Next. 7. At the Microsoft Update screen, check the use Microsoft Update to check for updates (recommended) box, and click Next. 8. Once the updates have been downloaded and installed, click Next. 9. At the Install Setup Files screen, allow the setup files to install, and click Next. 10. At the Install Rules screen, allow the Install Rules check to run, and click Next. 11. At the Setup Role screen, select the SQL Server Feature Installation radio button, and click Next. 12. At the Feature Selection screen, select the features required for your installation. We selected Database Engine Services, Full-Text and Semantic Extractions for Search, Client Tools Connectivity, Client Tool Backwards Compatibility, Management Tools - Basic, and Management Tools - Complete. 13. At the Feature Rules screen, allow the Feature Rules check to run, and click Next. 14. At the Instance Configuration screen, click Next to use the default instance named MSSQLSERVER. 15. At the Server Configuration screen, click Next. 16. At the Database Engine Configuration screen, select the radio button for Mixed Mode (SQL Server authentication and Windows authentication), and enter a password for the SQL Server system administrator (sa) account. 17. Click the Add Current User button. 18. In the Data Directories tab, enter the directories to be used for SQL data and logs. We used E: and F:, respectively, to place the data and logs on their appropriate VHDs. Click Next. 19. At the Feature Configuration Rules screen, allow the Feature Configuration Rules check to finish, and click Next. 20. At the Ready to Install screen, click Install. 21. After the installation has completed, close the wizard. Installing the Microsoft SQL Server In-Memory TPC-C Benchmark Kit 1. Extract the contents of the package to a directory on the SQL Server VM. We extracted to the root directory.
  • 12. A Principled Technologies report 12Improving performance with in-memory SQL Server 2014 database features on the Dell PowerEdge R930 2. Open a command prompt window, and run the following command to load the database into the local SQL instance: C:TPCC_For_HKMSTPCC.469.HKSETUPsetup.cmd /S:”” /U:sa /P:<password for sa> /W:500 /D:scale_down /H:true 3. When the database creation finishes, create a backup of the database. We used the backup to restore a fresh copy of the database before each run. 4. Run C:TPCC_For_HKEXESsetup2330C.exe and follow the steps in the installation wizard to install the Microsoft benchmark driver utility. 5. Click StartMicrosoft Benchmark Driver to start the benchmark utility. 6. In the Drivers tab, right-click the empty space, and click New. 7. Apply the following parameters and leave the rest at their default settings: a. Name: DRIVER1 b. Parameter Set: ~Default c. Machine Name: <VM IP address> d. Log File Name: C:log e. Connect Rate: 50 f. Start Rate: 50 8. In the Users tab, right-click the empty space, and click New. 9. Apply the following parameters and leave the rest at their default settings: a. Select the ODBC radio button. b. From the Engine Name drop-down menu, select DRIVER1. c. Range From: 1 d. Range To: 500 e. Min: 1 f. Max: 1 g. Select the Float radio button. h. User Count: 100 i. Check the Scale Down Database checkbox. j. SQL Server: <VM IP address> k. Database: tpcc l. User: sa m. Password: <password for sa> 10. In the Params tab, right-click the ~Default parameter set, and click Modify. 11. Change all the values to zero, and then set the Txn Weights as follows: a. New Order: 10 b. Payment: 10 c. Delivery: 1 d. Stock Level: 1 e. Order Status: 1 12. Click the Save icon to save the profile.
  • 13. A Principled Technologies report 13Improving performance with in-memory SQL Server 2014 database features on the Dell PowerEdge R930 Cloning the Windows Server 2012 R2 VMs 1. Shut down the base VM. 2. Navigate to each VHD directory, and create copies of each VHD. 3. Using Hyper-V Manager, create a new VM and attach the copied VHDs. Add SCSI controllers as needed to reflect the configuration of the base VM. 4. Configure the memory, virtual processor count, and networking adapters to reflect the configuration of the base VM. 5. Repeat these steps to create a total of four VMs. 6. Update the IP addresses on each new VM. Configuring the Dell PowerEdge R910 We used the Dell PERC H700 to create three RAID 10 volumes on the server: 2x 600GB HDD for the host OS and guest OS VHDs, 8x 800GB SSD for the guest Data VHDs, 6x 300GB HDD for the guest Logs VHDs. We turned the PERC caching off for the SSD volume and fully initialized all volumes. Installing Microsoft Windows Server 2008 R2 Datacenter 1. Insert the installation DVD for Windows Server 2008 R2 into the DVD drive. 2. Choose the language, time and currency, and keyboard input. Click Next. 3. Click Install Now. 4. Choose Windows Server 2008 R2 Datacenter (Full Installation) and click Next. 5. Accept the license terms, and click Next. 6. Click Custom. 7. Click the Disk, and click Drive options (advanced). 8. Click NewApplyFormat, and click Next. 9. After the installation completes, click OK to set the administrator password. 10. Enter the administrator password twice, and click OK. 11. Connect the machine to the Internet, and install all available Windows updates. Restart as necessary. 12. Enable remote desktop access. Adding the Hyper-V role on the legacy system under test 1. Open Server Manager, and click Roles. 2. Click Add Roles. 3. On the Before You Begin page, check the Skip this page by default box, and click Next. 4. Select Hyper-V, and click Next. 5. On the Hyper-V Introduction page, click Next. 6. On the Create Virtual Networks page, click Next. 7. Confirm installation selections, and click Install. 8. Once the installation is complete, click Close. 9. When the system prompts a restart, click Yes. 10. Allow the system to fully reboot, and log in using the administrator credentials. 11. Once the desktop loads, the Hyper-V Installation Results window will finish the installation. 12. Click Close. The Hyper-V role will now be available in Server Manager under Roles.
  • 14. A Principled Technologies report 14Improving performance with in-memory SQL Server 2014 database features on the Dell PowerEdge R930 Creating the virtual switch 1. In Hyper-V Manager, on the left side of Hyper-V, right-click the server name in the list, and choose Virtual Network Manager… 2. Choose External, and click Add. 3. Name the Virtual Network, and choose the appropriate NIC for your test bed network from the drop-down menu. 4. Click OK. Creating the base VM 1. Click ActionNewVirtual Machine. 2. On the Before You Begin window, click Next. 3. Enter the name of the VM, and click Next. 4. Assign 30GB of memory, and click Next. 5. Choose the virtual network you created from the drop-down menu, and click Next. 6. Choose to attach a virtual hard drive later. 7. Click Finish. 8. Create the following fixed size VHDs by choosing ActionNewVirtual Hard Drive: a. 80GB for the OS VHD placed on the C: volume. b. 100GB for the Data VHD placed on the E: volume. c. 50GB for the Logs VHD placed on the F: volume. 9. Right-click the VM, and choose Settings. 10. Add the OS VHD to the IDE controller. 11. Add a new SCSI Controller, and connect the Data VHD. 12. Add a new SCSI Controller, and connect the Logs VHD. 13. Click Processors, and adjust the number of virtual processors to 4. 14. Start the VM. 15. Attach the Windows Server 2008 R2 SP1 ISO image to the VM, and install Windows Server 2008 R2 on your VM. Installing SQL Server 2008 R2 Datacenter 1. Open the Hyper-V console for the VM. 2. Log into the virtual machine. 3. Attach the Microsoft SQL Server 2008 R2 installation media to the VM. 4. Click Run SETUP.EXE. If Autoplay does not begin the installation, navigate to the SQL Server 2008 R2 DVD and double-click. 5. If the installer prompts you with a .NET installation prompt, click Yes to enable the .NET Framework Core role. 6. In the left pane, click Installation. 7. Click New installation or add features to an existing installation. 8. At the Setup Support Rules screen, wait for the check to complete. If there are no failures or relevant warnings, click OK. 9. Select Evaluation mode. Click Next. 10. Click the checkbox to accept the license terms, and click Next. 11. To install the setup support files, click Install. 12. If there are no failures displayed, click Next. 13. At the Setup Role screen, choose SQL Server Feature Installation.
  • 15. A Principled Technologies report 15Improving performance with in-memory SQL Server 2014 database features on the Dell PowerEdge R930 14. At the Feature Selection screen, select Database Engine Services, Full-Text Search, Client Tools Connectivity, Client Tools Backwards Compatibility, Management Tools –Basic, and Management Tools – Complete. Click Next. 15. At the Installation Rules screen, after the check completes, click Next. 16. At the Instance configuration screen, leave the default selection of default instance, and click Next. 17. At the Disk space requirements screen, click Next. 18. At the Server configuration screen, choose NT AUTHORITYSYSTEM for SQL Server Agent, and choose NT AUTHORITYSYSTEM for SQL Server Database Engine. Click Next. 19. At the Database Engine Configuration screen, select Mixed Mode. 20. Enter and confirm a password for the system administrator account. 21. Click Add Current user. This may take several seconds. 22. In the Data Directories tab, enter the directories to be used for SQL data and logs. We used E: and F:, respectively, to place the data and logs on their appropriate VHDs. Click Next. 23. At the Error and usage reporting screen, click Next. 24. At the Installation Configuration rules screen, check that there are no failures or relevant warnings, and click Next. 25. At the Ready to Install screen, click Install. 26. After installation completes, click Next. 27. Click Close. Installing Benchmark Factory 7.1 1. Connect to the Microsoft Windows Server 2008 R2 VM. 2. Download the Benchmark Factory Trial 7.1 installer to the VM. 3. Run the Benchmark Factory Trial 7.1 installer. 4. At the welcome screen, click Next. 5. At the License Agreement screen, select the I accept the terms in the license agreement radio button, and click Next. 6. At the Destination Folder screen, leave the default installation location, and click Next. 7. At the Ready to Install the Program, ensure the install the default, service based, repository database checkbox is checked, and click Install. 8. When the installation completes, click Finish to close the window. Configuring Benchmark Factory 7.1 1. Open SQL Server Management Studio, and connect to the local instance. 2. Right-click Databases, and click New Database. 3. Enter a name for the database (we used bf500), and click OK. 4. Click StartBenchmark Factory Trial to start Benchmark Factory. 5. If this is the first time running Benchmark Factory, select the No, thank you radio button, and click OK. 6. When Benchmark Factory is first opened, the New Job Wizard will automatically open. If not, open the New Job Wizard manually by clicking New. 7. In the Database Under Test section, click New. 8. From the drop-down menu, choose Microsoft SQL Server (ODBC). 9. Click Add DSN. 10. Select the User Data Source radio button, and click Next.
  • 16. A Principled Technologies report 16Improving performance with in-memory SQL Server 2014 database features on the Dell PowerEdge R930 11. Select the SQL Server driver, and click Next. 12. Click Finish. 13. Give the new data source a name and description. In the Server field, enter the IP address of the current VM. Click Next. 14. Select the With SQL Server authentication using a login ID and password entered by the user radio button, and enter the SQL Server credentials for the sa user. Click Next. 15. Check the Change the default database to checkbox, and select bf500 from the drop-down menu. Click Next. 16. Click Finish. 17. Click Test Data Source to ensure that the connection is working properly, and click OK. 18. Select the newly created data source in the Data Source Name drop-down menu, and enter the credentials for the sa user. 19. Give the connection a name, and click Create Connection. 20. Click Add Workload. 21. Select Industry Standard Benchmark Test from the drop-down menu, and select the TPC-C radio button. 22. Click Add Test. 23. Under the Test Options tab, navigate to the Scale sub-tab, and change the Benchmark Scale to 500. 24. In the left pane, click TPC-C Transaction Mix. 25. In the Test Options tab, navigate to the Transactions sub-tab and edit each transaction have 0ms Keying Time and 0ms Think Time. Set the transaction weights as follows: a. New Order: 10 b. Payment: 10 c. Order-Status: 1 d. Delivery: 1 e. Stock-Level: 1 26. Navigate to the User Load sub-tab, and click Delete All. Add a single user load of 100. 27. Navigate to the Timing sub-tab, and change the Total Iteration Length to 10 minutes. 28. In the left-hand pane, click Agent. 29. Check the checkbox for the local server, and click Save/Close. 30. Click EditSettings. 31. In the left-hand pane, click TPC-C. 32. Change the default Benchmark Scale to 500. 33. Close and re-open Benchmark Factory Trial. 34. Right-click the newly created TPC-C Job, and click Copy. 35. Right-click the Jobs View pane, and click Paste. 36. Delete the TPC-C Transaction Mix component from the first job, and delete the Create Objects for TPC-C component from the second job. Save both jobs. 37. Select the job that still contains the Create Objects for TPC-C, and click Run Job. This will build the Benchmark Factory target database. 38. Once the database creation is complete, create a backup of the database and place the backup file on the OS drive.
  • 17. A Principled Technologies report 17Improving performance with in-memory SQL Server 2014 database features on the Dell PowerEdge R930 Cloning the Windows Server 2008 R2 VMs 1. Shut down the base VM. 2. Navigate to each VHD directory, and create copies of each VHD. 3. Using Hyper-V Manager, create a new VM and attach the copied VHDs. Add SCSI controllers as needed to reflect the configuration of the base VM. 4. Configure the memory, virtual processor count, and networking adapters to reflect the configuration of the base VM. 5. Repeat these steps to create a total of four VMs. 6. Update the IP addresses on each new VM. Running the benchmarks For both Benchmark Factory and Microsoft benchmark driver, we used the utility to create a 500-warehouse scale database with 100 users and 0ms think time. We then created a backup of the database that we used to restore a fresh copy before each test run. Before each test run, we restored the database and then shut down every VM. We rebooted the host, started the VMs, and allowed the server to reach a steady idle state. We ran each benchmark for ten minutes and reported the average transactions-per-minute for the last minute of the test run.
  • 18. A Principled Technologies report 18Improving performance with in-memory SQL Server 2014 database features on the Dell PowerEdge R930 ABOUT PRINCIPLED TECHNOLOGIES Principled Technologies, Inc. 1007 Slater Road, Suite 300 Durham, NC, 27703 www.principledtechnologies.com We provide industry-leading technology assessment and fact-based marketing services. We bring to every assignment extensive experience with and expertise in all aspects of technology testing and analysis, from researching new technologies, to developing new methodologies, to testing with existing and new tools. When the assessment is complete, we know how to present the results to a broad range of target audiences. We provide our clients with the materials they need, from market-focused data to use in their own collateral to custom sales aids, such as test reports, performance assessments, and white papers. Every document reflects the results of our trusted independent analysis. We provide customized services that focus on our clients’ individual requirements. Whether the technology involves hardware, software, Web sites, or services, we offer the experience, expertise, and tools to help our clients assess how it will fare against its competition, its performance, its market readiness, and its quality and reliability. Our founders, Mark L. Van Name and Bill Catchings, have worked together in technology assessment for over 20 years. As journalists, they published over a thousand articles on a wide array of technology subjects. They created and led the Ziff-Davis Benchmark Operation, which developed such industry-standard benchmarks as Ziff Davis Media’s Winstone and WebBench. They founded and led eTesting Labs, and after the acquisition of that company by Lionbridge Technologies were the head and CTO of VeriTest. Principled Technologies is a registered trademark of Principled Technologies, Inc. All other product names are the trademarks of their respective owners. Disclaimer of Warranties; Limitation of Liability: PRINCIPLED TECHNOLOGIES, INC. HAS MADE REASONABLE EFFORTS TO ENSURE THE ACCURACY AND VALIDITY OF ITS TESTING, HOWEVER, PRINCIPLED TECHNOLOGIES, INC. SPECIFICALLY DISCLAIMS ANY WARRANTY, EXPRESSED OR IMPLIED, RELATING TO THE TEST RESULTS AND ANALYSIS, THEIR ACCURACY, COMPLETENESS OR QUALITY, INCLUDING ANY IMPLIED WARRANTY OF FITNESS FOR ANY PARTICULAR PURPOSE. ALL PERSONS OR ENTITIES RELYING ON THE RESULTS OF ANY TESTING DO SO AT THEIR OWN RISK, AND AGREE THAT PRINCIPLED TECHNOLOGIES, INC., ITS EMPLOYEES AND ITS SUBCONTRACTORS SHALL HAVE NO LIABILITY WHATSOEVER FROM ANY CLAIM OF LOSS OR DAMAGE ON ACCOUNT OF ANY ALLEGED ERROR OR DEFECT IN ANY TESTING PROCEDURE OR RESULT. IN NO EVENT SHALL PRINCIPLED TECHNOLOGIES, INC. BE LIABLE FOR INDIRECT, SPECIAL, INCIDENTAL, OR CONSEQUENTIAL DAMAGES IN CONNECTION WITH ITS TESTING, EVEN IF ADVISED OF THE POSSIBILITY OF SUCH DAMAGES. IN NO EVENT SHALL PRINCIPLED TECHNOLOGIES, INC.’S LIABILITY, INCLUDING FOR DIRECT DAMAGES, EXCEED THE AMOUNTS PAID IN CONNECTION WITH PRINCIPLED TECHNOLOGIES, INC.’S TESTING. CUSTOMER’S SOLE AND EXCLUSIVE REMEDIES ARE AS SET FORTH HEREIN.