SlideShare une entreprise Scribd logo
1  sur  28
Télécharger pour lire hors ligne
DELL POWEREDGE M620 BLADE SERVER SOLUTIONS
FOR VIRTUAL DESKTOP INFRASTRUCTURES


                         When looking for blade servers to host your virtual desktop infrastructure you
                 need to select a solution that delivers solid performance with a high power efficiency
                 and the most competitive pricing. Lower-priced servers that consume less power in your
                 data center can save your organization money while providing an excellent virtual
                 desktop experience for users.
                         In Principled Technologies labs, we tested the virtual desktop infrastructure
                 (VDI) performance of three blade servers: the Dell PowerEdge M620, the Cisco UCS
                 B200 M3, and the HP ProLiant BL460c G8. We found that the Dell PowerEdge M620
                 solution not only cost up to 19.4 percent less per virtual desktop user than its
                 competitors did, but it also reduced power consumption by as much as 63.1 percent per
                 user.


                                                                                               OCTOBER 2012
                                     A PRINCIPLED TECHNOLOGIES TEST REPORT
                                                                                      Commissioned by Dell Inc.
GETTING MORE VALUE FOR YOUR VDI
                                              Assessing the potential of a server to deliver a seamless VDI experience to a
                               large number of end users is vital to planning your virtual desktop infrastructure, but
                               why not save money in the process?
                                              We compared three servers with identical processors and RAM amounts—the
                               Dell PowerEdge M620, HP ProLiant BL460c G8, and Cisco UCS B200 M3—and used the
                               Login VSI 3.6 benchmark to determine that each was able to support 160 VMware View
                               5.1 virtual desktops. Because the servers supported the same number of virtual
                               desktops, we assessed the value that the servers provided along with their blade
                               enclosures, both in initial hardware cost and in idle and active power consumption. For
                               detailed server and configuration information, see Appendix A and Appendix B. For
                               detailed steps on how we tested, see Appendix C.

                                Lower cost per/user and power/user
                                              Figure 1 compares the cost per virtual desktop user, in US dollars, for the three
                               blade solutions. The Dell PowerEdge M620 solution cost up to 19.4 percent less per user
                               than the HP and Cisco solutions. Prices include the cost of each blade and its
                               corresponding blade enclosure: the Dell PowerEdge M620 with Dell PowerEdge M1000e
                               Blade Enclosure; the HP ProLiant BL460c G8 with HP BladeSystem C7000 Enclosure; and
                               Cisco UCS B200 M3 with two Cisco UCE 5108 Blade Server Chassis and two Fabric
                               Interconnects, to achieve the same 16-blade capacity as the other solutions.


                                                                           Cost per user
                                              $140
                                                                                                           $120.78
                                              $120                                 $107.38
                                                            $97.31
                                              $100

 Figure 1: Cost per virtual                    $80
                                   USD/user


 desktop user, in USD, for                     $60
 the three blade servers.
                                               $40

                                               $20

                                                $0
                                                     Dell PowerEdge M620     HP ProLiant BL460c G8    Cisco UCS B200 M3
                                                            solution                solution                solution


Dell PowerEdge M620 blade server solutions for virtual desktop                          A Principled Technologies test report 2
infrastructures
Whether idle or while running the test workloads, the Dell PowerEdge M620
                                solution consumed less power per virtual desktop user than the HP and Cisco solutions.
                                Because the servers are blades, all power numbers include the power of one server plus
                                its chassis.
                                                  The Dell PowerEdge M620 consumed less idle watts per user than its
                                competitors did – 5.2 percent less watts/user than the HP ProLiant BL460c G8, and 63.1
                                percent less watts/user than the Cisco UCS B200 M3 server (see Figure 2).

                                                                          Average idle watts/user
                                                  10
                                                   9                                                                     8.7
                                                   8
                                                   7
 Figure 2: Average watts/user                      6
                                     Watts/user


 that the blade server                             5
 solutions consumed while                          4               3.2                      3.4
 running no workloads.                             3
                                                   2
                                                   1
                                                   0
                                                           Dell PowerEdge M620     HP ProLiant BL460c G8        Cisco UCS B200 M3
                                                                  solution                solution                    solution


                                                  While running typical workloads in all virtual desktops, the Dell PowerEdge
                                M620 solution consumed less power per user than its competitors did – 4.4 percent less
                                watts/user than the HP ProLiant BL460c G8 solution, and 57.3 percent less watts/user
                                than the Cisco UCS B200 M3 solution (see Figure 3).


                                                                    Average active watts/user
                                                   12
                                                                                                                   9.6
                                                   10

                                                       8
 Figure 3: Average watt/user
                                     Watts/user


 that the blade server                                 6
                                                                    4.1                   4.3
 solutions consumed while
                                                       4
 running our test workloads.
                                                       2

                                                       0
                                                            Dell PowerEdge M620   HP ProLiant BL460c G8     Cisco UCS B200 M3
                                                                   solution              solution                 solution


Dell PowerEdge M620 blade server solutions for virtual desktop                                  A Principled Technologies test report 3
infrastructures
WHAT WE FOUND
                                         For details on the results of our Login VSI tests, which show that each server
                               maxed out at 160 virtual desktops on each of the three server solutions, both in the 4-
                               second response time threshold and in CPU utilization, see Appendix D.
                                         The standard Dell and HP enclosures can fit 16 blades each, while the Cisco
                               chassis can hold only 8 blades. To determine the cost per virtual desktop user the
                               servers deliver, we compare an even number of servers in full chassis, as a business
                               would have, using 16 blades. Figure 4 details the costs of these solutions. The Dell
                               PowerEdge M620 solution pricing includes 16 servers, 2 Dell PowerConnect™ M-8024-k
                               switches, and one PowerEdge M1000e enclosure; the HP ProLiant BL460c G8 solution
                               pricing includes 16 servers and one HP BladeSystem c7000 Enclosure; and the Cisco UCS
                               B200 M3 solution pricing includes 16 servers, two Cisco UCS 5108 Blade Server Chassis,
                               and two Cisco UCS 6248UP Fabric Interconnects. Lower costs and dollars/user are
                               better. All server prices are from the respective vendor Web sites and do not include
                               any discounts, tax, or shipping costs.


                                         Total cost in USD
                                                                        Cost/user                Percentage Dell savings
                                       (16-server solutions)
Dell PowerEdge M620 solution                 $249,107                       $97.31
HP ProLiant BL460c G8 solution               $274,902                      $107.38                        9.4%
Cisco UCS B200 M3 solution                   $309,208                      $120.78                        19.4%
Figure 4: Comparison of 16-server solution costs and cost/user for the solutions we tested.


                                         Figure 5 details the wattage each solution consumed while idle and the
                               watts/user that each consumed. Lower watts and watts/user are better.
                                           Watts (idle)               Watts/user                   Percentage Dell win
Dell PowerEdge M620 solution                    511                      3.2
HP ProLiant BL460c G8 solution                  539                      3.4                                  5.2%
Cisco UCS B200 M3 solution                     1,385                     8.7                                 63.1%
Figure 5: Watts and watts/user that the solutions consumed while idle.


                                         Figure 6 details the wattage each solution consumed while actively running our
                               test workloads and the watts/user that each consumed. Lower watts and watts/user are
                               better.
                                          Watts (active)             Watts/user                    Percentage Dell win
Dell PowerEdge M620 solution                    657                      4.1
HP ProLiant BL460c G8 solution                  687                      4.3                                  4.4%
Cisco UCS B200 M3 solution                     1,539                     9.6                                 57.3%
Figure 6: Watts and watts/user that the solutions consumed while running workloads.


Dell PowerEdge M620 blade server solutions for virtual desktop                     A Principled Technologies test report 4
infrastructures
WHAT WE TESTED
About the Dell PowerEdge M620 blade server
                                       The Dell PowerEdge M620 is a half-height two-socket blade server powered by
                               the Intel Xeon processor E5-2680 that can hold up to 768 GB of RAM in 24 DIMM slots.
                               The PowerEdge M620 comes standard with several management features, including
                               iDRAC7 Express with Lifecycle Controller for Blades, which allow administrators to
                               manage in physical or virtual environments locally or remotely. Along with other
                               members of the M-series PowerEdge server line, the PowerEdge M620 fits right in with
                               the power-efficient Dell PowerEdge M1000e Blade Enclosure.
                                       For more information about the Dell PowerEdge M620, visit
                               http://www.dell.com/us/enterprise/p/poweredge-m620/pd.
About the Dell PowerEdge M1000e Blade Enclosure
                                       The Dell PowerEdge M1000e blade chassis and its supported fabric
                               interconnects are designed for dense computing situations. Features of the PowerEdge
                               M1000e include:
                                      Management. Reduces administrative demand by providing a secure centralized
                                       management interface for the chassis and blades within, using proven Web
                                       (SSL-encrypted) and CLI (SSH/Telnet) technologies.
                                      Simplified configuration. The Chassis Management Controller allows
                                       administrators to control up to nine enclosures and 144 server blades, including
                                       BIOS/firmware change management and updates, thermal monitoring, and
                                       power threshold configuration.
                                      Flexible I/O. Six interconnect sockets with the capability to support three fully-
                                       redundant fabrics, a passive midplane with more than 8Tbps in I/O bandwidth
                                       capacity, and FlexIO support provide a number of connectivity options for your
                                       servers.
                                      Reliability and efficiency. Six power supplies and nine fans, all hot- swappable,
                                       allowing for no-downtime maintenance of key chassis components. All
                                       components are tuned for maximum power efficiency to reduce data center
                                       power consumption.
                                   For more information about the Dell PowerEdge M1000e Blade Enclosure, visit
                                   http://www.dell.com/us/enterprise/p/poweredge-m1000e/pd.
About Login VSI 3.6
                                       Login Virtual Session Indexer (Login VSI) 3.6 is a tool that helps assess the virtual
                               desktop performance, capacity, and scalability of a server. After all desktops are idle,
                               Login VSI incrementally logs users into virtual desktop sessions and begins workloads on
                               each. Login VSI measures the total response times of seven typical office operations


Dell PowerEdge M620 blade server solutions for virtual desktop                    A Principled Technologies test report 5
infrastructures
from each session and calculates the VSI Index Average by taking the average response
                               times and dropping the highest and lowest 2 percent.
                                       As more sessions begin to consume system resources, response times degrade
                               and the VSI index increases until it is above the Dynamic VSImax. When this condition is
                               met, the benchmark records a Login VSImax, which is the maximum number of sessions
                               that the platform can support.
                                       The newest version of Login VSI, Login VSI 3.6, includes client side performance
                               testing that test character response, large text response, mouse-click feedback, and
                               image quality and loading times on clients to ensure good end-user performance. In our
                               tests, we did not use the client-side testing portion of Login VSI, but instead used the
                               tool to determine how many virtual desktops the servers could support and to run the
                               Medium workload to tax the servers. For more information about Login VSI 3.6, see
                               http://www.loginvsi.com/product-overview.


IN CONCLUSION
                                       Getting more value out of your blade solution is a smart way to reduce data
                               center and VDI costs. In our tests, the Dell PowerEdge M620 blade solution not only cost
                               up to 19.4 percent less per user than blade solutions from both HP and Cisco, it also
                               consumed as much as 63.1 percent less power per virtual desktop user. When
                               extrapolated over an entire chassis full of servers, and potentially data centers full of
                               these chassis, the potential savings both in hardware costs and power costs could be
                               dramatic.


Dell PowerEdge M620 blade server solutions for virtual desktop                    A Principled Technologies test report 6
infrastructures
APPENDIX A – SERVER CONFIGURATION INFORMATION
         Figure 7 provides detailed configuration information for the test servers.

System                               Dell PowerEdge M620            Cisco UCS B200 M3                HP ProLiant BL460c G8
Enclosure/chassis
                                                               Cisco UCS 5108 Blade Server
                                Dell PowerEdge M1000e                                            HP BladeSystem c7000
                                                               Chassis
Blade enclosure/chassis         Blade Enclosure with 2x                                          Enclosure with 2x HP
                                                               Connected to 2x Cisco UCS
                                M8024-k 10GbE Switch                                             Virtual Connect Flex-10Gb
                                                               6248UP Fabric Interconnects
Chassis power supplies
Total number                    6                              4                                 6
Maximum wattage of each
                                2,700                          2,500                             2,450
(W)
Chassis cooling fans
Total number                    9                              8                                 10
Dimensions (h x w) of each      3.1" x 3.5"                    3-5/8" x 5-1/2"                   4" x 4"
General
Number of processor
                                2                              2                                 2
packages
Number of cores per
                                8                              8                                 8
processor
Number of hardware
                                16                             16                                16
threads per core
System power management
                                Performance                    Maximum Performance               Default
power
CPU
Vendor                          Intel                          Intel                             Intel
Name                            Xeon                           Xeon                              Xeon
Model number                    E5-2680                        E5-2680                           E5-2680
Stepping                        C2                             C2                                C2
Socket type                     LGA2011                        LGA2011                           LGA2011
Core frequency (GHz)            2.7                            2.7                               2.7
Bus frequency (GT/s)            8                              8                                 8
L1 cache                        32 KB + 32 KB (per core)       32 KB + 32 KB (per core)          32 KB + 32 KB (per core)
L2 cache                        256 KB (per core)              256 KB (per core)                 256 KB (per core)
L3 cache (MB)                   20                             20                                20
Platform
Vendor and model number         Dell PowerEdge M620            Cisco UCS B200 M3                 HP ProLiant BL460c G8
                                                               B200M3.2.0.3.0.0516201212
BIOS name and version           Dell 1.3.6                                                       HP I31 07/15/2012
                                                               10
Memory module(s)
Total RAM in system (GB)        256                            256                               256
                                Samsung M393B2G70BH0-          Samsung M393B2G70BH0-             Samsung M393B2G70BH0-
Vendor and model number
                                YH9                            YH9                               YH9


Dell PowerEdge M620 blade server solutions for virtual desktop                        A Principled Technologies test report 7
infrastructures
System                              Dell PowerEdge M620                  Cisco UCS B200 M3          HP ProLiant BL460c G8
Type                              PC3-10600                        PC3-10600                      PC3-10600
Speed (MHz)                       1,333                            1,333                          1,333
Speed running in the system
                                  1,333                            1,333                          1,333
(MHz)
Size (GB)                         16                               16                             16
Number of RAM module(s)           16                               16                             16
Chip organization                 Double-sided                     Double-sided                   Double-sided
Rank                              Dual                             Dual                           Dual
Operating system
Name                              VMware ESXi 5.0.0                VMware ESXi 5.0.0              VMware ESXi 5.0.0
Build number                      768111                           768111                         768111
File system                       VMFS                             VMFS                           VMFS
Kernel                            VMkernel 5.0.0                   VMkernel 5.0.0                 VMkernel 5.0.0
Language                          English                          English                        English
RAID controller
Vendor and model number           Dell PERC H310 Mini              LSI™ MegaRaid™ SAS 2004        HP Smart Array P220i
Firmware version                  20.10.1-0084                     20.10.1-0061                   2.14
Hard disk
Vendor and model number           Fujitsu MBE2147RC                Toshiba MBF2300RC              HP EH0146FARWD
Number of disks in system         2                                2                              2
Size (GB)                         146                              300                            146
Buffer size (MB)                  16                               16                             16
RPM                               15,000                           10,000                         15,000
Type                              SAS                              SAS                            SAS
Network adapter
                                  Intel 82599EB 10Gb Dual                                         2x HP Virtual Connect Flex-
Vendor and model number                                            2x Cisco UCS-IOM-2208XP
                                  Port                                                            10Gb
USB ports
Number                            2                                0                              0
Type                              2.0                              N/A                            N/A
Figure 7: System configuration information for the test systems.


Dell PowerEdge M620 blade server solutions for virtual desktop                         A Principled Technologies test report 8
infrastructures
STORAGE INFORMATION
         Figures 8 and 9 present detailed storage information for the two Dell EqualLogic PS6010 arrays we used in our
tests.

Storage array 1                                                                      Dell EqualLogic PS6010
Number of storage controllers per array                            1
RAID level                                                         10
Number of drives per array                                         14 (12 active data drives, 2 spares)
Drive vendor and model number                                      Seagate ST3600002SS
Drive size (GB)                                                    600
Drive buffer size (MB)                                             16
Drive RPM                                                          10,000
Drive type                                                         SAS
Figure 8: Storage configuration information for the first Dell EqualLogic PS6010.


Storage array 2                                                                      Dell EqualLogic PS6010
Number of storage controllers per array                            1
RAID level                                                         10
Number of drives per array                                         14 (12 active data drives, 2 spares)
Drive vendor and model number                                      Seagate ST3146855SS
Drive size (GB)                                                    146
Drive buffer size (MB)                                             16
Drive RPM                                                          15,000
Drive type                                                         SAS
Figure 9: Storage configuration information for the second Dell EqualLogic PS6010.


Dell PowerEdge M620 blade server solutions for virtual desktop                         A Principled Technologies test report 9
infrastructures
APPENDIX C - HOW WE TESTED
         Figure 10 presents detailed information about the VMs we used in our testing.
  VM name                  Hosted OS                            Role (s)                   Host       Memory      # vCPUs
                                                    AD Domain controller VSI Share,
DC1              Win 2008 R2 x64 Enterprise         DHCP, DNS, NTP, AD roaming             infra        4 GB          2
                                                    profiles
VMW-View         Win 2008 R2 x64 Enterprise         VMware View Connection server          infra        4 GB          4
vCenter          Win 2008 R2 x64 Enterprise         VMware Virtual Center, Composer        infra        4 GB          4
Launcher         Windows 7 x 86 Enterprise          Login VSI Master launcher              infra        4 GB          2
View-gold        Windows 7 x 86 Enterprise          View master image                    vDT-host       1 GB          1
Figure 10: Detailed VM configuration information.


         We configured a Dell PowerEdge R710 server with VMware vSphere™ (ESXi) 5.0 to host all VDI infrastructure
components for VMware View 5.1 and configure a Dell M620 blade, a HP BL480c G8 blade and a Cisco UCS B200 M3
blade to host virtual desktops for VMware View 5.1.
         We connected all the blades and the infrastructure server to two Dell EqualLogic PS6010 storage arrays. The Dell
EqualLogic PS6010 storage arrays have 14 disks each for a total of 4.55TB of usable storage. We created two Storage
Pools on a RAID 10 configuration and four volumes to host View Composer linked clones. One additional volume was
created to host the infrastructure virtual machines.
Configuring power settings on the Dell M1000e chassis
    1.   Log into Dell Chassis Management Controller Web interface using a web browser.
    2.   Click on the Power tab and select configuration.
    3.   Set the System Input Power Cap to 100%.
    4.   Set the Redundancy Policy to AC Redundancy.
    5.   Enable Dynamic Power Supply Engagement.
Configuring power settings on the HP c7000 chassis
    1.   Log into HP BladeSystem Onboard Administration Web interface using a web browser.
    2.   Click on Power and Thermal and select Power Management.
    3.   Select AC Redundant under Power Mode.
    4.   Enable Dynamic Power.
    5.   Select None under Power Limit.
Configuring power settings on the Cisco UCS 5108 chassis
    1. Log into Cisco Unified Computing System Manager.
    2. Click on Service Profiles and click New to create a new Service Profile.
    3. Enter a profile name and description, configure vNICs, vHBA connections, boot order and server association.
       Click Ok.
    4. Double Click the Service Profile and select the Policies Tab.
    5. Select the Power Control Policy and create a new policy with no power cap.
    6. Click Apply, Click OK.


Dell PowerEdge M620 blade server solutions for virtual desktop                  A Principled Technologies test report 10
infrastructures
Configuring the Dell EqualLogic PS6010 storage
Configuring the array RAID
   1. Log into EqualLogic Web interface using a web browser.
   2. Enter the EqualLogic storage group IP address into a Web browser and use the administrator credentials to log
        in to the EqualLogic Group Manager.
   3. Select the storage group, and expand the members (arrays) in the left pane.
   4. Select the first member (array), which will show as unconfigured, and click Yes to configure the RAID.
   5. At the General Settings screen, leave the default name and storage pool assignment, and click Next.
   6. At the RAID configuration screen, select RAID 10, and click Next.
   7. At the Summary screen, click Finish.
   8. Select the second member (array), which will show as unconfigured, and click Yes to configure the RAID.
   9. At the General Settings screen, leave the default name and storage pool assignment, and click Next.
   10. At the RAID configuration screen, select RAID 10, and click Next.
   11. At the Summary screen, click Finish.
Creating a volume
   1. In the left pane, click Volumes, and, in the adjacent pane, click Create volume.
   2. Name the first volume, and click Next.
   3. Enter the appropriate volume size, and click Next.
   4. On the Step 3 – iSCSI Access screen, check the Limit access to iSCSI initiator name checkbox, and enter the
        appropriate iSCSI initiator names.
   5. Click Finish.
   6. Repeat steps 1 – 5 to create additional volumes.
Setting up the infrastructure server (infra) and the virtual desktop hosts (vDT-hosts)
BIOS settings
        We used the latest BIOS updates. We adjusted the default BIOS settings by ensuring Virtualization Technology is
enabled and setting the performance profile to maximum performance.
Installing VMware vSphere 5.0 (ESXi) on PowerEdge R710s (infra) and (vDT-Hosts)
    1. Insert the ESXi 5.0 disk, and select Boot from disk.
    2. On the Welcome screen, press Enter.
    3. On the End User License Agreement (EULA) screen, press F11.
    4. On the Select a Disk to install or Upgrade Screen, select the relevant volume to install ESXi on, and press Enter.
    5. On the Please Select a Keyboard Layout screen, press Enter.
    6. On the Enter a Root Password Screen, assign a root password, and confirm it by entering it again. Press Enter to
         continue.
    7. On the Confirm Install Screen, press F11 to install.
    8. On the Installation complete screen, press Enter to reboot.
Configuring ESXi after installation
    1. On the ESXi 5.0 screen, press F2, enter the root password, and press Enter.
    2. On the System Customization screen, select Troubleshooting Options, and press Enter.
    3. On the Troubleshooting Mode Options screen, select enable ESXi Shell, and press Enter.
    4. Select Enable SSH, press Enter, and press Esc.
    5. On the System Customization screen, select Configure Management Network.
    6. On the Configure Management Network screen, select IP Configuration.
    7. On the IP Configuration screen, select Set static IP; enter an IP address, subnet mask, and default gateway; and
         press Enter.

Dell PowerEdge M620 blade server solutions for virtual desktop                   A Principled Technologies test report 11
infrastructures
8. On the Configure Management Network screen, press Esc. When asked if you want to apply the changes, press
        Y.
    9. Log into infra as root with the vSphere client.
    10. Select the Configuration tab, and click Networking.
    11. Click Add Networking…
    12. Create a virtual machine network called PRIV-NET and select the appropriate adapters.
    13. Click OK.
    14. Select the Configuration tab, and click Time configuration.
    15. Select Properties, and click Options.
    16. In the General settings, select Start automatically if any ports are open, and Stop when all ports are closed.
    17. In the NTP settings, add a reliable NTP server, or use DC1.VDI.com.
    18. Close NTP settings.
    19. Select the Configuration tab, and click DNS and routing.
    20. Type infra for name, and VDI.com for domain.
    21. Enter 172.0.0.10 for preferred DNS.
    22. Close DNS.
Creating the ESXi datastores
   1.    Log into infra as root with the vSphere client.
   2.    Click Configuration tabStorage AdaptersAdd…
   3.    Select Add Software iSCSI Adapter, and click OK.
   4.    Select the iSCSI adapter and click on Properties…
   5.    Select the Dynamic Discovery tab and click on Add…
   6.    Enter the iSCSI Server IP and click OK.
   7.    Select Rescan All…
   8.    Selected the newly discovered volume.
   9.    For Datastore name, type LUN1 and click Next.
   10.   For Capacity, select Maximum Available Space, and click Next.
   11.   Click Finish to create the datastore.
   12.   Repeat steps 8 through 11 to create additional datastores.
Setting up a VM to host Microsoft Windows Active Directory® server (DC1) on (infra) server
   1.    Connect to the infra server via the VMware vSphere client.
   2.    Log in as root to the infra server.
   3.    In the vSphere client, connect to the vCenter™ Server, and browse to the ESXi host.
   4.    Click the Virtual Machines tab.
   5.    Right-click, and choose New Virtual Machine.
   6.    Choose Custom, and click Next.
   7.    Assign the name DC1 to the virtual machine, and click Next.
   8.    Select infra for the host, and click Next.
   9.    Select infraLUN for the storage, and click Next.
   10.   Choose Virtual Machine Version 8, and click Next.
   11.   Choose Windows, choose Microsoft Windows Server® 2008 R2 (64-bit), and click Next.
   12.   For CPUs, select one virtual processor socket, and 2 cores per virtual socket, and click Next.
   13.   Choose 4 GB RAM, and click Next.
   14.   Click 1 for the number of NICs, select VMXNET3, connect to the PRIV-NET network, and click Next.
   15.   Leave the default virtual storage controller, and click Next.
   16.   Choose to create a new virtual disk, and click Next.


Dell PowerEdge M620 blade server solutions for virtual desktop                 A Principled Technologies test report 12
infrastructures
17. Make the OS virtual disk size 40 GB, choose thick-provisioned lazy zeroed, specify external storage, and click
         Next.
    18. Keep the default virtual device node (0:0), and click Next.
    19. Click Finish.
    20. Right-click the VM, and choose Edit Settings.
    21. On the Hardware tab, click Add…
    22. Click Hard Disk, and click Next.
    23. Click Create a new virtual disk, and click Next.
    24. Specify 15 GB for the virtual disk size, choose thick-provisioned lazy zeroed, specify external storage, and click
         Next.
    25. Choose SCSI (0:1) for the device node, and click Next.
    26. On the Hardware tab, click Add…
    27. Click Create a new virtual disk, and click Next.
    28. Specify 50 GB for the virtual disk size, choose thick-provisioned lazy zeroed, specify external storage, and click
         Next.
    29. Choose SCSI (0:2) for the device node, and click Next.
    30. Click Finish, and click OK.
    31. Click the Resources tab, and click Memory.
    32. Select Reserve all guest memory, and click OK.
    33. Connect the VM virtual CD-ROM to the Microsoft Windows Server 2008 R2 installation disk.
    34. Start the VM.
Installing the Microsoft Windows Server 2008 R2 operating system on the VM
    1. Choose the language, time and currency, and keyboard input. Click Next.
    2. Click Install Now.
    3. Choose Windows Server 2008 R2 Enterprise (Full Installation), and click Next.
    4. Accept the license terms, and click Next.
    5. Click Custom.
    6. Click the Disk, and click Drive options (advanced).
    7. Click NewApplyFormat, and click Next.
    8. After the installation completes, click OK to set the Administrator password.
    9. Enter the administrator password twice, and click OK.
    10. Connect the machine to the Internet, and install all available Windows updates. Restart as necessary.
    11. Enable remote desktop access.
    12. Change the hostname to DC1 and reboot when prompted.
    13. Run diskmgmt.msc.
    14. Select the 15 GB secondary volume, name it profiles format it NTFS, and assign it drive letter E
    15. Select the 50 GB secondary volume, name it share format it NTFS, and assign it drive letter F
    16. Set up networking for the data network:
         a. Click StartControl Panel, right-click Network Connections, and choose Open.
         b. Right-click the VM traffic NIC, and choose Properties.
         c. Uncheck TCP/IP (v6).
         d. Select TCP/IP (v4), and choose Properties.
         e. Set the IP address as 172.0.1.10/255.255.252.0
    17. Install VMware Tools. For more information, see
         http://kb.vmware.com/selfservice/microsites/search.do?language=en_US&cmd=displayKC&externalId=340
    18. Reboot.


Dell PowerEdge M620 blade server solutions for virtual desktop                     A Principled Technologies test report 13
infrastructures
Installing Active Directory and DNS services on DC1
   1. Click StartRun, type dcpromo and click OK.
   2. At the Active Directory Domain Services Installation Wizard welcome screen, check the Use advanced mode
       installation option, and click Next.
   3. In the Choose a Deployment Configuration dialog box, select Create a new domain in a new forest, and click
       Next.
   4. At the FQDN page, type VDI.com and click Next.
   5. At the NetBIOS name prompt, leave the name VDI, and click Next.
   6. At the Forest Functionality level, select Windows Server 2008 R2, and click Next.
   7. At the additional Domain Controller Options, leave DNS server selected, and click Next.
   8. At the System Folder Location screen, change to E: leave the default options, and click Next.
   9. Assign a Directory Services Restore Mode Administrator account password, and click Next.
   10. At the Summary screen, review your selections, and click Next.
   11. Once Active Directory Domain Services finishes installing, click Finish, and restart the system.
   12. Run dnsmgmt.msc.
   13. Create a reverse lookup zone for DC1.
   14. Create static entries for infra and vDT-host.
   15. Open Windows Explorer, and create a folder called e:profiles
   16. Assign permissions of read/write to the VDIeveryone group.
Configuring the Windows time service on DC1
       To ensure reliable time, we pointed our Active Directory server to a physical NTP server.
   1. Open a command prompt.
   2. Type the following:
       W32tm /config /syncfromflags:manual /manualpeerlist:"<ip address of a NTP
       server>"
       W32tm /config /reliable:yes
       W32tm /config /update
       W32tm /resync
       Net stop w32time
       Net start w32time
Setting up DHCP services on DC1
   1.    Click StartAdministrative ToolsServer ManagerAdd Roles.
   2.    Select DHCP Server, and click Next.
   3.    At the Introduction to DHCP Server screen, click Next.
   4.    At the Specify IPv4 DNS Settings screen, type vdi.com for the parent domain.
   5.    Type the preferred DNS server IPv4 address, and click Next.
   6.    At the Specify IPv4 WINS Server Settings screen, select WINS is not required for applications on the network, and
         click Next.
   7.    At the Add or Edit DHCP Scopes screen, click Add.
   8.    At the Add Scope screen, enter the Name DHCP Scope name.
   9.    In the next box, set the following values, and click OK.
          Start IP address=172.0.0.101
          End IP address=172.0.3.200
          Subnet mask=255.255.252.0
   10.   Check the Activate This Scope box.
   11.   At the Add or Edit DHCP Scopes screen, click Next.


Dell PowerEdge M620 blade server solutions for virtual desktop                   A Principled Technologies test report 14
infrastructures
12. Click the Enable DHCP v6 Stateless Mode radio button, and click Next.
   13. Leave the default IPv6 DNS Settings, and click Next.
   14. At the Authorize DHCP server dialog box, select Use current credentials.
   15. At the Confirm Installation Selections screen, click Next. If the installation is set up correctly, a screen displays
       saying that DHCP server install succeeded.
   16. Click Close.
Setting up the Login VSI share and Active Directory users
         For Login VSI to work correctly, you must create a CIFS share, Active Directory OU, and Active directory. For
more information on Login VSI, see http://www.loginvsi.com/en/admin-guide/installation.html. Open Windows
Explorer, and create a file called f:share and e:profiles
   1.    Assign permissions of read/write to the VDI/everyone group.
   2.    Right-click the f:share and e:profiles folders, and select Properties.
   3.    Click the Sharing tab, and click Share…
   4.    Add everyone to the Read/Write group, and click Share.
   5.    From the Login VSI 3.6 media, run the Login VSI AD Setup.
   6.    Keep the defaults, and click Start.
Creating roaming profiles for users
   1.    Open Active Directory Users and Computers.
   2.    Browse to VDI.comLogin_VSIUsersTarget.
   3.    Select all Login VSI users, and right-click Properties.
   4.    Click the Profiles tab.
   5.    Check box Profile path, and type e:profiles%username%
   6.    Click OK.
Setting up a VM to host the vCenter server (vCenter)
   1.  Connect to the infra server via the vSphere client.
   2.  Log into infra with the VMware vSphere client.
   3.  In the vSphere client, connect to the vCenter Server, and browse to the ESXi host.
   4.  Click the Virtual Machines tab.
   5.  Right-click, and choose New Virtual Machine.
   6.  Choose Custom, and click Next.
   7.  Assign the name vCenter to the virtual machine, and click Next.
   8.  Select infra for the host, and click Next.
   9.  Select infraLUN for the storage, and click Next.
   10. Choose Virtual Machine Version 8, and click Next.
   11. Choose Windows, choose Microsoft Windows Server 2008 R2 (64-bit), and click Next.
   12. For CPUs, select one virtual processor socket, and 2 cores per virtual socket, and click Next.
   13. Choose 4GB RAM, and click Next.
   14. Click 1 for the number of NICs, select VMXNET3, connect to the PRIV-NET portgoup, and click Next.
   15. Leave the default virtual storage controller, and click Next.
   16. Choose to create a new virtual disk, and click Next.
   17. Make the OS virtual disk size 40 GB, choose thick-provisioned lazy zeroed, specify the OS datastore on the
       external storage, and click Next.
   18. Keep the default virtual device node (0:0), and click Next.
   19. Connect the VM virtual CD-ROM to the Microsoft Windows 2008 R2 installation disk.
   20. Click Finish.


Dell PowerEdge M620 blade server solutions for virtual desktop                      A Principled Technologies test report 15
infrastructures
21. Right-click the vCenter VM, and click Edit settings.
   22. Click the Resources tab, click Memory, check the Reserve all guest memory checkbox, and click OK.
   23. Start the VM.
Installing the Microsoft Windows Server 2008 R2 operating system on the VM
   1.    Choose the language, time and currency, and keyboard input. Click Next.
   2.    Click Install Now.
   3.    Choose Windows Server 2008 R2 Enterprise (Full Installation), and click Next.
   4.    Accept the license terms, and click Next.
   5.    Click Custom.
   6.    Click the Disk, and click Drive options (advanced).
   7.    Click NewApplyFormat, and click Next.
   8.    After the installation completes, click OK to set the Administrator password.
   9.    Enter the administrator password twice, and click OK.
   10.   Connect the machine to the Internet, and install all available Windows updates. Restart as necessary.
   11.   Enable remote desktop access.
   12.   Change the hostname to vCenter and reboot when prompted.
   13.   Set up networking for the data network:
         a. Click Start, Control Panel, right-click Network Connections, and choose Open.
         b. Right-click the VM traffic NIC, and choose Properties.
         c. Uncheck TCP/IP (v6).
         d. Select TCP/IP (v4), and choose Properties.
         e. Set the IP address, subnet, gateway, and DNS server.
   14.   Join the VDI domain.
   15.   Reboot the system.
   16.   Install VMware Tools. For more information, see
         http://kb.vmware.com/selfservice/microsites/search.do?language=en_US&cmd=displayKC&externalId=340.
   17.   Reboot.
Installing VMware vCenter 5
   1.    Log onto the vCenter as VDIadministrator
   2.    From the VMware vCenter5 install media, click Autorun.
   3.    Click Run to start the install wizard.
   4.    Click the Install button on the VMware vSphere 5.0 wizard.
   5.    Select the Install wizard language as English, and click OK.
   6.    At the Install wizard welcome screen, click Next.
   7.    Agree to the license agreement, and click Next.
   8.    Enter user information and a license key, and click Next.
   9.    Select Install the SQL express instance, and click Next.
   10.   Select the system account for the vCenter Server service account, and click Next.
   11.   Keep the installation directory as C:Program FilesVMwareInfrastructure, and click Next.
   12.   Select Create a standalone VMware vCenter Server instance, and click Next.
   13.   Keep the vCenter default ports, and click Next.
   14.   Select 1024 MB for the JVM memory, and click Next.
   15.   Click Install to finish the vCenter server installation.
   16.   Restart the server when complete.
   17.   Using the vSphere client, log into vCenter5 as VDIadministrator
   18.   Right-click the root of vCenter, and click New Data center.
   19.   Name the New datacenter VDI

Dell PowerEdge M620 blade server solutions for virtual desktop                   A Principled Technologies test report 16
infrastructures
20. Add the ESX server named vDT-Host to the datacenter.
    21. Add the ESX server named infra to the datacenter.
Setting up ODBC DSN for composer
    1. From the vCenter desktop, open StartAll ProgramsMicrosoft SQL Server 2008 R2Configuration
        ToolsSQL Server Configuration Manager.
    2. Click SQL Server Network ConfigurationProtocols for VIM_SQLEXP.
    3. Right-click TCP/IP, and select Enabled.
    4. Click SQL Servicesright-click SQL Server Browser, and select Properties.
    5. IN the SQL Server Browser properties, select the Services tab, change the Start mode to Automatic, and click OK.
    6. Start the SQL Server browser service.
    7. Select StartRunodbcad32.exe.
    8. Click the system DSN tab.
    9. Click Add.
    10. Click SQL Server, and click Finish.
    11. In the Create a New Data Source to SQL Server text box, enter the connection name type: composer
    12. For Server, select vCenterVIM_SQLEXP, and click Next.
    13. Leave authentication as default, click Next twice, and click Finish.
    14. Click OK to create the composer ODBC connection.
Setting up VMware View Composer
    1. Open the View5 media folder, and run the file names VMware-viewcomposer-.3.0.0-691993.exe.
    2. At the Welcome screen and the Patents screen, click Next.
    3. Accept the VMware end user license agreement, and click Next.
    4. Leave the Destination folder as default, and click Next.
    5. In the Database information box, for source name type composer for user name type VDIAdministrator
        type the password, and click Next.
    6. Leave the default SOAP port, and click Next.
    7. Click Install, and click finish.
Setting up a VM to host the VMware View connection server
   1.  Log into vCenter with the VMware vSphere client.
   2.  In the vSphere client, browse to the ESXi host named infra.
   3.  Click the Virtual Machines tab.
   4.  Right-click, and choose New Virtual Machine.
   5.  Choose Custom, and click Next.
   6.  Assign the name View5 to the virtual machine, and click Next.
   7.  Select infra for the host, and click Next.
   8.  Select infraLUN for the storage, and click Next.
   9.  Choose Virtual Machine Version 8, and click Next.
   10. Choose Windows, choose Microsoft Windows Server 2008 R2 (64-bit), and click Next.
   11. For CPUs, select one virtual processor socket, and 2 cores per virtual socket, and click Next.
   12. Choose 4GB RAM, and click Next.
   13. Click 1 for the number of NICs, select VMXNET 3, connect to the PRIV-NET portgroup, and click Next.
   13. Leave the default virtual storage controller, and click Next.
   14. Choose to create a new virtual disk, and click Next.
   15. Make the OS virtual disk size 40 GB, choose thick-provisioned lazy zeroed, specify the OS datastore on the
       external storage, and click Next.
   16. Keep the default virtual device node (0:0), and click Next.


Dell PowerEdge M620 blade server solutions for virtual desktop                 A Principled Technologies test report 17
infrastructures
17. Connect the VM virtual CD-ROM to the Microsoft Windows Server 2008 R2 installation disk.
    18. Right-click the View5 VM, and click Edit settings.
    19. Click the Resources tab, click Memory, check the Reserve all guest memory checkbox, and click OK.
    20. Click Finish.
    21. Start the VM.
Installing the Microsoft Windows Server 2008 R2 operating system on the VM
    1. Choose the language, time and currency, and keyboard input. Click Next.
    2. Click Install Now.
    3. Choose Windows Server 2008 R2 Enterprise (Full Installation), and click Next.
    4. Accept the license terms, and click Next.
    5. Click Custom.
    6. Click the Disk, and click Drive options (advanced).
    7. Click NewApplyFormat, and click Next.
    8. After the installation completes, click OK to set the Administrator password.
    9. Enter the administrator password twice, and click OK.
    10. Connect the machine to the Internet, and install all available Windows updates. Restart as necessary.
    11. Enable remote desktop access.
    12. Change the hostname to VMW-View and reboot when prompted.
    13. Set up networking for the data network:
         a. Click StartControl Panel, right-click Network Connections, and choose Open.
         b. Right-click the VM traffic NIC, and choose Properties.
         c. Uncheck TCP/IP (v6).
         d. Select TCP/IP (v4), and choose Properties.
         e. Set the IP address, subnet, gateway, and DNS server.
    14. Join the VDI domain.
    15. Install VMware Tools. For more information, see
        http://kb.vmware.com/selfservice/microsites/search.do?language=en_US&cmd=displayKC&externalId=340.
    16. Reboot.
Installing the VMware View Connection Server
    1. Log into the server named VMW-View.
    2. Click Install Media for View Connection Server x86_64-5.1.0-704644.exe
    3. To begin the install wizard, click Next.
    4. Agree to the license agreement, and click Next.
    5. Keep the destination directory as C:Program FilesVMware ViewServer, and click Next.
    6. Select View Standard Server, and click Next.
    7. Allow View Server to configure the firewall, and click Next.
    8. Authorize the local administrator to administer View and click Next.
    9. Choose whether to participate in the customer experience improvement program.
    10. Complete the installation wizard to finish installing View Connection Server
    11. Click Finish.
    12. Reboot server.
Configuring the VMware View Connection Server
    1. Open a Web browser to <the view server ipaddress>/admin.
    2. Log in as administrator
    3. Open View ConfigurationServers.
    4. In the vCenter Servers tab, click Add…

Dell PowerEdge M620 blade server solutions for virtual desktop                  A Principled Technologies test report 18
infrastructures
5.    In the Add vCenter Server settings, add the vCenter, and enable View Composer. Click OK.
    6.    Set the Host Cache setting to 2048MB.
    7.    Open View ConfigurationProduct Licensing and Usage.
    8.    Click Edit license…
    9.    Enter a valid license serial number, and click OK.
    10.   Close the View Administrator.
Setting up a Windows 7 Enterprise x86 image template
          Using the vSphere client, we created a Windows Enterprise X86 VMs base image and converted it into a
template. Using our template, we deployed a View gold image and a Login VSI launcher.
          On the gold image, we installed Microsoft Office 2010, installed the Login VSI target software, added them to
the VDI domain, added them to the Login VSI OU, and installed the respective VMware View 5.1 agents.
          For the Login VSI launcher VM, we installed the VMware View 5.1 client, added it to the VDI domain and Login
VSI OU in Active Directory, and installed the Login VSI Launcher software.
Installing the Windows 7 Enterprise (x86) base image VM
    1.    Log into the vCenter.
    2.    In the vSphere client, connect to the vCenter Server, and browse to the infra host.
    3.    Click the Virtual Machines tab.
    4.    Right-click, and choose New Virtual Machine.
    5.    Choose Custom, and click Next.
    6.    Assign the name as win7-temp and click Next.
    7.    Select infra for the host, and click Next.
    8.    Select infraLUN.
    9.    Choose Virtual Machine Version 8, and click Next.
    10.   Choose Windows, choose Microsoft Windows 7 (32-bit), and click Next.
    11.   For CPUs, select one virtual processor socket and one core per virtual socket, and click Next.
    12.   Choose 1GB RAM, and click Next.
    13.   Click 1 for the number of NICs, select VMX, and click Next.
    14.   Leave the default virtual storage controller, and click Next.
    15.   Choose to create a new virtual disk, and click Next.
    16.   Make the OS virtual disk size 20 GB, choose thick-provisioned lazy zeroed, specify the OS datastore on the
          external storage, and click Next.
    17.   Keep the default virtual device node (0:0), and click Next.
    18.   Click Finish.
    19.   Click Finish, and click OK.
    20.   Right-click the win7-temp VM, and click Edit settings.
    21.   Click the Resources tab, click Memory, and check the Reserve all guest memory checkbox.
    22.   Click the Hardware tab, CD/DVD Drive, and Connect the VM virtual CD-ROM to the Microsoft Windows 7 x86
          installation disk.
    23.   Click OK.
Installing the Windows 7 Enterprise (X86) on the base image VM
    1.    When the installation prompts you, press any key to begin setup.
    2.    Enter your language preferences, and click Next.
    3.    Click Install.
    4.    Accept the license terms, and click Next.
    5.    Select Custom, and select the drive that will contain the OS.


Dell PowerEdge M620 blade server solutions for virtual desktop                    A Principled Technologies test report 19
infrastructures
6.  Click Install, and the setup begins.
    7.  Type user for the username and change the computer name, and click Next.
    8.  Enter no password, and click Next.
    9.  For system protection, select Use recommended settings, and click Next.
    10. Enter your time zone, and click Next.
    11. Select the Work Network setting, and click Next.
    12. Use Windows Update to patch the Windows 7 installation.
    13. Install VMware Tools from
        http://kb.vmware.com/selfservice/microsites/search.do?language=en_US&cmd=displayKC&externalId=340.
    14. Reboot.
Installing Windows 7 Enterprise (X86), optimizing Windows 7
Adjusting page file
   1. Log in as administrator
   2. Right-click ComputerPropertiesChange settingsAdvancedPerformanceSettings.
   3. In Performance settings, select the Advanced tab, and select Change for Virtual Memory.
   4. Deselect automatically manage page file.
   5. Select Custom size, type 2048 for both values, and select Set.
Enabling ClearType fonts
    1. Click StartRun, and type cttune.exe
    2. Check the Turn on ClearType checkbox, and click Next.
    3. Follow the wizard to enable ClearType fonts.
Disabling Windows Firewall
        The domain GPO automatically disables the Windows Firewall.
Installing Office 2010 Professional and converting to template
   1. From the Office 2010 media, run Setup.
   2. Enter the product key for Office 2010, and click Continue.
   3. Accept the licensing agreement.
   4. Select Install Now.
   5. Reboot the system.
   6. Shut down the VM.
   7. Right-click, and select TemplateConvert to Template.
Deploying the view_gold image from template
   1. In vSphere Client, browse to HomeVMs and Templates.
   2. Right-click win7-temp to deploy a virtual machine from template.
   3. For Name, type view_gold and click Next.
   4. Click Datacenter, and click Next.
   5. Click the vDT-host server, and click Next.
   6. Select infraLUN, and click Next.
   7. Select customization using existing customization specifications, select the appropriate file, and click Next.
   8. Click Finish to deploy the view_gold VM.
   9. Repeat steps 1 through 8 to deploy a Launcher_1 VM to host infra.
Preparing view_gold for deployment
Installing Login VSI target software on view_gold
    1. Log into the view_gold VM as VDIadministrator


Dell PowerEdge M620 blade server solutions for virtual desktop                   A Principled Technologies test report 20
infrastructures
2. Browse to vsi-installTarget setup.
    3. Run the setup.exe.
    4. In the Target Setup wizard, specify the VSI share dc1share
    5. Click Start.
    6. At the security warnings, click OK.
    7. Reboot the system.
Installing the View 5 agent on view_gold
    1. Browse to the VMware View 5 media, and run the VMware-viewagent-x86_64-5.1.0-704644.exe file.
    2. Click Run.
    3. At the Welcome screen, click Next.
    4. Accept the VMware end user license agreement, and click Next.
    5. Select defaults, and click Next.
    6. Enter the server name of the View Connection Server, and click Next.
    7. Click Install.
Configuring Regedit for Quick prep (kb.vmware.com/kb/1026556)
    1.   Click StartRun, and type regedit
    2.   Browse to HKEY_LOCAL_MACHINESYSTEMCurrentControlSetServicesvmware-viewcomposer-ga.
    3.   Right-click SkipLicenseActivation, and click Modify…
    4.   Change the value from 0 to 1.
Preparing Launcher_1 for testing
         We installed our launcher with the Login VSI target software and View 5.1 client.
Installing Virtual Audio Cables
         By default, the virtual launchers cannot render audio so we installed Virtual Audio Cables version 4.10. The
software can be downloaded from http://software.muzychenko.net/eng/vac.htm
    1. Download and extract the media.
    2. Click Setup.
    3. Click Yes to begin the install.
    4. Click I accept to accept the software license agreement.
    5. Click Install.
Installing the Login VSI launcher
    1. Log into the XD_gold VM as VDIadministrator
    2. Browse to vsi-installLauncher setup.
    3. Run the setup.exe.
    4. In the Target Setup wizard, specify the VSI share dc1share
Patching the Login VSI launcher and updating the version of Adobe Flash
       By default, Login VSI installs an older version of Flash. To ensure Flash Media Redirection works, ensure that the
launcher version is 3.4.1 or greater and that adobe Flash player 11 plugin has been updated. It can be found here:
http://www.adobe.com/support/flashplayer/downloads.html.
Installing the VMware View client
    1. Browse to the VMware View 5.1 media, and run the VMware-viewclient-x86_64-5.1.0-704644.exe file.
    2. Click Run.
    3. At the welcome screen, click Next.
    4. At the Patents screen, click Next.


Dell PowerEdge M620 blade server solutions for virtual desktop                   A Principled Technologies test report 21
infrastructures
5. Accept the VMware end user license agreement, and click Next.
   6. Select defaults, and click Next.
   7. Click Install.
Configuring View 5 - creating a pool and adding entitlements for Login VSI users
   1.    Open vCenterDatacenterInfra, and right-click the view_gold VM, select SnapshotTake Snapshot.
   2.    Name the snapshot view_gold
   3.    Open the View Administrator.
   4.    Log in as administrator
   5.    Click Pools, and in the right window, click Add…
   6.    Select Automatic Pool, and click Next.
   7.    Select Floating, and click Next.
   8.    Select View Composer linked clones, and click Next.
   9.    Type pool for the pool ID and display name, and click Next.
   10.   Leave the pool settings as defaults, and click Next.
   11.   For the naming pattern, type View-{n:fixed=003}
   12.   Under Pool Sizing enter 160 for Max number of desktops and Number of spare (power on) desktops.
   13.   Select provision all desktops up-front, and click Next.
   14.   Select Redirect disposable files to a non-persistent disk, type 4096 MB for Disk Size, and click Next.
   15.   Under Storage Optimization, click Next.
   16.   For the pool settings, use the following:
          Default image: view_gold – view_gold
          VM folder: /Datacenter/vm/Pool
          Host or cluster: DataCenter/host/vd-host.vdi.com
          Resource pool: /Datacenter/host/vd-host.vdi.com/Resources
          Datastore= LUN1,LUN2,LUN3,LUN4 Storage Overcommit: Conservative
   17.   Under Advanced Storage Options select Use host caching, OS disk, 7 days, and click Next.
   18.   For Guest customization, select the following:
          Domain: VDI.com
          AD container: OU=Users,OU=Login_VSI
          Select Use Quick Prep, and click Next.
   19.   Click Finish.
   20.   Click Pool, and click Entitlements…
   21.   Click Add, type Login_VSI_TS and click OK.
   22.   Click Desktops, and wait for the virtual desktops to report as ready.


Dell PowerEdge M620 blade server solutions for virtual desktop                  A Principled Technologies test report 22
infrastructures
APPENDIX D – DETAILED TEST RESULTS
                         Figures 11 through 13 show the Login VSI response times throughout our tests at varying user counts. From
these results, we determined that each server solution could comfortably support 160 virtual desktops while
maintaining acceptable response times.

                                      Dell PowerEdge M620 - Login VSI response times
                        4,000

                        3,500

                        3,000
   Response time (ms)


                        2,500

                        2,000

                        1,500

                        1,000

                          500

                            0
                                10   22   30   40   48    55    63    71     79     88    97    106 114 123 132 140 149 160
                                                                            Users

Figure 11: Login VSI response times for the Dell PowerEdge M620 server throughout our Login VSI tests.


                                     HP ProLiant BL460c G8 - Login VSI response times
                        4,500

                        4,000

                        3,500
   Response time (ms)


                        3,000

                        2,500

                        2,000

                        1,500

                        1,000

                         500

                           0
                                10   22   30   40   48   55    63    71    79     88     97    106 114 123 132 140 149 160
                                                                          Users

Figure 12: Login VSI response times for the HP ProLiant BL460c G8 server throughout our Login VSI tests.


Dell PowerEdge M620 blade server solutions for virtual desktop                                            A Principled Technologies test report 23
infrastructures
Cisco UCS B200 M3 - Login VSI response times
                                4,500

                                4,000

                                3,500

                                3,000
           Response time (ms)


                                2,500

                                2,000

                                1,500

                                1,000

                                 500

                                     0
                                         10   22    30   40   48   55   63   71   79 88    97   106 114 123 132 140 149 160
                                                                                   Users

Figure 13: Login VSI response times for the Cisco UCS B200 M3 server throughout our Login VSI tests.


                                 Figures 14 through 16 show the processor utilization percentage for the servers throughout the Login VSI tests.


                                                              Dell PowerEdge M620 - CPU %
                               100
                                90
                                80
  CPU utilization percentage


                                70
                                60
                                50
                                40
                                30
                                20
                                10
                                 0
                                     06:46.0

                                     10:03.0
                                     11:46.0

                                     15:13.0
                                     17:00.0

                                     20:36.0

                                     24:12.0
                                     26:05.0

                                     29:58.0

                                     34:01.0
                                     36:06.0

                                     40:12.0

                                     44:14.0
                                     46:16.0

                                     50:18.0

                                     54:08.0
                                     55:55.0

                                     59:22.0

                                     02:40.0
                                     04:16.0
                                     08:23.0


                                     13:30.0


                                     18:47.0

                                     22:23.0


                                     28:01.0

                                     31:58.0


                                     38:09.0

                                     42:13.0


                                     48:17.0

                                     52:19.0


                                     57:38.0

                                     01:00.0


                                     05:53.0


                                                                                  Time
Figure 14: CPU utilization for the Dell PowerEdge M620 server throughout our Login VSI tests.


Dell PowerEdge M620 blade server solutions for virtual desktop                                           A Principled Technologies test report 24
infrastructures
CPU utilization percentage                                                                                                                                                                           CPU utilization percentage


                                                                                                                                                                                                 10
                                                                                                                                                                                                           30
                                                                                                                                                                                                                40
                                                                                                                                                                                                                     50
                                                                                                                                                                                                                          60
                                                                                                                                                                                                                               70
                                                                                                                                                                                                                                         90


                                                                                                                                                                                                      20
                                                                                                                                                                                                                                    80


                                                                                                                                                                                             0
                                                                                                                                                                                                                                              100
                                                                                                                                                                                                                                                                                                                                                                                                      10
                                                                                                                                                                                                                                                                                                                                                                                                           20
                                                                                                                                                                                                                                                                                                                                                                                                                     40
                                                                                                                                                                                                                                                                                                                                                                                                                          50
                                                                                                                                                                                                                                                                                                                                                                                                                               60
                                                                                                                                                                                                                                                                                                                                                                                                                                    70
                                                                                                                                                                                                                                                                                                                                                                                                                                         80
                                                                                                                                                                                                                                                                                                                                                                                                                                              90


                                                                                                                                                                                                                                                                                                                                                                                                                30


                                                                                                                                                                                                                                                                                                                                                                                                  0
                                                                                                                                                                                                                                                                                                                                                                                                                                                   100
                                                                                                                                                                                   27:25.0                                                                                                                                                                                              0:00:06
                                                                                                                                                                                   29:16.0


infrastructures
                                                                                                                                                                                                                                                                                                                                                                                        0:01:54
                                                                                                                                                                                   31:18.0                                                                                                                                                                                              0:03:42
                                                                                                                                                                                   33:07.0                                                                                                                                                                                              0:05:30
                                                                                                                                                                                   34:57.0                                                                                                                                                                                              0:07:18
                                                                                                                                                                                   36:53.0                                                                                                                                                                                              0:09:06
                                                                                                                                                                                   38:49.0                                                                                                                                                                                              0:10:54
                                                                                                                                                                                   40:44.0                                                                                                                                                                                              0:12:42
                                                                                                                                                                                   42:35.0                                                                                                                                                                                              0:14:30
                                                                                                                                                                                   44:27.0                                                                                                                                                                                              0:16:18
                                                                                                                                                                                   46:24.0
                                                                                                                                                                                                                                                                                                                                                                                        0:18:06
                                                                                                                                                                                   48:21.0
                                                                                                                                                                                                                                                                                                                                                                                        0:19:54
                                                                                                                                                                                   50:23.0
                                                                                                                                                                                                                                                                                                                                                                                        0:21:42
                                                                                                                                                                                   52:35.0
                                                                                                                                                                                                                                                                                                                                                                                        0:23:30
                                                                                                                                                                                   54:44.0
                                                                                                                                                                                                                                                                                                                                                                                        0:25:18
                                                                                                                                                                                   56:52.0
                                                                                                                                                                                                                                                                                                                                                                                        0:27:06
                                                                                                                                                                                   59:15.0
                                                                                                                                                                                                                                                                                                                                                                                        0:28:54
                                                                                                                                                                                   01:35.0


                                                                                                                                                                            Time
                                                                                                                                                                                                                                                                                                                                                                                        0:30:42


                                                                                                                                                                                                                                                                                                                                                                                 Time
                                                                                                                                                                                   03:47.0
                                                                                                                                                                                                                                                                                                                                                                                        0:32:30
                                                                                                                                                                                   05:53.0


Dell PowerEdge M620 blade server solutions for virtual desktop
                                                                                                                                                                                                                                                                                                                                                                                        0:34:18
                                                                                                                                                                                   07:31.0
                                                                                                                                                                                                                                                                                                                                                                                        0:36:06
                                                                                                                                                                                   09:09.0
                                                                                                                                                                                                                                                                                                                                                                                        0:37:54
                                                                                                                                                                                   10:42.0
                                                                                                                                                                                                                                                                                                                                                                                        0:39:42


                                                                                                                                                                                                                                                    Cisco UCS B200 M3 - CPU%
                                                                                                                                                                                   12:32.0
                                                                                                                                                                                                                                                                                                                                                                                        0:41:30
                                                                                                                                                                                                                                                                                                                                                                                                                                                         HP ProLiant BL460c G8 - CPU %


                                                                                                                                                                                   14:25.0
                                                                                                                                                                                                                                                                                                                                                                                        0:43:18
                                                                                                                                                                                   15:57.0
                                                                                                                                                                                                                                                                                                                                                                                        0:45:06
                                                                                                                                                                                   17:22.0


                                                                              Figure 16: CPU utilization for the Cisco UCS B200 M3 server throughout our Login VSI tests.
                                                                                                                                                                                                                                                                                                                                                                                        0:46:54
                                                                                                                                                                                   18:43.0
                                                                                                                                                                                                                                                                                                                                                                                        0:48:42
                                                                                                                                                                                                                                                                               Figure 15: CPU utilization for the HP ProLiant BL460c G8 server throughout our Login VSI tests.


                                                                                                                                                                                   20:10.0
                                                                                                                                                                                                                                                                                                                                                                                        0:50:30
                                                                                                                                                                                   21:31.0
                                                                                                                                                                                                                                                                                                                                                                                        0:52:18
                                                                                                                                                                                   22:52.0
                                                                                                                                                                                                                                                                                                                                                                                        0:54:06
                                                                                                                                                                                   23:44.0
                                                                                                                                                                                                                                                                                                                                                                                        0:55:54
                                                                                                                                                                                   24:34.0
                                                                                                                                                                                   25:23.0                                                                                                                                                                                              0:57:42
                                                                                                                                                                                                                                                                                                                                                                                        0:59:30


                                   A Principled Technologies test report 25
Figures 17 through 19 show the power consumption for the solutions throughout the Login VSI tests.

                                 Dell PowerEdge M620 solution - Power
           1,800
           1,600
           1,400
           1,200
           1,000
   Watts


             800
             600
             400
             200
               0
                   00:01.0
                   01:57.0


                   07:41.0
                   09:37.0
                   11:33.0
                   13:29.0
                   15:25.0


                   23:09.0
                   25:05.0
                   27:01.0
                   28:57.0


                   36:41.0
                   38:37.0
                   40:33.0
                   42:29.0
                   44:25.0


                   52:09.0
                   54:05.0
                   56:01.0
                   57:57.0
                   01:53.0
                   03:49.0
                   05:45.0


                   17:21.0
                   19:17.0
                   21:13.0


                   30:53.0
                   32:49.0
                   34:45.0


                   46:21.0
                   48:17.0
                   50:13.0
                                                        Time

Figure 17: Power, in watts, for the Dell PowerEdge M620 solution throughout our Login VSI tests.


                                  HP ProLiant BL460c G8 solution - Power
             1,800
             1,600
             1,400
             1,200
             1,000
     Watts


              800
              600
              400
              200
                   0
                       00:01.0

                       01:41.0
                       03:31.0

                       07:11.0
                       09:01.0

                       12:41.0
                       14:31.0


                       20:01.0
                       21:51.0

                       25:31.0
                       27:21.0

                       31:01.0
                       32:51.0

                       36:31.0
                       38:21.0


                       43:51.0
                       45:41.0

                       49:21.0
                       51:11.0

                       54:51.0
                       56:41.0
                       01:51.0


                       05:21.0


                       10:51.0


                       16:21.0
                       18:11.0


                       23:41.0


                       29:11.0


                       34:41.0


                       40:11.0
                       42:01.0


                       47:31.0


                       53:01.0


                       58:31.0


                                                           Time
Figure 18: Power, in watts, for the HP ProLiant BL460c G8 solution throughout our Login VSI tests.


Dell PowerEdge M620 blade server solutions for virtual desktop                         A Principled Technologies test report 26
infrastructures
Cisco UCS B200 M3 solution - Power
           1,800
           1,600
           1,400
           1,200
           1,000
   Watts


            800
            600
            400
            200
              0
                   01:47.0
                   03:40.0
                   05:33.0
                   07:26.0
                   09:19.0
                   11:12.0
                   13:05.0
                   14:58.0
                   16:51.0
                   18:44.0
                   20:37.0
                   22:30.0
                   24:23.0
                   26:16.0
                   28:09.0
                   30:02.0
                   31:55.0
                   33:48.0
                   35:41.0
                   37:34.0
                   39:27.0
                   41:20.0
                   43:13.0
                   45:06.0
                   46:59.0
                   48:52.0
                   00:01.0
                   01:54.0


                   50:45.0
                   52:38.0
                   54:31.0
                   56:24.0
                   58:17.0
                                                        Time

Figure 19: Power, in watts, for the Cisco UCS B200 M3 solution throughout our Login VSI tests.


Dell PowerEdge M620 blade server solutions for virtual desktop                        A Principled Technologies test report 27
infrastructures
Dell PowerEdge M620 blade server solutions for virtual desktop infrastructures

Contenu connexe

Similaire à Dell PowerEdge M620 blade server solutions for virtual desktop infrastructures

Server consolidation with the Dell PowerEdge M620
Server consolidation with the Dell PowerEdge M620Server consolidation with the Dell PowerEdge M620
Server consolidation with the Dell PowerEdge M620Principled Technologies
 
Dell PowerEdge M520 server solution: Energy efficiency and database performance
Dell PowerEdge M520 server solution: Energy efficiency and database performanceDell PowerEdge M520 server solution: Energy efficiency and database performance
Dell PowerEdge M520 server solution: Energy efficiency and database performancePrincipled Technologies
 
Windows Server 2012 on Dell - Great performance and value for the next genera...
Windows Server 2012 on Dell - Great performance and value for the next genera...Windows Server 2012 on Dell - Great performance and value for the next genera...
Windows Server 2012 on Dell - Great performance and value for the next genera...Principled Technologies
 
Dell PowerEdge R720 rack server solutions for virtual desktop infrastructures
Dell PowerEdge R720 rack server solutions for virtual desktop infrastructures Dell PowerEdge R720 rack server solutions for virtual desktop infrastructures
Dell PowerEdge R720 rack server solutions for virtual desktop infrastructures Principled Technologies
 
Dell PowerEdge R720 server with VMware vSphere 5 - Exchange server consolidation
Dell PowerEdge R720 server with VMware vSphere 5 - Exchange server consolidationDell PowerEdge R720 server with VMware vSphere 5 - Exchange server consolidation
Dell PowerEdge R720 server with VMware vSphere 5 - Exchange server consolidationPrincipled Technologies
 
The 16th Generation Dell PowerEdge R760 server with Broadcom NICs: Save money...
The 16th Generation Dell PowerEdge R760 server with Broadcom NICs: Save money...The 16th Generation Dell PowerEdge R760 server with Broadcom NICs: Save money...
The 16th Generation Dell PowerEdge R760 server with Broadcom NICs: Save money...Principled Technologies
 
Power efficiency and cost: AMD Opteron 6300 series processor-based Dell Power...
Power efficiency and cost: AMD Opteron 6300 series processor-based Dell Power...Power efficiency and cost: AMD Opteron 6300 series processor-based Dell Power...
Power efficiency and cost: AMD Opteron 6300 series processor-based Dell Power...Principled Technologies
 
Dell PowerEdge M820 blades: Balancing performance, density, and high availabi...
Dell PowerEdge M820 blades: Balancing performance, density, and high availabi...Dell PowerEdge M820 blades: Balancing performance, density, and high availabi...
Dell PowerEdge M820 blades: Balancing performance, density, and high availabi...Principled Technologies
 
Dell PowerEdge M820 blade storage solution: Software cost advantages with Ora...
Dell PowerEdge M820 blade storage solution: Software cost advantages with Ora...Dell PowerEdge M820 blade storage solution: Software cost advantages with Ora...
Dell PowerEdge M820 blade storage solution: Software cost advantages with Ora...Principled Technologies
 
Consolidating Web servers with the Dell PowerEdge FX2 enclosure and PowerEdge...
Consolidating Web servers with the Dell PowerEdge FX2 enclosure and PowerEdge...Consolidating Web servers with the Dell PowerEdge FX2 enclosure and PowerEdge...
Consolidating Web servers with the Dell PowerEdge FX2 enclosure and PowerEdge...Principled Technologies
 
Dell PowerEdge M820 blade storage solution: Software cost advantages with Mic...
Dell PowerEdge M820 blade storage solution: Software cost advantages with Mic...Dell PowerEdge M820 blade storage solution: Software cost advantages with Mic...
Dell PowerEdge M820 blade storage solution: Software cost advantages with Mic...Principled Technologies
 
VDI performance comparison: Dell PowerEdge FX2 and FC430 servers with VMware ...
VDI performance comparison: Dell PowerEdge FX2 and FC430 servers with VMware ...VDI performance comparison: Dell PowerEdge FX2 and FC430 servers with VMware ...
VDI performance comparison: Dell PowerEdge FX2 and FC430 servers with VMware ...Principled Technologies
 
Comparing performance and cost: Dell PowerEdge VRTX vs. legacy hardware solution
Comparing performance and cost: Dell PowerEdge VRTX vs. legacy hardware solutionComparing performance and cost: Dell PowerEdge VRTX vs. legacy hardware solution
Comparing performance and cost: Dell PowerEdge VRTX vs. legacy hardware solutionPrincipled Technologies
 
Dell PowerEdge R820 and R910 servers: Performance and reliability
Dell PowerEdge R820 and R910 servers: Performance and reliabilityDell PowerEdge R820 and R910 servers: Performance and reliability
Dell PowerEdge R820 and R910 servers: Performance and reliabilityPrincipled Technologies
 
Performance per dollar comparison: Dell PowerEdge R715 vs. HP ProLiant DL380p...
Performance per dollar comparison: Dell PowerEdge R715 vs. HP ProLiant DL380p...Performance per dollar comparison: Dell PowerEdge R715 vs. HP ProLiant DL380p...
Performance per dollar comparison: Dell PowerEdge R715 vs. HP ProLiant DL380p...Principled Technologies
 
Throughput comparison: Dell PowerEdge R720 drive options
Throughput comparison: Dell PowerEdge R720 drive optionsThroughput comparison: Dell PowerEdge R720 drive options
Throughput comparison: Dell PowerEdge R720 drive optionsPrincipled Technologies
 
Dell PowerEdge R660xs: Maximize VDI density while delivering a strong user ex...
Dell PowerEdge R660xs: Maximize VDI density while delivering a strong user ex...Dell PowerEdge R660xs: Maximize VDI density while delivering a strong user ex...
Dell PowerEdge R660xs: Maximize VDI density while delivering a strong user ex...Principled Technologies
 
dassault-systemes-catia-application-scalability-guide
dassault-systemes-catia-application-scalability-guidedassault-systemes-catia-application-scalability-guide
dassault-systemes-catia-application-scalability-guideJason Kyungho Lee
 
VDI performance comparison: Dell PowerEdge FX2 and FC430 servers with VMware ...
VDI performance comparison: Dell PowerEdge FX2 and FC430 servers with VMware ...VDI performance comparison: Dell PowerEdge FX2 and FC430 servers with VMware ...
VDI performance comparison: Dell PowerEdge FX2 and FC430 servers with VMware ...Principled Technologies
 

Similaire à Dell PowerEdge M620 blade server solutions for virtual desktop infrastructures (20)

Server consolidation with the Dell PowerEdge M620
Server consolidation with the Dell PowerEdge M620Server consolidation with the Dell PowerEdge M620
Server consolidation with the Dell PowerEdge M620
 
Dell PowerEdge M520 server solution: Energy efficiency and database performance
Dell PowerEdge M520 server solution: Energy efficiency and database performanceDell PowerEdge M520 server solution: Energy efficiency and database performance
Dell PowerEdge M520 server solution: Energy efficiency and database performance
 
Windows Server 2012 on Dell - Great performance and value for the next genera...
Windows Server 2012 on Dell - Great performance and value for the next genera...Windows Server 2012 on Dell - Great performance and value for the next genera...
Windows Server 2012 on Dell - Great performance and value for the next genera...
 
Dell PowerEdge R720 rack server solutions for virtual desktop infrastructures
Dell PowerEdge R720 rack server solutions for virtual desktop infrastructures Dell PowerEdge R720 rack server solutions for virtual desktop infrastructures
Dell PowerEdge R720 rack server solutions for virtual desktop infrastructures
 
Dell PowerEdge R720 server with VMware vSphere 5 - Exchange server consolidation
Dell PowerEdge R720 server with VMware vSphere 5 - Exchange server consolidationDell PowerEdge R720 server with VMware vSphere 5 - Exchange server consolidation
Dell PowerEdge R720 server with VMware vSphere 5 - Exchange server consolidation
 
The 16th Generation Dell PowerEdge R760 server with Broadcom NICs: Save money...
The 16th Generation Dell PowerEdge R760 server with Broadcom NICs: Save money...The 16th Generation Dell PowerEdge R760 server with Broadcom NICs: Save money...
The 16th Generation Dell PowerEdge R760 server with Broadcom NICs: Save money...
 
Power efficiency and cost: AMD Opteron 6300 series processor-based Dell Power...
Power efficiency and cost: AMD Opteron 6300 series processor-based Dell Power...Power efficiency and cost: AMD Opteron 6300 series processor-based Dell Power...
Power efficiency and cost: AMD Opteron 6300 series processor-based Dell Power...
 
Dell PowerEdge M820 blades: Balancing performance, density, and high availabi...
Dell PowerEdge M820 blades: Balancing performance, density, and high availabi...Dell PowerEdge M820 blades: Balancing performance, density, and high availabi...
Dell PowerEdge M820 blades: Balancing performance, density, and high availabi...
 
Dell PowerEdge M820 blade storage solution: Software cost advantages with Ora...
Dell PowerEdge M820 blade storage solution: Software cost advantages with Ora...Dell PowerEdge M820 blade storage solution: Software cost advantages with Ora...
Dell PowerEdge M820 blade storage solution: Software cost advantages with Ora...
 
Consolidating Web servers with the Dell PowerEdge FX2 enclosure and PowerEdge...
Consolidating Web servers with the Dell PowerEdge FX2 enclosure and PowerEdge...Consolidating Web servers with the Dell PowerEdge FX2 enclosure and PowerEdge...
Consolidating Web servers with the Dell PowerEdge FX2 enclosure and PowerEdge...
 
Dell PowerEdge M820 blade storage solution: Software cost advantages with Mic...
Dell PowerEdge M820 blade storage solution: Software cost advantages with Mic...Dell PowerEdge M820 blade storage solution: Software cost advantages with Mic...
Dell PowerEdge M820 blade storage solution: Software cost advantages with Mic...
 
The Case for Virtual Desktops
The Case for Virtual Desktops The Case for Virtual Desktops
The Case for Virtual Desktops
 
VDI performance comparison: Dell PowerEdge FX2 and FC430 servers with VMware ...
VDI performance comparison: Dell PowerEdge FX2 and FC430 servers with VMware ...VDI performance comparison: Dell PowerEdge FX2 and FC430 servers with VMware ...
VDI performance comparison: Dell PowerEdge FX2 and FC430 servers with VMware ...
 
Comparing performance and cost: Dell PowerEdge VRTX vs. legacy hardware solution
Comparing performance and cost: Dell PowerEdge VRTX vs. legacy hardware solutionComparing performance and cost: Dell PowerEdge VRTX vs. legacy hardware solution
Comparing performance and cost: Dell PowerEdge VRTX vs. legacy hardware solution
 
Dell PowerEdge R820 and R910 servers: Performance and reliability
Dell PowerEdge R820 and R910 servers: Performance and reliabilityDell PowerEdge R820 and R910 servers: Performance and reliability
Dell PowerEdge R820 and R910 servers: Performance and reliability
 
Performance per dollar comparison: Dell PowerEdge R715 vs. HP ProLiant DL380p...
Performance per dollar comparison: Dell PowerEdge R715 vs. HP ProLiant DL380p...Performance per dollar comparison: Dell PowerEdge R715 vs. HP ProLiant DL380p...
Performance per dollar comparison: Dell PowerEdge R715 vs. HP ProLiant DL380p...
 
Throughput comparison: Dell PowerEdge R720 drive options
Throughput comparison: Dell PowerEdge R720 drive optionsThroughput comparison: Dell PowerEdge R720 drive options
Throughput comparison: Dell PowerEdge R720 drive options
 
Dell PowerEdge R660xs: Maximize VDI density while delivering a strong user ex...
Dell PowerEdge R660xs: Maximize VDI density while delivering a strong user ex...Dell PowerEdge R660xs: Maximize VDI density while delivering a strong user ex...
Dell PowerEdge R660xs: Maximize VDI density while delivering a strong user ex...
 
dassault-systemes-catia-application-scalability-guide
dassault-systemes-catia-application-scalability-guidedassault-systemes-catia-application-scalability-guide
dassault-systemes-catia-application-scalability-guide
 
VDI performance comparison: Dell PowerEdge FX2 and FC430 servers with VMware ...
VDI performance comparison: Dell PowerEdge FX2 and FC430 servers with VMware ...VDI performance comparison: Dell PowerEdge FX2 and FC430 servers with VMware ...
VDI performance comparison: Dell PowerEdge FX2 and FC430 servers with VMware ...
 

Plus de Principled Technologies

A comparison of security features in Dell, HP, and Lenovo PC systems
A comparison of security features in Dell, HP, and Lenovo PC systemsA comparison of security features in Dell, HP, and Lenovo PC systems
A comparison of security features in Dell, HP, and Lenovo PC systemsPrincipled Technologies
 
Increase security, sustainability, and efficiency with robust Dell server man...
Increase security, sustainability, and efficiency with robust Dell server man...Increase security, sustainability, and efficiency with robust Dell server man...
Increase security, sustainability, and efficiency with robust Dell server man...Principled Technologies
 
Scale up your storage with higher-performing Dell APEX Block Storage for AWS ...
Scale up your storage with higher-performing Dell APEX Block Storage for AWS ...Scale up your storage with higher-performing Dell APEX Block Storage for AWS ...
Scale up your storage with higher-performing Dell APEX Block Storage for AWS ...Principled Technologies
 
Scale up your storage with higher-performing Dell APEX Block Storage for AWS
Scale up your storage with higher-performing Dell APEX Block Storage for AWSScale up your storage with higher-performing Dell APEX Block Storage for AWS
Scale up your storage with higher-performing Dell APEX Block Storage for AWSPrincipled Technologies
 
Get in and stay in the productivity zone with the HP Z2 G9 Tower Workstation
Get in and stay in the productivity zone with the HP Z2 G9 Tower WorkstationGet in and stay in the productivity zone with the HP Z2 G9 Tower Workstation
Get in and stay in the productivity zone with the HP Z2 G9 Tower WorkstationPrincipled Technologies
 
Open up new possibilities with higher transactional database performance from...
Open up new possibilities with higher transactional database performance from...Open up new possibilities with higher transactional database performance from...
Open up new possibilities with higher transactional database performance from...Principled Technologies
 
Improving database performance and value with an easy migration to Azure Data...
Improving database performance and value with an easy migration to Azure Data...Improving database performance and value with an easy migration to Azure Data...
Improving database performance and value with an easy migration to Azure Data...Principled Technologies
 
Realize better value and performance migrating from Azure Database for Postgr...
Realize better value and performance migrating from Azure Database for Postgr...Realize better value and performance migrating from Azure Database for Postgr...
Realize better value and performance migrating from Azure Database for Postgr...Principled Technologies
 
Set up students and teachers to excel now and in the future with Intel proces...
Set up students and teachers to excel now and in the future with Intel proces...Set up students and teachers to excel now and in the future with Intel proces...
Set up students and teachers to excel now and in the future with Intel proces...Principled Technologies
 
Finding the path to AI success with the Dell AI portfolio - Summary
Finding the path to AI success with the Dell AI portfolio - SummaryFinding the path to AI success with the Dell AI portfolio - Summary
Finding the path to AI success with the Dell AI portfolio - SummaryPrincipled Technologies
 
Finding the path to AI success with the Dell AI portfolio
Finding the path to AI success with the Dell AI portfolioFinding the path to AI success with the Dell AI portfolio
Finding the path to AI success with the Dell AI portfolioPrincipled Technologies
 
Achieve strong performance and value on Azure SQL Database Hyperscale
Achieve strong performance and value on Azure SQL Database HyperscaleAchieve strong performance and value on Azure SQL Database Hyperscale
Achieve strong performance and value on Azure SQL Database HyperscalePrincipled Technologies
 
Improve backup and recovery outcomes by combining Dell APEX Data Storage Serv...
Improve backup and recovery outcomes by combining Dell APEX Data Storage Serv...Improve backup and recovery outcomes by combining Dell APEX Data Storage Serv...
Improve backup and recovery outcomes by combining Dell APEX Data Storage Serv...Principled Technologies
 
Utilizing Azure Cosmos DB for intelligent AI‑powered applications
Utilizing Azure Cosmos DB for intelligent AI‑powered applicationsUtilizing Azure Cosmos DB for intelligent AI‑powered applications
Utilizing Azure Cosmos DB for intelligent AI‑powered applicationsPrincipled Technologies
 
Build an Azure OpenAI application using your own enterprise data
Build an Azure OpenAI application using your own enterprise dataBuild an Azure OpenAI application using your own enterprise data
Build an Azure OpenAI application using your own enterprise dataPrincipled Technologies
 
Dell Chromebooks: Durable, easy to deploy, and easy to service
Dell Chromebooks: Durable, easy to deploy, and easy to serviceDell Chromebooks: Durable, easy to deploy, and easy to service
Dell Chromebooks: Durable, easy to deploy, and easy to servicePrincipled Technologies
 
Back up and restore data faster with a Dell PowerProtect Data Manager Applian...
Back up and restore data faster with a Dell PowerProtect Data Manager Applian...Back up and restore data faster with a Dell PowerProtect Data Manager Applian...
Back up and restore data faster with a Dell PowerProtect Data Manager Applian...Principled Technologies
 

Plus de Principled Technologies (20)

A comparison of security features in Dell, HP, and Lenovo PC systems
A comparison of security features in Dell, HP, and Lenovo PC systemsA comparison of security features in Dell, HP, and Lenovo PC systems
A comparison of security features in Dell, HP, and Lenovo PC systems
 
Increase security, sustainability, and efficiency with robust Dell server man...
Increase security, sustainability, and efficiency with robust Dell server man...Increase security, sustainability, and efficiency with robust Dell server man...
Increase security, sustainability, and efficiency with robust Dell server man...
 
Increase security, sustainability, and efficiency with robust Dell server man...
Increase security, sustainability, and efficiency with robust Dell server man...Increase security, sustainability, and efficiency with robust Dell server man...
Increase security, sustainability, and efficiency with robust Dell server man...
 
Scale up your storage with higher-performing Dell APEX Block Storage for AWS ...
Scale up your storage with higher-performing Dell APEX Block Storage for AWS ...Scale up your storage with higher-performing Dell APEX Block Storage for AWS ...
Scale up your storage with higher-performing Dell APEX Block Storage for AWS ...
 
Scale up your storage with higher-performing Dell APEX Block Storage for AWS
Scale up your storage with higher-performing Dell APEX Block Storage for AWSScale up your storage with higher-performing Dell APEX Block Storage for AWS
Scale up your storage with higher-performing Dell APEX Block Storage for AWS
 
Get in and stay in the productivity zone with the HP Z2 G9 Tower Workstation
Get in and stay in the productivity zone with the HP Z2 G9 Tower WorkstationGet in and stay in the productivity zone with the HP Z2 G9 Tower Workstation
Get in and stay in the productivity zone with the HP Z2 G9 Tower Workstation
 
Open up new possibilities with higher transactional database performance from...
Open up new possibilities with higher transactional database performance from...Open up new possibilities with higher transactional database performance from...
Open up new possibilities with higher transactional database performance from...
 
Improving database performance and value with an easy migration to Azure Data...
Improving database performance and value with an easy migration to Azure Data...Improving database performance and value with an easy migration to Azure Data...
Improving database performance and value with an easy migration to Azure Data...
 
Realize better value and performance migrating from Azure Database for Postgr...
Realize better value and performance migrating from Azure Database for Postgr...Realize better value and performance migrating from Azure Database for Postgr...
Realize better value and performance migrating from Azure Database for Postgr...
 
Realize better value and performance migrating from Azure Database for Postgr...
Realize better value and performance migrating from Azure Database for Postgr...Realize better value and performance migrating from Azure Database for Postgr...
Realize better value and performance migrating from Azure Database for Postgr...
 
Set up students and teachers to excel now and in the future with Intel proces...
Set up students and teachers to excel now and in the future with Intel proces...Set up students and teachers to excel now and in the future with Intel proces...
Set up students and teachers to excel now and in the future with Intel proces...
 
Finding the path to AI success with the Dell AI portfolio - Summary
Finding the path to AI success with the Dell AI portfolio - SummaryFinding the path to AI success with the Dell AI portfolio - Summary
Finding the path to AI success with the Dell AI portfolio - Summary
 
Finding the path to AI success with the Dell AI portfolio
Finding the path to AI success with the Dell AI portfolioFinding the path to AI success with the Dell AI portfolio
Finding the path to AI success with the Dell AI portfolio
 
Achieve strong performance and value on Azure SQL Database Hyperscale
Achieve strong performance and value on Azure SQL Database HyperscaleAchieve strong performance and value on Azure SQL Database Hyperscale
Achieve strong performance and value on Azure SQL Database Hyperscale
 
Improve backup and recovery outcomes by combining Dell APEX Data Storage Serv...
Improve backup and recovery outcomes by combining Dell APEX Data Storage Serv...Improve backup and recovery outcomes by combining Dell APEX Data Storage Serv...
Improve backup and recovery outcomes by combining Dell APEX Data Storage Serv...
 
Improve backup and recovery outcomes by combining Dell APEX Data Storage Serv...
Improve backup and recovery outcomes by combining Dell APEX Data Storage Serv...Improve backup and recovery outcomes by combining Dell APEX Data Storage Serv...
Improve backup and recovery outcomes by combining Dell APEX Data Storage Serv...
 
Utilizing Azure Cosmos DB for intelligent AI‑powered applications
Utilizing Azure Cosmos DB for intelligent AI‑powered applicationsUtilizing Azure Cosmos DB for intelligent AI‑powered applications
Utilizing Azure Cosmos DB for intelligent AI‑powered applications
 
Build an Azure OpenAI application using your own enterprise data
Build an Azure OpenAI application using your own enterprise dataBuild an Azure OpenAI application using your own enterprise data
Build an Azure OpenAI application using your own enterprise data
 
Dell Chromebooks: Durable, easy to deploy, and easy to service
Dell Chromebooks: Durable, easy to deploy, and easy to serviceDell Chromebooks: Durable, easy to deploy, and easy to service
Dell Chromebooks: Durable, easy to deploy, and easy to service
 
Back up and restore data faster with a Dell PowerProtect Data Manager Applian...
Back up and restore data faster with a Dell PowerProtect Data Manager Applian...Back up and restore data faster with a Dell PowerProtect Data Manager Applian...
Back up and restore data faster with a Dell PowerProtect Data Manager Applian...
 

Dernier

Commit 2024 - Secret Management made easy
Commit 2024 - Secret Management made easyCommit 2024 - Secret Management made easy
Commit 2024 - Secret Management made easyAlfredo García Lavilla
 
AI as an Interface for Commercial Buildings
AI as an Interface for Commercial BuildingsAI as an Interface for Commercial Buildings
AI as an Interface for Commercial BuildingsMemoori
 
SAP Build Work Zone - Overview L2-L3.pptx
SAP Build Work Zone - Overview L2-L3.pptxSAP Build Work Zone - Overview L2-L3.pptx
SAP Build Work Zone - Overview L2-L3.pptxNavinnSomaal
 
"Debugging python applications inside k8s environment", Andrii Soldatenko
"Debugging python applications inside k8s environment", Andrii Soldatenko"Debugging python applications inside k8s environment", Andrii Soldatenko
"Debugging python applications inside k8s environment", Andrii SoldatenkoFwdays
 
Designing IA for AI - Information Architecture Conference 2024
Designing IA for AI - Information Architecture Conference 2024Designing IA for AI - Information Architecture Conference 2024
Designing IA for AI - Information Architecture Conference 2024Enterprise Knowledge
 
Training state-of-the-art general text embedding
Training state-of-the-art general text embeddingTraining state-of-the-art general text embedding
Training state-of-the-art general text embeddingZilliz
 
Connect Wave/ connectwave Pitch Deck Presentation
Connect Wave/ connectwave Pitch Deck PresentationConnect Wave/ connectwave Pitch Deck Presentation
Connect Wave/ connectwave Pitch Deck PresentationSlibray Presentation
 
WordPress Websites for Engineers: Elevate Your Brand
WordPress Websites for Engineers: Elevate Your BrandWordPress Websites for Engineers: Elevate Your Brand
WordPress Websites for Engineers: Elevate Your Brandgvaughan
 
Dev Dives: Streamline document processing with UiPath Studio Web
Dev Dives: Streamline document processing with UiPath Studio WebDev Dives: Streamline document processing with UiPath Studio Web
Dev Dives: Streamline document processing with UiPath Studio WebUiPathCommunity
 
"Federated learning: out of reach no matter how close",Oleksandr Lapshyn
"Federated learning: out of reach no matter how close",Oleksandr Lapshyn"Federated learning: out of reach no matter how close",Oleksandr Lapshyn
"Federated learning: out of reach no matter how close",Oleksandr LapshynFwdays
 
Kotlin Multiplatform & Compose Multiplatform - Starter kit for pragmatics
Kotlin Multiplatform & Compose Multiplatform - Starter kit for pragmaticsKotlin Multiplatform & Compose Multiplatform - Starter kit for pragmatics
Kotlin Multiplatform & Compose Multiplatform - Starter kit for pragmaticscarlostorres15106
 
My Hashitalk Indonesia April 2024 Presentation
My Hashitalk Indonesia April 2024 PresentationMy Hashitalk Indonesia April 2024 Presentation
My Hashitalk Indonesia April 2024 PresentationRidwan Fadjar
 
Nell’iperspazio con Rocket: il Framework Web di Rust!
Nell’iperspazio con Rocket: il Framework Web di Rust!Nell’iperspazio con Rocket: il Framework Web di Rust!
Nell’iperspazio con Rocket: il Framework Web di Rust!Commit University
 
"Subclassing and Composition – A Pythonic Tour of Trade-Offs", Hynek Schlawack
"Subclassing and Composition – A Pythonic Tour of Trade-Offs", Hynek Schlawack"Subclassing and Composition – A Pythonic Tour of Trade-Offs", Hynek Schlawack
"Subclassing and Composition – A Pythonic Tour of Trade-Offs", Hynek SchlawackFwdays
 
Scanning the Internet for External Cloud Exposures via SSL Certs
Scanning the Internet for External Cloud Exposures via SSL CertsScanning the Internet for External Cloud Exposures via SSL Certs
Scanning the Internet for External Cloud Exposures via SSL CertsRizwan Syed
 
"ML in Production",Oleksandr Bagan
"ML in Production",Oleksandr Bagan"ML in Production",Oleksandr Bagan
"ML in Production",Oleksandr BaganFwdays
 
Story boards and shot lists for my a level piece
Story boards and shot lists for my a level pieceStory boards and shot lists for my a level piece
Story boards and shot lists for my a level piececharlottematthew16
 
Bun (KitWorks Team Study 노별마루 발표 2024.4.22)
Bun (KitWorks Team Study 노별마루 발표 2024.4.22)Bun (KitWorks Team Study 노별마루 발표 2024.4.22)
Bun (KitWorks Team Study 노별마루 발표 2024.4.22)Wonjun Hwang
 

Dernier (20)

Commit 2024 - Secret Management made easy
Commit 2024 - Secret Management made easyCommit 2024 - Secret Management made easy
Commit 2024 - Secret Management made easy
 
AI as an Interface for Commercial Buildings
AI as an Interface for Commercial BuildingsAI as an Interface for Commercial Buildings
AI as an Interface for Commercial Buildings
 
SAP Build Work Zone - Overview L2-L3.pptx
SAP Build Work Zone - Overview L2-L3.pptxSAP Build Work Zone - Overview L2-L3.pptx
SAP Build Work Zone - Overview L2-L3.pptx
 
"Debugging python applications inside k8s environment", Andrii Soldatenko
"Debugging python applications inside k8s environment", Andrii Soldatenko"Debugging python applications inside k8s environment", Andrii Soldatenko
"Debugging python applications inside k8s environment", Andrii Soldatenko
 
Designing IA for AI - Information Architecture Conference 2024
Designing IA for AI - Information Architecture Conference 2024Designing IA for AI - Information Architecture Conference 2024
Designing IA for AI - Information Architecture Conference 2024
 
Training state-of-the-art general text embedding
Training state-of-the-art general text embeddingTraining state-of-the-art general text embedding
Training state-of-the-art general text embedding
 
Connect Wave/ connectwave Pitch Deck Presentation
Connect Wave/ connectwave Pitch Deck PresentationConnect Wave/ connectwave Pitch Deck Presentation
Connect Wave/ connectwave Pitch Deck Presentation
 
WordPress Websites for Engineers: Elevate Your Brand
WordPress Websites for Engineers: Elevate Your BrandWordPress Websites for Engineers: Elevate Your Brand
WordPress Websites for Engineers: Elevate Your Brand
 
Dev Dives: Streamline document processing with UiPath Studio Web
Dev Dives: Streamline document processing with UiPath Studio WebDev Dives: Streamline document processing with UiPath Studio Web
Dev Dives: Streamline document processing with UiPath Studio Web
 
"Federated learning: out of reach no matter how close",Oleksandr Lapshyn
"Federated learning: out of reach no matter how close",Oleksandr Lapshyn"Federated learning: out of reach no matter how close",Oleksandr Lapshyn
"Federated learning: out of reach no matter how close",Oleksandr Lapshyn
 
Kotlin Multiplatform & Compose Multiplatform - Starter kit for pragmatics
Kotlin Multiplatform & Compose Multiplatform - Starter kit for pragmaticsKotlin Multiplatform & Compose Multiplatform - Starter kit for pragmatics
Kotlin Multiplatform & Compose Multiplatform - Starter kit for pragmatics
 
E-Vehicle_Hacking_by_Parul Sharma_null_owasp.pptx
E-Vehicle_Hacking_by_Parul Sharma_null_owasp.pptxE-Vehicle_Hacking_by_Parul Sharma_null_owasp.pptx
E-Vehicle_Hacking_by_Parul Sharma_null_owasp.pptx
 
My Hashitalk Indonesia April 2024 Presentation
My Hashitalk Indonesia April 2024 PresentationMy Hashitalk Indonesia April 2024 Presentation
My Hashitalk Indonesia April 2024 Presentation
 
Nell’iperspazio con Rocket: il Framework Web di Rust!
Nell’iperspazio con Rocket: il Framework Web di Rust!Nell’iperspazio con Rocket: il Framework Web di Rust!
Nell’iperspazio con Rocket: il Framework Web di Rust!
 
"Subclassing and Composition – A Pythonic Tour of Trade-Offs", Hynek Schlawack
"Subclassing and Composition – A Pythonic Tour of Trade-Offs", Hynek Schlawack"Subclassing and Composition – A Pythonic Tour of Trade-Offs", Hynek Schlawack
"Subclassing and Composition – A Pythonic Tour of Trade-Offs", Hynek Schlawack
 
Scanning the Internet for External Cloud Exposures via SSL Certs
Scanning the Internet for External Cloud Exposures via SSL CertsScanning the Internet for External Cloud Exposures via SSL Certs
Scanning the Internet for External Cloud Exposures via SSL Certs
 
"ML in Production",Oleksandr Bagan
"ML in Production",Oleksandr Bagan"ML in Production",Oleksandr Bagan
"ML in Production",Oleksandr Bagan
 
Story boards and shot lists for my a level piece
Story boards and shot lists for my a level pieceStory boards and shot lists for my a level piece
Story boards and shot lists for my a level piece
 
Bun (KitWorks Team Study 노별마루 발표 2024.4.22)
Bun (KitWorks Team Study 노별마루 발표 2024.4.22)Bun (KitWorks Team Study 노별마루 발표 2024.4.22)
Bun (KitWorks Team Study 노별마루 발표 2024.4.22)
 
DMCC Future of Trade Web3 - Special Edition
DMCC Future of Trade Web3 - Special EditionDMCC Future of Trade Web3 - Special Edition
DMCC Future of Trade Web3 - Special Edition
 

Dell PowerEdge M620 blade server solutions for virtual desktop infrastructures

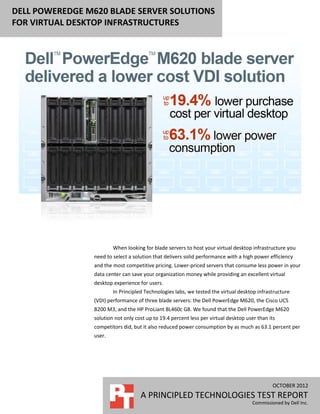
  • 1. DELL POWEREDGE M620 BLADE SERVER SOLUTIONS FOR VIRTUAL DESKTOP INFRASTRUCTURES When looking for blade servers to host your virtual desktop infrastructure you need to select a solution that delivers solid performance with a high power efficiency and the most competitive pricing. Lower-priced servers that consume less power in your data center can save your organization money while providing an excellent virtual desktop experience for users. In Principled Technologies labs, we tested the virtual desktop infrastructure (VDI) performance of three blade servers: the Dell PowerEdge M620, the Cisco UCS B200 M3, and the HP ProLiant BL460c G8. We found that the Dell PowerEdge M620 solution not only cost up to 19.4 percent less per virtual desktop user than its competitors did, but it also reduced power consumption by as much as 63.1 percent per user. OCTOBER 2012 A PRINCIPLED TECHNOLOGIES TEST REPORT Commissioned by Dell Inc.
  • 2. GETTING MORE VALUE FOR YOUR VDI Assessing the potential of a server to deliver a seamless VDI experience to a large number of end users is vital to planning your virtual desktop infrastructure, but why not save money in the process? We compared three servers with identical processors and RAM amounts—the Dell PowerEdge M620, HP ProLiant BL460c G8, and Cisco UCS B200 M3—and used the Login VSI 3.6 benchmark to determine that each was able to support 160 VMware View 5.1 virtual desktops. Because the servers supported the same number of virtual desktops, we assessed the value that the servers provided along with their blade enclosures, both in initial hardware cost and in idle and active power consumption. For detailed server and configuration information, see Appendix A and Appendix B. For detailed steps on how we tested, see Appendix C. Lower cost per/user and power/user Figure 1 compares the cost per virtual desktop user, in US dollars, for the three blade solutions. The Dell PowerEdge M620 solution cost up to 19.4 percent less per user than the HP and Cisco solutions. Prices include the cost of each blade and its corresponding blade enclosure: the Dell PowerEdge M620 with Dell PowerEdge M1000e Blade Enclosure; the HP ProLiant BL460c G8 with HP BladeSystem C7000 Enclosure; and Cisco UCS B200 M3 with two Cisco UCE 5108 Blade Server Chassis and two Fabric Interconnects, to achieve the same 16-blade capacity as the other solutions. Cost per user $140 $120.78 $120 $107.38 $97.31 $100 Figure 1: Cost per virtual $80 USD/user desktop user, in USD, for $60 the three blade servers. $40 $20 $0 Dell PowerEdge M620 HP ProLiant BL460c G8 Cisco UCS B200 M3 solution solution solution Dell PowerEdge M620 blade server solutions for virtual desktop A Principled Technologies test report 2 infrastructures
  • 3. Whether idle or while running the test workloads, the Dell PowerEdge M620 solution consumed less power per virtual desktop user than the HP and Cisco solutions. Because the servers are blades, all power numbers include the power of one server plus its chassis. The Dell PowerEdge M620 consumed less idle watts per user than its competitors did – 5.2 percent less watts/user than the HP ProLiant BL460c G8, and 63.1 percent less watts/user than the Cisco UCS B200 M3 server (see Figure 2). Average idle watts/user 10 9 8.7 8 7 Figure 2: Average watts/user 6 Watts/user that the blade server 5 solutions consumed while 4 3.2 3.4 running no workloads. 3 2 1 0 Dell PowerEdge M620 HP ProLiant BL460c G8 Cisco UCS B200 M3 solution solution solution While running typical workloads in all virtual desktops, the Dell PowerEdge M620 solution consumed less power per user than its competitors did – 4.4 percent less watts/user than the HP ProLiant BL460c G8 solution, and 57.3 percent less watts/user than the Cisco UCS B200 M3 solution (see Figure 3). Average active watts/user 12 9.6 10 8 Figure 3: Average watt/user Watts/user that the blade server 6 4.1 4.3 solutions consumed while 4 running our test workloads. 2 0 Dell PowerEdge M620 HP ProLiant BL460c G8 Cisco UCS B200 M3 solution solution solution Dell PowerEdge M620 blade server solutions for virtual desktop A Principled Technologies test report 3 infrastructures
  • 4. WHAT WE FOUND For details on the results of our Login VSI tests, which show that each server maxed out at 160 virtual desktops on each of the three server solutions, both in the 4- second response time threshold and in CPU utilization, see Appendix D. The standard Dell and HP enclosures can fit 16 blades each, while the Cisco chassis can hold only 8 blades. To determine the cost per virtual desktop user the servers deliver, we compare an even number of servers in full chassis, as a business would have, using 16 blades. Figure 4 details the costs of these solutions. The Dell PowerEdge M620 solution pricing includes 16 servers, 2 Dell PowerConnect™ M-8024-k switches, and one PowerEdge M1000e enclosure; the HP ProLiant BL460c G8 solution pricing includes 16 servers and one HP BladeSystem c7000 Enclosure; and the Cisco UCS B200 M3 solution pricing includes 16 servers, two Cisco UCS 5108 Blade Server Chassis, and two Cisco UCS 6248UP Fabric Interconnects. Lower costs and dollars/user are better. All server prices are from the respective vendor Web sites and do not include any discounts, tax, or shipping costs. Total cost in USD Cost/user Percentage Dell savings (16-server solutions) Dell PowerEdge M620 solution $249,107 $97.31 HP ProLiant BL460c G8 solution $274,902 $107.38 9.4% Cisco UCS B200 M3 solution $309,208 $120.78 19.4% Figure 4: Comparison of 16-server solution costs and cost/user for the solutions we tested. Figure 5 details the wattage each solution consumed while idle and the watts/user that each consumed. Lower watts and watts/user are better. Watts (idle) Watts/user Percentage Dell win Dell PowerEdge M620 solution 511 3.2 HP ProLiant BL460c G8 solution 539 3.4 5.2% Cisco UCS B200 M3 solution 1,385 8.7 63.1% Figure 5: Watts and watts/user that the solutions consumed while idle. Figure 6 details the wattage each solution consumed while actively running our test workloads and the watts/user that each consumed. Lower watts and watts/user are better. Watts (active) Watts/user Percentage Dell win Dell PowerEdge M620 solution 657 4.1 HP ProLiant BL460c G8 solution 687 4.3 4.4% Cisco UCS B200 M3 solution 1,539 9.6 57.3% Figure 6: Watts and watts/user that the solutions consumed while running workloads. Dell PowerEdge M620 blade server solutions for virtual desktop A Principled Technologies test report 4 infrastructures
  • 5. WHAT WE TESTED About the Dell PowerEdge M620 blade server The Dell PowerEdge M620 is a half-height two-socket blade server powered by the Intel Xeon processor E5-2680 that can hold up to 768 GB of RAM in 24 DIMM slots. The PowerEdge M620 comes standard with several management features, including iDRAC7 Express with Lifecycle Controller for Blades, which allow administrators to manage in physical or virtual environments locally or remotely. Along with other members of the M-series PowerEdge server line, the PowerEdge M620 fits right in with the power-efficient Dell PowerEdge M1000e Blade Enclosure. For more information about the Dell PowerEdge M620, visit http://www.dell.com/us/enterprise/p/poweredge-m620/pd. About the Dell PowerEdge M1000e Blade Enclosure The Dell PowerEdge M1000e blade chassis and its supported fabric interconnects are designed for dense computing situations. Features of the PowerEdge M1000e include:  Management. Reduces administrative demand by providing a secure centralized management interface for the chassis and blades within, using proven Web (SSL-encrypted) and CLI (SSH/Telnet) technologies.  Simplified configuration. The Chassis Management Controller allows administrators to control up to nine enclosures and 144 server blades, including BIOS/firmware change management and updates, thermal monitoring, and power threshold configuration.  Flexible I/O. Six interconnect sockets with the capability to support three fully- redundant fabrics, a passive midplane with more than 8Tbps in I/O bandwidth capacity, and FlexIO support provide a number of connectivity options for your servers.  Reliability and efficiency. Six power supplies and nine fans, all hot- swappable, allowing for no-downtime maintenance of key chassis components. All components are tuned for maximum power efficiency to reduce data center power consumption. For more information about the Dell PowerEdge M1000e Blade Enclosure, visit http://www.dell.com/us/enterprise/p/poweredge-m1000e/pd. About Login VSI 3.6 Login Virtual Session Indexer (Login VSI) 3.6 is a tool that helps assess the virtual desktop performance, capacity, and scalability of a server. After all desktops are idle, Login VSI incrementally logs users into virtual desktop sessions and begins workloads on each. Login VSI measures the total response times of seven typical office operations Dell PowerEdge M620 blade server solutions for virtual desktop A Principled Technologies test report 5 infrastructures
  • 6. from each session and calculates the VSI Index Average by taking the average response times and dropping the highest and lowest 2 percent. As more sessions begin to consume system resources, response times degrade and the VSI index increases until it is above the Dynamic VSImax. When this condition is met, the benchmark records a Login VSImax, which is the maximum number of sessions that the platform can support. The newest version of Login VSI, Login VSI 3.6, includes client side performance testing that test character response, large text response, mouse-click feedback, and image quality and loading times on clients to ensure good end-user performance. In our tests, we did not use the client-side testing portion of Login VSI, but instead used the tool to determine how many virtual desktops the servers could support and to run the Medium workload to tax the servers. For more information about Login VSI 3.6, see http://www.loginvsi.com/product-overview. IN CONCLUSION Getting more value out of your blade solution is a smart way to reduce data center and VDI costs. In our tests, the Dell PowerEdge M620 blade solution not only cost up to 19.4 percent less per user than blade solutions from both HP and Cisco, it also consumed as much as 63.1 percent less power per virtual desktop user. When extrapolated over an entire chassis full of servers, and potentially data centers full of these chassis, the potential savings both in hardware costs and power costs could be dramatic. Dell PowerEdge M620 blade server solutions for virtual desktop A Principled Technologies test report 6 infrastructures
  • 7. APPENDIX A – SERVER CONFIGURATION INFORMATION Figure 7 provides detailed configuration information for the test servers. System Dell PowerEdge M620 Cisco UCS B200 M3 HP ProLiant BL460c G8 Enclosure/chassis Cisco UCS 5108 Blade Server Dell PowerEdge M1000e HP BladeSystem c7000 Chassis Blade enclosure/chassis Blade Enclosure with 2x Enclosure with 2x HP Connected to 2x Cisco UCS M8024-k 10GbE Switch Virtual Connect Flex-10Gb 6248UP Fabric Interconnects Chassis power supplies Total number 6 4 6 Maximum wattage of each 2,700 2,500 2,450 (W) Chassis cooling fans Total number 9 8 10 Dimensions (h x w) of each 3.1" x 3.5" 3-5/8" x 5-1/2" 4" x 4" General Number of processor 2 2 2 packages Number of cores per 8 8 8 processor Number of hardware 16 16 16 threads per core System power management Performance Maximum Performance Default power CPU Vendor Intel Intel Intel Name Xeon Xeon Xeon Model number E5-2680 E5-2680 E5-2680 Stepping C2 C2 C2 Socket type LGA2011 LGA2011 LGA2011 Core frequency (GHz) 2.7 2.7 2.7 Bus frequency (GT/s) 8 8 8 L1 cache 32 KB + 32 KB (per core) 32 KB + 32 KB (per core) 32 KB + 32 KB (per core) L2 cache 256 KB (per core) 256 KB (per core) 256 KB (per core) L3 cache (MB) 20 20 20 Platform Vendor and model number Dell PowerEdge M620 Cisco UCS B200 M3 HP ProLiant BL460c G8 B200M3.2.0.3.0.0516201212 BIOS name and version Dell 1.3.6 HP I31 07/15/2012 10 Memory module(s) Total RAM in system (GB) 256 256 256 Samsung M393B2G70BH0- Samsung M393B2G70BH0- Samsung M393B2G70BH0- Vendor and model number YH9 YH9 YH9 Dell PowerEdge M620 blade server solutions for virtual desktop A Principled Technologies test report 7 infrastructures
  • 8. System Dell PowerEdge M620 Cisco UCS B200 M3 HP ProLiant BL460c G8 Type PC3-10600 PC3-10600 PC3-10600 Speed (MHz) 1,333 1,333 1,333 Speed running in the system 1,333 1,333 1,333 (MHz) Size (GB) 16 16 16 Number of RAM module(s) 16 16 16 Chip organization Double-sided Double-sided Double-sided Rank Dual Dual Dual Operating system Name VMware ESXi 5.0.0 VMware ESXi 5.0.0 VMware ESXi 5.0.0 Build number 768111 768111 768111 File system VMFS VMFS VMFS Kernel VMkernel 5.0.0 VMkernel 5.0.0 VMkernel 5.0.0 Language English English English RAID controller Vendor and model number Dell PERC H310 Mini LSI™ MegaRaid™ SAS 2004 HP Smart Array P220i Firmware version 20.10.1-0084 20.10.1-0061 2.14 Hard disk Vendor and model number Fujitsu MBE2147RC Toshiba MBF2300RC HP EH0146FARWD Number of disks in system 2 2 2 Size (GB) 146 300 146 Buffer size (MB) 16 16 16 RPM 15,000 10,000 15,000 Type SAS SAS SAS Network adapter Intel 82599EB 10Gb Dual 2x HP Virtual Connect Flex- Vendor and model number 2x Cisco UCS-IOM-2208XP Port 10Gb USB ports Number 2 0 0 Type 2.0 N/A N/A Figure 7: System configuration information for the test systems. Dell PowerEdge M620 blade server solutions for virtual desktop A Principled Technologies test report 8 infrastructures
  • 9. STORAGE INFORMATION Figures 8 and 9 present detailed storage information for the two Dell EqualLogic PS6010 arrays we used in our tests. Storage array 1 Dell EqualLogic PS6010 Number of storage controllers per array 1 RAID level 10 Number of drives per array 14 (12 active data drives, 2 spares) Drive vendor and model number Seagate ST3600002SS Drive size (GB) 600 Drive buffer size (MB) 16 Drive RPM 10,000 Drive type SAS Figure 8: Storage configuration information for the first Dell EqualLogic PS6010. Storage array 2 Dell EqualLogic PS6010 Number of storage controllers per array 1 RAID level 10 Number of drives per array 14 (12 active data drives, 2 spares) Drive vendor and model number Seagate ST3146855SS Drive size (GB) 146 Drive buffer size (MB) 16 Drive RPM 15,000 Drive type SAS Figure 9: Storage configuration information for the second Dell EqualLogic PS6010. Dell PowerEdge M620 blade server solutions for virtual desktop A Principled Technologies test report 9 infrastructures
  • 10. APPENDIX C - HOW WE TESTED Figure 10 presents detailed information about the VMs we used in our testing. VM name Hosted OS Role (s) Host Memory # vCPUs AD Domain controller VSI Share, DC1 Win 2008 R2 x64 Enterprise DHCP, DNS, NTP, AD roaming infra 4 GB 2 profiles VMW-View Win 2008 R2 x64 Enterprise VMware View Connection server infra 4 GB 4 vCenter Win 2008 R2 x64 Enterprise VMware Virtual Center, Composer infra 4 GB 4 Launcher Windows 7 x 86 Enterprise Login VSI Master launcher infra 4 GB 2 View-gold Windows 7 x 86 Enterprise View master image vDT-host 1 GB 1 Figure 10: Detailed VM configuration information. We configured a Dell PowerEdge R710 server with VMware vSphere™ (ESXi) 5.0 to host all VDI infrastructure components for VMware View 5.1 and configure a Dell M620 blade, a HP BL480c G8 blade and a Cisco UCS B200 M3 blade to host virtual desktops for VMware View 5.1. We connected all the blades and the infrastructure server to two Dell EqualLogic PS6010 storage arrays. The Dell EqualLogic PS6010 storage arrays have 14 disks each for a total of 4.55TB of usable storage. We created two Storage Pools on a RAID 10 configuration and four volumes to host View Composer linked clones. One additional volume was created to host the infrastructure virtual machines. Configuring power settings on the Dell M1000e chassis 1. Log into Dell Chassis Management Controller Web interface using a web browser. 2. Click on the Power tab and select configuration. 3. Set the System Input Power Cap to 100%. 4. Set the Redundancy Policy to AC Redundancy. 5. Enable Dynamic Power Supply Engagement. Configuring power settings on the HP c7000 chassis 1. Log into HP BladeSystem Onboard Administration Web interface using a web browser. 2. Click on Power and Thermal and select Power Management. 3. Select AC Redundant under Power Mode. 4. Enable Dynamic Power. 5. Select None under Power Limit. Configuring power settings on the Cisco UCS 5108 chassis 1. Log into Cisco Unified Computing System Manager. 2. Click on Service Profiles and click New to create a new Service Profile. 3. Enter a profile name and description, configure vNICs, vHBA connections, boot order and server association. Click Ok. 4. Double Click the Service Profile and select the Policies Tab. 5. Select the Power Control Policy and create a new policy with no power cap. 6. Click Apply, Click OK. Dell PowerEdge M620 blade server solutions for virtual desktop A Principled Technologies test report 10 infrastructures
  • 11. Configuring the Dell EqualLogic PS6010 storage Configuring the array RAID 1. Log into EqualLogic Web interface using a web browser. 2. Enter the EqualLogic storage group IP address into a Web browser and use the administrator credentials to log in to the EqualLogic Group Manager. 3. Select the storage group, and expand the members (arrays) in the left pane. 4. Select the first member (array), which will show as unconfigured, and click Yes to configure the RAID. 5. At the General Settings screen, leave the default name and storage pool assignment, and click Next. 6. At the RAID configuration screen, select RAID 10, and click Next. 7. At the Summary screen, click Finish. 8. Select the second member (array), which will show as unconfigured, and click Yes to configure the RAID. 9. At the General Settings screen, leave the default name and storage pool assignment, and click Next. 10. At the RAID configuration screen, select RAID 10, and click Next. 11. At the Summary screen, click Finish. Creating a volume 1. In the left pane, click Volumes, and, in the adjacent pane, click Create volume. 2. Name the first volume, and click Next. 3. Enter the appropriate volume size, and click Next. 4. On the Step 3 – iSCSI Access screen, check the Limit access to iSCSI initiator name checkbox, and enter the appropriate iSCSI initiator names. 5. Click Finish. 6. Repeat steps 1 – 5 to create additional volumes. Setting up the infrastructure server (infra) and the virtual desktop hosts (vDT-hosts) BIOS settings We used the latest BIOS updates. We adjusted the default BIOS settings by ensuring Virtualization Technology is enabled and setting the performance profile to maximum performance. Installing VMware vSphere 5.0 (ESXi) on PowerEdge R710s (infra) and (vDT-Hosts) 1. Insert the ESXi 5.0 disk, and select Boot from disk. 2. On the Welcome screen, press Enter. 3. On the End User License Agreement (EULA) screen, press F11. 4. On the Select a Disk to install or Upgrade Screen, select the relevant volume to install ESXi on, and press Enter. 5. On the Please Select a Keyboard Layout screen, press Enter. 6. On the Enter a Root Password Screen, assign a root password, and confirm it by entering it again. Press Enter to continue. 7. On the Confirm Install Screen, press F11 to install. 8. On the Installation complete screen, press Enter to reboot. Configuring ESXi after installation 1. On the ESXi 5.0 screen, press F2, enter the root password, and press Enter. 2. On the System Customization screen, select Troubleshooting Options, and press Enter. 3. On the Troubleshooting Mode Options screen, select enable ESXi Shell, and press Enter. 4. Select Enable SSH, press Enter, and press Esc. 5. On the System Customization screen, select Configure Management Network. 6. On the Configure Management Network screen, select IP Configuration. 7. On the IP Configuration screen, select Set static IP; enter an IP address, subnet mask, and default gateway; and press Enter. Dell PowerEdge M620 blade server solutions for virtual desktop A Principled Technologies test report 11 infrastructures
  • 12. 8. On the Configure Management Network screen, press Esc. When asked if you want to apply the changes, press Y. 9. Log into infra as root with the vSphere client. 10. Select the Configuration tab, and click Networking. 11. Click Add Networking… 12. Create a virtual machine network called PRIV-NET and select the appropriate adapters. 13. Click OK. 14. Select the Configuration tab, and click Time configuration. 15. Select Properties, and click Options. 16. In the General settings, select Start automatically if any ports are open, and Stop when all ports are closed. 17. In the NTP settings, add a reliable NTP server, or use DC1.VDI.com. 18. Close NTP settings. 19. Select the Configuration tab, and click DNS and routing. 20. Type infra for name, and VDI.com for domain. 21. Enter 172.0.0.10 for preferred DNS. 22. Close DNS. Creating the ESXi datastores 1. Log into infra as root with the vSphere client. 2. Click Configuration tabStorage AdaptersAdd… 3. Select Add Software iSCSI Adapter, and click OK. 4. Select the iSCSI adapter and click on Properties… 5. Select the Dynamic Discovery tab and click on Add… 6. Enter the iSCSI Server IP and click OK. 7. Select Rescan All… 8. Selected the newly discovered volume. 9. For Datastore name, type LUN1 and click Next. 10. For Capacity, select Maximum Available Space, and click Next. 11. Click Finish to create the datastore. 12. Repeat steps 8 through 11 to create additional datastores. Setting up a VM to host Microsoft Windows Active Directory® server (DC1) on (infra) server 1. Connect to the infra server via the VMware vSphere client. 2. Log in as root to the infra server. 3. In the vSphere client, connect to the vCenter™ Server, and browse to the ESXi host. 4. Click the Virtual Machines tab. 5. Right-click, and choose New Virtual Machine. 6. Choose Custom, and click Next. 7. Assign the name DC1 to the virtual machine, and click Next. 8. Select infra for the host, and click Next. 9. Select infraLUN for the storage, and click Next. 10. Choose Virtual Machine Version 8, and click Next. 11. Choose Windows, choose Microsoft Windows Server® 2008 R2 (64-bit), and click Next. 12. For CPUs, select one virtual processor socket, and 2 cores per virtual socket, and click Next. 13. Choose 4 GB RAM, and click Next. 14. Click 1 for the number of NICs, select VMXNET3, connect to the PRIV-NET network, and click Next. 15. Leave the default virtual storage controller, and click Next. 16. Choose to create a new virtual disk, and click Next. Dell PowerEdge M620 blade server solutions for virtual desktop A Principled Technologies test report 12 infrastructures
  • 13. 17. Make the OS virtual disk size 40 GB, choose thick-provisioned lazy zeroed, specify external storage, and click Next. 18. Keep the default virtual device node (0:0), and click Next. 19. Click Finish. 20. Right-click the VM, and choose Edit Settings. 21. On the Hardware tab, click Add… 22. Click Hard Disk, and click Next. 23. Click Create a new virtual disk, and click Next. 24. Specify 15 GB for the virtual disk size, choose thick-provisioned lazy zeroed, specify external storage, and click Next. 25. Choose SCSI (0:1) for the device node, and click Next. 26. On the Hardware tab, click Add… 27. Click Create a new virtual disk, and click Next. 28. Specify 50 GB for the virtual disk size, choose thick-provisioned lazy zeroed, specify external storage, and click Next. 29. Choose SCSI (0:2) for the device node, and click Next. 30. Click Finish, and click OK. 31. Click the Resources tab, and click Memory. 32. Select Reserve all guest memory, and click OK. 33. Connect the VM virtual CD-ROM to the Microsoft Windows Server 2008 R2 installation disk. 34. Start the VM. Installing the Microsoft Windows Server 2008 R2 operating system on the VM 1. Choose the language, time and currency, and keyboard input. Click Next. 2. Click Install Now. 3. Choose Windows Server 2008 R2 Enterprise (Full Installation), and click Next. 4. Accept the license terms, and click Next. 5. Click Custom. 6. Click the Disk, and click Drive options (advanced). 7. Click NewApplyFormat, and click Next. 8. After the installation completes, click OK to set the Administrator password. 9. Enter the administrator password twice, and click OK. 10. Connect the machine to the Internet, and install all available Windows updates. Restart as necessary. 11. Enable remote desktop access. 12. Change the hostname to DC1 and reboot when prompted. 13. Run diskmgmt.msc. 14. Select the 15 GB secondary volume, name it profiles format it NTFS, and assign it drive letter E 15. Select the 50 GB secondary volume, name it share format it NTFS, and assign it drive letter F 16. Set up networking for the data network: a. Click StartControl Panel, right-click Network Connections, and choose Open. b. Right-click the VM traffic NIC, and choose Properties. c. Uncheck TCP/IP (v6). d. Select TCP/IP (v4), and choose Properties. e. Set the IP address as 172.0.1.10/255.255.252.0 17. Install VMware Tools. For more information, see http://kb.vmware.com/selfservice/microsites/search.do?language=en_US&cmd=displayKC&externalId=340 18. Reboot. Dell PowerEdge M620 blade server solutions for virtual desktop A Principled Technologies test report 13 infrastructures
  • 14. Installing Active Directory and DNS services on DC1 1. Click StartRun, type dcpromo and click OK. 2. At the Active Directory Domain Services Installation Wizard welcome screen, check the Use advanced mode installation option, and click Next. 3. In the Choose a Deployment Configuration dialog box, select Create a new domain in a new forest, and click Next. 4. At the FQDN page, type VDI.com and click Next. 5. At the NetBIOS name prompt, leave the name VDI, and click Next. 6. At the Forest Functionality level, select Windows Server 2008 R2, and click Next. 7. At the additional Domain Controller Options, leave DNS server selected, and click Next. 8. At the System Folder Location screen, change to E: leave the default options, and click Next. 9. Assign a Directory Services Restore Mode Administrator account password, and click Next. 10. At the Summary screen, review your selections, and click Next. 11. Once Active Directory Domain Services finishes installing, click Finish, and restart the system. 12. Run dnsmgmt.msc. 13. Create a reverse lookup zone for DC1. 14. Create static entries for infra and vDT-host. 15. Open Windows Explorer, and create a folder called e:profiles 16. Assign permissions of read/write to the VDIeveryone group. Configuring the Windows time service on DC1 To ensure reliable time, we pointed our Active Directory server to a physical NTP server. 1. Open a command prompt. 2. Type the following: W32tm /config /syncfromflags:manual /manualpeerlist:"<ip address of a NTP server>" W32tm /config /reliable:yes W32tm /config /update W32tm /resync Net stop w32time Net start w32time Setting up DHCP services on DC1 1. Click StartAdministrative ToolsServer ManagerAdd Roles. 2. Select DHCP Server, and click Next. 3. At the Introduction to DHCP Server screen, click Next. 4. At the Specify IPv4 DNS Settings screen, type vdi.com for the parent domain. 5. Type the preferred DNS server IPv4 address, and click Next. 6. At the Specify IPv4 WINS Server Settings screen, select WINS is not required for applications on the network, and click Next. 7. At the Add or Edit DHCP Scopes screen, click Add. 8. At the Add Scope screen, enter the Name DHCP Scope name. 9. In the next box, set the following values, and click OK.  Start IP address=172.0.0.101  End IP address=172.0.3.200  Subnet mask=255.255.252.0 10. Check the Activate This Scope box. 11. At the Add or Edit DHCP Scopes screen, click Next. Dell PowerEdge M620 blade server solutions for virtual desktop A Principled Technologies test report 14 infrastructures
  • 15. 12. Click the Enable DHCP v6 Stateless Mode radio button, and click Next. 13. Leave the default IPv6 DNS Settings, and click Next. 14. At the Authorize DHCP server dialog box, select Use current credentials. 15. At the Confirm Installation Selections screen, click Next. If the installation is set up correctly, a screen displays saying that DHCP server install succeeded. 16. Click Close. Setting up the Login VSI share and Active Directory users For Login VSI to work correctly, you must create a CIFS share, Active Directory OU, and Active directory. For more information on Login VSI, see http://www.loginvsi.com/en/admin-guide/installation.html. Open Windows Explorer, and create a file called f:share and e:profiles 1. Assign permissions of read/write to the VDI/everyone group. 2. Right-click the f:share and e:profiles folders, and select Properties. 3. Click the Sharing tab, and click Share… 4. Add everyone to the Read/Write group, and click Share. 5. From the Login VSI 3.6 media, run the Login VSI AD Setup. 6. Keep the defaults, and click Start. Creating roaming profiles for users 1. Open Active Directory Users and Computers. 2. Browse to VDI.comLogin_VSIUsersTarget. 3. Select all Login VSI users, and right-click Properties. 4. Click the Profiles tab. 5. Check box Profile path, and type e:profiles%username% 6. Click OK. Setting up a VM to host the vCenter server (vCenter) 1. Connect to the infra server via the vSphere client. 2. Log into infra with the VMware vSphere client. 3. In the vSphere client, connect to the vCenter Server, and browse to the ESXi host. 4. Click the Virtual Machines tab. 5. Right-click, and choose New Virtual Machine. 6. Choose Custom, and click Next. 7. Assign the name vCenter to the virtual machine, and click Next. 8. Select infra for the host, and click Next. 9. Select infraLUN for the storage, and click Next. 10. Choose Virtual Machine Version 8, and click Next. 11. Choose Windows, choose Microsoft Windows Server 2008 R2 (64-bit), and click Next. 12. For CPUs, select one virtual processor socket, and 2 cores per virtual socket, and click Next. 13. Choose 4GB RAM, and click Next. 14. Click 1 for the number of NICs, select VMXNET3, connect to the PRIV-NET portgoup, and click Next. 15. Leave the default virtual storage controller, and click Next. 16. Choose to create a new virtual disk, and click Next. 17. Make the OS virtual disk size 40 GB, choose thick-provisioned lazy zeroed, specify the OS datastore on the external storage, and click Next. 18. Keep the default virtual device node (0:0), and click Next. 19. Connect the VM virtual CD-ROM to the Microsoft Windows 2008 R2 installation disk. 20. Click Finish. Dell PowerEdge M620 blade server solutions for virtual desktop A Principled Technologies test report 15 infrastructures
  • 16. 21. Right-click the vCenter VM, and click Edit settings. 22. Click the Resources tab, click Memory, check the Reserve all guest memory checkbox, and click OK. 23. Start the VM. Installing the Microsoft Windows Server 2008 R2 operating system on the VM 1. Choose the language, time and currency, and keyboard input. Click Next. 2. Click Install Now. 3. Choose Windows Server 2008 R2 Enterprise (Full Installation), and click Next. 4. Accept the license terms, and click Next. 5. Click Custom. 6. Click the Disk, and click Drive options (advanced). 7. Click NewApplyFormat, and click Next. 8. After the installation completes, click OK to set the Administrator password. 9. Enter the administrator password twice, and click OK. 10. Connect the machine to the Internet, and install all available Windows updates. Restart as necessary. 11. Enable remote desktop access. 12. Change the hostname to vCenter and reboot when prompted. 13. Set up networking for the data network: a. Click Start, Control Panel, right-click Network Connections, and choose Open. b. Right-click the VM traffic NIC, and choose Properties. c. Uncheck TCP/IP (v6). d. Select TCP/IP (v4), and choose Properties. e. Set the IP address, subnet, gateway, and DNS server. 14. Join the VDI domain. 15. Reboot the system. 16. Install VMware Tools. For more information, see http://kb.vmware.com/selfservice/microsites/search.do?language=en_US&cmd=displayKC&externalId=340. 17. Reboot. Installing VMware vCenter 5 1. Log onto the vCenter as VDIadministrator 2. From the VMware vCenter5 install media, click Autorun. 3. Click Run to start the install wizard. 4. Click the Install button on the VMware vSphere 5.0 wizard. 5. Select the Install wizard language as English, and click OK. 6. At the Install wizard welcome screen, click Next. 7. Agree to the license agreement, and click Next. 8. Enter user information and a license key, and click Next. 9. Select Install the SQL express instance, and click Next. 10. Select the system account for the vCenter Server service account, and click Next. 11. Keep the installation directory as C:Program FilesVMwareInfrastructure, and click Next. 12. Select Create a standalone VMware vCenter Server instance, and click Next. 13. Keep the vCenter default ports, and click Next. 14. Select 1024 MB for the JVM memory, and click Next. 15. Click Install to finish the vCenter server installation. 16. Restart the server when complete. 17. Using the vSphere client, log into vCenter5 as VDIadministrator 18. Right-click the root of vCenter, and click New Data center. 19. Name the New datacenter VDI Dell PowerEdge M620 blade server solutions for virtual desktop A Principled Technologies test report 16 infrastructures
  • 17. 20. Add the ESX server named vDT-Host to the datacenter. 21. Add the ESX server named infra to the datacenter. Setting up ODBC DSN for composer 1. From the vCenter desktop, open StartAll ProgramsMicrosoft SQL Server 2008 R2Configuration ToolsSQL Server Configuration Manager. 2. Click SQL Server Network ConfigurationProtocols for VIM_SQLEXP. 3. Right-click TCP/IP, and select Enabled. 4. Click SQL Servicesright-click SQL Server Browser, and select Properties. 5. IN the SQL Server Browser properties, select the Services tab, change the Start mode to Automatic, and click OK. 6. Start the SQL Server browser service. 7. Select StartRunodbcad32.exe. 8. Click the system DSN tab. 9. Click Add. 10. Click SQL Server, and click Finish. 11. In the Create a New Data Source to SQL Server text box, enter the connection name type: composer 12. For Server, select vCenterVIM_SQLEXP, and click Next. 13. Leave authentication as default, click Next twice, and click Finish. 14. Click OK to create the composer ODBC connection. Setting up VMware View Composer 1. Open the View5 media folder, and run the file names VMware-viewcomposer-.3.0.0-691993.exe. 2. At the Welcome screen and the Patents screen, click Next. 3. Accept the VMware end user license agreement, and click Next. 4. Leave the Destination folder as default, and click Next. 5. In the Database information box, for source name type composer for user name type VDIAdministrator type the password, and click Next. 6. Leave the default SOAP port, and click Next. 7. Click Install, and click finish. Setting up a VM to host the VMware View connection server 1. Log into vCenter with the VMware vSphere client. 2. In the vSphere client, browse to the ESXi host named infra. 3. Click the Virtual Machines tab. 4. Right-click, and choose New Virtual Machine. 5. Choose Custom, and click Next. 6. Assign the name View5 to the virtual machine, and click Next. 7. Select infra for the host, and click Next. 8. Select infraLUN for the storage, and click Next. 9. Choose Virtual Machine Version 8, and click Next. 10. Choose Windows, choose Microsoft Windows Server 2008 R2 (64-bit), and click Next. 11. For CPUs, select one virtual processor socket, and 2 cores per virtual socket, and click Next. 12. Choose 4GB RAM, and click Next. 13. Click 1 for the number of NICs, select VMXNET 3, connect to the PRIV-NET portgroup, and click Next. 13. Leave the default virtual storage controller, and click Next. 14. Choose to create a new virtual disk, and click Next. 15. Make the OS virtual disk size 40 GB, choose thick-provisioned lazy zeroed, specify the OS datastore on the external storage, and click Next. 16. Keep the default virtual device node (0:0), and click Next. Dell PowerEdge M620 blade server solutions for virtual desktop A Principled Technologies test report 17 infrastructures
  • 18. 17. Connect the VM virtual CD-ROM to the Microsoft Windows Server 2008 R2 installation disk. 18. Right-click the View5 VM, and click Edit settings. 19. Click the Resources tab, click Memory, check the Reserve all guest memory checkbox, and click OK. 20. Click Finish. 21. Start the VM. Installing the Microsoft Windows Server 2008 R2 operating system on the VM 1. Choose the language, time and currency, and keyboard input. Click Next. 2. Click Install Now. 3. Choose Windows Server 2008 R2 Enterprise (Full Installation), and click Next. 4. Accept the license terms, and click Next. 5. Click Custom. 6. Click the Disk, and click Drive options (advanced). 7. Click NewApplyFormat, and click Next. 8. After the installation completes, click OK to set the Administrator password. 9. Enter the administrator password twice, and click OK. 10. Connect the machine to the Internet, and install all available Windows updates. Restart as necessary. 11. Enable remote desktop access. 12. Change the hostname to VMW-View and reboot when prompted. 13. Set up networking for the data network: a. Click StartControl Panel, right-click Network Connections, and choose Open. b. Right-click the VM traffic NIC, and choose Properties. c. Uncheck TCP/IP (v6). d. Select TCP/IP (v4), and choose Properties. e. Set the IP address, subnet, gateway, and DNS server. 14. Join the VDI domain. 15. Install VMware Tools. For more information, see http://kb.vmware.com/selfservice/microsites/search.do?language=en_US&cmd=displayKC&externalId=340. 16. Reboot. Installing the VMware View Connection Server 1. Log into the server named VMW-View. 2. Click Install Media for View Connection Server x86_64-5.1.0-704644.exe 3. To begin the install wizard, click Next. 4. Agree to the license agreement, and click Next. 5. Keep the destination directory as C:Program FilesVMware ViewServer, and click Next. 6. Select View Standard Server, and click Next. 7. Allow View Server to configure the firewall, and click Next. 8. Authorize the local administrator to administer View and click Next. 9. Choose whether to participate in the customer experience improvement program. 10. Complete the installation wizard to finish installing View Connection Server 11. Click Finish. 12. Reboot server. Configuring the VMware View Connection Server 1. Open a Web browser to <the view server ipaddress>/admin. 2. Log in as administrator 3. Open View ConfigurationServers. 4. In the vCenter Servers tab, click Add… Dell PowerEdge M620 blade server solutions for virtual desktop A Principled Technologies test report 18 infrastructures
  • 19. 5. In the Add vCenter Server settings, add the vCenter, and enable View Composer. Click OK. 6. Set the Host Cache setting to 2048MB. 7. Open View ConfigurationProduct Licensing and Usage. 8. Click Edit license… 9. Enter a valid license serial number, and click OK. 10. Close the View Administrator. Setting up a Windows 7 Enterprise x86 image template Using the vSphere client, we created a Windows Enterprise X86 VMs base image and converted it into a template. Using our template, we deployed a View gold image and a Login VSI launcher. On the gold image, we installed Microsoft Office 2010, installed the Login VSI target software, added them to the VDI domain, added them to the Login VSI OU, and installed the respective VMware View 5.1 agents. For the Login VSI launcher VM, we installed the VMware View 5.1 client, added it to the VDI domain and Login VSI OU in Active Directory, and installed the Login VSI Launcher software. Installing the Windows 7 Enterprise (x86) base image VM 1. Log into the vCenter. 2. In the vSphere client, connect to the vCenter Server, and browse to the infra host. 3. Click the Virtual Machines tab. 4. Right-click, and choose New Virtual Machine. 5. Choose Custom, and click Next. 6. Assign the name as win7-temp and click Next. 7. Select infra for the host, and click Next. 8. Select infraLUN. 9. Choose Virtual Machine Version 8, and click Next. 10. Choose Windows, choose Microsoft Windows 7 (32-bit), and click Next. 11. For CPUs, select one virtual processor socket and one core per virtual socket, and click Next. 12. Choose 1GB RAM, and click Next. 13. Click 1 for the number of NICs, select VMX, and click Next. 14. Leave the default virtual storage controller, and click Next. 15. Choose to create a new virtual disk, and click Next. 16. Make the OS virtual disk size 20 GB, choose thick-provisioned lazy zeroed, specify the OS datastore on the external storage, and click Next. 17. Keep the default virtual device node (0:0), and click Next. 18. Click Finish. 19. Click Finish, and click OK. 20. Right-click the win7-temp VM, and click Edit settings. 21. Click the Resources tab, click Memory, and check the Reserve all guest memory checkbox. 22. Click the Hardware tab, CD/DVD Drive, and Connect the VM virtual CD-ROM to the Microsoft Windows 7 x86 installation disk. 23. Click OK. Installing the Windows 7 Enterprise (X86) on the base image VM 1. When the installation prompts you, press any key to begin setup. 2. Enter your language preferences, and click Next. 3. Click Install. 4. Accept the license terms, and click Next. 5. Select Custom, and select the drive that will contain the OS. Dell PowerEdge M620 blade server solutions for virtual desktop A Principled Technologies test report 19 infrastructures
  • 20. 6. Click Install, and the setup begins. 7. Type user for the username and change the computer name, and click Next. 8. Enter no password, and click Next. 9. For system protection, select Use recommended settings, and click Next. 10. Enter your time zone, and click Next. 11. Select the Work Network setting, and click Next. 12. Use Windows Update to patch the Windows 7 installation. 13. Install VMware Tools from http://kb.vmware.com/selfservice/microsites/search.do?language=en_US&cmd=displayKC&externalId=340. 14. Reboot. Installing Windows 7 Enterprise (X86), optimizing Windows 7 Adjusting page file 1. Log in as administrator 2. Right-click ComputerPropertiesChange settingsAdvancedPerformanceSettings. 3. In Performance settings, select the Advanced tab, and select Change for Virtual Memory. 4. Deselect automatically manage page file. 5. Select Custom size, type 2048 for both values, and select Set. Enabling ClearType fonts 1. Click StartRun, and type cttune.exe 2. Check the Turn on ClearType checkbox, and click Next. 3. Follow the wizard to enable ClearType fonts. Disabling Windows Firewall The domain GPO automatically disables the Windows Firewall. Installing Office 2010 Professional and converting to template 1. From the Office 2010 media, run Setup. 2. Enter the product key for Office 2010, and click Continue. 3. Accept the licensing agreement. 4. Select Install Now. 5. Reboot the system. 6. Shut down the VM. 7. Right-click, and select TemplateConvert to Template. Deploying the view_gold image from template 1. In vSphere Client, browse to HomeVMs and Templates. 2. Right-click win7-temp to deploy a virtual machine from template. 3. For Name, type view_gold and click Next. 4. Click Datacenter, and click Next. 5. Click the vDT-host server, and click Next. 6. Select infraLUN, and click Next. 7. Select customization using existing customization specifications, select the appropriate file, and click Next. 8. Click Finish to deploy the view_gold VM. 9. Repeat steps 1 through 8 to deploy a Launcher_1 VM to host infra. Preparing view_gold for deployment Installing Login VSI target software on view_gold 1. Log into the view_gold VM as VDIadministrator Dell PowerEdge M620 blade server solutions for virtual desktop A Principled Technologies test report 20 infrastructures
  • 21. 2. Browse to vsi-installTarget setup. 3. Run the setup.exe. 4. In the Target Setup wizard, specify the VSI share dc1share 5. Click Start. 6. At the security warnings, click OK. 7. Reboot the system. Installing the View 5 agent on view_gold 1. Browse to the VMware View 5 media, and run the VMware-viewagent-x86_64-5.1.0-704644.exe file. 2. Click Run. 3. At the Welcome screen, click Next. 4. Accept the VMware end user license agreement, and click Next. 5. Select defaults, and click Next. 6. Enter the server name of the View Connection Server, and click Next. 7. Click Install. Configuring Regedit for Quick prep (kb.vmware.com/kb/1026556) 1. Click StartRun, and type regedit 2. Browse to HKEY_LOCAL_MACHINESYSTEMCurrentControlSetServicesvmware-viewcomposer-ga. 3. Right-click SkipLicenseActivation, and click Modify… 4. Change the value from 0 to 1. Preparing Launcher_1 for testing We installed our launcher with the Login VSI target software and View 5.1 client. Installing Virtual Audio Cables By default, the virtual launchers cannot render audio so we installed Virtual Audio Cables version 4.10. The software can be downloaded from http://software.muzychenko.net/eng/vac.htm 1. Download and extract the media. 2. Click Setup. 3. Click Yes to begin the install. 4. Click I accept to accept the software license agreement. 5. Click Install. Installing the Login VSI launcher 1. Log into the XD_gold VM as VDIadministrator 2. Browse to vsi-installLauncher setup. 3. Run the setup.exe. 4. In the Target Setup wizard, specify the VSI share dc1share Patching the Login VSI launcher and updating the version of Adobe Flash By default, Login VSI installs an older version of Flash. To ensure Flash Media Redirection works, ensure that the launcher version is 3.4.1 or greater and that adobe Flash player 11 plugin has been updated. It can be found here: http://www.adobe.com/support/flashplayer/downloads.html. Installing the VMware View client 1. Browse to the VMware View 5.1 media, and run the VMware-viewclient-x86_64-5.1.0-704644.exe file. 2. Click Run. 3. At the welcome screen, click Next. 4. At the Patents screen, click Next. Dell PowerEdge M620 blade server solutions for virtual desktop A Principled Technologies test report 21 infrastructures
  • 22. 5. Accept the VMware end user license agreement, and click Next. 6. Select defaults, and click Next. 7. Click Install. Configuring View 5 - creating a pool and adding entitlements for Login VSI users 1. Open vCenterDatacenterInfra, and right-click the view_gold VM, select SnapshotTake Snapshot. 2. Name the snapshot view_gold 3. Open the View Administrator. 4. Log in as administrator 5. Click Pools, and in the right window, click Add… 6. Select Automatic Pool, and click Next. 7. Select Floating, and click Next. 8. Select View Composer linked clones, and click Next. 9. Type pool for the pool ID and display name, and click Next. 10. Leave the pool settings as defaults, and click Next. 11. For the naming pattern, type View-{n:fixed=003} 12. Under Pool Sizing enter 160 for Max number of desktops and Number of spare (power on) desktops. 13. Select provision all desktops up-front, and click Next. 14. Select Redirect disposable files to a non-persistent disk, type 4096 MB for Disk Size, and click Next. 15. Under Storage Optimization, click Next. 16. For the pool settings, use the following:  Default image: view_gold – view_gold  VM folder: /Datacenter/vm/Pool  Host or cluster: DataCenter/host/vd-host.vdi.com  Resource pool: /Datacenter/host/vd-host.vdi.com/Resources  Datastore= LUN1,LUN2,LUN3,LUN4 Storage Overcommit: Conservative 17. Under Advanced Storage Options select Use host caching, OS disk, 7 days, and click Next. 18. For Guest customization, select the following:  Domain: VDI.com  AD container: OU=Users,OU=Login_VSI  Select Use Quick Prep, and click Next. 19. Click Finish. 20. Click Pool, and click Entitlements… 21. Click Add, type Login_VSI_TS and click OK. 22. Click Desktops, and wait for the virtual desktops to report as ready. Dell PowerEdge M620 blade server solutions for virtual desktop A Principled Technologies test report 22 infrastructures
  • 23. APPENDIX D – DETAILED TEST RESULTS Figures 11 through 13 show the Login VSI response times throughout our tests at varying user counts. From these results, we determined that each server solution could comfortably support 160 virtual desktops while maintaining acceptable response times. Dell PowerEdge M620 - Login VSI response times 4,000 3,500 3,000 Response time (ms) 2,500 2,000 1,500 1,000 500 0 10 22 30 40 48 55 63 71 79 88 97 106 114 123 132 140 149 160 Users Figure 11: Login VSI response times for the Dell PowerEdge M620 server throughout our Login VSI tests. HP ProLiant BL460c G8 - Login VSI response times 4,500 4,000 3,500 Response time (ms) 3,000 2,500 2,000 1,500 1,000 500 0 10 22 30 40 48 55 63 71 79 88 97 106 114 123 132 140 149 160 Users Figure 12: Login VSI response times for the HP ProLiant BL460c G8 server throughout our Login VSI tests. Dell PowerEdge M620 blade server solutions for virtual desktop A Principled Technologies test report 23 infrastructures
  • 24. Cisco UCS B200 M3 - Login VSI response times 4,500 4,000 3,500 3,000 Response time (ms) 2,500 2,000 1,500 1,000 500 0 10 22 30 40 48 55 63 71 79 88 97 106 114 123 132 140 149 160 Users Figure 13: Login VSI response times for the Cisco UCS B200 M3 server throughout our Login VSI tests. Figures 14 through 16 show the processor utilization percentage for the servers throughout the Login VSI tests. Dell PowerEdge M620 - CPU % 100 90 80 CPU utilization percentage 70 60 50 40 30 20 10 0 06:46.0 10:03.0 11:46.0 15:13.0 17:00.0 20:36.0 24:12.0 26:05.0 29:58.0 34:01.0 36:06.0 40:12.0 44:14.0 46:16.0 50:18.0 54:08.0 55:55.0 59:22.0 02:40.0 04:16.0 08:23.0 13:30.0 18:47.0 22:23.0 28:01.0 31:58.0 38:09.0 42:13.0 48:17.0 52:19.0 57:38.0 01:00.0 05:53.0 Time Figure 14: CPU utilization for the Dell PowerEdge M620 server throughout our Login VSI tests. Dell PowerEdge M620 blade server solutions for virtual desktop A Principled Technologies test report 24 infrastructures
  • 25. CPU utilization percentage CPU utilization percentage 10 30 40 50 60 70 90 20 80 0 100 10 20 40 50 60 70 80 90 30 0 100 27:25.0 0:00:06 29:16.0 infrastructures 0:01:54 31:18.0 0:03:42 33:07.0 0:05:30 34:57.0 0:07:18 36:53.0 0:09:06 38:49.0 0:10:54 40:44.0 0:12:42 42:35.0 0:14:30 44:27.0 0:16:18 46:24.0 0:18:06 48:21.0 0:19:54 50:23.0 0:21:42 52:35.0 0:23:30 54:44.0 0:25:18 56:52.0 0:27:06 59:15.0 0:28:54 01:35.0 Time 0:30:42 Time 03:47.0 0:32:30 05:53.0 Dell PowerEdge M620 blade server solutions for virtual desktop 0:34:18 07:31.0 0:36:06 09:09.0 0:37:54 10:42.0 0:39:42 Cisco UCS B200 M3 - CPU% 12:32.0 0:41:30 HP ProLiant BL460c G8 - CPU % 14:25.0 0:43:18 15:57.0 0:45:06 17:22.0 Figure 16: CPU utilization for the Cisco UCS B200 M3 server throughout our Login VSI tests. 0:46:54 18:43.0 0:48:42 Figure 15: CPU utilization for the HP ProLiant BL460c G8 server throughout our Login VSI tests. 20:10.0 0:50:30 21:31.0 0:52:18 22:52.0 0:54:06 23:44.0 0:55:54 24:34.0 25:23.0 0:57:42 0:59:30 A Principled Technologies test report 25
  • 26. Figures 17 through 19 show the power consumption for the solutions throughout the Login VSI tests. Dell PowerEdge M620 solution - Power 1,800 1,600 1,400 1,200 1,000 Watts 800 600 400 200 0 00:01.0 01:57.0 07:41.0 09:37.0 11:33.0 13:29.0 15:25.0 23:09.0 25:05.0 27:01.0 28:57.0 36:41.0 38:37.0 40:33.0 42:29.0 44:25.0 52:09.0 54:05.0 56:01.0 57:57.0 01:53.0 03:49.0 05:45.0 17:21.0 19:17.0 21:13.0 30:53.0 32:49.0 34:45.0 46:21.0 48:17.0 50:13.0 Time Figure 17: Power, in watts, for the Dell PowerEdge M620 solution throughout our Login VSI tests. HP ProLiant BL460c G8 solution - Power 1,800 1,600 1,400 1,200 1,000 Watts 800 600 400 200 0 00:01.0 01:41.0 03:31.0 07:11.0 09:01.0 12:41.0 14:31.0 20:01.0 21:51.0 25:31.0 27:21.0 31:01.0 32:51.0 36:31.0 38:21.0 43:51.0 45:41.0 49:21.0 51:11.0 54:51.0 56:41.0 01:51.0 05:21.0 10:51.0 16:21.0 18:11.0 23:41.0 29:11.0 34:41.0 40:11.0 42:01.0 47:31.0 53:01.0 58:31.0 Time Figure 18: Power, in watts, for the HP ProLiant BL460c G8 solution throughout our Login VSI tests. Dell PowerEdge M620 blade server solutions for virtual desktop A Principled Technologies test report 26 infrastructures
  • 27. Cisco UCS B200 M3 solution - Power 1,800 1,600 1,400 1,200 1,000 Watts 800 600 400 200 0 01:47.0 03:40.0 05:33.0 07:26.0 09:19.0 11:12.0 13:05.0 14:58.0 16:51.0 18:44.0 20:37.0 22:30.0 24:23.0 26:16.0 28:09.0 30:02.0 31:55.0 33:48.0 35:41.0 37:34.0 39:27.0 41:20.0 43:13.0 45:06.0 46:59.0 48:52.0 00:01.0 01:54.0 50:45.0 52:38.0 54:31.0 56:24.0 58:17.0 Time Figure 19: Power, in watts, for the Cisco UCS B200 M3 solution throughout our Login VSI tests. Dell PowerEdge M620 blade server solutions for virtual desktop A Principled Technologies test report 27 infrastructures