SlideShare une entreprise Scribd logo
1  sur  23
Télécharger pour lire hors ligne
JANUARY 2014
A PRINCIPLED TECHNOLOGIES TEST REPORT
Commissioned by Dell Inc.
SAVE SPACE, INCREASE EFFICIENCY, AND BOOST PERFORMANCE
IN YOUR REMOTE OFFICE WITH DELL POWEREDGE VRTX
Replacing the servers in your remote office or branch office (ROBO) with the
powerful new Dell PowerEdge VRTX, powered by the Intel Xeon processor E5-2400 v2
product family and running Microsoft® Windows® Server 2012 R2, can be a wise move.
Dell designed the VRTX with simplicity, efficiency, and versatility in mind. Its space-
saving design can greatly simplify the office environment—it installs almost anywhere,
reduces cabling because the server, storage, and networking are converged in a single
compact chassis, and contributes further to space savings through consolidation of
legacy servers into the VRTX. The VRTX brings efficiency to IT staff, who can manage
servers, storage, and networking with the unified, integrated Chassis Management
Controller. Businesses can enjoy the versatility of this solution, which lets them deploy
performance anywhere and experience accelerated performance with a unique PCIe
SSD option.
In this report, we focus on the simplicity and versatility aspects of the Dell
PowerEdge VRTX by looking specifically at performance comparisons to a legacy dual-
socket server. To learn about the management advantages of the Dell PowerEdge VRTX,
see our companion report.* To show simplicity via consolidation and space savings, we
first measured the database performance of a prior-generation dual-socket HP ProLiant
server, typical of those in use today. To explore the versatility of the Dell PowerEdge
*For management and automation highlights, see the companion to this one, “Efficient and versatile hardware
management with Dell PowerEdge VRTX,” at www.principledtechnologies.com/Dell/VRTX_management_0314.pdf.
A Principled Technologies test report 2Save space, increase efficiency, and boost performance in your
remote office with Dell PowerEdge VRTX
VRTX, we then measured its performance using an accelerated configuration with a
Micron® P420m PCIe solid-state drive (SSD) attached to each node. In our tests, the
base-configuration VRTX could consolidate four legacy dual-socket servers using the
same database and workload configuration while providing 5.4 times the performance
of one legacy server. With the Micron P420m PCIe SSD added to the configuration, the
performance advantage was even greater—the VRTX consolidated eight legacy dual-
socket servers and delivered 10.7 times the performance of one legacy server.
Based on the overall performance advantage the VRTX had in our testing, you
would need six legacy servers to do the work of a single base-configuration VRTX and 11
legacy servers to deliver the performance of a single accelerated-configuration VRTX.
Because the Dell PowerEdge VRTX in its tower form factor uses approximately the same
square footage as a typical tower, replacing multiple legacy tower servers with a VRTX
would yield an immediate gain in square footage efficiency in your remote office. This
gain would be in addition to the benefits of a shared storage platform and encapsulated
networking components.1
For both performance and space efficiency, consolidating your older servers
with the Dell PowerEdge VRTX makes excellent business sense. You can free up space in
your remote or branch office, and you can save on power and cooling.
MORE PERFORMANCE, LESS SPACE
In many remote offices, performance needs are steadily increasing, space is at a
premium, and cabling has become complex. If your remote office faces any or all of
these challenges, the Dell PowerEdge VRTX is an attractive, compact, integrated solution
that can fit easily beside a desk and uses minimal cabling. As our testing showed, in
addition to reducing the compute footprint of your environment, the VRTX could also
deliver exceptional performance.
To measure the performance of the Dell PowerEdge VRTX with two M520 server
nodes, we tested with an OLTP workload that uses a performance metric of orders per
minute (OPM). We tested the base configuration of the VRTX and an accelerated version
with a Micron P420m PCIe SSD card to further boost performance. As we will show,
both Dell PowerEdge VRTX configurations performed the workloads of multiple legacy
servers and did so using a fraction of the compute space the equivalent legacy solution
would require.
For the legacy system, we tested a three-year-old dual-socket HP ProLiant
server configured with two Intel Xeon processor X5670s, 12 GB of memory, and eight
300GB SAS hard drives configured in a two-disk RAID 1 for OS and logs and a six-disk
RAID 10 for database. On the new VRTX-powered environment, we configured the VMs
1
Comparing performance and cost: Dell PowerEdge VRTX vs. legacy hardware solution
www.principledtechnologies.com/Dell/VRTX_performance_TCO_0713.pdf
Configuration note
For testing, we
configured the Dell
PowerEdge VRTX
with two M520
server nodes as our
base configuration,
leaving room for
further expansion.
Adding additional
nodes to populate
the PowerEdge
VRTX fully could
increase
performance and
further your space
savings.
TCO
A June 2013
Principled
Technologies study
compared the Dell
PowerEdge VRTX
and a legacy
solution composed
of multiple servers.1
That study found
that the VRTX
delivered a lower
total cost of
ownership than the
multi-server legacy
solution.
A Principled Technologies test report 3Save space, increase efficiency, and boost performance in your
remote office with Dell PowerEdge VRTX
with 12 vCPUs and 12 GB of memory to match the legacy server configuration. For
detailed configuration information about the solutions we tested, see Appendix A. For
testing details, see Appendix B.
As Figure 1 shows, the Dell PowerEdge VRTX in both configurations delivered far
greater database performance than the legacy server did. The base-configuration VRTX
ran four database VMs, delivering 320,415 orders per minute, 5.4 times as many as the
legacy server using the same database and workload configuration. Upgrading the Dell
PowerEdge VRTX with the Micron P420m PCIe SSD card doubled the number of VMs the
server could support under the same conditions, and those eight VMs delivered 10.7
times the orders per minute the legacy server delivered.
Figure 1: Both configurations of the Dell
PowerEdge VRTX delivered far greater
database performance than the legacy
server.
VM 1 VM 1
VM 2 VM 2
VM 3 VM 3
VM 4 VM 4
VM 5
VM 6
VM 7
VM 8
0
100,000
200,000
300,000
400,000
500,000
600,000
700,000
Legacy server Dell PowerEdge VRTX Dell PowerEdge VRTX
with Micron P420m
PCIe SSD
OPM
Database performance inorders per minute
59,119
320,415
634,473
Adding to the performance advantage of the Dell PowerEdge VRTX server is the
fact that it delivers this performance in a space-efficient profile and greatly reduces the
cabling complexity that can come with multiple servers, whether those servers are in
rack or tower form factor.
As we noted earlier, in June 2013, Principled Technologies conducted a study
similar to this one. That study compared the number of Ethernet cables and power
cables required by the Dell PowerEdge VRTX and a legacy solution composed of multiple
servers.2
Figure 2, excerpted from that study, shows how the Dell PowerEdge VRTX used
only six cables, 13 fewer cables than the legacy, disparate hardware solution consisting
of three tower servers, a switch, and a storage array.
2
Comparing performance and cost: Dell PowerEdge VRTX vs. legacy hardware solution
www.principledtechnologies.com/Dell/VRTX_performance_TCO_0713.pdf
A Principled Technologies test report 4Save space, increase efficiency, and boost performance in your
remote office with Dell PowerEdge VRTX
Cabling comparison from 2013 Principled Technologies study
Dell PowerEdge VRTX Ethernet cables Power cables
Total by type 2 4
Total cables 6
Legacy, disparate hardware solution Ethernet cables Power cables
HP ProLiant ML310 G5 2 1
HP ProLiant ML370 G5 2 1
HP ProLiant ML110 G6 2 1
NETGEAR ProSAFE Smart Switch 1 1
Storage 6 2
Total by type 13 6
Total cables 19
Figure 2: In a June 2013 Principled Technologies study, the Dell PowerEdge VRTX reduced cabling complexity compared to the
legacy, disparate hardware solution.
While the 2013 study used different workload parameters than this study, it is
reflective of the potential cabling savings when consolidating tower servers to the Dell
PowerEdge VRTX.
About the Dell PowerEdge VRTX
The Dell PowerEdge VRTX is a compact, integrated solution in a 5U rack-able
tower chassis. Designed to be quiet under normal operating conditions, the Dell
PowerEdge VRTX can be stowed beside a desk. Its four bays house Dell PowerEdge
M520 or M620 server nodes, providing a space-saving alternative to tower or rack
servers. In addition to space savings, the Dell PowerEdge VRTX provides administrators
with a unified interface, the Chassis Management Controller, for performing routine
systems management tasks. The Dell PowerEdge VRTX chassis supports up to 48 TB of
shared internal storage that is presentable as virtual drives to single or multiple
compute nodes, and provides eight PCIe slots for additional device connectivity. The
chassis integrated storage can be configured with 25 bays for 2.5-inch drives or with 12
bays for 3.5-inch drives. The Dell PowerEdge VRTX integrated switch contains multiple
external network ports for easy expansion or integration into existing computing
environments.
For more information about the Dell PowerEdge VRTX, visit
www.Dell.com/PowerEdge/VRTX.
About the Intel Xeon processor E5-2400 v2 product family
According to Intel, the Intel Xeon processor E5-2400 v2 product family is
designed to complement the E5-2600 v2 product family with “lower core counts, lower
frequency, and lower TDP options. The new Intel Xeon processor E5-2400 v2 product
family is based on a 22nm manufacturing process and includes 12 different models. It is
designed to offer performance and features to address small and medium business,
enterprise storage, and entry to mid-range communications markets.”
A Principled Technologies test report 5Save space, increase efficiency, and boost performance in your
remote office with Dell PowerEdge VRTX
For more information on the Intel Xeon processor E5-2400 v2 product family,
visit www.intel.com.
About the Micron P420m PCIe SSD
According to Micron, their low-latency, high-IOPS PCIe SSDs “are real
overachievers, providing the highest read throughput in the industry, combined with
extended endurance, exceptional reliability, and remarkable power efficiency. They are
ideal solutions for optimizing applications with heavy read access, from web
accelerators to media streaming and video-on-demand servers, as well as data
warehousing.
“Built on server-grade Micron NAND, [their] PCIe SSDs furnish up to 50
petabytes of drive life and an astounding power economy of up to 30,000 read IOPS per
watt. Our custom controller is designed specifically to interact with and optimize our
leading-edge NAND, achieving read IOPS up to 785,000 and sequential speeds up to 3.2
GB/s.”
For more information on the Micron P420m PCIe SSD 2.0 card, visit
www.micron.com/products/solid-state-storage/enterprise-pcie-ssd.
About Microsoft Windows Server 2012 R2
Microsoft Windows Server 2012 R2, the newest version of Microsoft Windows
Server, was designed with the enterprise-class datacenter and cloud platforms in mind.
It includes a range of new and enhanced features to boost efficiency and performance
for corporate workloads.
For more information on Microsoft Windows Server 2012 R2, visit
www.microsoft.com/en-us/server-cloud/products/windows-server-2012-r2/.
A Principled Technologies test report 6Save space, increase efficiency, and boost performance in your
remote office with Dell PowerEdge VRTX
IN CONCLUSION
Two realities drive many remote and branch office server decisions: the need
for a versatile platform that delivers excellent performance, and the need for
simplification by using fewer servers and cables. By consolidating your older servers to
the powerful, space-efficient Dell PowerEdge VRTX server, you can increase database
performance while saving valuable space. In our tests, the base-configuration Dell
PowerEdge VRTX could consolidate four legacy servers while providing 5.4 times the
overall performance. With the Micron P420m PCIe SSD added to the configuration, the
VRTX consolidated eight legacy servers and delivered 10.7 times the overall
performance.
Investing in the Dell PowerEdge VRTX—in either configuration—can elevate
your IT infrastructure by answering database performance and space-saving challenges
that face your remote and branch offices.
In addition to providing excellent performance in a space-efficient manner, the
VRTX simplifies the office environment, brings efficiency to IT staff through its
management advantages, and offers businesses the versatility of deploying
performance anywhere.
A Principled Technologies test report 7Save space, increase efficiency, and boost performance in your
remote office with Dell PowerEdge VRTX
APPENDIX A – DETAILED CONFIGURATION INFORMATION
Figure 3 presents detailed configuration information for the Dell PowerEdge VRTX solution we tested.
System Dell PowerEdge VRTX solution
Enclosure
Compute node enclosure Dell PowerEdge VRTX
General dimensions of compute node enclosure
Height (inches) 8.0
Width (inches) 19.0
Depth (inches) 29.5
Power supplies
Total number 4
Vendor and model number Dell 80 Plus Platinum E1100E-S0 (P/N 0YT39Y)
Wattage of each 1,100
Cooling fans
Total number 6
Vendor and model number Delta Electronics, Inc.
Dimensions (h × w) of each 60mm × 60mm
Volts 12
Chassis RAID controller
Vendor and model number Dell Shared PERC8
Firmware version 23.8.2-0005
Cache size (GB) 1
PCIe SSD card
Vendor and model number Micron P420m PCIe SSD
Number of cards 2
Capacity (TB) 1.4 (each card)
Chassis shared hard drives
Hard drive #1
Vendor and model number Hitachi HUC151414CSS600
Number of drives 21
Size (GB) 146
RPM 15,000
Hard drive #2
Vendor and model number Fujitsu MBE2147RC
Number of drives 4
Size (GB) 146
RPM 15,000
Chassis USB ports
Number 2
Type 2.0
A Principled Technologies test report 8Save space, increase efficiency, and boost performance in your
remote office with Dell PowerEdge VRTX
System Dell PowerEdge VRTX solution
Platform
Vendor and model number Dell PowerEdge M520
Motherboard model number 0NRG83X03
BIOS name and version Dell BIOS 2.0.23
BIOS settings Performance
General
Number of processor packages 2
Number of cores per processor 10
Number of hardware threads per core 2
System power management policy Performance
CPU
Vendor Intel
Name Xeon E5-2470 v2
Stepping M1
Socket type Socket 1356 / LGA1356
Core frequency (GHz) 2.40
L1 cache 32 KB (per core)
L2 cache 256 KB (per core)
L3 cache 256 MB (shared)
Memory modules (per node)
Total RAM in system (GB) 96
Vendor and model number Hynix Semiconductor HMT42GR7MFR4C-PB
Type PC3-12800
Speed (MHz) 1,600
Speed in the system currently running @ (MHz) 1,600
Timing/latency (tCL-tRCD-iRP-tRASmin) 11-11-11-35
Size (GB) 16
Number of RAM modules 6
Chip organization Double-sided
RAID controller
Vendor and model number Dell PERC H310 mini
Firmware version 20.12.0-0004
Cache size (GB) 0
Hard drive
Vendor and model number FUJITSU MBD2147RC
Number of drives 2
Size (GB) 146
RPM 10K
Type SAS
Network adapter
Vendor and model number Broadcom® NetXtreme® BCM5720 Gigabit Ethernet PCIe
Type Embedded
Number of ports 2
A Principled Technologies test report 9Save space, increase efficiency, and boost performance in your
remote office with Dell PowerEdge VRTX
System Dell PowerEdge VRTX solution
USB ports (per node)
Number 2 external, 1 internal
Type 2.0
Figure 3: Detailed configuration information for the Dell PowerEdge VRTX solution.
Figure 4 presents detailed configuration information for the legacy server we tested.
System HP ProLiant DL380 G7
Power supplies
Total number 2
Vendor and model number HP DPS-750RB A
Wattage of each (W) 750
Cooling fans
Total number 6
Vendor and model number Nidec® UltraFlo®
Dimensions (h × w) of each 2-3/8″ × 2-5/8″
Volts 12
Amps 2.45
General
Number of processor packages 2
Number of cores per processor 6
Number of hardware threads per core 2
System power management policy High Performance
CPU
Vendor Intel
Name Xeon X5670
Stepping B1
Socket type Socket 1366 LGA
Core frequency (GHz) 2.93
L1 cache 32 KB + 32 KB (per core)
L2 cache 256 KB (per core)
L3 cache (MB) 12
Platform
Vendor and model number HP ProLiant DL380 G7
BIOS name and version HP P67
BIOS settings High Performance
Memory modules
Total RAM in system (GB) 12
Vendor and model number Kingston KVR1333D3D8R9S/2G
Type PC3-10600R
Speed (MHz) 1,333
Speed in the system currently running @ (MHz) 1,333
Timing/latency (tCL-tRCD-iRP-tRASmin) 9-9-9-24
Size (GB) 2
A Principled Technologies test report 10Save space, increase efficiency, and boost performance in your
remote office with Dell PowerEdge VRTX
System HP ProLiant DL380 G7
Number of RAM modules 6
Chip organization Double-sided
RAID controller
Vendor and model number HP Smart Array P410i
Cache size (MB) 512
Hard drive #1
Vendor and model number HP ST9300603SS
Number of drives 8
Size (GB) 300
RPM 10K
Type SAS
Network adapter
Vendor and model number HP NC382i Dual Port Gigabit Adapter
Type Integrated
Number of ports 4
USB ports (per node)
Number 4 external, 1 internal
Type 2.0
Figure 4: Detailed configuration information for the HP ProLiant DL380 G7.
A Principled Technologies test report 11Save space, increase efficiency, and boost performance in your
remote office with Dell PowerEdge VRTX
APPENDIX B – HOW WE TESTED
About DVD Store Version 2.1
To create our OLTP workload, we used the DVD Store Version 2.1 (DS2) benchmarking tool. DS2 models an
online DVD store, where customers log in, search for movies, and make purchases. DS2 reports these actions in orders
per minute that the system could handle, to show what kind of performance you could expect for your customers. The
DS2 workload also performs other actions, such as adding new customers, to exercise the wide range of database
functions you would need to run your ecommerce environment.
For more details about the DS2 tool, see www.delltechcenter.com/page/DVD+Store.
SETTING UP THE INFRASTRUCTURE
We detail our Dell PowerEdge VRTX configuration steps below. Perform the following steps on each Dell
PowerEdge server.
Setting up and configuring an Active Directory VM
We configured a virtual machine to be used as an Active Directory server for authentication on a separate utility
hypervisor.
Installing Windows Server 2012 R2 on the Active Directory VM
1. Create a VM on a separate hypervisor host, and choose 4GB RAM and 30GB virtual disk size.
2. Install the operating system on the VM.
3. Copy the installation DVD image for Windows Server 2012 R2 into the local machine storage. Mount the DVD
ISO to the guest VM.
4. Choose the language, time and currency, and keyboard input. Click Next.
5. Click Install Now.
6. Enter product key, and click Next.
7. Choose Windows Server 2012 R2 Datacenter (Server with a GUI), and click Next.
8. Accept the license terms, and click Next.
9. Click Custom, and select Install Windows Only.
10. Click the Disk, and click Drive options (advanced).
11. Click NewApplyFormat, and click Next.
12. After the installation completes, click OK to set the administrator password.
13. Enter the administrator password twice, and click OK.
14. Connect the machine to the Internet and install all available Windows updates. Restart as necessary.
15. In Server Manager, select Local Server and change each of the following parameters by clicking on the
highlighted field for each.
16. Enable remote desktop access.
17. Click Windows Firewall, and set to Off (all).
18. Click IE Enhanced Security Configuration, and set to Off.
19. Click Windows Updates, and set to Disabled.
20. Change the hostname and reboot when the installation prompts you.
21. Create a shared folder to store test script files. Set permissions as needed.
A Principled Technologies test report 12Save space, increase efficiency, and boost performance in your
remote office with Dell PowerEdge VRTX
22. Set up networking for the Hyper-V management console by creating a static IP address.
Configuring TCP/IP and computer name on the Active Directory VM
1. Connect to the AD VM.
2. After the initial installation, the Server Manager comes up and you are presented with initial system
configuration. Select Local Server and click the current IP address to bring up the network properties.
3. In Network Connections, right-click Local Area Connection, and click Properties.
4. Click Internet Protocol Version 4 (TCP/IPv4), and click Properties.
5. Select Use the following IP address and enter an appropriate IP address, subnet mask, and Preferred DNS.
6. Close the Network Connections window.
7. In Server Manager, click the current computer name.
8. In System Properties, click Change. In Computer name, type the name of the domain controller machine, click
OK twice, and click Close. When you are prompted to restart the computer, click Restart Now.
9. After restarting, log in using the local administrator account.
Configuring the Active Directory VM as a domain controller and DNS server
1. Log into the AD VM.
2. In Server Manager select Local Server and in the upper right corner select Manage. Click Add Roles and Features.
In the details pane, click Role-Based or Feature-Based Installation, and click Next.
3. On the Select Server Roles page, click Active Directory Domain Services, click Add Required Features, click Next
twice, and click Install. When installation is complete, click Close.
4. To start the Active Directory Installation Wizard, click Start, type dcpromo and press Enter.
5. In the Active Directory Installation Wizard dialog box, click Next twice.
6. On the Choose a Deployment Configuration page, click Create a new domain in a new forest, and click Next.
7. On the Name the Forest Root Domain page, type the desired domain name, and click Next.
8. On the Set Forest Functional Level page, in Forest Functional Level, click Windows Server 2012 R2, and click
Next.
9. On the Additional Domain Controller Options page, click Next, click Yes to continue, and click Next.
10. On the Directory Services Restore Mode Administrator Password page, type a strong password twice, and click
Next.
11. On the Summary page, click Next.
12. Wait while the wizard completes the configuration of Active Directory and DNS services, and click Finish.
13. When the wizard prompts you to restart the computer, click Restart Now.
14. After the computer restarts, log into the domain using the Administrator account.
15. Create Computer accounts for each server to be used in the domain in the Active Directory Manager.
Configuring the database workload clients
For each test VM on the host machines, there needs to be a corresponding client VM to generate the workload
to stress the database under test. To do this, we configured a virtual machine with Windows Server 2008 R2 SP1 on a
separate utility hypervisor. To create these clients, we installed Windows Server 2008 R2 SP1, assigned a static IP
address, and installed .NET 3.5.
A Principled Technologies test report 13Save space, increase efficiency, and boost performance in your
remote office with Dell PowerEdge VRTX
SETTING UP THE VRTX
We detail our Dell PowerEdge VRTX configuration steps below.
Configuring the VRTX shared storage
1. Open a Web browser, and enter the address listed for the CMC IP on the front LCD display.
2. Log in with the appropriate credentials.
3. Expand Storage.
4. Click Storage.
5. Click the Setup tab.
a. Under Assignment Mode, select the radio button for Multiple Assignment, and click Apply.
b. Click OK to confirm the message box indicating Operation Successful.
6. Configure virtual disks:
a. Click StorageVirtual Disks.
b. On the Virtual Disks tab, click Create.
i. For Choose a virtual disk type, select RAID 10.
ii. Select the first six disks, and click Create Virtual Disk.
iii. Click OK to confirm the message box indicating Operation Successful.
iv. Repeat steps i-iii for the second Virtual Disk, selecting the first 18 disks remaining.
c. On the Virtual Disks tab, click Manage.
i. Select the Virtual Disks Action pull-down menu for Virtual Disk 0 and initialize the drives.
ii. Click Apply.
iii. Click OK to confirm the message box indicating Operation Successful once the initialization
completes.
iv. Repeat steps i-iii for the second virtual disk.
d. Configure the remaining physical disk as a global hot spare.
e. In this step, we will allow shared LUN access to both compute nodes. On the Virtual Disks tab, click
Assign.
i. Use the pull-down menu for all virtual disks and SLOT-01, and select Full Access.
ii. Use the pull-down menu for all virtual disks and SLOT-02, and select Full Access.
iii. Click Apply.
iv. Click OK to confirm the message box indicating Operation Successful.
Configuring boot properties of the Dell PowerEdge M520s
1. Open a Web browser, and enter the address listed for the CMC IP on the front LCD display.
2. Log in with the appropriate credentials.
3. Expand Server Overview, and select Slot-01.
4. Click the Setup Tab. Perform the following steps in the iDRAC settings:
a. Check the box for Enable LAN.
b. Check the box for Enable IPv4.
c. Check the box for DHCP.
d. Check the box for IPMI Over LAN.
e. Click Apply iDRAC Network Settings.
A Principled Technologies test report 14Save space, increase efficiency, and boost performance in your
remote office with Dell PowerEdge VRTX
f. To confirm changes to the iDRAC network settings, click OK.
5. Power on the server.
a. Click the Power Tab.
b. Select Power On Server.
c. Click Apply.
d. To confirm server control action, click OK.
e. To confirm operation was successful, click OK.
6. Click the Properties tab.
7. Click Launch Remote Console.
8. On new browser page, click Continue to website (not recommended) if prompted.
a. If a message appears indicating a pop-up was blocked, select Always allow pop-ups from this site.
b. Close the browser tab for the iDRAC.
c. Click Launch Remote Console.
d. If a message appears indicating the Web page wants to run an add-on called “Virtual Console from Dell
Inc.,” select Allow for all websites.
9. A new window appears showing the console for the server to configure. Select PowerReset System.
Installing the Microsoft Windows Server 2012 R2 operating system
1. Insert the installation disk to the VRTX chassis drive bay, or attach an image to the slot via iDRAC with virtual
media.
2. Choose the language, time and currency, and keyboard input. Click Next.
3. Click Install Now.
4. Choose Windows Server 2012 R2 Datacenter (Server with a GUI), and click Next.
5. Accept the license terms, and click Next.
6. Click Custom.
7. Click the Disk, and click Drive options (advanced).
8. Click NewApplyFormat, and click Next.
9. After the installation completes, click OK to set the Administrator password.
10. Enter the administrator password twice, and click OK.
11. Connect to the Internet, and install all available Windows updates. Restart as necessary.
12. Enable remote desktop access.
13. Change the hostname and reboot when prompted.
14. Set up networking for the data network:
a. Click StartControl Panel, right-click Network Connections, and choose Open.
b. Right-click the Testing traffic NIC, and choose Properties.
c. Select TCP/IP (v4), and choose Properties.
d. Assign a static IP address.
Installing the Hyper-V Role and Failover Clustering feature
1. From Server Manager, click ManageAdd Roles and Features.
2. At the Before You Begin screen, click Next.
3. At the Installation Type screen, click Next.
A Principled Technologies test report 15Save space, increase efficiency, and boost performance in your
remote office with Dell PowerEdge VRTX
4. At the Server Roles screen, check the box for Hyper-V, and click Add Features in the pop-up that appears.
5. Click Next.
6. At the Features screen, click the box for Failover Clustering, click Add Features in the window that pops up, and
click Next.
7. At the Hyper-V screen, click Next.
8. At the Virtual Switches screen, click Next.
9. At the Migration screen, leave the defaults, and click Next.
10. At the Default Stores screen, click Next.
11. At the Confirmation screen, click Install.
12. When the installation finishes, click Close.
Allowing RAID bus types in a failover cluster
For more information on the registry edit, see support.microsoft.com/kb/2839292.
1. Press the Windows key and type regedit and press Enter.
2. Navigate to HKEY_LOCAL_MACHINESYSTEMCurrentControlSetServicesClusDiskParameters in the Registry
Editor.
3. Click EditNewDWORD (32-bit) Value.
4. Enter AllowBusTypeRAID as the name.
5. Right-click the new DWORD and click Modify.
6. In the Value data field, enter 1 and click OK.
7. Close the Registry Editor.
Validating and creating the failover cluster
1. On either Dell PowerEdge server, click ToolsFailover Cluster Manager.
2. At the Before You Begin screen, click Next.
3. In the Select Servers or a Cluster screen, enter the names of each Dell PowerEdge VRTX server node in the Enter
name field, clicking the Add button after each. Click Next when finished.
4. At the Testing Options screen, click Next.
5. At the Confirmation page, click Next.
6. After the testing completes successfully, make sure the Create a cluster now using the validated nodes box is
checked.
7. Click Finish.
8. At the Before You Begin screen, click Next.
9. At the Access Point for Administering the Cluster screen, give the cluster an appropriate name, an appropriate IP
address, and click Next. We used the name TestCluster and an IP address of 192.168.1.50.
10. Click Next.
11. At the Confirmation screen, make sure the Add all eligible storage to the cluster box is checked, and click Next.
12. At the Summary screen, click Finish.
13. Open Failover Clustering Manager.
14. Navigate to StorageDisks, and click Add Disk.
15. Select all the available disks, and click OK.
16. In the Disks pane in FCM, right-click each Cluster Disk, and select Add to Cluster Shared Volumes.
A Principled Technologies test report 16Save space, increase efficiency, and boost performance in your
remote office with Dell PowerEdge VRTX
17. Close Failover Clustering Manager.
18. Acquire Update for Windows Server 2012 R2 (KB2803748) from www.microsoft.com/en-
us/download/confirmation.aspx?id=36468.
19. Launch the standalone update installer file in both Dell PowerEdge VRTX server nodes.
20. When the update installer completes its operations, click Restart Now.
Configuring the virtual network
1. In Hyper-V Manager, right-click the server name in the list on the left side of Hyper-V, and choose Virtual
Network Manager…
2. Choose External, and click Add.
3. Name the Virtual Network, and choose the appropriate NIC for your VM network from the drop-down menu.
4. Click OK.
Configuring the first VM
1. On the first host, within Failover Cluster Manager, select Roles.
2. On the right pane, click ActionVirtual Machines New Virtual Machine.
3. On the Before You Begin window, click Next.
4. Enter the name of the VM, and click Next.
5. Assign 12 GB of memory, and click Next.
6. Choose the virtual network you created from the drop-down menu, and click Next.
7. Choose to attach a virtual hard drive later and click Next.
8. Choose to install on operating system later.
9. Click Finish.
10. Create the following fixed size VHDs by right-clicking on the virtual machine and selecting Settings. Choose the
following:
 60GB VHD for the VM OS and Logging data
 30GB VHD for SQL Server data
11. Add the VM OS VHD and the VM SQL VHD to the SCSI controller.
12. Click Processors, and adjust the number of virtual processors to 12.
13. Start the VM.
Installing the VM operating system on the first VM
1. Connect to the ISO image of the installation DVD for Windows Server 2012 R2 from the VM console. If the ISO
image is not stored on the host, start the VM first and then connect to the ISO image.
2. Start the VM.
3. At the Language Selection Screen, click Next.
4. Click Install Now.
5. Select Windows Server 2012 R2 (Full Installation), and click Next.
6. Click the I accept the license terms check box, and click Next.
7. Click Custom.
8. Click Next.
9. At the User’s password must be changed before logging on warning screen, click OK.
A Principled Technologies test report 17Save space, increase efficiency, and boost performance in your
remote office with Dell PowerEdge VRTX
10. Enter the desired password for the administrator in both fields, and click the arrow to continue.
11. At the Your password has been changed screen, click OK.
12. Connect the machine to the Internet, and install all available Windows updates. Restart as necessary. We
configured each VM on the Dell PowerEdge VRTX with all available Windows Updates as of January 12, 2014.
13. Enable remote desktop access.
14. Change the hostname and reboot when prompted.
15. Create a shared folder to store test script files. Set permissions as needed.
16. Set up networking:
a. Click StartControl Panel, right-click Network Connections, and choose Open.
b. Right-click the testing traffic NIC, and choose Properties.
c. Select TCP/IP (v4), and choose Properties.
d. Set the IP address and subnet, click OK, and click Close.
17. Shut down the VM and export it to the same volume as the original.
18. Import the VM, copying files and generating a new ID, for each additional VM needed.
SETTING UP THE LEGACY SYSTEM
We configured an HP ProLiant DL380 G7 with Windows Server 2008 R2. We detail our legacy setup configuration
steps below.
Configuring the internal disks on the legacy system
1. Power on the server.
2. Enter the setup for the onboard RAID controller.
3. Create a RAID1 using the first two installed hard drives.
4. Create a RAID10 using the remaining six hard drives.
5. Begin initialization on the newly created virtual disks, then reboot the server.
Installing the operating systems on the legacy system
1. Insert installation DVD for Windows Server 2008 R2 Enterprise.
2. Power on the system.
3. At the Language Selection Screen, click Next.
4. Click Install Now.
5. Select Windows Server 2008 Enterprise (Full Installation), and click Next.
6. Click the I accept the license terms check box, and click Next.
7. Click Custom.
8. Click Next.
9. At the User’s password must be changed before logging on warning screen, click OK.
10. Enter the desired password for the administrator in both fields, and click the arrow to continue.
11. At the Your password has been changed screen, click OK.
12. Connect the machine to the Internet, and install all available Windows updates. Restart as necessary.
13. Enable remote desktop access.
14. Change the hostname and reboot when prompted.
A Principled Technologies test report 18Save space, increase efficiency, and boost performance in your
remote office with Dell PowerEdge VRTX
15. Connect the machine to the Internet, and install all available Windows updates. Restart as necessary. We
configured the HP ProLiant DL380 G7 with all available Windows Updates as of January 12, 2014.
16. Click StartControl Panel, right-click Network Connections, and choose Open.
17. Right-click the testing network NIC, and choose Properties.
18. Select TCP/IP (v4), and choose Properties.
19. Set the IP address, subnet, gateway, and DNS server for the NIC, which will handle outgoing testing traffic. Click
OK, and click Close.
INSTALLING MICROSOFT SQL SERVER AND CONFIGURING THE
WORKLOAD
We installed Microsoft SQL Server 2012 R2 on the VMs residing on the Dell PowerEdge M520s and Microsoft
SQL Server 2008 R2 on the HP ProLiant DL3800 G7.
Configuring the SQL Server VM on the VMs
After cloning, modify the SQL VMs to contain the following settings:
 Memory: 12GB
 Virtual Processors: 12
 Additional virtual disks:
o 1 × 30GB virtual disk for SQL database data
 In the VM, configure the VM storage:
o Click the Server Manager icon in the taskbar.
o In the left pane, expand Storage, and click Disk Management.
o Right-click the uninitialized volume, and choose Initialize Disk.
o In the right pane, right-click the volume, and choose New Simple VoIume…
o At the welcome window, click Next.
o At the Specify Volume Size window, leave the default selection, and click Next.
o At the Assign Drive Letter or Path window, choose a drive letter, and click Next.
o At the Format Partition window, choose NTFS, and click Next.
o At the Completing the New Simple Volume Wizard window, click Finish.
Installing SQL Server 2012 on the VMs
1. Open the console for the VM or connect to the VM with RDP.
2. Mount the installation ISO to the VM.
3. Click Run SETUP.EXE. If Autoplay does not begin the installation, navigate to the SQL Server 2012 DVD, and
double-click.
4. If the installer prompts you with a .NET installation prompt, click Yes to enable the .NET Framework Core role.
5. In the left pane, click Installation.
6. Click New SQL Server stand-alone installation or add features to an existing installation.
7. At the Setup Support Rules screen, wait for the rule check to complete. If there are no failures or relevant
warnings, click OK.
8. Select the Specify a free edition, and select Evaluation from the drop-down menu. Click Next.
A Principled Technologies test report 19Save space, increase efficiency, and boost performance in your
remote office with Dell PowerEdge VRTX
9. Click the checkbox to accept the license terms, and click Next.
10. If no failures are displayed after the setup support files are installed, click Next.
11. At the Setup Role screen, choose SQL Server Feature Installation.
12. At the Feature Selection screen, select Database Engine Services, Full-Text and Semantic Extractions for Search,
Client Tools Connectivity, Client Tools Backwards Compatibility, Management Tools – Basic, and Management
Tools – Complete. Click Next.
13. At the Installation Rules screen, click Next after the check completes.
14. At the Instance configuration screen, leave the default selection of default instance, and click Next.
15. At the Disk Space Requirements screen, click Next.
16. At the Server Configuration screen, check that NT AUTHORITYSYSTEM is selected for SQL Server Agent and SQL
Server Database Engine. Click Next.
17. Assuming there are no failures, click Next.
18. At the Database Engine Configuration screen, select Mixed Mode.
19. Enter and confirm a password for the system administrator account.
20. Click Add Current user. This may take several seconds.
21. Click the Data Directories tab and enter the appropriate drive and folders for database and logs.
22. Click Next.
23. At the Error and usage reporting screen, click Next.
24. At the Installation Configuration Rules screen, check that there are no failures or relevant warnings, and click
Next.
25. At the Ready to Install screen, click Install.
26. After installation completes, click Close.
27. Create a SQL Server login for the ds2user (see the Data generation overview section for the specific script to
use).
28. Copy the pre-created DVD Store backup to the specified backup volume.
29. Download and install any available updates for Microsoft SQL Server 2012.
Configuring the legacy machine
1. Log into Windows using the appropriate credentials.
2. Open the Start menu, type Hard Disk Partitions, select Settings on the right, and click the displayed tile.
3. Right-click the disk, and select Online.
4. Right-click the disk, select Initialize Disk, and click Ok.
5. Right-click the volume space, and select Create Simple Volume.
6. At the Specify Volume Size window, leave the default selection, and click Next.
7. At the Assign Drive Letter or Path window, choose a drive letter, and click Next.
8. At the Format Partition window, choose NTFS, and click Next.
9. At the Completing the New Simple Volume Wizard window, click Finish.
A Principled Technologies test report 20Save space, increase efficiency, and boost performance in your
remote office with Dell PowerEdge VRTX
Installing SQL Server 2008 R2 on the legacy machine
1. Open the console for the VM or connect to the VM with RDP.
2. Mount the installation ISO to the VM.
3. Click Run SETUP.EXE. If Autoplay does not begin the installation, navigate to the SQL Server 2008 R2 DVD, and
double-click.
4. If the installer prompts you with a .NET installation prompt, click Yes to enable the .NET Framework Core role.
5. In the left pane, click Installation.
6. Click New SQL Server stand-alone installation or add features to an existing installation.
7. At the Setup Support Rules screen, wait for the rule check to complete. If there are no failures or relevant
warnings, click OK.
8. Select the Specify a free edition and select Evaluation from the drop-down menu. Click Next.
9. Click the checkbox to accept the license terms, and click Next.
10. If no failures are displayed after the setup support files are installed, click Next.
11. At the Setup Role screen, choose SQL Server Feature Installation.
12. At the Feature Selection screen, select Database Engine Services, Full-Text and Semantic Extractions for Search,
Client Tools Connectivity, Client Tools Backwards Compatibility, Management Tools – Basic, and Management
Tools – Complete. Click Next.
13. At the Installation Rules screen, click Next after the check completes.
14. At the Instance configuration screen, leave the default selection of default instance, and click Next.
15. At the Disk Space Requirements screen, click Next.
16. At the Server Configuration screen, check that NT AUTHORITYSYSTEM is selected for SQL Server Agent and SQL
Server Database Engine. Click Next.
17. Assuming there are no failures, click Next.
18. At the Database Engine Configuration screen, select Mixed Mode.
19. Enter and confirm a password for the system administrator account.
20. Click Add Current user. This may take several seconds.
21. Click the Data Directories tab and enter the appropriate drive and folders for database and logs.
22. Click Next.
23. At the Error and usage reporting screen, click Next.
24. At the Installation Configuration Rules screen, check that there are no failures or relevant warnings, and click
Next.
25. At the Ready to Install screen, click Install.
26. After installation completes, click Close.
27. Create a SQL Server login for the ds2user (see the next section for the specific script to use).
28. Copy the pre-created DVD Store backup to the specified backup volume.
29. Download and install any available updates for Microsoft SQL Server 2008 R2.
A Principled Technologies test report 21Save space, increase efficiency, and boost performance in your
remote office with Dell PowerEdge VRTX
CONFIGURING THE DATABASE
Data generation overview
We generated the data using the Install.pl script included with DVD Store version 2.1 (DS2), providing the
parameters for our 10GB database size and the database platform on which we ran: Microsoft SQL Server. We ran the
Install.pl script on a utility system running Linux. The database schema was also generated by the Install.pl script.
After processing the data generation, we transferred the data files and schema creation files to a Windows-
based system running SQL Server 2012. We built the 10GB database in SQL Server 2012, and then performed a full
backup, storing the backup file on the C: drive for quick access. We used that backup file to restore the server between
test runs.
The only modification we made to the schema creation scripts were the specified file sizes for our database. We
set the file sizes higher than necessary to ensure that no file-growth activity would affect the outputs of the test. Besides
this file size modification, the database schema was created and loaded according to the DVD Store documentation.
Specifically, we followed the steps below:
1. We generated the data and created the database and file structure using database creation scripts in the DS2
download. We made size modifications specific to our 10GB database and the appropriate changes to drive
letters.
2. We transferred the files from our Linux data generation system to a Windows system running SQL Server.
3. We created database tables, stored procedures, and objects using the provided DVD Store scripts.
4. We set the database recovery model to bulk-logged to prevent excess logging.
5. We loaded the data we generated into the database. For data loading, we used the import wizard in SQL Server
Management Studio. Where necessary, we retained options from the original scripts, such as Enable Identity
Insert.
6. We created indices, full-text catalogs, primary keys, and foreign keys using the database-creation scripts.
7. We updated statistics on each table according to database-creation scripts, which sample 18 percent of the
table data.
8. On the SQL Server instance, we created a ds2user SQL Server login using the following Transact SQL (TSQL)
script:
USE [master]
GO
CREATE LOGIN [ds2user] WITH PASSWORD=N’’,
DEFAULT_DATABASE=[master],
DEFAULT_LANGUAGE=[us_english],
CHECK_EXPIRATION=OFF,
CHECK_POLICY=OFF
GO
9. We set the database recovery model back to full.
10. We created the necessary full text index using SQL Server Management Studio.
11. We created a database user and mapped this user to the SQL Server login.
12. We then performed a full backup of the database. This backup allowed us to restore the databases to a pristine
state relatively quickly between tests.
A Principled Technologies test report 22Save space, increase efficiency, and boost performance in your
remote office with Dell PowerEdge VRTX
Figure 5 shows our initial file size modifications.
Logical name Filegroup Initial size (MB)
Database files
primary PRIMARY 3.25
cust1 DS_CUST_FG 5,767
cust2 DS_CUST_FG 5,767
ind1 DS_IND_FG 2,621
ind2 DS_IND_FG 2,621
ds_misc DS_MISC_FG 2,621
orders1 DS_ORDERS 2,621
orders2 DS_ORDERS 2,621
Log files
ds_log N/A 20,480
Figure 5: Our initial file size modifications.
RUNNING THE TEST
Test start and run times
We ran all workloads concurrently in order to start and record all performance counters for this report. The
specific testing parameters we used are included in the setup section, and specifics for launching these tests are
described below.
About running the DVD Store tests
We created a series of batch files, SQL scripts, and shell scripts to automate the complete test cycle. DVD Store
outputs an orders-per-minute metric, which is a running average calculated through the test. In this report, we report
the last OPM reported by each client/target pair.
Each complete test cycle consisted of the general steps listed below.
1. Clean up prior outputs from the target system and the client driver system.
2. Drop the database from the target.
3. Restore the database on the target.
4. Shut down the target.
5. Reboot the host and client system.
6. Wait for a ping response from the server under test (the hypervisor system), the client system, and the target.
7. Let the test server idle for 20 minutes.
8. Start the DVD Store driver on the client.
We used the following DVD Store parameters for testing:
ds2sqlserverdriver.exe --target=<target_IP> --ramp_rate=10 --
run_time=30 --n_threads=12 --db_size=10GB --detailed_view=Y --
warmup_time=15
A Principled Technologies test report 23Save space, increase efficiency, and boost performance in your
remote office with Dell PowerEdge VRTX
ABOUT PRINCIPLED TECHNOLOGIES
Principled Technologies, Inc.
1007 Slater Road, Suite 300
Durham, NC, 27703
www.principledtechnologies.com
We provide industry-leading technology assessment and fact-based
marketing services. We bring to every assignment extensive experience
with and expertise in all aspects of technology testing and analysis, from
researching new technologies, to developing new methodologies, to
testing with existing and new tools.
When the assessment is complete, we know how to present the results to
a broad range of target audiences. We provide our clients with the
materials they need, from market-focused data to use in their own
collateral to custom sales aids, such as test reports, performance
assessments, and white papers. Every document reflects the results of
our trusted independent analysis.
We provide customized services that focus on our clients’ individual
requirements. Whether the technology involves hardware, software, Web
sites, or services, we offer the experience, expertise, and tools to help our
clients assess how it will fare against its competition, its performance, its
market readiness, and its quality and reliability.
Our founders, Mark L. Van Name and Bill Catchings, have worked
together in technology assessment for over 20 years. As journalists, they
published over a thousand articles on a wide array of technology subjects.
They created and led the Ziff-Davis Benchmark Operation, which
developed such industry-standard benchmarks as Ziff Davis Media’s
Winstone and WebBench. They founded and led eTesting Labs, and after
the acquisition of that company by Lionbridge Technologies were the
head and CTO of VeriTest.
Principled Technologies is a registered trademark of Principled Technologies, Inc.
All other product names are the trademarks of their respective owners.
Disclaimer of Warranties; Limitation of Liability:
PRINCIPLED TECHNOLOGIES, INC. HAS MADE REASONABLE EFFORTS TO ENSURE THE ACCURACY AND VALIDITY OF ITS TESTING, HOWEVER,
PRINCIPLED TECHNOLOGIES, INC. SPECIFICALLY DISCLAIMS ANY WARRANTY, EXPRESSED OR IMPLIED, RELATING TO THE TEST RESULTS AND
ANALYSIS, THEIR ACCURACY, COMPLETENESS OR QUALITY, INCLUDING ANY IMPLIED WARRANTY OF FITNESS FOR ANY PARTICULAR PURPOSE.
ALL PERSONS OR ENTITIES RELYING ON THE RESULTS OF ANY TESTING DO SO AT THEIR OWN RISK, AND AGREE THAT PRINCIPLED
TECHNOLOGIES, INC., ITS EMPLOYEES AND ITS SUBCONTRACTORS SHALL HAVE NO LIABILITY WHATSOEVER FROM ANY CLAIM OF LOSS OR
DAMAGE ON ACCOUNT OF ANY ALLEGED ERROR OR DEFECT IN ANY TESTING PROCEDURE OR RESULT.
IN NO EVENT SHALL PRINCIPLED TECHNOLOGIES, INC. BE LIABLE FOR INDIRECT, SPECIAL, INCIDENTAL, OR CONSEQUENTIAL DAMAGES IN
CONNECTION WITH ITS TESTING, EVEN IF ADVISED OF THE POSSIBILITY OF SUCH DAMAGES. IN NO EVENT SHALL PRINCIPLED TECHNOLOGIES,
INC.’S LIABILITY, INCLUDING FOR DIRECT DAMAGES, EXCEED THE AMOUNTS PAID IN CONNECTION WITH PRINCIPLED TECHNOLOGIES, INC.’S
TESTING. CUSTOMER’S SOLE AND EXCLUSIVE REMEDIES ARE AS SET FORTH HEREIN.

Contenu connexe

Tendances

Performance per dollar comparison: Dell PowerEdge R715 vs. HP ProLiant DL380p...
Performance per dollar comparison: Dell PowerEdge R715 vs. HP ProLiant DL380p...Performance per dollar comparison: Dell PowerEdge R715 vs. HP ProLiant DL380p...
Performance per dollar comparison: Dell PowerEdge R715 vs. HP ProLiant DL380p...Principled Technologies
 
VDI performance comparison: Dell PowerEdge FX2 and FC430 servers with VMware ...
VDI performance comparison: Dell PowerEdge FX2 and FC430 servers with VMware ...VDI performance comparison: Dell PowerEdge FX2 and FC430 servers with VMware ...
VDI performance comparison: Dell PowerEdge FX2 and FC430 servers with VMware ...Principled Technologies
 
Converged architecture advantages: Dell PowerEdge FX2s and FC830 servers vs. ...
Converged architecture advantages: Dell PowerEdge FX2s and FC830 servers vs. ...Converged architecture advantages: Dell PowerEdge FX2s and FC830 servers vs. ...
Converged architecture advantages: Dell PowerEdge FX2s and FC830 servers vs. ...Principled Technologies
 
Workstation heat and power usage: Lenovo ThinkStation P500 vs. HP Z440 Workst...
Workstation heat and power usage: Lenovo ThinkStation P500 vs. HP Z440 Workst...Workstation heat and power usage: Lenovo ThinkStation P500 vs. HP Z440 Workst...
Workstation heat and power usage: Lenovo ThinkStation P500 vs. HP Z440 Workst...Principled Technologies
 
Consolidating older database servers onto Dell PowerEdge FX2 with FC830 serve...
Consolidating older database servers onto Dell PowerEdge FX2 with FC830 serve...Consolidating older database servers onto Dell PowerEdge FX2 with FC830 serve...
Consolidating older database servers onto Dell PowerEdge FX2 with FC830 serve...Principled Technologies
 
Webinář: Provozujte datacentrum v kanceláři (Dell VRTX) / 5.9.2013
Webinář: Provozujte datacentrum v kanceláři (Dell VRTX) / 5.9.2013Webinář: Provozujte datacentrum v kanceláři (Dell VRTX) / 5.9.2013
Webinář: Provozujte datacentrum v kanceláři (Dell VRTX) / 5.9.2013Jaroslav Prodelal
 
Increasing performance with the Dell PowerEdge FX2 and VMware Virtual SAN
Increasing performance with the Dell PowerEdge FX2 and VMware Virtual SANIncreasing performance with the Dell PowerEdge FX2 and VMware Virtual SAN
Increasing performance with the Dell PowerEdge FX2 and VMware Virtual SANPrincipled Technologies
 
Increased database performance and reduced costs with Dell PowerEdge FX2 & VM...
Increased database performance and reduced costs with Dell PowerEdge FX2 & VM...Increased database performance and reduced costs with Dell PowerEdge FX2 & VM...
Increased database performance and reduced costs with Dell PowerEdge FX2 & VM...Principled Technologies
 
Virtualize with Confidence
Virtualize with ConfidenceVirtualize with Confidence
Virtualize with ConfidenceNetWize
 
Consolidating Oracle database servers onto Dell PowerEdge R920 running Oracle...
Consolidating Oracle database servers onto Dell PowerEdge R920 running Oracle...Consolidating Oracle database servers onto Dell PowerEdge R920 running Oracle...
Consolidating Oracle database servers onto Dell PowerEdge R920 running Oracle...Principled Technologies
 
Dell PowerEdge R820 and R910 servers: Performance and reliability
Dell PowerEdge R820 and R910 servers: Performance and reliabilityDell PowerEdge R820 and R910 servers: Performance and reliability
Dell PowerEdge R820 and R910 servers: Performance and reliabilityPrincipled Technologies
 
A Dell Latitude 7420 laptop powered by a four-core Intel Core i7-1185G7 vPro ...
A Dell Latitude 7420 laptop powered by a four-core Intel Core i7-1185G7 vPro ...A Dell Latitude 7420 laptop powered by a four-core Intel Core i7-1185G7 vPro ...
A Dell Latitude 7420 laptop powered by a four-core Intel Core i7-1185G7 vPro ...Principled Technologies
 
Consolidating Oracle database servers onto Dell PowerEdge R920 running Oracle VM
Consolidating Oracle database servers onto Dell PowerEdge R920 running Oracle VMConsolidating Oracle database servers onto Dell PowerEdge R920 running Oracle VM
Consolidating Oracle database servers onto Dell PowerEdge R920 running Oracle VMPrincipled Technologies
 
A Dell Latitude 5420 laptop powered by a four-core Intel Core i5-1145G7 vPro ...
A Dell Latitude 5420 laptop powered by a four-core Intel Core i5-1145G7 vPro ...A Dell Latitude 5420 laptop powered by a four-core Intel Core i5-1145G7 vPro ...
A Dell Latitude 5420 laptop powered by a four-core Intel Core i5-1145G7 vPro ...Principled Technologies
 
Consolidate and upgrade to save up to $172K: Dell PowerEdge R620 and Microso...
Consolidate and upgrade to save up to $172K:  Dell PowerEdge R620 and Microso...Consolidate and upgrade to save up to $172K:  Dell PowerEdge R620 and Microso...
Consolidate and upgrade to save up to $172K: Dell PowerEdge R620 and Microso...Principled Technologies
 
Back up deduplicated data in less time with the Dell DR6000 Disk Backup Appli...
Back up deduplicated data in less time with the Dell DR6000 Disk Backup Appli...Back up deduplicated data in less time with the Dell DR6000 Disk Backup Appli...
Back up deduplicated data in less time with the Dell DR6000 Disk Backup Appli...Principled Technologies
 
Power efficiency and cost: AMD Opteron 6300 series processor-based Dell Power...
Power efficiency and cost: AMD Opteron 6300 series processor-based Dell Power...Power efficiency and cost: AMD Opteron 6300 series processor-based Dell Power...
Power efficiency and cost: AMD Opteron 6300 series processor-based Dell Power...Principled Technologies
 
Dell PowerEdge M820 blades: Balancing performance, density, and high availabi...
Dell PowerEdge M820 blades: Balancing performance, density, and high availabi...Dell PowerEdge M820 blades: Balancing performance, density, and high availabi...
Dell PowerEdge M820 blades: Balancing performance, density, and high availabi...Principled Technologies
 

Tendances (20)

Performance per dollar comparison: Dell PowerEdge R715 vs. HP ProLiant DL380p...
Performance per dollar comparison: Dell PowerEdge R715 vs. HP ProLiant DL380p...Performance per dollar comparison: Dell PowerEdge R715 vs. HP ProLiant DL380p...
Performance per dollar comparison: Dell PowerEdge R715 vs. HP ProLiant DL380p...
 
VDI performance comparison: Dell PowerEdge FX2 and FC430 servers with VMware ...
VDI performance comparison: Dell PowerEdge FX2 and FC430 servers with VMware ...VDI performance comparison: Dell PowerEdge FX2 and FC430 servers with VMware ...
VDI performance comparison: Dell PowerEdge FX2 and FC430 servers with VMware ...
 
VDI performance comparison: Dell PowerEdge FX2 and FC430 servers with VMware ...
VDI performance comparison: Dell PowerEdge FX2 and FC430 servers with VMware ...VDI performance comparison: Dell PowerEdge FX2 and FC430 servers with VMware ...
VDI performance comparison: Dell PowerEdge FX2 and FC430 servers with VMware ...
 
Converged architecture advantages: Dell PowerEdge FX2s and FC830 servers vs. ...
Converged architecture advantages: Dell PowerEdge FX2s and FC830 servers vs. ...Converged architecture advantages: Dell PowerEdge FX2s and FC830 servers vs. ...
Converged architecture advantages: Dell PowerEdge FX2s and FC830 servers vs. ...
 
Converged architecture advantages: Dell PowerEdge FX2s and FC830 servers vs. ...
Converged architecture advantages: Dell PowerEdge FX2s and FC830 servers vs. ...Converged architecture advantages: Dell PowerEdge FX2s and FC830 servers vs. ...
Converged architecture advantages: Dell PowerEdge FX2s and FC830 servers vs. ...
 
Workstation heat and power usage: Lenovo ThinkStation P500 vs. HP Z440 Workst...
Workstation heat and power usage: Lenovo ThinkStation P500 vs. HP Z440 Workst...Workstation heat and power usage: Lenovo ThinkStation P500 vs. HP Z440 Workst...
Workstation heat and power usage: Lenovo ThinkStation P500 vs. HP Z440 Workst...
 
Consolidating older database servers onto Dell PowerEdge FX2 with FC830 serve...
Consolidating older database servers onto Dell PowerEdge FX2 with FC830 serve...Consolidating older database servers onto Dell PowerEdge FX2 with FC830 serve...
Consolidating older database servers onto Dell PowerEdge FX2 with FC830 serve...
 
Webinář: Provozujte datacentrum v kanceláři (Dell VRTX) / 5.9.2013
Webinář: Provozujte datacentrum v kanceláři (Dell VRTX) / 5.9.2013Webinář: Provozujte datacentrum v kanceláři (Dell VRTX) / 5.9.2013
Webinář: Provozujte datacentrum v kanceláři (Dell VRTX) / 5.9.2013
 
Increasing performance with the Dell PowerEdge FX2 and VMware Virtual SAN
Increasing performance with the Dell PowerEdge FX2 and VMware Virtual SANIncreasing performance with the Dell PowerEdge FX2 and VMware Virtual SAN
Increasing performance with the Dell PowerEdge FX2 and VMware Virtual SAN
 
Increased database performance and reduced costs with Dell PowerEdge FX2 & VM...
Increased database performance and reduced costs with Dell PowerEdge FX2 & VM...Increased database performance and reduced costs with Dell PowerEdge FX2 & VM...
Increased database performance and reduced costs with Dell PowerEdge FX2 & VM...
 
Virtualize with Confidence
Virtualize with ConfidenceVirtualize with Confidence
Virtualize with Confidence
 
Consolidating Oracle database servers onto Dell PowerEdge R920 running Oracle...
Consolidating Oracle database servers onto Dell PowerEdge R920 running Oracle...Consolidating Oracle database servers onto Dell PowerEdge R920 running Oracle...
Consolidating Oracle database servers onto Dell PowerEdge R920 running Oracle...
 
Dell PowerEdge R820 and R910 servers: Performance and reliability
Dell PowerEdge R820 and R910 servers: Performance and reliabilityDell PowerEdge R820 and R910 servers: Performance and reliability
Dell PowerEdge R820 and R910 servers: Performance and reliability
 
A Dell Latitude 7420 laptop powered by a four-core Intel Core i7-1185G7 vPro ...
A Dell Latitude 7420 laptop powered by a four-core Intel Core i7-1185G7 vPro ...A Dell Latitude 7420 laptop powered by a four-core Intel Core i7-1185G7 vPro ...
A Dell Latitude 7420 laptop powered by a four-core Intel Core i7-1185G7 vPro ...
 
Consolidating Oracle database servers onto Dell PowerEdge R920 running Oracle VM
Consolidating Oracle database servers onto Dell PowerEdge R920 running Oracle VMConsolidating Oracle database servers onto Dell PowerEdge R920 running Oracle VM
Consolidating Oracle database servers onto Dell PowerEdge R920 running Oracle VM
 
A Dell Latitude 5420 laptop powered by a four-core Intel Core i5-1145G7 vPro ...
A Dell Latitude 5420 laptop powered by a four-core Intel Core i5-1145G7 vPro ...A Dell Latitude 5420 laptop powered by a four-core Intel Core i5-1145G7 vPro ...
A Dell Latitude 5420 laptop powered by a four-core Intel Core i5-1145G7 vPro ...
 
Consolidate and upgrade to save up to $172K: Dell PowerEdge R620 and Microso...
Consolidate and upgrade to save up to $172K:  Dell PowerEdge R620 and Microso...Consolidate and upgrade to save up to $172K:  Dell PowerEdge R620 and Microso...
Consolidate and upgrade to save up to $172K: Dell PowerEdge R620 and Microso...
 
Back up deduplicated data in less time with the Dell DR6000 Disk Backup Appli...
Back up deduplicated data in less time with the Dell DR6000 Disk Backup Appli...Back up deduplicated data in less time with the Dell DR6000 Disk Backup Appli...
Back up deduplicated data in less time with the Dell DR6000 Disk Backup Appli...
 
Power efficiency and cost: AMD Opteron 6300 series processor-based Dell Power...
Power efficiency and cost: AMD Opteron 6300 series processor-based Dell Power...Power efficiency and cost: AMD Opteron 6300 series processor-based Dell Power...
Power efficiency and cost: AMD Opteron 6300 series processor-based Dell Power...
 
Dell PowerEdge M820 blades: Balancing performance, density, and high availabi...
Dell PowerEdge M820 blades: Balancing performance, density, and high availabi...Dell PowerEdge M820 blades: Balancing performance, density, and high availabi...
Dell PowerEdge M820 blades: Balancing performance, density, and high availabi...
 

Similaire à Save space, increase efficiency, and boost performance in your remote office with Dell PowerEdge VRTX

Efficient and versatile hardware management with Dell PowerEdge VRTX
Efficient and versatile hardware management with Dell PowerEdge VRTXEfficient and versatile hardware management with Dell PowerEdge VRTX
Efficient and versatile hardware management with Dell PowerEdge VRTXPrincipled Technologies
 
Consolidating Oracle database servers on the Dell PowerEdge R930
Consolidating Oracle database servers on the Dell PowerEdge R930Consolidating Oracle database servers on the Dell PowerEdge R930
Consolidating Oracle database servers on the Dell PowerEdge R930Principled Technologies
 
Configuring a highly available Microsoft Exchange Server 2013 environment on ...
Configuring a highly available Microsoft Exchange Server 2013 environment on ...Configuring a highly available Microsoft Exchange Server 2013 environment on ...
Configuring a highly available Microsoft Exchange Server 2013 environment on ...Principled Technologies
 
A single-socket Dell EMC PowerEdge R7515 solution delivered better value on a...
A single-socket Dell EMC PowerEdge R7515 solution delivered better value on a...A single-socket Dell EMC PowerEdge R7515 solution delivered better value on a...
A single-socket Dell EMC PowerEdge R7515 solution delivered better value on a...Principled Technologies
 
Handle more Oracle transactions and support more VMs with the Dell PowerEdge ...
Handle more Oracle transactions and support more VMs with the Dell PowerEdge ...Handle more Oracle transactions and support more VMs with the Dell PowerEdge ...
Handle more Oracle transactions and support more VMs with the Dell PowerEdge ...Principled Technologies
 
SQL Server 2016 database performance on the Dell PowerEdge R830 QLogic 16G Fi...
SQL Server 2016 database performance on the Dell PowerEdge R830 QLogic 16G Fi...SQL Server 2016 database performance on the Dell PowerEdge R830 QLogic 16G Fi...
SQL Server 2016 database performance on the Dell PowerEdge R830 QLogic 16G Fi...Principled Technologies
 
Consolidating Web servers with the Dell PowerEdge FX2 enclosure and PowerEdge...
Consolidating Web servers with the Dell PowerEdge FX2 enclosure and PowerEdge...Consolidating Web servers with the Dell PowerEdge FX2 enclosure and PowerEdge...
Consolidating Web servers with the Dell PowerEdge FX2 enclosure and PowerEdge...Principled Technologies
 
Maximizing Oracle Database performance with Intel SSD DC P3600 Series NVMe SS...
Maximizing Oracle Database performance with Intel SSD DC P3600 Series NVMe SS...Maximizing Oracle Database performance with Intel SSD DC P3600 Series NVMe SS...
Maximizing Oracle Database performance with Intel SSD DC P3600 Series NVMe SS...Principled Technologies
 
Boosting virtualization performance with Intel SSD DC Series P3600 NVMe SSDs ...
Boosting virtualization performance with Intel SSD DC Series P3600 NVMe SSDs ...Boosting virtualization performance with Intel SSD DC Series P3600 NVMe SSDs ...
Boosting virtualization performance with Intel SSD DC Series P3600 NVMe SSDs ...Principled Technologies
 
Dell PowerEdge Porfolio 2013
Dell PowerEdge Porfolio 2013Dell PowerEdge Porfolio 2013
Dell PowerEdge Porfolio 2013Anh Tuan
 
Dell PowerEdge M420 and Oracle Database 11g R2: A Reference Architecture
Dell PowerEdge M420 and Oracle Database 11g R2: A Reference ArchitectureDell PowerEdge M420 and Oracle Database 11g R2: A Reference Architecture
Dell PowerEdge M420 and Oracle Database 11g R2: A Reference ArchitecturePrincipled Technologies
 
Boosting performance with the Dell Acceleration Appliance for Databases
Boosting performance with the Dell Acceleration Appliance for DatabasesBoosting performance with the Dell Acceleration Appliance for Databases
Boosting performance with the Dell Acceleration Appliance for DatabasesPrincipled Technologies
 
Update your private cloud with 14th generation Dell EMC PowerEdge FC640 serve...
Update your private cloud with 14th generation Dell EMC PowerEdge FC640 serve...Update your private cloud with 14th generation Dell EMC PowerEdge FC640 serve...
Update your private cloud with 14th generation Dell EMC PowerEdge FC640 serve...Principled Technologies
 
File server performance on the Intel processor-powered Dell PowerEdge R730xd ...
File server performance on the Intel processor-powered Dell PowerEdge R730xd ...File server performance on the Intel processor-powered Dell PowerEdge R730xd ...
File server performance on the Intel processor-powered Dell PowerEdge R730xd ...Principled Technologies
 
Run more applications without expanding your datacenter
Run more applications without expanding your datacenterRun more applications without expanding your datacenter
Run more applications without expanding your datacenterPrincipled Technologies
 
DELL PS article - Hariharan Ramalingam & Nick Jervis
DELL PS article - Hariharan Ramalingam & Nick JervisDELL PS article - Hariharan Ramalingam & Nick Jervis
DELL PS article - Hariharan Ramalingam & Nick JervisHariharan Ramalingam
 
Elevate your e-commerce business by upgrading to the Dell EMC PowerEdge R740x...
Elevate your e-commerce business by upgrading to the Dell EMC PowerEdge R740x...Elevate your e-commerce business by upgrading to the Dell EMC PowerEdge R740x...
Elevate your e-commerce business by upgrading to the Dell EMC PowerEdge R740x...Principled Technologies
 
OLTP with Dell hybrid arrays: Comparing the EqualLogic PS6210XS with the Equa...
OLTP with Dell hybrid arrays: Comparing the EqualLogic PS6210XS with the Equa...OLTP with Dell hybrid arrays: Comparing the EqualLogic PS6210XS with the Equa...
OLTP with Dell hybrid arrays: Comparing the EqualLogic PS6210XS with the Equa...Principled Technologies
 
Dell_R730xd_RedHat_Ceph_Performance_SizingGuide_WhitePaper.pdf
Dell_R730xd_RedHat_Ceph_Performance_SizingGuide_WhitePaper.pdfDell_R730xd_RedHat_Ceph_Performance_SizingGuide_WhitePaper.pdf
Dell_R730xd_RedHat_Ceph_Performance_SizingGuide_WhitePaper.pdfhellobank1
 

Similaire à Save space, increase efficiency, and boost performance in your remote office with Dell PowerEdge VRTX (19)

Efficient and versatile hardware management with Dell PowerEdge VRTX
Efficient and versatile hardware management with Dell PowerEdge VRTXEfficient and versatile hardware management with Dell PowerEdge VRTX
Efficient and versatile hardware management with Dell PowerEdge VRTX
 
Consolidating Oracle database servers on the Dell PowerEdge R930
Consolidating Oracle database servers on the Dell PowerEdge R930Consolidating Oracle database servers on the Dell PowerEdge R930
Consolidating Oracle database servers on the Dell PowerEdge R930
 
Configuring a highly available Microsoft Exchange Server 2013 environment on ...
Configuring a highly available Microsoft Exchange Server 2013 environment on ...Configuring a highly available Microsoft Exchange Server 2013 environment on ...
Configuring a highly available Microsoft Exchange Server 2013 environment on ...
 
A single-socket Dell EMC PowerEdge R7515 solution delivered better value on a...
A single-socket Dell EMC PowerEdge R7515 solution delivered better value on a...A single-socket Dell EMC PowerEdge R7515 solution delivered better value on a...
A single-socket Dell EMC PowerEdge R7515 solution delivered better value on a...
 
Handle more Oracle transactions and support more VMs with the Dell PowerEdge ...
Handle more Oracle transactions and support more VMs with the Dell PowerEdge ...Handle more Oracle transactions and support more VMs with the Dell PowerEdge ...
Handle more Oracle transactions and support more VMs with the Dell PowerEdge ...
 
SQL Server 2016 database performance on the Dell PowerEdge R830 QLogic 16G Fi...
SQL Server 2016 database performance on the Dell PowerEdge R830 QLogic 16G Fi...SQL Server 2016 database performance on the Dell PowerEdge R830 QLogic 16G Fi...
SQL Server 2016 database performance on the Dell PowerEdge R830 QLogic 16G Fi...
 
Consolidating Web servers with the Dell PowerEdge FX2 enclosure and PowerEdge...
Consolidating Web servers with the Dell PowerEdge FX2 enclosure and PowerEdge...Consolidating Web servers with the Dell PowerEdge FX2 enclosure and PowerEdge...
Consolidating Web servers with the Dell PowerEdge FX2 enclosure and PowerEdge...
 
Maximizing Oracle Database performance with Intel SSD DC P3600 Series NVMe SS...
Maximizing Oracle Database performance with Intel SSD DC P3600 Series NVMe SS...Maximizing Oracle Database performance with Intel SSD DC P3600 Series NVMe SS...
Maximizing Oracle Database performance with Intel SSD DC P3600 Series NVMe SS...
 
Boosting virtualization performance with Intel SSD DC Series P3600 NVMe SSDs ...
Boosting virtualization performance with Intel SSD DC Series P3600 NVMe SSDs ...Boosting virtualization performance with Intel SSD DC Series P3600 NVMe SSDs ...
Boosting virtualization performance with Intel SSD DC Series P3600 NVMe SSDs ...
 
Dell PowerEdge Porfolio 2013
Dell PowerEdge Porfolio 2013Dell PowerEdge Porfolio 2013
Dell PowerEdge Porfolio 2013
 
Dell PowerEdge M420 and Oracle Database 11g R2: A Reference Architecture
Dell PowerEdge M420 and Oracle Database 11g R2: A Reference ArchitectureDell PowerEdge M420 and Oracle Database 11g R2: A Reference Architecture
Dell PowerEdge M420 and Oracle Database 11g R2: A Reference Architecture
 
Boosting performance with the Dell Acceleration Appliance for Databases
Boosting performance with the Dell Acceleration Appliance for DatabasesBoosting performance with the Dell Acceleration Appliance for Databases
Boosting performance with the Dell Acceleration Appliance for Databases
 
Update your private cloud with 14th generation Dell EMC PowerEdge FC640 serve...
Update your private cloud with 14th generation Dell EMC PowerEdge FC640 serve...Update your private cloud with 14th generation Dell EMC PowerEdge FC640 serve...
Update your private cloud with 14th generation Dell EMC PowerEdge FC640 serve...
 
File server performance on the Intel processor-powered Dell PowerEdge R730xd ...
File server performance on the Intel processor-powered Dell PowerEdge R730xd ...File server performance on the Intel processor-powered Dell PowerEdge R730xd ...
File server performance on the Intel processor-powered Dell PowerEdge R730xd ...
 
Run more applications without expanding your datacenter
Run more applications without expanding your datacenterRun more applications without expanding your datacenter
Run more applications without expanding your datacenter
 
DELL PS article - Hariharan Ramalingam & Nick Jervis
DELL PS article - Hariharan Ramalingam & Nick JervisDELL PS article - Hariharan Ramalingam & Nick Jervis
DELL PS article - Hariharan Ramalingam & Nick Jervis
 
Elevate your e-commerce business by upgrading to the Dell EMC PowerEdge R740x...
Elevate your e-commerce business by upgrading to the Dell EMC PowerEdge R740x...Elevate your e-commerce business by upgrading to the Dell EMC PowerEdge R740x...
Elevate your e-commerce business by upgrading to the Dell EMC PowerEdge R740x...
 
OLTP with Dell hybrid arrays: Comparing the EqualLogic PS6210XS with the Equa...
OLTP with Dell hybrid arrays: Comparing the EqualLogic PS6210XS with the Equa...OLTP with Dell hybrid arrays: Comparing the EqualLogic PS6210XS with the Equa...
OLTP with Dell hybrid arrays: Comparing the EqualLogic PS6210XS with the Equa...
 
Dell_R730xd_RedHat_Ceph_Performance_SizingGuide_WhitePaper.pdf
Dell_R730xd_RedHat_Ceph_Performance_SizingGuide_WhitePaper.pdfDell_R730xd_RedHat_Ceph_Performance_SizingGuide_WhitePaper.pdf
Dell_R730xd_RedHat_Ceph_Performance_SizingGuide_WhitePaper.pdf
 

Plus de Principled Technologies

Get in and stay in the productivity zone with the HP Z2 G9 Tower Workstation
Get in and stay in the productivity zone with the HP Z2 G9 Tower WorkstationGet in and stay in the productivity zone with the HP Z2 G9 Tower Workstation
Get in and stay in the productivity zone with the HP Z2 G9 Tower WorkstationPrincipled Technologies
 
Open up new possibilities with higher transactional database performance from...
Open up new possibilities with higher transactional database performance from...Open up new possibilities with higher transactional database performance from...
Open up new possibilities with higher transactional database performance from...Principled Technologies
 
Improving database performance and value with an easy migration to Azure Data...
Improving database performance and value with an easy migration to Azure Data...Improving database performance and value with an easy migration to Azure Data...
Improving database performance and value with an easy migration to Azure Data...Principled Technologies
 
Realize better value and performance migrating from Azure Database for Postgr...
Realize better value and performance migrating from Azure Database for Postgr...Realize better value and performance migrating from Azure Database for Postgr...
Realize better value and performance migrating from Azure Database for Postgr...Principled Technologies
 
Set up students and teachers to excel now and in the future with Intel proces...
Set up students and teachers to excel now and in the future with Intel proces...Set up students and teachers to excel now and in the future with Intel proces...
Set up students and teachers to excel now and in the future with Intel proces...Principled Technologies
 
Finding the path to AI success with the Dell AI portfolio - Summary
Finding the path to AI success with the Dell AI portfolio - SummaryFinding the path to AI success with the Dell AI portfolio - Summary
Finding the path to AI success with the Dell AI portfolio - SummaryPrincipled Technologies
 
Finding the path to AI success with the Dell AI portfolio
Finding the path to AI success with the Dell AI portfolioFinding the path to AI success with the Dell AI portfolio
Finding the path to AI success with the Dell AI portfolioPrincipled Technologies
 
Achieve strong performance and value on Azure SQL Database Hyperscale
Achieve strong performance and value on Azure SQL Database HyperscaleAchieve strong performance and value on Azure SQL Database Hyperscale
Achieve strong performance and value on Azure SQL Database HyperscalePrincipled Technologies
 
Improve backup and recovery outcomes by combining Dell APEX Data Storage Serv...
Improve backup and recovery outcomes by combining Dell APEX Data Storage Serv...Improve backup and recovery outcomes by combining Dell APEX Data Storage Serv...
Improve backup and recovery outcomes by combining Dell APEX Data Storage Serv...Principled Technologies
 
Utilizing Azure Cosmos DB for intelligent AI‑powered applications
Utilizing Azure Cosmos DB for intelligent AI‑powered applicationsUtilizing Azure Cosmos DB for intelligent AI‑powered applications
Utilizing Azure Cosmos DB for intelligent AI‑powered applicationsPrincipled Technologies
 
Build an Azure OpenAI application using your own enterprise data
Build an Azure OpenAI application using your own enterprise dataBuild an Azure OpenAI application using your own enterprise data
Build an Azure OpenAI application using your own enterprise dataPrincipled Technologies
 
Dell Chromebooks: Durable, easy to deploy, and easy to service
Dell Chromebooks: Durable, easy to deploy, and easy to serviceDell Chromebooks: Durable, easy to deploy, and easy to service
Dell Chromebooks: Durable, easy to deploy, and easy to servicePrincipled Technologies
 
Back up and restore data faster with a Dell PowerProtect Data Manager Applian...
Back up and restore data faster with a Dell PowerProtect Data Manager Applian...Back up and restore data faster with a Dell PowerProtect Data Manager Applian...
Back up and restore data faster with a Dell PowerProtect Data Manager Applian...Principled Technologies
 
Back up and restore data faster with a Dell PowerProtect Data Manager Appliance
Back up and restore data faster with a Dell PowerProtect Data Manager ApplianceBack up and restore data faster with a Dell PowerProtect Data Manager Appliance
Back up and restore data faster with a Dell PowerProtect Data Manager AppliancePrincipled Technologies
 
Meeting the challenges of AI workloads with the Dell AI portfolio - Summary
Meeting the challenges of AI workloads with the Dell AI portfolio - SummaryMeeting the challenges of AI workloads with the Dell AI portfolio - Summary
Meeting the challenges of AI workloads with the Dell AI portfolio - SummaryPrincipled Technologies
 
The Dell Latitude 5440 survived 30 drops and still functioned properly
The Dell Latitude 5440 survived 30 drops and still functioned properlyThe Dell Latitude 5440 survived 30 drops and still functioned properly
The Dell Latitude 5440 survived 30 drops and still functioned properlyPrincipled Technologies
 
Meeting the challenges of AI workloads with the Dell AI portfolio
Meeting the challenges of AI workloads with the Dell AI portfolioMeeting the challenges of AI workloads with the Dell AI portfolio
Meeting the challenges of AI workloads with the Dell AI portfolioPrincipled Technologies
 
A Dell PowerEdge MX environment using OpenManage Enterprise and OpenManage En...
A Dell PowerEdge MX environment using OpenManage Enterprise and OpenManage En...A Dell PowerEdge MX environment using OpenManage Enterprise and OpenManage En...
A Dell PowerEdge MX environment using OpenManage Enterprise and OpenManage En...Principled Technologies
 

Plus de Principled Technologies (20)

Get in and stay in the productivity zone with the HP Z2 G9 Tower Workstation
Get in and stay in the productivity zone with the HP Z2 G9 Tower WorkstationGet in and stay in the productivity zone with the HP Z2 G9 Tower Workstation
Get in and stay in the productivity zone with the HP Z2 G9 Tower Workstation
 
Open up new possibilities with higher transactional database performance from...
Open up new possibilities with higher transactional database performance from...Open up new possibilities with higher transactional database performance from...
Open up new possibilities with higher transactional database performance from...
 
Improving database performance and value with an easy migration to Azure Data...
Improving database performance and value with an easy migration to Azure Data...Improving database performance and value with an easy migration to Azure Data...
Improving database performance and value with an easy migration to Azure Data...
 
Realize better value and performance migrating from Azure Database for Postgr...
Realize better value and performance migrating from Azure Database for Postgr...Realize better value and performance migrating from Azure Database for Postgr...
Realize better value and performance migrating from Azure Database for Postgr...
 
Realize better value and performance migrating from Azure Database for Postgr...
Realize better value and performance migrating from Azure Database for Postgr...Realize better value and performance migrating from Azure Database for Postgr...
Realize better value and performance migrating from Azure Database for Postgr...
 
Set up students and teachers to excel now and in the future with Intel proces...
Set up students and teachers to excel now and in the future with Intel proces...Set up students and teachers to excel now and in the future with Intel proces...
Set up students and teachers to excel now and in the future with Intel proces...
 
Finding the path to AI success with the Dell AI portfolio - Summary
Finding the path to AI success with the Dell AI portfolio - SummaryFinding the path to AI success with the Dell AI portfolio - Summary
Finding the path to AI success with the Dell AI portfolio - Summary
 
Finding the path to AI success with the Dell AI portfolio
Finding the path to AI success with the Dell AI portfolioFinding the path to AI success with the Dell AI portfolio
Finding the path to AI success with the Dell AI portfolio
 
Achieve strong performance and value on Azure SQL Database Hyperscale
Achieve strong performance and value on Azure SQL Database HyperscaleAchieve strong performance and value on Azure SQL Database Hyperscale
Achieve strong performance and value on Azure SQL Database Hyperscale
 
Improve backup and recovery outcomes by combining Dell APEX Data Storage Serv...
Improve backup and recovery outcomes by combining Dell APEX Data Storage Serv...Improve backup and recovery outcomes by combining Dell APEX Data Storage Serv...
Improve backup and recovery outcomes by combining Dell APEX Data Storage Serv...
 
Improve backup and recovery outcomes by combining Dell APEX Data Storage Serv...
Improve backup and recovery outcomes by combining Dell APEX Data Storage Serv...Improve backup and recovery outcomes by combining Dell APEX Data Storage Serv...
Improve backup and recovery outcomes by combining Dell APEX Data Storage Serv...
 
Utilizing Azure Cosmos DB for intelligent AI‑powered applications
Utilizing Azure Cosmos DB for intelligent AI‑powered applicationsUtilizing Azure Cosmos DB for intelligent AI‑powered applications
Utilizing Azure Cosmos DB for intelligent AI‑powered applications
 
Build an Azure OpenAI application using your own enterprise data
Build an Azure OpenAI application using your own enterprise dataBuild an Azure OpenAI application using your own enterprise data
Build an Azure OpenAI application using your own enterprise data
 
Dell Chromebooks: Durable, easy to deploy, and easy to service
Dell Chromebooks: Durable, easy to deploy, and easy to serviceDell Chromebooks: Durable, easy to deploy, and easy to service
Dell Chromebooks: Durable, easy to deploy, and easy to service
 
Back up and restore data faster with a Dell PowerProtect Data Manager Applian...
Back up and restore data faster with a Dell PowerProtect Data Manager Applian...Back up and restore data faster with a Dell PowerProtect Data Manager Applian...
Back up and restore data faster with a Dell PowerProtect Data Manager Applian...
 
Back up and restore data faster with a Dell PowerProtect Data Manager Appliance
Back up and restore data faster with a Dell PowerProtect Data Manager ApplianceBack up and restore data faster with a Dell PowerProtect Data Manager Appliance
Back up and restore data faster with a Dell PowerProtect Data Manager Appliance
 
Meeting the challenges of AI workloads with the Dell AI portfolio - Summary
Meeting the challenges of AI workloads with the Dell AI portfolio - SummaryMeeting the challenges of AI workloads with the Dell AI portfolio - Summary
Meeting the challenges of AI workloads with the Dell AI portfolio - Summary
 
The Dell Latitude 5440 survived 30 drops and still functioned properly
The Dell Latitude 5440 survived 30 drops and still functioned properlyThe Dell Latitude 5440 survived 30 drops and still functioned properly
The Dell Latitude 5440 survived 30 drops and still functioned properly
 
Meeting the challenges of AI workloads with the Dell AI portfolio
Meeting the challenges of AI workloads with the Dell AI portfolioMeeting the challenges of AI workloads with the Dell AI portfolio
Meeting the challenges of AI workloads with the Dell AI portfolio
 
A Dell PowerEdge MX environment using OpenManage Enterprise and OpenManage En...
A Dell PowerEdge MX environment using OpenManage Enterprise and OpenManage En...A Dell PowerEdge MX environment using OpenManage Enterprise and OpenManage En...
A Dell PowerEdge MX environment using OpenManage Enterprise and OpenManage En...
 

Dernier

Generative Artificial Intelligence: How generative AI works.pdf
Generative Artificial Intelligence: How generative AI works.pdfGenerative Artificial Intelligence: How generative AI works.pdf
Generative Artificial Intelligence: How generative AI works.pdfIngrid Airi González
 
Infrared simulation and processing on Nvidia platforms
Infrared simulation and processing on Nvidia platformsInfrared simulation and processing on Nvidia platforms
Infrared simulation and processing on Nvidia platformsYoss Cohen
 
All These Sophisticated Attacks, Can We Really Detect Them - PDF
All These Sophisticated Attacks, Can We Really Detect Them - PDFAll These Sophisticated Attacks, Can We Really Detect Them - PDF
All These Sophisticated Attacks, Can We Really Detect Them - PDFMichael Gough
 
Unleashing Real-time Insights with ClickHouse_ Navigating the Landscape in 20...
Unleashing Real-time Insights with ClickHouse_ Navigating the Landscape in 20...Unleashing Real-time Insights with ClickHouse_ Navigating the Landscape in 20...
Unleashing Real-time Insights with ClickHouse_ Navigating the Landscape in 20...Alkin Tezuysal
 
React Native vs Ionic - The Best Mobile App Framework
React Native vs Ionic - The Best Mobile App FrameworkReact Native vs Ionic - The Best Mobile App Framework
React Native vs Ionic - The Best Mobile App FrameworkPixlogix Infotech
 
Microservices, Docker deploy and Microservices source code in C#
Microservices, Docker deploy and Microservices source code in C#Microservices, Docker deploy and Microservices source code in C#
Microservices, Docker deploy and Microservices source code in C#Karmanjay Verma
 
Microsoft 365 Copilot: How to boost your productivity with AI – Part one: Ado...
Microsoft 365 Copilot: How to boost your productivity with AI – Part one: Ado...Microsoft 365 Copilot: How to boost your productivity with AI – Part one: Ado...
Microsoft 365 Copilot: How to boost your productivity with AI – Part one: Ado...Nikki Chapple
 
UiPath Community: Communication Mining from Zero to Hero
UiPath Community: Communication Mining from Zero to HeroUiPath Community: Communication Mining from Zero to Hero
UiPath Community: Communication Mining from Zero to HeroUiPathCommunity
 
Emixa Mendix Meetup 11 April 2024 about Mendix Native development
Emixa Mendix Meetup 11 April 2024 about Mendix Native developmentEmixa Mendix Meetup 11 April 2024 about Mendix Native development
Emixa Mendix Meetup 11 April 2024 about Mendix Native developmentPim van der Noll
 
Genislab builds better products and faster go-to-market with Lean project man...
Genislab builds better products and faster go-to-market with Lean project man...Genislab builds better products and faster go-to-market with Lean project man...
Genislab builds better products and faster go-to-market with Lean project man...Farhan Tariq
 
A Framework for Development in the AI Age
A Framework for Development in the AI AgeA Framework for Development in the AI Age
A Framework for Development in the AI AgeCprime
 
Transcript: New from BookNet Canada for 2024: BNC SalesData and LibraryData -...
Transcript: New from BookNet Canada for 2024: BNC SalesData and LibraryData -...Transcript: New from BookNet Canada for 2024: BNC SalesData and LibraryData -...
Transcript: New from BookNet Canada for 2024: BNC SalesData and LibraryData -...BookNet Canada
 
Landscape Catalogue 2024 Australia-1.pdf
Landscape Catalogue 2024 Australia-1.pdfLandscape Catalogue 2024 Australia-1.pdf
Landscape Catalogue 2024 Australia-1.pdfAarwolf Industries LLC
 
Varsha Sewlal- Cyber Attacks on Critical Critical Infrastructure
Varsha Sewlal- Cyber Attacks on Critical Critical InfrastructureVarsha Sewlal- Cyber Attacks on Critical Critical Infrastructure
Varsha Sewlal- Cyber Attacks on Critical Critical Infrastructureitnewsafrica
 
A Journey Into the Emotions of Software Developers
A Journey Into the Emotions of Software DevelopersA Journey Into the Emotions of Software Developers
A Journey Into the Emotions of Software DevelopersNicole Novielli
 
How to Effectively Monitor SD-WAN and SASE Environments with ThousandEyes
How to Effectively Monitor SD-WAN and SASE Environments with ThousandEyesHow to Effectively Monitor SD-WAN and SASE Environments with ThousandEyes
How to Effectively Monitor SD-WAN and SASE Environments with ThousandEyesThousandEyes
 
Design pattern talk by Kaya Weers - 2024 (v2)
Design pattern talk by Kaya Weers - 2024 (v2)Design pattern talk by Kaya Weers - 2024 (v2)
Design pattern talk by Kaya Weers - 2024 (v2)Kaya Weers
 
Microsoft 365 Copilot: How to boost your productivity with AI – Part two: Dat...
Microsoft 365 Copilot: How to boost your productivity with AI – Part two: Dat...Microsoft 365 Copilot: How to boost your productivity with AI – Part two: Dat...
Microsoft 365 Copilot: How to boost your productivity with AI – Part two: Dat...Nikki Chapple
 
Modern Roaming for Notes and Nomad – Cheaper Faster Better Stronger
Modern Roaming for Notes and Nomad – Cheaper Faster Better StrongerModern Roaming for Notes and Nomad – Cheaper Faster Better Stronger
Modern Roaming for Notes and Nomad – Cheaper Faster Better Strongerpanagenda
 
JET Technology Labs White Paper for Virtualized Security and Encryption Techn...
JET Technology Labs White Paper for Virtualized Security and Encryption Techn...JET Technology Labs White Paper for Virtualized Security and Encryption Techn...
JET Technology Labs White Paper for Virtualized Security and Encryption Techn...amber724300
 

Dernier (20)

Generative Artificial Intelligence: How generative AI works.pdf
Generative Artificial Intelligence: How generative AI works.pdfGenerative Artificial Intelligence: How generative AI works.pdf
Generative Artificial Intelligence: How generative AI works.pdf
 
Infrared simulation and processing on Nvidia platforms
Infrared simulation and processing on Nvidia platformsInfrared simulation and processing on Nvidia platforms
Infrared simulation and processing on Nvidia platforms
 
All These Sophisticated Attacks, Can We Really Detect Them - PDF
All These Sophisticated Attacks, Can We Really Detect Them - PDFAll These Sophisticated Attacks, Can We Really Detect Them - PDF
All These Sophisticated Attacks, Can We Really Detect Them - PDF
 
Unleashing Real-time Insights with ClickHouse_ Navigating the Landscape in 20...
Unleashing Real-time Insights with ClickHouse_ Navigating the Landscape in 20...Unleashing Real-time Insights with ClickHouse_ Navigating the Landscape in 20...
Unleashing Real-time Insights with ClickHouse_ Navigating the Landscape in 20...
 
React Native vs Ionic - The Best Mobile App Framework
React Native vs Ionic - The Best Mobile App FrameworkReact Native vs Ionic - The Best Mobile App Framework
React Native vs Ionic - The Best Mobile App Framework
 
Microservices, Docker deploy and Microservices source code in C#
Microservices, Docker deploy and Microservices source code in C#Microservices, Docker deploy and Microservices source code in C#
Microservices, Docker deploy and Microservices source code in C#
 
Microsoft 365 Copilot: How to boost your productivity with AI – Part one: Ado...
Microsoft 365 Copilot: How to boost your productivity with AI – Part one: Ado...Microsoft 365 Copilot: How to boost your productivity with AI – Part one: Ado...
Microsoft 365 Copilot: How to boost your productivity with AI – Part one: Ado...
 
UiPath Community: Communication Mining from Zero to Hero
UiPath Community: Communication Mining from Zero to HeroUiPath Community: Communication Mining from Zero to Hero
UiPath Community: Communication Mining from Zero to Hero
 
Emixa Mendix Meetup 11 April 2024 about Mendix Native development
Emixa Mendix Meetup 11 April 2024 about Mendix Native developmentEmixa Mendix Meetup 11 April 2024 about Mendix Native development
Emixa Mendix Meetup 11 April 2024 about Mendix Native development
 
Genislab builds better products and faster go-to-market with Lean project man...
Genislab builds better products and faster go-to-market with Lean project man...Genislab builds better products and faster go-to-market with Lean project man...
Genislab builds better products and faster go-to-market with Lean project man...
 
A Framework for Development in the AI Age
A Framework for Development in the AI AgeA Framework for Development in the AI Age
A Framework for Development in the AI Age
 
Transcript: New from BookNet Canada for 2024: BNC SalesData and LibraryData -...
Transcript: New from BookNet Canada for 2024: BNC SalesData and LibraryData -...Transcript: New from BookNet Canada for 2024: BNC SalesData and LibraryData -...
Transcript: New from BookNet Canada for 2024: BNC SalesData and LibraryData -...
 
Landscape Catalogue 2024 Australia-1.pdf
Landscape Catalogue 2024 Australia-1.pdfLandscape Catalogue 2024 Australia-1.pdf
Landscape Catalogue 2024 Australia-1.pdf
 
Varsha Sewlal- Cyber Attacks on Critical Critical Infrastructure
Varsha Sewlal- Cyber Attacks on Critical Critical InfrastructureVarsha Sewlal- Cyber Attacks on Critical Critical Infrastructure
Varsha Sewlal- Cyber Attacks on Critical Critical Infrastructure
 
A Journey Into the Emotions of Software Developers
A Journey Into the Emotions of Software DevelopersA Journey Into the Emotions of Software Developers
A Journey Into the Emotions of Software Developers
 
How to Effectively Monitor SD-WAN and SASE Environments with ThousandEyes
How to Effectively Monitor SD-WAN and SASE Environments with ThousandEyesHow to Effectively Monitor SD-WAN and SASE Environments with ThousandEyes
How to Effectively Monitor SD-WAN and SASE Environments with ThousandEyes
 
Design pattern talk by Kaya Weers - 2024 (v2)
Design pattern talk by Kaya Weers - 2024 (v2)Design pattern talk by Kaya Weers - 2024 (v2)
Design pattern talk by Kaya Weers - 2024 (v2)
 
Microsoft 365 Copilot: How to boost your productivity with AI – Part two: Dat...
Microsoft 365 Copilot: How to boost your productivity with AI – Part two: Dat...Microsoft 365 Copilot: How to boost your productivity with AI – Part two: Dat...
Microsoft 365 Copilot: How to boost your productivity with AI – Part two: Dat...
 
Modern Roaming for Notes and Nomad – Cheaper Faster Better Stronger
Modern Roaming for Notes and Nomad – Cheaper Faster Better StrongerModern Roaming for Notes and Nomad – Cheaper Faster Better Stronger
Modern Roaming for Notes and Nomad – Cheaper Faster Better Stronger
 
JET Technology Labs White Paper for Virtualized Security and Encryption Techn...
JET Technology Labs White Paper for Virtualized Security and Encryption Techn...JET Technology Labs White Paper for Virtualized Security and Encryption Techn...
JET Technology Labs White Paper for Virtualized Security and Encryption Techn...
 

Save space, increase efficiency, and boost performance in your remote office with Dell PowerEdge VRTX

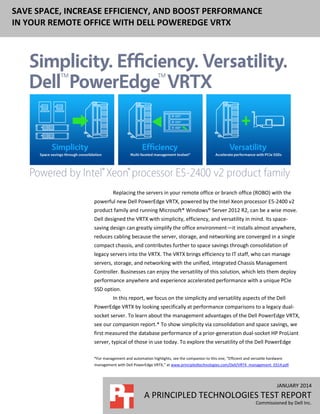
  • 1. JANUARY 2014 A PRINCIPLED TECHNOLOGIES TEST REPORT Commissioned by Dell Inc. SAVE SPACE, INCREASE EFFICIENCY, AND BOOST PERFORMANCE IN YOUR REMOTE OFFICE WITH DELL POWEREDGE VRTX Replacing the servers in your remote office or branch office (ROBO) with the powerful new Dell PowerEdge VRTX, powered by the Intel Xeon processor E5-2400 v2 product family and running Microsoft® Windows® Server 2012 R2, can be a wise move. Dell designed the VRTX with simplicity, efficiency, and versatility in mind. Its space- saving design can greatly simplify the office environment—it installs almost anywhere, reduces cabling because the server, storage, and networking are converged in a single compact chassis, and contributes further to space savings through consolidation of legacy servers into the VRTX. The VRTX brings efficiency to IT staff, who can manage servers, storage, and networking with the unified, integrated Chassis Management Controller. Businesses can enjoy the versatility of this solution, which lets them deploy performance anywhere and experience accelerated performance with a unique PCIe SSD option. In this report, we focus on the simplicity and versatility aspects of the Dell PowerEdge VRTX by looking specifically at performance comparisons to a legacy dual- socket server. To learn about the management advantages of the Dell PowerEdge VRTX, see our companion report.* To show simplicity via consolidation and space savings, we first measured the database performance of a prior-generation dual-socket HP ProLiant server, typical of those in use today. To explore the versatility of the Dell PowerEdge *For management and automation highlights, see the companion to this one, “Efficient and versatile hardware management with Dell PowerEdge VRTX,” at www.principledtechnologies.com/Dell/VRTX_management_0314.pdf.
  • 2. A Principled Technologies test report 2Save space, increase efficiency, and boost performance in your remote office with Dell PowerEdge VRTX VRTX, we then measured its performance using an accelerated configuration with a Micron® P420m PCIe solid-state drive (SSD) attached to each node. In our tests, the base-configuration VRTX could consolidate four legacy dual-socket servers using the same database and workload configuration while providing 5.4 times the performance of one legacy server. With the Micron P420m PCIe SSD added to the configuration, the performance advantage was even greater—the VRTX consolidated eight legacy dual- socket servers and delivered 10.7 times the performance of one legacy server. Based on the overall performance advantage the VRTX had in our testing, you would need six legacy servers to do the work of a single base-configuration VRTX and 11 legacy servers to deliver the performance of a single accelerated-configuration VRTX. Because the Dell PowerEdge VRTX in its tower form factor uses approximately the same square footage as a typical tower, replacing multiple legacy tower servers with a VRTX would yield an immediate gain in square footage efficiency in your remote office. This gain would be in addition to the benefits of a shared storage platform and encapsulated networking components.1 For both performance and space efficiency, consolidating your older servers with the Dell PowerEdge VRTX makes excellent business sense. You can free up space in your remote or branch office, and you can save on power and cooling. MORE PERFORMANCE, LESS SPACE In many remote offices, performance needs are steadily increasing, space is at a premium, and cabling has become complex. If your remote office faces any or all of these challenges, the Dell PowerEdge VRTX is an attractive, compact, integrated solution that can fit easily beside a desk and uses minimal cabling. As our testing showed, in addition to reducing the compute footprint of your environment, the VRTX could also deliver exceptional performance. To measure the performance of the Dell PowerEdge VRTX with two M520 server nodes, we tested with an OLTP workload that uses a performance metric of orders per minute (OPM). We tested the base configuration of the VRTX and an accelerated version with a Micron P420m PCIe SSD card to further boost performance. As we will show, both Dell PowerEdge VRTX configurations performed the workloads of multiple legacy servers and did so using a fraction of the compute space the equivalent legacy solution would require. For the legacy system, we tested a three-year-old dual-socket HP ProLiant server configured with two Intel Xeon processor X5670s, 12 GB of memory, and eight 300GB SAS hard drives configured in a two-disk RAID 1 for OS and logs and a six-disk RAID 10 for database. On the new VRTX-powered environment, we configured the VMs 1 Comparing performance and cost: Dell PowerEdge VRTX vs. legacy hardware solution www.principledtechnologies.com/Dell/VRTX_performance_TCO_0713.pdf Configuration note For testing, we configured the Dell PowerEdge VRTX with two M520 server nodes as our base configuration, leaving room for further expansion. Adding additional nodes to populate the PowerEdge VRTX fully could increase performance and further your space savings. TCO A June 2013 Principled Technologies study compared the Dell PowerEdge VRTX and a legacy solution composed of multiple servers.1 That study found that the VRTX delivered a lower total cost of ownership than the multi-server legacy solution.
  • 3. A Principled Technologies test report 3Save space, increase efficiency, and boost performance in your remote office with Dell PowerEdge VRTX with 12 vCPUs and 12 GB of memory to match the legacy server configuration. For detailed configuration information about the solutions we tested, see Appendix A. For testing details, see Appendix B. As Figure 1 shows, the Dell PowerEdge VRTX in both configurations delivered far greater database performance than the legacy server did. The base-configuration VRTX ran four database VMs, delivering 320,415 orders per minute, 5.4 times as many as the legacy server using the same database and workload configuration. Upgrading the Dell PowerEdge VRTX with the Micron P420m PCIe SSD card doubled the number of VMs the server could support under the same conditions, and those eight VMs delivered 10.7 times the orders per minute the legacy server delivered. Figure 1: Both configurations of the Dell PowerEdge VRTX delivered far greater database performance than the legacy server. VM 1 VM 1 VM 2 VM 2 VM 3 VM 3 VM 4 VM 4 VM 5 VM 6 VM 7 VM 8 0 100,000 200,000 300,000 400,000 500,000 600,000 700,000 Legacy server Dell PowerEdge VRTX Dell PowerEdge VRTX with Micron P420m PCIe SSD OPM Database performance inorders per minute 59,119 320,415 634,473 Adding to the performance advantage of the Dell PowerEdge VRTX server is the fact that it delivers this performance in a space-efficient profile and greatly reduces the cabling complexity that can come with multiple servers, whether those servers are in rack or tower form factor. As we noted earlier, in June 2013, Principled Technologies conducted a study similar to this one. That study compared the number of Ethernet cables and power cables required by the Dell PowerEdge VRTX and a legacy solution composed of multiple servers.2 Figure 2, excerpted from that study, shows how the Dell PowerEdge VRTX used only six cables, 13 fewer cables than the legacy, disparate hardware solution consisting of three tower servers, a switch, and a storage array. 2 Comparing performance and cost: Dell PowerEdge VRTX vs. legacy hardware solution www.principledtechnologies.com/Dell/VRTX_performance_TCO_0713.pdf
  • 4. A Principled Technologies test report 4Save space, increase efficiency, and boost performance in your remote office with Dell PowerEdge VRTX Cabling comparison from 2013 Principled Technologies study Dell PowerEdge VRTX Ethernet cables Power cables Total by type 2 4 Total cables 6 Legacy, disparate hardware solution Ethernet cables Power cables HP ProLiant ML310 G5 2 1 HP ProLiant ML370 G5 2 1 HP ProLiant ML110 G6 2 1 NETGEAR ProSAFE Smart Switch 1 1 Storage 6 2 Total by type 13 6 Total cables 19 Figure 2: In a June 2013 Principled Technologies study, the Dell PowerEdge VRTX reduced cabling complexity compared to the legacy, disparate hardware solution. While the 2013 study used different workload parameters than this study, it is reflective of the potential cabling savings when consolidating tower servers to the Dell PowerEdge VRTX. About the Dell PowerEdge VRTX The Dell PowerEdge VRTX is a compact, integrated solution in a 5U rack-able tower chassis. Designed to be quiet under normal operating conditions, the Dell PowerEdge VRTX can be stowed beside a desk. Its four bays house Dell PowerEdge M520 or M620 server nodes, providing a space-saving alternative to tower or rack servers. In addition to space savings, the Dell PowerEdge VRTX provides administrators with a unified interface, the Chassis Management Controller, for performing routine systems management tasks. The Dell PowerEdge VRTX chassis supports up to 48 TB of shared internal storage that is presentable as virtual drives to single or multiple compute nodes, and provides eight PCIe slots for additional device connectivity. The chassis integrated storage can be configured with 25 bays for 2.5-inch drives or with 12 bays for 3.5-inch drives. The Dell PowerEdge VRTX integrated switch contains multiple external network ports for easy expansion or integration into existing computing environments. For more information about the Dell PowerEdge VRTX, visit www.Dell.com/PowerEdge/VRTX. About the Intel Xeon processor E5-2400 v2 product family According to Intel, the Intel Xeon processor E5-2400 v2 product family is designed to complement the E5-2600 v2 product family with “lower core counts, lower frequency, and lower TDP options. The new Intel Xeon processor E5-2400 v2 product family is based on a 22nm manufacturing process and includes 12 different models. It is designed to offer performance and features to address small and medium business, enterprise storage, and entry to mid-range communications markets.”
  • 5. A Principled Technologies test report 5Save space, increase efficiency, and boost performance in your remote office with Dell PowerEdge VRTX For more information on the Intel Xeon processor E5-2400 v2 product family, visit www.intel.com. About the Micron P420m PCIe SSD According to Micron, their low-latency, high-IOPS PCIe SSDs “are real overachievers, providing the highest read throughput in the industry, combined with extended endurance, exceptional reliability, and remarkable power efficiency. They are ideal solutions for optimizing applications with heavy read access, from web accelerators to media streaming and video-on-demand servers, as well as data warehousing. “Built on server-grade Micron NAND, [their] PCIe SSDs furnish up to 50 petabytes of drive life and an astounding power economy of up to 30,000 read IOPS per watt. Our custom controller is designed specifically to interact with and optimize our leading-edge NAND, achieving read IOPS up to 785,000 and sequential speeds up to 3.2 GB/s.” For more information on the Micron P420m PCIe SSD 2.0 card, visit www.micron.com/products/solid-state-storage/enterprise-pcie-ssd. About Microsoft Windows Server 2012 R2 Microsoft Windows Server 2012 R2, the newest version of Microsoft Windows Server, was designed with the enterprise-class datacenter and cloud platforms in mind. It includes a range of new and enhanced features to boost efficiency and performance for corporate workloads. For more information on Microsoft Windows Server 2012 R2, visit www.microsoft.com/en-us/server-cloud/products/windows-server-2012-r2/.
  • 6. A Principled Technologies test report 6Save space, increase efficiency, and boost performance in your remote office with Dell PowerEdge VRTX IN CONCLUSION Two realities drive many remote and branch office server decisions: the need for a versatile platform that delivers excellent performance, and the need for simplification by using fewer servers and cables. By consolidating your older servers to the powerful, space-efficient Dell PowerEdge VRTX server, you can increase database performance while saving valuable space. In our tests, the base-configuration Dell PowerEdge VRTX could consolidate four legacy servers while providing 5.4 times the overall performance. With the Micron P420m PCIe SSD added to the configuration, the VRTX consolidated eight legacy servers and delivered 10.7 times the overall performance. Investing in the Dell PowerEdge VRTX—in either configuration—can elevate your IT infrastructure by answering database performance and space-saving challenges that face your remote and branch offices. In addition to providing excellent performance in a space-efficient manner, the VRTX simplifies the office environment, brings efficiency to IT staff through its management advantages, and offers businesses the versatility of deploying performance anywhere.
  • 7. A Principled Technologies test report 7Save space, increase efficiency, and boost performance in your remote office with Dell PowerEdge VRTX APPENDIX A – DETAILED CONFIGURATION INFORMATION Figure 3 presents detailed configuration information for the Dell PowerEdge VRTX solution we tested. System Dell PowerEdge VRTX solution Enclosure Compute node enclosure Dell PowerEdge VRTX General dimensions of compute node enclosure Height (inches) 8.0 Width (inches) 19.0 Depth (inches) 29.5 Power supplies Total number 4 Vendor and model number Dell 80 Plus Platinum E1100E-S0 (P/N 0YT39Y) Wattage of each 1,100 Cooling fans Total number 6 Vendor and model number Delta Electronics, Inc. Dimensions (h × w) of each 60mm × 60mm Volts 12 Chassis RAID controller Vendor and model number Dell Shared PERC8 Firmware version 23.8.2-0005 Cache size (GB) 1 PCIe SSD card Vendor and model number Micron P420m PCIe SSD Number of cards 2 Capacity (TB) 1.4 (each card) Chassis shared hard drives Hard drive #1 Vendor and model number Hitachi HUC151414CSS600 Number of drives 21 Size (GB) 146 RPM 15,000 Hard drive #2 Vendor and model number Fujitsu MBE2147RC Number of drives 4 Size (GB) 146 RPM 15,000 Chassis USB ports Number 2 Type 2.0
  • 8. A Principled Technologies test report 8Save space, increase efficiency, and boost performance in your remote office with Dell PowerEdge VRTX System Dell PowerEdge VRTX solution Platform Vendor and model number Dell PowerEdge M520 Motherboard model number 0NRG83X03 BIOS name and version Dell BIOS 2.0.23 BIOS settings Performance General Number of processor packages 2 Number of cores per processor 10 Number of hardware threads per core 2 System power management policy Performance CPU Vendor Intel Name Xeon E5-2470 v2 Stepping M1 Socket type Socket 1356 / LGA1356 Core frequency (GHz) 2.40 L1 cache 32 KB (per core) L2 cache 256 KB (per core) L3 cache 256 MB (shared) Memory modules (per node) Total RAM in system (GB) 96 Vendor and model number Hynix Semiconductor HMT42GR7MFR4C-PB Type PC3-12800 Speed (MHz) 1,600 Speed in the system currently running @ (MHz) 1,600 Timing/latency (tCL-tRCD-iRP-tRASmin) 11-11-11-35 Size (GB) 16 Number of RAM modules 6 Chip organization Double-sided RAID controller Vendor and model number Dell PERC H310 mini Firmware version 20.12.0-0004 Cache size (GB) 0 Hard drive Vendor and model number FUJITSU MBD2147RC Number of drives 2 Size (GB) 146 RPM 10K Type SAS Network adapter Vendor and model number Broadcom® NetXtreme® BCM5720 Gigabit Ethernet PCIe Type Embedded Number of ports 2
  • 9. A Principled Technologies test report 9Save space, increase efficiency, and boost performance in your remote office with Dell PowerEdge VRTX System Dell PowerEdge VRTX solution USB ports (per node) Number 2 external, 1 internal Type 2.0 Figure 3: Detailed configuration information for the Dell PowerEdge VRTX solution. Figure 4 presents detailed configuration information for the legacy server we tested. System HP ProLiant DL380 G7 Power supplies Total number 2 Vendor and model number HP DPS-750RB A Wattage of each (W) 750 Cooling fans Total number 6 Vendor and model number Nidec® UltraFlo® Dimensions (h × w) of each 2-3/8″ × 2-5/8″ Volts 12 Amps 2.45 General Number of processor packages 2 Number of cores per processor 6 Number of hardware threads per core 2 System power management policy High Performance CPU Vendor Intel Name Xeon X5670 Stepping B1 Socket type Socket 1366 LGA Core frequency (GHz) 2.93 L1 cache 32 KB + 32 KB (per core) L2 cache 256 KB (per core) L3 cache (MB) 12 Platform Vendor and model number HP ProLiant DL380 G7 BIOS name and version HP P67 BIOS settings High Performance Memory modules Total RAM in system (GB) 12 Vendor and model number Kingston KVR1333D3D8R9S/2G Type PC3-10600R Speed (MHz) 1,333 Speed in the system currently running @ (MHz) 1,333 Timing/latency (tCL-tRCD-iRP-tRASmin) 9-9-9-24 Size (GB) 2
  • 10. A Principled Technologies test report 10Save space, increase efficiency, and boost performance in your remote office with Dell PowerEdge VRTX System HP ProLiant DL380 G7 Number of RAM modules 6 Chip organization Double-sided RAID controller Vendor and model number HP Smart Array P410i Cache size (MB) 512 Hard drive #1 Vendor and model number HP ST9300603SS Number of drives 8 Size (GB) 300 RPM 10K Type SAS Network adapter Vendor and model number HP NC382i Dual Port Gigabit Adapter Type Integrated Number of ports 4 USB ports (per node) Number 4 external, 1 internal Type 2.0 Figure 4: Detailed configuration information for the HP ProLiant DL380 G7.
  • 11. A Principled Technologies test report 11Save space, increase efficiency, and boost performance in your remote office with Dell PowerEdge VRTX APPENDIX B – HOW WE TESTED About DVD Store Version 2.1 To create our OLTP workload, we used the DVD Store Version 2.1 (DS2) benchmarking tool. DS2 models an online DVD store, where customers log in, search for movies, and make purchases. DS2 reports these actions in orders per minute that the system could handle, to show what kind of performance you could expect for your customers. The DS2 workload also performs other actions, such as adding new customers, to exercise the wide range of database functions you would need to run your ecommerce environment. For more details about the DS2 tool, see www.delltechcenter.com/page/DVD+Store. SETTING UP THE INFRASTRUCTURE We detail our Dell PowerEdge VRTX configuration steps below. Perform the following steps on each Dell PowerEdge server. Setting up and configuring an Active Directory VM We configured a virtual machine to be used as an Active Directory server for authentication on a separate utility hypervisor. Installing Windows Server 2012 R2 on the Active Directory VM 1. Create a VM on a separate hypervisor host, and choose 4GB RAM and 30GB virtual disk size. 2. Install the operating system on the VM. 3. Copy the installation DVD image for Windows Server 2012 R2 into the local machine storage. Mount the DVD ISO to the guest VM. 4. Choose the language, time and currency, and keyboard input. Click Next. 5. Click Install Now. 6. Enter product key, and click Next. 7. Choose Windows Server 2012 R2 Datacenter (Server with a GUI), and click Next. 8. Accept the license terms, and click Next. 9. Click Custom, and select Install Windows Only. 10. Click the Disk, and click Drive options (advanced). 11. Click NewApplyFormat, and click Next. 12. After the installation completes, click OK to set the administrator password. 13. Enter the administrator password twice, and click OK. 14. Connect the machine to the Internet and install all available Windows updates. Restart as necessary. 15. In Server Manager, select Local Server and change each of the following parameters by clicking on the highlighted field for each. 16. Enable remote desktop access. 17. Click Windows Firewall, and set to Off (all). 18. Click IE Enhanced Security Configuration, and set to Off. 19. Click Windows Updates, and set to Disabled. 20. Change the hostname and reboot when the installation prompts you. 21. Create a shared folder to store test script files. Set permissions as needed.
  • 12. A Principled Technologies test report 12Save space, increase efficiency, and boost performance in your remote office with Dell PowerEdge VRTX 22. Set up networking for the Hyper-V management console by creating a static IP address. Configuring TCP/IP and computer name on the Active Directory VM 1. Connect to the AD VM. 2. After the initial installation, the Server Manager comes up and you are presented with initial system configuration. Select Local Server and click the current IP address to bring up the network properties. 3. In Network Connections, right-click Local Area Connection, and click Properties. 4. Click Internet Protocol Version 4 (TCP/IPv4), and click Properties. 5. Select Use the following IP address and enter an appropriate IP address, subnet mask, and Preferred DNS. 6. Close the Network Connections window. 7. In Server Manager, click the current computer name. 8. In System Properties, click Change. In Computer name, type the name of the domain controller machine, click OK twice, and click Close. When you are prompted to restart the computer, click Restart Now. 9. After restarting, log in using the local administrator account. Configuring the Active Directory VM as a domain controller and DNS server 1. Log into the AD VM. 2. In Server Manager select Local Server and in the upper right corner select Manage. Click Add Roles and Features. In the details pane, click Role-Based or Feature-Based Installation, and click Next. 3. On the Select Server Roles page, click Active Directory Domain Services, click Add Required Features, click Next twice, and click Install. When installation is complete, click Close. 4. To start the Active Directory Installation Wizard, click Start, type dcpromo and press Enter. 5. In the Active Directory Installation Wizard dialog box, click Next twice. 6. On the Choose a Deployment Configuration page, click Create a new domain in a new forest, and click Next. 7. On the Name the Forest Root Domain page, type the desired domain name, and click Next. 8. On the Set Forest Functional Level page, in Forest Functional Level, click Windows Server 2012 R2, and click Next. 9. On the Additional Domain Controller Options page, click Next, click Yes to continue, and click Next. 10. On the Directory Services Restore Mode Administrator Password page, type a strong password twice, and click Next. 11. On the Summary page, click Next. 12. Wait while the wizard completes the configuration of Active Directory and DNS services, and click Finish. 13. When the wizard prompts you to restart the computer, click Restart Now. 14. After the computer restarts, log into the domain using the Administrator account. 15. Create Computer accounts for each server to be used in the domain in the Active Directory Manager. Configuring the database workload clients For each test VM on the host machines, there needs to be a corresponding client VM to generate the workload to stress the database under test. To do this, we configured a virtual machine with Windows Server 2008 R2 SP1 on a separate utility hypervisor. To create these clients, we installed Windows Server 2008 R2 SP1, assigned a static IP address, and installed .NET 3.5.
  • 13. A Principled Technologies test report 13Save space, increase efficiency, and boost performance in your remote office with Dell PowerEdge VRTX SETTING UP THE VRTX We detail our Dell PowerEdge VRTX configuration steps below. Configuring the VRTX shared storage 1. Open a Web browser, and enter the address listed for the CMC IP on the front LCD display. 2. Log in with the appropriate credentials. 3. Expand Storage. 4. Click Storage. 5. Click the Setup tab. a. Under Assignment Mode, select the radio button for Multiple Assignment, and click Apply. b. Click OK to confirm the message box indicating Operation Successful. 6. Configure virtual disks: a. Click StorageVirtual Disks. b. On the Virtual Disks tab, click Create. i. For Choose a virtual disk type, select RAID 10. ii. Select the first six disks, and click Create Virtual Disk. iii. Click OK to confirm the message box indicating Operation Successful. iv. Repeat steps i-iii for the second Virtual Disk, selecting the first 18 disks remaining. c. On the Virtual Disks tab, click Manage. i. Select the Virtual Disks Action pull-down menu for Virtual Disk 0 and initialize the drives. ii. Click Apply. iii. Click OK to confirm the message box indicating Operation Successful once the initialization completes. iv. Repeat steps i-iii for the second virtual disk. d. Configure the remaining physical disk as a global hot spare. e. In this step, we will allow shared LUN access to both compute nodes. On the Virtual Disks tab, click Assign. i. Use the pull-down menu for all virtual disks and SLOT-01, and select Full Access. ii. Use the pull-down menu for all virtual disks and SLOT-02, and select Full Access. iii. Click Apply. iv. Click OK to confirm the message box indicating Operation Successful. Configuring boot properties of the Dell PowerEdge M520s 1. Open a Web browser, and enter the address listed for the CMC IP on the front LCD display. 2. Log in with the appropriate credentials. 3. Expand Server Overview, and select Slot-01. 4. Click the Setup Tab. Perform the following steps in the iDRAC settings: a. Check the box for Enable LAN. b. Check the box for Enable IPv4. c. Check the box for DHCP. d. Check the box for IPMI Over LAN. e. Click Apply iDRAC Network Settings.
  • 14. A Principled Technologies test report 14Save space, increase efficiency, and boost performance in your remote office with Dell PowerEdge VRTX f. To confirm changes to the iDRAC network settings, click OK. 5. Power on the server. a. Click the Power Tab. b. Select Power On Server. c. Click Apply. d. To confirm server control action, click OK. e. To confirm operation was successful, click OK. 6. Click the Properties tab. 7. Click Launch Remote Console. 8. On new browser page, click Continue to website (not recommended) if prompted. a. If a message appears indicating a pop-up was blocked, select Always allow pop-ups from this site. b. Close the browser tab for the iDRAC. c. Click Launch Remote Console. d. If a message appears indicating the Web page wants to run an add-on called “Virtual Console from Dell Inc.,” select Allow for all websites. 9. A new window appears showing the console for the server to configure. Select PowerReset System. Installing the Microsoft Windows Server 2012 R2 operating system 1. Insert the installation disk to the VRTX chassis drive bay, or attach an image to the slot via iDRAC with virtual media. 2. Choose the language, time and currency, and keyboard input. Click Next. 3. Click Install Now. 4. Choose Windows Server 2012 R2 Datacenter (Server with a GUI), and click Next. 5. Accept the license terms, and click Next. 6. Click Custom. 7. Click the Disk, and click Drive options (advanced). 8. Click NewApplyFormat, and click Next. 9. After the installation completes, click OK to set the Administrator password. 10. Enter the administrator password twice, and click OK. 11. Connect to the Internet, and install all available Windows updates. Restart as necessary. 12. Enable remote desktop access. 13. Change the hostname and reboot when prompted. 14. Set up networking for the data network: a. Click StartControl Panel, right-click Network Connections, and choose Open. b. Right-click the Testing traffic NIC, and choose Properties. c. Select TCP/IP (v4), and choose Properties. d. Assign a static IP address. Installing the Hyper-V Role and Failover Clustering feature 1. From Server Manager, click ManageAdd Roles and Features. 2. At the Before You Begin screen, click Next. 3. At the Installation Type screen, click Next.
  • 15. A Principled Technologies test report 15Save space, increase efficiency, and boost performance in your remote office with Dell PowerEdge VRTX 4. At the Server Roles screen, check the box for Hyper-V, and click Add Features in the pop-up that appears. 5. Click Next. 6. At the Features screen, click the box for Failover Clustering, click Add Features in the window that pops up, and click Next. 7. At the Hyper-V screen, click Next. 8. At the Virtual Switches screen, click Next. 9. At the Migration screen, leave the defaults, and click Next. 10. At the Default Stores screen, click Next. 11. At the Confirmation screen, click Install. 12. When the installation finishes, click Close. Allowing RAID bus types in a failover cluster For more information on the registry edit, see support.microsoft.com/kb/2839292. 1. Press the Windows key and type regedit and press Enter. 2. Navigate to HKEY_LOCAL_MACHINESYSTEMCurrentControlSetServicesClusDiskParameters in the Registry Editor. 3. Click EditNewDWORD (32-bit) Value. 4. Enter AllowBusTypeRAID as the name. 5. Right-click the new DWORD and click Modify. 6. In the Value data field, enter 1 and click OK. 7. Close the Registry Editor. Validating and creating the failover cluster 1. On either Dell PowerEdge server, click ToolsFailover Cluster Manager. 2. At the Before You Begin screen, click Next. 3. In the Select Servers or a Cluster screen, enter the names of each Dell PowerEdge VRTX server node in the Enter name field, clicking the Add button after each. Click Next when finished. 4. At the Testing Options screen, click Next. 5. At the Confirmation page, click Next. 6. After the testing completes successfully, make sure the Create a cluster now using the validated nodes box is checked. 7. Click Finish. 8. At the Before You Begin screen, click Next. 9. At the Access Point for Administering the Cluster screen, give the cluster an appropriate name, an appropriate IP address, and click Next. We used the name TestCluster and an IP address of 192.168.1.50. 10. Click Next. 11. At the Confirmation screen, make sure the Add all eligible storage to the cluster box is checked, and click Next. 12. At the Summary screen, click Finish. 13. Open Failover Clustering Manager. 14. Navigate to StorageDisks, and click Add Disk. 15. Select all the available disks, and click OK. 16. In the Disks pane in FCM, right-click each Cluster Disk, and select Add to Cluster Shared Volumes.
  • 16. A Principled Technologies test report 16Save space, increase efficiency, and boost performance in your remote office with Dell PowerEdge VRTX 17. Close Failover Clustering Manager. 18. Acquire Update for Windows Server 2012 R2 (KB2803748) from www.microsoft.com/en- us/download/confirmation.aspx?id=36468. 19. Launch the standalone update installer file in both Dell PowerEdge VRTX server nodes. 20. When the update installer completes its operations, click Restart Now. Configuring the virtual network 1. In Hyper-V Manager, right-click the server name in the list on the left side of Hyper-V, and choose Virtual Network Manager… 2. Choose External, and click Add. 3. Name the Virtual Network, and choose the appropriate NIC for your VM network from the drop-down menu. 4. Click OK. Configuring the first VM 1. On the first host, within Failover Cluster Manager, select Roles. 2. On the right pane, click ActionVirtual Machines New Virtual Machine. 3. On the Before You Begin window, click Next. 4. Enter the name of the VM, and click Next. 5. Assign 12 GB of memory, and click Next. 6. Choose the virtual network you created from the drop-down menu, and click Next. 7. Choose to attach a virtual hard drive later and click Next. 8. Choose to install on operating system later. 9. Click Finish. 10. Create the following fixed size VHDs by right-clicking on the virtual machine and selecting Settings. Choose the following:  60GB VHD for the VM OS and Logging data  30GB VHD for SQL Server data 11. Add the VM OS VHD and the VM SQL VHD to the SCSI controller. 12. Click Processors, and adjust the number of virtual processors to 12. 13. Start the VM. Installing the VM operating system on the first VM 1. Connect to the ISO image of the installation DVD for Windows Server 2012 R2 from the VM console. If the ISO image is not stored on the host, start the VM first and then connect to the ISO image. 2. Start the VM. 3. At the Language Selection Screen, click Next. 4. Click Install Now. 5. Select Windows Server 2012 R2 (Full Installation), and click Next. 6. Click the I accept the license terms check box, and click Next. 7. Click Custom. 8. Click Next. 9. At the User’s password must be changed before logging on warning screen, click OK.
  • 17. A Principled Technologies test report 17Save space, increase efficiency, and boost performance in your remote office with Dell PowerEdge VRTX 10. Enter the desired password for the administrator in both fields, and click the arrow to continue. 11. At the Your password has been changed screen, click OK. 12. Connect the machine to the Internet, and install all available Windows updates. Restart as necessary. We configured each VM on the Dell PowerEdge VRTX with all available Windows Updates as of January 12, 2014. 13. Enable remote desktop access. 14. Change the hostname and reboot when prompted. 15. Create a shared folder to store test script files. Set permissions as needed. 16. Set up networking: a. Click StartControl Panel, right-click Network Connections, and choose Open. b. Right-click the testing traffic NIC, and choose Properties. c. Select TCP/IP (v4), and choose Properties. d. Set the IP address and subnet, click OK, and click Close. 17. Shut down the VM and export it to the same volume as the original. 18. Import the VM, copying files and generating a new ID, for each additional VM needed. SETTING UP THE LEGACY SYSTEM We configured an HP ProLiant DL380 G7 with Windows Server 2008 R2. We detail our legacy setup configuration steps below. Configuring the internal disks on the legacy system 1. Power on the server. 2. Enter the setup for the onboard RAID controller. 3. Create a RAID1 using the first two installed hard drives. 4. Create a RAID10 using the remaining six hard drives. 5. Begin initialization on the newly created virtual disks, then reboot the server. Installing the operating systems on the legacy system 1. Insert installation DVD for Windows Server 2008 R2 Enterprise. 2. Power on the system. 3. At the Language Selection Screen, click Next. 4. Click Install Now. 5. Select Windows Server 2008 Enterprise (Full Installation), and click Next. 6. Click the I accept the license terms check box, and click Next. 7. Click Custom. 8. Click Next. 9. At the User’s password must be changed before logging on warning screen, click OK. 10. Enter the desired password for the administrator in both fields, and click the arrow to continue. 11. At the Your password has been changed screen, click OK. 12. Connect the machine to the Internet, and install all available Windows updates. Restart as necessary. 13. Enable remote desktop access. 14. Change the hostname and reboot when prompted.
  • 18. A Principled Technologies test report 18Save space, increase efficiency, and boost performance in your remote office with Dell PowerEdge VRTX 15. Connect the machine to the Internet, and install all available Windows updates. Restart as necessary. We configured the HP ProLiant DL380 G7 with all available Windows Updates as of January 12, 2014. 16. Click StartControl Panel, right-click Network Connections, and choose Open. 17. Right-click the testing network NIC, and choose Properties. 18. Select TCP/IP (v4), and choose Properties. 19. Set the IP address, subnet, gateway, and DNS server for the NIC, which will handle outgoing testing traffic. Click OK, and click Close. INSTALLING MICROSOFT SQL SERVER AND CONFIGURING THE WORKLOAD We installed Microsoft SQL Server 2012 R2 on the VMs residing on the Dell PowerEdge M520s and Microsoft SQL Server 2008 R2 on the HP ProLiant DL3800 G7. Configuring the SQL Server VM on the VMs After cloning, modify the SQL VMs to contain the following settings:  Memory: 12GB  Virtual Processors: 12  Additional virtual disks: o 1 × 30GB virtual disk for SQL database data  In the VM, configure the VM storage: o Click the Server Manager icon in the taskbar. o In the left pane, expand Storage, and click Disk Management. o Right-click the uninitialized volume, and choose Initialize Disk. o In the right pane, right-click the volume, and choose New Simple VoIume… o At the welcome window, click Next. o At the Specify Volume Size window, leave the default selection, and click Next. o At the Assign Drive Letter or Path window, choose a drive letter, and click Next. o At the Format Partition window, choose NTFS, and click Next. o At the Completing the New Simple Volume Wizard window, click Finish. Installing SQL Server 2012 on the VMs 1. Open the console for the VM or connect to the VM with RDP. 2. Mount the installation ISO to the VM. 3. Click Run SETUP.EXE. If Autoplay does not begin the installation, navigate to the SQL Server 2012 DVD, and double-click. 4. If the installer prompts you with a .NET installation prompt, click Yes to enable the .NET Framework Core role. 5. In the left pane, click Installation. 6. Click New SQL Server stand-alone installation or add features to an existing installation. 7. At the Setup Support Rules screen, wait for the rule check to complete. If there are no failures or relevant warnings, click OK. 8. Select the Specify a free edition, and select Evaluation from the drop-down menu. Click Next.
  • 19. A Principled Technologies test report 19Save space, increase efficiency, and boost performance in your remote office with Dell PowerEdge VRTX 9. Click the checkbox to accept the license terms, and click Next. 10. If no failures are displayed after the setup support files are installed, click Next. 11. At the Setup Role screen, choose SQL Server Feature Installation. 12. At the Feature Selection screen, select Database Engine Services, Full-Text and Semantic Extractions for Search, Client Tools Connectivity, Client Tools Backwards Compatibility, Management Tools – Basic, and Management Tools – Complete. Click Next. 13. At the Installation Rules screen, click Next after the check completes. 14. At the Instance configuration screen, leave the default selection of default instance, and click Next. 15. At the Disk Space Requirements screen, click Next. 16. At the Server Configuration screen, check that NT AUTHORITYSYSTEM is selected for SQL Server Agent and SQL Server Database Engine. Click Next. 17. Assuming there are no failures, click Next. 18. At the Database Engine Configuration screen, select Mixed Mode. 19. Enter and confirm a password for the system administrator account. 20. Click Add Current user. This may take several seconds. 21. Click the Data Directories tab and enter the appropriate drive and folders for database and logs. 22. Click Next. 23. At the Error and usage reporting screen, click Next. 24. At the Installation Configuration Rules screen, check that there are no failures or relevant warnings, and click Next. 25. At the Ready to Install screen, click Install. 26. After installation completes, click Close. 27. Create a SQL Server login for the ds2user (see the Data generation overview section for the specific script to use). 28. Copy the pre-created DVD Store backup to the specified backup volume. 29. Download and install any available updates for Microsoft SQL Server 2012. Configuring the legacy machine 1. Log into Windows using the appropriate credentials. 2. Open the Start menu, type Hard Disk Partitions, select Settings on the right, and click the displayed tile. 3. Right-click the disk, and select Online. 4. Right-click the disk, select Initialize Disk, and click Ok. 5. Right-click the volume space, and select Create Simple Volume. 6. At the Specify Volume Size window, leave the default selection, and click Next. 7. At the Assign Drive Letter or Path window, choose a drive letter, and click Next. 8. At the Format Partition window, choose NTFS, and click Next. 9. At the Completing the New Simple Volume Wizard window, click Finish.
  • 20. A Principled Technologies test report 20Save space, increase efficiency, and boost performance in your remote office with Dell PowerEdge VRTX Installing SQL Server 2008 R2 on the legacy machine 1. Open the console for the VM or connect to the VM with RDP. 2. Mount the installation ISO to the VM. 3. Click Run SETUP.EXE. If Autoplay does not begin the installation, navigate to the SQL Server 2008 R2 DVD, and double-click. 4. If the installer prompts you with a .NET installation prompt, click Yes to enable the .NET Framework Core role. 5. In the left pane, click Installation. 6. Click New SQL Server stand-alone installation or add features to an existing installation. 7. At the Setup Support Rules screen, wait for the rule check to complete. If there are no failures or relevant warnings, click OK. 8. Select the Specify a free edition and select Evaluation from the drop-down menu. Click Next. 9. Click the checkbox to accept the license terms, and click Next. 10. If no failures are displayed after the setup support files are installed, click Next. 11. At the Setup Role screen, choose SQL Server Feature Installation. 12. At the Feature Selection screen, select Database Engine Services, Full-Text and Semantic Extractions for Search, Client Tools Connectivity, Client Tools Backwards Compatibility, Management Tools – Basic, and Management Tools – Complete. Click Next. 13. At the Installation Rules screen, click Next after the check completes. 14. At the Instance configuration screen, leave the default selection of default instance, and click Next. 15. At the Disk Space Requirements screen, click Next. 16. At the Server Configuration screen, check that NT AUTHORITYSYSTEM is selected for SQL Server Agent and SQL Server Database Engine. Click Next. 17. Assuming there are no failures, click Next. 18. At the Database Engine Configuration screen, select Mixed Mode. 19. Enter and confirm a password for the system administrator account. 20. Click Add Current user. This may take several seconds. 21. Click the Data Directories tab and enter the appropriate drive and folders for database and logs. 22. Click Next. 23. At the Error and usage reporting screen, click Next. 24. At the Installation Configuration Rules screen, check that there are no failures or relevant warnings, and click Next. 25. At the Ready to Install screen, click Install. 26. After installation completes, click Close. 27. Create a SQL Server login for the ds2user (see the next section for the specific script to use). 28. Copy the pre-created DVD Store backup to the specified backup volume. 29. Download and install any available updates for Microsoft SQL Server 2008 R2.
  • 21. A Principled Technologies test report 21Save space, increase efficiency, and boost performance in your remote office with Dell PowerEdge VRTX CONFIGURING THE DATABASE Data generation overview We generated the data using the Install.pl script included with DVD Store version 2.1 (DS2), providing the parameters for our 10GB database size and the database platform on which we ran: Microsoft SQL Server. We ran the Install.pl script on a utility system running Linux. The database schema was also generated by the Install.pl script. After processing the data generation, we transferred the data files and schema creation files to a Windows- based system running SQL Server 2012. We built the 10GB database in SQL Server 2012, and then performed a full backup, storing the backup file on the C: drive for quick access. We used that backup file to restore the server between test runs. The only modification we made to the schema creation scripts were the specified file sizes for our database. We set the file sizes higher than necessary to ensure that no file-growth activity would affect the outputs of the test. Besides this file size modification, the database schema was created and loaded according to the DVD Store documentation. Specifically, we followed the steps below: 1. We generated the data and created the database and file structure using database creation scripts in the DS2 download. We made size modifications specific to our 10GB database and the appropriate changes to drive letters. 2. We transferred the files from our Linux data generation system to a Windows system running SQL Server. 3. We created database tables, stored procedures, and objects using the provided DVD Store scripts. 4. We set the database recovery model to bulk-logged to prevent excess logging. 5. We loaded the data we generated into the database. For data loading, we used the import wizard in SQL Server Management Studio. Where necessary, we retained options from the original scripts, such as Enable Identity Insert. 6. We created indices, full-text catalogs, primary keys, and foreign keys using the database-creation scripts. 7. We updated statistics on each table according to database-creation scripts, which sample 18 percent of the table data. 8. On the SQL Server instance, we created a ds2user SQL Server login using the following Transact SQL (TSQL) script: USE [master] GO CREATE LOGIN [ds2user] WITH PASSWORD=N’’, DEFAULT_DATABASE=[master], DEFAULT_LANGUAGE=[us_english], CHECK_EXPIRATION=OFF, CHECK_POLICY=OFF GO 9. We set the database recovery model back to full. 10. We created the necessary full text index using SQL Server Management Studio. 11. We created a database user and mapped this user to the SQL Server login. 12. We then performed a full backup of the database. This backup allowed us to restore the databases to a pristine state relatively quickly between tests.
  • 22. A Principled Technologies test report 22Save space, increase efficiency, and boost performance in your remote office with Dell PowerEdge VRTX Figure 5 shows our initial file size modifications. Logical name Filegroup Initial size (MB) Database files primary PRIMARY 3.25 cust1 DS_CUST_FG 5,767 cust2 DS_CUST_FG 5,767 ind1 DS_IND_FG 2,621 ind2 DS_IND_FG 2,621 ds_misc DS_MISC_FG 2,621 orders1 DS_ORDERS 2,621 orders2 DS_ORDERS 2,621 Log files ds_log N/A 20,480 Figure 5: Our initial file size modifications. RUNNING THE TEST Test start and run times We ran all workloads concurrently in order to start and record all performance counters for this report. The specific testing parameters we used are included in the setup section, and specifics for launching these tests are described below. About running the DVD Store tests We created a series of batch files, SQL scripts, and shell scripts to automate the complete test cycle. DVD Store outputs an orders-per-minute metric, which is a running average calculated through the test. In this report, we report the last OPM reported by each client/target pair. Each complete test cycle consisted of the general steps listed below. 1. Clean up prior outputs from the target system and the client driver system. 2. Drop the database from the target. 3. Restore the database on the target. 4. Shut down the target. 5. Reboot the host and client system. 6. Wait for a ping response from the server under test (the hypervisor system), the client system, and the target. 7. Let the test server idle for 20 minutes. 8. Start the DVD Store driver on the client. We used the following DVD Store parameters for testing: ds2sqlserverdriver.exe --target=<target_IP> --ramp_rate=10 -- run_time=30 --n_threads=12 --db_size=10GB --detailed_view=Y -- warmup_time=15
  • 23. A Principled Technologies test report 23Save space, increase efficiency, and boost performance in your remote office with Dell PowerEdge VRTX ABOUT PRINCIPLED TECHNOLOGIES Principled Technologies, Inc. 1007 Slater Road, Suite 300 Durham, NC, 27703 www.principledtechnologies.com We provide industry-leading technology assessment and fact-based marketing services. We bring to every assignment extensive experience with and expertise in all aspects of technology testing and analysis, from researching new technologies, to developing new methodologies, to testing with existing and new tools. When the assessment is complete, we know how to present the results to a broad range of target audiences. We provide our clients with the materials they need, from market-focused data to use in their own collateral to custom sales aids, such as test reports, performance assessments, and white papers. Every document reflects the results of our trusted independent analysis. We provide customized services that focus on our clients’ individual requirements. Whether the technology involves hardware, software, Web sites, or services, we offer the experience, expertise, and tools to help our clients assess how it will fare against its competition, its performance, its market readiness, and its quality and reliability. Our founders, Mark L. Van Name and Bill Catchings, have worked together in technology assessment for over 20 years. As journalists, they published over a thousand articles on a wide array of technology subjects. They created and led the Ziff-Davis Benchmark Operation, which developed such industry-standard benchmarks as Ziff Davis Media’s Winstone and WebBench. They founded and led eTesting Labs, and after the acquisition of that company by Lionbridge Technologies were the head and CTO of VeriTest. Principled Technologies is a registered trademark of Principled Technologies, Inc. All other product names are the trademarks of their respective owners. Disclaimer of Warranties; Limitation of Liability: PRINCIPLED TECHNOLOGIES, INC. HAS MADE REASONABLE EFFORTS TO ENSURE THE ACCURACY AND VALIDITY OF ITS TESTING, HOWEVER, PRINCIPLED TECHNOLOGIES, INC. SPECIFICALLY DISCLAIMS ANY WARRANTY, EXPRESSED OR IMPLIED, RELATING TO THE TEST RESULTS AND ANALYSIS, THEIR ACCURACY, COMPLETENESS OR QUALITY, INCLUDING ANY IMPLIED WARRANTY OF FITNESS FOR ANY PARTICULAR PURPOSE. ALL PERSONS OR ENTITIES RELYING ON THE RESULTS OF ANY TESTING DO SO AT THEIR OWN RISK, AND AGREE THAT PRINCIPLED TECHNOLOGIES, INC., ITS EMPLOYEES AND ITS SUBCONTRACTORS SHALL HAVE NO LIABILITY WHATSOEVER FROM ANY CLAIM OF LOSS OR DAMAGE ON ACCOUNT OF ANY ALLEGED ERROR OR DEFECT IN ANY TESTING PROCEDURE OR RESULT. IN NO EVENT SHALL PRINCIPLED TECHNOLOGIES, INC. BE LIABLE FOR INDIRECT, SPECIAL, INCIDENTAL, OR CONSEQUENTIAL DAMAGES IN CONNECTION WITH ITS TESTING, EVEN IF ADVISED OF THE POSSIBILITY OF SUCH DAMAGES. IN NO EVENT SHALL PRINCIPLED TECHNOLOGIES, INC.’S LIABILITY, INCLUDING FOR DIRECT DAMAGES, EXCEED THE AMOUNTS PAID IN CONNECTION WITH PRINCIPLED TECHNOLOGIES, INC.’S TESTING. CUSTOMER’S SOLE AND EXCLUSIVE REMEDIES ARE AS SET FORTH HEREIN.