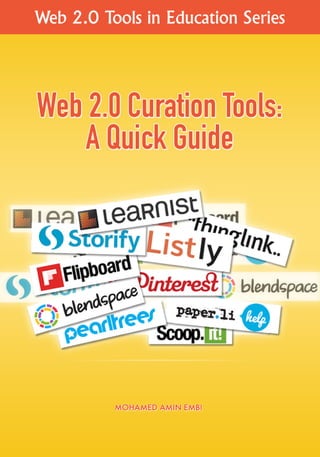
Web 2.0 Curation Tools: A Quick Guide
•
15 j'aime•41,829 vues

This document provides instructions for getting started with the social curation tool List.ly. It explains that List.ly allows users to create lists on various topics and embed them on their blogs, allowing other users to add to and update the lists. The instructions describe how to create a List.ly account, make a new list by adding a title and description, and insert different types of content like videos, web pages, text, and photos. Users can then publish their lists and share them on other sites and with other users.

Recommandé
Recommandé
Contenu connexe
Tendances
Tendances (11)
Similaire à Web 2.0 Curation Tools: A Quick Guide
Similaire à Web 2.0 Curation Tools: A Quick Guide (20)
Plus de Mohamed Amin Embi
Plus de Mohamed Amin Embi (20)
Dernier
Dernier (20)
Web 2.0 Curation Tools: A Quick Guide
- 2. Web 2.0 Curation Tools: A Quick Guide MOHAMED AMIN EMBI Centre for Teaching & Learning Technologies Universiti Kebangsaan Malaysia 2016
- 3. TABLE OF CONTENTS i TABLE OF CONTENTS Page CHAPTER 1SCOOP.IT What is Scoop.it? …………………………………………………..….…… 1 Benefits of Using Scoop.it………………………………………….…..…… 1 Using Scoop.it for Education………………………….…………….……… 2 Get Started with Scoop.it.……………………………………………. …… 3 References……………………………………………………………...…… 13 CHAPTER 2PINTEREST What is Pinterest? ………………………………………………….……… 15 Benefits of Using Pinterest……………………………………….………… 15 Get Started with Pinterest………………………………………………… 17 References…………………………………………….…………………… 25 CHAPTER 3LIST.LY What is List.ly? …….……………………………………………..………… 27 Banefits of List.ly ………………….………..………………………………. 27 Get Started with List.ly……………………….……………………………. 28 References…………………………………….……………………….…… 42 CHAPTER 4PEARLTREES What is Pearltrees?..…………………….………………………………..… 43 Ways to Use Pearltrees…...………………………………………………... 44 Get Started with Pearltrees………………………………………………… 46 References……………………………………...…………………………… 62
- 4. ii TABLE OF CONTENTS CHAPTER 5BLENDSPACE What is a Flipboard?....……………………………………………………. 63 Using Flipboard by Educators..…………………………………………… 63 Get Started with Flipboard.………………………………….……….…… 65 References…………………………………………………………..……. 74 CHAPTER 6FLIPBOARD What is a Flipboard?....……………………………………………………. 75 Using Flipboard by Educators..…………………………….……………… 75 Get Started with Flipboard.………………………………….……….…… 77 References…………………………………………………….……..……. 86 CHAPTER 7PAPER.LI What is Paper.li?...………………………………….……………………… 87 Ways to Use Paper.li………....……………………………………………. 87 Get Started with Paper.li…………………………………..……………… 88 References…………………………………..……………………….……. 96 CHAPTER 8THINGLINK What is Thinglink?....……………………………………….……………… 97 Ways to Use Thinglink for Teaching and Learning……………...………… 97 Get Started with Thinglink……………………………….……..…………. 100 References……………………………………………….………………… 115
- 5. TABLE OF CONTENTS iii CHAPTER 9 STORIFY What is Storify?………………………………………...………………..… 117 Using Storify in the Classroom…………………….……………………… 117 Get Started with Storify..…………………………..……………………… 119 References………………………………………………………………… 132 CHAPTER 10 LEARNIST What is Learnist?……………………………………….………….………. 133 Using Learnist in the Classroom………….………..……………………… 133 Get Started with Learnist………………………………………………….. 137 References………………………………………….……………………… 152
- 7. CHAPTER 1: SCOOP.IT 1 WHAT IS SCOOP.IT? Scoop.it is a content curation platform, where users can curate information about any topic they want. Users will be able to create a topic of their choice (no limits) and start curating information. The site is geared towards providing users a very quick and easy way to “scoop” any information that they feel is relevant to the topic they have chosen. (Source: http://www.iblogzone.com/2011/11/scoop-it-content-curation- tool.html) BENEFITS OF USING SCOOP.IT There following are some benefits of using Scoop.it: 1. No ads on either the user or the public end. 2. Content is suggested to user not included automatically. User has a full control over what goes into their topic. 3. Posts can be promoted to the top spot and held there. This is useful if users blog on a particular topic and would like their latest blog post to be prominent. 4. Users can follow other users who share the same interest. (Source: http://www.molly-greene.com/how-can-a-writer-use-scoop-it/) Chapter 1 Scoop.it
- 8. 2 CHAPTER 1: SCOOP.IT USING SCOOP.IT FOR EDUCATION 1. Create a simple webpage for a single topic. If you are teaching about a specific topic (a holiday, country, person, etc.) in some depth, you can aggregate articles on the subject matter on one page. 2. Publish a magazine for colleagues or like-minded types on what you think are interesting or pertinent topics. 3. Organizing in one location materials that you might use across different classes. You can use a Scoop.it page to aggregate educational videos, online quizzes, spelling resources, and other similar stuff. 4. If you are teaching about an active news item, you can use Scoop.it curation tools to create a page that is constantly updated with the latest items on the topic. 5. Or use it to create your own lightweight, low-maintenance blog with automated content addition. (Source: http://www.theedublogger.com/2012/08/31/keep-your-content- fresh-with-scoop-it/)
- 9. CHAPTER 1: SCOOP.IT 3 GET STARTED WITH SCOOP.IT Go to http://www.scoop.it/ Signing UpSTEP 2 STEP 1 Click at the ‘Join Free’ button to register. If you have already registered, click at the ‘Login’ button.
- 12. 6 CHAPTER 1: SCOOP.IT Creating a Topic STEP 3 Choose your Scoop.it package, then click at the ‘Get started’ button. Now you have successfully created your Scoop.it account. You can begin to create a topic of your interest. Type your topics here. Then, click at the ‘Next’ button.
- 15. CHAPTER 1: SCOOP.IT 9 This is example of the content you have scooped it. Add your insight here (optional). Use this to share on your social media. Then, click at the ‘Publish’ button.
- 16. 10 CHAPTER 1: SCOOP.IT Scoop.it BookmarkletSTEP 5 Click here at your account. Click at this button. Drag and drop it onto your bookmark toolbar. Choose ‘Bookmarklet’. Now, your bookmarklet has been installed here.
- 17. CHAPTER 1: SCOOP.IT 11 Scooping it From a LinkSTEP 6 Then, click the ‘PUBLISH’ button. Open any website you would like to share/scoop. Click at the ‘Scoop.it’ bookmarklet.
- 21. CHAPTER 2: PINTEREST 15 WHAT IS PINTEREST? Pinterest lets users organize and share all the beautiful things they find on the web. People use pinboards to plan their weddings, decorate their homes, and organize their favorite recipes. Best of all, users can browse pinboards created by other people. Browsing pinboards is a fun way to discover new things and get inspiration from people who share same interests. Pinterest is connecting people all over the world based on shared tastes and interests. (Source: http://pinterest.com/about/) BENEFITS OF USING PINTEREST The following are some benefits of using Pinterest: 1. To share photos with family and friends. 2. To share information – many people use Pinterest to post their recipes and ideas, or showcase their talents through photographs. 3. To gather inspiration – individuals from around the world use Pinterest to showcase their best ideas. Chapter 2 Pinterest
- 22. 16 CHAPTER 2: PINTEREST 4. To promote a business – Pinterest can be a great way to share your products with the world. Post your product pictures, or use Pinterest to showcase the talents that you have to offer. Even better, use it to create a visual brand personality for your business. (Source: http://www.mymagneticblog.com/what-is-pinterest/)
- 23. CHAPTER 2: PINTEREST 17 GET STARTED WITH PINTEREST Go to http://pinterest.com/ Joining PinterestSTEP 2 STEP 1 Then, click at the ‘Sign up’ button. You can join Pinterest using your Facebook account or you can register manually using your email.
- 24. 18 CHAPTER 2: PINTEREST Following Topics Insert your details. Then, click at the ‘Come on in’ button. STEP 3 Click five or more topics you want to follow.
- 25. CHAPTER 2: PINTEREST 19 Browsing ButtonSTEP 4 Pinterest browser button makes it easier for you to pin any web page you are interested. Click here to install the Pinterest browser button. The Pinterest browser button will be installed here.
- 26. 20 CHAPTER 2: PINTEREST Pin ItSTEP 5 Choose the content you would like to pin. Then, click at the ‘Pinit’ button.
- 28. 22 CHAPTER 2: PINTEREST Searching Pinterest Now, you have one board and one item that you have pinned. STEP 6 Type keywords you want to search here. These are example of the contents related to your keywords.
- 29. CHAPTER 2: PINTEREST 23 Sending to Friends If you want to send or share the content on the Pinterest, click at the ‘Send’ button. STEP 6
- 33. CHAPTER 3: LIST.LY 27 WHAT IS LIST.LY? List.ly is about creating and curating lists. Users can create lists of tips, websites or anything they are interested in. The challenge though for normal blog post lists is that users have to identify and write about each list item. Sometimes as soon as the list is published, it begins to become stale and outdated. List.ly addresses those issues head-on by allowing users to start a list on their site, embed it within their blog, and then let other people continue to add to and update their list. (Source: http://www.thesocialmediahat.com/article/how-use-listly-blow-your- blog-traffic) BENEFITS OF LIST.LY The following are some benefits of using List.ly: 1. Listly took the blogging trend of compiling informational lists, and made it social. 2. Get friends involved. 3. Vote list items up and down. 4. Share easily by embedding lists anywhere. (Source: http://www.steamfeed.com/social-lists-7-secrets-revealed-listly- facebook-marketers/) Chapter 3 List.ly
- 34. 28 CHAPTER 3: LIST.LY GET STARTED WITH LIST.LY Go to http://list.ly/ Creating an AccountSTEP 2 STEP 1 Click at the ‘SIGN IN’ button if you already have a List.ly account. Or, you can click at the ‘Get Started’ button to sign up.
- 36. 30 CHAPTER 3: LIST.LY Making a List.ly Adding Items Type the name of your list or topic here. STEP 3 Choose your preferred layout. Insert the description of your list. Then, click at the ‘Make List’ button. STEP 4 You can upload a picture for your list cover. For adding an item, click at the ‘Add To List’ button.
- 37. CHAPTER 3: LIST.LY 31 (a) Adding Video To add a video, click at this video icon. Open any video you like from the internet. For an example a video from YouTube. Then, copy the link of the video.
- 39. CHAPTER 3: LIST.LY 33 (b) Adding Web Pages To add a web page in your list, click at this link icon. Open any web page you like from the internet. Then, copy the link of the page.
- 40. 34 CHAPTER 3: LIST.LY (c) Adding Texts Insert the link of the page in your List.ly. Now, you have successfully added the page in your list. You can edit the description and add tags. Then, click at the ‘Save All’ button. To add a text in your list, click at this text icon.
- 41. CHAPTER 3: LIST.LY 35 (d) Adding Photos To add a photo in your list, click at this photo icon. Add the title here You can upload a photo from your computer if you like. Or, you can insert a web page by copying the link of the page. Insert the description here. Then, click at the ‘Save All’ button.
- 42. 36 CHAPTER 3: LIST.LY An example of a photo added Upload a photo from your computer. Or, you can insert an image by copying the link of the image.
- 43. CHAPTER 3: LIST.LY 37 (e) Adding Audios (f) Adding Places To add an audio in your list, click at this audio icon. You can paste the URL of the audio here. To add a place, click at this place icon.
- 44. 38 CHAPTER 3: LIST.LY An example of a place Type the location here.
- 45. CHAPTER 3: LIST.LY 39 Previewing a ListSTEP 5 Go to your List.ly home. Then click here. Next, click at the ‘Lists’ to preview your list. This is an example of the list created.
- 46. 40 CHAPTER 3: LIST.LY Following a ListSTEP 6 Type the keyword here to find any list you have interested. This is example of the list based on the searching keyword. Choose the list you like. Then, you can click at ‘Follow List’.
- 47. CHAPTER 3: LIST.LY 41 Inviting FriendsSTEP 7 Go to your List.ly home. Then click here. Next, click at the ‘Invite Friends’ button. You can invite your friends to use List.ly. from your Facebook contacts or via email.
- 49. CHAPTER 4: PEARLTREES 43 WHAT IS PEARLTREES? Pearltrees is a fascinating and innovative new social networking site that is centered on communicating common interests in a visually interesting and complex manner. Pearltrees uses the concept of organizing individual topics and overall subject matter within user defined points of data, the ‘pearls’ from the title, which connect webs of content, serving as the ‘tree’ portion of the title. Once these trees are created, all springing from the central point of a user profile, creates a repository of what a person is interested in their life and online experience. By searching within Pearltrees, you can access other user’s pearltrees, grab the trees that you find interesting and attach them to your own pearltree. You can access the wealth of information, shares specific interests and store it to access it later. In certain ways, Pearltree is a tool for sharing an entire archive of bookmarks, an exciting method in explaining the thought behind the organization of information. (Source: http://webupon.com/social-networks/the-advantages-and- innovations-of-pearltrees/) Chapter 4 Pearltrees
- 50. 44 CHAPTER 4: PEARLTREES WAYS TO USE PEARLTREES The following are some ways to use Pearltrees suggested by Oliver Starr (2011): 1. To give meaning as well as context to what users find on the Web. Pearltrees lets users select, organize and manipulate the web in meaningful ways. Pearltrees allows users to create personal library of web content that user want to organize and preserve. It makes it easy to classify whether that content is videos, research for work project or simple topics users find interesting. 2. To archive user favorite online discoveries. With Pearltrees, nothing gets lost as the account is organized similar as a personal library to the way and it’s always at hand when users wants it. 3. To re-use what you have done. Pearltree allows users to easily retrieved previous results from the first time it has been use. Pearltrees allows users to create his/her own personal "memory of the Web." 4. To find rare content in your areas of interest. Users can benefit from the curation of others. The collective efforts of a community of like-minded people can vastly accelerate users own personal discoveries.
- 51. CHAPTER 4: PEARLTREES 45 5. To "Team Up" and curate collaboratively. Organizing content with a group of people who share the same passion is a unique experience to Pearltrees’s user. Every time a user return to a team pearltree, it is likely new content will be added. 6. To share the web pages you have curated with a single click. Users can share an entire curated collection on the subject among friends with a single click with friends.
- 52. 46 CHAPTER 4: PEARLTREES GET STARTED WITH PEARLTREES Go to http://www.pearltrees.com/ Creating an Account Then, click at the ‘Join’ button or you can register using your social media account. STEP 2 STEP 1 Insert the required information
- 53. CHAPTER 4: PEARLTREES 47 Choosing a Plan Editing a Profile Choose your plan. Edit your profile. Upload your profile picture. STEP 3 STEP 4
- 54. 48 CHAPTER 4: PEARLTREES Installing a Web ClipperSTEP 5 Click here to install the web clipper. Now you have a web clipper on your browser toolbar. You can add any page, video and text while browsing by using this web clipper.
- 55. CHAPTER 4: PEARLTREES 49 Creating a CollectionSTEP 6 To create a collection, click at this icon. Insert the title of your collection. Insert the description here. Then, click at the ‘Add’ button.
- 56. 50 CHAPTER 4: PEARLTREES Adding ItemsYour in Collection This is an example of the collection created. STEP 7 Click at your collection.
- 57. CHAPTER 4: PEARLTREES 51 (a) Importing items from your computer, social media and storage media To add item, click at this icon. Select ‘Import’ tab. Select the media you want to add to the item. For example, click at the ‘My computer’ icon.
- 59. CHAPTER 4: PEARLTREES 53 (b) Adding items from web pages Click at the ‘Web page’ tab. Insert the URL of the web page here. Then, click at the ‘Add’ button. Open any web page you like to add and copy the URL address.
- 60. 54 CHAPTER 4: PEARLTREES (c) Adding items using the web clipper Open any web page you like to add in your collection. Click at the web clipper. Select the collection you want to add to the web page. This is an example of the web page added in the collection.
- 61. CHAPTER 4: PEARLTREES 55 (d) Adding file Click at the ‘File’ tab. You can drag and drop the file here. Select the file and click at the ‘Open’ button.
- 62. 56 CHAPTER 4: PEARLTREES (e) Adding notes An example of the file added in the collection. Click at the ‘Notes’ tab. Insert the title here. Type your notes here. Then, click at the ‘Add’ button.
- 63. CHAPTER 4: PEARLTREES 57 Creating Team An example of notes. STEP 8 To invite people to team up on your collection or collaborate on interesting topics, click at this icon.
- 64. 58 CHAPTER 4: PEARLTREES Invite your friends to team up from your Pearltrees friend list or contact from your email. Sharing a CollectionSTEP 9 To share your collection, click at this icon.
- 65. CHAPTER 4: PEARLTREES 59 You can share your collection using these applications Editing CollectionsSTEP 10 To edit your collection, click at this icon.
- 66. 60 CHAPTER 4: PEARLTREES You can use these settings to edit your collections. Editing ItemsSTEP 11 Select any item you want to edit.
- 67. CHAPTER 4: PEARLTREES 61 Use these settings to edit your item Click at this icon.
- 68. 62 CHAPTER 4: PEARLTREES REFERENCES http://webupon.com/social-networks/the-advantages-and-innovations-of- pearltrees/) Oliver Starr. 2011. 6 reasons to use Pearltrees. http://www.tgdaily.com/software- features/55373-6-reasons-to-use- pearltrees
- 69. CHAPTER 5: BLENDSPACE 63 WHAT IS BLANDESPACE? Blendspace is the easiest way to blend your classroom with digital content. Teachers and students can collect, annotate and share digital resources using Blendspace as a platform. (Source: http://blog.blendspace.com/) BENEFITS OF BLENDSPACE The following are some benefits of Blendspace for teachers: 1. Blendspace is free for teachers and schools. 2. Allows teachers to easily create rich multimedia lessons for classes and allowing for differentiated resources. 3. Supports an inquiry-based approach as well as the flipped classroom model. 4. Quizzes that are marked automatically can be easily built-in and used for formative assessment purposes assess student knowledge. 5. Track student progress during or outside lessons using lesson tracker. 6. Useful as an organisational tool to collate numerous resources. (Source: http://usingblendspace.wikispaces.com/Benefits+of+Blendspace) Chapter 5 Blendspace
- 70. 64 CHAPTER 5: BLENDSPACE ADVANTAGES OF USING BLENDSPACE IN EDUCATION The following are some advantages of using Blendspace in education: 1. Lesson Tracking: See real-time dashboards on student progress, engagement and assessment results. 2. Lesson Sharing and Collaboration: Discover, re-use, re-mix and collaborate on lessons from teachers within your school and district. 3. Common Core, Next Gen Science, custom standards: Align lessons to standards and track student mastery of standards. 4. Drag-and-drop: Easily add, insert, and delete resources from all over the web and from computer. 5. Organization: Group resources into groups, group lessons into classes and easily organize the students. (Source: http://blog.blendspace.com/) 6. Presentations: Add online multimedia for examples YouTube videos, documents and websites. 7. Flipping the class: Create self-paced lessons and share with using link. 8. Project-Based learning: Students can research, learn and showcase their projects. 9. Differentiated instruction: Personalize student learning with different online materials (Source: https://www.edsurge.com/blendspace--2)
- 71. CHAPTER 5: BLENDSPACE 65 GET STARTED WITH BLENDSPACE Go to https://www.tes.com/lessons Creating an Account Then, click at the ‘Join us for FREE’ button. STEP 2 STEP 1 Insert the required information.
- 72. 66 CHAPTER 5: BLENDSPACE Creating Lesson Select your experience or career. STEP 3 To start creating a lesson, click at the ‘+New Lesson’.
- 74. 68 CHAPTER 5: BLENDSPACE Inserting ContentsSTEP 4 Select the content resources. For example a content from YouTube. Type the keyword here to search. Choose the content you want to add in your lesson.
- 75. CHAPTER 5: BLENDSPACE 69 Adding Quizzes Drag and drop the selected content on to the lesson box. STEP 5 At the lesson box, click at the ‘Add Quiz’ button.
- 77. CHAPTER 5: BLENDSPACE 71 This is an example of the quiz you have created. Changing Templates & ThemesSTEP 6 Click here to change the template of your lesson. Choose the template. Now the template of your lesson has been changed.
- 78. 72 CHAPTER 5: BLENDSPACE Sharing Your Lessons Click here to change the theme of your lesson. Choose either dark or coloured theme. Now you theme of your lesson have been changed. STEP 7 Click at the ‘Share’ button.
- 79. CHAPTER 5: BLENDSPACE 73 Setting Privacy You can share by sending the lesson link. Or, you can share using these items. STEP 8 Click at the ‘Privacy’ icon. Select your requirement.
- 80. 74 CHAPTER 5: BLENDSPACE Collaborating with Others REFERENCES http://blog.blendspace.com/ http://usingblendspace.wikispaces.com/Benefits+of+Blendspace http://blog.blendspace.com/ https://www.edsurge.com/blendspace--2 STEP 9 Click at the ‘Collaborate’ icon. Type the name or email address of the collaborators Then, click at the ‘Add’ button. Or, you can send the link to the collaborators.
- 81. CHAPTER 6: FLIPBOARD 75 WHAT IS FLIPBOARD? Flipboard is a part of social apps and a part of magazine. It gathers content from social networks, news publications and blogs. Flipboard displays stories, articles, blog posts, videos and other pieces of content in a magazine format. Flipboard is available on multiple operating systems and devices, including smartphones and tablets. Flipboard also can be access in a web browser from computer. (Source: http://www.verizonwireless.com/mobile-living/entertainment/what- is-flipboard-app-how-to-use/) USING FLIPBOARD BY EDUCATORS Flipboard is the perfect tool for educators to create magazines for themselves, their students and colleagues. Here is how Flipboard can be used by educators: 1. Collect and share information with students Educators can search Flipboard to find content on any topic, then flip (add) that content into a magazine, and then share that magazine with their students. Creating magazines like this allow educators to provide Chapter 6 FLIPBOARD
- 82. 76 CHAPTER 6: FLIPBOARD students with specific information and saves students’ time that they would otherwise spend searching for content. 2. Collaborate with colleagues This feature allows multiple curators to flip content into one magazine. With this method of co-curating, educators would reduce the time spent finding content on their own. 3. Save conference resources Educators can curate Flipboard magazines for conferences by adding content from the web related to the event. This includes article, videos, photos, slides, tweets and more. Items posted online can be added to a conference magazine whether or not the curator is in attendance. After the conference, the magazine can be used as a historical document and as a resource for educators who want to review what happened at a later date. 4. Grow professionally Like most educators, they all want to stay current. Flipboard magazines can be used to drive educators’ professional development. Educators use Flipboard search feature to find already created magazines on topics they interested then click on the “follow option” to add the magazine to their Flipboard reading list. Magazines such as “Blended Learning” and “Flipped Classroom” help educators to stay current. (Source: https://about.flipboard.com/educators/how-i-use-flipboard-as-an- educator/)
- 83. CHAPTER 6: FLIPBOARD 77 GET STARTED WITH FLIPBOARD Go to https://flipboard.com/ Creating an Account Click at the ‘Sign Up’ button to create a Flipboard account. STEP 2 STEP 1
- 84. 78 CHAPTER 6: FLIPBOARD Creating New Magazine Select 7 or more topics you want to follow. Then, click at the ‘Done’ button. For creating a new magazine, click at the ‘NEW MAGAZINE’ button. STEP 3
- 86. 80 CHAPTER 6: FLIPBOARD Searching Items Click at this icon to search items. STEP 4 Insert the keyword here.
- 87. CHAPTER 6: FLIPBOARD 81 Flipping Items Select the item you want to insert in your magazine. STEP 5 To flip your selected item into your magazine, click at this icon. If you want to see more stories like this in your magazine, click here. If you want to share this story to your friend, click here.
- 88. 82 CHAPTER 6: FLIPBOARD Editing a Magazine After you have clicked the flip button, you can choose either to ‘PICK’, or add in your ‘New Magazine’ or magazine that you have created. Then, click at the ‘Add’ button. STEP 6 Select the new magazine that has been created. Then, click at the ‘Edit’ button.
- 89. CHAPTER 6: FLIPBOARD 83 (a) Inviting people to contribute Click at the ‘Invite People to Contribute’ button. Click here to make your magazine visible to the public.
- 90. 84 CHAPTER 6: FLIPBOARD (b) Sharing your magazine Then, click at the ‘OK’ button. Choose the contact detail from these applications to select the contributors. To share your magazine, click at the ‘Share’ button.
- 91. CHAPTER 6: FLIPBOARD 85 (c) Viewing a magazine Then, select the application you want to share with others. For viewing your magazine, click at the ‘view’ button.
- 92. 86 CHAPTER 6: FLIPBOARD This is an example of the magazine created REFERENCES http://www.verizonwireless.com/mobile-living/entertainment/what-is- flipboard-app-how-to-use/ https://about.flipboard.com/educators/how-i-use-flipboard-as-an-educator/
- 93. CHAPTER 7: PAPER.LI 87 WHAT IS PAPER.LI? Paper.li is a content curation service that helps users find and share great content in their own visually appealing online newspaper. (Source: http://www.razorsocial.com/how-to-use-paper-li-to-share-great- content/) WAYS TO USE PAPER.LI Here are some ideas on how to use Paper.li: • Create a daily newspaper just for you. It’s great at finding content you may not always find on twitter. • Prior to sending the content, you can remove what you do not like and reorganize the layout of the newspaper to make sure only the best content is delivered. • You do not just focus on your content you focus on providing really relevant and useful information related to your students. • Create a newspaper based on your lesson and share internally with your students. (Source: http://www.razorsocial.com/how-to-use-paper-li-to-share-great- content/) Chapter 7 Paper.li
- 94. 88 CHAPTER 7: PAPER.LI GET STARTED WITH PAPER.LI Go to http://paper.li/ Creating an AccountSTEP 2 STEP 1 Click at the ‘Start Now For Free’ button to create a Paper.li account. You also can sign up using your social media and email account.
- 96. 90 CHAPTER 7: PAPER.LI Creating a PaperSTEP 3 Select ‘Your papers’. Then, click at the ‘CREATE PAPER’ button. Type the title of your paper here. You also can change it later. Click at the ‘paper.li’ menu.
- 97. CHAPTER 7: PAPER.LI 91 Inserting ContentsSTEP 4 Click at the ‘Get Content Now’ to search the content. This is the content in your paper. This is the theme of your paper.
- 98. 92 CHAPTER 7: PAPER.LI Editing ContentsSTEP 5 At the top right corner, click at the ‘Edit’ button. Click this icon to remove the content from your theme. Click this icon to the content from your paper. Click this icon to blacklist the person who is sharing the content. Click this icon to blacklist the website of the content.
- 99. CHAPTER 7: PAPER.LI 93 Sharing Contents Dashboard STEP 6 Select the content you want to share. Click at this icon to start sharing. Select the platform you want to share the content. STEP 7 At the top right corner, click at this icon. Select and edit your setting. Install this bookmarklet and drag it at your bookmarks bar. You can add any content from anywhere on the web using this bookmarklet.
- 100. 94 CHAPTER 7: PAPER.LI (a) Global setting (b) Content You can edit the title of your paper, subtitle and note. You can search content, connect with your social media and review your selected content.
- 101. CHAPTER 7: PAPER.LI 95 (c) Layout and appearance Reviewing a Paper Edit your paper layout and appearance. STEP 8 Go to ‘Paper.li’ menu. Select ‘Newsstand’
- 102. 96 CHAPTER 7: PAPER.LI This is an example of the paper created REFERENCES http://www.razorsocial.com/how-to-use-paper-li-to-share-great-content/
- 103. CHAPTER 8: THINGLINK 97 WHAT IS THINGLINK? ThingLink is a free and user friendly digital tool that provides users with the ability to turn any image into an interactive graphic. Create multiple “hot spots” on specific parts of an image and turn that image into a multimedia launcher. Include video, record audio or provide a link to any website with the click of a button. Easily embed an interactive ThingLink graphic into any blog or website. ThingLink is a truly amazing tool that allows users to pack a lot of content into a small space. (Source: http://gettingsmart.com/2012/08/5-ways-use-thinglink-teaching- learning/) WAYS TO USE THINGLINK FOR TEACHING AND LEARNING Here are some ideas and interactive examples to get you started with Thinglink: 1. Use ThingLink as a Multimedia Curriculum Launcher ThingLink provides teachers with opportunities to design multimedia rich student driven learning experiences that offer flexible learning paths to meet the diverse learning needs of all students. A ThingLink graphic can Chapter 8 Thinglink
- 104. 98 CHAPTER 8: THINGLINK provide students with background knowledge and opportunities for challenge all in one place. To make sure students are accountable for learning, use an Essential Question or scavenger hunt to guide the learning. 2. Use ThingLink to Introduce a Technology Tool Using an interactive graphic to introduce new technology to a group of teachers or students can be a very effective and appealing to those who are hesitant to learn to use new technology. The ability to pack a large amount of multimedia content into one graphic and the addition of colored nubbins to the ThingLink features provides a way to differentiate instruction visually, allowing teachers and students to explore areas of interest. 3. Use Thinglink for Professional Development A ThingLink graphic packed with resources and combined with sufficient time for constructive play is an excellent way to introduce a new technology tool to teachers Include video tutorials, written directions, links to examples and podcasts to provide participants with all the resources they need in one easily accessible and compact graphic. 4. Use ThingLink to Publish Student Work Students who create and publish for an audience are likely to do their best and most careful work. Why not promote your program and provide visitors with a peek into your classroom by using ThingLink to regularly publish student work? Do remember to protect student identities when publishing their work on the Internet.
- 105. CHAPTER 8: THINGLINK 99 5. Use ThingLink to Create Interactive Student Reports Students today should have plenty of opportunities to engage in research. It’s a good idea to occasionally offer alternatives to the traditional written research report. Use ThingLink to let students create interactive, multimedia reports that utilize their personal strengths. (Source: http://gettingsmart.com/2012/08/5-ways-use-thinglink-teaching- learning/)
- 106. 100 CHAPTER 8: THINGLINK GET STARTED WITH THINGLINK Go to https://www.thinglink.com/ Creating an AccountSTEP 2 STEP 1 Next, click at the ‘CONTINUE REGISTERATION’ button. Insert your email and password to create an account. Insert your name here. Then, click at the ‘REGISTER FOR FREE!’ button.
- 107. CHAPTER 8: THINGLINK 101 Creating a Thinglink (a) Searching images Open your email, and click here to verify your email. STEP 3 To start creating thinglink, click at the ‘CREATE’ button. Insert a keyword to search the image related.
- 109. CHAPTER 8: THINGLINK 103 (b) Upload images Click here to upload an image from your hard drive. Or, you can click here to drag and drop the image from your hard drive. Select the image and drag and drop at thinglink.
- 110. 104 CHAPTER 8: THINGLINK (c) Searching videos or webs This is an example of the selected image that has been dragged and dropped from hard drive. Click at the image to start editing. Click at this button. To add a video, go to YouTube. To add a web or an image, insert the link here.
- 111. CHAPTER 8: THINGLINK 105 This is an example of the video that has been added. Insert the keyword of the content and select the video. Copy the link of the selected YouTube video. Paste the link of the YouTube video here. Click at the ‘TAG THIS MEDIA’ to start tagging.
- 112. 106 CHAPTER 8: THINGLINK Inserting a Title Adding Tags to Images STEP 4 Insert the title of the image here. Click here to zoom in or zoom out the image. Click here to add a tag. STEP 5
- 113. CHAPTER 8: THINGLINK 107 Insert the link or image address of your tag here. Type notes or information about your tag (optional). Then, click at the ‘SAVE TAG’ button. This is an example of the tagging.
- 114. 108 CHAPTER 8: THINGLINK Editing a Tag The image shows that you have one tag here. STEP 6 Click at the ‘EDIT’ icon.
- 116. 110 CHAPTER 8: THINGLINK Adding a Tag to VideosSTEP 7 Click at the video you have uploaded and click play button. To start adding the tag, click ‘+ ADD NEW TAG’ button. Insert the URL address or the embed code of the content from the web you would like for tagging at the video. You can change the icon of the tag. The timing of the tag will appear. Insert the description of the content. Then, click at the ‘Save’ button.
- 118. 112 CHAPTER 8: THINGLINK Sharing VideosSTEP 8 To share a video, click at this icon. You share your video using your social media, or link or embed code.
- 119. CHAPTER 8: THINGLINK 113 Inviting StudentsSTEP 9 Click at the ‘STUDENTS’. To add students, go to ‘GROUP’ tab.
- 120. 114 CHAPTER 8: THINGLINK Register students without email Click here to register your students without using email address. Insert the students’ name here. Then, click at the ‘REGISTER STUDENTS’ button.
- 122. CHAPTER 9: STORIFY 117 WHAT IS STORIFY? Storify is a social media tool that lets users create stories or timelines from a variety of social media resources like Facebook and Twitter, as well as other web resources. Users can use it to pull together information on whatever they want, and can customise it. Users also can share the story on the site with friends on those social media sites. (Source: http://libroediting.com/2013/11/27/what-is-storify-and-how-do-i-use- it/). USING STORIFY IN THE CLASSROOM The following are some ways to use Storify in the classroom: 1. Compile a story about a recent event or phenomenon. Want to help students engage with the world around them? You might assign them to craft a story from a certain point of view (e.g., to create a story from a senator’s perspective about the ongoing budget crisis) or ask students to pick out tweets, pictures, and videos that cover a variety of perspectives. Chapter 9 STORIFY
- 123. 118 CHAPTER 9: STORIFY 2. Literature Class: Create a multimedia “book report” If students are reading a non-fiction book, they can comb the web for YouTube videos, links, pictures and more related to the subject matter. If students are reading a novel, they might choose to create a Storify story on the author’s biography or about the time period in which the novel is set. 3. History: “Reenact” a Historical Narrative Teaching students about the Civil Rights movement, the French Revolution, or the War of 1812? Have students create a Storify narrative that focuses on one aspect of the lesson. For example, a one student might choose to create a story about art at the time of the French Revolution, using Flickr images and historical websites to flesh out a narrative of the neo-classical art movement. 4. Science: Put together photos, videos, and other information about a scientific concept. Use Storify to chronicle a scientific phenomenon or discovery, or have students collect photos from a particular type of ecosystem. 5. Add a public speaking component! Encourage students to present their Storify stories to the class. If you have assigned students a current events story, students could even use their stories in the context of a debate – have two students create stories about opposing viewpoints, and use them to back up their respective arguments. (Source: https://www.knewton.com/resources/blog/edtech/4-ways-to-use- storify-in-the-classroom/)
- 124. CHAPTER 9: STORIFY 119 GET STARTED WITH STORIFY Go to: https://storify.com/ Signing UpSTEP 2 STEP 1 Click at the ‘Sign Up Free’ button.
- 125. 120 CHAPTER 9: STORIFY Creating a Storify STEP 3 Insert the required information. Then, click at the ‘Sign up’ button. To start creating a Storify, click at the ‘New Story’ button.
- 126. CHAPTER 9: STORIFY 121 (a) Inserting headlines & descriptions Storify section Media section Insert the name of your story here. Type the description of the story here.
- 127. 122 CHAPTER 9: STORIFY An example of headline and description created (b) Inserting videos from YouTube Click at the ‘Youtube’ icon at the media toolbar. Insert the keyword here and search. Find the video you like to add to storify, then drop it in the storify section. You can add as many as you like.
- 128. CHAPTER 9: STORIFY 123 This is an example of the video inserted in Storify. (c) Adding texts At your Storify section, go to ‘Insert’ and select to add ‘Text’ or ‘Horizontal Rule’. Or, you can direcly click at the Storify window section to add text or horizontal rule.
- 129. 124 CHAPTER 9: STORIFY This is an example of the text added. (d) Instagram Click at the ‘Instagram’ icon at the media toolbar. Insert the keyword here and search. Find the picture you like to add to Storify, then drop it in the Storify section. You can add as many as you like.
- 130. CHAPTER 9: STORIFY 125 This is an example of a picture from Instagram added in Storify. (f) Giphy Click at the ‘Giphy’ icon at the media toolbar. Insert the keyword here and search. Find the picture you like to add to Storify, then drop it in the Storify section. You can add as many as you like.
- 131. 126 CHAPTER 9: STORIFY (g) Twitter and facebook (h) Provide link To add items from Twitter or Facebook, you need to connect with the account first. Click at the ‘link’ icon at the media toolbar. Insert the link here and search. This is the page from the link.
- 132. CHAPTER 9: STORIFY 127 This is an example of the page from the link added in Storify. (i) Flickr Click at the ‘Flickr’ icon at the media toolbar. Insert the keyword here and search. Find the picture you like to add to Storify, then drop it in the Storify section. You can add as many as you like.
- 133. 128 CHAPTER 9: STORIFY This is an example of the picture from the Flickr added in Storify. (j) Google Click at the ‘Google’ icon at the media toolbar. Insert the keyword here and search. Find the content you like to add to Storify, then drop it in the Storify section. You can add as many as you like.
- 134. CHAPTER 9: STORIFY 129 This is an example of the content from Google added in Storify. (k) Sound Cloud Click at the ‘Sound Cloud’ icon at the media toolbar. Insert the keyword here and search. Find the sound you like to add to Storify, then drop it in the Storify section. You can add as many as you like.
- 135. 130 CHAPTER 9: STORIFY Publishing Storify STEP 4 At the top of your Storify, click at the ‘Publish’. This message shows that your story have been published.
- 136. CHAPTER 9: STORIFY 131 Editing & Sharing Storify STEP 5 At your Storify Home, click at the story that you have been created. Click at the ‘Edit’ if you want to edit your story.
- 138. CHAPTER 10: LEARNIST 133 WHAT IS LEARNIST? Learnist is freemedia and resource sharing site that is an extremely useful tool for teachers and students to curate a number of relevant sites relating to a topic. Learnist is also available as an iPad app and an Android app. When people study with others, they will learn faster. With Learnist, users can quickly share information with online network about things they know, get feedback, and collaborate to learn new things (http://www.slideshare.net/fionabeal/have-you-considered-creating-a-learnist- board). Learnist is a learning board for the digital age. The web application itself describes a “learn board” as a “set of learnings organized as a series of steps for people to learn.” Users can also look at a learning board as a container for any content that helps them understand things they are interested in. On the web, there is a glut of content that can add to education (http://www.makeuseof.com/tag/how-to-use-learnist-to-effectively- organize-your-learning-teaching/). Chapter 10 Learnist
- 139. 134 CHAPTER 10: LEARNIST USING LEARNIST IN THE CLASSROOM The following are how an educator can use “Learnist” effectively: 1. Collect and Share Resources In Learnist, you can organize resources through learn boards. Create a board to share your knowledge and show your expertise. Learnist allows you to add resources from anywhere on the web. Post relevant resources to your learn board and add a description. Through the search toolbar, you can access many learn boards relevant to your lesson. You can suggest resources to the board, re-add resources to your board and also add tags to it. There are many options to like, comment, share and follow the boards if you find them interesting. Once you have collected resources for your lesson and added them to your board, you can easily provide students a better learning environment in the classroom as well as at home. 2. Collaborate While creating the board, you can add your colleagues or administrators or others as collaborators to it. By this, collaborators observe what students are learning and are able to suggest related learning resources for your learn-board. You can also observe the other boards as a collaborator and can help them provide good resources. Exchange of information leads to better understanding and greater exposure.
- 140. CHAPTER 10: LEARNIST 135 3. Make your lesson interesting: Based on present learning approaches, students find difficulty with the traditional classroom environment. If you still make them confined to their chairs and listen to your lectures, they will lose interest. Learnist provides you with a beautiful platform to deliver your lecture. You can engage your students with images, videos and songs relevant to your lesson content. Students pay more attention if you use technological approaches like multimedia. 4. Keep students up to date: If a student is absent, he may surely miss the valuable lesson topic. But Learnist allows you to help those students also by sending out emails and tweets containing lecture resources to them. 5. Encourage Group activities: Learnist helps students to finish their projects with the help of other group members. A student can surely understand his responsibility in a group and thus collaborate with others effectively. They can create and manage their boards together as a team. 6. Save your precious time and effort: There are many users adding resources continuously, educators can take this as an advantage to collect best resources for their lesson content. It saves your precious research time and help you make a lesson effective. On the top of the site, you can find numerous categories like “art & design”, “science”, “education” and much more. You can filter your
- 141. 136 CHAPTER 10: LEARNIST search results through “featured”, “popular” and “new”. Learnist makes a class your classroom interactive and real life learning environment. (Source: http://edtechreview.in/news/481-amazing-ways-educators-are-using- learnist)
- 142. CHAPTER 10: LEARNIST 137 GET STARTED WITH LEARNIST Go to http://learni.st/ Signing UpSTEP 2 STEP 1 Click at the ‘Sign Up’ button.
- 143. 138 CHAPTER 10: LEARNIST Creating a Board Insert the required information. Then, click at the ‘Sign up’ button. STEP 3 To start creating a Learnist, click at the ‘Create a Board’ button.
- 144. CHAPTER 10: LEARNIST 139 (a) Adding board information Once you have created a board. You can add the cover that is relevant to your content in your board. Then, insert the title of your board. Next, insert the description of your board. You can insert a link of the image to add the photo.
- 145. 140 CHAPTER 10: LEARNIST This is an example of the cover photo. This is an example of the title and description for a board.
- 146. CHAPTER 10: LEARNIST 141 Creating Learning STEP 4 Once you have finished inserting the board information, click at the ‘Let’s go!’ button. Select the post type you like.
- 147. 142 CHAPTER 10: LEARNIST (a) Text Section This is example of the content for text section’s type. Insert the title and the description. Select ‘Text Section’ type.
- 148. CHAPTER 10: LEARNIST 143 (b) Link Section Insert the title and the description. Select ‘Link Section’ type. Then, click here to add a web link. Insert the URL address of the webpage here.
- 149. 144 CHAPTER 10: LEARNIST This is an example of the content for link section’s type. (c) Adding images Select ‘Image’ type.
- 150. CHAPTER 10: LEARNIST 145 This is an example of the image. Insert the title and the description. Insert the image from your computer here.
- 152. CHAPTER 10: LEARNIST 147 This is an example of the video. Insert the keyword of the video here. Select the video. Then, click at the ‘Add video’.
- 153. 148 CHAPTER 10: LEARNIST Tracking Progress Categorization STEP 5 At the top of you learning board, you can see the percentage of your progress. The higher the level of progress, the better your chances are for getting featured. STEP 6 Then, select the category of your Learnist’s content. Click at this icon to categorize your content. It will help you widen your audience by making your content more discoverable.
- 154. CHAPTER 10: LEARNIST 149 Reordering Contents . STEP 7 Click at this icon to reorder your content. Click and drag to change the order. Then, click at the ‘Save’ button.
- 155. 150 CHAPTER 10: LEARNIST Publishing a BoardSTEP 8 Once you have completed your board, click at the ‘Publish’ button. Now, your board have been published. You also can share your board in your facebook or twitter.
- 156. CHAPTER 10: LEARNIST 151 Editing a BoardSTEP 9 For viewing your board, click at the ‘Profile’ button. This is the number of your board. Select the board you want to edit.