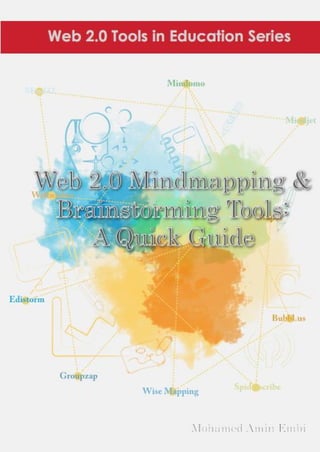
Web 2.0 Mindmapping & Brainstorming Tools: A Quick Guide
•
15 j'aime•15,094 vues

web 2.0 mi

Recommandé
Recommandé
Contenu connexe
Tendances
Tendances (20)
Similaire à Web 2.0 Mindmapping & Brainstorming Tools: A Quick Guide
Similaire à Web 2.0 Mindmapping & Brainstorming Tools: A Quick Guide (20)
Plus de Mohamed Amin Embi
Plus de Mohamed Amin Embi (19)
Web 2.0 Mindmapping & Brainstorming Tools: A Quick Guide
- 2. Web 2.0 Mindmapping & Brainstorming Tools: A Quick Guide MOHAMED AMIN EMBI Centre for Academic Advancement Universiti Kebangsaan Malaysia 2012
- 4. Table of Contents i TABLE OF CONTENTS Page CHAPTER 1 MINDOMO What is Mindomo?…………………………………………………...16 1 Benefits of Mindomo..……………………………………………… 1 Advantages of using Mindomo in education……….………………… 2 Get started with Mindomo.……………………………………………. 3 References……………………………………………………………22 9 CHAPTER 2 MINDJET What is Mindjet?............................................................................................. 10 Benefits of Mindjet for teachers ….………………………………… 10 Get started with Mindjet………………………………………………312 References………………………………………………………………..9 19 CHAPTER 3 WISE MAPPING What is Wise Mapping?……………………………………………...16 20 Advantages of Wise Mapping……………….………………………… 20 Get started with Wise Mapping………………………………………..18 21 References………………………………………………………………22 27 CHAPTER 4 BUBBL.US What is Bubbl.us?……………………………………………………… 28 Benefits of Bubbl.us………………………………………….…………23 28 Ideas for usage as a research tool..………………………………… 29 Get started with Bubbl.us...…………………………………………….25 30 References………………………………………………………………40
- 5. ii Table of Contents CHAPTER 5 MAPUL What is Mapul?............................................................................................... 41 Advantages of Mapul………………………………………………….. 42 Get started with Mapul…………..……………………………………..2 43 References……………………………………………………………….8 49 CHAPTER 6 MIND42 What is a Mind42?....……………………………………………………..1 50 Advantages of Mind42..…..……………………………………………....1 50 Using Mind42……………………………..…………………………. 51 Get started with Mind42…….…………………………………………2 52 References……………………………………………………………….6 62 CHAPTER 7 EDISTORM What is Edistorm?..……………………………………………………..58 63 Benefits of Edistorm………....…………………………………………..64 Using Edistorm in the classroom………………………………………… 64 Get started with Edistorm……………………………………………...60 66 References………………………………………………………………69 71 CHAPTER 8 WALLWISHER What is Wallwisher?……………………………………………………70 72 Benefits of using Wallwisher.………………………………………..70 72 Using Wallwisher as a research tool……………………………….. 73 Get started with Wallwisher…………………………………………72 74 References………………………………………………………………80 82
- 6. Table of Contents iii CHAPTER 9 GROUPZAP What is GroupZap?……………………………………………………81 83 Benefits of GroupZap..……………………………………………….81 83 Get started with GroupZap…………………………………………...82 86 References………………………………………………………………85 91 CHAPTER 10 SPIDERSCRIBE What is SpiderScribe?……………………………………………………1 92 Benefits of SpiderScribe………………………………………………192 Advantages of SpiderScribe…………………………………………. 93 Get started with SpiderScribe…………………………………………...3 94 References……………………………………………………………….9 99
- 7. Chapter 1: Mindomo 1 Chapter 1 MINDOMO WHAT IS MINDOMO? Mindomo is an online mind mapping tool and service that offers the perfect place to develop ideas and brainstorm in team (http://www.mindomo.com/help/faq.htm). BENEFITS OF MINDOMO 1. Easily recallable. 2. Easily modified. 3. Flexible (adapts to user’s needs). 4. Simple to use. 5. Flash based online tool. 6. Neat look. (Source: http://www.mindomo.com/mindmap/advantages-of-mindomo- 038a1012f5a74f1e92d32f8677b87e8a http://bibl.wordpress.com/2007/05/17/mindomo-free-online-flash- mindmapping-tool/)
- 8. 2 Chapter 1: Mindomo ADVANTAGES OF USING MINDOMO IN EDUCATION The following are the advantages of using Mindomo in education: 1. Recognize trends, clusters and other patterns in your information. 2. Synthesize separate pieces of information into new knowledge. 3. Retain information more efficiently. 4. Enhance thinking and learning. 5. Communicate information more effectively. 6. Students can use mind maps to better understand and learn new concepts, identify key concepts easily, evaluate concepts and ideas, and improve problem solving. 7. Students can create, edit, and share mind maps with teachers and other students. 8. Mindomo can be used as a pre- and post-topic assessment tool. Students can preview a specified topic by creating a mind map to show what they know at the beginning of a lesson. Following a lesson or teaching unit students can review the material by creating a mind map showing what they have learned. (Source: http://www.mindomo.com/mindmap/advantages-of-mindomo- 60666e8f41a7a1a7de6a63b465542dd5 http://www.web2teachingtools.com/Mindomo.html)
- 9. Chapter 1: Mindomo 3 GET STARTED WITH MINDOMO STEP 1 Go to http://www.mindomo.com/ STEP 2 Creating an Account Click the ‘Sign Up’ button to create a Mindomo account. Fill in the required information. Then, click the ‘Sign Up’ button. Or, you can sign up using other accounts.
- 10. 4 Chapter 1: Mindomo Mindomo will send you an email. Click the link given so that you can activate your Mindomo account. STEP 3 Creating Maps Insert the title Click at the of your map. ‘New Map’ button. Click at the ‘New’ button.
- 11. Chapter 1: Mindomo 5 Double click to edit the title or main topic. (a) Inserting topic or subtopic Choose and insert the type of the mapping for topic and its’ subtopics. (b) Changing the map’s theme Select the theme you like.
- 12. 6 Chapter 1: Mindomo (c) Changing the map’s theme Select the layout of the mapping map that you like. (d) Insert relationship You can insert and choose the boundary.
- 13. Chapter 1: Mindomo 7 Example of a mind mapping created Relationship Boundary. between the topic. Topics and sub topics. STEP 4 Mindomo Tools
- 14. 8 Chapter 1: Mindomo STEP 5 Sharing Maps Copy the Edit your link given ‘Share and share it Settings’. to the public. Copy the embed code given and paste it onto your website. STEP 6 Exporting/Importing Files Go to ‘File’. Select ‘Import from’ to import the map you have created into Select any image ‘Export’ to format. export other files you’re your map.
- 15. Chapter 1: Mindomo 9 REFERENCES http://www.mindomo.com/help/faq.htm [8 October 2012] http://www.mindomo.com/mindmap/advantages-of-mindomo- 038a1012f5a74f1e92d32f8677b87e8a [8 October 2012] http://bibl.wordpress.com/2007/05/17/mindomo-free-online-flash- mindmapping-tool/ [8 October 2012] http://www.mindomo.com/mindmap/advantages-of-mindomo- 60666e8f41a7a1a7de6a63b465542dd5 [8 October 2012] http://www.web2teachingtools.com/Mindomo.html [8 October 2012]
- 16. 10 Chapter 2: Mindjet Chapter 2 MINDJET WHAT IS MINDJET? Mindjet is software for brainstorming, sharing ideas, creating plans, prioritizing tasks, and working across teams to implement projects. (Source: http://www.mindjet.com/) BENEFITS OF MINDJET FOR TEACHERS The following are some benefits of Mindjet for teachers: 1. Course planning: Help teachers manage their many classes and numerous activities. 2. Research for lectures: Help teachers find and collect information for lectures. They also help teachers to keep track of latest development in their field and share that information readily with students. 3. Lecture compositions: Help teachers summarize, organize, and present lecture information. 4. Presentations: Teachers and students can collaborate during the lecture by jointly manipulating the lecture mind map, making lectures fun and creative.
- 17. Chapter 2: Mindjet 11 5. Assessment of students: Mind maps express students’ misconceptions just as clearly as their correct conceptions and can help students and instructors diagnose and remedy these misconceptions. (Source: http://blog.mindjet.com/2010/07/guest-post-learning-with-mind- maps-part-2/)
- 18. 12 Chapter 2: Mindjet GET STARTED WITH MINDJET STEP 1 Go to http://www.mindjet.com/ STEP 2 Creating an Account Click at this button. Fill in the required information. Then, click the ‘LET’S GET GOING’ button.
- 19. Chapter 2: Mindjet 13 Choose type of usage. Insert the required information. Click the ‘CONTINUE’ button. This is how the Mindjet mind map will look like.
- 20. 14 Chapter 2: Mindjet STEP 3 Creating Maps Open Mindjet and click at the ‘New’ icon. Insert the title of your map. Choose the type of the template you like. Then, click at the ‘Create’ button. (a) Inserting a Topic Click at the ‘Home’ tab. Use these tools to insert a topic into your mind map.
- 21. Chapter 2: Mindjet 15 Floating topic. Main topic. Topic. (b) Topic Elements Go to ‘Topic Elements’. Insert the URL address here to add Write notes to your the hyperlink to your topic here. topic.
- 22. 16 Chapter 2: Mindjet Notes added. File attached. Image added. (c) Tasks
- 23. Chapter 2: Mindjet 17 Progress. Priority. Task done. (d) Boundary and relationship Click at the ‘Insert’ tab. Boundary. Relationship.
- 24. 18 Chapter 2: Mindjet STEP 4 Exporting Open your mind maps and go to the ‘Home’ tab. Then, click the ‘Export’ button.
- 25. Chapter 2: Mindjet 19 REFERENCES http://www.mindjet.com/ http://blog.mindjet.com/2010/07/guest-post-learning-with-mind-maps-part-2/
- 26. 20 Chapter 3: Wise Mapping Chapter 3 WISE MAPPING WHAT IS WISE MAPPING? Wise Mapping is the web mind mapping tool that leverages the power of Mind Maps mixing new technologies like HTML 5.0 and SVG. (http://www.wisemapping.com/faq.html). ADVANTAGES OF WISE MAPPING 1. It is free. 2. It is easy to use. 3. It has an interactive interface. 4. It requires a sign up. 5. It allows you to create and edit colorful and complex mind maps using just mouse and keyword. 6. It lets you customize your maps by changing the border, text, shape and background color of your notes. 7. It has a sophisticated authoring editor to help you manage your maps. 8. You can share or save your mind maps right from the editor. 9. You can make your mind maps either private or public. 10. You can embed the image of your map anywhere you want online. (Source: http://mahoganygirl.blogspot.com/2011/05/wise-mapping-great-mind- maps-creation.html)
- 27. Chapter 3: Wise Mapping 21 GET STARTED WITH WISE MAPPING STEP 1 Go to http://www.wisemapping.com/ STEP 2 Creating an Account Click the ‘Sign Up Free!’ button or you can try without login first. Fill in the required information. Then, click the ‘Sign Up’ button.
- 28. 22 Chapter 3: Wise Mapping Click ‘here’ to start using wise mapping. STEP 3 Creating a map Then, click the ‘New’ button. Insert the name and description To create a new of the map. map, go to ‘My Maps’. Then, click the ‘Create’ button. This is an example of This is how main topic your map will created. look like.
- 29. Chapter 3: Wise Mapping 23 (a) Inserting topics or subtopics An example of a topic and its sub-topics created. (b) Adding other tools
- 30. 24 Chapter 3: Wise Mapping Icon and note Relationship. added to the topic. Link added. STEP 4 Sharing Click at this icon and insert email of the Click this icon persons you to publish your want to share map. with.
- 31. Chapter 3: Wise Mapping 25 Mark the ‘Enable Sharing’ button. Or click at the ‘Public URLs’ tab to copy the URL Copy the address. embed code and insert it onto your blog or page. STEP 5 Exporting Maps Click this icon to export your map.
- 32. 26 Chapter 3: Wise Mapping Choose the format of the map you want to export. Then, click the ‘Accept’ button.
- 33. Chapter 3: Wise Mapping 27 REFERENCES http://www.wisemapping.com/faq.html http://mahoganygirl.blogspot.com/2011/05/wise-mapping-great-mind-maps- creation.html
- 34. 28 Chapter 4: Bubbl.us Chapter 4 BUBBL.US WHAT IS BUBBL.US? Bubbl.us is a Web 2.0 tool that enables users to create mind mapping and brainstorming diagrams online. To begin, the main topic or concept is entered in to the parent bubble. Then ideas and thoughts are recorded in colorful text bubbles linked to the parent bubble. Users continue to add text bubbles which are color coded according to hierarchy. The site is simple and easy to use. The application is Flash-based so the latest Flash viewer needs to be installed. (Source: http://www.web2teachingtools.com/bubbl_us.html) BENEFITS OF BUBBL.US Some benefits for using Bubbl.us: Easy to use. Saving time, supplies, and money. Does not require an account unless to save work. Helps to organize thoughts and explore relationships. Aids in generating ideas. Encourages risk taking. Encourages group discussions.
- 35. Chapter 4: Bubbl.us 29 Incorporates multiple intelligences. (Source: http://www.web2teachingtools.com/bubbl_us.html) IDEAS FOR USAGE AS A RESEARCH TOOLS Bubbl.us allows users to create the mind mapping without the use of paper and pen. Here are some ideas in using bubb.us as research tool: Create flow charts for grant proposals. Presenting the ideas of research Create a mind map of a brainstorming session for research planning that can be shared with all research team members using the collaboration feature or pasted into a blog or wiki. Organize sources or notes for a paper or research article, in order to aid in the writing process and narrow the focus of each topic. (Source: http://rbuerkett.edublogs.org/2009/03/08/reflections-on-bubblus/)
- 36. 30 Chapter 4: Bubbl.us GET STARTED WITH BUBBL.US STEP 1 Go to: https://bubbl.us/ STEP 2 Creating an Account Fill in the required information. Then, click ‘Create account’.
- 37. Chapter 4: Bubbl.us 31 Once you have registered, you need to sign in. Insert your Username/email and password. Then, click the ‘Sign In’ button. STEP 3 Creating Mind Mapping Click the ‘Sheet’ button.
- 38. 32 Chapter 4: Bubbl.us This is how your bubbl.us sheet will look like. Now you can start creating your mind mapping. Draw a Change the directional line to another size of the text. bubble. Delete the bubble. Change the bubble background color. Create new bubble. Create new child bubble.
- 39. Chapter 4: Bubbl.us 33 An example of a mind mapping created STEP 4 Bubbl.Us Toolbar
- 40. 34 Chapter 4: Bubbl.us STEP 5 Printing Click at ‘Print’ icon. Choose your print layout. Then, click the ‘Print’ button. STEP 6 Exporting Click at the ‘Export’ icon.
- 41. Chapter 4: Bubbl.us 35 Choose your export option, either image or HTML Outline. For the image option, select your image format. Then, click the ‘Export’ button. STEP 7 Creating Folder Click at the ‘Folder’ button Save you work to add the sheet. folder. This is the folder you have created This is the work sheet you and you can have created. You can rename it. manage your work sheet by dragging this sheet to your folder. ‘Delete’ button to delete For the free account, your you are allowed to folder or create only three sheet sheets of mind created. mapping.
- 42. 36 Chapter 4: Bubbl.us STEP 8 Adding Contacts Go to ‘Contacts’ and click at ‘Add Contacts’. Type your friends’s name/email. Then click at the ‘Find’ button. List of your friends will appear here. This is your selected Select your friends. friend. Once done, you can Then, click at click ‘Close’ to close ‘Add to this dialogue box. Contacts’.
- 43. Chapter 4: Bubbl.us 37 STEP 9 Creating Groups Click at This is the ‘Group’ new group button. you have created. You can rename your group. Use this ‘Delete’ button to delete your You can drag your contact or the group contacts to the group you have created. you have created.
- 44. 38 Chapter 4: Bubbl.us STEP 10 Sharing Click at the ‘Sharing’ button to start sharing your mind mapping. If you click here, you can see ‘Read-only link to sheet’ and ‘HTML embed code’. If you click ‘HTML embed code’ this dialogue box will appear. Copy the HTML code to insert your mind mapping onto your blog or website. If you click ‘Read-only link to sheet’ this dialogue box will appear. Copy the URL given and share it with your friends through IM or email.
- 45. Chapter 4: Bubbl.us 39 Click the desired permission to set reading or editing access of your mind mapping. Select the Then choose sheet you like your friends. to share. Lastly, click ‘Apply Permission & Close’.
- 46. 40 Chapter 4: Bubbl.us REFERENCES http://www.web2teachingtools.com/bubbl_us.html [4 April 2012] http://www.web2teachingtools.com/bubbl_us.html [4 April 2012] http://rbuerkett.edublogs.org/2009/03/08/reflections-on-bubblus/ [4 April 2012]
- 47. Chapter 5: Mapul 41 Chapter 5 MAPUL WHAT IS MAPUL? Mapul’s MAPMYself is an online tool with an intuitive interface that helps you to document mind maps and brainstorms directly into a digital format. This makes it easier to recall the information in a later moment. The maps/organograms are built in simple but effective organic looking graphics, in which you are able to edit shape, colours and fonts. The digital format offers an important benefit compared to plain pen and paper; the free trial contains more than 3000 images that can be found and placed easily. If you are willing to pay $4.60, the image library will be extended with a Flickr add- in (www.flickr.com). As a premium user you are also able to add links to other media to the branches. The ability to add any kind of image to your map within a second adds interesting opportunities for brainstorm sessions. (Source: http://wikid.eu/index.php/MAPMYself)
- 48. 42 Chapter 5: Mapul ADVANTAGES OF MAPUL The advantages of using this tool in a teaching environment are as follow: 1. Ability to organize ideas and display them in a fun and pleasing way. 2. It is a nice tool to use to start a project or group project. 3. Organize thoughts and group ideas together 4. Break up the responsibilities and list the things that each person is to do. 5. Free for the user. 6. Easy to use and is intuitive to create. 7. The final product is colorful and organized. 8. The mind maps can be used for a quick reference or for a more complex memorization assignment. (Source: http://wordlereview.blogspot.com/2012/06/theweb-2.html http://jennaoliva.blogspot.com/2012/06/1.html)
- 49. Chapter 5: Mapul 43 GET STARTED WITH MAPUL STEP 1 Go to: http://mapmyself.com STEP 2 Installing Microsoft Silverlight On MAPUL or MAPMYself first page, go to ‘Pricing’. Choose ‘TRY BASIC’ for a free account. You need to update or install your browser with Microsoft Silverlight. Click at the ‘Update And Start’ button.
- 50. 44 Chapter 5: Mapul Choose the type of installation, either ‘Windows’ or ‘Macintosh’. Click the ‘Run’ button. Then click the ‘Install now’ button. Then, wait for MAPUL software to start loading. Once you have finished installing the application, click ‘GO’.
- 51. Chapter 5: Mapul 45 STEP 3 Signing Up Fill in the required information. Click ‘Sign Up’. Then, click the ‘OK’ button. STEP 4 Creating Mind Maps Choose the central image or you can upload the image from your computer. Enter the text of your central idea. Then, click the ‘OK’ button.
- 52. 46 Chapter 5: Mapul Click and hold this point. Then, drag it to create a branch. To insert a text or an idea at each branch, select the branch and type directly using your keyboard.
- 53. Chapter 5: Mapul 47 This is an example of the mind map you have created. STEP 5 Tools
- 54. 48 Chapter 5: Mapul Go to the ‘Export’tab. Choose the format of the mind map Click this icon to copy the you want to export. URL and embed code of the mind map you have created. Publish your mind map on your blog or web page.
- 55. Chapter 5: Mapul 49 REFERENCES http://wikid.eu/index.php/MAPMYself [5 November 2012] http://wordlereview.blogspot.com/2012/06/theweb-2.html [5 November 2012] http://jennaoliva.blogspot.com/2012/06/1.html [5 November 2012]
- 56. 50 Chapter 6: Mind42 Chapter 6 MIND42 WHAT IS MIND42? Mind42 is a browser-based free mindmapping application which allows private, public or group shared maps to be created. Nodes are automatically arranged in space, but each node can be enriched with colours, icons, links to websites, notes and so on. Collaboration is easily arranged, using email addresses to invite viewers or participants. (Source: http://www.knowledgenetworklearning.net/tools/10greattools/mind42/) ADVANTAGES OF MIND42 Some advantages for using mind42 includes: No installation needed. Accessable everywhere. Intuitive interface. Many node attributes (icons, colors, images, text styles, links). Collaboration (simultaneous editing). Easy publishing and distribution of maps. (Source: http://wssdshares.wikispaces.com/Mind42)
- 57. Chapter 6: Mind42 51 USING MIND42 (a) Affordance Mind42 successfully links all streams of thought without cluttering the workspace. The simplicity of this application benefits a user by getting straight to it and providing focus. These tools enable a user to attach different forms of external information. This incorporates an opportunity to clearly depict, better explain or deepen thoughts. The attachment of notes, images or linking to external web content, a map of thinking is revealed. A user is now presented with a full and contextualised visualisation of thinking. (b) Group application Mind42 has the potential to be very effective in the visualisation of a groups overall objectives and activity. With the commitment of all members to update and contribute to a mind map, group activity can be easily monitored. Any members that may not be contributing are quickly identified. Any areas or ideas that may have been over looked can also be quickly identified by the group and acted upon. If a group implement’s icons for each member, ideas can be voted upon and highlighted for further research. Mind42.com offers groups a shared platform with an easy to use interface. (Source: http://net205-2011-curtin.wikidot.com/hartnett-mind42)
- 58. 52 Chapter 6: Mind42 GET STARTED WITH MIND42 STEP 1 Go to: http://www.mind42.com/ STEP 2 Signing Up At the mind42 homepage, click at the ‘Sign up’ button. Fill in the required information. Then, click the ‘Sign up’ button.
- 59. Chapter 6: Mind42 53 Mind42 will send an email to your registered email account. Check your email and click at the link given. Now you can start login. Insert your registered username and password. Then, click the ‘Signin’ button. STEP 3 Creating Mind Mapping When you launch mind42, the ‘Mind map manager’ dialogue box will appear. Go to ‘New mind map’. Type your Next, click mind map the ‘Create’ title. button.
- 60. 54 Chapter 6: Mind42 This is how your mind42 sheet will look like.
- 61. Chapter 6: Mind42 55 (a) Adding nodes Click once at your You will see this node. tool. To add another node, click at this icon. Retype the name of your new node. If you want to add another sibling of Then click the node, click ‘Apply’ button. this icon. This is an example of a mind mapping you have created.
- 62. 56 Chapter 6: Mind42 (b) Adding links to the node Click at this icon. ‘Add new link’ dialogue box will appear. Go to ‘External’ tab. Insert the selected URL address here. Then, click the ‘Apply’ button. Or, you can search for links by inserting the keyword here. This is the preview of your added link.
- 63. Chapter 6: Mind42 57 (c) Adding attachment to the node To add an attachment in your selected node, click this icon. You can add three types of attachment. You can type a short note here. You can attach the Wikipedia article at your selected node. You can attach the ‘Todo-list’ or the progress of your selected node.
- 64. 58 Chapter 6: Mind42 (d) Convert text node to image To change the text node to an image, click this icon. You can insert the URL address of the image, or you can search by inserting the keyword. This is an example of a text node changed into an image.
- 65. Chapter 6: Mind42 59 STEP 4 Inviting & Managing Collaborators To invite and manage collaborators, click at this icon. You can enter one or more email addresses here. Then, click the ‘Invite’ button.
- 66. 60 Chapter 6: Mind42 STEP 5 Viewing Revision To view the revision of your mind mapping you have created, click at this icon. This is the list of your mind mapping revision. Select the revision you want to view. Then, click this icon to load the mind mapping you want to view. STEP 6 Publishing Mind Maps To publish your mind mapping, click this icon.
- 67. Chapter 6: Mind42 61 Then, mark this box. Copy this URL and send it to your friends or colleagues. Copy this text and integrate it into your blog or website - you will see a link which will bring the visitors to your mind map after clicking it. Copy this text into your blog or website if you want to display the mind map embedded in the blog or website.
- 68. 62 Chapter 6: Mind42 REFERENCES http://www.knowledgenetworklearning.net/tools/10greattools/mind42/ [12 April 2012] http://wssdshares.wikispaces.com/Mind42 [12 April 2012] http://net205-2011-curtin.wikidot.com/hartnett-mind42 [17 May 2012]
- 69. Chapter 7: Edistorm 63 Chapter 7 EDISTORM WHAT IS EDISTORM? The name Edistorm is a mash-up of the name Thomas Edison and brainstorm. It is inspired by Edison’s idea factories. Edistorm is an incredible brainstorming and collaboration tool. Edistorm has some additional features and abilities that make it very useful in the classroom, you can brainstorm and collaborate using virtual sticky notes. Edistorm gives you a place to organize ideas in a real-time interactive wall. Virtual sticky notes can teach have their own color and can be organized in vertical or horizontal groupings. Edistorm can be created independently or with others in a collaborative effort. Edistorm features an idea works at the bottom of the screen offering suggested ideas based on what students add to the sticky notes in the work space. Public and solo Edistorm are free to create, premium accounts are available for private Edistorm. (Source: http://ilearntechnology.com/?p=2434)
- 70. 64 Chapter 7: Edistorm BENEFITS OF EDISTORM The following are benefits you can get by using Edistorm: 1. No hastle because of known concept 'sticky notes'. 2. Understandable for everyone. 3. Easy way to brainstorm and plan. 4. Makes brainstorming and planning much easier and more pleasant. 5. Possible to use from different locations and work together real-time. 6. No longer bound to location. 7. Measure results. 8. Can share images, videos and links. 9. No need to install software. 10. It is free. (Source: http://2012digitalmediatrends.blogspot.com/2012/04/edistorm- online-brainstorming-and.html) USING EDISTORM IN THE CLASSROOM The following are some ideas of using Edistorm in the classroom: Edistorm offers an exceptional opportunity for students to brainstorm, collaborate, and group ideas. Students can use Edistorm to brainstorm ideas for writing, research, for grouping ideas, and collaborating on group projects.
- 71. Chapter 7: Edistorm 65 Create an Edistorm for your students and ask them to group like ideas, sort, and expand on thoughts. This could be done for any historical event, literature, science concept, and even phonics. Students could practice spelling by typing out their spelling words along with a sentence or synonyms on sticky notes. Then, they can group words by spelling pattern or common phoneme blends. Create an Edistorm of sticky notes with English words and sticky notes with a foreign language word on them. Students can work together to group words with their meanings. In math, create Edistorm with word problems on one color of sticky note and answers on another set of sticky notes. Students can work to create groups of problems and their solutions. Edistorm can be used for whole class activities using an interactive whiteboard, the class can brainstorm together and collect ideas or use the grouping feature in an activity created by the teacher or students. (Source: http://ilearntechnology.com/?p=2434)
- 72. 66 Chapter 7: Edistorm GET STARTED WITH EDISTORM STEP 1 Go to http://www.edistorm.com/ STEP 2 Creating an Account Click at this button. Fill in the required information. Then, click the ‘Sign Up’ button.
- 73. Chapter 7: Edistorm 67 To know more about Edistorm, you can watch the introductory Edistrom video here. Or you can continue using Edistorm by clicking the ‘Create New Storm’ button. STEP 3 Creating a Strom Open your Edistorm and click at the ‘Create a Storm’ button. Fill in the required information.
- 74. 68 Chapter 7: Edistorm This is an example of your ‘Storm’ being displayed. Then, click the ‘Create’ button’. (a) Adding Sticky Notes Click at the Select the ‘STICKY’ tab. color of sticky notes. Type your notes here. Then, click at the ‘Add Idea’ button’.
- 75. Chapter 7: Edistorm 69 (b) Adding Photos Click at the ‘PHOTO’ tab. Then, click the ‘Upload Image’ button’. Select the picture you want to insert. Then, click the ‘Open’ button. (c) Inserting Videos Click at the ‘VIDEO’ tab. Inter video URL from youtube or Then, click at vimoe. the ‘Add Video’ button’.
- 76. 70 Chapter 7: Edistorm An example of a storm created. Sticky notes. Image Video STEP 4 Sharing You can invite others Go to by sending ‘Share’. the URL address of your storm or you can invite them via email address. Click at the Then, click at the ‘Invite Users’ ‘Send Invites’ button. button.
- 77. Chapter 7: Edistorm 71 REFERENCES http://ilearntechnology.com/?p=2434 [16 October 2012] http://2012digitalmediatrends.blogspot.com/2012/04/edistorm-online- brainstorming-and.html [16 October 2012]
- 78. 72 Chapter 8: Wallwisher Chapter 8 WALLWISHER WHAT IS WALLWISHER? Wallwisher is a collaborative tool that lets users be prosumers rather consumers (Sharon Tonner 2011). It allow users to post their thoughts on a common topic using electronic sticky notes on a shared digital wall. The sticky note can incorporate an image, audio or video using the appropriate web address link (Sharon Tonner 2011). Wallwisher can be also used for personal note taking, to-do lists, feedback collection, etc. Best of all there is no signup needed- simply create a wall and start posting (Anon. 2011). BENEFITS OF USING WALLWISHER The following are some benefits of using Wallwisher: 1. To allow in a collaborative conversation. 2. To brainstorm an idea. 3. To access discussions and ideas. 4. To provide an interactive area that incorporates text, audio and visual materials. 5. To make the survey interactive through responding using mobile devices that has internet accessibility.
- 79. Chapter 8: Wallwisher 73 6. A wall that offers individual feedback when determining a decision that needs a group vote. 7. A wall that tracks the completion status for each group member's task (Anon. 2011). USING WALLWISHER AS A RESEARCH TOOL Collaborative research by working in small groups to find information (http://year6wykeham.blogspot.com/2012/01/science-wallwisher- research.html). Provides a very simple way to gather feedback from respondents (http://staffweb2tools.wordpress.com/walls/). Brainstormed and shared short simple ideas of research among research group (http://www.teachmaths- inthinking.co.uk/conferences/harare-2012-what-is-ibl.htm). Received and record the feedback of the research.
- 80. 74 Chapter 8: Wallwisher GET STARTED WITH WALLWISHER STEP 1 Go to:http://www.wallwisher.com/ STEP 2 Log in/Register Click the login button a top right hand corner. Click ‘Build a wall’ if you do not want to go at login/register page.
- 81. Chapter 8: Wallwisher 75 Fill in the the Wallwisher account. Then click the ‘SIGN UP’ button. If you already have an account, just click ‘LOG IN’. STEP 3 Building & Customizing Walls Click at the ‘Build a wall’ button.
- 82. 76 Chapter 8: Wallwisher Choose the existing image you want or you can browse the image you like from your computer or website. Insert your wall title and description. Choose your theme of your wall. Choose your privacy setting. Change your You can control who can wall URL read, write and post notes address. into your wall. You can delete the wall you have created.
- 83. Chapter 8: Wallwisher 77 STEP 4 Typing Sticky Notes Enter your name. Double click the wall to add sticky Write your message notes. here. Add any item or format from a web link or upload from your computer or you can take a photo from your webcam. STEP 5 Inserting Image Insert an image URL location here.
- 84. 78 Chapter 8: Wallwisher An example of an image added. Click to zoom the image. STEP 6 Inserting Videos Insert URL location of a video link here.
- 85. Chapter 8: Wallwisher 79 Click at the video to view and play. STEP 7 Inserting Documents Click this icon to upload a file from your computer.
- 86. 80 Chapter 8: Wallwisher Click here to browse the file. Click at the document to view. An example of a document viewed.
- 87. Chapter 8: Wallwisher 81 STEP 8 Sharing Wallwisher Share your wall using socialize tools or you can subscribe, snap and email the wall to others. Copy and paste the embed code onto your blog or web page. Click ‘Share’. Mobilize your wall using the scan code.
- 88. 82 Chapter 8: Wallwisher REFERENCES Anon. 2011. Wallwisher: A new way to promote student collaboration for online colleges. http://blog.ecollegefinder.org/post/Wallwisher-A-New- Way-to-Promote-Student-Collaboration-for-Online-Colleges.aspx [14 March 2011] Sharon Tonner. 2011. Wallwisher. http://i-c-t.wikispaces.com/WALLWISHER [14 March 2011] http://year6wykeham.blogspot.com/2012/01/science-wallwisher-research.html [17 May 2012] http://staffweb2tools.wordpress.com/walls/ [17 May 2012] http://www.teachmaths-inthinking.co.uk/conferences/harare-2012-what-is- ibl.htm [17 May 2012]
- 89. Chapter 9: GroupZap 83 Chapter 9 GROUPZAP WHAT IS GROUPZAP? GroupZap is a Web-based tool that groups of teammates and colleagues can use to host real-time brainstorming sessions. The difference between a meeting that is conducted through GroupZap and a meeting that’s held in a typical conference room, besides the abundance of high-tech features and tools is that GroupZap is an inclusive application that helps people get involved no matter where they are located in the world. (Source: http://www.appvita.com/2011/10/29/groupzap-creative- brainstorming/) BENEFITS OF GROUPZAP The following are some benefits of using GroupZap: 1. Create a Whiteboard - Create a new board for the issue you want to discuss or brainstorm. New boards are free and instantly available. Just enter or confirm your email address and go straight to the board. You can create as many boards as you like.
- 90. 84 Chapter 9: GroupZap 2. Invite Your Team - Share the board's URL with the other members of your team. Just copy and instant message it or use our 'share' page to send an email direct from GroupZap. 3. Get Stuck In - GroupZap uses a sticky note metaphor to allow you to get stuff up on the board quickly. Unlike most whiteboarding software we don't force you to write or draw with the mouse. 4. Moodboard or Document Store - Upload images or files simply by dragging and dropping them into the web page, directly from your computer's explorer or finder window. Use our simple boxes and arrows to quickly sketch processes and dependencies. 5. Freedom of Choice - A GroupZap whiteboard can be used in lots of different ways. Enable our range of stickers and select different backgrounds to help organise and annotate your notes. After a brainstorm, you can use stickers to vote on items. 6. Silent Brainstorm - One great way to use GroupZap is for all participants to silently add notes to the board to capture everyone's initial thoughts on a topic. Then, take it in turns to explain what your stickies mean, and to remove any duplicates and add any newly inspired points. Finally start to cluster, organise, discuss and summarise the group's thoughts.
- 91. Chapter 9: GroupZap 85 7. Playback & Rewind - The entire history of the thought process is recorded so you can rewind to review how certain ideas or decisions came about. 8. Distribute Conclusions - Finally, create a PDF to send round to the team as a record of the meeting for follow up actions or documents. 9. Follow Up & Review - Your team can continue to add items to the board after meeting, as afterthoughts occur or absent colleagues become available. (Source: http://groupzap.com/tour/features/)
- 92. 86 Chapter 9: GroupZap GET STARTED WITH GROUPZAP STEP 1 Go to: http://groupzap.com/ STEP 2 Creating a Map Click at the ‘Start >>’ button. Then, click at the ‘Go to Whiteboard >>’. To sign in, insert your email address and the topic of your board.
- 93. Chapter 9: GroupZap 87 An example of a board. STEP 3 Inserting Stuffs (a) Adding Notes Double click the notes to edit, delete or change the position. Click and drag the Drop the notes notes to the on the board. board.
- 94. 88 Chapter 9: GroupZap (b) Adding Connections Select the connection you This is an want to add on example of the your board. connection you have added. (c) Adding Buttons/Badges Choose the button/badges. Add on your board to show your feedback.
- 95. Chapter 9: GroupZap 89 (d) Adding Images/Files Go to ‘Images/Files’ and click at the ‘Choose file…’ button. Or, you can insert the URL address of the images or file. STEP 4 Exporting Choose the type Go to of format you ‘EXPORT’. want to export. Or, you can click ‘Share/Embed…’ Share your board into these social Copy and paste websites. these embed codes onto Then, click to your blog or the ‘Update>>’ web page. button.
- 96. 90 Chapter 9: GroupZap STEP 5 Inviting Others Go to ‘INVITE’. Use the link given and send to anyone you want to join the board. Click to the ‘Send Invitation>>’. Choose your security setting. Click to the ‘Save>>’ button.
- 97. Chapter 9: GroupZap 91 REFERENCES http://groupzap.com/tour/features/ [31 Oktober 2012] http://www.appvita.com/2011/10/29/groupzap-creative-brainstorming/ [31 Oktober 2012]
- 98. 92 Chapter 10: Spiderscribe Chapter 10 SPIDERSCRIBE WHAT IS SPIDERSCRIBE? SpiderScribe is an online mind mapping and brainstorming tool. It lets you organize your ideas by connecting notes, files, calendar events, etc. in free- form maps. You can collaborate and share those maps online! (Source: http://www.spiderscribe.net/) BENEFITS OF SPIDERSCRIBE The following are some benefits of using SpiderScribe: 1. Connect and organize ideas With SpiderScribe you can visualize your ideas by connecting various pieces of information together. Unlike other mind mapping applications, SpiderScribe allows you to create free- style maps by connecting your stencils in any way. 2. Text, images, files, events, etc. SpiderScribe maps can combine elements like text, images, files, calendar events and geographic locations. More type of stencils will be added in time. Stencils can be customized - change colors, resize, format, etc.
- 99. Chapter 10:Spiderscribe 93 3. Share and Collaborate You can create public and private maps. Private maps can be shared with others and multiple people can collaborate on them at the same time. Public maps can be viewed by anybody, without having to login into SpiderScribe. 4. Access from anywhere Your collection of maps is stored online and can be accessed from anywhere, through internet. All you need is a web browser (Flash plugin is required). 5. Embed maps into your website or blog You can create public and private maps. Embed SpiderScribe.net public maps into your website easily with our Embed Wizard. You can modify the map size, zoom level, even the visual area position and generate the embed code. (Source: http://www.spiderscribe.net/tour.php) ADVANTAGES OF SPIDERSCRIBE The following are some advantages of using SpiderScribe: Visual representation of information and the connection between related features. Easily embedded directly into your website. Always up to date and displays the latest version – no need to re- post it (like with static images). Can be easily navigated and moved around Looks nice, without much effort (http://blog.spiderscribe.net/)
- 100. 94 Chapter 10: Spiderscribe GET STARTED WITH SPIDERSCRIBE STEP 1 Go to: http://www.spiderscribe.net/ STEP 2 Signing Up Click at the ‘sign up’ button. Choose Personal (free) account and click at the ‘Sign Up >’ button.
- 101. Chapter 10:Spiderscribe 95 Fill in the required information. Then, click at the ‘Create my account’. STEP 3 Creating Maps Log in to Spiderscribe and click at the ‘+ Create New Map’ button. Insert the title Then, click at and description the ‘Create’ of the map you button. have created.
- 102. 96 Chapter 10: Spiderscribe Hold and drag this icon on the board to insert the idea of your map. To add another new idea/branch, click and drag this symbol ‘+’.
- 103. Chapter 10:Spiderscribe 97 STEP 3 Tools An example of a map created.
- 104. 98 Chapter 10: Spiderscribe Place the map Export the map created on the created to JPG board. and PNG format. STEP 3 Sharing Click at the ‘Share’ button. Use the link given to share with other You can click here to people. get the embed code to publish your map onto your blog or web page. Then, click at the Save’ button.
- 105. Chapter 10:Spiderscribe 99 REFERENCES http://www.spiderscribe.net/ http://schools.natlib.govt.nz/blogs/libraries-and-learning/11-08/spiderscribe http://www.spiderscribe.net/tour.php http://blog.spiderscribe.net/