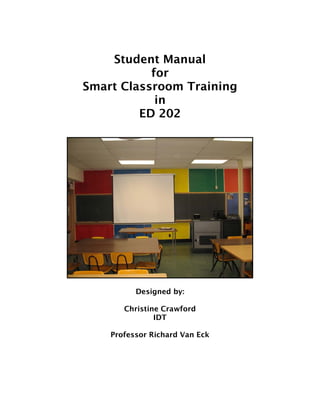
Student Manual for Smart Classroom Training
•
2 j'aime•1,155 vues

The student manual developed for face to face instruction of faculty members at University of North Dakota. The manual goes step by step with supporting images and instructions.

Recommandé
Contenu connexe
Tendances
Tendances (14)
En vedette
En vedette (20)
Similaire à Student Manual for Smart Classroom Training
Similaire à Student Manual for Smart Classroom Training (20)
Plus de Christine Gonnella
Plus de Christine Gonnella (20)
Dernier
Dernier (20)
Student Manual for Smart Classroom Training
- 1. Student Manual for Smart Classroom Training in ED 202 Designed by: Christine Crawford IDT Professor Richard Van Eck
- 2. Table of Contents Introduction .................................................................................................. 3 Training Objectives ...................................................................................... 5 Module I - Regular use of the smart classroom ........................................... 6 Part 1 – Getting Started .................................................................................................................7 Experience Assessment .....................................................................................................8 Part 2 – Tour of the system and powering up .............................................................................10 Diagram of ED 202 .........................................................................................................11 Tour of the room .............................................................................................................12 Powering Up ...................................................................................................................13 Part 3 – Projector, camera and instructor mic .............................................................................14 Projector .........................................................................................................................14 Camera ............................................................................................................................15 Instructor microphone .....................................................................................................18 Part 4 – Using computers with the system ..................................................................................20 Module II - Passive (one way) Broadcasting ................................................ 21 The Recording Process ...................................................................................................23 Part 5 – Streaming .......................................................................................................................24 Part 6 – Recording to mini-DV tape ...........................................................................................25 Part 7 – Recording to DVD .........................................................................................................28 Finalizing a DVD ............................................................................................................31 Module III - Active (two way) Broadcasting ................................................. 34 Part 8 – Audio Conferencing ......................................................................................................35 Part 9 – Breeze ...........................................................................................................................37 Fire wire ..........................................................................................................................37 Logging in .......................................................................................................................38 Start the camera...............................................................................................................40 Start the audio conference ...............................................................................................42 Record in Breeze .............................................................................................................43 Share your screen ............................................................................................................44 Share a document ............................................................................................................45 Module IV – What did we learn? ................................................................... 49 Part 10 – Recap ...........................................................................................................................50 Assessment ......................................................................................................................51 Something Extra ........................................................................................... 56 Using the VCR ................................................................................................................57 Using the DVD player ....................................................................................................58 Plugging in your laptop...................................................................................................59 Student Manual 2
- 3. Introduction Welcome to this instruction on the smart classroom in ED room 202. This face-to-face instructional unit is designed to train faculty members of the College of Education and Human Services at the University of North Dakota to use the smart classroom in the Education Building Room 202 for distance education. Distance education is a critical component of education in today’s academic environment. The challenge inherent in distance education is to provide students with instruction that does not sacrifice the quality of a face-to-face experience yet reaches anywhere in the world. Technology is the vehicle to provide this experience but it is often difficult to find technology that is both reliable and appropriate for the instructional tasks at hand. In addition, the College of Education and Human Services has the unique opportunity to be leaders on the UND campus by modeling cutting edge teaching methodologies and technologies. With the continued emergence of distance education as a viable and even preferred method of teaching, it is important for faculty at UND to offer high quality distance education for their students. This smart classroom system provides a means to do that without sacrificing the face- to-face quality of classroom instruction. This smart classroom is designed to accommodate distance instruction. Not only does it include the usual classroom enhancements but it also includes the ability to broadcast one way using streaming, record a class to DVD or mini-DV tape and broadcast two way using audio conferencing and Breeze. This instruction is designed to take about 90 minutes and is divided into five modules. The modules are ordered from least complicated to most complicated use of the smart classroom. Each module is divided into short units which are 10 to 20 minutes each. Each unit contains the following sections: Objectives, Introduction, Discussion/Demonstration, Summary and Practice. Module I is entitled “Regular use of the smart classroom.” In this module the instructor will orient you to the manuals, the classroom and the equipment and show you how to turn the system on and off. The instructor will also demonstrate how each component works and will give you the chance to practice it yourself. Module II is entitled “Passive Broadcasting (one way)” and this is where the instructor will discuss how to use the system to stream audio and video for viewing without interacting. In Module III, entitled “Recording” you will learn how to record sessions on the system. Module IV will demonstrate how to perform two way audio and video conferencing and is entitled “Active Broadcasting (two way)” Module V will recap what you have learned and gives a short quiz on the important points of each module. This quiz will also serve the function of helping you remember what you have learned and to make sure the objectives of instruction were met. Student Manual 3
- 4. Learners should have some knowledge of computers and may or may not have used a smart classroom on the UND campus in the past. Beginners and advanced learners should all feel comfortable with this instruction as we have broken down each task into simple steps while at the same time provided supplemental information in the form of suggested reading and tech tips for those who wish to learn more. Student Manual 4
- 5. Training Objectives Module I – Regular use of the smart classroom Part 1 – Getting Started In this section we will review the student manual and take the experience assessment if it has not been done before. Part 2 – Tour of the system and powering up In this section you will show students how to turn on the system, the touch panel, and the power to the desktop computer. Part 3 – Projector, camera and instructor mic In this section you will demonstrate how to turn the projector on and off using the touch panel, how to control the camera using the touch pane and how to use the instructor microphone. Part 4 – Using computers with the system You will demonstrate how to use the desktop computer and your laptop with the system. Module II – Passive (one way) Broadcasting Part 5 – Streaming You will explain what it means to stream in real-time and you will summarize the process by stating the procedure for contacting the IDT department. Part 6 – Recording to mini-DV tape In this section you will teach students to record sessions to mini-DV tape Part 7 - DVD In this section you will teach students to record sessions to DVD, DVD-R and DVD-RW. You will also review a job aid on how to finalize a DVD. Module III – Active (two way) Broadcasting Part 8 – Audio conference You will demonstrate how to hold an audio conference using this system. Part 9 – Breeze In this section you will show students the following: Logging in, changing participant levels, using the audio conferencing feature, recording a meeting, sharing the desktop, sharing documents. Module IV – What did we learn? Part 10 – Recap and Assessment You will briefly review the objectives for the previous sections. You will give the students their paper-based assessment to complete. Then you will use the checklist to assess them while they demonstrate their knowledge of the system by performing the required tasks. Student Manual 5
- 6. Module I Regular use of the smart classroom Student Manual 6
- 7. Part 1 – Getting Started In this section we will review the student manual and take the experience assessment if it has not been done before. The Student Manual This student manual is designed to supplement the face-to-face instruction by providing you with job aids for various aspects of the training. Job aids will help trigger your memory for each task and will walk you through each of them step by step. I have also provided photos and screen shots which should aid with this process. Each lesson has plenty of space for you to take notes during the instruction as well. If facilitation is not available, you may use this manual as stand- alone training guide In addition, if you need assistance in the future, please feel free to call the help number on the podium or contact CILT at (701) 777-2129. These graphic conventions will be used to help you quickly identify certain types of information: Job Aids will provide you with step by step instructions on how to perform a specific task. Notes sections give you a little extra information about a topic. Reading sections provide you with resources to find extra reading if you’re interested in learning more. Tech Tips provide you with technical tips for using the equipment. Something Extra provides you a place to go or something to do that will supplement the instruction for the task. There is also a “Something Extra” section at the end of the manual that addresses topics relevant to the classroom but which were not discussed in the facilitated instruction. Before you begin Prior to registration you should have received your Experience Assessment and sent it to the instructor. If not, please take a moment to fill it out now. (See page 8). Student Manual 7
- 8. Experience Assessment Please answer these questions to the best of your ability by placing a “X” in the appropriate response area. 1. How many years have you been using computers? <----------------------------------------------------------------------------------------------------------------> ( ) ( ) ( ) ( ) ( ) <1 1-3 4-6 7-9 >10 2. How often do you use computers to teach? <----------------------------------------------------------------------------------------------------------------> ( ) ( ) ( ) ( ) ( ) Almost Never Not Often Sometimes Often Always 3. How often do you use an LCD projector to teach? <----------------------------------------------------------------------------------------------------------------> ( ) ( ) ( ) ( ) ( ) Almost Never Not Often Sometimes Often Always 4. Have you ever taken a class where a smart classroom was used by an instructor? ( ) ( ) Yes No 5. Have you ever used a smart classroom yourself? ( ) ( ) Yes No 6. How often do you use smart classrooms to teach? <----------------------------------------------------------------------------------------------------------------> ( ) ( ) ( ) ( ) ( ) Almost Never Not Often Sometimes Often Always 7. Please rate your ability to learn new technical skills (based on your success in the past). <----------------------------------------------------------------------------------------------------------------> ( ) ( ) ( ) ( ) ( ) Difficult Somewhat Can sometimes Somewhat Easy Difficult do it Easy Student Manual 8
- 9. 8. Have you ever taken a course using distance education? ( ) ( ) Yes No 9. Have you ever taught a course using distance education yourself? ( ) ( ) Yes No 10. What do you think is the biggest barrier to teaching online? Student Manual 9
- 10. Part 2 - Tour of the system and Powering up Objectives In this section the instructor will give you a history of the room and a tour of the system. You will also learn how to turn on the system using the touch panel, the main power switch and the desktop computer. Introduction This section should take approximately 15 minutes. The purpose of this unit is to orient you to the room and its contents and to show you how to power up the equipment. We have created a diagram of the room which is included here. Refer to the diagram as you walk around the room and observe the various components. Discussion/Demonstration (next page) Student Manual 10
- 11. Diagram of ED 202 As you can see by this diagram, the boundary mics and the camera are fed into the podium so that anything coming from there can be recorded by mini-DV tape or DVD. The equipment in the podium also feeds out to the IDT server in another room so you can stream to that server if you like. We’ll discuss this more in detail later. Student Manual 11
- 12. Tour of the Room Projector - Use the touch panel to turn the projector on and off. Boundary microphones • Two on each side wall • Pick up the voices of the students in the room • The sound goes directly to the podium for recording or streaming. • Broadcast student voices to the people at a distance • Acoustic materials will be added to walls and floors to reduce echo The camera is • high resolution (3CCD) analog with a codec • the signal is converted from analog to digital • can be recorded and edited from mini-DV tape Go to http://en.wikipedia.org/wiki/3CCD for more information on 3CCD high resolution cameras. Speakers • eight speakers built into the ceiling • broadcast audio from a distance and from the instructor station. Touch panel • sits on top of the podium • “brain” of the system Inside the podium you will find the various components of the system. Student Manual 12
- 13. Powering Up Labeled for your use is the main power switch. If the system is not turned on when you arrive, simply flip this switch, and then turn on the Gateway power as well. Once these are activated, the system should be up and running. Gateway Main Power Power Switch Switch Once the main power is on you can touch the touch panel to wake it up. The touch panel acts as the “brain” for this system - almost everything in the system is run through the touch panel. Some other smart classrooms on campus have touch panels as well so you may be familiar with the layout. The touch panel defaults to the computer interface which is indicated by the green button next to the computer icon. When the touch panel is interfacing with the computer, anything you do on the PC will be displayed on the monitor and the projector screen (as long as they are on). As you can see, all of the components of the smart classroom are represented on the face of this touch panel. On the left side of the touch panel are the interface buttons for the computer, a laptop, the VCR and DVD player and the document camera, none of which we will cover in this instruction. On the right side of the screen you see the projector power buttons, a clock, and the media volume controls. On the bottom is the help button, which simply gives you a phone number to call for assistance, the mic volume which allows you to turn up the volume on the instructor microphone. Also on the bottom are the buttons that control the distance education features of the room: the audio conference, record and camera control buttons. We will be covering each of these later. 13
- 14. Part 3 – Projector, camera and instructor mic Objectives In this section the instructor will show you how to turn the projector on and off using the touch panel. You will learn how to control the camera using the touch panel and you will also learn how to use the wireless instructor microphone. Introduction This section will take about 10 minutes. We will go over how to use the projector, the camera and the wireless mic. Projector To turn the projector ON, press and hold the button, then wait a moment. The ON button will turn green when it is on but it usually takes a few seconds to warm up. Sometimes it is hard to tell whether the projector is on or off. If you are trying to turn it on and it’s not responding, touch and hold the off button for three to five seconds and then try turning it on again. To turn the projector OFF, hold the off button down for about 5 seconds until you see the off button turn red and the projector turn off. Be careful that you only press the off button – if you activate the On button as well, it will not turn off. 14
- 15. Camera To switch to the camera interface, touch the “cam control” icon on the bottom of the touch panel screen. If the camera is facing away from you, you will need to use the touch panel to turn it on. The camera is always on but it does go to sleep so you may have to power down the entire system and re-power to wake it up. Press the Cam Control icon to activate the camera screen. Below is the screen you will see. There are 5 camera presets that you can use to change the camera angle. 15
- 16. Pan and tilt controls Similar to how you might use a camera for personal use, the camera can also pan, tilt and zoom by using the white arrows on the screen. • Pan moves the camera side to side • Tilt moves it up and down • Zoom moves the focus closer to or further from the object The longer you hold down the arrow button, the quicker the camera moves. Zoom controls 16
- 17. You can also get a full screen view of what is being shot by the camera. Simply press the “Touch for Full Screen” area on the touch panel. Touch anywhere but the arrows. Touch for full screen Summary As you can see, the camera is a very important feature of this system, especially for distance ed. 17
- 18. Instructor microphone The instructor microphone is wireless and is stored in a bag inside the drawer of the podium. • Press the power button for three seconds to turn it on – watch for the display to turn on • Check the battery indicator to be sure you have full strength. If you use the last of the batteries in the drawer, please call CILT by picking up the phone. They will replenish the supply. • Place the lapel mic about 8 inches away from your mouth • The clip-on microphone must be positioned as shown below to work correctly. Center it on your body rather than putting it on one side or the other. • Attach the battery pack to your clothing or place it your pocket • This room is not very big and the instructor doesn’t really need a mic. The mic volume is intended to amplify the instructor’s voice for the distance students and overrides the boundary mics or for the recording. When students are speaking in the classroom they will only be heard if the instructor is not speaking. Only the two speakers in the back broadcast the lapel mic to help overcome the air conditioner noise. 18
- 19. • The volume has already been optimized within the system. If you need to change the volume for any reason, touch the mic volume button first, then use the media volume controls. Be careful not to press the MUTE button or it will turn off the sound altogether. 19
- 20. Part 4 – Using computers with the system Objectives In this section you’ll learn how to use the desktop computer and how to plug in a laptop to use with the system. Introduction It’s easy to use the desktop machine with this system. You just have to make sure that the computer has been turned on and that the touch panel is on computer interface. Discussion/Demonstration Desktop machine The tower for the computer built into the system is housed inside the podium. When you first power up the system you will also turn on the desktop machine. The computer monitor is sitting on top of the podium and the keyboard and mouse are in the drawer (twist the knob and pull out the drawer). You use this machine much like you would any other Windows machine. USB Ports To use a USB drive with the desktop machine, you can plug the drive into the ports shown above and below. USB Port 20
- 21. Module II Passive (one way) Broadcasting 21
- 22. Objectives This section will show you how to stream a class session simultaneously to your students not in your classroom. Introduction This unit will take about 20 minutes to complete. One of the unique features of this room is its ability to record class sessions. We can record on mini-DV tapes and DVDs or we can use the web conferencing software Breeze to record, stream and archive. The diagram below illustrates the recording process Everything you use in the room – the camera, the mics, the computer, your laptop – can be recorded. This allows you to record everything that goes on in the room. You can also stream everything you do in the room because there are lines going to the server in IDT. The computer in the system allows you to use Breeze as well to video conference with distance students. 22
- 23. 23
- 24. Part 5 – Streaming Demonstration/Discussion Streaming is a passive way to broadcast a class session. Students will click on a link given to them by the instructor and will be able to watch the class simultaneously. The stream will be running off of the IDT server so in order to stream the session, the instructor must contact the IDT department at least 48 hours prior to the class session. Someone in IDT will give you a link to send to your students to watch. You can also archive this link – check with IDT on this as well. On the diagram labeled “The Recording Process,” notice the computer labeled IDT server. This is actually housed in Rick Van Eck’s office. That is why the IDT department needs to be contacted to stream. Remember, the phone number listed here next to the monitor is the number for CILT when you need technical help. This is NOT the phone number you call to stream a session. Summary As you can see, streaming can help you bring your classroom to your off campus students. For more information on streaming multimedia, visit http://en.wikipedia.org/wiki/Streaming_media 24
- 25. Part 6 - Recording to mini-DV tape This section is about recording classroom activity using a mini-DV tape. With DV-tapes you can upload to a computer using a fire wire and edit. You have to use “ripping” software to do that with DVDs (for more information see the section on Recording to DVDs). To record to mini-DV tapes, you must bring a tape with you. You can find mini-DV tapes in the electronics department of such places as Wal-Mart, Target or ask your department to supply these materials. Make sure the indicator light is on DV by pressing the DV/HDD/DVD button until the green light shows DV. To record, insert the tape into the recorder. The recorder may begin to play the tape, so press stop to keep it from playing through. You can tell if it is playing by pressing “cam control” and waving your hand to see if you are being shown. Insert mini DV tape here Also make sure the channel is on Line 1 (it will read L-1) because the video is “fed” through Line 1 of the JVC recorder. If it is not on Line 1, press the channel button up or down to change it. Channel LCD display buttons should read “L - 1” 25
- 26. If you cannot toggle between DV and DVD, turn the device off and back on again. Next, press the record icon on the touch panel. Whatever you’re doing should show on the touch panel. If it does not show up, call the help desk. Wave to yourself to make sure you’re the video’s not playing back. Next you should see this screen… At this screen you can control the functions of the recorder. To begin recording, press the record button. 26
- 27. You’ll know it is recording because a white circle and the phrase “12 bit” will show up on the screen briefly, as shown below. Everything that you do on the system will be recorded. Also, a red RECORD light will remain lit on the device while it is recording. To stop recording, simply press the stop button on the touch panel. You can test your recording on this system by pressing play on the JVC, but there is no audio output connected to the recording device so remember that you will not be able to hear what you recorded when you test it. Eject the tape by pressing the eject button on the device. 27
- 28. Part 7 - Recording to DVD You may wish to record to a DVD instead of a mini-DV tape. Is it better to record to mini-DV tape or DVD? Reasons to record DVD follow: • DVDs last longer and do not wear out over time like tapes • You can search DVDs by chapter rather than running through the entire recording like you have to with tapes. • You can use a DVD-R/RW which allows you to write and re-write to the same disc. (You do have to make sure you use the “minus” disc with this system). A problem with recording to DVD is that you have to “rip” the audio and video files to edit them (See below for more information). For more information on how to “rip” audio and video from a DVD to edit, see http://en.wikipedia.org/wiki/Ripping_DVD To record to a DVD, insert a DVD-R or -RW, which is a DVD on which you can record. For this system, you MUST use the “minus” DVDs, NOT the “+” (see below). You can buy DVD-Rs at Wal-Mart, Target, Office Max and Best Buy. For more information on DVD-RW technology, see http://www.pctechguide.com/34DVD_DVD-RW.htm 28
- 29. To record, insert the DVD into the recorder. Make sure the indicator light is on DVD by pressing the DV/HDD/DVD button until the green light shows DVD. DV/HDD/DVD button Insert DVD here Also make sure the channel is on Line 1 because the video is “fed” through Line 1 of the JVC recorder. If it is not on Line 1, press the channel button up or down to change it. Channel LCD display buttons should read “L - 1” Next, go back to the touch panel and press the record icon. 29
- 30. ….which will bring you to this screen… At this screen you can control the functions of the recorder. To begin recording, press the record button You will know it’s recording because you will see this screen, which says “Recording Index”…. Also, you will see a red RECORD light on the device while it is recording. It will prompt you to hit stop again - press ( □) again to stop recording. To stop recording, simply press the stop button. The next step is to finalize. 30
- 31. Finalizing a DVD In order to play the DVD that you have recorded on any other DVD player, you must FINALIZE the recording. Tech tip called “What is finalizing?” – from http://en.wikipedia.org/wiki/Finalize Finalizing a disk makes it playable on a system other than the one it was recorded on. As a general rule, finalization means that the disc cannot have any more data written to it. Finalizing is the last step in the DVD authoring process. You CAN rewrite on DVD-RWs by unfinalizing and re-finalizing. For more information on what it means to finalize a DVD and the file structure of disks, please see page 9 in the JVC manual: http://pro.jvc.com/prof/attributes/inst_man.jsp?model_id=MDL101541&feature_id=11 31
- 32. Tips for finalizing • Use the remote for this entire process. • Make sure your point the remote at the unit rather than at the touch panel. • You may finalize at a later time as long as you do it on this machine. • If you time-out of the finalizing process, press Set Up again • If you forget to stop recording before you finalize, you must exit the finalizing process and start over. 1. On the remote, press DVD so that the DVD lamp lights up on the JVC unit. 2. Press Set Up to access the Main Menu. The Main Menu will show up on the touch panel screen. 3. On the touch panel, press “Touch for Full Screen.” 4. Use the arrow keys on the remote to highlight HDD/DVD/DV SET UP 5. Use the arrows to highlight DISC SET UP 6. Use the arrow keys to select FINALIZE then press ENTER. 7. The background selection screen will appear. Select the desired background, and then press ENTER. 8. The screen will say “Finalizing will make disk read-only. Start Finalizing.” Use the arrow keys to select OK and press ENTER on the remote. 9. The screen will say “Disc will be finalize. Will take about ___ min. Start to finalize?” Use the arrow keys to select OK and press ENTER on the remote. 10. After it finalizes, a “Record Preview” screen will show on the touch panel. Highlight OK and press ENTER on the remote. 11. Press SET UP to return to the normal screen. Menu screen is cleared. Your disc is finalized. You may eject. 32
- 33. . You can test your recording on this system by pressing play on the JVC unit, but there is no audio connected to the recording device so remember that you will not be able to hear what you recorded when you test it. See your page 33 of your student manual for a tech tip on editing your recording (shown below). If you want to edit your recording, you can do so whether you’ve recorded to DVD-R/RW or to mini-DV tape. To edit a mini-DV tape, bring your tape to the Mac lab in ED room 308A. Use the camera to upload your tape into i-movie and edit from there. To edit your DVD, you must rip your audio and video using ripping software, and then you can edit using a movie editing software like i-movie. You will have to save to a DVD after making your changes to the movie. If you need assistance with this process, contact Joneen Iverson, Technology Coordinator at 777-3718. 33
- 34. Module III Active (two way) Broadcasting 34
- 35. Part 8 - Audio conference Objective Given a verbal prompt, the student will be able to summarize the audio conference feature by describing the process of using the touch panel to dial to a conference site with no errors. Time required: 15 minutes; Prerequisites: Materials needed: Phone # of call in line: 777-3467 Introduction Since the instructor mic is used for to amplify your voice for recordings, we need to make sure it is on for the audio conferences as well. Discussion/Demonstration To utilize the audio conference feature, press the “audio conf” icon on the touch panel. This screen gives you full control over the audio conference. If numbers appear in the text box, press “Clear” to remove them. Dialing Dial the numbers like you would any other University phone. • For someone ON campus, dial 7-#### • For someone OFF campus, dial 9 and the number with no area code. 35
- 36. You can also control the volume of the caller’s voice with the RX Volume control on this screen. • To end the call, simply press “hang up.” • Or, your student can call the system by dialing the in-room phone number. • Press the “answer” button to answer the call. • Press “hang up” when you’re done. We also use the audio conference feature in Breeze but we dial through the software application. More on that later. For more on audio conferencing, see http://en.wikipedia.org/wiki/Conference_call 36
- 37. Part 9 - Breeze Introduction Breeze is web conferencing software which can integrate audio, video and multimedia into a distance classroom. You can stream in real-time with Breeze and/or you can record your Breeze sessions and archive them for later viewing. The IDT program uses Breeze to facilitate with its distance students and we have found it to be a fairly stable program for our purposes. Discussion/Demonstration For the purposes of this training, you will use the IDT training login and password. If you were to teach a class in Breeze, you would have to contact Continuing Education to set up the class and your students would have received an email with passwords and the link to Breeze for your live classes. What follows is step-by-step instructions on how to start Breeze and begin an audio conference. Fire wire The first step is to plug in the fire wire cable which is kept in the drawer. 4-pin (left) and 6-pin (right) FireWire connectors Make sure the JVC is on DV and on Line 1 because the video line is fed into the JVC. If it is not on Line 1, use the channel button to change the line input. Channel LCD display buttons should read “L - 1” 37
- 38. Plug it into the JVC port labeled “DV In/Out” and into the Gateway fire wire port. The 6-pin end can be difficult to plug in. The computer will make a “high/low ” tone when it detects the new hardware and it will come up with a dialog box. Choose “Take no action” Logging in On the computer there is a shortcut to the Macromedia Breeze login page. If for some reason it’s not there, go to Breeze URL: http://conted.breeze.und.nodak.edu/idtest/ . The following screen will appear (show the screen on the desktop): Enter using the login name idt.trainer@und.edu and the password trainer07 38
- 39. Breeze will show this splash screen while it loads the page… And then you will enter the meeting room for that live class session, where you will see your name in a small window called "Attendees." Due to the frequent problems with Voice over IPs (VoIP), IDT began using audio conferencing to relay distance audio. Voice over IPs are voice communications over the Internet. The audio conference feature provides a stable platform for distance students to communicate. It’s like having a conference call with everyone sitting in the classroom. To learn more about VoIPs, see wikipedia http://en.wikipedia.org/wiki/VoIP and the FCC website: http://www.fcc.gov/voip/ 39
- 40. Start the camera • Make sure the JVC recorder is on DV and Line 1 • Select “Meeting” from the Menu Bar • Click on “Select Camera” The Macromedia Flash Player Settings dialog box appears. Click the blue camera icon and the image will show. If it shows up, click Close. If the camera feed is NOT showing in this box, make sure the JVC is on DV. If it is and the camera is not working, close out of Breeze and try again. If it still does not work, power down the entire system and try again. After that, if it still doesn’t work, call the Help line. 40
- 41. Once you have selected the camera, go to the “Camera and Voice box” in the upper left hand corner of the screen. Find the “Start my Camera and Voice” icon and click it. And click “Allow”…. This dialog box will disappear and you will see the video being shared with the participants of the Breeze session. 41
- 42. Start the Audio Conference: • Click on your name • Click on the little yellow phone icon • Click Start Audio Conference This will begin the audio conference Next, you will need to dial in to the audio conference which means you will use Breeze through your keyboard and the computer to dial the phone in the room – you will not use the touch panel to make this call, but you will to answer it. The system will pick up the call and play it on the speaker phone through the overhead speakers. • Make sure your icon is still highlighted • Click the phone icon again • Then click call “Selected User” • Enter the phone number including area code 701-777-3467 • Click “Call” • The phone will ring. 42
- 43. • Press “Answer” on the TOUCH PANEL • Follow the prompts – press 1 on the touch panel • No need to say your name or press # Students will call into the audio conference by dialing the 1-866- # in the Note pod at the bottom of the screen and using the passcode listed. If the number does not show there, hover over the phone icon on the upper right corner of the screen and the info will show. Record in Breeze If you would like to record a session in Breeze, follow these instructions: Before you formally begin your class session but AFTER you have started the video feed, begin the recording. • Choose “Meeting” from the Menu Bar • Choose “Record Meeting” Name your recording (usually by course and date) and give it a short summary if you’d like. • An icon will appear to remind you that the meeting is being recorded. 43
- 44. • When you’re ready to stop recoding, hover over the red button and press the “Stop Recording” link as shown below. Share your screen • Click on “My Computer Screen” Continued on next page… 44
- 45. Refer to the screen while you go thru these: • You can click Desktop which will show all participants your desktop • You can click Windows which will show a description of every window you have open and will share it with all participants • You can click Applications which will show a description of every application you have open and will share it with all participants • Click “cancel” to get out of the “Start Screen Sharing” dialog box Share a Document • Click on Documents • Select RLCpowerpoint.ppt 45
- 46. • The PowerPoint will load and you will be sharing your screen with all who are signed in. • Use the arrow keys to move through the PowerPoint presentation • To stop sharing press the “Stop Sharing” button 46
- 47. To stop the Audio Conference: • Click on yellow phone icon in the Attendees box • Click on “Stop Audio Conference” To end the Breeze meeting: • Click on “Meeting” in the Menu Bar • Then click on …”End Meeting” • The “End Meeting” dialog box comes up. Click OK. • Close all Breeze Windows Summary The ability to record to mini-DV tape and DVD allows you to save a recording for a later and/or send to students. Also, Breeze is a powerful tool for integrating distance technology into the classroom and providing distance students with an experience close to the same quality as face- to-face courses. Again, if you have further questions on using Breeze, please contact ITSS for a workshop. 47
- 48. For more information on Breeze at UND, check out the following website: http://cilt.und.edu/breeze/ 48
- 49. Module IV What did we learn? 49
- 50. Recap 1. We learned the basics of the system. 2. We learned how to stream 3. We learned how to record to mini-DV tape 4. We learned how to record to DVDs 5. We learned how to use and audio conference 6. We learned how to use Breeze Shutting Down To properly shut the system down, start with the PC and shut down like you would any other Windows machine, by going to Start, Turn of Computer… and Turn Off. After the PC has shut down, switch the main power switch to off. Turn off the mic and put it away. You’re almost there… only one more section to go…. 50
- 51. Assessment 51
- 52. Please fill in the blanks with the name of each component. Objective 1.1.1.3.1 52
- 53. Matching touch panel quiz Directions: A. Audio conference Please enter the letter of each icon. B. Media volume C. DVD player D. Computer E. Help F. Projector power G. Cam control H. Mic volume I. Doc cam J. Laptop K. Record Objective 1.1.1.3 L. VCR player
- 54. Matching components quiz A. Touch panel B. Speakers C. Main power D. Mini-DV tape/DVD recorder E. Camera F. PC power G. Boundary microphone 54 Objective 1.1.1.3.1.1
- 55. You’re done!! ….the rest is just something extra…
- 56. Something Extra 56
- 57. Using the VCR (This is not addressed in the instruction.) Touch the VCR icon on the touch panel and then insert the VHS tape. Insert VHS tape here This player is like any other player you use at home. And you can see on the touch panel it has the same control options as well. Press play to play and stop to stop. The eject button is on the player. You cannot use the touch panel to eject. 57
- 58. DVD Player To switch to the DVD player, press the DVD icon on the touch panel. Use the eject button on the player to open the drive. Insert the DVD into the player. Insert DVD here The touch panel buttons control the DVD player similar to the way they do on your home machine. Again, play is play, stop is stop. One difference is if you press and hold fast forward, you will move from scene to scene like skip does on other machines. Again, the eject button is on the player. You cannot use the touch panel to eject. 58
- 59. Plugging in your laptop To tell the system to interface with your laptop, simply press the laptop button on the touch panel. To hook up your Windows laptop, simply plug the Video Graphics Array (VGA) cord into the port on your laptop. This will enable the video on the laptop to display on the desktop monitor and the projector screen. For audio to also be transmitted through the system, plug the audio cord into your headphone port. Do not plug the USB port into your laptop. Sometimes people get these two cords confused and try to plug the USB port extension into their laptop. See the photo above which labels each cord. If you have any doubt when you use the room, call the help desk number which is posted on the podium. 59
- 60. USB Port Audio Cord VGA Cord VGA Plug on laptop VGA Cord Summary/Transition As you can see, using the desktop and a laptop on this system is very simple. 60
- 61. Congratulations! …you’re really done this time. Thank you! 61