Pin retained amalgam restorations
•
195 j'aime•72,290 vues

This document discusses pin-retained amalgam restorations for teeth with extensive caries or fractures. It describes the advantages as conserving tooth structure and providing increased resistance and retention compared to cast restorations. Potential disadvantages include dentinal microfractures, microleakage, and decreased amalgam strength. Factors that affect pin retention such as pin type, size, orientation, and number are examined. Guidelines for cavity preparation and pin placement based on tooth anatomy and pulp location are provided. Common problems and their solutions are also outlined.

Recommandé
Contenu connexe
Tendances
Tendances (20)
En vedette
En vedette (19)
Similaire à Pin retained amalgam restorations
Similaire à Pin retained amalgam restorations (20)
Plus de IAU Dent
Plus de IAU Dent (20)
Dernier
Dernier (20)
Pin retained amalgam restorations
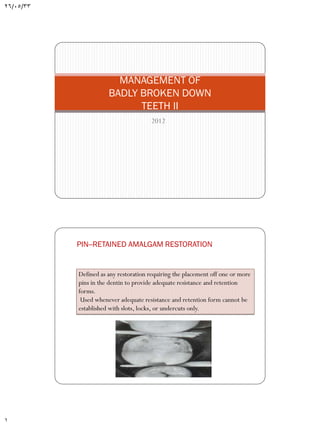
- 1. 26/05/33 MANAGEMENT OF BADLY BROKEN DOWN TEETH II 2012 PIN--RETAINED AMALGAM RESTORATION Defined as any restoration requiring the placement off one or more pins in the dentin to provide adequate resistance and retention forms. Used whenever adequate resistance and retention form cannot be established with slots, locks, or undercuts only. 1
- 2. 26/05/33 Indication: It is indicated for tooth with extensive caries or fractures. Rarely used in anterior teeth(Bonding Technique). In class V is rare (horizontal groove in the gingival & occlusal aspect). Can be used with cast restoration ADVANTAGES: Conservation of tooth structure Save time vs.. cast restoration Economic Provide ↑ resistance & retention form 2
- 3. 26/05/33 DISADVANTAGE: Dentinal micro-facture or crazing Microleakage around pin ↓ strength of amalgam Perforation of the pulp or external tooth structure 3
- 4. 26/05/33 Cavity preparation The cavity preparation for mutilated teeth through excavation of carious dentin and removal of all undermined enamel. The dentin floor must be sound . The rim of the preparation in the damaged areas is then squared to resemble a shoulder finish line. The outline of the cavity is extend onto smooth and sound tooth structure 4
- 5. 26/05/33 Every effort should be done to conserve the remaining tooth structure. Addition undercut can be done in the cavity walls . The cavity depth is detected to determine the type of base should be used. TYPE OF PINS: 1. Cemented(Markley) • Larger than other pin • Use Zn Ph cem or Zn Polycarboxylate cement 2. Friction – locked or tapping pins • Smaller • Retained by resilience of dentin • ↑ retentive than cemented pin With time dentin relax →loose pin 5
- 6. 26/05/33 3. Self-threading pin . Different size • Threads engage dentin • Depend on elasticity of dentin • Most retentive (3-6 times) • No corrosion (gold plated) • Create horizontal & vertical stress • Cause dentinal craze line (size of pin) MOST CURRENTLY MARKED PINS HAVE: Metal thread separated Wider dentinal thread →retained well in dentin Shoulder stop (to prevent putting stress at the end of pin channel) 6
- 7. 26/05/33 TMS PIN (PIN THREAD MATE SYSTEM): Regular 0.031 inch diameter Minim 0.024 inch diameter Minikin 0.019 inch diameter Minuta 0.017 inch diameter TMS PIN (PIN THREAD MATE SYSTEM) available in: Double shear (two pins in one) Gold plated,, stainless steel or titanium alloy Inserted manually or with low-speed latch-type handpiece 7
- 8. 26/05/33 FACTORS AFFECTING THE RETENTION OF THE PIN IN DENTIN AND AMALGAM 1-Type of pin: Self-threading – most retentive Friction-locked – intermediate Cemented – least 2-Surface characteristics: Number & depth of the elevation on the pin (serration or thread) self-threading pin – greatest retention 3-Orientation and number Non-parallel pin - ↑ retention Bending of pin – not desirable • Interfere with condensation of amalgam • Weaker pin, fractured dentin ↑ no. of pin - ↑ retention • ↑ crazing & fracture • ↓ amount of dentin available • ↓ amalgam strength 8
- 9. 26/05/33 4-↑ diameter of pin →↑ retention Danger of perforation on pulp or external tooth surface Interfere with condensation of amalgam and adaptation to pins 5-Extension into dentin and amalgam Retention is not increase when depth of the pin ↑ 2mm in dentin →fracture of dentin ↑ 2mm in amalgam→fractured amalgam PIN PLACEMENT FACTORS AND TECHNIQUES Pin Size Depend on the amount of dentin available and amount of retention desired. TMS – pin of choice is: Minim (0.024 inch) Minikin (0.019 inch) Minikin →↓ risk of--- Dentin crazing Pulpal penetration Potential perforation 9
- 10. 26/05/33 Number of Pins Several factors must be considered: Amount of tooth structure Amount of dentin available to receive pin safely Amount of retention required Size of the pin Number of Pins As a rule→one pin/missing axial line angle should be used Excessive number of pins →fracture the tooth →weaken the amalgam restoration 10
- 11. 26/05/33 Location Several factors aid in determining pinhole Location: 1. Knowledge of normal pulp anatomy & external tooth contour 2. Current radiograph of the tooth 3.Patient’s age SOME CONSIDERATIONS: Occlusal clearance should be sufficient to provide 2mmof amalgam over the pin. Pinhole should be located halfway between the pulp and DEJ (0.5-1 mm inside DEJ) At least 1 mm of sound dentin around the circumference of the pinhole. 11
- 12. 26/05/33 Such location ensures proper stress distribution of occlusal force Pinhole: Should be located in areas where greater stresses occur Should be located near the line angles of the tooth, marginal ridges or cusp tip. Should be parallel to the adjacent external surface of the tooth (not closer than 1 - 1.5 mm) Should be prepared on a flat surface If three or more pinholes are placed: Should be located at different vertical levels on the tooth Inter-pin distance depend on the size of the pin to be used For Minim (0.024 inch) →5 mm For Minikin (0.019 inch)→3mm Maximal inter-pin distance results in lower level of stress in dentin. 12
- 13. 26/05/33 EXTERNAL PERFORATIION MAY RESULT FROM PIINHOLE PLACEMENT 1. Over the prominent mesial concavity of the maxillary first premolar. 2. At the midlingual and midfacial bifurcations of mandiblular first & second molars. 3. At the midfacial, midmesial, mid-distal furcations of maxillary first and second molars.. PULP PENETRATION MAY RESULT FROM PIN PLACEMENT At mesiofacial corner of: Maxillary first molar 13 Mandibular first molar
- 14. 26/05/33 PINHOLE PREPARATION: No.¼bur used to prepare a pilot hole (dimple) → To permit more accurate placement of the twist drill Prevent the drill from crawling once it has began to rotate Optimal depth of the pinhole into the dentin is 2mm (Omni-Depth gauge used) PINHOLE PREPARATION: The hole should be prepared on flat surface and the drill perpendicular to it. Place flat thin-bladed hand instrument into the crevice and against the external surface of the tooth →To indicate the proper angulations for the drill 14
- 15. 26/05/33 PINHOLE PREPARATION: Place the drill tip in its proper position Hand piece rotating at very low speed Prepare pinhole in one or two movement until the depth-limiting portion is reached Remove the drill from pinhole PINHOLE PREPARATION: Using more than one or two Movements, tilting the hand piece → to large pinhole The drill should never stop rotating → 15 to prevent the drill from breaking in the pinhole
- 16. 26/05/33 PINHOLE PREPARATION: Dull drill → ↑ Frictional heat Cracks in the dentin To bend the pin →TMS bending tool INTERNAL STRESS CAUSED BY THE PIN DECREASED BY: 1. ↑ space between pins 2. Channel 2mm deep 3. Pins parallel to occlusal force 16
- 17. 26/05/33 The success of all amalgam restoration depend on → stability of the matrix Matrix: Tofflemire Double matrix Copper Auto matrix FAILURE OF PIN--RETAINED RESTORATION Occur at any of five different location: a. Restoration fracture (failure within rest) b. Pin restoration separation (at the interface between the pin and restorative material) c. Pin fracture (within the pin) d. Pin dentin separation (at the interface between the pin and dentin) e. Dentin fracture (within the dentin) Failure is more likely to occur at the pin dentin interface 17
- 18. 26/05/33 PROBLEMS THAT ARISE DURING PINRETAINED RESTORATION: 1. Broken drills and pins Twist drill will break if: Stressed laterally Allowed to stop rotating before removing from the pinhole Dull drill (can be used till 20 holes) Pin will break: During pending Over - screwed in the hole Solution: Leave it in place. Do another hole 1.5mm away from broken item 2. Loose pins • Due to: Loosened while shortened with bur Pinhole prepared too large Solution: • Remove pin , pinhole prepared with next largest size drill , appropriate pin inserted • Drill another hole 1.5mm from original pinhole, close the other one with amalgapins or cement the pin 18
- 19. 26/05/33 3-Penetration into the pulp and perforation of the external tooth surface: • Either penetration is obvious if there is hemorrhage in the pinhole • Radiograph can help sometimes. • solution: Pulpal penetration treated as a pinpoint exposure →Ca OH and prepare another hole • If patient complains of pain after that →endodontic treatment 4-Latteral Perforation: Solution: Occlusal to gingival attachment Pin cut-off flush with the tooth surface. Pin cut-off and cast restoration extend gingivaly. Remove pin , enlarge hole and restored with amalgam. 19
- 20. 26/05/33 Apical to gingival attachment: Solution: Surgically remove the bone after reflecting the tissue, enlarge pinhole, restored with amalgam Crown lengthening and cast restoration cover the perforation. 20