1. Knowledge Base
Streaming Video in Second Life
Streaming video into Second Life is fairly simple and provides you with increased
abilities in information delivery for businesses and educators, as well as greater
potential for entertainment venues and special events.
This article steps you through the processes of establishing movie playback, streaming
live video into Second Life, and broadcasting from Second Life.
Streaming Video into Second Life
Getting Started
The following are the basic prerequisites for streaming video into Second Life:
• You must either be the landowner or administrator of the property you plan to
stream into
• Your movie files must be compressed using QuickTime format, and QuickTime
must be installed on your computer
o If the video you're attempting to stream plays in the QuickTime player on
your own computer, it should stream into Second Life correctly
o If the video you're attempting to stream doesn't play in the QuickTime
player on your own computer, it almost certainly won't work
• The movie must exist as an active URL link on a hosting web server
Prior to setting up your media playback mechanism in Second Life, test the URL of your
movie by pasting its link in the address bar of a web browser. If it works there, you
shouldn't experience any problems streaming it into Second Life.
Setting Up the Media Player and Accessing a
Stream
The first step is to set up a media player in Second Life. While standing on the parcel of
land you wish to stream into, follow these steps:
1. Create an object to be your video screen.
2. Open the About Land window and click the Media tab. There are three ways to do
this:
o Right-click on the parcel of land you're on and select About Land from the
pie menu
o From the menu bar at the top of the Second Life window, select World >
About Land
o On the menu bar, click on the location information text
2. The About Land window can be prompted simply by clicking on your location
information on the menu bar.
3. Place a unique texture from your inventory on the video screen.
Note: We suggest that you use the default media texture found in the Library > Textures
folder in your inventory.
You can use any texture you like, as long as the textures in steps 3 and 4 are identical.
4. Place the same texture you placed on the screen (from #3 above) into the Replace
this texture thumbnail texture on the Media tab.
The video screen and the Media tab thumbnail must hold the same texture. Note
the playback control at the bottom of the screen: This appears automatically when
a URL is placed in the content entry field.
5. Enter the URL of the video you want to stream in the with content from this URL
field immediately below the texture thumbnail.
6. The media player controls will appear at the bottom of your screen, and for any
visitor to your parcel as well.
7. Use your playback controls to view the movie. The movie will play on your object
surface (the screen you made), as well as in the Media tab thumbnail.
Using LSL Commands to Play Movies
3. The Linden Scripting Language (LSL) is one of the most powerful components of the
Second Life platform, and through it you can be more creative with how you stream
video onto objects. An example can be found in your Second Life inventory:
Inventory > Library > Objects > Media Player
After dragging and dropping the media player object onto your land:
1. Right-click on the Media Player to access the Edit window
2. Click the Contents tab, and double click on the script labeled Media Controller.
3. Edit the script as necessary for your playback (you may want to consult a scripting
specialist in Second Life to set it up correctly).
Broadcasting Video from Second Life
Broadcasting from Second Life is very similar to streaming live media into Second Life,
although you have a few more options.
To do this, make sure you have:
• A computer fast enough to run Second Life and your capture/broadcasting
software simultaneously
• Enough upload bandwidth for the stream, typically a minimum of 250kbps
• A media streaming host
• A website to stream from
Setup for Mac
1. Run Second Life on a fast Macintosh computer.
2. Set Second Life's window size by selecting File > Set Window Size and choosing
your preferred setting.
3. Install and run QuickTime Broadcaster.
Read the information on Apple's web site to configure it correctly.
4. Point Broadcaster's output to a host server (QTSS), which provides you with a URL
for the stream.
5. You'll now have an active URL of the stream.
Setup for PC
1. Run Second Life on a fast computer.
2. Set Second Life's window size by selecting File > Set Window Size and choosing
your preferred setting.
3. Install and run Windows Media Encoder 9.
Read the documentation in order to configure it correctly.
4. Make Second Life the window to capture in WME9:
1. Click Properties > Sources > [Video] Configure.
2. In the Capture Source dropdown, select Second Life.
4. In Properties > Sources > [Video] Configure you can select Region of Screen from
the dropdown menu, then set a precise region of your screen to capture either by
dragging a selection window or entering exact pixel coordinates.
You can also choose to both broadcast and save a local version (compressed in
WMV format) on your hard drive, although this requires an extremely fast
computer, a lot of RAM, and a lot of free space on your hard drive.
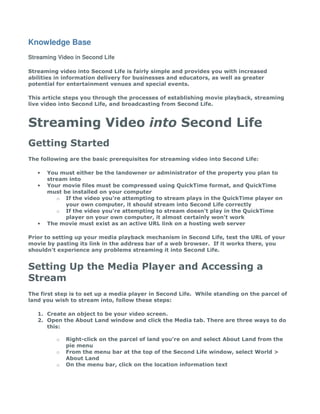
The Windows Media Encoder 9 Properties panel, with Second Life selected as the
Capture Source window.
5. In the Output tab, select Push to server and enter the data for your hosting
server. This will provide you with a URL for the stream.
5. Streaming Live Video into Second
Life
Common Considerations
• When deciding on a host for your stream, be aware of the maximum number of
simultaneous connections allowed.
• Understand that you may experience latency in the stream (from when you do
something in Second Life to when you can see it in the final URL stream). This is
common in any form of streamed media, and can range from a few seconds to 15
seconds or more.
• Make sure your video and audio codecs are up to date.
Tip: Test each portion of this process as you go along. Troubleshooting will be much easier
because you'll be able to isolate exactly where a problem may exist in the process.
Second Life Event Broadcasting (Concerts,
meetings, contests, etc.)
When broadcasting an inworld live event, you may need to keep your avatar logged in
for more than the 10-minute maximum on the capturing computer. To do this, open then
Client menu if it's not already on the menu bar, then deselect select Client > Character
Tests > Go Away/AFK When Idle.
Only run Second Life and your capture/broadcasting software on your source
computer. This will enable the system to focus its resources solely on your broadcasting
task.
Real-World Event Broadcasting (Concerts,
lectures, sports, etc.)
A video camera will (most likely) serve as your capture source device.
Only run Second Life and your capture/broadcasting software on your source computer.
This will enable the system to focus its resources solely on your broadcasting task.
Setup for Mac
1. Install and run QuickTime Broadcaster on a fast computer.
Read the information on Apple's web site to configure it correctly.
6. 2. Take the output from your video camera and make it the input (source) in
QuickTime Broadcaster.
Tip: The simplest way to connect your camera to your computer is to connect the FireWire
output on the camera to the FireWire input on the computer.
3.
4. Point Broadcaster's output to a host server. This will provide you with the URL for
the stream.
Tip: Apple's QuickTime Streaming Server is a great solution for this.
5.
6. In Second Life, configure the Media tab as described above, and paste the
streaming URL into the with content from this URL field.
7. This diagram shows how to setup a live video stream into Second Life via QuickTime
Broadcaster (QTB) and QuickTime Streaming Server (QTSS). Windows configuration is
the same, except for the software used on the encoding/broadcasting computer.
Set-up for PC
1. Install and run a streaming software solution such as Vara Software's Wirecast 3
or NetroMedia on a fast computer.
Be sure to read the information about the technology you're using so you
configure it correctly (see "Helpful Links" below).
2. Take the output from your video camera and make it the input (source).
Tip: The simplest way to connect your camera to your computer is to connect the FireWire
output on the camera to the FireWire input on the computer (this may require a capture
card with FireWire input).
3.
4. Point the output stream to a host server. This will provide you with the URL for the
stream (see "Helpful Links" below).
8. 5. In Second Life, configure the Media tab as described above, and paste the
streaming URL into the with content from this URL field.
Helpful Links
Capture/Broadcasting solutions
QuickTime Broadcaster
Windows Media Encoder 9
Camtasia Studio 4
VaraSoftware
Netro Media
For a list of software capture and broadcast solutions, Google: "streaming video
software" (remember that they must be QuickTime compatible)
Hosting Solutions
QuickTime Streaming Server
Stream Hoster
Bulletstream Technologies
VitalStream
Streaming Marketplace
StreamingMedia (this site is a great resource for streaming video and audio)
For a list of host sites, Google: "video streaming host" (remember that they must be
QuickTime compatible)
Case Studies
Ustream.com
DestroyTV.com
To learn more about this topic, visit the link below:
http://support.secondlife.com/ics/support/default.asp?deptID=4417&task=knowledge&question
ID=4434