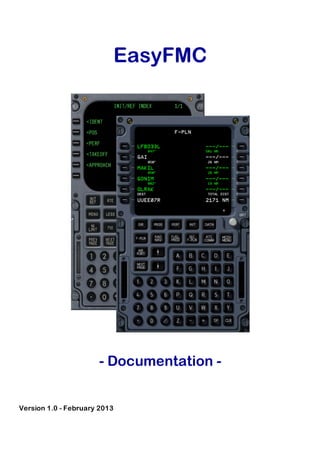
SlideShare a Scribd company logo
1 of 14
Download to read offline
EasyFMC


                      - Documentation -


Version 1.0 - February 2013
EasyFMC - Introduction

What is EasyFMC?
As its name says, EasyFMC is a simplified Flight Management Computer that can be easily installed and used with any aircraft
in FS2004 and FSX. As a simplified FMC, it does not provide all the advanced features of an realistic FMC, but it lets you enter
a flight plan from scratch (departure and arrival airports and runways, waypoints along the route), it provides lateral
navigation to guide your flight along the programmed route and also provides fancy additional features, such as full support
for DIRECT operations and radio-nav autotuning. Any flight plan created with EasyFMC can be saved and can be used for flying
with the FS2004/FSX virtual ATC.

EasyFMC is provided with different look-and-feels that are supposed to handle the different ways of using an FMC, especially
the differences between Airbus and Boeing philosophies. All the variations of EasyFMC provide the same main features, with
some slight differences explained in this manual.


Installing EasyFMC
After EasyFMC has been installed through its automatic installer, you need to install the device itself in the panel of the
aircraft(s) of your choice. The 'EasyFMC Panel Updater' is a specific application provided for this purpose. It automatically
updates the necessary aircraft file (panel.cfg) to make EasyFMC available in its panel.


Run the application through the Windows start menu (in EasyFMC folder). Then follow the instructions as shown in the image
above:

           1. The Panel Updater automatically detects the Flight Simulator installation folder, shown in 'location'. If it is
              wrong or empty, you can specify it manually by pressing the 'Change' button.
           2. The Panel Updater reads your aircraft collection and lets you select one of them using the manufacturer, model
              and variation.
           3. When the aircraft is selected, you can select the size of the panel window that will be created for EasyFMC. If
              you don't know what size to put here, use the default values, they can be changed later.
           4. Check the 'visible' box if you want to have the EasyFMC window visible as soon as the panel appears.
           5. Select the look-and-feel among the available ones.
           6. Press the 'Add to Panel' window. As soon as the operation is executed, a confirmation window appears, which
              informs you about the changes in the panel.cfg. A backup copy of the panel.cfg file is always done before
              modifying the original file. It is named panel.bak.

EasyFMC Presentation

Layout
Whatever the look-and-feel you have selected, EasyFMC is composed of a alphanumeric keyboard, specific page keys, a
screen and 2 lines of select keys on the left and right side of the screen. These keys are called “line select keys” (LSK) and
they are identified as 1L to 6L on the left, and 1R to 6R on the right.
When you type something using the keyboard (letters or digits), they appear on the bottom line of the screen, called the
“scratchpad”. Any character entered in the scratchpad can be deleted using the CLR key. The Boeing look-and-feel also
provides a DEL key that entirely deletes the scratchpad content.
To enter any information into the FMC, you have to type it in the scratchpad, then press the appropriate LSK to enter the
information at the right place. If you press the CLR key (Airbus) or DEL key (Boeing) while the scratchpad is empty, a deletion
message appears on the last line (CLR on Airbus, DELETE on Boeing). This means you are in delete mode, which will be used
later to delete information, i.e. deleting a waypoint from the flight plan.
The FMC may have to display messages for you, such as error or warning messages. They are displayed on the same line as the
scratchpad, at the bottom of the screen. Once you have seen the message, you can erase it by pressing the CLR or DEL key,
and the scratchpad is displayed again.
The page keys exist to provide direct access to some specific pages, such as FPLN/RTE (for the flight plan display), RAD NAV
for the radio nav settings, etc. They can be seen as “shortcuts” for a quick and direct access to pages that are usually used
during the flight.

Keyboard Mode
In order to enter information more easily, EasyFMC lets you use the PC keyboard instead of clicking the FMC keyboard with
the keyboard mode. A "hidden" clickable area is defined on the top left screw, which activates/deactivates the keyboard
mode. When the keyboard mode is activated, ANY key that comes from the PC keyboard will go to the FMC until is is
deactivated. When the keyboard mode is active, a 'K' appears in the top left corner of the FMC.

You can use your PC keyboard to enter characters in the scratchpad and use also function keys: F1 to F6 for LSK 1L to 6L, F7
to F12 for LSK 1R to 6R. Backspace key can be used like the EasyFMC CLR key, and DEL key can be used like the EasyFMC DEL
key (Boeing only).

        WARNING !! When the keyboard mode is active, all the key press actions are sent to the FMC and ignored by
       Windows. It means that even the famous Alt-Tab key combination that is commonly used to switch to another
           application is not operative until you deactivates the keyboard mode by clicking the FMC screw area.


Page Navigation
The page navigation is not exactly the same in the Airbus and Boeing philosophy:

                             Airbus                                                         Boeing
                                                                If a page has more items to display than the 6 available lines
Any page that displays more items than the 6 lines displayed    of the screen, you can see more by pressing the NEXT PAGE
on the screen can be scrolled up and down using the up and      button. The total number of pages is displayed in the top left
down arrow keys. Two arrows are drawn in the right bottom       corner of the screen. If you press NEXT PAGE on the last
corner of the screen to indicate if the page can be scrolled    available page, you come back to the first page. Conversely,
up or down.                                                     you can press PREV PAGE to see the previous page and if you
                                                                are on the first available page, you access the last page.


Starting EasyFMC
As soon as EasyFMC is added in an aircraft panel through its installation application (see paragraph above), you can select this
aircraft is FS2004/FSX and see EasyFMC in the panel. Depending on the option you have chosen in the installer, the EasyFMC
device may be visible at startup or you may have to make it visible through a Shift-? key press or through the “View” menu of
FS2004/FSX.

                                      Airbus                                                         Boeing
The MENU page appears, the first option (FMC) is the only valid option, which The INDEX page appears first, giving you
leads to the INIT page.                                                       access to the most important FMC pages.
EasyFMC - Flight Plan Management

Flight Plan Creation
If a flight plan exists in memory (created or loaded in the FS2004/FSX flight planner), it is immediately handled by EasyFMC
and you can view/edit it with EasyFMC. If the aircraft is not located at the departure airport defined in the flight plan, you
get a “CHECK POSITION” warning message. It is just a warning and does not prevent you from using the flight plan.
If no flight plan exists, you can create it using EasyFMC, as you can read below.

The process of creating a flight plan is always the same: you have to define the departure and arrival airports (also called
origin and destination airports), define the waypoints of the route and optionally define the departure and arrival runways.

If you have a GPS display in the aircraft panel, any action on the flight plan done by EasyFMC is immediately visible on the GPS
screen. This is why it is suggested to have a GPS display visible when editing the flight plan, this allows you to see the effect
of any modification in real time.

1) Definition of the origin and destination airports and runways

                             Airbus                                                           Boeing
On the INIT page, you can define the departure and arrival         The origin and destination airports are defined on the first
airports (named FROM and TO airports) by entering the ICAO         ROUTE page. You can access this page through the index
codes of both airports separated by a '/' and pressing LSK 1R      page or by pressing the RTE button. The fist displayed page
for FROM/TO. For example, if you want to fly from Paris            lets you enter the origin airport on LSK 1L and the
Charles de Gaulle to London Heathrow, you have to enter            destination airport on LSK 1R. For example, if you want to fly
LFPG/EGLL, then press LSK 1R.                                      from Paris Charles de Gaulle to London Heathrow, you have to
                                                                   enter LFPG, press LSK 1L for the origin, then enter EGLL and
                                                                   press LSK 1R for the destination.
                                                                   Please note the origin must always be entered BEFORE the
                                                                   destination.


                                                                   On this page, you can also define the departure runway
                                                                   manually by entering its designation and press LSK 3L.


       Warning: As soon as the departure and arrival airports are defined, the existing flight plan is erased and a new
                flight plan is created, only composed with these 2 airports as the first and last waypoints.


If your aircraft is not located at the departure airport, you get a warning message: CHECK POSITION. This is supposed to
prevent a possible error in the ICAO code of the departure airport.

When the origin/destination airports are defined, you can select the departure/arrival runway. This operation is slightly
different on Airbus and Boeing look-and-feel:

                             Airbus                                                           Boeing
On the flight plan page (F-PLN), just press the left line select The runway selection is done on the DEP ARR page that you
key for the departure/arrival airport. On this example, you      can display pressing the DEP ARR button:
must press LSK 1L for departure (LFPG) and LSK 2L for arrival
(EGLL):


This leads to the runway selection page; letting you select    Press LSK 1L or 2R to select departure or arrival runway.
the appropriate runway by clicking the corresponding left line This leads to the runway selection page where you can select
select key.                                                    the desired runway using LSK 1R to 6R, as shown here:
You can also enter the runway designation manually on the
                                                                   first ROUTE page by pressing LSK 3L.

When the arrival runway is selected, you can activate the AUTOTUNE. If the arrival runway is equiped with an ILS, the
autotune function automatically sets the ILS course and frequency when the aircraft flies within 30 NM of the destination
airport.

Autotune Activation:

The autotune can be activated only if the ILS course and frequency are defined. This information is automatically set when
the arrival runway is defined, if it is equiped with an ILS (see above). It can also can be entered manually.
If this information is not defined, a message appears: "ENTER ILS FREQ"

                            Airbus                                                            Boeing
Switch to the RADIO NAV page by pressing the RAD NAV               Switch to the DATA page by pressing the MENU button, then
button:                                                            pressing the LSK 1R:


Press LSK 6R to turn autotune On/Off.                              Press LSK 6R to turn autotune On/Off.


2) Entering the waypoints

                            Airbus                                                            Boeing
To enter the flight plan waypoints, you must go to the flight      To enter a new waypoint in the route, access the ROUTE
plan page, by pressing the F-PLN key. You just have to enter       page through the index page or by pressing the RTE button.
the waypoint identifier and insert it in the existing flight       The first route page is displayed, showing the origin and
plan. Inserting a waypoint is done by pressing the left line       destination airports. Press the NEXT PAGE button to have
select key that corresponds to the waypoint where you want         access to the second page, which is the first route definition
to insert the new waypoint.                                        page: it displays all the route waypoints.
If you are in the process of creating a new flight plan, only      If you are in the process of creating a new flight plan, no
the departure and arrival airports exist in the flight plan. In    waypoint is shown here because only the origin and
that case, the departure airport is displayed on the first line    destination airports are defined. This is why you just have a
(LSK 1L) and the arrival airport is on the second line (LSK 2L).   dash line displayed on the first line. You just have to enter
You just have to enter the waypoint identifier in the              the waypoint identifier in the scratchpad and press the LSK
scratchpad and press the LSK 2L to insert the new waypoint         1R to insert the new waypoint in the route. The waypoint is
BEFORE the arrival airport. The waypoint is added and the          added and the new flight plan is immediately displayed with
new flight plan is immediately displayed with the new              the new waypoint inserted at the right place. Keep doing the
waypoint inserted at the right place. Keep doing the same for      same for all the waypoints. At any time, you can insert a
all the waypoints.                                                 waypoint between 2 existing waypoints by clicking the LSK
For example, if you program a flight from LFPG to EGLL, only       that corresponds to the waypoint before which you want to
these 2 airports are defined in the flight plan and appear on      insert the new waypoint.
the F-PLN page. Imagine you want to add the Rambouillet            For example, if you program a flight from LFPG to EGLL, only
VOR (RBT) as a new waypoint, you just have to enter RBT and        these 2 airports are defined in the flight plan and appear on
press LSK 2L (where EGLL is displayed) and it is added             the ROUTE page 1. Imagine you want to add the Rambouillet
between LFPG and EGLL.                                             VOR (RBT) as a new waypoint, you just have to press NEXT
You can press the AIRPORT key to navigate directly to the          PAGE and enter RBT, then press LSK 1R to add it in the
departure or arrival airport. This is convenient when the          route.
flight plan contains many waypoints displayed on several
pages.
A waypoint can be any kind of navaid: VOR, NDB or intersection. When you enter a waypoint identifier, it may correspond to
several navaids in the navigation database. In this case, all the waypoints that correspond to this identifier are displayed
with its specific information (frequency, if any, and distance to the aircraft) and you have to choose one of them by pressing
the corresponding left line select key.
Example for the RBT VOR :

                             Airbus                                                          Boeing


The process described above explains how a waypoint can be added by entering its identifier. There are other ways of
entering waypoints:

               You can enter the latitude/longitude coordinates. This is useful if you want to add a waypoint that does not
               exist in the database. The waypoints coordinates can usually be found on the airport charts:


               Format: For the RBT waypoint shown here, located at 48°39.20' North and 1° 59.70' East, you must enter:
               N48 39.2/E1 59.7
               A new waypoint is created with name WPT-XX (where XX is the index number)
               You can create a waypoint relatively to another existing waypoint, defining its bearing and distance to the
               original waypoint. From the image above, imagine that BOBSA exists in the database but BENAR does not. You
               can read BENAR is located at 15NM from BOBSA along the 167° bearing. To add this waypoint in the flight plan,
               you would just have to enter: BOBSA/167/15.


3) Deleting waypoints

Deleting a waypoint is easy: make sure the scratchpad is empty and press the CLR key (Airbus) or DEL key (Boeing). The
delete message appears (CLR for Airbus, DELETE for Boeing) and you just have to press the left line select key that
corresponds to the waypoint you wish to delete.

Warning: If you are used to more advanced Flight Management Computers, such as the ones in the PMDG, Level-D or Wilco
aircrafts, you will see a major difference here: there is no temporary flight plan and no confirmation when the flight plan is
updated. Any change in the flight plan is immediately effective, with no possible roll back. If you are not sure about a flight
plan modification, you can save it before updating it so that you will be able to restore it in case of a wrong modification.

4) Saving the flight plan
When the flight plan is created, you may want to save it. This is important if you want to use it later.

                             Airbus                                                           Boeing
Access the DATA page by pressing the corresponding button,         Access the INDEX page by pressing the MENU page, then
then press the LSK 5L to activate the "EXPORT F-PLN"               press LSK 1R to access the NAV STATUS page. Then press the
function. A confirmation message should be displayed to            LSK 5L to activate the "EXPORT ROUTE" function. A
confirm the operation (you can clear it pressing the CLR key).     confirmation message should be displayed to confirm the
                                                                   operation (you can clear it pressing the CLR or DEL key).


If the scratchpad is empty, the flight plan is named with the EZFMC prefix and the origin and destination airports. For
example, a flight from LFPG to EGLL is named "EZFMC-LFPG to EGLL.pln".
The flight plan is saved as a GPS flight plan, in the same location as the other GPS flight plans. It can be used like any other
flight plan created with the FS2004/FSX flight planner. You can use it later with the standard GPS or with EasyFMC.
If the departure/arrival runway is defined, it is saved in the flight plan so that it can be used later if the flight plan is
reloaded by EasyFMC.

IMPORTANT:
EasyFMC uses a specific technology for the flight plan creation and edition. For this reason, any flight plan modification is
just ignored by the virtual ATC, but there is an easy workaround: if you want to fly a flight plan with the virtual ATC, you just
have to save it and re-load it in the FS2004/FSX flight planner. Doing this allows it to be "seen" by the virtual ATC and
everything works fine.


Flying the Programmed Flight Plan
As the aircraft flies along the route, the flight plan is displayed on the EasyFMC screen:

                             Airbus                                                           Boeing
On the F-PLN page, the first waypoint displayed on this page       On the ROUTE page, the first page always shows the origin
is the previous waypoint. The second waypoint is the next          and destination airports. Pressing NEXT PAGE shows the
waypoint, displayed in white. All the other waypoints follow,      other ROUTE pages. The next waypoint of the route is
displayed in green. The last line always displays the              displayed on the first line in inversed video. The PROGRESS
destination airport (in white) with the remaining distance to      page (accessible through the PROG button) shows the
the destination.                                                   remaining distance to the destination.

At any time during the flight, you can affect the flight plan by adding/deleting waypoints or by flying directly the a waypoint
bypassing the intermediate waypoints, which is called a DIRECT operation (usually proposed by the ATC to make your flight
shorter). The DIRECT can be done to fly directly to an existing waypoint of the flight plan, or to a new waypoint not defined
in the flight plan.
If you fly direct to an existing waypoint, a new waypoint is created at the current aircraft position(named T-P for 'turning
point') and all the waypoints between the T-P and the waypoint selected for DIRECT are automatically deleted for you. The
consequence is that your aircraft flies directly from its current position to the selected waypoint.
If you fly to a new waypoint, a new T-P waypoint is also created at the aircraft position and the waypoint selected for the
DIRECT is added as the next waypoint (also called 'active' waypoint). The aircraft consequently flies from its current position
to the new waypoint you have created for the DIRECT, but no waypoint is deleted, you have to delete the necessary
waypoints manually.

Proceeding to a DIRECT operation depends on the EasyFMC look-and-feel you are using:

                             Airbus                                                           Boeing
The DIR page must be displayed by pressing the DIR button. It      The operation is managed through the ROUTE page,
displays the current flight plan, but the first line is there to   accessible by pressing the RTE button. It displays the current
let you enter a new waypoint if needed.                            route, the first waypoint being displayed in inverted video to
For a direct to an existing waypoint, you just have to press       show it is the next waypoint (aka active waypoint).
the left line select key that corresponds to the waypoint          For a DIRECT to an existing waypoint, you just have to select
selected for DIRECT.                                               the desired waypoint by pressing the corresponding left line
For a DIRECT to a new waypoint, enter its identifier in the        select key. Its name appears in the scratchpad. Then click on
scratchpad and press LSK 1L to enter it in the first line of the   the left line selected that corresponds to the active
DIR page.                                                          waypoint (LSK 1L on the first route page, displayed in
                                                                   inversed video).
                                                                   For a DIRECT to a new waypoint, enter its identifier in the
                                                                   scratchpad and click on the left line selected that
                                                                   corresponds to the active waypoint.
EasyFMC - Pages in Detail

FMC Pages
The flight plan creation and modification process is the most important part of EasyFMC. This is why it was detailed in the
previous section and it allowed you to see some of the FMC pages.
This section describes in details all the other EasyFMC pages for each available look-and-feel, to let you get the best of this
device.


DATA Page


                              Airbus                                                         Boeing


             Accessible through the DATA button:                        Accessible from the MENU page through LSK 1R:


This page provides the following:

              Gives access to the navigation database to get information about any airport, VOR or NDB. Just enter the
              identifier and press LSK 1L, 2L or 3L depending on the type of facility (airport, VOR, NDB).
              For the airports, additional pages provide detailed information about the runways (length, orientation and ILS
              frequency) and COM frequencies (tower, ATIS, ...)
              Indicates the current version of EasyFMC (1.0.0 in this screenshot) on LSK 4R.
              Lets you save the current flight plan as a GPS flight plan using LSK 6L.
              (Boeing only) Lets you enter hte ILS frequency and course for arrival. It is automatically set when you select
              the arrival runway if it is equiped with an ILS. You can also enter this information manuallyon LSK 1R and 2R.
              On Airbus, this is available on the RAD NAV page (see below).
              (Boeing only) Lets you turn AUTOTUNE on and off. When the ILS frequency and course are set (automatically or
              manually), you can activate the AUTOTUNE. It will automatically set ILS frequency and course when your
              aircraft arrives within 30 NM of the destination airport.
              On Airbus, this is available on the RAD NAV page (see below).

INIT Page
Accessible through the INIT
button:
As explained in the flight plan section, you can enter the FROM and TO airports on this
                                  page (LSK 1R).

                                  You can also enter the flight number on LSK 3L, enter the cost index on LSK 5L (it has no
                                  impact on performance at this time) and enter the cruise altitude or flight level on LSK
                                  6L.

                                  The current lat/long position is displayed on LSK 4L and LSK 4R.


RADIO NAV Page
Accessible through the RAD NAV
button:


                                  This page lets you set the radio-nav frequencies and activate the AUTOTUNE function.

                                  To set the frequency for VOR1, VOR2, ADF1 or ADF2, you can enter the navaid
                                  frequency or enter its identifier in LSK1L, 1R, 5L or 5R respectively. Entering the
                                  identifier is very convenient, even if you may have to choose between several navaids
                                  that have the same identifier (through the 'DUPLICATES" page).


POS INIT Page
Accessible through the INIT REF
button:


                                  This page displayes the current aircraft position according to the IRS. Unlike more
                                  advanced Flight Management Computers, you cannot update the aircraft position, it is
                                  read-only.
LEGS Page
Accessible through the LEGS
button or from POS INIT page and
LSK 6R:


                                   This page displays the flight plan waypoints, starting from the next waypoint (also called
                                   the active waypoint) to the last waypoint before the destination airport. The first
                                   waypoint of the first page is displayed in inverted video to indicate it is the active
                                   waypoint. This is important because specific interactions can be done on this waypoint,
                                   especially the DIRECT operations (see the Flight Plan page for more details).
                                   For each waypoint, the distance and heading to the next waypoint is indicated on this
                                   page.
                                   Use PREV PAGE and NEXT PAGE buttons to navigate through the LEGS pages.


DEP ARR Page
Accessible through the DEP ARR
button:


                                   This page lets you select the runways at the departure and arrival airport and also gives
                                   you access to any airport information from the navigation database.
                                   To select the departure runway, press LSK 1L. It may happen that the departure airport
                                   is also the arrival airport (for example if you return in case of an emergency landing). In
                                   this case, press LSK 1R to select an arrival runway on the departure airport. In normal
                                   situation, press LSK 2R to select the runway at destination.

                                   In any case, the runway selection page appears:


                                   Select the desired runway by pressing the corresponding right line select key.

                                   In order to get runway information about any other airport, enter its identifier in the
                                   scratchpad and press LSK 6L or 6R for departure and arrival accordingly.


PROG Page
Accessible through the PROG
button:
This page displays the previous and next waypoint, displaying the distance to the active
waypoint.
It also shows the destination airport and the distance to go to the destination.
EasyFMC - Notes
This section summarizes all the most important things you should remember about EasyFMC.

Keyboard Mode
A keyboard mode is available with EasyFMC. It lets you use your PC keyboard to enter information and activate the line select
keys. To activate/deactivate the keyboard mode, press the clickable area located around the top left screw of the FMC, as
shown here.
You should remember that when the keyboard mode is active, EVERY key press is intercepted by EasyFMC, even the key
presses that should be handled by Windows. It means that pressing Alt to show the pulldown menus is FS, or Alt-Tab to
switch to another application will NOT work until the keyboard mode is deactivated.


Flight Plan Creation
Creating a new flight plan is done by entering the departure and arrival airports. You should remember that if a flight plan
already exists in the memory of EasyFMC, it is immediately erased as soon as a new departure/arrival airport is entered,
without any confirmation and without any possible rollback.
For more information, read here.


Entering Waypoints
When entering waypoints to create the flight plan, keep in mind that you can enter the waypoints in differents ways:

              by entering the waypoint identifier
              by entering the waypoint latitude/longitude coordinates
              by entering the location of a waypoint relatively to another existing waypoint

All this is explained with more details here.

Saving a Flight Plan
At any time you can save the EasyFMC flight plan. You can do this through the DATA page or through the ROUTE page (Boeing
only). If you enter a name in the scratchpad before pressing the LSK for saving, this name will be used for the flight plan file.
Otherwise, a name will be automatically generated by EasyFMC.
The flight plan is saved like a flight plan you would create in the FS2004/FSX flight planner. It has the same format and it is
saved at the same place.
For more information, read here.


Clearing the Flight Plan
There is no option to clear the flight plan with EasyFMC. But as you certainly understood, the flight plan created or edited
with EasyFMC is the FS standard GPS flight plan. Consequently, you can clear the flight plan by opening to the Flight Planner
window in FS2004/FSX and press the 'Clear' button.


Flying DIRECT to a waypoint
Unlike the standard FS2004/FSX GPS, EasyFMC allows you to fly direct to a waypoint without destroying the existing flight
plan. EasyFMC manages the DIRECT operation like a real FMC, allowing you to fly direct to an existing waypoint of your route
or to any other waypoint.
For more information, read here.


Radio Navigation
The RAD NAV page is available with some look-and-feel of EasyFMC. This page lets you set the radio navigation (VOR, NDB)
that you want to use. Remember that EasyFMC allows you to enter a VOR/NDB identifier instead of entering its frequency.
This is very convenient, you should take advantage of it. As soon as the identifier is entered, EasyFMC will set its frequency
for you.
For more information, read here.


Auto-Tuning
EasyFMC can automatically set the arrival ILS course and heading for you, if the arrival runway is equiped with an ILS of
course. You just have to select the runway on the destination airport and activate the autotune. When the aircraft will fly
close to the destination airport (within 30 NM), EasyFMC will set the arrival ILS for you. This is very convenient because the
workload is often important during this phase of the flight.
For more information, read here.


Error Messages
List of all the possible EasyFMC error messages:

        Message                                                          Reason
    CHECK POSITION        The airport you have defined as the departure is far from the current aircraft position. It means
                          you probably entered a wrong ICAO code for the departure airport.
                          This can also happen if a flight plan already exists in the FS2004/FSX flight planner when you load
                          the aircraft in FS. You can erase the existing flight plan or create a new one to clear the error.
     INVALID ENTRY        The value you have entered is out of range. It may also happen if you enter letters when a
numerical value is expected.
  FORMAT ERROR       The format of the information entered in the scratchpad is not compliant with the expected
                     format. For example, the format of a lot/long coordinate does not respect the required format.
    NOT FOUND        The identifier you have entered for a waypoint does not exist in the navigation database.
  DEP NOT FOUND      The ICAO code for the departure airport does not exist in the navigation database.
  ARR NOT FOUND      The ICAO code for the arrival airport does not exist in the navigation database.
ENTRY OUT OF RANGE   The value entered in the scratchpad is out of the required range. This is especially important for
                     radio frequencies.
  ENTER ILS FREQ     You have tried to activate the autotune but the ILS frequency and course are not defined. You
                     must enter them manually or select the arrival runway. Remember autotune works only if the arrival
                     runway is equiped with an ILS.
    ENTER ICAO       You request information for an airport but you did not enter its ICAO code in the scratchpad.
 NOT IN DATABASE     You tried to enter a runway designation that does not exist on this airport.
    NO ROUTE         You are trying to save a flight plan that is currently empty.
  FPLN EXPORTED      The flight plan has been successfully saved. You can press CLR to clear this message.
  EXPORT FAILED      An error occured while saving the flight plan, the operation was aborted.

More Related Content

Viewers also liked

Viewers also liked (7)

болезни осетровых
болезни осетровыхболезни осетровых
болезни осетровых
 
Anthilia Corporate Presentation 2013
Anthilia Corporate Presentation 2013Anthilia Corporate Presentation 2013
Anthilia Corporate Presentation 2013
 
Career Summary and Highlights
Career Summary and HighlightsCareer Summary and Highlights
Career Summary and Highlights
 
Ksc
KscKsc
Ksc
 
Moitruong
MoitruongMoitruong
Moitruong
 
Geeta
GeetaGeeta
Geeta
 
E literacy
E literacy E literacy
E literacy
 

Similar to Easy fmc

Easy fms
Easy fmsEasy fms
Easy fmssn7
 
Chapter 6 Basic Navigational Functions1.4.pptx
Chapter 6 Basic Navigational Functions1.4.pptxChapter 6 Basic Navigational Functions1.4.pptx
Chapter 6 Basic Navigational Functions1.4.pptxSantosoWahyudi
 
Chapter 6 Basic Navigational Functions1.4.pptx
Chapter 6 Basic Navigational Functions1.4.pptxChapter 6 Basic Navigational Functions1.4.pptx
Chapter 6 Basic Navigational Functions1.4.pptxdiklatstimartamni
 
Speereo Voice Translator for Symbian
Speereo Voice Translator for SymbianSpeereo Voice Translator for Symbian
Speereo Voice Translator for SymbianDaniel Ischenko
 
Pss airbus a320 flight tutorial
Pss airbus a320 flight tutorialPss airbus a320 flight tutorial
Pss airbus a320 flight tutorialLuisa Ardila
 
Speereo Voice Translator Maps edt.
Speereo Voice Translator Maps edt.Speereo Voice Translator Maps edt.
Speereo Voice Translator Maps edt.Daniel Ischenko
 
737 ng fmc guide toohey
737 ng fmc guide toohey737 ng fmc guide toohey
737 ng fmc guide tooheyJim Toohey
 
Autocad 131102050945-phpapp02
Autocad 131102050945-phpapp02Autocad 131102050945-phpapp02
Autocad 131102050945-phpapp02Vipin kamboj
 
Tech guides - Using the Communications Terminal
Tech guides - Using the Communications TerminalTech guides - Using the Communications Terminal
Tech guides - Using the Communications TerminalQuantum Composers
 
Create a Microsoft Access Database that has multiple tables based on t.pdf
Create a Microsoft Access Database that has multiple tables based on t.pdfCreate a Microsoft Access Database that has multiple tables based on t.pdf
Create a Microsoft Access Database that has multiple tables based on t.pdfKeithyZpBucklandu
 
Flapping flightsimulationmanualv1.1
Flapping flightsimulationmanualv1.1Flapping flightsimulationmanualv1.1
Flapping flightsimulationmanualv1.1vishalantil
 

Similar to Easy fmc (20)

Easy fms
Easy fmsEasy fms
Easy fms
 
3123074.ppt
3123074.ppt3123074.ppt
3123074.ppt
 
Chapter 6 Basic Navigational Functions1.4.pptx
Chapter 6 Basic Navigational Functions1.4.pptxChapter 6 Basic Navigational Functions1.4.pptx
Chapter 6 Basic Navigational Functions1.4.pptx
 
Chapter 6 Basic Navigational Functions1.4.pptx
Chapter 6 Basic Navigational Functions1.4.pptxChapter 6 Basic Navigational Functions1.4.pptx
Chapter 6 Basic Navigational Functions1.4.pptx
 
Speereo Voice Translator for Symbian
Speereo Voice Translator for SymbianSpeereo Voice Translator for Symbian
Speereo Voice Translator for Symbian
 
Pss airbus a320 flight tutorial
Pss airbus a320 flight tutorialPss airbus a320 flight tutorial
Pss airbus a320 flight tutorial
 
Speereo Voice Translator Maps edt.
Speereo Voice Translator Maps edt.Speereo Voice Translator Maps edt.
Speereo Voice Translator Maps edt.
 
Crj200 fms
Crj200 fmsCrj200 fms
Crj200 fms
 
Readme z25
Readme z25Readme z25
Readme z25
 
Readme z25
Readme z25Readme z25
Readme z25
 
737 ng fmc guide toohey
737 ng fmc guide toohey737 ng fmc guide toohey
737 ng fmc guide toohey
 
Autocad 131102050945-phpapp02
Autocad 131102050945-phpapp02Autocad 131102050945-phpapp02
Autocad 131102050945-phpapp02
 
Tech guides - Using the Communications Terminal
Tech guides - Using the Communications TerminalTech guides - Using the Communications Terminal
Tech guides - Using the Communications Terminal
 
Skt100manual
Skt100manualSkt100manual
Skt100manual
 
Create a Microsoft Access Database that has multiple tables based on t.pdf
Create a Microsoft Access Database that has multiple tables based on t.pdfCreate a Microsoft Access Database that has multiple tables based on t.pdf
Create a Microsoft Access Database that has multiple tables based on t.pdf
 
Avionics
AvionicsAvionics
Avionics
 
AutoCAD
AutoCADAutoCAD
AutoCAD
 
Flapping flightsimulationmanualv1.1
Flapping flightsimulationmanualv1.1Flapping flightsimulationmanualv1.1
Flapping flightsimulationmanualv1.1
 
Eagle tut
Eagle tutEagle tut
Eagle tut
 
Vb%20 tutorial
Vb%20 tutorialVb%20 tutorial
Vb%20 tutorial
 

Easy fmc

  • 1. EasyFMC - Documentation - Version 1.0 - February 2013
  • 2. EasyFMC - Introduction What is EasyFMC? As its name says, EasyFMC is a simplified Flight Management Computer that can be easily installed and used with any aircraft in FS2004 and FSX. As a simplified FMC, it does not provide all the advanced features of an realistic FMC, but it lets you enter a flight plan from scratch (departure and arrival airports and runways, waypoints along the route), it provides lateral navigation to guide your flight along the programmed route and also provides fancy additional features, such as full support for DIRECT operations and radio-nav autotuning. Any flight plan created with EasyFMC can be saved and can be used for flying with the FS2004/FSX virtual ATC. EasyFMC is provided with different look-and-feels that are supposed to handle the different ways of using an FMC, especially the differences between Airbus and Boeing philosophies. All the variations of EasyFMC provide the same main features, with some slight differences explained in this manual. Installing EasyFMC After EasyFMC has been installed through its automatic installer, you need to install the device itself in the panel of the aircraft(s) of your choice. The 'EasyFMC Panel Updater' is a specific application provided for this purpose. It automatically updates the necessary aircraft file (panel.cfg) to make EasyFMC available in its panel. Run the application through the Windows start menu (in EasyFMC folder). Then follow the instructions as shown in the image above: 1. The Panel Updater automatically detects the Flight Simulator installation folder, shown in 'location'. If it is wrong or empty, you can specify it manually by pressing the 'Change' button. 2. The Panel Updater reads your aircraft collection and lets you select one of them using the manufacturer, model and variation. 3. When the aircraft is selected, you can select the size of the panel window that will be created for EasyFMC. If you don't know what size to put here, use the default values, they can be changed later. 4. Check the 'visible' box if you want to have the EasyFMC window visible as soon as the panel appears. 5. Select the look-and-feel among the available ones. 6. Press the 'Add to Panel' window. As soon as the operation is executed, a confirmation window appears, which informs you about the changes in the panel.cfg. A backup copy of the panel.cfg file is always done before modifying the original file. It is named panel.bak. EasyFMC Presentation Layout Whatever the look-and-feel you have selected, EasyFMC is composed of a alphanumeric keyboard, specific page keys, a screen and 2 lines of select keys on the left and right side of the screen. These keys are called “line select keys” (LSK) and they are identified as 1L to 6L on the left, and 1R to 6R on the right.
  • 3. When you type something using the keyboard (letters or digits), they appear on the bottom line of the screen, called the “scratchpad”. Any character entered in the scratchpad can be deleted using the CLR key. The Boeing look-and-feel also provides a DEL key that entirely deletes the scratchpad content. To enter any information into the FMC, you have to type it in the scratchpad, then press the appropriate LSK to enter the information at the right place. If you press the CLR key (Airbus) or DEL key (Boeing) while the scratchpad is empty, a deletion message appears on the last line (CLR on Airbus, DELETE on Boeing). This means you are in delete mode, which will be used later to delete information, i.e. deleting a waypoint from the flight plan. The FMC may have to display messages for you, such as error or warning messages. They are displayed on the same line as the scratchpad, at the bottom of the screen. Once you have seen the message, you can erase it by pressing the CLR or DEL key, and the scratchpad is displayed again. The page keys exist to provide direct access to some specific pages, such as FPLN/RTE (for the flight plan display), RAD NAV for the radio nav settings, etc. They can be seen as “shortcuts” for a quick and direct access to pages that are usually used during the flight. Keyboard Mode In order to enter information more easily, EasyFMC lets you use the PC keyboard instead of clicking the FMC keyboard with the keyboard mode. A "hidden" clickable area is defined on the top left screw, which activates/deactivates the keyboard mode. When the keyboard mode is activated, ANY key that comes from the PC keyboard will go to the FMC until is is deactivated. When the keyboard mode is active, a 'K' appears in the top left corner of the FMC. You can use your PC keyboard to enter characters in the scratchpad and use also function keys: F1 to F6 for LSK 1L to 6L, F7 to F12 for LSK 1R to 6R. Backspace key can be used like the EasyFMC CLR key, and DEL key can be used like the EasyFMC DEL key (Boeing only). WARNING !! When the keyboard mode is active, all the key press actions are sent to the FMC and ignored by Windows. It means that even the famous Alt-Tab key combination that is commonly used to switch to another application is not operative until you deactivates the keyboard mode by clicking the FMC screw area. Page Navigation The page navigation is not exactly the same in the Airbus and Boeing philosophy: Airbus Boeing If a page has more items to display than the 6 available lines Any page that displays more items than the 6 lines displayed of the screen, you can see more by pressing the NEXT PAGE on the screen can be scrolled up and down using the up and button. The total number of pages is displayed in the top left down arrow keys. Two arrows are drawn in the right bottom corner of the screen. If you press NEXT PAGE on the last corner of the screen to indicate if the page can be scrolled available page, you come back to the first page. Conversely, up or down. you can press PREV PAGE to see the previous page and if you are on the first available page, you access the last page. Starting EasyFMC As soon as EasyFMC is added in an aircraft panel through its installation application (see paragraph above), you can select this aircraft is FS2004/FSX and see EasyFMC in the panel. Depending on the option you have chosen in the installer, the EasyFMC device may be visible at startup or you may have to make it visible through a Shift-? key press or through the “View” menu of FS2004/FSX. Airbus Boeing
  • 4. The MENU page appears, the first option (FMC) is the only valid option, which The INDEX page appears first, giving you leads to the INIT page. access to the most important FMC pages.
  • 5. EasyFMC - Flight Plan Management Flight Plan Creation If a flight plan exists in memory (created or loaded in the FS2004/FSX flight planner), it is immediately handled by EasyFMC and you can view/edit it with EasyFMC. If the aircraft is not located at the departure airport defined in the flight plan, you get a “CHECK POSITION” warning message. It is just a warning and does not prevent you from using the flight plan. If no flight plan exists, you can create it using EasyFMC, as you can read below. The process of creating a flight plan is always the same: you have to define the departure and arrival airports (also called origin and destination airports), define the waypoints of the route and optionally define the departure and arrival runways. If you have a GPS display in the aircraft panel, any action on the flight plan done by EasyFMC is immediately visible on the GPS screen. This is why it is suggested to have a GPS display visible when editing the flight plan, this allows you to see the effect of any modification in real time. 1) Definition of the origin and destination airports and runways Airbus Boeing On the INIT page, you can define the departure and arrival The origin and destination airports are defined on the first airports (named FROM and TO airports) by entering the ICAO ROUTE page. You can access this page through the index codes of both airports separated by a '/' and pressing LSK 1R page or by pressing the RTE button. The fist displayed page for FROM/TO. For example, if you want to fly from Paris lets you enter the origin airport on LSK 1L and the Charles de Gaulle to London Heathrow, you have to enter destination airport on LSK 1R. For example, if you want to fly LFPG/EGLL, then press LSK 1R. from Paris Charles de Gaulle to London Heathrow, you have to enter LFPG, press LSK 1L for the origin, then enter EGLL and press LSK 1R for the destination. Please note the origin must always be entered BEFORE the destination. On this page, you can also define the departure runway manually by entering its designation and press LSK 3L. Warning: As soon as the departure and arrival airports are defined, the existing flight plan is erased and a new flight plan is created, only composed with these 2 airports as the first and last waypoints. If your aircraft is not located at the departure airport, you get a warning message: CHECK POSITION. This is supposed to prevent a possible error in the ICAO code of the departure airport. When the origin/destination airports are defined, you can select the departure/arrival runway. This operation is slightly different on Airbus and Boeing look-and-feel: Airbus Boeing On the flight plan page (F-PLN), just press the left line select The runway selection is done on the DEP ARR page that you key for the departure/arrival airport. On this example, you can display pressing the DEP ARR button: must press LSK 1L for departure (LFPG) and LSK 2L for arrival (EGLL): This leads to the runway selection page; letting you select Press LSK 1L or 2R to select departure or arrival runway. the appropriate runway by clicking the corresponding left line This leads to the runway selection page where you can select select key. the desired runway using LSK 1R to 6R, as shown here:
  • 6. You can also enter the runway designation manually on the first ROUTE page by pressing LSK 3L. When the arrival runway is selected, you can activate the AUTOTUNE. If the arrival runway is equiped with an ILS, the autotune function automatically sets the ILS course and frequency when the aircraft flies within 30 NM of the destination airport. Autotune Activation: The autotune can be activated only if the ILS course and frequency are defined. This information is automatically set when the arrival runway is defined, if it is equiped with an ILS (see above). It can also can be entered manually. If this information is not defined, a message appears: "ENTER ILS FREQ" Airbus Boeing Switch to the RADIO NAV page by pressing the RAD NAV Switch to the DATA page by pressing the MENU button, then button: pressing the LSK 1R: Press LSK 6R to turn autotune On/Off. Press LSK 6R to turn autotune On/Off. 2) Entering the waypoints Airbus Boeing To enter the flight plan waypoints, you must go to the flight To enter a new waypoint in the route, access the ROUTE plan page, by pressing the F-PLN key. You just have to enter page through the index page or by pressing the RTE button. the waypoint identifier and insert it in the existing flight The first route page is displayed, showing the origin and plan. Inserting a waypoint is done by pressing the left line destination airports. Press the NEXT PAGE button to have select key that corresponds to the waypoint where you want access to the second page, which is the first route definition to insert the new waypoint. page: it displays all the route waypoints. If you are in the process of creating a new flight plan, only If you are in the process of creating a new flight plan, no the departure and arrival airports exist in the flight plan. In waypoint is shown here because only the origin and that case, the departure airport is displayed on the first line destination airports are defined. This is why you just have a (LSK 1L) and the arrival airport is on the second line (LSK 2L). dash line displayed on the first line. You just have to enter You just have to enter the waypoint identifier in the the waypoint identifier in the scratchpad and press the LSK scratchpad and press the LSK 2L to insert the new waypoint 1R to insert the new waypoint in the route. The waypoint is BEFORE the arrival airport. The waypoint is added and the added and the new flight plan is immediately displayed with new flight plan is immediately displayed with the new the new waypoint inserted at the right place. Keep doing the waypoint inserted at the right place. Keep doing the same for same for all the waypoints. At any time, you can insert a all the waypoints. waypoint between 2 existing waypoints by clicking the LSK For example, if you program a flight from LFPG to EGLL, only that corresponds to the waypoint before which you want to these 2 airports are defined in the flight plan and appear on insert the new waypoint. the F-PLN page. Imagine you want to add the Rambouillet For example, if you program a flight from LFPG to EGLL, only VOR (RBT) as a new waypoint, you just have to enter RBT and these 2 airports are defined in the flight plan and appear on press LSK 2L (where EGLL is displayed) and it is added the ROUTE page 1. Imagine you want to add the Rambouillet between LFPG and EGLL. VOR (RBT) as a new waypoint, you just have to press NEXT You can press the AIRPORT key to navigate directly to the PAGE and enter RBT, then press LSK 1R to add it in the departure or arrival airport. This is convenient when the route. flight plan contains many waypoints displayed on several pages.
  • 7. A waypoint can be any kind of navaid: VOR, NDB or intersection. When you enter a waypoint identifier, it may correspond to several navaids in the navigation database. In this case, all the waypoints that correspond to this identifier are displayed with its specific information (frequency, if any, and distance to the aircraft) and you have to choose one of them by pressing the corresponding left line select key. Example for the RBT VOR : Airbus Boeing The process described above explains how a waypoint can be added by entering its identifier. There are other ways of entering waypoints: You can enter the latitude/longitude coordinates. This is useful if you want to add a waypoint that does not exist in the database. The waypoints coordinates can usually be found on the airport charts: Format: For the RBT waypoint shown here, located at 48°39.20' North and 1° 59.70' East, you must enter: N48 39.2/E1 59.7 A new waypoint is created with name WPT-XX (where XX is the index number) You can create a waypoint relatively to another existing waypoint, defining its bearing and distance to the original waypoint. From the image above, imagine that BOBSA exists in the database but BENAR does not. You can read BENAR is located at 15NM from BOBSA along the 167° bearing. To add this waypoint in the flight plan, you would just have to enter: BOBSA/167/15. 3) Deleting waypoints Deleting a waypoint is easy: make sure the scratchpad is empty and press the CLR key (Airbus) or DEL key (Boeing). The delete message appears (CLR for Airbus, DELETE for Boeing) and you just have to press the left line select key that corresponds to the waypoint you wish to delete. Warning: If you are used to more advanced Flight Management Computers, such as the ones in the PMDG, Level-D or Wilco aircrafts, you will see a major difference here: there is no temporary flight plan and no confirmation when the flight plan is updated. Any change in the flight plan is immediately effective, with no possible roll back. If you are not sure about a flight plan modification, you can save it before updating it so that you will be able to restore it in case of a wrong modification. 4) Saving the flight plan
  • 8. When the flight plan is created, you may want to save it. This is important if you want to use it later. Airbus Boeing Access the DATA page by pressing the corresponding button, Access the INDEX page by pressing the MENU page, then then press the LSK 5L to activate the "EXPORT F-PLN" press LSK 1R to access the NAV STATUS page. Then press the function. A confirmation message should be displayed to LSK 5L to activate the "EXPORT ROUTE" function. A confirm the operation (you can clear it pressing the CLR key). confirmation message should be displayed to confirm the operation (you can clear it pressing the CLR or DEL key). If the scratchpad is empty, the flight plan is named with the EZFMC prefix and the origin and destination airports. For example, a flight from LFPG to EGLL is named "EZFMC-LFPG to EGLL.pln". The flight plan is saved as a GPS flight plan, in the same location as the other GPS flight plans. It can be used like any other flight plan created with the FS2004/FSX flight planner. You can use it later with the standard GPS or with EasyFMC. If the departure/arrival runway is defined, it is saved in the flight plan so that it can be used later if the flight plan is reloaded by EasyFMC. IMPORTANT: EasyFMC uses a specific technology for the flight plan creation and edition. For this reason, any flight plan modification is just ignored by the virtual ATC, but there is an easy workaround: if you want to fly a flight plan with the virtual ATC, you just have to save it and re-load it in the FS2004/FSX flight planner. Doing this allows it to be "seen" by the virtual ATC and everything works fine. Flying the Programmed Flight Plan As the aircraft flies along the route, the flight plan is displayed on the EasyFMC screen: Airbus Boeing On the F-PLN page, the first waypoint displayed on this page On the ROUTE page, the first page always shows the origin is the previous waypoint. The second waypoint is the next and destination airports. Pressing NEXT PAGE shows the waypoint, displayed in white. All the other waypoints follow, other ROUTE pages. The next waypoint of the route is displayed in green. The last line always displays the displayed on the first line in inversed video. The PROGRESS destination airport (in white) with the remaining distance to page (accessible through the PROG button) shows the the destination. remaining distance to the destination. At any time during the flight, you can affect the flight plan by adding/deleting waypoints or by flying directly the a waypoint bypassing the intermediate waypoints, which is called a DIRECT operation (usually proposed by the ATC to make your flight shorter). The DIRECT can be done to fly directly to an existing waypoint of the flight plan, or to a new waypoint not defined in the flight plan. If you fly direct to an existing waypoint, a new waypoint is created at the current aircraft position(named T-P for 'turning point') and all the waypoints between the T-P and the waypoint selected for DIRECT are automatically deleted for you. The consequence is that your aircraft flies directly from its current position to the selected waypoint. If you fly to a new waypoint, a new T-P waypoint is also created at the aircraft position and the waypoint selected for the DIRECT is added as the next waypoint (also called 'active' waypoint). The aircraft consequently flies from its current position to the new waypoint you have created for the DIRECT, but no waypoint is deleted, you have to delete the necessary waypoints manually. Proceeding to a DIRECT operation depends on the EasyFMC look-and-feel you are using: Airbus Boeing The DIR page must be displayed by pressing the DIR button. It The operation is managed through the ROUTE page, displays the current flight plan, but the first line is there to accessible by pressing the RTE button. It displays the current let you enter a new waypoint if needed. route, the first waypoint being displayed in inverted video to For a direct to an existing waypoint, you just have to press show it is the next waypoint (aka active waypoint). the left line select key that corresponds to the waypoint For a DIRECT to an existing waypoint, you just have to select selected for DIRECT. the desired waypoint by pressing the corresponding left line For a DIRECT to a new waypoint, enter its identifier in the select key. Its name appears in the scratchpad. Then click on scratchpad and press LSK 1L to enter it in the first line of the the left line selected that corresponds to the active DIR page. waypoint (LSK 1L on the first route page, displayed in inversed video). For a DIRECT to a new waypoint, enter its identifier in the scratchpad and click on the left line selected that corresponds to the active waypoint.
  • 9. EasyFMC - Pages in Detail FMC Pages The flight plan creation and modification process is the most important part of EasyFMC. This is why it was detailed in the previous section and it allowed you to see some of the FMC pages. This section describes in details all the other EasyFMC pages for each available look-and-feel, to let you get the best of this device. DATA Page Airbus Boeing Accessible through the DATA button: Accessible from the MENU page through LSK 1R: This page provides the following: Gives access to the navigation database to get information about any airport, VOR or NDB. Just enter the identifier and press LSK 1L, 2L or 3L depending on the type of facility (airport, VOR, NDB). For the airports, additional pages provide detailed information about the runways (length, orientation and ILS frequency) and COM frequencies (tower, ATIS, ...) Indicates the current version of EasyFMC (1.0.0 in this screenshot) on LSK 4R. Lets you save the current flight plan as a GPS flight plan using LSK 6L. (Boeing only) Lets you enter hte ILS frequency and course for arrival. It is automatically set when you select the arrival runway if it is equiped with an ILS. You can also enter this information manuallyon LSK 1R and 2R. On Airbus, this is available on the RAD NAV page (see below). (Boeing only) Lets you turn AUTOTUNE on and off. When the ILS frequency and course are set (automatically or manually), you can activate the AUTOTUNE. It will automatically set ILS frequency and course when your aircraft arrives within 30 NM of the destination airport. On Airbus, this is available on the RAD NAV page (see below). INIT Page Accessible through the INIT button:
  • 10. As explained in the flight plan section, you can enter the FROM and TO airports on this page (LSK 1R). You can also enter the flight number on LSK 3L, enter the cost index on LSK 5L (it has no impact on performance at this time) and enter the cruise altitude or flight level on LSK 6L. The current lat/long position is displayed on LSK 4L and LSK 4R. RADIO NAV Page Accessible through the RAD NAV button: This page lets you set the radio-nav frequencies and activate the AUTOTUNE function. To set the frequency for VOR1, VOR2, ADF1 or ADF2, you can enter the navaid frequency or enter its identifier in LSK1L, 1R, 5L or 5R respectively. Entering the identifier is very convenient, even if you may have to choose between several navaids that have the same identifier (through the 'DUPLICATES" page). POS INIT Page Accessible through the INIT REF button: This page displayes the current aircraft position according to the IRS. Unlike more advanced Flight Management Computers, you cannot update the aircraft position, it is read-only.
  • 11. LEGS Page Accessible through the LEGS button or from POS INIT page and LSK 6R: This page displays the flight plan waypoints, starting from the next waypoint (also called the active waypoint) to the last waypoint before the destination airport. The first waypoint of the first page is displayed in inverted video to indicate it is the active waypoint. This is important because specific interactions can be done on this waypoint, especially the DIRECT operations (see the Flight Plan page for more details). For each waypoint, the distance and heading to the next waypoint is indicated on this page. Use PREV PAGE and NEXT PAGE buttons to navigate through the LEGS pages. DEP ARR Page Accessible through the DEP ARR button: This page lets you select the runways at the departure and arrival airport and also gives you access to any airport information from the navigation database. To select the departure runway, press LSK 1L. It may happen that the departure airport is also the arrival airport (for example if you return in case of an emergency landing). In this case, press LSK 1R to select an arrival runway on the departure airport. In normal situation, press LSK 2R to select the runway at destination. In any case, the runway selection page appears: Select the desired runway by pressing the corresponding right line select key. In order to get runway information about any other airport, enter its identifier in the scratchpad and press LSK 6L or 6R for departure and arrival accordingly. PROG Page Accessible through the PROG button:
  • 12. This page displays the previous and next waypoint, displaying the distance to the active waypoint. It also shows the destination airport and the distance to go to the destination.
  • 13. EasyFMC - Notes This section summarizes all the most important things you should remember about EasyFMC. Keyboard Mode A keyboard mode is available with EasyFMC. It lets you use your PC keyboard to enter information and activate the line select keys. To activate/deactivate the keyboard mode, press the clickable area located around the top left screw of the FMC, as shown here. You should remember that when the keyboard mode is active, EVERY key press is intercepted by EasyFMC, even the key presses that should be handled by Windows. It means that pressing Alt to show the pulldown menus is FS, or Alt-Tab to switch to another application will NOT work until the keyboard mode is deactivated. Flight Plan Creation Creating a new flight plan is done by entering the departure and arrival airports. You should remember that if a flight plan already exists in the memory of EasyFMC, it is immediately erased as soon as a new departure/arrival airport is entered, without any confirmation and without any possible rollback. For more information, read here. Entering Waypoints When entering waypoints to create the flight plan, keep in mind that you can enter the waypoints in differents ways: by entering the waypoint identifier by entering the waypoint latitude/longitude coordinates by entering the location of a waypoint relatively to another existing waypoint All this is explained with more details here. Saving a Flight Plan At any time you can save the EasyFMC flight plan. You can do this through the DATA page or through the ROUTE page (Boeing only). If you enter a name in the scratchpad before pressing the LSK for saving, this name will be used for the flight plan file. Otherwise, a name will be automatically generated by EasyFMC. The flight plan is saved like a flight plan you would create in the FS2004/FSX flight planner. It has the same format and it is saved at the same place. For more information, read here. Clearing the Flight Plan There is no option to clear the flight plan with EasyFMC. But as you certainly understood, the flight plan created or edited with EasyFMC is the FS standard GPS flight plan. Consequently, you can clear the flight plan by opening to the Flight Planner window in FS2004/FSX and press the 'Clear' button. Flying DIRECT to a waypoint Unlike the standard FS2004/FSX GPS, EasyFMC allows you to fly direct to a waypoint without destroying the existing flight plan. EasyFMC manages the DIRECT operation like a real FMC, allowing you to fly direct to an existing waypoint of your route or to any other waypoint. For more information, read here. Radio Navigation The RAD NAV page is available with some look-and-feel of EasyFMC. This page lets you set the radio navigation (VOR, NDB) that you want to use. Remember that EasyFMC allows you to enter a VOR/NDB identifier instead of entering its frequency. This is very convenient, you should take advantage of it. As soon as the identifier is entered, EasyFMC will set its frequency for you. For more information, read here. Auto-Tuning EasyFMC can automatically set the arrival ILS course and heading for you, if the arrival runway is equiped with an ILS of course. You just have to select the runway on the destination airport and activate the autotune. When the aircraft will fly close to the destination airport (within 30 NM), EasyFMC will set the arrival ILS for you. This is very convenient because the workload is often important during this phase of the flight. For more information, read here. Error Messages List of all the possible EasyFMC error messages: Message Reason CHECK POSITION The airport you have defined as the departure is far from the current aircraft position. It means you probably entered a wrong ICAO code for the departure airport. This can also happen if a flight plan already exists in the FS2004/FSX flight planner when you load the aircraft in FS. You can erase the existing flight plan or create a new one to clear the error. INVALID ENTRY The value you have entered is out of range. It may also happen if you enter letters when a
  • 14. numerical value is expected. FORMAT ERROR The format of the information entered in the scratchpad is not compliant with the expected format. For example, the format of a lot/long coordinate does not respect the required format. NOT FOUND The identifier you have entered for a waypoint does not exist in the navigation database. DEP NOT FOUND The ICAO code for the departure airport does not exist in the navigation database. ARR NOT FOUND The ICAO code for the arrival airport does not exist in the navigation database. ENTRY OUT OF RANGE The value entered in the scratchpad is out of the required range. This is especially important for radio frequencies. ENTER ILS FREQ You have tried to activate the autotune but the ILS frequency and course are not defined. You must enter them manually or select the arrival runway. Remember autotune works only if the arrival runway is equiped with an ILS. ENTER ICAO You request information for an airport but you did not enter its ICAO code in the scratchpad. NOT IN DATABASE You tried to enter a runway designation that does not exist on this airport. NO ROUTE You are trying to save a flight plan that is currently empty. FPLN EXPORTED The flight plan has been successfully saved. You can press CLR to clear this message. EXPORT FAILED An error occured while saving the flight plan, the operation was aborted.