
Recommandé
Recommandé
Contenu connexe
En vedette
Similaire à Zenlive basic instructions
Similaire à Zenlive basic instructions (20)
Plus de McGill_RSB
Plus de McGill_RSB (20)
Dernier
Dernier (20)
Zenlive basic instructions
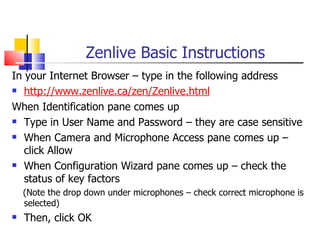
- 1. Zenlive Basic Instructions In your Internet Browser – type in the following address http://www.zenlive.ca/zen/Zenlive.html When Identification pane comes up Type in User Name and Password – they are case sensitive When Camera and Microphone Access pane comes up – click Allow When Configuration Wizard pane comes up – check the status of key factors (Note the drop down under microphones – check correct microphone is selected) Then, click OK
- 2. Zenlive Basic Instructions When the My Meetings pane comes up – click JOIN on the right hand side of the EDEM Introduction to Theory and Research Meeting or the meeting that you want to join The new screen will include the following sections: Personal View Section Participants – Multiple Chat Presentation Section – largest area to the middle and right of screen Let us look at each of these sections
- 3. Personal View Section To speak to other people – click and hold down the X box beside the picture or, hold the CONTROL key down – usually on the left side of the keyboard (Note – when you are speaking your name will appear on the right, top side of the screen) Note for participants the other boxes in the Personal View pane are not needed, except the icon of the “home”, which always returns one home to the active page
- 4. Chat and Participants - Multiple Chat: Read messages from other participants The space to type in a message is at the bottom – scroll down to see it To send a message, type it in and click SEND – note all participants can read it To send a private message to another participant, right click on that person’s name - a new window will open, Type message and Click Send Participants – Multiple: indicates the people who are in the meeting
- 5. Presentation Section Presentation Section – largest area to the middle and right of screen PowerPoint slides can be read here the Moderator selects the type of activity, for example: show a PowerPoint, use a Whiteboard or show a video – the type of activity will be shown at the top of this section
- 6. Whiteboard Use When the whiteboard is used – Whiteboard will appear at the top of the screen Note the tools on the right hand side, some of the most important are reviewed below: Unlock icon – allows participants access to board Arrow – use as a pointer Pencil – draw or write on the whiteboard A – click and a Textbox appears note comments can be typed in or pasted in
- 7. Uploading Activities: PPt, Whiteboard, Video, etc. To upload activities – PowerPoint, Whiteboard, Video etc. Click Home icon on the top of the Zenlive screen The following screen comes up: Personal View Participants – Multiple Chat Meeting Information Activities – with icons to click for different functions Participants – on right side
- 8. Uploading a Specific Activity Example PowerPoint Scroll to the bottom of the Activities pane Click right side to see Add an activity options Click Presentation Type title of PPt in Activity Name area: Ex. Zenlive Basic Instructions Click Browse to view online documents and find the PPt Click the PPt that you want to upload as an activity Click SAVE to upload the PPt as an activity on the Activities List
- 9. Inserting Text into a PowerPoint Slide Click the Pencil Icon at the top of the slide- Tools will appear on the right side Click the A icon to type in a comment in the text box that will appear Be ready to share your ideas on the comments you made Hold down the control key to do so
Notes de l'éditeur
- http://zenlive.learnquebec.ca/Zenlive.html