
Recommandé
Contenu connexe
Tendances
Tendances (20)
En vedette
Similaire à Intermediate Web Design.doc
Similaire à Intermediate Web Design.doc (20)
Plus de butest
Plus de butest (20)
Intermediate Web Design.doc
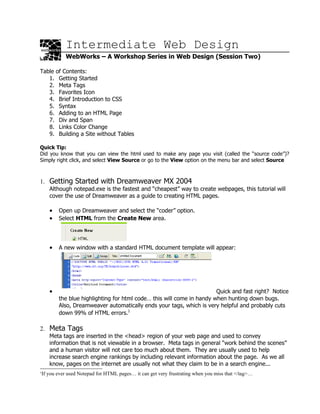
- 1. Intermediate Web Design WebWorks – A Workshop Series in Web Design (Session Two) Table of Contents: 1. Getting Started 2. Meta Tags 3. Favorites Icon 4. Brief Introduction to CSS 5. Syntax 6. Adding to an HTML Page 7. Div and Span 8. Links Color Change 9. Building a Site without Tables Quick Tip: Did you know that you can view the html used to make any page you visit (called the “source code”)? Simply right click, and select View Source or go to the View option on the menu bar and select Source 1. Getting Started with Dreamweaver MX 2004 Although notepad.exe is the fastest and “cheapest” way to create webpages, this tutorial will cover the use of Dreamweaver as a guide to creating HTML pages. • Open up Dreamweaver and select the “coder” option. • Select HTML from the Create New area. • A new window with a standard HTML document template will appear: • Quick and fast right? Notice the blue highlighting for html code… this will come in handy when hunting down bugs. Also, Dreamweaver automatically ends your tags, which is very helpful and probably cuts down 99% of HTML errors.1 2. Meta Tags Meta tags are inserted in the <head> region of your web page and used to convey information that is not viewable in a browser. Meta tags in general “work behind the scenes” and a human visitor will not care too much about them. They are usually used to help increase search engine rankings by including relevant information about the page. As we all know, pages on the internet are usually not what they claim to be in a search engine... 1 If you ever used Notepad for HTML pages… it can get very frustrating when you miss that </tag>…
- 2. Webworks: Lists, Tables, and Frames Page 2 of 14 A little friendly note: If you want to be ranked #1 in a search engine like Google, meta tags alone will not help you because they use a different algorithm in site ranking. The moral of the story here? Content > flashy junky stuff. If you have good content, more people will link to you, thus driving up the site ranking. Here is an example of meta tags in use: <head> </title> RabbitWorld </title> <meta name = “description” content = “All you want to know about rabbits.”> <meta name = “keywords” content = “rabbits, bunnies, bunny, world, no sleep”> <meta name = “robots” content = “noindex”> </head> Meta tags do not have an end tag! Name – type of meta tag used Content – information about this tag Quick rundown on the tags: Description – Brief statement describing the page Keywords – What a user would type into a search engine to find this page Robots – Should web spiders be allowed to index this page? Another useful meta tag is REFRESH. Use this little snippet of code for redirecting to another site. <meta http-equiv="refresh" content="5;url=http://www.site.com/"> Notice the number 5 inside content. This is the number of seconds before the browser will attempt to redirect so you can have a little message in the main page “Please wait FIVE seconds before jumping to another page!” Dreamweaver automatically includes a meta tag in the new generated HTML file: Content-type tells the browser what sort of character set (iso-8859-1) to load so the page will look correct. This is optional, but this meta tag can be left alone. 3. Adding Favorites Icon You’ve all seen a little icon appear right before the url in a web browser or in your favorites folder: Now you want to include your own customized icon for your own site! Workshop Committee of Technology Assist By Students
- 3. Webworks: Lists, Tables, and Frames Page 3 of 14 Start by drawing a 16x16 image and convert it into the icon format. Save the icon as favicon.ico. Upload this icon onto your webspace and put the following code inside the <head> tag to link to the icon: <link REL="SHORTCUT ICON” HREF= http://www.site.com/favicon.ico > Refresh your webpage, and the favorites icon will be replaced with your own customized icon! If your computer doesn’t have a program to convert picture files to icons, here are some links to icon converting programs: • http://www.pcworld.com/downloads/file_description/0,fid,22323,00.asp • http://www.mostshareware.com/soft/Image-Icon-Converter- download-7867.html 4. (very) Brief Introduction to CSS Cascading Style Sheets (CSS) allow the web page designer to define HTML elements. This amount of control over the rendering of the page allows a great deal of freedom in determining what your page will look like. An example would be taking a tag <h1> and give it new attributes like highlighting text with red. Whenever you want text to be highlighted red, all you have to do is use the <h1> tag instead of using <font color= “red”></font>. Since CSS allows the designer to separate style from content, this saves a lot of time when editing pages and makes HTML code easier to read. Style is identified with its <style> </style> tags, and these tags will show up as purple in Dreamweaver. Want an example of CSS in action. You’ll find tons at the CSS Zen Garden (http://www.csszengarden.com/). 5. Syntax CSS sytnax is easy to remember: selector, property, and value. The selector is the HTML tag you want to modify, property is an attribute you want to modify with a value. Example: p {font-family: “verdana, arial, helvetica”} The <p> tag is your selector, “font-family” is the property that will be modified by the value “verdana, arial, helvetica.” Workshop Committee of Technology Assist By Students
- 4. Webworks: Lists, Tables, and Frames Page 4 of 14 You can also make style definitions easier to read by spacing them out and writing each property on a different line: span { color:red font-style: italic } When modifying fonts using CSS, there are units and values that should be kept in mind: • em – height of a character • px – pixels • pt – point • % - percentages! body { font-size:10px; } 6. Adding to a HTML Page Now you may be wondering, where do I stick all this CSS code? Well there are 3 ways to use CSS. External This is the most common implementation of styles. The CSS code is in a separate file with a “.css” extension (NOTE: You must have the .css extension). A snippet is put in the <head> section of the HTML file specifying where the style sheet is. For example, if you had a style sheet called main.css in your styles folder under your web directory, your HTML will be: <head> <link rel="stylesheet" type="text/css" href="./styles/main.css" /> </head> The CSS file would then just contain your CSS code AND NOTHING ELSE. For example if all your style sheet did was set the background color of your pages to yellow, the CSS file would look like this: body {background-color: yellow} Using external style sheets makes it easy to apply the style sheet to multiple pages. Even better, any changes you make to the source style sheet cascades and updates the styling of all your pages. Internal/Embedded Say you apply an external style sheet to your page, but then want just one page to have a blue background. Then you can include the page specific CSS code within the <head> section of your page. While other styles of your external style sheet come through, the background color style of the external sheet will be overridden by the internal stylesheet in the page. Now the CSS code needs to be wrapped with special <STYLE> tags in the HTML: Workshop Committee of Technology Assist By Students
- 5. Webworks: Lists, Tables, and Frames Page 5 of 14 <head> <style type="text/css"> <!-- body { background-color: blue;}--> </style> </head> The use of comments within the style tag is to hide the code from someone viewing the page with a really old browser. All the code will be displayed on the screen and that looks really bad, so take the extra 2 seconds to comment out the style area! Inline Inline uses of CSS is generally not recommended and is slowly being faded out. Inline CSS is where you stick the style directly inside a HTML tag. For example: <p style=”color:green”> The text in this paragraph would then be green. </p> The only time you would use Inline CSS is if you need one instance of CSS, say highlighting a sentence or something that would be difficult to do with other HTML methods. You can use more than one of these implementations. When they conflict, the order of precedence: 1. Inline styles 2. Internal styles 3. External styles Custom Selectors Besides selecting HTML elements to apply styles to, you can also create your own custom element names to apply to any element. Custom styles take two forms, CLASS and ID. When should I use ID or CLASS? • CLASS styles can be attached to multiple elements • ID styles can only be attached to one element. • Use ID when there is only ONE instance. Use Class when there are multiple instances. The syntax for both is as follows: CLASS .somename { color: green; } ID #someothername {color: red; } ID must be preceeded by a hash “#”. Workshop Committee of Technology Assist By Students
- 6. Webworks: Lists, Tables, and Frames Page 6 of 14 p#ID1 { background-color: blue; } CLASS must be preceeded by a period. p.redpen {color:red} p.greenpen {color:green} Whenever you wanted to “highlight” text of a certain color: <p class = ”redpen”> This text is red! </p> <p class = “greenpen”> The text is green! </p> Comments! Comment as often as possible! You might have to look at your code several months or years down the line, and realize you don’t understand what is going on because you failed to document it properly! Comments start with /* and end with */ : /* Hello! This is a very important comment! */ Comments will not be displayed in the page; they only appear in the source. They also appear as gray in Dreamweaver. 7. Div and Span The <div> tag is used to divide portions of a web page and allows you to define a style section. <div> to </div> is used to indicate the beginning to the end of a paragraph. Remember that you cannot have a <div> within a <div>! <span> is used to tell the browser to apply formatting. The big difference between <div> and <span> is <div>’s ability to create paragraph breaks (line break before and after.) <span> elements only affect a small chunk of text in a line. Screenshot of these two tags in use: <span> can be nested within a <div>: <div class="blueback"> Workshop Committee of Technology Assist By Students
- 7. Webworks: Lists, Tables, and Frames Page 7 of 14 <span class="sitaround">Sit around in center! </span> <span class="floatright">I am floating to the right! </span> <span class="other">Other text</span> </div> The width of a <div> can be set, and the importance of this will be discussed later. .box {width = 10px;} 8. Links Color Change A fun thing to do is to make your web links change to a different color when the mouse cursors hovers over the link. In this example, “a” is the “a” in <a href =”....”></a> and we can apply the following style changes: a:link { text-decoration: none; color: #33CCFF; } a:visited { text-decoration: none; color: #33CCFF; } a:hover { text-decoration: underline; color: #FF0000; } When correctly done, the link should be displayed in light blue and once the user hovers over the link, it should be underlined and in red. 9. Building a Site without Tables The ability to just “layout” a page without tables is one of CSS’s strongest points. There is no need to keep track of millions of nested tables and tags. Position This property allows the coder to determine where a block of text will go in the page. • Static – places the block wherever it is • Absolute – places the block in the page defined by the coder .somewhere {position: absolute; top: 50px; right: 100px; } (This places the block of text 50 pixels from the top, and 100 pixels from the right) • Relative – places the block where it would have been if there was nothing around. .shift {position: relative; top: 12px; right: 10px; } Border This is the standard property that allows us to draw lines around blocks of text. There are many border styles, ranging from solid to ... hidden. .a1 {border-style: solid; } /* Your standard black border */ .a2 {border-style: double; } /* Double border*/ .a3 {border-style: hidden; } /* Hidden! */ .a4 {border-style: inset; } /* Creates an indented border */ .a5 {border-style: outset; } /* Creates a raised border */ .a6 {border-style: groove; } /* Creates a grooved border */ Workshop Committee of Technology Assist By Students
- 8. Webworks: Lists, Tables, and Frames Page 8 of 14 For the ubiquitous thin border you see all the time, use this code: border: 1px solid #000000; Up to this point, a simple two-column page can be created using the following code: #navbar { position: absolute; top: 10px; left: 2px; width: 200px; border: 1px solid #000000; } #maintext { position: absolute; top: 10px; left: 210px; border: 1px solid #000000;} } Adding a third column is very easy, just create a new ID with the position of the third area. Use the <div> tags in the <body> region of the HTML code (remember that <div> tags are like blocks of text) and you’re done! Float This property “floats” a block of text or image in a direction (left or right or nowhere.) #flt_right { float: right;} /* self-explanatory */ Multiple blocks with the same float direction will appear alongside each other. To create the effect of blocks stacked on top of each other, but still floating towards a direction, use the CLEAR property. Without clear: #flt_rightclear { float: right; clear:right; } With clear: Workshop Committee of Technology Assist By Students
- 9. Webworks: Lists, Tables, and Frames Page 9 of 14 Useful Tags Background Property Values Description Background-color Red, blue, FFFFFF, transparent, etc Sets the background color Background-image url Sets the background image Border Property Values Description Border-color Red, blue, FFFFFF, etc Sets the color of the border Border-style Hidden, dotted, dashed, solid, double, groove, Sets the style of the border ridge, inset, outset Border-width Thin, medium, thick, pixels Sets the width of the border Border-bottom- See border-color Sets the color of the bottom border color (bottom can be replaced by left, right, or top) Border-bottom- See border-style Sets the style of the bottom style border(bottom can be replaced by left, right, or top) Border-bottom- See border-width Sets the style of the bottom width width (bottom can be replaced by left, right, or top) Classification Property Values Description Workshop Committee of Technology Assist By Students
- 10. Webworks: Lists, Tables, and Frames Page 10 of 14 Cursor Auto, crosshair, default, pointer, move, text, wait, Sets the type of cursor to display help Display None, inline, block, list-item, run-in, compact, marker, table, inline-table, table-row-group, table-header-group, table-footer-group, Sets how an item is displayed table-row, table- column-group, table- row, table-column- group, table-column, table-cell, table- caption Float Left, right, none Sets where an item will appear within another Position Static, relative, absolute, fixed Sets where to put the item Visibility Visible, hidden, collapse Sets the visibility mode of the item Dimension Property Values Description Height Auto, pixels, 30% Sets the height of an item Line-height Normal, #, pixels, 30% Sets the distance between lines Max-height None, length, % Sets the maximum height of an item Min-height None, length, % Sets the minimum height of an item Max-width Length, % Sets the maximum width of an item Min-width Length, % Sets the minimum width of an item width Auto, length, % Sets the width of an item Font Property Values Description Font-family Family name (Arial)or a generic Sets the font family (Allows a list by name (serif) priority) Workshop Committee of Technology Assist By Students
- 11. Webworks: Lists, Tables, and Frames Page 11 of 14 Font-size xx-small, x-small, small, medium, large, x-large, xx- Sets the font size large, smaller, larger, length, % Font-stretch Normal, wider, narrower, ultra- condensed, extra- condensed, condensed, semi- Stretches or condenses the font condensed, semi- expanded, expanded, extra-expanded, ultra-expanded Font-style Normal, italic, oblique Sets the style of the font Font-font-weight Normal, bold, bolder, lighter, Sets the weight of the font 100-900 List Property Values Description List-style-type None, disc, circle, square, decimal, lower-roman, upper- Sets the type of the list marker roman, lower-alpha, upper-alpha List-style- Inside, outsider position Sets where the marker is placed List-style-image None, url Sets an image for the list marker Marker-offset Auto, length Specifies by how much the marker is to be offset Margin Property Values Description Margin-bottom Auto, length, % Sets the bottom margin of the element Margin-left Auto, length, % Sets the left margin of the element Margin-right Auto, length, % Sets the right margin of the element Margin-top Auto, length, % Sets the top margin of the element Workshop Committee of Technology Assist By Students
- 12. Webworks: Lists, Tables, and Frames Page 12 of 14 Outline Property Values Description Outline-color Color, invert Sets the color of the outline around an item Outline-style None, dotted, dashed, solid, Sets the style of the outline around double, groove, an item ridge, inset, outset Outline-width Thin, medium, thick, Sets the width of the outline around length an item Padding Property Values Description Padding-bottom Length, % Sets the padding on the bottom of an item Padding-left Length, % Sets the padding on the left of an item Padding-right Length, % Sets the padding on the right of an item Padding-top Length, % Sets the padding on the top of an item Position Property Values Description Bottom Auto, %, length Sets how far from the bottom of the parent item the current item is Left Auto, %, length Sets how far from the left of the left of the parent item the current item is Right Auto, %, length Sets how far from the right of the right of the parent item the current item is. Top Auto, %, length Sets how far from the top of the parent item the current item is Clip Shape, auto Clips the item into a specific shape Overflow Visible, hidden, Sets what is to happen if the item scroll, auto overflows its given area Vertical-align Baseline, sub, Sets the vertical alignment of an Workshop Committee of Technology Assist By Students
- 13. Webworks: Lists, Tables, and Frames Page 13 of 14 super, top, text- top, middle, bottom, text-bottom, length, item % z-index Auto, # Sets the stack order of an item Table Property Values Description Border-collapse Collapse, separate Sets the border of a table to collapse or separate Border-spacing Length Sets the distance between borders of two cells Empty-cells Top, bottom, left, Sets whether empty cells should right have a border Table-layout Auto, fixed Sets how the table is to be laid out Text Property Values Description Color Blue, green, FFFFFF, etc Sets the color of the text Direction Ltr, rtl Sets the direction of the text Letter-spacing Normal, length Changes the space between characters Text-align Left, right, center, justify Aligns the text Text-decoration None, underline, overline, line- Decorates the text through, blink Text-indent Length, % Indents the first line of text Text-shadow None, color, length Shadows the text Text-transform None, capitalize, uppercase, lowercase Transforms the text White-space Normal, pre, nowrap Decides how white space is handled Word-spacing Normal, length Changes the space between words Workshop Committee of Technology Assist By Students
- 14. Webworks: Lists, Tables, and Frames Page 14 of 14 Workshop Committee of Technology Assist By Students