
Recommandé
Contenu connexe
Dernier
Dernier (20)
En vedette
En vedette (20)
How to look after your headlights
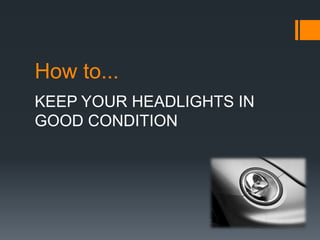
- 1. How to... KEEP YOUR HEADLIGHTS IN GOOD CONDITION
- 2. Intro Despite the fact that they’re one of the most vital parts of your car, many people take their headlights for granted. Of course, you only ever seem to worry about them once they stop working. However, by paying a bit of attention to them in order to keep them running at tip top performance, you can save yourself a lot of hassle, and help to prevent them from going on the blink while you’re behind the wheel.
- 3. First off – cleaning them Headlights looking a bit dirty or grimy? Don’t just stare at them - do something about it! If they’re dirty you won’t get the best out of them, defeating the purpose of headlights altogether in some instances. But how best to clean them? Read on…
- 4. Cleaning, continued. Apply some toothpaste on a dry cloth. Rub the headlight cover with said cloth, in an effort to get the grime off. If you’re struggling to make much of an impact, make sure to rub in a circular motion to break down the grime. After that, simply rinse with water then wipe down with a wet cloth. Easy-peasy, and definitely cheaper than buying a specialist kit, although those are on the market as well. Be warned though, whitening toothpastes or those with extra mint car have an adverse affect, so try to avoid those for this particular job. Feel free to use them in your everyday life though…
- 5. Changing the bulb By regularly keeping your headlights clean, you’ll have another advantage – knowing when your bulb is dimming, or close to needing to be changed. While hopefully you’ll see it coming, sometimes these things can happen unexpectedly. If your bulb isn’t working, you can’t drive in the dark for the obvious reasons (well, as long as you don’t want to have to fork out for windshield repair). As for changing the bulb, a garage can do this for you, but it can often work out pretty expensive. If you’d rather do it yourself…
- 6. DIY bulb change, part 1 First things first, you’ll need to work out what kind of bulb your car needs Done that? Good. Now you’ll need to locate the bulb holder. You can usually find this by safely propping the hood open and looking back around to the back of the headlight. The bulb holder should have three wires coming out of a plug shaped like a trapezoid.
- 7. DIY bulb change, part 2. From there, you’ll need to remove the plug attached at the base of the headlight itself. Depending on the type of car you drive, this plug will either be held in by a plastic, metal or screw cap. If it’s a plastic cap, press down the lever sticking up at the top of the plug, this should allow the plug to slide off. If it’s metal, just pull and it should come off in your hands. Finally, if it’s a screw cap, just, er, screw it off. Simple!
- 8. DIY bulb change, part 3. Now it’s time to remove the old bulb. Do this by simply holding onto the base of the bulb (this is what the plug was in) and gently pulling. If you’re struggling to get it out, try rotating it ever so slightly. As you might expect, it’s time to add the new bulb now. However, before taking it out of its packaging, grab a clean rag or a tissue to make sure the oils on your skin don’t come into contact with the bulb. This can have a severe impact on its performance.
- 9. DIY bulb change, part 4 From there, you simply have to plug the bulb in. To do this, hold the bulb’s plug end and stick it into the back of the headlight. Make sure that it’s properly in though – if it is, everything should be lined up properly, and the bulb’s rubber gasket should be showing. To finish up, simply plug the wiring back in and make sure the bulb is secure. Test it from there, and if it’s working – hey presto, you’re done!
- 10. Further reading: http://www.ehow.com/how_4519165_clean-car- headlights.html http://autorepair.about.com/od/fixityourself/ss/hlite_replace.ht m http://www.wikihow.com/Clean-Headlights