1. HOW TO CREATE A NEW CLIENT:
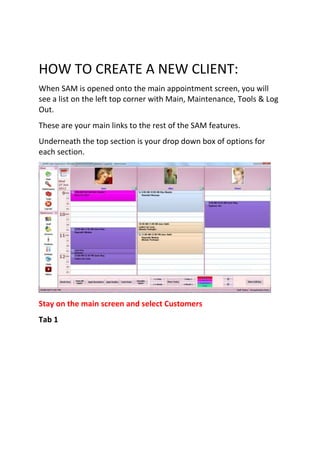
When SAM is opened onto the main appointment screen, you will
see a list on the left top corner with Main, Maintenance, Tools & Log
Out.
These are your main links to the rest of the SAM features.
Underneath the top section is your drop down box of options for
each section.
Stay on the main screen and select Customers
Tab 1
2. In this box there are several options available to you. You can search
for a customer here by
· First Name
· Last Name
· Mobile, Work & Home Phone Numbers
· Email Address
· Street Address
Select New and a box will appear in which you fill in the customers
details.
There are multiple tabs in order to do this.
Main Tab:
· Customer Number (This updates automatically in numerical
order with each new customer)
3. · Account Allowed (Tick this if your business runs accounts
and you agree to allow said customer to have an account)
· First Name
· Surname Active Box (Tick this if the customer is currently
active. If a customer is no longer coming to your business, you
can simply un-tick the Active box and still keep their records for
future)
· Street is where you enter in the first part of the customers
address eg; house number & street name.
· Suburb has a search box where you click on the magnifying
glass and then enter in the suburb. This will fill in all of the
other details including postcode and state.
4. If you cannot find the suburb, you can also search for the
suburb through the postcode. Click on the magnifying glass
and enter in the postcode. There are usually several suburbs
that are within the same postcode. Click on the appropriate
postcode.
Next enter in the customers contact details including:
Home Phone Number
Fax Number
Email Address
Work Phone Number
5. Mobile Phone Number
There is also a section to enter in the customers Private Health Fund
if they are in one. To do this, simply click on the magnifying glass and
select the appropriate Health Fund or select No Fund and then click
OK.
Beneath the customers contact details is the customers marketing
preferences section. This provides the following options:
6. Marketing Not Allowed (If this is ticked, none of the
following options can be selected. It needs to be un-ticked
in order to change marketing preferences)
Marketing Permitted box (when you select any of the
following options, this box will tick automatically)
Email
SMS
Phone
Appointment Reminders Permitted
Email
SMS
Phone
Within the Main tab there are also several other options available to
you. These include:
A search box to Select Customer- Click on the magnifying
glass to search
Scroll Buttons <> This scrolls to the next customer
(alphabetically)
Cancel- to Cancel the process of creating a new customer
Delete- To delete selected customer
Appointment History- The customers appointment history
Product History- Which products the customer has
purchased
Sales History- Overview of the Customers sales
Referred Customers- Which other customers this customer
has referred to you.
Add New Family Member- Add family members who are also
customer
Marketing Tags-can be used for tagging customers to be
specifically marketed to. EG; received information on new
7. laser treatment, when treatment arrives, let the customer
know through the marketing.
Tab 2
Within the New Customer field, you will find the Photos tab next
to the Main tab.
This is where you have the option of uploading a photo of
your customer, taking a photo if you have a webcam
installed on the computer or removing a photo.
You will need to Save the new customers details before you
can upload a photo. This is so that you do not lose the data
that you have already entered in.
To upload a photo, click Upload and then browse through
your photos for the one you wish to upload.
8. Select the photo and then click on Open. This will appear in
the space on the original photo tab. Ensure to click save
when the photo is uploaded.
9. Tab 3
The next tab is Other. Here you can input the customers DOB,
Next of Kin, Occupation, Marital Status, Credit Card Details,
who they were referred by and the date of their original visit.
There is also space to enter in their ABN and to make notes for
their Next of Kin-up to 2000 characters.
10. Use the magnifying glasses to search for dates and
information to fill out other sections such as Marital Status.
Please ensure to save all data between tabs.
Tab 4
Special Requests/Notes
This tab allows you to enter in details of a customer’s special
requests or their favourite drink etc. When you book in an
appointment for a customer with notes, a box will appear
showing the notes before you can continue with the
booking.
11. When your customer arrives for their appointment and you
have selected them as arrived, the Notes button will also be
highlighted in yellow. This tells the service provider that the
customer has Notes attached to their profile and to please
read them.
12.
13. Click ok to go back to the main appointment screen.
Tab 5
Loyalty Club Points
Within this screen you are able to:
See the amount of points the customer has accrued
Credit loyalty points
debit loyalty points
see redeemed points
reasons for credited points
14.
15. Tab 6: Marketing
Within this tab you are able to view the different marketing email
&sms that have been sent to this customer and view the Details of
what was sent.