
Recommandé
Contenu connexe
En vedette
En vedette (20)
How to Make an Animoto Video
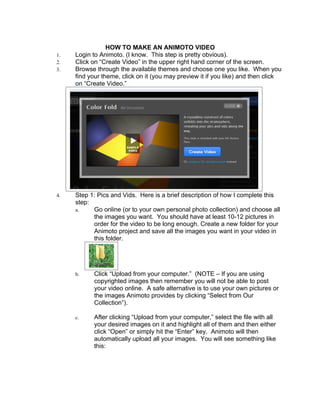
- 1. HOW TO MAKE AN ANIMOTO VIDEO 1. Login to Animoto. (I know. This step is pretty obvious). 2. Click on “Create Video” in the upper right hand corner of the screen. 3. Browse through the available themes and choose one you like. When you find your theme, click on it (you may preview it if you like) and then click on “Create Video.” 4. Step 1: Pics and Vids. Here is a brief description of how I complete this step: a. Go online (or to your own personal photo collection) and choose all the images you want. You should have at least 10-12 pictures in order for the video to be long enough. Create a new folder for your Animoto project and save all the images you want in your video in this folder. b. Click “Upload from your computer.” (NOTE – If you are using copyrighted images then remember you will not be able to post your video online. A safe alternative is to use your own pictures or the images Animoto provides by clicking “Select from Our Collection”). c. After clicking “Upload from your computer,” select the file with all your desired images on it and highlight all of them and then either click “Open” or simply hit the “Enter” key. Animoto will then automatically upload all your images. You will see something like this:
- 2. d. After your pictures have uploaded, you can move them around by clicking on one picture and dragging it wherever you want it to go. e. Next you need to add your text. To do this, you will have to look at the menu at the bottom and use the text button. f. After clicking on the Add Text button you will see on the right of the screen a space to write what you want the video to say in that particular spot. Fill it out and then press “done.” g. When you are satisfied with your pictures and your text, press “Done” in the menu. 5. Next you need to pick your music. You have two choices. You may upload music from your computer or choose from Animoto’s collection. Animoto’s collection has been donated by up-and-coming artists for the
- 3. sake of exposure. If you use this music, you do NOT need to worry about copyright infringement. After you have selected your music, press “Save and Continue to move on to the final step. 6. Finally, you need to put the finishing touches on your video. This means selecting pacing and length (ALWAYS CHOOSE FULL-LENGTH). I highly recommend always choosing 2x speed. Anything else goes too slow and puts viewers to sleep. 7. Next, press continue and name your video. You may also put in a description if you want.
- 4. 8. Finally, press “Create Video” Animoto will begin making your video. This will take about half an hour so don’t plan on sitting around waiting for it. Directions for creating photos from PowerPoint Slides Save the Slides in a Picture Format Once you have created your PowerPoint presentation, you may wish to make picture files of all or certain slides in the presentation. This is easily done when you use the Save As... command. Steps 1. Save the presentation as a PowerPoint presentation file, just as you normally would. This will ensure that your presentation is always editable. 2. Navigate to the slide that you wish to save as a picture. ○PowerPoint 2007 ■ Click Office button > Save As 3. Add a file name in the File name: text box 4. From the Save as type: drop down list, choose the picture format for this picture. 5. Click the Save button. Current Slide or All Slides? Once you choose to save the PowerPoint presentation as a picture file, you will be prompted whether you want to export the current PowerPoint slide or all slides in the presentation as pictures. Click the appropriate button. Save All Slides or a Single PowerPoint Slide as a Picture 1. Saving One Slide as a Picture ○ If you choose to save only the current slide, PowerPoint will save the picture in the chosen format using the current presentation filename as the picture filename, or you can choose to give the picture slide a new filename. 2. Saving All Slides as Pictures ○ If you choose to save all the slides as picture files, PowerPoint will create a new folder using the presentation filename for the folder name (you may opt to change this folder name), and add all the picture files to the folder. Each picture will be named Slide 1, Slide 2 and so on.