Beginners Guide to TikTok for Search - Rachel Pearson - We are Tilt __ Bright...
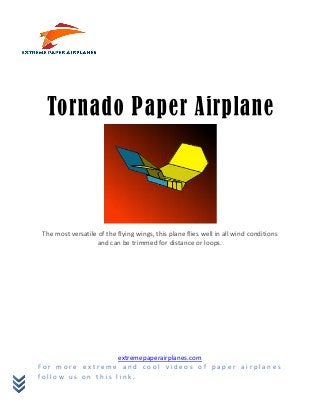
Tornado Paper Airplane
1. The most versatile of the flying wings, this plane flies well in all wind conditions
and can be trimmed for distance or loops.
extremepaperairplanes.com
For more extreme and cool videos of paper airplanes
follow us on this link.
2. INSTRUCTIONS
Start with a medium to light weight letter size sheet.
1. Make the starting crease by folding down the top edge but miss the
bottom edge by about two or three finger widths. If this gap is either too big
or too small, the resulting plane will not fly as well.
2. Make a corner crease by folding down the upper left corner. The left edge
of the paper should fall exactly along the edge of the top flap of paper.
Unfold this crease after making it tight.
3. Repeat the same fold on the other corner. Make a corner crease by folding
down the upper right corner. The right edge of the paper should fall exactly
along the edge of the top flap of paper. Unfold this crease after making it
tight.
4. Open the sheet to see all the creases created.
5. Refold the large horizontal crease but this time pull in the edges just where
the crease meets them. This requires you to reverse the portions of the
horizontal crease and the top diagonal crease. Pull all creases down tightly.
6. Reposition the paper so the narrow part is toward the top. Make a new
crease by bringing the top edge down but miss the edge of the top layer by
about one finger width. This crease should be parallel with the bottom edge.
7. Make another new crease by bringing the top edge down but miss the edge
of the previous flap by about one finger width. This crease should also be
parallel with the bottom edge. There are many layers of paper now so be sure
to press down hard.
extremepaperairplanes.com
For more extreme and cool videos of paper airplanes
follow us on this link.
3. 8. Turn the paper over and reposition it so that the flaps you just folded are
toward the right.
9. Fold the top edge down to the bottom edge dividing the plane exactly in
half. Make sure to line up all the edges before making the crease.
10. Reposition the plane so that the new crease is toward the bottom.
11. Make the first main wing crease by bringing down the top edge of the top
layer. The new crease should be about one large finger width above the
bottom edge and parallel with it.
12. Make another new crease by bringing up the bottom edge of the wing flap
you just folded on the last step. The size of this flap is not too critical but the
crease should be parallel with the others and the edges should line up.
13. Form down the top triangular layer to form a flap that points downward.
The new crease should be parallel to the bottom edge.
extremepaperairplanes.com
For more extreme and cool videos of paper airplanes
follow us on this link.
4. 14. Turn the plane over from left to right keeping the triangular flap you just
folded pointed downward.
15. Fold down the other wing making a crease which exactly matches the
one below it.
16. Fold up the bottom edge of the wing just folded down to match the
flap created on the other wing. Line up all the edges and try to match the
other creases exactly.
17. As before bring down the top layer of the triangle to form a flap which
points downward. Try to match the flap beneath it which was created on
the other wing.
18. Open the plane and adjust all the angles so they are the same on both
sides. Open the small triangular flaps and adjust their angles. The plane is
shown here upside down so you can see these flaps. The dihedral should
be flat or slightly up. Experiment with the angles for different kinds of
flights.
THE THROW - Launch with a moderate to hard throw. The wing sections
and triangle flaps can be adjusted for different kinds of flights. By setting
the dihedral downward and the triangle flaps vertical, long straight
flights are possible. As shown, the flights tend to be more acrobatic.
extremepaperairplanes.com
For more extreme and cool videos of paper airplanes
follow us on this link.