
Recommandé
Contenu connexe
Similaire à Print Screns
Similaire à Print Screns (20)
Plus de Gemma
Plus de Gemma (20)
Dernier
Dernier (20)
Print Screns
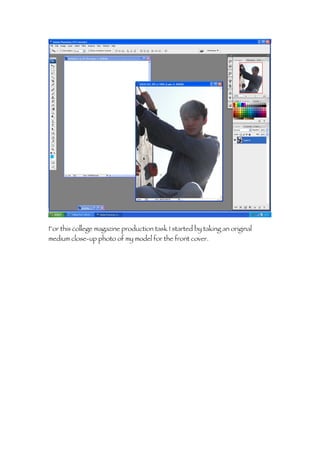
- 1. For this college magazine production task I started by taking an original medium close-up photo of my model for the front cover.
- 2. After transferring original image on to a new page, using the magic wand tool I selected and removed the background leaving only the medium close-up and leaving a clean background to work off from.
- 3. After looking at www.dafont.com I decided on a style of text suitable for my masthead. I choose to do the masthead in black and then went to my brushes and added a smoky affect on top of the text in red, making up my house style colours.
- 4. I carried on with this colour scheme, added a new layer to create a lead article, after deciding on a title I double clicked the layer opening up the layer style and went to stoke to create a bubble effect around the text.
- 5. Following on from this idea I added more coverlines, using a combination of red, black and white as my house style and outlining them. Using free transform on all my separate layers, I was able to move and angle the texts individually.
- 6. as all my layers are separate I was able to strip them back and go to my background layer with another smoky brush design, adding extra dept to the overall cover and breaking up the blocks of solid white.
- 7. I decided to add a new layer underneath the text; I chose a brush of a London city landscape and printed it in white.
- 8. Over the top of the London cityscape brush I added a pull quote on “loving city life” from the prospective of a student and added another pull quote to the aim higher lead article for a teachers or lecturers point of view.
- 9. I also included a sky line adding to the appeal of the magazine by advertising discounts. I chose to decreased the optically of the text outline, so the masthead would not be too obstructed. And finally, again using free transform, slightly rearranged some of the cover lines so both the main image and the text can be seen clearly.
- 10. After finishing my front cover I then moved on to my contents page, I started by changing the background colour to red, connecting the two pages by the colours used – the house style.
- 11. To reduce confusion I decided on one text style that I would use throughout my contents page, which is the same font I used most on my cover page. Caring on with using a different layer for each new item, I started by titling the page.
- 12. Too unify the two pages even more I used another London cityscape brush, this time in black along the bottom of the page.
- 13. I then went back to my brushes and selected two that I liked and using transform and free transform was able to flip, rotate and enlarge them both individually so they would fit together as one piece. I also added an outline to the text to make it stand out and link it to the cover page.
- 14. I went back to my brushes and selected another, but this time printed it in white, I moved the layer so it would appear under the other two prints, I like this brush effect as the arrows give a sense of direction, tying in nicely with the idea of a contents page.
- 15. I then started to add the contents of my contents page, I decided to invert the colour scheme of my title so that the text would be in black and the outline white and keeping the same font as before.
- 16. As I put each content title on a new layer I was able to move around and pivot the text using free transform stopping it from becoming too regimented and formal.
- 17. I decided to first put up all my text on different layers and then, once everything was up, go back and using free transform again, position them in the layout I wanted.
- 18. After settling on a layout I decided to make a new layer and move it underneath everything apart from the red background layer, then using the smoky brushes I used on the cover page, went around the top and bottom of the page to break up some of the block red and finish off the contents page.