1. Creating custom menus for Rifftrax DVD Reauthors
Creating menus is pretty easy once you get the hang of it. There are a lot of optional steps that depend on how fancy you
want your menu to look, and there are further embellishments you can make if you want to add things like Easter eggs or
stingers. I am just going to cover the basics.
I use Mediachance's DVD Lab Pro, and that is what this guide will be written for. There are other programs which will do
this, such as Nero or Sony Vegas, but I don't use them so obviously can't write a guide. DVD Lab Pro is free without
restrictions for 30 days, but after that it will stop working until you buy a full license for $250. Not cheap, but worth it in
my opinion. DVD Lab is easy to use and has some great features. If you wanted to, you could make menus with full
motion that rival those developed by professional studios. Also, keep in mind that this is actually cheaper than Sony Vegas,
which costs over six hundred dollars.
Before you begin: make sure you've already demultiplexed your DVD and created the combined audio track for the riff.
There are other guides out there for that. I use the Rifftrax DVD Creating Step-by-Step Guide on the Technical Support
forum at the Rifftrax Roundtable.
We'll be using Planet of Dinosaurs for this guide. If you are going to be adding background music to your menus, or using
custom backgrounds, follow the next few steps. DVD Lab contains a few stock backgrounds and music, and you can use
those if you want. Otherwise, skip straight to the section on creating menus.
Preparing the custom backgrounds and music (optional)
Step One: Download your background
There are a lot of good sites out there. You can do a Google image search as I did for a few. I got the bulk of my
backgrounds from movieposterdb.com which is not free, but still pretty cheap. You can pay about $6.50 (actually 5 British
pounds, as the site is based in England) to get 100 credits. Posters from movies released 2007 and later are 2 credits; from
movies older than 2007 they are 1 credit.
For some older movies where I couldn't find a decent poster (because the poster was too crowded and didn't have a decent
place to put the menu text), I took a screenshot from the movie. Save this picture to C:Program
FilesDVDlabPro2Backgrounds or a subfolder. Personally, I use the subfolder “Custom Backgrounds” to keep them
separate from the stock backgrounds provided. You must save background images in this folder or a subfolder of it.
DVD Lab cannot pull backgrounds from anywhere else.
Step Two: Download and prepare your menu music
This is a little tougher because DVD Lab tends to be very particular about its video and audio file formats. Background
music has to be in MP2 or AC3 format or you'll start seeing weird errors. The stock background music is in MP2 format,
but I convert all mine into AC3 format. You could just download the AC3 files I've posted if you want. Otherwise:
1. Find suitable music in whatever format you like.
a) You can download music from YouTube clips if you want. DVD Video Soft's aptly named “Free Youtube to
MP3 Converter” will do this quickly and easily. Do a Google search and you'll find it.
b) You can also take clips from the movie's audio, cut out in Audacity. I did this for a few movies when I
couldn't find anything online. Highlight the portion of the audio clip and use Audacity's “Export Selection”. If
you do this, don't export it in AC3 format. Even though your end product will be an AC3, DVD Lab gave
me some horrid errors with Missile to the Moon that took me hours to figure out. Best bet is to export as
WAV and then convert to AC3 using a program like FFMPEGUI.
c) You can also download MP3s of generic music from the audio portal at Newgrounds.com . If you're going to
take just a portion of the MP3, remember to export in WAV format as I describe in step 1-B
d) Any MP3s you have lying around your computer ripped from CDs or downloaded anywhere off Limewire or
something will work too. I did this for the main menu music for Jurassic Park and Top Gun.
2. 2. Save the AC3 file to C:Program FilesDVDlabPro2Music or a subfolder so that DVD Lab can find them.
Okay, now that generating backgrounds and music is out of the way, we move on to the main guide.
Creating the Menus
Okay, you've got your custom backgrounds and custom music ready (or not, maybe you're using the stock backgrounds).
You've got an .M2V file for the movie's video, and AC3 files for the audio tracks. Let's get started!
Now remember that some of this is optional. You might not want to bother with scene selection menus. I like them for
some reason, even though I rarely use them.
When you open DVD Lab, it'll look like this. Pardon the smaller pictures. I had to shrink down some of the screen grabs. I
hope it's clear enough.
You start with one menu and one movie. I am going to rename the menu as “Main Menu” and the movie as “Planet of
Dinosaurs”.
Step One: Importing your DVD Files into DVD Lab
Fortunately, this is easy.
1) Click the “Video and Audio” tab down below.
2) Drag and drop your M2V and AC3 files into it.
3. Step Two: Preparing the Movie
1) Double click on your movie over in the project window to bring it to the forefront. Drag the files from the “Video
& Audio” window into the movie. It's pretty intuitive; drag the m2v file into the section that looks like a filmstrip.
Drag the audio files to the rows labeled “Audio...”, in the order you want them to appear on your final DVD. I
always set the unriffed audio track as audio 1 and the Rifftrax as audio 2.
2) With your video and audio files in place, add chapter stops. This is optional, but highly recommended. You can
add your menus manually, but it's a better idea to use chapter stops exported from the original DVD using
ChapterXtractor. That way, it will match up to the chapter stops in the Rifftrax readme, which is the only way
your scene selection menus will make sense if you use the Rifftrax readme's chapter sub text.
Anyway, what you need to do is right click where it says “Chapters”, and select “Import”. Navigate to the text file
containing your chapter stops, and hit “Ok”. DVD Lab will create an IDX files which does something, I'm not
sure. Whatever it is, it takes a few minutes. Afterwards, your movie window will look like this:
4. Step Three: Adding the Command Objects for Automatic Audio Selection
You need to make command objects so that the finished menu will know which audio track to use when you tell it to play.
You'll need one for the original audio, and one for each riff. Obviously Planet of Dinosaurs will only have two, but some
projects have had more. Anything with an associated iRiff involved (The Happening, Jurassic Park, Die Hard etc.,) and the
three man re-dos (Carnival of Souls, Plan 9, Missile to the Moon etc.,) had three. Twilight, because of all the iRiffs, had
five. Anyway, it's pretty simple.
First off, you need to get over to the “Connections” window, which is a lovely window that displays the logical layout of
the DVD. Over in the Project window over to the left, double click on “Connections”.
5. The Connection window should look something like this.
To add the command objects:
1) Right click any blank area in the connections window. Scroll down to “Add” > “Add Command Object” and “In
VTS Domain”. A little box will pop up.
2) Click it and hit F2 to rename it to avoid confusion. Something meaningful like “Regular”.
3) Repeat steps 1 and 2 for the second command object for the riff. Your connections window should then look
something like this:
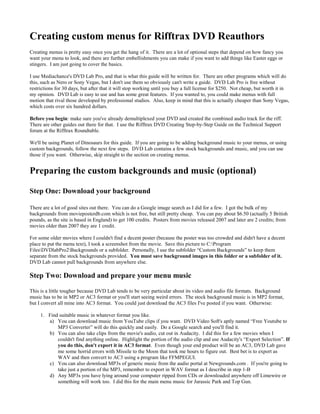
4) Right click on the command object “Regular” and select “Edit VM Commands...” The “Customize VM
Commands” window will come up.
6. 5) Click the radio button labeled “Script Editor” (if it isn't already selected).
6) Click the “Edit” button in the top right window labeled “A Custom PRE Commands”. The VM Script window
will come up.
You need to type in one line, but it will differ based on which VM Object you are editing. The command is
SetSTN (audio=x). In place of x, you need to put in the audio track number from the movie window (see step
two), minus one. So audio track one becomes zero, audio track two becomes one etc.,
Look back to your movie window. See how above we set the original audio as “Audio 1” and the Rifftrax
combined audio as “Audio 2”? Well, the command object named “Regular” will be used to set the original
unriffed audio track. The command object named “Rifftrax” will be used to set the audio track with embedded riff.
So, the command for “Regular” is SetSTN (audio=0) and the command for “Rifftrax” is SetSTN (audio=1).
So you'll need to go through this editing process for each command object you set, which should only be two for a
project like this.
When you finish editing the VM command objects, they'll appear in your connections window with little yellow
plus signs next to them.
Step Four: Designing Your Main Menu
7. This is largely stylistic and it's hard to write a good tutorial on designing the menu. I'll go over some basics.
First, double click “Main Menu” in either your project window or connections window. That will bring up the menu, which
by default is completely black.
To add a background: Click on the “Backgrounds” tab down at the bottom of the screen (in the Assets window).
Thumbnails of all your backgrounds will appear. To add, simply left click, drag, and drop into the menu.
To add text: It's a lot like adding text in paint. Click the text icon that looks like a little “Aa”over to the left. Then click to
where you want to add the text. Choose a size, and a font. Again, it's stylistic and you'll have to figure out for yourself how
you want your menu to look. If you want more fonts, you'll have to download and install them through the mechanisms that
Windows uses, then restart DVD Lab.
When you've added your text, you can use the “Color” and “Fill” tabs over on the right to add various effects. You can
change color, add a pattern, add effects, add shadow. You'll have to play around with it to figure out what you want.
Working with Styles: If you find a combination of shadow, fill, color etc., that you like, you can save it as a style. Once
you find something you like, right click on the stylized text, and select “Add to Styles”. It will show up in the styles menu
as a little colored circle.
To apply these styles to any other text that you add, left click on it, drag it on top of the text, and drop. It's really cool and
really easy. Adding effects until you find something you like is tough, and there are so many configuration items that you
don't want to have to remember and try to replicate them. I have enough trouble trying to match the font when I redo a
menu.
When I get done, I get something that looks like this.
8. Setting the link color: This is the color that the text will be when you highlight it. It's purple by default, which usually is
too ugly to be pretty. To change it, click the tab on the side which says “Map”. You'll see this:
Click the purple box with the '3' next to it. A fairly limited palette of 16 colors will come up. Select something that you
think will look nice. I choose blue
You can move the horizontal slider bar to adjust how dark the highlighting will be. Too dark and it will obscure the menu
text. Too light and you won't even notice that the button is highlighted. I usually leave it near the middle. Again, it's a
matter of taste.
Step Five: Adding Scene Selection Menus (Optional)
You might not want to bother with this step. The disadvantage of the scene selection menus is that they'll go straight to
whatever audio track was last selected. So you have to have already started the movie with the riff, then returned to the
menu, in order to go through scene selection menus and end up with the riff.
1) Return to the connections screen.
2) Look up above the top left of the screen to find the little icon that looks like a magic wand.
3) Select “Add Scene Selection Menus”. A window pops up with a few templates. I usually use one of the ones with
6 per page, so that I have room to fit in the chapter stop text from the Rifftrax's readme file. If it's a Rifftrax
Presents title and doesn't have that text, I just use the ones with 16 per page.
The cool part here is that DVD Lab will automatically generate all your scene selection menus and link them together. You
don't have to do anything except link to it from your main menu.
9. You will have to add in the backgrounds to each one, like you did for the main menu. Also, if you want to add in the
chapter stop text from the readme, you have to do that manually. That can be a little tricky fitting it in. I'll let you figure
that out if you want to do such. It's easy.
Also, now that you have your scene selection menus, the links will be highlighted the default purple. If you want them to
match your main menu:
1) Go to your main menu.
2) Right click in any blank area without text.
3) Scroll down to “Actions” and select “Copy Color map properties to all menus”.
Step Six: Adding Music
Adding the music is easy. You basically drag and drop the sound files into your menus.
1) Click the “Music” tab down in your assets window.
2) Find the AC3 music file (if using custom music) or one of the stock MP2 sound files that you want to use.
3) Left click on the file you want to use. Drag and drop to your menu. A sub window will pop up in the menu to
show that there is music now.
Step Seven: Linking it all Together
Now you have your menus cooked up, but you need to link them together. There are really two sub steps to this. The first
is linking your main menu to your movie and your scene selection menu. The second is linking things together on your
connections menu.
To create links to your movie and sub menus from the main menu:
Left click on any of the text you created on the main menu. You''ll notice that it has a blue box around it. This is because,
by default, all text can be used as a link. You just need to tell it what to link to.
However, remember that when you are playing the movie, you aren't going straight to the movie. The movie needs to know
which audio track to use. That's what the VM command objects we created up in Step Three were for. You need to link to
those, not the movie itself. What you're telling the menu to do is to stop at this command object to find out what audio track
top use, then play the movie.
1) Right click the text. We'll start with “Play Movie”.
2) A menu with a bunch of options will pop out. Select “Link”.
10. 3) Another menu will pop up with all your movies and all your other sub menus. We want to link to the command
object that tells the movie to use the regular, unriffed audio track. Link to “Regular”, or whatever you called it
when you created the command object.
4) Repeat for the “Play Movie with Rifftrax...” selection.
5) For the “Scene Selection” link, you do want to go straight to the scene selection link. Using the same method as
before, link to “Scenes 1 for ....” whatever your movie is (Planet of Dinosaurs in this instance).
Okay. You main menu is all linked up. The scene selection menus were already all linked up. Return to your connections
screen, which is looking something like this by now (although I dragged some of the objects around to clean it up).
Linking up objects in the connections window
This is different, but easy. You'll need to use the “Draw links” function, which is is off to the side of the connections
window, and looks like a little plus sign.
You need to draw the following links:
1: One from each VM command object to the movie. This will tell the VM object to go to the movie after it has told the
menu which audio track to use.
2: One from the movie back to the main menu. This will send the movie back to the main menu after it has finished
playing.
Now this is super easy. All you have to do to draw the links from the VM command object:
1) Left click the “Draw links” button”.
2) Left click inside the VM command object and hold down the left mouse button.
3) Drag over to the the movie.
To draw the link from the movie:
1) Left click the “Draw links” button”.
2) Left click inside the VM command object and hold down the left mouse button.
3) Drag over to the the movie.
The connections screen will look something like this now.
11. Your menu is finished! Now to turn it into something that you can watch!
Step Eight: Compiling and Burning to DVD
Well, this isn't much of a step. Go to “Project” > “Compile DVD”. The Compile window will come up.
It's pretty intuitive. There are some options you can select.
12. Test Compile: Will compile but without the video streams. You can use this to test out the links. In place of the video,
you'll see a test pattern. You'll still hear the audio for about 10 seconds.
Smart Compile: Can only be used after you've done an initial compile and made changes that do not affect the links or
movies. Like if you changed some superficial text, or changed music in a menu, or changed a background. You can then
recompile much more quickly and these changes will be reflected in the new finished project.
Create Verification Report: Will make some kind of report with information that is not particularly useful, so be sure to
uncheck it.
Build DVD Image File: Will create an .IMG file after the compiling is done. You can use this to burn to DVD or mount as
a virtual drive if you want, but I don't think it will burn to DVD if the file is more than 4.7 Gb. You need DVD Shrink or
CloneDVD to do that.
Choose where you want the finished project to end up, then click “Start”. It'll take about 10-15 minutes, and create
VIDEO_TS and AUDIO_TS folders filled with IFO and VOB files. You can play these in your DVD playing software to
check before burning to DVD or creating an image file.
Once you have your VIDEO_TS files, they're ready to be burnt to DVD. You'll probably need to use DVD Shrink or
CloneDVD or something like that. Getting it onto DVD is a separate issue from the scope of this guide.
Conclusion
Well, I hope that comes in clear and understandable. I left out some of the more advanced features I use, such as Play Lists,
Chapter Play Lists, menu transitions, adding stingers and easter eggs. If you want to do that stuff, you can figure it out after
you've gotten the hang of the program. I'm always around the Rifftrax Roundtable, so I can answer questions.