Contenu connexe Similaire à Sci fair (20) 1. Menu Print
Science Fair Guide
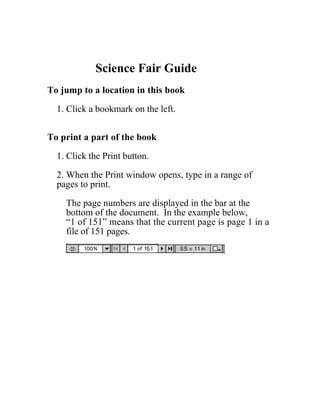
To jump to a location in this book
1. Click a bookmark on the left.
To print a part of the book
1. Click the Print button.
2. When the Print window opens, type in a range of
pages to print.
The page numbers are displayed in the bar at the
bottom of the document. In the example below,
“1 of 151” means that the current page is page 1 in a
file of 151 pages.
2. Menu
Copyright © by Holt, Rinehart and Winston. All rights reserved.
Print
PART 1: RESOURCES
FOR
TEACHERS
SCIENCE FAIR GUIDE
1
PART 1: RESOURCES FOR TEACHERS
w
w
w
3. Menu Print
Hands-on Science
The most obvious goal of a science project is to extend a student’s
understanding of science. Science is hands-on by nature, and there is
no doubt that hands-on experiences facilitate the learning process.
The scientific method allows scientists to collect and analyze data in
a strategic and unified manner. When students use the scientific
method to design and execute a project, they use the same steps
professional researchers use to gather new information.
Building Scientific Confidence More importantly, science proj-
ects make science more fun and relevant to the student. Every student,
regardless of aptitude, can benefit from planning and executing an
inquiry-based science project. A science project can be a great way to
spark a student’s interest in science or to help a student develop a
broader interest in research.
Philosophy of Science Fairs
Science fairs range in scale from a single class of students sharing
their projects to an international event offering scholarship money
as prizes. From the largest science fair to the smallest, science fairs
generally share a common philosophy and similar values:
• emphasis on using the scientific method
• investigation by experimentation (inquiry-based learning)
• development of critical thinking skills
• opportunity for a positive learning experience
• extension of formal science education
How to Use This Guide
Copyright © by Holt, Rinehart and Winston. All rights reserved.
While a science project is entirely the product of a student’s ingenu-
ity and work, motivation from teachers and parents is invaluable.
The Science Fair Guide leads teachers, parents, and students through
the process of developing a science project.
What’s in This Guide Using the scientific method, this guide
divides the science project into five phases:
• Phase 1: Generating an Idea
• Phase 2: Research and Planning
• Phase 3: Data Collection and Analysis
• Phase 4: Writing a Report
• Phase 5: Creating and Exhibiting a Display
For each phase, you will find a set of management tips for teachers,
an instruction worksheet for students, and a handout encouraging
parental involvement. This guide also provides three progress
reports, allowing each participant—the teacher, the student, and the
2 HOLT SCIENCE AND TECHNOLOGY
4. Menu Print
parents—to monitor the student’s work. Also included are sample
timelines, rubrics, and safety guidelines. For additional resources on
ideas and equipment, see pp. 28–29.
PART 1: RESOURCES FOR TEACHERS
Rules, Rules, Rules Often a school will conduct its own science
fair. The winners of the school science fair may enter a citywide sci-
ence fair, and the winners of a citywide science fair may enter a
regional science fair. Before assigning the project, consider whether
your students should prepare their science project to meet the
requirements of subsequent science fairs.
Regulations vary from science fair to science fair and even from
year to year, so it is essential to contact the science fair sponsors for
current listing of rules and regulations. Some science fairs have regis-
tration fees and cutoff dates, lists of materials that students are not
permitted to use, and requirements for reports and displays. It is
extremely important to be prepared with the necessary information
before assigning a science project.
Getting Started w
Before you begin Phase 1, complete these steps using the strategies w
that follow. w
1. create a timeline
2. send home a parent letter with a safety guide, a safety contract,
and a copy of the timeline
3. hand out Resources for Students and get students excited about
the science fair
4. send home Resources for Parents and explain how parents should
use the progress reports
1. Timelines Your first step is to create a timeline that will allow
Copyright © by Holt, Rinehart and Winston. All rights reserved.
plenty of time for students to develop a project that is suitable for
entering the chosen science fair. If students are participating in a
national science fair, their projects will be more involved, requir-
ing more teacher and parental guidance. On the next few pages,
you will find sample timelines for a 4-week schedule (page 5), an
8-week schedule (pp. 6–7), and a blank timeline (page 8) that
allows you to create a schedule tailored to your students’ needs.
Distribute this timeline to both parents and students, letting
them know in advance what their responsibilities will be.
SCHEDULING TIP
On the timeline, having Monday as a completion date for each
assignment will allow parents to help their child over the week-
end with library trips, data collection, and other parts of the
project.
2. Prepping Parents After you have notified the students of the
upcoming activity, you are ready to prepare the parents. You may
choose to send them a notice 1 or 2 weeks before you make the
first assignment. Include the timeline, which identifies the date
SCIENCE FAIR GUIDE 3
5. Menu Print
of the science fair and describes when assignments are due. Also
include the Safety Guide (page 33) and Safety Contract (page 34)
for parents to read with their child in preparation for the experi-
ment. Below is a sample letter.
You can find this letter on the One-Stop Planner CD-ROM.
Dear Parent or Guardian,
In the next few weeks, your son or daughter will begin a
science project in our science class. The science project’s
objective is to give every child hands-on experience using the
scientific method. In addition, each student will have the
opportunity to independently research a topic of his or her
interest. You can help motivate your son or daughter by
taking an interest in the project.
Your child will have an opportunity to enter his or her
science project in the science fair, which takes place on
. The emphasis of our project is not on win-
ning, but on having positive learning experiences and having
fun.
I am including with this letter a copy of a timeline for our
class projects, a safety guide, and a safety contract. Please go
over the safety guide with your child, and have him or her
return the signed contract. An information packet for parents
will be arriving shortly to keep you informed about how you
can best assist your child with his or her project. Thank you
for your help.
Sincerely,
Copyright © by Holt, Rinehart and Winston. All rights reserved.
3. Motivating Students Next, you will want to discuss with stu-
dents what a science fair is and get them excited about the event.
When you introduce the science fair, give the students their
instruction worksheets (Part 2: Resources for Students). You can
either hand out Resources for Students in its entirety or as indi-
vidual worksheets as the class begins each phase. Either way,
make sure students are aware of the due dates for their assign-
ments. Also, be certain that they clearly understand the safety
guidelines they are expected to uphold. Distribute the Student’s
Progress Reports (pp. 35–36), and explain how they will be used.
4. Request Back-up Finally, send home the parent information
packet (Part 3 of this guide) so that the parents are prepared to
help with each phase of the student’s work. Be sure to explain how
they can use the Parent’s Progress Report (pp. 65–66) to guide
their children. You will find more about how to use the progress
reports in the Evaluation section of this guide (page 9–11).
4 HOLT SCIENCE AND TECHNOLOGY
6. Menu
Copyright © by Holt, Rinehart and Winston. All rights reserved.
Timeline for a 4-Week Science Project
Print
Sunday Monday Tuesday Wednesday Thursday Friday Saturday
Week Phase 1
project Brainstorm ideas in
is assigned school and at home
over weekend
Library Develop investigative question Check progress Phase 2
research day report—end of Library research day
Week 1 Student-teacher meetings to confirm topic Phase 1
Reconfirm hypothesis
Develop hypothesis with teacher
Check progress Phase 3 In-class data
Week 2 report—end of Brief safety collection
Phase 2 reminder
In-class data Check progress Outline due In-class draft check
collection and report—end of
Week 3 analysis Phase 3 Begin written
report
Phase 4
Begin outline
Written report Check progress Phase 5 Display due
due report—end of Reminder of
Phase 4 display Oral presentation,
Week 4 requirements practice for interview Science Fair!
Check progress
report—end of
Phase 5
SCIENCE FAIR GUIDE
5
w
w
w
PART 1: RESOURCES FOR TEACHERS
7. 6
Menu
Timeline for an 8-Week Science Project
Sunday Monday Tuesday Wednesday Thursday Friday Saturday
Print
Week Phase 1
project Brainstorm ideas in
is assigned school and at home
over weekend
HOLT SCIENCE AND TECHNOLOGY
Library Develop investigative question
research day
Week 1 Student-teacher meetings to confirm topic
Develop hypothesis
Check progress Phase 2 Reconfirm
report—end of Library research hypothesis with
Week 2
Phase 1 day teacher
Library research
day
Week 3
Check progress Phase 3 In-class data
report—end of Brief safety collection
Week 4 Phase 2 reminder
Copyright © by Holt, Rinehart and Winston. All rights reserved.
8. Menu
Copyright © by Holt, Rinehart and Winston. All rights reserved.
Timeline for an 8-Week Science Project, continued
Print
Sunday Monday Tuesday Wednesday Thursday Friday Saturday
In-class data In-class
collection data collection
Week 5 and analysis
Check progress Phase 4 Outline due
report—end of Begin outline
Phase 3 Begin written
Week 6 report
In-class Writen report
Week 7 draft check due
Check progress Phase 5 Display due
report—end Reminder of
Week 8 of Phase 4 display Oral presentation,
requirements practice for interview Science Fair!
Check progress
report—end
of Phase 5
SCIENCE FAIR GUIDE
7
PART 1: RESOURCES FOR TEACHERS
w
w
w
9. Menu Print
Create Your Own Timeline
Sunday Monday Tuesday Wednesday Thursday Friday Saturday
Week
Week
Week
Week
Week
Copyright © by Holt, Rinehart and Winston. All rights reserved.
Week
Week
Week
Week
8 HOLT SCIENCE AND TECHNOLOGY
10. Menu Print
Evaluation
The science projects will likely be evaluated twice: first by you for a
PART 1: RESOURCES FOR TEACHERS
grade and second by the judges at the science fair. Setting your evalu-
ative criteria to reflect the criteria the judges hold for a competitive
project will be helpful for students who are entering the science fair.
Students can then use your evaluation to improve the project before
presenting it to the judges.
What the Judges Are Looking For
Because science fairs vary widely, it is of the utmost importance that
you familiarize yourself with the specific judging criteria of a particu-
lar science fair. Many science fairs judge entries using the following
criteria:
use of scientific thought 30%
creativity of approach 30%
thoroughness of investigation and research 15% w
w
skill of experimental technique 15%
w
clarity of expression in presentation and report 10%
OTHER CONSIDERATIONS
The following are suggestions for evaluating a student project or
predicting how a judge will evaluate a project:
• Besides assessing the five categories that appear above, some
science fairs reward memorable presentations or displays.
• A science project should have a clear hypothesis, research
plan, and conclusion.
Copyright © by Holt, Rinehart and Winston. All rights reserved.
• Many science fairs will not accept models or demonstrations,
only experiments that follow the scientific method.
• Simple library research or an unplanned experiment is not
acceptable.
• The student should design a controlled experiment.
• Judges typically evaluate projects using a rubric.
• Projects should be assessed against the other projects in the
science fair or competition, as opposed to being judged
against an ideal.
• Judges at most science fairs will be asking themselves how
they would approach the investigative question and whether
they would draw the same conclusions the student did.
• Creative use of materials should be considered.
Student Understanding The student’s work should be evident in
the project. The scientific process and the manner in which the
research was conducted tend to outweigh the actual display of infor-
mation. The judges will be looking carefully to see that the student
SCIENCE FAIR GUIDE 9
11. Menu Print
has an understanding of his or her project and is responsible for the
final product. In a group project, the judges will be looking for evi-
dence that each group member completed specified tasks that fur-
thered the progress of the group.
Tailoring Evaluation to Criteria of a Particular Fair Each
science fair differs in the types of science projects that qualify for
entry. Some strictly require that students perform experiments that
follow the scientific method rather than perform demonstrations of
scientific principles. Other science fairs accept inventions, scientific
models, engineering projects, and informative exhibits. For instance,
Invent America, a nonprofit K–8 educational program, holds a
national contest in which students can enter inventions that solve
everyday problems. The resources in this guide are tailored for experi-
mental science projects. If you choose to broaden the scope of the
projects that you accept, be sure to inform your students and their
parents.
Display Regulations
Although the display may not be an important part of your evalua-
tion, the judges will evaluate it. Rules regarding acceptable display
materials vary. Most science fairs have a long list of items that are
unacceptable for display. Restricted items can include everything
from living organisms to any chemical, including water. It is also
important to verify the parameters for displays. For example, some
science fairs limit the size of displays to 76 cm deep, 122 cm wide,
and 274 cm high, including the height of the table supporting the
display. Be sure students have the list of unacceptable display items
and the required display parameters at the time the projects are
assigned.
The Poster Session Preliminary judging sometimes includes a
Copyright © by Holt, Rinehart and Winston. All rights reserved.
“poster session” in which no electrical power is provided for the dis-
plays. The purpose of this session is to maintain the focus on the
creative and scientific aspects of the project and to decrease the
impact of a fancy display.
What to Look For
Positive Learning Many students do not feel like they can win
and therefore become discouraged about participating. Emphasize
healthy competition and a positive learning experience over simply
winning. Participating in a science fair allows a student the opportu-
nity to take charge of his or her own learning experience and to
explore something that interests him or her. To emphasize positive
learning, your evaluation can focus on the student’s use of the scien-
tific method and the amount of effort he or she put into the project
rather than the student’s ability to win a science fair.
Rubrics You may find that some students excel at developing a sci-
entifically sound experiment yet are not as talented at expressing
what they have learned. Others have good oral and written skills but
do not have a firm grasp of the scientific method. Since both the
development process and the clear expression of ideas are important
aspects of a competitive science project, it may be best to focus on
10 HOLT SCIENCE AND TECHNOLOGY
12. Menu Print
these skills in separate evaluations. For this reason, you will find
included in this guide one rubric that emphasizes the development
PART 1: RESOURCES FOR TEACHERS
process and another that emphasizes the final report and display.
You can use these together, or you may choose to develop your own
rubric using the Create Your Own Rubric found on page 14.
Additional checklists and rubrics can be found on the One-
Stop Planner CD-ROM.
Progress Reports
Many students find it difficult to keep track of all of the tasks
required in a project that lasts several weeks. To help you monitor
student progress, you will find a Teacher’s Progress Report on
pp. 15–16. You may choose to use this as a checklist to determine
whether or not a student performed each assigned task on time.
Student’s Progress Report Maintaining the Student’s Progress
Report (pp. 35–36) may help your students better understand their w
responsibilities. The Student’s Progress Report lists the tasks required w
in each phase of the science project, giving students a better under- w
standing of what the judges may be looking for as well as what you
expect of them. The Student’s Progress Report also can serve as a
handy checklist to remind students what to do next.
Parent’s Progress Report A Parent’s Progress Report is also
included in Resources for Parents on pp. 65–66. Parents may find the
progress reports useful if their child requires help with long-term
organization and keeping track of responsibilities.
Progress Reports and Evaluation You may wish to include the
results of all three progress reports in the final evaluation. This
approach will reward students who carefully planned their science
Copyright © by Holt, Rinehart and Winston. All rights reserved.
project and spent time developing each phase. Including the
progress reports in your evaluation will discourage students from
waiting until the weekend before the science fair to prepare the
entire science project. However you choose to incorporate the
progress reports into your evaluation, be sure to make both students
and parents aware of the intended use of the progress reports.
Group Projects
You may choose to let your students work in groups. If this is the
case, assign the groups before beginning Phase 1. For progress
reports, you may still want to evaluate students on an individual
basis. Making this clear at the beginning of the project may encour-
age participation from students who tend to let the others do the
work. Consult Holt Science & Technology Assessment Checklists &
Rubrics for a sample teacher evaluation of a cooperative group
activity.
SCIENCE FAIR GUIDE 11
13. Menu Print
Science Project Development Rubric
This rubric focuses on the development process (planning, research, and data collection)
of a science project.
Possible Use of Scientific Method
points (40 points possible)
40–31 Student designed an experiment with clear control and experimental
groups that effectively tested a hypothesis.
30–21 Student designed an experiment with control and experimental groups that
adequately tested a hypothesis.
20–11 Student designed an experiment with control and experimental groups that
were related indirectly to the hypothesis.
10–1 Student designed an experiment that did not effectively test a hypothesis
and had inadequate control and experimental groups.
Thoroughness of Research and Data Collection
(40 points possible)
40–31 Student thoroughly researched topic, collected data with care and preci-
sion, recorded all observations and sources in a science project journal, and
achieved a high level of detail.
30–21 Student researched topic well, collected data with care but lack of preci-
sion, recorded most observations and sources in a science project journal,
and achieved moderate detail.
20–11 Student adequately researched topic, collected data imprecisely, made a
Copyright © by Holt, Rinehart and Winston. All rights reserved.
fair attempt to record observations and sources in a science project journal,
and achieved average detail.
10–1 Student poorly researched topic, collected data inappropriately, and made
a poor attempt to record observations and sources in a science project jour-
nal; research lacked detail.
Originality of Approach and Use of Equipment
(20 points possible)
20–16 Student adopted an original, resourceful, and novel approach and had
creative design and use of equipment.
15–11 Student extended standard approach and use of equipment and exercised
moderate creativity.
10–6 Student employed standard approach and use of equipment and exercised
little creativity.
5–1 Student used equipment and topic in an ineffective and unimaginative way.
12 HOLT SCIENCE AND TECHNOLOGY
14. Menu Print
Science Project Presentation Rubric
This rubric focuses on the final written report and display of a science project.
PART 1: RESOURCES FOR TEACHERS
Possible Understanding and Scientific Thought
points (40 points possible)
40–31 Student completely understands the topic and uses scientific terminology
properly and effectively.
30–21 Student demonstrates solid understanding of the topic and adequate use of
scientific terminology.
20–11 Student displays insufficient understanding of the topic and uses very little
scientific terminology.
10–1 Student lacks understanding of the topic and incorrectly uses scientific
terminology.
w
Quality of Oral/Written Presentation w
(32 points possible) w
32–25 Student exhibits an original, resourceful, and novel approach to presenta-
tion of topic; paper is creatively and clearly written.
24–17 Student presents topic with standard approach; writing is unimaginative
but effectively gets point across.
16–9 Student’s presentation of topic is incomplete and unimaginative; writing
lacks clarity.
8–1 Student’s presentation of topic is ineffective and lacks cohesion; paper lacks
Copyright © by Holt, Rinehart and Winston. All rights reserved.
clarity and is poorly written.
Effectiveness of Exhibit or Display
(28 points possible)
28–22 Layout is logical and imaginative and can be followed easily; student dis-
plays creative use of materials.
21–15 Layout of exhibit is acceptable; student demonstrates proper use of materials.
14–8 Layout lacks organization; student exhibits poor but effective use of materials.
7–1 Layout is difficult to understand; student uses materials poorly and
ineffectively.
SCIENCE FAIR GUIDE 13
15. Menu Print
Create Your Own Rubric
Possible
points Criteria
Copyright © by Holt, Rinehart and Winston. All rights reserved.
14 HOLT SCIENCE AND TECHNOLOGY
16. Menu Print
Name ____________________________________________________ Date __________________ Class _______________
Teacher’s Progress Report
❑ individual project ❑ team member
For each step of each phase of the science project, record the task due date and the date
the student accomplished the task.
Date Date
Phase 1—Generating an Idea due accomplished
Student brainstormed five possible subjects.
Student came up with two investigative questions for each
topic.
Student consulted with teacher and parents about project
possibilities.
Student chose a suitable topic.
Student formed a hypothesis.
Student discussed topic and hypothesis with teacher and
gained approval.
Student recorded ideas in science project journal.
Date Date
Phase 2—Research and Planning due accomplished
Student researched the hypothesis.
Copyright © by Holt, Rinehart and Winston. All rights reserved.
Student reconfirmed or changed the hypothesis based
on further research and then gained teacher approval.
Student contacted all appropriate people before
beginning data collection.
Student recorded all details of research so far in a
bibliography in the science project journal.
Student filled out the Procedural Plan for Action and
obtained necessary signatures.
Student developed the initial plan for display materials.
Teacher comments:
SCIENCE FAIR GUIDE 15
17. Menu Print
Name ____________________________________________________ Date __________________ Class _______________
Teacher’s Progress Report, continued
Date Date
Phase 3—Data Collection and Analysis due accomplished
Student conducted the experiment safely.
Student chose an appropriate sample size.
Student performed several trials of his or her experiment.
Student collected data accurately.
Student recorded all data and observations in the science
project journal.
Student graphed or charted data and looked for trends.
Student prepared a written conclusion supported by the
data.
Date Date
Phase 4—Writing a Report due accomplished
Student answered the questions on page 55.
Student prepared an outline and discussed it with the
teacher.
Student prepared a draft and discussed it with the teacher.
Copyright © by Holt, Rinehart and Winston. All rights reserved.
Student revised the draft according to the teacher’s
feedback.
Student turned in the final draft of the written report.
Date Date
Phase 5—Creating and Exhibiting a Display due accomplished
Student sketched possible designs for display.
Student created a display board within the appropriate
parameters.
Student displayed the results in a clear and interesting
manner.
Student gave an oral presentation as practice for the
science fair interview.
16 HOLT SCIENCE AND TECHNOLOGY
18. Menu Print
Phase 1—Generating an Idea:
Management Tips
PART 1: RESOURCES FOR TEACHERS
DURING THIS PHASE, STUDENTS WILL
1. brainstorm five possible subjects
2. come up with two investigative questions per topic
3. consult with teacher and parents about project possibilities
4. choose a suitable topic and investigative question
5. form a hypothesis
6. discuss topic and hypothesis with the teacher and gain
approval
7. record ideas in their science project journal
w
Begin by distributing the Phase 1 packet to students and parents. w
Check the timeline and schedule library visits and individual meet- w
ings with students.
TIP
Throughout the course of the project, and especially during the
beginning stages, emphasize that one of the main goals of the
project is to have fun. Healthy competition can be exciting,
but the purpose of a science project is to learn about science
through inquiry in a hands-on experiment.
Copyright © by Holt, Rinehart and Winston. All rights reserved.
The Journal: An Important Tool Resources for Students
periodically reminds students to enter information in their
science project journals. Students will need their science
project journals as soon as they begin Phase 1. They may use a spiral
bound notebook, or they may choose to make a journal by stapling
together ruled paper or graph paper.
Explain to students that this journal is an important tool that they
will use in every phase of the science project. For instance, they
will write in their journal all of the notes that they take while brain-
storming and researching. They will also record all data, observations,
and calculations in their journals. This way all of the information
needed for writing a report and preparing a display will be in one
place. For group projects, every team member must keep a science
project journal containing their notes and data.
SCIENCE FAIR GUIDE 17
19. Menu Print
Brainstorming for Topics
Students often find that coming up with a suitable idea is the most
challenging part of a project. Encourage students to brainstorm and
to be creative. Trying to come up with new ideas can be difficult
and sometimes embarrassing for sensitive students. Make sure they
feel free to record any idea, no matter how odd it seems at first.
Familiarize yourself with the students’ packets to help them. If you
know of a subject that a student is particularly interested in, offer
ideas related to that topic.
Caution: Be careful not to take over the brainstorming process for stu-
dents. Avoid assigning topics. Unless a student finds something that
interests him or her, he or she may have a difficult time putting
forth the effort necessary to complete a project.
Suggesting Ideas For students who have trouble coming up with
science project topics, try the following:
• Provide your students with a list of projects that previous stu-
dents have successfully completed.
• You may also decide to list some projects that did not work out
as planned. Explain why the projects were unsuccessful (too
involved, too expensive, not enough time, etc.).
• Holt Science & Technology Long-Term Projects & Research Ideas con-
tains several ideas that may be developed into science projects.
• Resources for Students mentions several topics for science
projects.
• The Additional Resources section of this booklet also provides a
list of books with ideas for science projects (see pp. 28–29).
Forming Investigative Questions
Copyright © by Holt, Rinehart and Winston. All rights reserved.
Require that all students generate at least two investigative questions
for each of five topics. If they have 10 investigative questions to
choose from, chances are good that they will be able to settle on a
viable investigative question.
TIP
The timelines and Resources for Students suggest a library trip
early in Phase 1, after a student has brainstormed for topics.
Before or during the scheduled library trips, brief students on
how to use library resources.
Strengthening Research Skills For students who require addi-
tional help with researching topics, use the following worksheets
from Holt Science & Technology Science Skills Worksheets:
• Worksheet 17: Organizing Your Research
• Worksheet 18: Finding Useful Sources
• Worksheet 19: Researching on the Web
18 HOLT SCIENCE AND TECHNOLOGY
20. Menu Print
The Teacher-Student Meetings
This is the best time to meet with students individually to ensure
PART 1: RESOURCES FOR TEACHERS
that they are on the right track. Discuss their project options, and
help them decide which investigative question they will choose.
Steer them away from projects that would exceed a reasonable
budget or projects that may risk disqualification. During the meet-
ings, it would be helpful for you to have a copy of the science fair
rules handy to point out problems that may make a particular proj-
ect difficult. For example, many science fairs prohibit the display of
chemicals. A student may be allowed to perform a supervised proce-
dure with chemicals during the data collection phase of the project,
but the rules prohibiting chemicals would limit the display.
Forming a Hypothesis
When students have chosen their topics, it is time for them to form
a hypothesis. Having researched their topic thoroughly, students are
now able to make an educated guess that answers their investigative
question. Make sure students understand the scientific method. w
Emphasize that they will not design an experiment in order to yield w
results that support the hypothesis they have formed. Instead, they w
will design an experiment to test the hypothesis. There is often great
pressure to be right about the hypothesis, but that is not the point of
a science project. The purpose is to discover whether the hypothesis
is supported or disproved by the experimental results. The quality of
the project is independent of the accuracy of the hypothesis.
At the end of Phase 1, make sure you are still following the
timeline. Check students’ progress on their Student’s Progress Report
and Parent’s Progress Report.
Copyright © by Holt, Rinehart and Winston. All rights reserved.
SCIENCE FAIR GUIDE 19
21. Menu Print
Phase 2—Research and Planning:
Management Tips
DURING THIS PHASE, STUDENTS WILL
1. research the hypothesis
2. change or reconfirm the hypothesis with the teacher
3. contact all appropriate people
4. record all research sources in their science project journal
5. fill out the Procedural Plan for Action and obtain signatures
6. develop the initial plan for display materials
Research
You may feel it is necessary to give students a further lesson on
Internet research or library research. The library may have a list of
useful sources that students can refer to while planning their experi-
ments. You may wish to meet with the librarian to discuss what the
students will be researching so that he or she can prepare for the
class visit. Also, Additional Resources (page 29) provides a list that
includes books about developing science projects. Remind students
to record all research in their science project journals.
Students may wish to obtain information using other methods,
such as seeking an interview with a scientist or writing a letter to a
company. Encourage students to contact all sources early in Phase 2
in order to allow plenty of time for a response. The student packet
includes a sample letter for students who wish to contact someone
about information needed for their science project.
Copyright © by Holt, Rinehart and Winston. All rights reserved.
Bibliography Make sure students are familiar with the style of
bibliography that you require. Resources for Students encourages stu-
dents to record all sources used, including interviews, in their sci-
ence project journals. Recording all sources during the research
phase will give students a head start on the bibliographies that they
will need for the written report and the display.
Procedural Plan
Students will plan how they are going to test their investigative
questions. Their packets include a brief discussion of control groups
versus experimental groups and dependent variables versus inde-
pendent variables. You may want to discuss these terms further in
class. Once each student has an idea of how to scientifically test
his or her hypothesis, you may require students to fill out the
Procedural Plan for Action (page 47) and the Task List (page 48).
Caution: Watch for projects that will require too much time, money,
or effort. Now is the time for the student to determine whether the
procedural plan for an experiment exceeds budget or time limits. At
this point, it would not be too late for a student to choose a differ-
ent topic. However, changing a project any later than this stage may
pose a problem in meeting the deadlines on the timeline.
20 HOLT SCIENCE AND TECHNOLOGY
22. Menu Print
Obtaining Equipment and Materials
Cutting Costs Remind students to keep cost and availability of
PART 1: RESOURCES FOR TEACHERS
materials in mind when planning a project. Some ideas require more
resources than are available within a limited budget. Not all expen-
sive ideas need to be discarded. Encourage students to come up with
less expensive ways to conduct their experiment or ways to perform
a similar yet less costly experiment within the chosen topic. For
prices and availability of materials, provide students with a list of
local businesses that carry scientific and laboratory supplies (see
page 28).
After students have chosen a hypothesis and planned their proj-
ect, it is important to anticipate costs. When preparing a budget, a
student should consider the following expenses:
• Science fair entry fee
• Science fair travel expenses
• Library trips
• Book purchases w
w
• Journal purchase w
• Materials necessary for experimentation
• Materials necessary for display
Creativity Counts Judges often take creative use of materials into
account when judging a science fair; a student who has built a
barometer will likely be recognized as more motivated than a stu-
dent who purchased one. In other words, high-dollar projects will
not be recognized as better just because they employ fancier equip-
ment. The library and Internet may provide resources with sugges-
tions on how to make equipment using inexpensive materials.
Copyright © by Holt, Rinehart and Winston. All rights reserved.
Outside Sponsors Also, many businesses and institutions will lend
equipment to young scientists. Encourage your students to write
to such businesses for help in obtaining expensive equipment or
materials for their science projects. Be sure that the schedule allows
enough time for students to receive a response. (This approach to
procuring equipment works best with an 8-week timeline.)
MONEY-RAISING IDEAS
The following are a few ideas for raising funds to help defray science project expenses:
• A local business may be willing to act as a monetary sponsor in exchange for an
advertisement at the event or in the event program.
• Schools participating in science fairs may hold raffles to raise money for projects.
• Parents may be willing to donate materials (or time) to support the science fair.
At the end of Phase 2, make sure you are still following the
timeline. Check students’ progress on their Student’s Progress Report
and Parent’s Progress Report.
SCIENCE FAIR GUIDE 21
23. Menu Print
Phase 3—Data Collection and Analysis:
Management Tips
DURING THIS PHASE, STUDENTS WILL
1. conduct experiments safely
2. choose an appropriate sample size
3. perform several trials of the experiment
4. collect data accurately
5. record all data and observations in their science project
journal
6. graph or chart the data and look for trends
7. prepare a written conclusion supported by the data
Safety First! Safety is of particular concern during the data collec-
tion phase. The timelines allow one class period for a brief review of
safety before students begin collecting data. The in-class data collec-
tion days give you a chance to supervise safety. Remind students to
have an adult supervise all data collection at home.
In-Class Data Collection
The following tips may be helpful during in-class data collection:
• Take a moment in class to review the difference between quali-
tative data and quantitative data. Go over with your students
the kinds of projects that call for each type of data.
• Make sure that students understand the importance of using an
Copyright © by Holt, Rinehart and Winston. All rights reserved.
adequate sample size, as discussed in Resources for Students on
page 50.
• Explain that in order for data to be valid, a researcher must per-
form several trials of an experiment.
• Watch to see that students measure accurately. (You may choose
to distribute the SI Unit Conversion Chart on page 30.)
• Check students’ science project journals to make sure that they
keep a neat record of all aspects of the project.
• If a student’s project does not lend itself to collecting data in
class, ask the student to bring in a book he or she is reading for
continued research so that class time will be used effectively.
• Students who have collected all the data they need can use the
in-class data collection days to work on analyzing the data.
22 HOLT SCIENCE AND TECHNOLOGY
24. Menu Print
Strengthening Data Collection Skills For students who require
additional help with data collection, use the following worksheets
from Holt Science & Technology Science Skills Worksheets:
PART 1: RESOURCES FOR TEACHERS
• Worksheet 14: Using the International System of Units (SI)
• Worksheet 15: Measuring
• Worksheet 23: Science Drawing
Analysis and Conclusions
Analysis When students have finished collecting data and making
observations, they can begin the analysis. As part of the analysis, stu-
dents will make charts and graphs in their science project journals.
Page 54 includes a sheet of graph paper that can be used for graph-
ing purposes. Resources for Students discusses graphing, which you
may want to review in class, along with a brief lesson on useful
mathematical terms, such as median and mean. Instruct students to
examine the charts and graphs for trends and record these trends
and all calculations in their journal. w
w
Strengthening Graphing and Analysis Skills For students w
who require additional help with graphing and analysis, use the fol-
lowing worksheets from Holt Science & Technology Science Skills
Worksheets:
• Worksheet 25: Introduction to Graphs
• Worksheet 26: Grasping Graphing
• Worksheet 27: Interpreting Your Data
• Worksheet 28: Recognizing Bias in Graphs
• Worksheet 29: Making Data Meaningful
Copyright © by Holt, Rinehart and Winston. All rights reserved.
Conclusions In the conclusion, students will determine whether
the results support or disprove the hypothesis. Discourage students
from simply writing opinions in the conclusion. Instead have stu-
dents discuss factors that contributed to the results and explain how
they would control these factors if the experiment were performed
again.
At the end of Phase 3, make sure you are still following the
timeline. Check students’ progress on their Student’s Progress Report
and Parent’s Progress Report.
SCIENCE FAIR GUIDE 23
25. Menu Print
Phase 4—Writing a Report: Management
Tips
DURING THIS PHASE, STUDENTS WILL
1. answer the questions on page 55
2. prepare an outline and discuss it with the teacher
3. prepare a draft and discuss it with the teacher
4. revise the draft according to the teacher’s feedback
5. turn in a completed draft
Assigning a Written Report If the science fair you are entering
requires a written report, you will need to share the particulars (how
long it should be, whether it must be typed, etc.) with your students
and their parents. Not all science fairs require a written report, but a
paper gives students the chance to express what about the project
meant the most to them and to organize their thoughts for an oral
presentation. It is also a very important part of any scientific
endeavor.
Having Fun Have your students use the italicized questions on
page 55 of Resources for Students as a guideline for writing their
reports. By asking students to answer questions about their personal
experiences with the emphasis on what they enjoyed about doing a
science project, you can reinforce that the science fair can be fun.
The more fun they have writing the report, the easier it will be to
complete and the more interesting it will be to read.
Writing Tips
Copyright © by Holt, Rinehart and Winston. All rights reserved.
Use the following tips to help students with writing:
• Require students to first write an outline for the written report.
You may need to review the outlining process in class.
• Explain how index cards that are grouped together by subject
can be helpful in writing a paper.
• Written reports can greatly improve when students write
more than one draft. You may wish to add more drafts to
the timeline.
Strengthening Writing Skills For students who require addi-
tional help with science writing, use Worksheet 22: Science Writing
from Holt Science & Technology Science Skills Worksheets.
24 HOLT SCIENCE AND TECHNOLOGY
26. Menu Print
Feedback and Assessment
Giving feedback to a student need not be difficult. The following tips
PART 1: RESOURCES FOR TEACHERS
may help:
• Try to mention both the strong and weak points of a draft.
• Encourage students to do several drafts, if needed, and to ask an
adult to read each one.
• Peer editing may be helpful and will give students a chance to
see how their friends are handling similar problems.
• When assessing a written report, be aware that students’ differ-
ent writing abilities can affect the overall quality of presenta-
tion. Try not to let that overshadow the quality of the scientific
content.
At the end of Phase 4, make sure you are still following the
timeline. Check students’ progress on their Student’s Progress Report
and Parent’s Progress Report. w
w
w
Copyright © by Holt, Rinehart and Winston. All rights reserved.
SCIENCE FAIR GUIDE 25
27. Menu Print
Phase 5—Creating and Exhibiting a
Display: Management Tips
DURING THIS PHASE, STUDENTS WILL
1. sketch possible designs for the display
2. create a display board within the appropriate parameters
3. display results in a clear and interesting manner
4. give an oral presentation as practice for the science fair
interview
The Display Board
A typical display is a trifold board made from corrugated cardboard,
foam core, or corkboard. Impress upon students the importance of
measuring the display board more than once to ensure that it fits the
size constraints of the science fair. Many science fairs require that
the display be no more than 274 cm tall, 122 cm wide, and 76 cm
deep. Having an oversized display can disqualify the entire project,
no matter the quality of the work. Be aware that certain materials are
often prohibited in the display area.
A Sample Display You may want to set up a successful sample dis-
play in your classroom. Students can study the sample display up
close, noticing the neatness of the lettering, the layout of the dis-
play, and the type of information contained in each section. Show
students how a display board can have a large middle section and
two smaller “wings” on the left and right that can fold up, making a
display more portable.
Copyright © by Holt, Rinehart and Winston. All rights reserved.
Is the Data Clearly Presented and Relevant?
You may decide to have conferences with students about the data
that they plan to present. Check charts and graphs for accuracy and
readability. Make sure that the information shown in the figures is
relevant to the purpose, hypothesis, and conclusion. The purpose of
a display is to present the information in the clearest manner possi-
ble so that the judges will be able to recognize quickly that the stu-
dent performed a successful science project.
Display Design Although the display introduces the project, the
design should not distract from the content. Encourage students to
be creative with borders, font, and layout but not to the point that a
judge would find it difficult to read the information contained in
the display. Illustrations should be informative, not just decorative.
A sleek, mature, and professional style can impress the judges, but
they prefer presentations which are unique and are clearly a product
of the student who created it.
26 HOLT SCIENCE AND TECHNOLOGY