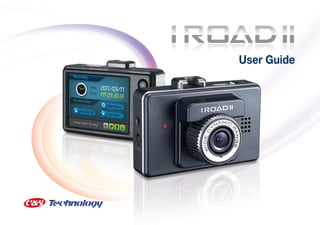
2. ■ This product is a car video recorder which is installed in a car to record video, GPS information
(only for GPS-supporting model), and voices so that car accidents can be fully understood.
■ This manual contains user guide and precautions. Please be sure to read this manual before use.
■ Product specifications and components can be changed without prior notice for performance
improvement. Visit our website to download the latest software and user manual.
Thank you.
Web site http://www.cnstec.com
Customer center 82.2.3015.1478(Sales, Technology, A/S)
Open Mon ~ Fri, 9 am ~ 6 pm
3. Warranty Scope and Responsibility
■ This product is intended to automatically record video and audio in case of a car accident. We do not
warrant that the whole accident will be recorded.
■ This product is a supplementary device that helps to understand a car accident. We do not take
responsibility for damage, video and data loss caused by the product failure; damage caused by loss
of recorded data; and other damage arising during the use of this product.
■ We do not bear any expenses related to insurance or other accident handling costs. However,
if people are injured or objects are damaged due to our product, they can be covered by our PL
insurance.
■ While a vehicle is traveling, data is recorded into “normal file (normal situation)” and “event file
(accident or shock)” which is recorded by the G-Sensor when a shock exceeds the user’s setting.
As the oldest file is overwritten when data is saved, if you want to save data, you have to back up
data on the PC or other storage devices. At the same time, as the number of supported event files is
limited and the oldest file is overwritten when the maximum number of event is exceeded, you should
save important files on the PC or other storage devices.
■ While a vehicle is parked, if there is no movement or change in light for a certain period of time, data
recording stops. If a movement or change in light is detected, data recording starts again.
■ Intentionally or unintentionally, videos and audios regarding your privacy can be recorded on the
memory card of this product. They can cause legally critical problems. You will be fully accountable
for disclosing, transferring, distributing or using data saved on the memory.
■ This product is a car video recorder. Other than its purpose, do not use the product in a way that
violates ethics, morals, customs and laws. We do not take any responsibility for such uses.
4. Contents
Precautions 05 Firmware Upgrade 24
Components 08 Windows Viewer 25
Product Information 09 1. Installation Guide
2. Basic Configuration
Product Specification 10 3. Play Video
Installation Procedure 11 4. Setting
Cautions for Installation 12 FAQ 28
Directions 13 Warranty 30
Starting mode-Recording
Main Menu
1. Play Video
2. Sound Option
3. Device Information
4. Card Format
5. Time Option
6. Language
7. Video Option
5. Precautions
Be sure to read the following for correct use and safe driving.
Time Setting
When the product is delivered to you, the time is not set. After purchasing the product, set the time.
However, the GPS-supporting models do not need time setting as their time is automatically set.
Always Automatic Saving
Basically, this product always automatically record data. Its recording time depends on card capacity,
recording environments and parking modes.
Error Message on the LCD Screen
If there is a problem in the memory card, trouble occurs while the memory card is inserted, or there is no
memory card, the error message is displayed on the LCD screen and audio guidance is provided. Follow
introductions to clear errors, and then use the product.
Power Supply
The product is designed to work on DC12~24V. Be sure to use the power cable supplied by us. In
principle, we do not take any responsibility for problems caused by using other power cables.
Start-up Time
Precautions
After the vehicle starts, for 10 - 20 seconds, the product does not record. During this time, power is
being stabilized.
Operation after Power Shutdown
Even when power is shut down, this product can record 3 - 5 seconds. However, the LCD is off as soon
as power is off.
05
6. LCD Safety Mode according to Operation Environments
One minute after video recording starts or if product’ internal temperature rises above 60℃, the LCD is
s
automatically off for stable operation. When product’ internal temperature goes down to 60℃ or less,
s
if the user presses the button, the LCD is on. For safe driving, drive with the LCD off.
Parking Mode (Motion Detection)
This product supports the constant power supply and parking mode (motion detection). However, the
constant power supply unit is sold separately.
Constant Power Supply
This product supports the constant power supply. However, when the constant power supply is used,
the memory card’s lifespan can be reduced and vehicle batteries can be discharged.
Memory Card Handling
❶ The memory card supplied with the product contains information for fast data saving and reliability.
However, if you use the other memory card than the one supplied with the product, its performance
cannot be guaranteed and we do not take any responsibility for damages caused by such use.
❷ If the memory card is used for a long time, it may not save data. If you cannot save videos, replace
the memory card.
Precautions
❸ Use “Copy” to save recorded videos on your PC. If you use “Cut”, there can be a problem with the
number of files saved on the memory card, and video recording may not be available.
❹ If you “Rename” or “Cut” files on the memory card, the product may malfunction. Also, never store
anything on the memory card other than data created by the product.
❺ Do not use the memory card for other devices such as the navigation, digital camera, MP3 player,
PMP, cellular phone or electronic dictionary.
06
7. Smoke or Smell of Burning
If you sense a smoke or smell of burning, shut down power supply immediately. Due to risk of fire and
electric shock, remove the power cable from the body and contact us or dealer.
Camera Adjustment During Driving
Adjust the camera while your vehicle is safely parked as it is risky to relocate the product or adjust the
camera angle while driving the vehicle.
Audio Recording
When the product is delivered, audio recording is not set. However, you can set it on. Turn on the MIC
button. Even if power is shut down, the user setting is not deleted.
Precautions
07
8. Components
Basic Components
Black-Box Cradle Memory Card Micro SD Card Cable Clips
Reader
Additional Components to sale
Components
User Guide Power Cable Constant Power supply cable
08
9. Product Information
ESC / Go to the upper menu
LCD
Go UP / Mic
Menu LED Select the MENU/ENTER
Blink in normal operation
Go DOWN / VIEW
Settler for Cradle
Security LED
Turned on in general video mode
Blink in detecting motion Speaker
Camera Lens
Product Information
TV-Out(EXT)
MIC
DCIN
Insertion for memory
09
10. Product Specification
The specification of this product may be changed for better performance
without prior notice.
Items Details
3˝ 1.9˝ 1.5˝(7.5cm × 4.8cm × 3.8cm) /
× ×
Size / Weight
65grams(Main body), 22grams(Mounting bracket)
1 Channel, 1/3 inch WDR Digital CMOS sensor, VGA (640 × 480),
CAMERA
Max 30 Frame(Auto Frame), View Angle : 67o(V) × 92o(H) × 122o(D)
Video Compression MPEG 4
LCD 2.4 inch
Motion Detection Fuzzy Algorithm
GPS or RTC Internal GPS (iRoad ll-G11) or RTC (iRoad ll-R11)
Product Specification
G-Sensor 3D, Internal G-Sensor
Data Storage micro SD(2GB), micro SDHC Card(4GB ~16GB)
Recording Continuous Rec., Events Rec., Motion Detection
Cradle L / R 90o, Up / Down 130o
Audio / TV-output Built-In mike(On/Off), Built-In Speaker, TV output (NTSC / PAL)
Button ESC, UP(MIC), ENTER(MENU), DOWN(VIEW)
LED 2LED : Red LED(in ENTER key), Security LED
Operating Temperature -20 ~ +80℃
Power DC 12 ~ 24V, Power Cable , Compatible with all vehicles
10
11. Installation Procedure
❶ Insert the memory card to the body, and then close the door. If the
door is not closed fully, videos are not saved. When the product is
delivered, the memory card is installed.
❷ Connect the body to the mount. Remove the lens protection film,
LCD protection film and mount sticker. Install the mount to the
desired location.
❸ Connect the power cable and arrange the cable with the cable clip.
Installation Procedure
❹ When you start the vehicle, video recording starts automatically.
(Red LED blinks in the ENTER / MENU key [ ] .)
11
12. Cautions for Installation
Be sure to read the following for safe installation.
■ For your safety, while the vehicle is off and parked on the flat ground in the bright environment,
install the product in a way that it does not blind the driver. The product cannot be installed on the
outside of the vehicle.
■ Clean the surface where the mount will be attached.
■ Do not touch the cable with wet hands or do not damage the cable. This may result in a fire or
electric shock.
■ Install the camera in the traveling direction of the vehicle. Do not have coating block the camera.
Videos will be unclear or distorted.
■ Keep a distance from the radio device and reception antenna inside the vehicle.
■ Do not drop the product or apply a shock to the product.
Cautions for Installation
■ Do not make the product contact chemicals such as alcohol, benzene, thinner or cleaning agents.
This may result in surface deformation, inner part damage or fire.
■ Do not leave the product at extremely low or high temperatures. If the product is left for a long time in
such conditions during summer or winter, this may cause deformation or failure. Under such
conditions, store the product separately.
Never disassemble or modify the product. The disassembled or modified product may not function
properly and cannot be covered by the warranty.
12
13. Directions
Starting mode - Recording
After the product is booted, this Recording menu is displayed on the LCD at first.
If you can see this menu, the product is already recording your driving scene.
If you want to stop recording and to go to main menu,
press the ENTER key [ ] .
In this menu, there are two controllable function.
press the UP key [ ] to turn on or off the microphone.
press the DOWN key [ ] to view the current video on the LCD.
GPS Reception
Speaker On/ Off
MIC On /Off
Date and Time
Directions
Drive/ Parking Mode
There are four status indicator of the product about GPS, Speaker, MIC and Recording modes.
For the iRoad ll-G11 with GPS module, it indicate a status of GPS.
For the iRoad ll-R11 without GPS module, it don’t indicate a status of GPS.
13
14. ✽Button Information
There are four buttons in this device. All buttons except ESC have bi-function.
For example, pressing UP key [ ] have function to go up from current highlight and
can turn on or off the microphone in the recording menu.
ESC : EXIT
ESC Press this key to go to the upper menu.
UP : Press this key to go up.
UP / MIC MIC : In the recording mode, press this button to turn on or off
the microphone.
ENTER/ MENU ENTER : Press this key to enter the selected menu.
MENU : In the recording mode, press this key to stop recording and
enter the menu.
DOWN : Press this key to go down.
DOWN /VIEW VIEW : Press this key to view the current video on the LCD.
Directions
Press the View button to move the screen in the following order:
Full Center Top Left Top Right Bottom Left Bottom Right.
Play the External Video : In the view mode, press the Menu button to
play the external video.
14
15. Main Menu
If the product is operated normally, it’s possible to use or configure various menus.
Main menu is consist of 7-sub menus. It is listed as follows.
Play Video
It have driving recorded files and you can play and see it.
Sound Option
You can select recording type, speaker volume and voice notice.
Device Information
You can check a firmware version of device, coordinates from
GPS and can configure the format of external out for outer display.
Card Format
You can format micro-SD memory card.
Time Option
You can select Region, Summer Time and adjust time.
Language
This device is two option(menu language and voice notice) to select language.
Directions
This device is supported seven different languages in menu text and four different languages in
voice notice.
Video Option
You can configure Brightness, Impact Sensitivity and Parking mode.
If there is no user activity in all menu for one minute, it automatically switches to the save mode.
15
16. Play Video
When Play Video is green in the main menu, press the
ENTER key [ ] to show the recorded video list.
In this menu, you can check recorded driving videos.
When the File that you want to see is green in this menu,
press the ENTER key [ ] to play recorded video.
✽File Name Information
Current File / Total Files
e.g. 2/22 : 2nd file out of 22 files
Directions
13-VIDEO.ASF 2012/06/25 10:25:34
Impact event File name Recording date
icon and time
16
17. Sound Option
When Sound Option is green in the main menu, press
the ENTER key [ ] to show the menu lists for sound setting.
In Sound Option, use the UP /DOWN key [ / ] to select one
out of Recording Type, Speaker Volume and Voice Notice.
Then press the ENTER key [ ] to change settings.
Format
•You can decide to record both video and audio or video only.
Speaker Volume
•You can adjust speaker volume.
Voice Notice : The voice notice is given for eight events. .
•If you use voice notice, you can select one of four different languages in Language Setting menu.
(Available Languages : Korean / English / Japanese / Chinese - Simplified / Traditional)
Directions
17
18. Device Information
When Device Information is green in the main menu, press the
ENTER key [ ] to show the menu lists of device information.
Use the UP/ DOWN key [ / ] to select Version, GPS or Ext.OUT.
Then press the ENTER key [ ] to change device settings.
Version
•You can check the current firmware version of the product.
•If your firmware version is older, download the latest one from
our website and update your product.
GPS
•For the iRoad ll-G11 with the GPS module, coordinates
from the GPS are displayed.
•For the iRoad ll-R11 without the GPS module, coordinates are not
displayed.
EXT.OUT
Directions
•Select NTSC or PAL to see the product’s GUI via the external device.
•Output to the external device : In the Recording Menu, press the DOWN key [ ] to go to the
view mode, and then press the ENTER key [ ]. When the LCD is off, information is displayed on the
external device.
•Specification for the external device : 2.5∏ Mono
※ Purchase the video output cable separately as the input terminal differs by product.
18
19. Card Format
When Card Format is green in the main menu, press the
ENTER key [ ] to show memory card information.
Memory Card Format
If there is any problem in the memory card supplied with the
product or the memory card should be reinstalled for some
reasons, you should format the memory card. However, for any
problem caused by not using the memory card supplied with
this product, we do not take any responsibility.
In the Card Format menu, press the ENTER key [ ] .
Then, the following message appears. “All files will be lost.
Do you want to continue?” If you want to format the memory card,
press the ENTER key [ ] .
If not, press the ESC key [ ] .
Directions
•Once you format the memory card, all saved files will be lost. You must make sure to Back-up
important files before formatting.
•Card formatting time and number of files depend on card capacity.
(No. of files : 45 for 2GB, 60 for 4GB, 90 for 8GB, 96 for 16GB)
•Be sure to format the memory card after updating firmware.
•You can format the memory card with our PC playback program.
19
20. Time Option
Model with GPS(iRoad ll-G11)
When Time Option is green in the main menu, press the
ENTER key [ ] to show the menu lists for time setting.
Use the UP/ DOWN key [ / ] to select Region or Summer Time.
Then press the ENTER key [ ] to change time settings.
Region
•Select one out of 141 regions to set correct time in the time zone.
Summer Time GPS built-in model
•You can set summer time for your region. (iRoad ll-G11)
As for the product with GPS module installed, time is
automatically set without your intervention.
Model without GPS(iRoad ll-R11)
Directions
When Time Option is green in the main menu, press the ENTER key [ ] to show the menu lists for
time setting.
Use the UP/ DOWN key [ / ] to select Region or adjust Time. Then press the ENTER key [ ] to
change time settings.
Region
•Select one out of 141 regions to set correct time in the time zone.
20
21. Adjust Time
•You can set time.
In case of iRoad-II-R11 model, after purchasing the product,
you should set time by yourself.
In case of No GPS model
(iRoad ll-R11)
If you entered this menu, you can configure your time by
using UP/ DOWN key [ / ] to select one of menus.
(Year, Month, Date, Hour, Min, Sec)
Directions
After time is set, press the ENTER key [ ] to save time
settings.
21
22. Language
When Language is green in the main menu, press the
ENTER key [ ] to show the menu lists for language setting.
Use the UP/ DOWN key [ / ] to select Menu text or Voice
notice language. Then press the ENTER key [ ] to change setting.
Menu text
•Select one out of seven different languages to set. If you
select a language, all texts of menu is changed to it.
Voice notice
•Select one out of four different languages to set. If you
select a language, all voice notice is changed to it.
※ If you want to set voice notice to use or not, you set in
Sound Setting menu. Refer to 2. Sound Setting.
Video Option
Directions
When Video Option is green in the main menu, press the
ENTER key [ ] to show the menu lists for video setting.
In Video Option, use the UP/ DOWN key [ / ] to go to the
Park mode /G-Level /Brightness.
22
23. Parking Mode : Off, 10 Min., 20 Min., or 30 Min. can be selected.
•On the Recording menu, the parking icon [ ] appears.
•Parking Mode Setting and Description (e.g. when 10 Min. is selected)
❶ During 10 minutes after the vehicle is parked, if any movement is not detected, the parking
mode starts.
❷ When a movement is detected, the general video is recorded for 20 seconds. If a movement
is still detected after 20seconds, the general video is recorded for additional 40seconds.
❸ When a movement disappears, it is switched to the parking mode in 10 minutes.
G-Level : You can control Impact Sensitivity.
Brightness : You can control LCD brightness.
✽Video modes : Three types of video are available.
•General : If the impact is lower than the specified level, the video is automatically recorded as
general one in the format of VGA (640x480) 30fps after the product is switched on.
•Event : The video is recorded only when the impact is higher than the specified level.
The file has an event mark in front of its name.
•Parking : Off, 10 Min., 20 Min., or 30 Min. can be selected for the parking mode. In this mode,
the video is recorded as the parking one only if the camera lens is detected movement or change in
Directions
contrast for the selected time period. FPS is the same as that of the general video.
• In the parking mode, power must be supplied continuously.
• If ambient brightness or external movement is not strong, motion detection may not work.
23
24. Firmware Upgrade
After download the latest F/W, copy it to micro SD Card.
And you should insert micro SD card to the product and
connect power.
❶ Download the latest F/W for each model from our website.
❷ Decompress the file on the display.
❸ Copy sel5upg.slm in the decompressed folder.
❹ Insert the SD card to the computer, open the black box drive,
and paste mbs7upg.slm next to Myvideo.
❺ Remove the SD card from the computer, and insert it to
Folder downloaded the latest
firmware file
the black box and close the Door and connect power.
❻ During F/W upgrade, the red LED blinks fastly. Copy
❼ After upgrade, the product reboots and recording starts.
(The red LED blinks fastly.)
Firmware Upgrade
Folder in micro SD Card
After F/W upgrade, format the memory card to improve
data recording reliability.
24
25. Windows Viewer
You can play and view videos saved on the memory card.
Installation Guide
❶ Run the Setup file
•Download the Setup file from the memory card or website
•Run and Install the Setup file after download
❷ After installation, the shortcut icon appears on the display.
And Blackbox folder appears in “all programs” at Windows
Startup.
Basic Configuration
Viewer to play videos saved on the memory card
❶ Video screen window ❷ Setting and control
❸ File path ❹ File list ❺ Impact sensor graph ❷
❻ Play/Volume ❼ Running speed ❸
Windows Viewer
❶
❽ Play information / GPS information extraction /
Map link window / Section video extraction ❹
•Running speed / GPS information extraction / Map link are
❺
available only for the model with the GPS module. ❽
❻ ❼
•Map link is available only for the computer with internet connection.
(Naver Map and Google Map are supported.)
25
26. Play Video
Viewer to play videos saved on the memory card
❶ Select the folder
(Go to My Computer BLACKBOX MyVideo)
❷ Double-click the file
Play Screen Map Link Screen
Windows Viewer
Map Link Window
GPS file extraction
(My DocumentBlackboxGps)
Section extraction
Capture (My DocumentBlackboxVideo)
(My DocumentBlackboxSnapshot)
26
27. Setting
Recording Option
Card Information
Speaker Volume
Card Format Sensitivity Setting
Windows Viewer
GPS Standard Time Capture
NTSC/ PAL
Language
Summer Time
27
28. FAQ
Where should I install the product?
Install the product on the windshield in a way it does not block the driver’s view.
The video is played upside down. What shall I do?
Check if the body is connected to the mount in the correct direction.
When power is supplied, LED is not on. What shall I do?
Check if the power cable is connected correctly. Clean the cable jack if it is dirty.
Since power voltage is unstable when you start the vehicle, this may be the cause. In this case,
unplug the power cable, and then plug it back in.
How can I know if the product is functioning correctly?
Start the vehicle, check if the LED is on, and record the video for a few minutes.
Then, check the recorded video with your LCD/PC.
I need the longer power cable.
The power cable is 5m long. If this is not enough, relocate the body without blocking the driver’s
FAQ
view or purchase the longer cable.
I don’t want to record audio.
Turn off the audio recording using the up key [ ] in the recording menu.
28
29. Can I delete videos?
Reset the memory to delete all data.
Even when power is down due to crash, can the product record the video?
Even when power is down, the product can record the video for 3 ~ 5 seconds.
What shall I do when the memory card fails?
The memory card is expendable. Purchase the authentic memory card. For other memory cards,
we do not warrant product performance and our service can be limited.
If the product is damaged due to the car accident, how do I repair it?
If the product is damaged due to the car accident, it may not function properly. So, do not use the
product again.
Even when the memory card is full, can the product continue to record video?
The memory card cannot be full as older files are overwritten. However, back up necessary data
before it is overwritten.
FAQ
The video is not clear.
Remove the lens protection sticker or clean the lens or windshield.
29
30. Warranty
This is the car video recorder developed and manufactured by C&S Technology. We provide After
Service support and free repair for faults that occur within one year from the date of purchasing.
However, for the product of which purchasing date is not clear, its delivery date will be used instead.
Warranty period Item
1 year Body
6 months Micro SD card
No warranty Other components
■ Cases of Charged Service
•When the warranty period specified above is over
•When the product is damaged or fails due to the customer’s fault even if the warranty period remains
•When the customer repairs or modifies the product at his/her own discretion
•When the product fails as it is used with other unproven products or the product fails due to
natural disaster
Warranty
•When the product fails as the customer does not follow instructions in the user manual.
•When the warranty is lost
•When the product is damaged due to the car accident
■ Standard for Warranty
For repair, exchange and refund of the car video recorder developed and manufactured by
C&S Technology, we follow the standard of the Ministry of Strategy and Finance.
30
31. Warranty
This Warranty is only covered for units used within Republic of Korea.
If the unit is faulty, please call C&S Technology for an RMA number for return.
In circumstances relating to the limitations mentioned on the previous page, some repairs may
be charged.
If the unit is faulty, please send this warranty card with the unit for repair.
Product iROAD-II-G11 / iROAD-II-R11
Serial No.
Date of Purchase
Retailer
C&S B/D, 54-7 Munjung 1 Dong, Songpa-Ku, Seoul, 138-826, Korea
Tel. 82.2.3015.1478 Fax. 82.2.400.4990 www.cnstec.com