Multimedia Studio OH&S
•Télécharger en tant que PPTX, PDF•
1 j'aime•4,110 vues

Mulitmedia Studio OH&S

Recommandé
Contenu connexe
Tendances
Tendances (20)
En vedette
En vedette (13)
Similaire à Multimedia Studio OH&S
Similaire à Multimedia Studio OH&S (20)
Plus de Webmaster
Plus de Webmaster (20)
Dernier
Dernier (20)
Multimedia Studio OH&S
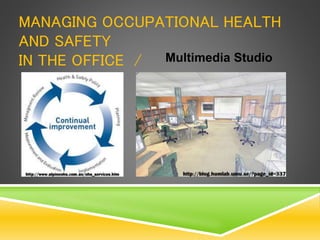
- 1. MANAGING OCCUPATIONAL HEALTH AND SAFETY IN THE OFFICE / Multimedia Studio
- 2. OFFICEWISE – A GUIDE TO HEALTH & SAFETY IN THE OFFICE Officewise is designed to help employers and employees take a look at their workplace. It aims to: Raise awareness of health and safety issues in the office; Help identify existing and potential health and safety problems; Encourage consultation on health and safety issues; Help employers meet their legal responsibilities in relation to health and safety; Offer solutions and advice; and Give guidance on where to go for further information and help.
- 3. THE RISK MANAGEMENT APPROACHEmployers are required to provide information, training and supervision so that employees can perform their work in a safe manner. Training should provide employees and their supervisors with an understanding of: health and safety legal responsibilities; The nature of the hazards in the workplace; The process of hazard identification, risk assessment and risk control; The arrangements for reporting; Circumstances likely to cause hazards; The reasons for and safe use of the risk control measures in place in The workplace; and Safe work practices.
- 4. WHY IS HEALTH AND SAFETY RISK MANAGEMENT IMPORTANT TO A BUSINESS? There is a legal obligation to provide a healthy and safe workplace. In addition, effective management of health and safety hazards makes good business sense. It can lead to reduced costs, increased productivity, higher morale and better employee relations.
- 5. WHO IS RESPONSIBLE FOR HEALTH AND SAFETY? Everyone! Employers have a duty of care to provide a healthy and safe working environment under occupational health and safety legislation and common law. Employers should ensure that all managers, supervisors and employees are aware of their occupational health and safety responsibilities. This should be done through consultation, documenting responsibilities and ensuring there are processes in place to hold people accountable for occupational health and safety performance.
- 6. INTEGRATING HEALTH AND SAFETY INTO OFFICE MANAGEMENT Systems and processes for the management of health and safety hazards in the office should be built into the day-to-day running of any business. They should be viewed as part of the normal operation of the business.
- 7. HOW CAN THIS BE ACHIEVED? Occupational health and safety must be managed systematically. The best system will depend on the nature and size of the business, however, there are a number of aspects to be considered as a basis for any sound occupational health and safety management system.
- 9. CONSULTATION Consultative arrangements should be in place to enable effective cooperation between the employer and employees in developing and promoting measures to ensure employees’ health, safety and welfare at work. Consultation should involve: • managers and supervisors representing the employer; and • employees and elected Health and Safety Representatives (HSR) or other parties representing the employees. An effective forum for consultation is a health and safety committee. Consultation about specific issues and hazards should include direct discussion with relevant employees. Further information about health and safety committees and Health and Safety Representatives is found in the legislation.
- 10. DEFINITIONS AND PROCESSES Hazard means the potential to cause harm (such as injury or illness). Risk means the likelihood of harm arising from exposure to any hazards and the consequences of that harm. For example, cleaning fluids may be a potential hazard but may not pose a risk of exposure unless they are incorrectly stored or handled.
- 11. HAZARD IDENTIFICATION This is the process of identifying all situations or events that could give rise to injury or illness. It generally involves consideration of the type of injury or illness possible, (for example musculoskeletal disorders (MSD)) and the situations and events that could create potential for the injury or illness (for example, prolonged bending over a low desk during a collating task).
- 12. RISK ASSESSMENT This process determines whether there are any risks associated with the identified hazards. This generally involves consideration of the nature of exposure to the hazards, including the frequency and level of exposure, pattern of exposure (continuous or intermittent) and adequacy of any existing risk control measures.
- 13. RISK CONTROL This process determines and implements appropriate measures to control risk. Factors that are assessed as posing an increased risk are required by legislation to be controlled so far as is ‘reasonably practicable’. ‘Reasonably practicable’ in this case means you need to consider: The likelihood of the hazard or risk eventuating; The degree of harm that would result if the hazard or risk eventuated; What the person concerned knows, or ought reasonably to know, about the hazard or risk and any ways of eliminating or reducing the hazard or risk; The availability and suitability of ways to eliminate or reduce the hazard or risk; and The cost of eliminating or reducing the hazard or risk.
- 14. THE OBJECTIVE OF THE OCCUPATIONAL HEALTH AND SAFETY ACT Is the elimination at source of risks to the health, safety and welfare of persons at work. If risks cannot be eliminated, occupational health and safety legislation requires that they be reduced so far as is reasonably practicable. You could use one or more of the following methods: Substitution of the hazard with something posing a lower risk; Isolation – for example, enclosing the hazard; or Engineering control – for example, a mechanical aid. If a risk to health and safety remains after the above methods have been used, administrative controls, for example work procedures and training, should be applied and, if relevant, personal protective equipment should be worn.
- 15. EVALUATION OF CONTROL MEASURES This means checking to see whether the introduced changes reduce the risk previously assessed. It may involve repeating the process of hazard identification, risk assessment and risk control to ensure that all risks to health and safety from a particular hazard have been controlled as far as practicable. This depends on the hazard, the nature of the assessed risks and on the control measures used. Where the evaluation of risk control measures reveals some remaining risk, the process continues until risk is minimised as far as reasonably practicable.
- 16. IDENTIFYING HAZARDS IN THE OFFICE Consider the type of hazard present in your office Mechanical hazards, such as filing cabinets that tend to tip when heavily laden top drawers are open; tripping hazards. Physical hazards, like glare or reflections from screens; hot components of photocopiers; poorly designed chairs that do not provide the user with adequate back support; poorly designed jobs and tasks that demand prolonged work in a fixed posture. Chemical hazards, such as vapours in the atmosphere – for example, paint, solvents or airborne particles like photocopier toner. Psychological hazards, like the need to perform excessive workloads under pressure, lack of satisfaction from a job where there is inadequate recognition of work performed or repetitive work and insufficient task variety. Electrical hazards such as damaged electrical cords or overloaded power points that may lead to the risk of electric shock. Each of these hazards is discussed in more detail in other sections of this guide.
- 17. CHECK RECORDS OF INJURIES AND INCIDENTS Check injury records, first aid reports and workers compensation claim forms for information about the work tasks, the area in which work is performed, the activity being undertaken at the time of injury, factors thought to be related to the incident and the type of symptoms or injury reported.
- 18. CONDUCT A WALK-THROUGH INSPECTION OF THE OFFICE USING A HAZARD CHECKLIST A checklist is a useful method for identifying hazards. A good checklist provides a systematic method to ensure that you do not miss hazards. It enables you to gather important information and record it quickly so that it can be considered more thoroughly during the assessment.
- 19. WHAT TO CONSIDER WHEN ASSESSING RISK The likelihood of the exposure leading to injury or disease Typically the common injuries include: musculoskeletal disorders of the back, neck and upper limbs; minor injuries due to cuts, trips or falls or being hit by an object; and stress-related conditions. The employer should assess the likelihood of these or other injuries at their workplace.
- 20. THE FREQUENCY AND DURATION OF EXPOSURE How often and for how long employees may be exposed to a particular hazard should be estimated or measured by consulting with employees, looking at duty rosters and observing employees performing the work. Who may be affected Determining tasks and areas that may be affected by a particular hazard can help direct limited resources to those areas where the most effect can be obtained from control measures.
- 21. WHAT TO CONSIDER WHEN CONTROLLING RISK A range of measures for controlling risk involves elimination, substitution, isolation, engineering, administration and personal protective equipment. Elimination Redesigning the job to design out risks altogether is the most effective method of risk control. For example, the need for excessive photocopying and collation can be eliminated if memoranda are circulated by email. A quality photocopier can sort, collate and staple to eliminate manual handling.
- 22. Substitution Materials, equipment or processes can be replaced with less hazardous ones. For example, a telephone handset can be replaced with a headset where there is prolonged use of the telephone or where typing is required while using the telephone. Isolation Enclosing or isolating the hazard from employees can eliminate or reduce the risk of injury or illness. For example, a photocopier can be located in a separate well ventilated room to isolate noise and fumes.
- 23. Engineering Engineering controls may involve the provision of mechanical aids, barriers, guarding, ventilation or insulation to prevent employees being exposed to a hazard. For example, a heavy compactus system may have a mechanical winder or electric controls to prevent the need for pushing and pulling the sections. Administration This may involve establishing policies, procedures and work practices designed to reduce an employee’s exposure to a risk. It may also relate to the provision of specific training and supervisory practices. For example, by advising employees against performing continuous keyboard work for long periods, and increasing task variety.
- 24. PREVENTION & HAZARDS Reducing risk by using a telephone headset (Worksafe Vic, 2006)
- 25. RELAXED, COMFORTABLE WORK POSITIONS (Worksafe Vic, 2006)
- 26. ASSESSING REFLECTIONS (Worksafe Vic, 2006)
- 27. PREFERRED PLACEMENT OF THE SCREEN TO REDUCE REFLECTIONS (Worksafe Vic, 2006)
- 28. POOR POSTURE MAY BE DUE TO INADEQUATE LIGHTING OR UNCORRECTED VISUAL PROBLEMS (Worksafe Vic, 2006)
- 29. DIRECT AIR FLOW AWAY FROM PEOPLE (Worksafe Vic, 2006)
- 30. RECEPTION DESK (Worksafe Vic, 2006)
- 31. RECEPTION/WAITING AREA (Worksafe Vic, 2006)
- 33. THE COMPUTER AND ADMINISTRATIVE WORKSTATION (Worksafe Vic, 2006)
- 34. ADJUSTABLE OFFICE CHAIR (Worksafe Vic, 2006)
- 35. KNEELING CHAIR (Worksafe Vic, 2006)
- 36. SEAT HEIGHT AND FOOTREST ADJUSTMENT (Worksafe Vic, 2006)
- 38. CORRECT STANDING-HEIGHT BENCH (Worksafe Vic, 2006)
- 39. ANGLE BOARD (Worksafe Vic, 2006)
- 40. KNEE CLEARANCE DIMENSIONS FOR OFFICE DESKS (from WorkSafe Checklist for Ergonomic Design of Office Desks) (Worksafe Vic, 2006)
- 41. KEYBOARD PLACEMENT IN FRONT OF THE OPERATOR (Worksafe Vic, 2006)
- 42. NEUTRAL POSITION WHILE USING A MOUSE (Worksafe Vic, 2006)
- 43. THUMBS STRETCHED TO REACH A TRACKBALL OR GLIDE POINT (Worksafe Vic, 2006)
- 44. DOCUMENT HOLDER DESIGNS – A4 AND A3 SIZES ARE USUALLY AVAILABLE (Worksafe Vic, 2006)
- 45. LOCATION OF A DOCUMENT HOLDER AND MONITOR AT A WORKSTATION (Worksafe Vic, 2006)
- 46. SHELVING TOO HIGH AND DEEP (Worksafe Vic, 2006)
- 47. CONTROLLING RISK OF STORAGE AT HEIGHT (Worksafe Vic, 2006)
- 48. REACH SECTORS ON A DESK (Worksafe Vic, 2006)
- 49. FILING CABINET MAY BE UNSTABLE WHEN FULLY LOADED AND THE TOP TWO DRAWERS ARE OPEN (Worksafe Vic, 2006)
- 50. OBTAIN INFORMATION ABOUT HAZARDOUS SUBSTANCES (Worksafe Vic, 2006)
- 51. ELECTRICAL AND TRIP HAZARDS (Worksafe Vic, 2006)
- 52. SLIPS, TRIPS AND FALLS (Worksafe Vic, 2006)
- 53. SETTING UP YOUR WORKSTATION The following checklist is a step-by-step approach designed to be used when employees are located at a new workstation or whenever their tasks change. When setting up the position of this furniture and equipment it is important to try new positions to find the most comfortable arrangement for yourself. Give yourself a chance to get used to any changes, as it may take several hours or even days to determine the best position. Remember, it may take a few tries to get the best arrangement, but it is worth the effort – and if a change doesn’t work, you can always reset it.
- 54. CHAIR When adjusting your chair please refer to any instructions that are provided with the chair or have someone show you how to adjust it and use the controls. If there is no one available to assist you, work through this checklist with another person and observe each other’s postures and body positions. Also, remember to try and avoid sitting for long periods of time. Some form of break from sitting every 20 – 30 minutes is helpful. Even getting up for 20 to 30 seconds to go to a printer or standing while talking on the telephone will provide some relief. (Worksafe Vic, 2006)
- 55. SEA T Height – adjust chair height so feet are comfortably flat on the floor, thighs are approximately horizontal and the lower legs approximately vertical. Low heeled shoes will improve comfort of the legs with the chair at this height. Back support Height – start by raising the backrest to its maximum height. Then sit in the chair and check the fit of the backrest to the curve of the lower back. If it’s not comfortable, lower the height by several centimetres and try this position. Repeat this adjustment and try each new position until the most comfortable fit is found. Ensure that the backrest supports the curve of your lower back and is not placed too low. Forward/backward position – adjust the position of the backrest until a comfortable pressure is exerted on the lower back area while seated in theusual working posture at the desk. (Worksafe Vic, 2006)
- 56. The backrest position should not feel as though it pushes you out of the seat or that you have to lean back too far to reach it. There should be a two-finger clearance between the front of the chair and the back of the knee. Trial a number of different positions until the best fit is achieved. A slight backward tilt is a preferred position as the force on the lower back is reduced. However, some people prefer to sit upright. You can vary this angle to provide changes in posture from time to time. Armrests Armrests are usually not recommended unless they are short, fit under the desk or are adjustable. However, if your chair has armrests make sure that they do not prevent you from getting as close to the desk as you require or that they impinge on your elbows while you are working. If this is the case, either remove them by unscrewing them, or replace them with a smaller or adjustable option. (Worksafe Vic, 2006)
- 57. DESK IF YOU HAVE A HEIGHT-ADJUSTABLE DESK Having first adjusted your chair to suit your body size, adjust the desk so the top surface is just below elbow height. To determine your elbow height, relax your shoulders and bend your elbows to about 90 degrees and check the elbow height against the desk height. (Worksafe Vic, 2006)
- 58. IF YOU DON’T HAVE A HEIGHT- ADJUSTABLE DESK If the chair has been adjusted and the desk is higher or lower than the elbow, other forms of adjustment will be required. Start by measuring the height difference between the desk and your elbow. If the desk is too high Raise the chair by the measured difference and use a footrest. Set the footrest platform so that it is the same as the measured difference. OR Lower the desk by cutting the legs down by the measured difference.
- 59. IF THE DESK IS TOO LOW Raise the height of the desk by extending the leg length or sitting it on wooden blocks or something similar. Remember to ensure that any such changes are secure and stable. (Worksafe Vic, 2006)
- 60. CLEARANCE UNDER THE DESK General items, like computer hard disk drives, boxes of documents or files, rubbish bins and mobile drawers should not be stored under desks where they will decrease or interfere with the space required for the legs. This may force you to adopt a twisted or awkward posture of the spine. (Worksafe Vic, 2006)
- 61. DRAWERS Most commonly used items should be placed in the top desk drawer to improve access and reduce reaching and bending movements. Where drawers are fitted to the desk, equipment such as the keyboard and computer screen should be arranged on the desk so that you can sit comfortably in the leg-well space.
- 62. GENERAL STORAGE ON THE DESK In/out-trays Place trays at the outer reach sector . In- trays should not be located above shoulder level. Stationery A variety of containers are available for mixed stationery items. These should also be stored at the outer reach sector or in the top desk drawer. Reference books and folders Large or heavy references such as telephone directories and manuals should either be stored within close reach or in a nearby position where you need to stand to access them. Handling of these items should not be conducted at the limit of your reach capacity while sitting, as this can result in undue strain on the back, shoulder and arm muscles. (Worksafe Vic, 2006)
- 63. KEYBOARD Angle Tilt the keyboard using the feet at the back to suit your level of comfort. The common and preferred setting is where the feet are lowered so the keyboard sits flat on the desk. This assists in preventing awkward postures of the wrists. Position on the desk Place the keyboard as close to the front edge of the desk as is comfortable. Do not place documents between the keyboard and the front edge of the desk while using the keyboard as this increases the reach distance to the keyboard and may result in excessive bending of the neck to look at the documents. Ensure that there is room to put the keyboard to one side when it is not in use. (Worksafe Vic, 2006)
- 64. MOUSE Place the mouse mat directly beside the end of the keyboard on your preferred side. Use the mouse in this position and always aim to keep the mouse on the mat during use. If you frequently use the mouse in your work you may wish to: • learn to use it with both hands so that you can swap between the right and left sides for improved comfort; • set the tracking speed of the mouse to a setting that suits you; • maintain your mouse to keep it in good working order (for example, keeping it clean inside); and • where possible, try and avoid holding on to the mouse when not in use. (Worksafe Vic, 2006)
- 65. COMPUTER SCREEN The screen should be positioned once the chair and desk heights have been established. Height The screen should be positioned so that the top of the screen is level with, or slightly lower than, your eyes when you are sitting upright . If the screen does not have a raising device such as a monitor stand, you may be able to use telephones books to raise the screen height on a temporary basis. Distance from the eye First place the screen so that it is approximately an arm’s length away from your usual seated position .Trial this position and if necessary move it further away or closer as required. (Worksafe Vic, 2006)
- 66. POSITIONING THE SCREEN The screen should be placed so that it does not face windows, catching reflections from the windows, or have a window directly behind it causing glare from the window. (Worksafe Vic, 2006)
- 67. DOCUMENT HOLDERThe position of the document holder depends on your need to view and reach the documents and the type of document holder that is used. For continuous or frequent data entry where the source document is observed more than, or the same amount as, the screen: • place the screen slightly to one side so that the document holder is directly in front of the user OR • place the document holder in a similar position to the screen where it is slightly to one side and you look evenly between the two . An A-frame style book rest that sits on top of the desk is the most practical and can be set at different angles. It is usually best placed so that it supports documents on an inclined angle between the keyboard and the screen. A lever or swivel arm document holder suspends the document above the desk at eye level. Anchor it to the desk on either the left or right or the screen, according to your preference, and place it directly beside the screen. (Worksafe Vic, 2006)
- 68. TELEPHON E The telephone should be placed either within or at the limit of the optimum reach sector, depending on the amount of use. The placement should enable the user to operate the telephone without the need to move their trunk to grasp the handset or to operate the numeric and function buttons. When making a lot of calls, it may be best to place the telephone on the same side as the dominant hand so that this hand can comfortably operate the numeric and function buttons. When mostly receiving calls, it may be more comfortable to place it on the non-dominant side. Learn and utilise the functions of your phone, such as redial and the storage of commonly used phone numbers, to improve the efficiency of its use. Also, where the phone is used very often or for prolonged periods, a headset should be used.
- 69. ANGLED READING AND WRITING SURFACE An angled board can improve neck comfort where a job involves a lot of reading and handwriting. It should be placed immediately in front of the user on top of the desk . (Worksafe Vic, 2006)
- 70. PLACEMENT OF SCREEN TO REDUCE REFLECTIONS (Worksafe Vic, 2006)
- 71. SCREEN POSITION WITH UNDESIRABLE REFLECTIONS (Worksafe Vic, 2006)
- 72. EXERCISES FOR OFFICE WORKERS Neck stretch Stop, get up and move Getting up and walking around is the best exercise you can get to provide a break from sitting, concentrating and using the muscles of the arms and hands. About every 20 to 30 minutes is a guide to how often it is helpful to move around. Even getting up for 20 to 30 seconds to pick up papers from the photocopier or get some water is a way to change your posture and give muscles a chance to recover. Keeping your chin tucked in, gently lower ear to shoulder and hold for 10 seconds on either side. Repeat several times. (Worksafe Vic, 2006)
- 73. S-T-R-E-T-C-H AND CHECK! Head turns Turn head slowly to look over left shoulder. Turn head the other way. Repeat several times. Stretching exercises help to relax muscles which have been working and move those which have been in a fixed position. If possible, stand up to do your stretches. While you are exercising, read the notes alongside each instruction and consider whether your workstation is adjusted to suit you. • Do a few of these exercises a few times everyday. • Dots show the muscles that you are exercising. • Make sure you relax and perform them gently. • Hold the stretch or repeat as indicated on the diagram. • Do not over-stretch. • Stop if you feel discomfort when performing an action. • Remember to do each side. (Worksafe Vic, 2006)
- 74. CHIN TUCKS Raise the head to straighten the neck. Tuck the chin in and upwards creating a double chin. This also results in a forward tilt of the head. Repeat several times. Check neck posture • Position the top of your screen at eye level. • Use a document holder directly beside or below the screen – it saves you looking down. (Worksafe Vic, 2006)
- 75. SHOULDERS Shoulder rolls Circle shoulders forward several times, then backwards. Repeat 3 to 5 times. Check shoulder posture Relax your shoulders and rest your hands on your lap. Bend your elbows to no more than 90 degrees and check the height of your finger tips against your current work height. If the work (keyboard or desk) is higher than your hands you may be hunching your shoulders unnecessarily. If so, try and raise your chair height or lower your desk height and try and relax your shoulders while working. (Worksafe Vic, 2006)
- 76. WRISTS, HANDS AND ARMS Wrist and elbow stretch Interlace fingers, palms outward, and straighten arms in front. Hold for 10 seconds and repeat several times. Wrist stretch Straighten your arm in front and bend your wrist forward, gently assist the stretch with your other hand. Hold for 10 seconds then stretch your wrist back and hold for 10 seconds. Repeat with other arm. (Worksafe Vic, 2006)
- 77. CHECK HAND AND WRIST POSTURE • While keying, keep your wrist straight while your fingers are suspended over the keyboard. • Keep elbows at keyboard level. This may mean adjusting the desk or chair height. • Don’t rest your wrists on the desk or keyboard while keying. Keep hands suspended. • Rest on the desk between periods of keying. (Worksafe Vic, 2006)
- 78. UPPER AND LOWER BACK Upper and lower back stretch Interlace fingers and turn palms upwards above head; straighten arms then slowly lean slightly from side to side. Repeat movement several times. (Worksafe Vic, 2006)
- 79. BACK ARCHING Stand up. Support your lower back with hands and gently arch back and hold for 5 to 10 seconds. Repeat as often as is needed.(Worksafe Vic, 2006)
- 80. PECTORAL STRETCH Raise both arms to shoulder height and bend elbows. Pull both elbows back slowly to bring shoulder blades towards each other. Repeat several times. Check back support • Sit well back in your chair – if your feet need support, use a footrest. • Adjust the backrest on your chair to support your lower back. (Worksafe Vic, 2006)
- 81. LEGS Foot pump Stand up, holding the chair for balance if necessary, and alternately raise heels and toes. Repeat 10 times. Check leg comfort • If the seat of your chair is digging into the backs of your thighs check that it is not too high or whether it is tilted backwards. • If the seat is too high, lower the chair and desk or use a foot rest to support your feet. • Also check the tilt of the seat and, if necessary, adjust it to a horizontal position. (Worksafe Vic, 2006)
- 82. EYES Eye exercise Sit up straight, face forward and repeat this sequence several times without moving your head. Look up, then down. Look left, then right. (Worksafe Vic, 2006)
- 83. VISUAL REST Look up and away from the screen. Focus on a distant object (more than 3 metres away). For example, look out of the window or at a picture on a far wall. Shift vision back to screen and refocus. Check eye comfort • Is there enough light falling on your documents? • Do windows or light fittings cause glare or reflection on the screen? If so, try turning the screen or blocking the path of the light. • Use a screen with a light background when working with text. Software with a light background for text is more comfortable for the eyes. (Worksafe Vic, 2006)
- 84. FIRE & EXPLOSIONS Fires can occur in both indoor and outdoor workplaces. Fires and explosions can be caused by batteries, chemicals, and unsafe habits and storage practices. Plan and practice a fire safety plan at your workplace and at home. Post the evacuation maps.
- 85. STORING FLAMMABLE & EXPLOSIVE MATERIALS Store flammable or explosive materials such as gasoline, oil and cleaning agents apart from other materials Keep flammable and explosive materials in proper containers with contents clearly marked Dispose of greasy, oily rags and other flammable materials in approved containers Store full barrels in an upright position Keep gasoline and oil barrels on barrel racks Store empty barrels separately Post signs prohibiting smoking, open flames and other ignition sources in areas
- 86. STORING FLAMMABLE & EXPLOSIVE MATERIALS CONTINUED…. Where flammable and explosive materials are stored or used Store and chain all compressed gas cylinders in an upright position Mark all empty cylinders with the letters “mt,” and store them separately from full or partially full cylinders Ventilate all storage areas properly Ensure that all electric fixtures and switches are explosion-proof where flammable materials are stored Use grounding straps equipped with clamps on containers to prevent static electricity buildup Provide the appropriate fire extinguishers for the materials found on-site Keep fire extinguisher stations clear and accessible
- 87. WORKPLACE VIOLENCE Workplace violence includes any physical or sexual assault from a patient, client, supervisor, or co-worker. Behaviour such as pushing, hitting, pinching, or biting is violence. Verbal abuse, threatening language and harassment are also violence. Another form of workplace bullying and violence is destruction of property. In addition to the physical injuries it causes, workplace violence can cause unseen stress and a dysfunctional work environment. Many employers are unaware violence is even occurring. Employers and workers must cooperate to create a violence-free workplace. Many employers adopt a zero tolerance policy to prevent workplace violence.
- 88. ZERO TOLERANCE POLICY I am an employer or manager - what can I do to prevent workplace violence? Many employers are unaware that violence is occurring the workplace. You can help prevent workplace violence by creating a written policy. This policy must: Apply to anyone who has a relationship with your company (including management, employees, clients, and independent contractors) Use precise language to define workplace violence State in clear terms your organization’s view toward workplace violence and your commitment to the prevention of workplace violence Provide concrete examples of unacceptable behaviour Precisely state the consequences of making threats or committing violent acts
- 89. ZERO TOLERANCE POLICY CONTINUED…. Encourage reporting of violence by explaining: o All reports are confidential o How to report acts of violence o How to submit the reports (to whom) o Reassure them there are no reprisals for submitting a report Explain how complaints are investigated and resolved. Describe how potential risks of violence will be communicated to employees Make a commitment to provide support services to victims of violence Offer a confidential Employee Assistance Program (EAP) to allow employees with personal problems to seek help Offer violence prevention training for all workers within the organization
- 90. OH&S Safety Representative is Steven Segal. Steve has worked in the occupational health and safety area for more than 15 years and has an extensive range of experience that shows through his work. If there are any concerns or suggestions that you may have, you can contact Steve on 0400123456 or email on: stevesegal@disneydesigns.c om Hi!
- 91. Induction process for new employees Under the workplace health and safety act, Disney Designs have an obligation to let their employees know about the OH&S policies and procedures in the company. Employees also have an obligation to abide by these rules and procedures in the correct way. As a new employee for Disney Designs, here is a list of OH&S requirements that need to be addressed and marked off: *Continued on next slide:
- 92. Knowledge of the nearest fire and emergency exits Posture when sitting needs to be in the correct position so that the back is fully straight not slouching. Daily exercise and stretches need to be done to improve circulation and improving the posture of the body Eyes need to be relaxed every 10 minutes by glaring at another object then back to the computer screen. When lifting heavy items, need to bend the knees not the back and if unable to then have to call someone else for assistance. If dealing with dangerous goods, need to make sure that the correct procedure is followed as stated on the information on the goods. Employee’s duties to report any hazards or potential hazards in the workplace to the duty manager and/or the safety representative Steve Segal and document these in the company’s intranet service. Aware of where the first aid kit is. I ...........................................have read the OH&S policies and procedures and have understood it. I have been explained what my obligations are and who to contact if have any questions. Staff number: Staff name: Title: Date......................
- 93. EQUIPMENT SAFETY CHECKS To maintain occupational, health and safety within a business like Disney Designs, equipment needs to be maintained on a regular basis. Things such as: Tagging items of where certain items are like first aid kit, up to date fire extinguishes. Furniture and fixtures are in good condition and in working order. Maintaining the condition of the computer peripherals such as cables wires and making sure that it is not broken or damaged. First aid kits are in date.
- 94. RESOURCES: worksafe.vic.gov.au Design studio image Continual improvement image WorkSafe Saskachewan http://www.physics.uq.edu.au/health_and_safety/OHSRetroSafety Induction06.pdf