Micro-Scholarship, What it is, How can it help me.pdf
20110817 learning files graphic organiser
1. A U G U S T 2 0 1 1
the learning files
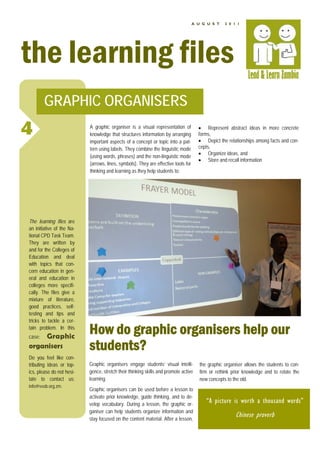
GRAPHIC ORGANISERS
4 A graphic organiser is a visual representation of
knowledge that structures information by arranging
important aspects of a concept or topic into a pat-
• Represent abstract ideas in more concrete
forms,
• Depict the relationships among facts and con-
tern using labels. They combine the linguistic mode cepts,
• Organize ideas, and
(using words, phrases) and the non-linguistic mode
• Store and recall information
(arrows, lines, symbols). They are effective tools for
thinking and learning as they help students to:
The learning files are
an initiative of the Na-
tional CPD Task Team.
They are written by
and for the Colleges of
Education and deal
with topics that con-
cern education in gen-
eral and education in
colleges more specifi-
cally. The files give a
mixture of literature,
good practices, self-
testing and tips and
tricks to tackle a cer-
tain problem. In this
case:Graphic
How do graphic organisers help our
organisers students?
Do you feel like con-
tributing ideas or top- Graphic organisers engage students’ visual intelli- the graphic organiser allows the students to con-
ics, please do not hesi- gence, stretch their thinking skills and promote active firm or rethink prior knowledge and to relate the
tate to contact us: learning. new concepts to the old.
info@vvob.org.zm.
Graphic organisers can be used before a lesson to
activate prior knowledge, guide thinking, and to de-
velop vocabulary. During a lesson, the graphic or-
“A picture is worth a thousand words”
ganiser can help students organize information and
stay focused on the content material. After a lesson,
Chinese proverb
2. Story After the Lead and Learn Zambia seminar I
have started with my personal goal on Graphic
Mrs. Bwalya is a lecturer in Educational Studies at Mimosa Organisers. I wanted to use comparison matri-
College of Education. ces and Venn diagrams with my Chemistry
class to summarise and assess lessons. I have
Last week she asked her students to read an article on just completed a topic 'the periodic table', sub-
learning theories as preparation for her lesson. topic 'periodic law' and have used the compari-
Today they are going to work with those preparations. Once son matrix to summarise how chemical and
all students are seated, she asks them to form 3 groups. physical characteristics recur periodically with
Each group will present their learnings from the article via increasing atomic number (Z). My first year students were happy to be
drawing a mind map. One group will map the cognitivist exposed to this instructional strategy. I got feedback from students by
model, another group the behaviourist model and yet anoth- using the entrance and the exit slips. I have, therefore, encouraged my
er group the constructivist model. All students start their students to use graphic organizers more often even in biology and phys-
work. Mrs. Bwalya walks from group to group and observes ics to summarize topics. I hope to use more instructional strategies next
what’s happening. She answers some questions of students term with third year students as they will be back from School Teaching
and notes down some issues she later wants to discuss with Practice.
the students. Once all groups are ready, the students stick (John Tebeka, lecturer Mufulira College of Education)
their mind maps on the wall. Mrs. Bwalya invites all students
to look carefully at the other mind maps and, where possible
and needed, add information. She then leads a class discus- “Students were hap-
sion where the 3 learning theories are discussed in detail,
based on the mind maps made by the students. Where nec- py to be exposed to
essary she gives some extra information and explanation.
such strategy”
To assess how well all is understood and to take the stu-
dents to a higher thinking level, she gives them a sheet with
a 4 column table. She asks students to compare the 3 learn- During the Lead and Learn Zambia Seminar
ing theories based on criteria such as role of the teacher, (LLZ) in May – June 2011, I made a personal
learner, learning activities, … plan which I implemented immediately. I used
the Frayer Model in my Language lessons
Cognitivist Behaviourist Constructivist with first year students. The topic was about the language use and
needs in Zambia, in which students were asked to explain how the
Role of teacher English language is a formidable medium of communication at all
levels in Zambia, and to bring out the role of indigenous lan-
Role of student guages.
Learning activities I encouraged the students to use this strategy to improve their
study skills in other components and subjects. The students were
... happy with this strategy as it was seen from the feedback I re-
ceived from them through the parking lot.
Figure 1: Example of a Compare chart
(Clare Mwiinga, NISTCOL)
Why use graphic organisers?
Mrs. Bwalya from Mimosa College of Education has been experi- how information is related. This helps them to better understand
menting with the use of organisers. Here is why she feels everyone my lessons. The visual representation makes it also easier for them
should use them: to remember information; they were not just listening and writing but
also seeing and drawing in my class. I have seen that this approach
“I believe my students have reached higher levels of thinking be-
caters better for all intelligences: verbal, visual, logical, etc. Be-
cause of the use of the graphic organisers. They developed concept
cause the information is represented visually rather than verbally
maps and compared and contrasted concepts. Because the organis-
also limited English proficient students grasp the concepts.”
ers force them to look for content connections, they can better see
PAGE 2
3. Variety of graphic organisers
There are different types of graphic organisers. Different authors identify different types and give them different names. Here are some of the
most common named types. For each type we have given some examples and ideas, but there are many more.
Compare/contrast
Compare/contrast organisers depict similarities or contrasts among
key concepts
organisers
Figure 3: T chart
Figure 2: Venn diagram
Figure 4: Compare/contrast chart
Sequence organisers
Illustrate a series of steps or place events in a chronological or-
der, or in cyclic process
Figure 5: Timeline
Figure 7: Cyclic graph
Figure 6: Chain
Figure 8: Upward arrow
PAGE 3
4. Conceptual organisers Include a main concept with supporting facts, evidence, or
characteristics (mind maps, concept maps, word webs)
Figure 10: Frayer Model
Figure 9: Mind map
Figure 11: Concept map
Categorise/classify Arrange information in categories or classifications. These
organisers
can be hierarchical.
Figure 12: Tree Figure 13: Matrix
Figure 14: Pyramid (hierarchy)
Evaluation organisers Used for evaluating purposes such as agree/disagree, agree-
ment scales, etc.
Strongly Strongly
agree 1 2 3 4 5 disagree
Figure 15: Evaluation chart
Figure 16: Agreement scale
PAGE 4
5. Relational organisers
Illustrate the relation, such as cause and effect, between a
series of events or concept.
Figure 17: Fish bone
Figure 18: Pie
Figure 19: Embedded concepts
How do you decide on what type
of graphic organiser to use?
The content and organisation of science lecturer was doing. He chose
the “fishbone” graphic organiser (shows
material usually determines the type of
cause and effect) because it looked like
organiser to be created. Another factor
science. It became his favourite and
is the cognitive or learning style everything they discussed somehow fit
of the person creating the organiser. into the “fishbone” which of course was
Often individuals have a preference for not correct.
one type of graphic organiser. For ex-
ample, holistic, creative thinkers often Beware of overuse and al-
like the nonlinear and open-ended ways test it out on someone before
quality of the conceptual organiser. you use it with your students, via reflec-
The more sequential thinker might tion or asking a colleague for feedback.
prefer the hierarchical structure of the If you are unable to get your point across
hierarchical organiser and chronologi- in the “testing” stage, you can conclude
cal structure of the sequential organis- that you chose the wrong graphic organ-
er. Most importantly, however, is hav- iser. For the first few times, always start
ing experiences with a variety of organ- simple. Get your students accustomed to
isers to allow you and your students to the fact that visualising a concept is ben-
ap-
pick and choose the type most eficial for both the lecturer and the stu-
propriate for the subject dent. You will know that they know when
they can verbalise what they have visu-
and purpose. Figure 20: Example of a graphic organiser to help in alised.
Beware of doing what the following planning
PAGE 5
6. Getting started
1. Analyse the information to be taught and highlight key
words and phrases. Key concepts will provide the categories How do you construct
under the big idea, while key word/phrases provide the ele-
ments that are the most important for students to understand. your own graphic or-
2. Identify the relationship among concepts and facts. The
relationship will help you decide on the format of your graphic ganiser?
designer.
3. Arrange information into a logical order. b. If posting information ... it must be clear, with key words
4. Prepare the graphic organiser. First put all the information and relationships identified. Colour can be used to capture
in the organiser. Then, depending on how you are going interest and cue the student to key components.
to use it, prepare also a blank or half blank one. Think about c. If using as a learning or note-taking guide ... provide spac-
the purpose of the organiser (Is it for presenting information es with enough room to write all key information.
without much instruction, as a learning guide for students, or a 5. Add pictures, icons, etc. to "grab" students' attention/interest
guide for taking notes?). and make vague concepts more obvious.
a. If using as a presentation technique ... it must not be too 6. Remember to think about student abilities so that the form and
cluttered, and it must be big enough for all to see (at least complexity of the graphic organiser facilitates understanding
24 pt font). Empty spaces that are filled in as the presen- rather than causing confusion.
tation occurs (i.e., scaffolding) can encourage active par-
ticipation by students.
Free materials and
templates
Education Place Teach-nology
(http://www.eduplace.com) (http://teachers.teach-nology.co)
This site allows you to download, print, and make copies of over 40 Make your own graphic organisers on this site by filling out a simple
different graphic organisers for use in your classroom. form. The materials are made instantly and can be printed directly
from your computer.
The Graphic Organiser Enchanted learning
(http://www.graphic.org)
This site contains resources you might find useful for writing and http://www.enchantedlearning.com/graphicorganisers/
using graphic organisers. Especially helpful are the links to articles Lots of information and printable versions of graphic organisers.
and books on the web. There is an interesting tool to decide which graphic organiser suits
best your topic.
Get inspired by others.
Browse and find more
great ideas. PAGE 6
7. Do the test
How good are you in using graphic organisers? yes no
I prepare graphic organisers as part of my lesson preparation.
I make sure I use a variety of graphic organisers.
I carefully select the organiser based on lesson outcomes, lesson content and learning styles.
I test (reflect, ask feedback) the graphic organiser before using it in my class.
I actively engage all students in verbalizing the graphic organizer.
I create opportunities for students to fill in pre-set organisers as a way of taking notes.
I design activities for students to create their own organisers.
I adjust my graphic organisers after a lesson, based on feedback of students.
I assess whether all students can verbalise the visualised content..
How to use this learning file in CPD?
Steps to follow (as a department or section or a group of people who would like to improve the use of graphic organisers in the classroom)
1. Discuss the learning file (e.g. during CPD time). See if there is a shared understanding. Feel free to add on more information that
might for example be specific for your subject.
2. Reflect on your current practice. Compile a list of graphical organisers used during recent lessons.
a. Do you use graphic organisers?
b. How many types do you use? (see the learning file)
• Are the organisers you use linked to desired lesson outcomes?
• How far are students actively involved in choosing graphic organisers?
b. Try to come up with some graphic organisers that can add value to your lesson. Discuss in pairs and in the group.
3. Lesson study approach
a. In groups (or as a section), plan a demonstration lesson in which appropriate graphic organisers will be used.
b. Somebody volunteers to teach the lesson; other observe and one person records the lesson on video. People observing could in
advance agree to focus on the use of the graphic organisers (relevance for the lesson topic, good choice of type of organiser,
introduction of the organizer, interaction with students in doing the organizer,...)
c. Exchange notes and views about the use of the graphic organisers in the observed lesson in pairs and then as a whole group (the
video could be played again to aid the discussion)
d. Agree on lessons learned and next steps
4. Alternatively, personal action plan approach,
This is a short term commitment to implementation by all members of the group.
a. They answer a simple question: what am I going to put into action during the coming week? e.g. ”I will prepare at least 1 suitable
graphic organiser for each lesson I will teach in the coming week, based on lessons learned from this learning file”
b. Try out and individual reflection (did I do what I promised to do? How did it go?)
c. Group meeting: exchange of experiences, challenges, finding solutions.
d. Agree on lessons learned and next steps
5. Invite each other to observe each other’s lesson and coach each other
6. Discuss the experiences during a whole staff CPD meeting
PAGE 7
8. Reflections
What did you take with you from this learning file in terms of
knowledge, insights, skills, attitudes?
How will you use what you’ve What questions do you still
learned? have?
Literature
http://www2.scholastic.com/browse/article.jsp?id=2983 Gregg, L., O’Connel, M.J. (2011). Instructional strategies .
(retrieved on 2 Aug 2011) Presentation at the Lead and Learn Zambia Seminar, Lusaka,
May-June 2011.
http://library.thinkquest.org/J001156/writing%20process/
sl_graphic_organisers.htm (retrieved on 2 Aug 2011) Marzano, R.J., Pickering, D.J., Pollock, J.E. (2001). Class-
room instruction that works. Research based strategies for
http://en.wikipedia.org/wiki/Graphic_organiser (retrieved on 2 increasing student achievement. Alexandria, VA: ASCD.
Aug 2011)
Peery, A. (2009). Power strategies for effective teaching. Eng-
http://tuesdayswithkaren.blogspot.com/2011/08/graphic- lewood: The Leadership and learning Center.
organizers.html (retrieved on 8 Aug 2011) s.n. (2001). Smart card: graphic organizers. San Clemente:
Kagan Pubishing.
Bromley, et al., (1998). In http://www.specialconnections.ku.edu/
cgi-bin/cgiwrap/specconn/main.php?
cat=instruction§ion=main&subsection=udl/graphic
(retrieved on 2 Aug 2011)
the learning files
Research: Lieve Leroy General editing, photographs and graphical Contact: info@vvob.org.zm
Editing: Lieve Leroy, Clare Mwiinga, John Te- design: Lieve Leroy
beka, Publishing: VVOB-MOE Teacher training support
Critical readers: Hans Casier, Patrick Kayawe, programme
Leonie Meijerink, John Tebeka