1. Name ___________________________________ Date ____________ Period ________
Lab: Using a Compound Light Microscope
Background:
Microscopes are very important tools in biology. The term microscope can be translated
as “to view the tiny,” because microscopes are used to study things that are too small to be
easily observed by other methods. The type of microscope that we will be using in this lab is a
compound light microscope. Light microscopes magnify the image of the specimen using light
and lenses. The term compound means that this microscope passes light through the specimen
and then through two different lenses. The lens closest to the specimen is called the objective
lens, while the lens nearest to the user’s eye is called the ocular lens or eyepiece.
When you use a compound light microscope, the specimen being studied is placed on a
glass slide. The slide may be either a prepared slide that is permanent and was purchased from
a science supply company, or it may be a wet mount that is made for temporary use and is
made in the lab room.
Objectives: In this lab you will:
1. Learn the parts of a compound light microscope and their functions.
2. Learn how to calculate the magnification of a compound light microscope.
3. Learn how to make a wet mount slide.
4. Understand how the orientation and movement of the specimen’s image changes
when viewed though a compound light microscope.
5. Learn the proper use of the low and high power objective lenses.
6. Learn the proper use of the coarse and fine adjustments for focusing.
Materials:
microscope water
slides pipette
cover slips scissors
lens paper magazine picture with various colors
paper towels hairs of different color
sheets of newspaper/phonebook other objects for viewing
Procedure:
Part I. Learning about the microscope
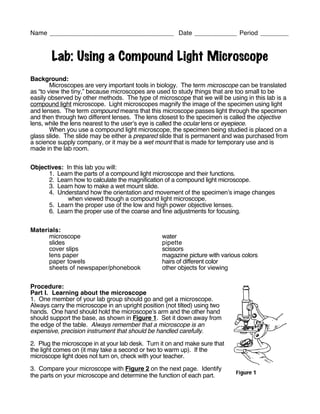
1. One member of your lab group should go and get a microscope.
Always carry the microscope in an upright position (not tilted) using two
hands. One hand should hold the microscope’s arm and the other hand
should support the base, as shown in Figure 1. Set it down away from
the edge of the table. Always remember that a microscope is an
expensive, precision instrument that should be handled carefully.
2. Plug the microscope in at your lab desk. Turn it on and make sure that
the light comes on (it may take a second or two to warm up). If the
microscope light does not turn on, check with your teacher.
3. Compare your microscope with Figure 2 on the next page. Identify
the parts on your microscope and determine the function of each part.
2. Use the words from the word
F bank below to fill in the parts
names in Table 1 below.
Word Bank:
Arm
Base
G Coarse adjustment
A Diaphragm
B Fine adjustment
Objective lenses
H Ocular lens
C Light
Stage
I Stage clips
D
J
E
Figure 2
4. Fill in Table 1 with the names and functions of each microscope part in Figure 2.
TABLE 1:
Part Name Function
A
B
C
D
E
F
G
H
I
J
4. 5. The ocular lens is marked with its magnification power. (This is how much larger the lens
makes objects appear.)
a. What is the magnification power of the ocular lens of your microscope?
6. The three objective lenses are marked with their magnification power. The first number
marked on each lens is the magnification power of that lens.
b. What is the magnification of the lowest power lens of your microscope?
c. What is the magnification of the high power lens?
7. To find the total magnification of your microscope as you are using it, multiply the ocular lens
power times the power of the objective lens that you are using. For example, if the ocular lens of
a microscope has a power of 5x and you use an objective that is 10x, then the total magnification
of the microscope at that time is 50x (5x10=50).
d. What is the total magnification of your microscope when using low power?
e. What is the total magnification of your microscope when using high power?
Part II. Preparing and using a Wet Mount
8. Using a piece of newspaper or phone book, find a small, lowercase letter “e.” Cut a 1 cm
square with that letter “e” near the middle of the square. (Do not just cut out the letter e, or it will
be too hard to work with. The piece of paper that you cut out should be about the size of a
fingernail.)
9. Place the square of paper in the middle of a clean glass slide. Position the square so that the
words are in normal reading position (in other words, don’t have the “e” turned sideways or
upside-down). With a pipette, put 1 drop of water on the paper square. Drop the water from
about 1 cm above the slide; do not touch the pipette to the paper square or the paper will stick
to the pipette.
10. Now, cover the water drop with a clean cover slip.
The best way to do this is shown in Figure 3. Hold
the cover slip at a 45° angle to the slide and move it
over the drop. As the water touches the cover slip, it
will start to spread. Gently lower the angle of the
cover slip to allow the water to evenly coat the under
surface, then let the slip drop into place.
You should not just drop the cover slip onto the
slide or air bubbles will get trapped. This makes the
slide very difficult to study. If you do trap several air
bubbles, remove the slip and try again. Never Figure 3
press on the cover slip to try to remove air bubbles.
This will break the cover slip and/or damage your specimen.
11. On your microscope, move the low-power objective into place. You should always begin
studying a slide on low power, because this makes it easiest to find objects on the slide.
Position the diaphragm so that the largest opening is used. This will allow the maximum amount
of light to be used. Check your wet mount slide to be sure that the bottom of the slide is dry. (A
wet slide will stick on the stage of the microscope.) Sit so that the arm of the microscope is
closest to you, and place the slide on the stage with the “e” in a normal reading position for you.
5. 12. You may use the stage clips to hold the slide in place if you like. If so, make sure that the
clips do not bump into the cover slip or touch the water. Look at the microscope from the side
and use the coarse adjustment knob to get the stage as close to the low-power objective as
possible.
13. Look through the ocular lens, keeping both eyes open. (It may seem
difficult to keep both eyes open, but learning to do so helps to prevent
eyestrain or headaches.) Slowly adjust the focus of the microscope using the
coarse adjustment knob until the letters become clear. Then, use the fine
adjustment to sharpen the focus. Move the slide left or right, forward or
backward, until the letter “e” is in the center of the field of view. Do not turn the
slide or pivot it. In the circle to the right, draw the letter “e” in the same size and
position as you see it in the microscope.
f. Describe the position of the image of the letter “e” through the microscope compared to
the position that it is placed on the slide.
14. Move the slide to the left.
g. Which direction did the image move?
15. Move the slide away from you.
h. Which way did the image move?
16. Look through the microscope as you change the adjustment of the diaphragm.
i. What does the diaphragm control?
Important Note: Before switching to high power, you should always position the specimen in
the center of the field of view and use the fine adjust to sharpen the focus of the image. Never
use the coarse adjustment when using high power. Doing so could break the slide or the
microscope!
17. Watching from the side, switch to the high-power objective lens. Make sure
that the lens does not hit the slide, but expect it to be very close.
18. Looking through the ocular, use a slight turn of the fine adjustment knob to
focus the image of the letter “e”. In the circle to the right, draw the letter “e” in
the same size and position as you see it in the microscope.
j. Describe the appearance of the image that you see. Are you
seeing more or less of the letter “e” than you did at low-power?
k. Is the field of view (the area that you are observing) larger or smaller when you use
high power?
6. 19. Look through the microscope (on high power) with the diaphragm at its largest setting. While
looking through the ocular, switch the microscope to low-power.
l. Compare the brightness of the field under high power and low power. Which setting
is brighter?
Part III. Other Observations
20. Select a picture from a magazine that has several bright colors. Cut out a 1 cm square from
the picture that has a variety of colors. Clean off your slide from Part II and make a new wet
mount with the magazine picture.
21. Observe the magazine picture, starting on low power and scanning the image. Then switch
to high power and observe the colors.
m. Record the colors seen without the microscope:
Record the colors seen with the microscope:
22. Prepare a new wet mount, this time using hair from people that are two
different colors. Cross the hairs on the slide (it may be easiest to cut each hair
to about a 1 cm length) and cover them where they cross. View the slide
under low power and focus on where they cross. Draw the image that you
see in the circle to the right.
23. Center the crossing point and switch to high power. Focus on the lighter of
the two hairs, using the fine adjustment knob.
n. Is the darker hair in focus at the same time as the lighter hair? Explain.
24. Prepare wet mounts of various other things, such as pieces of cloth, a fly’s wing, cotton, or
anything else that is thin enough to make into a wet mount. Draw your observations in the circles
below, labeling each with a brief description of what the specimen is and what magnification was
used for the drawing.
Object: Object: Object:
Magnification: Magnification: Magnification:
7. Final Analysis:
1. Why should you always begin to use a microscope with the low-power objective?
2. Why should you only use the fine adjust when the high-power objective is in position?
3. Why must the specimen be centered before switching to high power?
4. If you placed a letter “g” under the microscope, how would the image look in the field of view?
5. If a microscope has an ocular with a 5x power, and has objectives with powers of 10x and
50x, what is the total magnification of: (Show your math for full credit!)
a. low power?
b. high power?
6. If you are looking through a microscope at a freshly prepared wet mount and you see several
perfect circles that are completely clear surrounding you specimen, what is the most likely
explanation?