SlideShare une entreprise Scribd logo
1  sur  61
Télécharger pour lire hors ligne
Creating Online Tutorials
with Byte-Syze Learning


volume 2
Meylah’s eBook Series for Creatives
Click Here to Subscribe

                    eBooks
subscribe to this

Table of Contents                                      free eBook series


                Byte-Syze Learning:           How to Screencast
                What It Is All About          Your Own Web Video
                Introduction                  Byte-Syze Learning

                How to Make Earrings          How to Make Your Own
                by Wire Wrapping Briolettes   Photography Drink Coasters
                Byte-Syze Learning            Byte-Syze Learning

                How to Make
                Paper Cupcake Stands
                Byte-Syze Learning

                How to Make Chai
                (Indian Tea)
                Byte-Syze Learning


         eBooks                                                             2
Byte-Syze Learning:                                                                           subscribe to this
What It Is All About                                                                         free eBook series

Introduction / by Meylah
>
                      s


                                      talents with the world and get paid in    easy for both the creator as well as
                                      the process with Meylah's incredibly      the consumer.
                                      easy Byte-Syze Learning tool.
                                                                                You can also choose whether to sell
                                      What Is Byte-Syze Learning?               your Byte-Syze Learning tutorials or
                                      A Byte-Syze Learning is a visual          give them away for free to raise your
                                      online tutorial, displayed in a step-     profile. The tool allows you to set
                                      by-step and easy to consume               any price you’d like and you can elect
                                      format for your audience. We              to provide PDF versions of your step-
                                      have built an easy to use Byte-           by-step creative guides automatically
Photo credit: Dot D
                                      Syze Learning tool that allows you        so everyone wins!
So, what do you know? Whatever        to create beautiful step-by-step
it is, we bet you can share some of   tutorials with Images and Video.          What do you think? Why don’t you
your knowledge with others and        And, you can even sell them!.             check out some of the Byte-Syze
maybe even sell some of it or as we                                             Learning tutorials in this eBook and
like to say - Monetize Your Brain!    How Does It Work?                         see if it sparks an idea for your own
                                      You can create great looking, money-      tutorial or just follow the steps and
We have found that everyone has       making tutorials in just a few steps...   create something creative today!
unique skills that people want and    just like creating a blog post.  We       And, don’t forget to have fun!
now you can share those creative      really wanted to build this so it was


                          eBooks                                                                                        3
How to Make Earrings                                                                              subscribe to this
by Wire Wrapping Briolettes                                                                      free eBook series

Byte-Syze Learning / by Courtney Dirks
>
                s


                                           how to hold or work with the pliers.    •	 Make sure your briolettes are side
                                           After much practice, I mastered            drilled, not drilled top to bottom
                                           the technique, but it would have           (top to bottom drilling requires
                                           been much easier if I had watched          headpins).
                                           someone else first.
                                                                                   Good luck mastering this technique
                                           Here are a few tips you may want        and please share your finished
                                           to consider if you’re just getting      products with us!
                                           started:
                                          •	 Use a soft, high gauge of wire (26-    Related Articles
                                             28 mm), thinner wire will allow you
                                                                                   – How To Make A Pair of Earrings
                                             more flexibility and control as you
When I was getting started with              work with the wire.                   – Handmade Wire Jewelry -
wire jewelry, I had a difficult time                                                 Love at First Sight
trying to learn how to wire wrap          •	 You may want to start out with        – Throwing a Home Jewelry Party
side drilled briolette (pear or oval         copper wire to master the
shaped) gems. I bought a book                technique since it’s less expensive
to walk me through steps, but I              than sterling silver or gold (I
still struggled with the process             wasted a lot of wire before I
because I wasn’t comfortable with            mastered this technique).


                                       share this          view this           post this
                                       on facebook         on meylah           on twitter


                      eBooks                                                                Byte-Syze Learning             4
How to Make Earrings                                                                   subscribe to this
by Wire Wrapping Briolettes                                                           free eBook series

Byte-Syze Learning / by Courtney Dirks
 >
                 s


 Step 1:

Gather Your Supplies
•	 Wire (Sterling silver round soft 28 mm gauge
   wire for this demo)
•	 Side Drilled Briolette Gems or Beads (20x13
   mm faceted green amethyst briolettes were
   used for this demo)
•	 Ear Wires (Sterling silver leverback ear wires
   were used in this demo)
•	 Needle Nose Pliers
•	 Flat Nose Pliers
•	 Curved Nose Pliers
•	 Round Nose Pliers
•	 Wire Cutters                                     Video Tutorial: Click Here to Watch It


                       eBooks                                                   Byte-Syze Learning         5
How to Make Earrings                                   subscribe to this
by Wire Wrapping Briolettes                           free eBook series

Byte-Syze Learning / by Courtney Dirks
>
                s


 Step 2:

Clip and String Wire
Clip approximately 2 inches of wire using your
wire cutters and string the wire through your
briolette


                     eBooks                      Byte-Syze Learning        6
How to Make Earrings                                                                   subscribe to this
by Wire Wrapping Briolettes                                                           free eBook series

Byte-Syze Learning / by Courtney Dirks
 >
                 s


 Step 3:

Prep Your Wire
•	 With your flat nose pliers, leaving a small
   space above the tip of the briolette, bend one
   end of the wire at a 90 degree angle.

•	 Repeat the process with the other end of the
   wire in the opposite direction.

•	 The two wires should be crisscrossed once
   you’ve finished this step.


                                                    Video Tutorial: Click Here to Watch It


                      eBooks                                                    Byte-Syze Learning         7
How to Make Earrings                                                                 subscribe to this
by Wire Wrapping Briolettes                                                         free eBook series

Byte-Syze Learning / by Courtney Dirks
>
                s


 Step 4:

Clamp and Twist the Wires
Using your flat nose pliers, clamp on to the
wires you’ve crisscrossed and twist the pliers
toward you until you’ve coiled the wires to the
tip of the briolette.


                                                  Video Tutorial: Click Here to Watch It


                      eBooks                                                  Byte-Syze Learning         8
How to Make Earrings                                       subscribe to this
by Wire Wrapping Briolettes                               free eBook series

Byte-Syze Learning / by Courtney Dirks
>
                s


 Step 5:

Clip One of Your Wires
Using your wire cutters, clip one of your wires at
the top of the area that you’ve twisted, leaving
only one end of wire to work with.


                      eBooks                         Byte-Syze Learning        9
How to Make Earrings                                                                    subscribe to this
by Wire Wrapping Briolettes                                                            free eBook series

Byte-Syze Learning / by Courtney Dirks
 >
                 s


 Step 6:

Form a Circle with Your Wire
•	 Using your round nose pliers, clamp onto your
   wire as close to the top of the twisted area as
   possible.

•	 With your free hand, wrap the wire around the
   round nose pliers to create a circle.


                                                     Video Tutorial: Click Here to Watch It


                       eBooks                                                    Byte-Syze Learning         10
How to Make Earrings                                                                 subscribe to this
by Wire Wrapping Briolettes                                                         free eBook series

Byte-Syze Learning / by Courtney Dirks
>
               s


 Step 7:

Begin Wrapping your Wire
Hold the clamped circle in your non-dominant
hand using the round nose pliers. In your
dominant hand hold the curved nose pliers,
clamp on to the end of the loose wire and begin
wrapping that wire until you reach the base of
your briolette.


                                                  Video Tutorial: Click Here to Watch It


                     eBooks                                                   Byte-Syze Learning         11
How to Make Earrings                                                                  subscribe to this
by Wire Wrapping Briolettes                                                          free eBook series

Byte-Syze Learning / by Courtney Dirks
 >
                 s


 Step 8:

Clip Excess Wire
•	 Using your wire cutters, clip any excess wire
   at the base of the area you’ve just wrapped.

•	 If needed, use the needle nose pliers to tidy
   up the end of the wire.


                                                   Video Tutorial: Click Here to Watch It


                       eBooks                                                  Byte-Syze Learning         12
How to Make Earrings                                                                     subscribe to this
by Wire Wrapping Briolettes                                                             free eBook series

Byte-Syze Learning / by Courtney Dirks
>
                 s


 Step 9:

Slip Finished Wire Wrapped Stone to
the Earwire
Open the ear wire with your needle nose pliers,
slip the finished stone on, and close the ear wire.


                                                      Video Tutorial: Click Here to Watch It


                       eBooks                                                     Byte-Syze Learning         13
How to Make Earrings                                   subscribe to this
by Wire Wrapping Briolettes                           free eBook series

Byte-Syze Learning / by Courtney Dirks
>
                s


Step 10:

Complete the Pair
Repeat steps 2-9 to create a second earring to
complete your pair!


                     eBooks                      Byte-Syze Learning        14
How to Make                                                                                      subscribe to this
Paper Cupcake Stands                                                                            free eBook series

Byte-Syze Learning / by Dionne Christiansen
>
                s


                                           These paper cupcake stands are great    Related Articles
                                           because you can color-coordinate
                                                                                  – Spring Craft Tutorial: How to Make a
                                           them with a themed party, and you
                                                                                    Button Bouquet
                                           can make them any size you want.
                                           They’re also very cheap to make, so    – How To Package Your Product
                                           you can make plenty of them without    – How to Set up a Craft Booth that
                                           breaking the bank.                       Customers Can't Resist


Who doesn’t love cupcakes? I love
to entertain, and have a collection
of pretty plates and cupcake stands
to pretty up my presentation when I
have friends over for baked goodies.
But all that china and ceramic-
ware can add up and get pricey, so
I decided to make my own paper
cupcake stands.


                                       share this          view this          post this
                                       on facebook         on meylah          on twitter


                      eBooks                                                               Byte-Syze Learning              15
How to Make                                              subscribe to this
Paper Cupcake Stands                                    free eBook series

Byte-Syze Learning / by Dionne Christiansen
>
                s


Step 1:

What You Will Need
Here is what you will need to get started:
•	 1 sheet of chipboard
•	 1 sheet of plain colored carstock
•	 1 sheet of pattered cardstock
•	 1 length of ribbon/lace to fit around your
   cupcake stand
•	 Scissors
•	 Glue
•	 Ruler
•	 Pen
•	 Cup (if you don’t have a circle-drawing tool)


                      eBooks                       Byte-Syze Learning        16
How to Make                                           subscribe to this
Paper Cupcake Stands                                 free eBook series

Byte-Syze Learning / by Dionne Christiansen
>
                s


Step 2:

Creating The Tray
We are going to start by making the tray that
your cupcake will sit on. Take your chipboard
and use your cup to trace a circle on the
chipboard. Then repeat this step on the plain
colored cardstock.


                     eBooks                     Byte-Syze Learning        17
How to Make                                             subscribe to this
Paper Cupcake Stands                                   free eBook series

Byte-Syze Learning / by Dionne Christiansen
>
                s


Step 3:

Creating The Support
Next we will be making the support stands.
Grab your chipboard and measure and rule a 3
inch x 2.75 inch rectangle on the corner of the
sheet.


                      eBooks                      Byte-Syze Learning        18
How to Make                                                subscribe to this
Paper Cupcake Stands                                      free eBook series

Byte-Syze Learning / by Dionne Christiansen
>
                 s


Step 4:

Measure and Mark Your Support
From there, measure in 5/8 of an inch in from
the left and right sides along the 2.75 inch side.
Mark these places with your pen. Then along
the 3 inch side, measure and mark 1 inch down.


                       eBooks                        Byte-Syze Learning        19
How to Make                                               subscribe to this
Paper Cupcake Stands                                     free eBook series

Byte-Syze Learning / by Dionne Christiansen
>
                 s


Step 5:

Finish Measuring the Support
Rule a line across the 2.75 length of the
rectangle 1 inch down from the top where you
marked at the end of Step 3, and then rule a
line from the two marks you made at the start
of Step 4 to the 1 inch line your just drew. Your
rectangle should look like this image here.


                      eBooks                        Byte-Syze Learning        20
How to Make                                                subscribe to this
Paper Cupcake Stands                                      free eBook series

Byte-Syze Learning / by Dionne Christiansen
>
                s


Step 6:

Cutting Your Pieces
Cut along the lines your ruled to make the first
support leg for the stand.

Then cut a slit down the middle of the shape,
but only half way. Repeat steps 3 through 6 to
make another leg, but on this second leg, cut
the slit on the opposite side, and again only half
way down.


                      eBooks                         Byte-Syze Learning        21
How to Make                                             subscribe to this
Paper Cupcake Stands                                   free eBook series

Byte-Syze Learning / by Dionne Christiansen
>
                s


Step 7:

Decorating Your Pieces
Trace your two new leg pieces onto your
patterned cardstock, but make them half an
inch taller on the thin side of the shape.

Cut slits on these patterned pieces in the same
position you did on the chipboard.


                      eBooks                      Byte-Syze Learning        22
How to Make                                          subscribe to this
Paper Cupcake Stands                                free eBook series

Byte-Syze Learning / by Dionne Christiansen
>
                s


Step 8:

Gather Your Pieces
These are the pieces you should have at this
point.


                     eBooks                    Byte-Syze Learning        23
How to Make                                                  subscribe to this
Paper Cupcake Stands                                        free eBook series

Byte-Syze Learning / by Dionne Christiansen
>
                 s


Step 9:

Glue Your Pieces
Apply glue to the back of your chipboard leg
pieces, and stick a patterned cardstock piece
over one side.

Then fold over the half inch flap so that it sits at
a right angle.


                       eBooks                          Byte-Syze Learning        24
How to Make                                             subscribe to this
Paper Cupcake Stands                                   free eBook series

Byte-Syze Learning / by Dionne Christiansen
>
                s


Step 10:

Stick The Pieces Together
Stick the patterned cardstock to the other side
and make sure that both top flaps are folded
out at right angles.


                      eBooks                      Byte-Syze Learning        25
How to Make                                           subscribe to this
Paper Cupcake Stands                                 free eBook series

Byte-Syze Learning / by Dionne Christiansen
>
                 s


Step 11:

Cut Your Pieces
Cut a slit in the middle of the folded flaps.


                       eBooks                   Byte-Syze Learning        26
How to Make                                              subscribe to this
Paper Cupcake Stands                                    free eBook series

Byte-Syze Learning / by Dionne Christiansen
>
                s


Step 12:

Fit Together Base Legs
Slot together the two legs by pushing them
along the middle slits. It should end up looking
like this.


                      eBooks                       Byte-Syze Learning        27
How to Make                                              subscribe to this
Paper Cupcake Stands                                    free eBook series

Byte-Syze Learning / by Dionne Christiansen
>
                s


Step 13:

Add Trim To The Tray
Apply glue around the rim of one side of the
chipboard circle, and then take your ribbon/lace
and stick it around the edges. Gather it every
now and then so that it contours along the rim.


                     eBooks                        Byte-Syze Learning        28
How to Make                                              subscribe to this
Paper Cupcake Stands                                    free eBook series

Byte-Syze Learning / by Dionne Christiansen
>
                s


Step 14:

Cover The Tray
Apply glue to the rim of your plain colored
circle on one side, and then adhere it to the
other side of the tray (opposite to the side you
applied the lace/ribbon to).


                      eBooks                       Byte-Syze Learning        29
How to Make                                               subscribe to this
Paper Cupcake Stands                                     free eBook series

Byte-Syze Learning / by Dionne Christiansen
>
                 s


Step 15:

Assemble The Stand
Apply glue to the folded flaps on the top of the
leg base.

Then center it on the under-side of the tray
(the side with the lace/ribbon) and press down
firmly to secure. Hold still for a few minutes to
allow glue to set.


                      eBooks                        Byte-Syze Learning        30
How to Make                                         subscribe to this
Paper Cupcake Stands                               free eBook series

Byte-Syze Learning / by Dionne Christiansen
>
               s


Step 16:

Ready To Go!
Your cupcake stand is now complete. Now all
you have to do is bake some cupcakes!


                    eBooks                    Byte-Syze Learning        31
Download This eBook!                 >

>
      s


                    If you enjoy this eBook, please      You Can:
                    consider sending it to your          – Download This eBook
                    friends and network!                 – Share This eBook by Email
                                                         – Post or Embed This eBook on Your Blog
                                                         – Post to Twitter


            Pssssst! Go to next page for more content!   >


          eBooks                                                                               32
How to Make Chai                                                                              subscribe to this
(Indian Tea)                                                                                 free eBook series

Byte-Syze Learning / by Ram Dutt
>
               s


                                      Chai is prepared with loose tea          cardamom, ginger, cinnamon, bay
                                      leaves brewed in boiling water.          leaves and more. Follow this step by
                                      There are several types of tea leaves    step Byte-Syze Leaning tutorial to
                                      from all over the world…some of          make your own Chai and enjoy…and,
                                      the more popular names of tea are        don’t forget to share with us how
                                      from Assam, Darjeling and many           you make your own Chai and the
                                      more. Each region’s tea leaves have      special ingredients that you use!
                                      a different flavor and strength.
                                                                               Related Articles
                                      The most commonly used tea leaf is
                                                                            – Sweet Creativity: Handmade
                                      called Orange Peoke. This has mild
                                                                              Inspiration for Valentine's Day
                                      body in flavor and you can buy this
The Indian subcontinent calls         type of loose tea at any South Asian – Crafty Foodies: 9 Handmade Products
it Chai and today you can find        grocery store and some larger chains.   for the Kitchen
several versions of Chai at cafés     In the absence of Orange Peoke, you – 10 Creative Ideas To Do With Your
all around the world. Chai in         can use Lipton tea bags as well.        Kids
the South East Asian countries
is commonly a hot beverage of         Based on your taste, you can add
choice for breakfast, snack time or   a spice or a combination of spices
just anytime to relax.                to add flavor to your Chai such as


                                 share this           view this            post this
                                 on facebook          on meylah            on twitter


                     eBooks                                                             Byte-Syze Learning         33
How to Make Chai                               subscribe to this
(Indian Tea)                                  free eBook series

Byte-Syze Learning / by Ram Dutt
>
                s


Step 1:

Ingredients You Will Need
To make Chai you will need:
•	 Loose Tea
•	 Milk (Any type works great)
•	 Sugar or sweetener
•	 A Pot
•	 A Strainer
•	 A Cup (To Drink!)

To add flavor you may want some of the
following:
•	 Ginger
•	 Cardamom
•	 Cinnamon
•	 Bay Leaves


                      eBooks             Byte-Syze Learning        34
How to Make Chai                                                                    subscribe to this
(Indian Tea)                                                                       free eBook series

Byte-Syze Learning / by Ram Dutt
>
               s


Step 2:

Boil the Water
For each cup of Chai, you will need 1/2 cup to
3/4 cup of water (depending on how much milk
you want). Put your water in the pot and bring
to a boil.


                                                 Video Tutorial: Click Here to Watch It


                     eBooks                                                  Byte-Syze Learning         35
How to Make Chai                                                                     subscribe to this
(Indian Tea)                                                                        free eBook series

Byte-Syze Learning / by Ram Dutt
>
                s


Step 3:

Add Tea and Spices
Once the water is at a boil, add 1 tea spoon of
loose tea (or 1 tea bag). You can add more or
less based on the strength of the flavor you
want. Also add your spices to the pot at this
time. In this video, ginger and cardamom were
added.


                                                  Video Tutorial: Click Here to Watch It


                      eBooks                                                  Byte-Syze Learning         36
How to Make Chai                                                                     subscribe to this
(Indian Tea)                                                                        free eBook series

Byte-Syze Learning / by Ram Dutt
>
                s


Step 4:

Add Milk
Once the tea starts to brew, let the water boil
for a few minutes based on how strong you
want your Chai. Add 1/2 cup or 1/4 cup of milk
as needed and bring the ingredients to boil.


                                                  Video Tutorial: Click Here to Watch It


                      eBooks                                                  Byte-Syze Learning         37
How to Make Chai                                                                    subscribe to this
(Indian Tea)                                                                       free eBook series

Byte-Syze Learning / by Ram Dutt
>
               s


Step 5:

Strain the Chai
Let the Chai come to boil 2-3 times and reduce
heat to keep from boiling over. Then pour the
Chai through the strainer into your cup.


                                                 Video Tutorial: Click Here to Watch It


                     eBooks                                                  Byte-Syze Learning         38
How to Make Chai                                         subscribe to this
(Indian Tea)                                            free eBook series

Byte-Syze Learning / by Ram Dutt
>
                s


Step 6:

Add Sweeter and Enjoy your Chai!
Add sweetener (sugar, brown sugar, agave
nectar, honey) to your Chai and stir and enjoy a
nice cup of hot Chai!


                      eBooks                       Byte-Syze Learning        39
How to Screencast                                                                             subscribe to this
Your Own Web Video                                                                           free eBook series

Byte-Syze Learning / by Justine Smith
>
                       s


                                      We've put together the following
                                      Byte-Syze Learning tutorial to show
                                      you exactly how quick it is to record,
                                      edit and produce your very first web
                                      video.

                                      Related Articles
                                      – How to Use Screencasting To Promote
                                        Your Business
                                      – How To Find and Source an Image
Photo credit: Blakie                    with Creative Commons and Flickr
As we've discussed on Meylah          – 3 Favorite Pocket Video Cameras
before, screencasting is a fun
and unique way to increase your
readership, fans and friends by
offering useful web videos that
help both your viewers and your
business.


                                  share this          view this            post this
                                  on facebook         on meylah            on twitter


                           eBooks                                                       Byte-Syze Learning        40
How to Screencast                                        subscribe to this
Your Own Web Video                                      free eBook series

Byte-Syze Learning / by Justine Smith
>
                s


Step 1:

Download
Download your preferred screencasting
software of choice. In this case, we've used the
30 day free trial of Camtasia, from TechSmith.


                      eBooks                       Byte-Syze Learning        41
How to Screencast                                       subscribe to this
Your Own Web Video                                     free eBook series

Byte-Syze Learning / by Justine Smith
>
                 s


Step 2:

Set Your Recording Size
Once you have downloaded and installed the
program, open it up and organize the screen
size you'd like to capture by using your mouse.

When you’re all finished, hit record.


                       eBooks                     Byte-Syze Learning        42
How to Screencast                                                                    subscribe to this
Your Own Web Video                                                                  free eBook series

Byte-Syze Learning / by Justine Smith
>
                s


Step 3:

Record Your Video
Once you hit record, you will see 4 green
corners flashing which gives you a reminder
of what your audience will see when they
watch your video. Keep your navigational
window within these frames to avoid cutting off
information you'd like your viewers to obtain.

When you have finished recording your first
video, hit stop.


                                                  Video Tutorial: Click Here to Watch It


                     eBooks                                                   Byte-Syze Learning         43
How to Screencast                                           subscribe to this
Your Own Web Video                                         free eBook series

Byte-Syze Learning / by Justine Smith
>
                 s


Step 4:

Hit Stop or Delete
In the bottom right corner of your screen you
will see a tiny camcorder icon. When you are
finished recording your video, you will right click
and hit 'stop'.

*Alternatively, if you have made an error while
recording your video, you can hit 'delete' and it
will automatically allow you to start over without
any additional steps.*


                       eBooks                         Byte-Syze Learning        44
How to Screencast                                        subscribe to this
Your Own Web Video                                      free eBook series

Byte-Syze Learning / by Justine Smith
>
                s


Step 5:

Decide How to Proceed
Once you hit stop, a preview of your video will
pop up. Watch your video and then choose one
of four options:

Save: This will allow you to save the video as a
Camtasia (or AVI) file.

Delete: If you decide that you want to redo your
video, simply hit ‘delete’ and try again.

Edit: This option allows you to add graphics,
music, audio and much more before publishing it.

Produce: If you are happy with the video as
is, simply hit ‘produce’ and follow the steps
provided.


                      eBooks                       Byte-Syze Learning        45
How to Screencast                                                                     subscribe to this
Your Own Web Video                                                                   free eBook series

Byte-Syze Learning / by Justine Smith
>
                s


Step 6:

Edit Your Video
Should you decide to edit your video, you will
be sent to Camtasia Studio where you can then
edit your video by adding intro graphics, music,
adjusting the audio and much more.

Watch this short video walking you through
where to find options for adding text, music and
adjusting your audio.


                                                   Video Tutorial: Click Here to Watch It


                      eBooks                                                   Byte-Syze Learning         46
How to Screencast                                          subscribe to this
Your Own Web Video                                        free eBook series

Byte-Syze Learning / by Justine Smith
>
                 s


Step 7:

Produce Your Video
If the video is ready to go and you don't want to
add any bells and whistles, simply hit ‘produce’
and follow the short series of options in order
to export your file for uploading on various sites
like YouTube.

Go to file, select ‘produce’ and follow a simple
step by step wizard to get your file ready for
uploading to your blog, website or YouTube
account.


                      eBooks                         Byte-Syze Learning        47
How to Screencast                                      subscribe to this
Your Own Web Video                                    free eBook series

Byte-Syze Learning / by Justine Smith
>
               s


Step 8:

Video Rendering
Once you have finished the wizard to produce
your video, you will have to wait just a few
moments for the video to render.

That's it! It's extremely simple to screencast
amazing videos for your audience and fan base
by using software like Camtasia and we hope
you liked this Byte-Size Learning tutorial.


                     eBooks                      Byte-Syze Learning        48
How to Make Your Own                                                                                    subscribe to this
Photography Drink Coasters                                                                             free eBook series

Byte-Syze Learning / by Jason Dirks
>
                 s


                                           it doesn’t always happen. So in the            Related Articles
                                           spirit of “trying a little extra” next time,
                                                                                          – The Anatomy of a Great Product Shot
                                           here’s a way to make you want to use a
                                           drink coaster using your own pictures!         – What I've Learned from Taking
                                           And, these make great gifts too!                 Thousands of Product Shots
                                                                                          – Online Printing Solutions: More Perks
                                           Follow this simple step-by-step                  than Price and Quality
                                           tutorial on how to make your own
                                           photography drink coasters and the
                                           next time you’ll not only prevent
                                           unwanted water rings, you’ll be able to
                                           show off your pictures each time you
Last week, I saw this Do-It-Yourself for   grab a drink!
making photo coasters on Photojojo
and I wanted to replicate it using Byte-
Syze Learning.

I know in our house we “try” to use
drink coasters to keep the water rings
off the coffee table and desks, but


                                     share this               view this              post this
                                     on facebook              on meylah              on twitter


                       eBooks                                                                     Byte-Syze Learning                49
How to Make Your Own                                                                 subscribe to this
Photography Drink Coasters                                                          free eBook series

Byte-Syze Learning / by Jason Dirks
>
                s


Step 1:

Gather Supplies
The first thing you’ll need to do is gather the
supplies you’ll need:
•	 Printed Pictures (as many as you want!)
•	 A Pencil or Pen
•	 A Paint Brush
•	 An X-ACTO Knife (this works best) or Pair of
   Scissors
•	 Round or Square Object to Draw Around
   (cup, plate, old coaster, etc.)
•	 Varnish to Waterproof your Coasters
•	 Cork (Sheets or Tiles work great and can be
   found at any craft store)                      Video Tutorial: Click Here to Watch It
•	 A Cutting Surface


                      eBooks                                                  Byte-Syze Learning         50
How to Make Your Own                                      subscribe to this
Photography Drink Coasters                               free eBook series

Byte-Syze Learning / by Jason Dirks
>
                s


Step 2:

Trace Your Cork
Simply put your round or square object on top
of your cork and take your pencil or pen and
trace around it. Anything will work like a coffee
cup, a small plate, or even an old drink coaster.


                      eBooks                        Byte-Syze Learning        51
How to Make Your Own                                    subscribe to this
Photography Drink Coasters                             free eBook series

Byte-Syze Learning / by Jason Dirks
>
                s


Step 3:

Trace Your Pictures
Use the same round or square object that you
used to shape your cork and take your pencil
or pen and trace around your selected pictures.
Choose any pictures you like or ones that
someone else would enjoy if you’re giving these
as a gift!


                     eBooks                       Byte-Syze Learning        52
How to Make Your Own                                  subscribe to this
Photography Drink Coasters                           free eBook series

Byte-Syze Learning / by Jason Dirks
>
               s


Step 4:

Cut Your Cork
Now, that you have the shape drawn on your
cork, it’s time to cut. The best is to use an
X-ACTO knife although you can also use a box
cutter or pair of scissors too…just remember
to be careful. Place the cork on your cutting
surface and cut around the line you traced
earlier.


                     eBooks                     Byte-Syze Learning        53
How to Make Your Own                                     subscribe to this
Photography Drink Coasters                              free eBook series

Byte-Syze Learning / by Jason Dirks
>
                s


Step 5:

Cut Your Pictures
The easiest way to cut your pictures is probably
to use a pair of scissors, although you may not
get the perfectly round edges as you would
with an X-ACTO knife so you choose. Place
picture on your cutting surface and cut around
the line you traced earlier.


                      eBooks                       Byte-Syze Learning        54
How to Make Your Own                                       subscribe to this
Photography Drink Coasters                                free eBook series

Byte-Syze Learning / by Jason Dirks
>
                 s


Step 6:

Stick them Together
Using the varnish and your paint brush, apply
a layer of varnish to the top of the cut piece of
cork and then stick your picture to the top of
that cork. Make sure to apply even pressure to
the picture for about 30 seconds to make sure
it’s not going anywhere…hey, it’s starting to look
like a coaster!


                      eBooks                         Byte-Syze Learning        55
How to Make Your Own                                        subscribe to this
Photography Drink Coasters                                 free eBook series

Byte-Syze Learning / by Jason Dirks
>
                 s


Step 7:

Waterproof Your New Coaster
You want to make sure these will hold up with all
the drinks so apply at least 2 layers of varnish to
the top and sides of the picture and cork to make
it waterproof. And remember to wait for the first
layer to dry before applying the second layer.


                       eBooks                         Byte-Syze Learning        56
How to Make Your Own                                      subscribe to this
Photography Drink Coasters                               free eBook series

Byte-Syze Learning / by Jason Dirks
>
                s


Step 8:

You’re Finished, Just Wait!
You’re all finished! Now, all you have to do is
wait for them to dry. The best thing to do is put
them in a safe place overnight before testing
them out with a drink. And that’s it! Good luck
and enjoy your new coasters!


                      eBooks                        Byte-Syze Learning        57
Download This eBook!                 >

>
      s


                    If you enjoy this eBook, please      You Can:
                    consider sending it to your          – Download This eBook
                    friends and network!                 – Share This eBook by Email
                                                         – Post or Embed This eBook on Your Blog
                                                         – Post to Twitter


            Pssssst! Go to next page for more content!   >


          eBooks                                                                               58
subscribe to this
                                                                                                 free eBook series


>
                 s


Contributors                              wildlife and nature, travel, sports and   Justine Smith, an Etsy success
Ram Dutt, an engineer by profession       adventure.                                story who used her experience
who comes from a family of                                                          selling online and turned it into a
musicians and artists. He sees his        Courtney Dirks, a recent escapee          full-time wholesale business. Her
own passion for music and art in his      of the corporate world with a             real passion is helping handmade
nine year old son, who has already        background in commercial real estate,     sellers find success marketing their
inspired many with his art and            communications, and sales. She            craft products. She offers tips on
has led Ram to foster creativity in       began alleviating her stress at work      advertising, branding, social media
many others. Ram and his family           through creating handmade jewelry.        and growth via email through her
live in Seattle, which is full of life,   After bouncing around the west coast      blog Justine's Media.
energy and an enthusiastic creative       for years, she settled in Seattle and
community.                                has found great joy traveling, playing    Stay Tuned…
                                          sports and interacting with the local     As part of the Meylah eBook Series,
Jason Dirks, a business                   creative community.                       we will be releasing our next eBook
management consultant by day and                                                    on building a successful online
a passionate outdoor photographer         Dionne Christiansen, a graphic            storefront. We will cover topics
by night (or any other hour he can        designer based in Houston, Texas          including blogging for your business,
get outside and take pictures)! He        and the face behind the Etsy store        using social media to build your
and his wife live in beautiful Seattle,   City of Dionne and her blog, Notes        brand, and all the important things
which provides the ideal landscape        From Dionne.                              that go into building a successful
for his photographic interests:                                                     online storefront so stay tuned!


                       eBooks                                                                                              59
subscribe to this
                                                                          free eBook series


>
                 s


About Meylah
Meylah is devoted to building an online
creative community for individuals to
learn, share and support each other’s
business growth online. We know how
difficult and time consuming being
an entrepreneur can be, but with the
proper skills at hand and togetherness
(the theme of our logo), we believe
anyone can succeed!

Our Values
•	 Be Committed to Helping Each           •	 Together We Create a Great
   Other                                     Experience
•	 Live and Breathe Creativity            •	 Foster Dynamic Learning
•	 Smile and Have Fun                     •	 Be Humble and Honest
•	 Show Passion in All That You Do        •	 Do More with Less
•	 Give Before You Take                   •	 Embrace Change


                       eBooks                                                                  60
subscribe to this
                                                                                   free eBook series


>
                s


License                                 Warning and Disclaimer
This work is licensed under the         Every effort has been made to
Creative Commons Attribution Non-       make this book as complete and as
commercial No Derivative Works          accurate as possible, but no warranty
3.0 United States License. To view      of fitness is implied. The information
a copy of this license, visit http://   provided is on an “as is” basis. The
creativecommons.org/licenses/           authors shall have neither liability nor
byncnd/3.0/us/ or send a letter         responsibility to any person or entity
to Creative Commons, 171 Second         with respect to loss or damages
Street, Suite 300, San Francisco,       arising from the information
California, 94105, USA                  contained in this eBook.

Trademarks
All terms mentioned in this book
that are known to be trademarks
or service marks have been
appropriately capitalized. Use of
a term in this book should not be
regarded as affecting the validity of
any trademark or service mark.


                      eBooks                                                                            61

Contenu connexe

Dernier

call Now 9811711561 Cash Payment乂 Call Girls in Dwarka Mor
call Now 9811711561 Cash Payment乂 Call Girls in Dwarka Morcall Now 9811711561 Cash Payment乂 Call Girls in Dwarka Mor
call Now 9811711561 Cash Payment乂 Call Girls in Dwarka Mor
vikas rana
 

Dernier (15)

2k Shots ≽ 9205541914 ≼ Call Girls In Palam (Delhi)
2k Shots ≽ 9205541914 ≼ Call Girls In Palam (Delhi)2k Shots ≽ 9205541914 ≼ Call Girls In Palam (Delhi)
2k Shots ≽ 9205541914 ≼ Call Girls In Palam (Delhi)
 
2k Shots ≽ 9205541914 ≼ Call Girls In Mukherjee Nagar (Delhi)
2k Shots ≽ 9205541914 ≼ Call Girls In Mukherjee Nagar (Delhi)2k Shots ≽ 9205541914 ≼ Call Girls In Mukherjee Nagar (Delhi)
2k Shots ≽ 9205541914 ≼ Call Girls In Mukherjee Nagar (Delhi)
 
8377087607 Full Enjoy @24/7-CLEAN-Call Girls In Chhatarpur,
8377087607 Full Enjoy @24/7-CLEAN-Call Girls In Chhatarpur,8377087607 Full Enjoy @24/7-CLEAN-Call Girls In Chhatarpur,
8377087607 Full Enjoy @24/7-CLEAN-Call Girls In Chhatarpur,
 
9892124323, Call Girls in mumbai, Vashi Call Girls , Kurla Call girls
9892124323, Call Girls in mumbai, Vashi Call Girls , Kurla Call girls9892124323, Call Girls in mumbai, Vashi Call Girls , Kurla Call girls
9892124323, Call Girls in mumbai, Vashi Call Girls , Kurla Call girls
 
(Aarini) Russian Call Girls Surat Call Now 8250077686 Surat Escorts 24x7
(Aarini) Russian Call Girls Surat Call Now 8250077686 Surat Escorts 24x7(Aarini) Russian Call Girls Surat Call Now 8250077686 Surat Escorts 24x7
(Aarini) Russian Call Girls Surat Call Now 8250077686 Surat Escorts 24x7
 
Top Rated Pune Call Girls Tingre Nagar ⟟ 6297143586 ⟟ Call Me For Genuine Se...
Top Rated  Pune Call Girls Tingre Nagar ⟟ 6297143586 ⟟ Call Me For Genuine Se...Top Rated  Pune Call Girls Tingre Nagar ⟟ 6297143586 ⟟ Call Me For Genuine Se...
Top Rated Pune Call Girls Tingre Nagar ⟟ 6297143586 ⟟ Call Me For Genuine Se...
 
The Selfspace Journal Preview by Mindbrush
The Selfspace Journal Preview by MindbrushThe Selfspace Journal Preview by Mindbrush
The Selfspace Journal Preview by Mindbrush
 
WOMEN EMPOWERMENT women empowerment.pptx
WOMEN EMPOWERMENT women empowerment.pptxWOMEN EMPOWERMENT women empowerment.pptx
WOMEN EMPOWERMENT women empowerment.pptx
 
Pokemon Go... Unraveling the Conspiracy Theory
Pokemon Go... Unraveling the Conspiracy TheoryPokemon Go... Unraveling the Conspiracy Theory
Pokemon Go... Unraveling the Conspiracy Theory
 
2k Shots ≽ 9205541914 ≼ Call Girls In Dashrath Puri (Delhi)
2k Shots ≽ 9205541914 ≼ Call Girls In Dashrath Puri (Delhi)2k Shots ≽ 9205541914 ≼ Call Girls In Dashrath Puri (Delhi)
2k Shots ≽ 9205541914 ≼ Call Girls In Dashrath Puri (Delhi)
 
call Now 9811711561 Cash Payment乂 Call Girls in Dwarka Mor
call Now 9811711561 Cash Payment乂 Call Girls in Dwarka Morcall Now 9811711561 Cash Payment乂 Call Girls in Dwarka Mor
call Now 9811711561 Cash Payment乂 Call Girls in Dwarka Mor
 
$ Love Spells^ 💎 (310) 882-6330 in West Virginia, WV | Psychic Reading Best B...
$ Love Spells^ 💎 (310) 882-6330 in West Virginia, WV | Psychic Reading Best B...$ Love Spells^ 💎 (310) 882-6330 in West Virginia, WV | Psychic Reading Best B...
$ Love Spells^ 💎 (310) 882-6330 in West Virginia, WV | Psychic Reading Best B...
 
2k Shots ≽ 9205541914 ≼ Call Girls In Jasola (Delhi)
2k Shots ≽ 9205541914 ≼ Call Girls In Jasola (Delhi)2k Shots ≽ 9205541914 ≼ Call Girls In Jasola (Delhi)
2k Shots ≽ 9205541914 ≼ Call Girls In Jasola (Delhi)
 
(Anamika) VIP Call Girls Navi Mumbai Call Now 8250077686 Navi Mumbai Escorts ...
(Anamika) VIP Call Girls Navi Mumbai Call Now 8250077686 Navi Mumbai Escorts ...(Anamika) VIP Call Girls Navi Mumbai Call Now 8250077686 Navi Mumbai Escorts ...
(Anamika) VIP Call Girls Navi Mumbai Call Now 8250077686 Navi Mumbai Escorts ...
 
LC_YouSaidYes_NewBelieverBookletDone.pdf
LC_YouSaidYes_NewBelieverBookletDone.pdfLC_YouSaidYes_NewBelieverBookletDone.pdf
LC_YouSaidYes_NewBelieverBookletDone.pdf
 

En vedette

Social Media Marketing Trends 2024 // The Global Indie Insights
Social Media Marketing Trends 2024 // The Global Indie InsightsSocial Media Marketing Trends 2024 // The Global Indie Insights
Social Media Marketing Trends 2024 // The Global Indie Insights
Kurio // The Social Media Age(ncy)
 

En vedette (20)

PEPSICO Presentation to CAGNY Conference Feb 2024
PEPSICO Presentation to CAGNY Conference Feb 2024PEPSICO Presentation to CAGNY Conference Feb 2024
PEPSICO Presentation to CAGNY Conference Feb 2024
 
Content Methodology: A Best Practices Report (Webinar)
Content Methodology: A Best Practices Report (Webinar)Content Methodology: A Best Practices Report (Webinar)
Content Methodology: A Best Practices Report (Webinar)
 
How to Prepare For a Successful Job Search for 2024
How to Prepare For a Successful Job Search for 2024How to Prepare For a Successful Job Search for 2024
How to Prepare For a Successful Job Search for 2024
 
Social Media Marketing Trends 2024 // The Global Indie Insights
Social Media Marketing Trends 2024 // The Global Indie InsightsSocial Media Marketing Trends 2024 // The Global Indie Insights
Social Media Marketing Trends 2024 // The Global Indie Insights
 
Trends In Paid Search: Navigating The Digital Landscape In 2024
Trends In Paid Search: Navigating The Digital Landscape In 2024Trends In Paid Search: Navigating The Digital Landscape In 2024
Trends In Paid Search: Navigating The Digital Landscape In 2024
 
5 Public speaking tips from TED - Visualized summary
5 Public speaking tips from TED - Visualized summary5 Public speaking tips from TED - Visualized summary
5 Public speaking tips from TED - Visualized summary
 
ChatGPT and the Future of Work - Clark Boyd
ChatGPT and the Future of Work - Clark Boyd ChatGPT and the Future of Work - Clark Boyd
ChatGPT and the Future of Work - Clark Boyd
 
Getting into the tech field. what next
Getting into the tech field. what next Getting into the tech field. what next
Getting into the tech field. what next
 
Google's Just Not That Into You: Understanding Core Updates & Search Intent
Google's Just Not That Into You: Understanding Core Updates & Search IntentGoogle's Just Not That Into You: Understanding Core Updates & Search Intent
Google's Just Not That Into You: Understanding Core Updates & Search Intent
 
How to have difficult conversations
How to have difficult conversations How to have difficult conversations
How to have difficult conversations
 
Introduction to Data Science
Introduction to Data ScienceIntroduction to Data Science
Introduction to Data Science
 
Time Management & Productivity - Best Practices
Time Management & Productivity -  Best PracticesTime Management & Productivity -  Best Practices
Time Management & Productivity - Best Practices
 
The six step guide to practical project management
The six step guide to practical project managementThe six step guide to practical project management
The six step guide to practical project management
 
Beginners Guide to TikTok for Search - Rachel Pearson - We are Tilt __ Bright...
Beginners Guide to TikTok for Search - Rachel Pearson - We are Tilt __ Bright...Beginners Guide to TikTok for Search - Rachel Pearson - We are Tilt __ Bright...
Beginners Guide to TikTok for Search - Rachel Pearson - We are Tilt __ Bright...
 
Unlocking the Power of ChatGPT and AI in Testing - A Real-World Look, present...
Unlocking the Power of ChatGPT and AI in Testing - A Real-World Look, present...Unlocking the Power of ChatGPT and AI in Testing - A Real-World Look, present...
Unlocking the Power of ChatGPT and AI in Testing - A Real-World Look, present...
 
12 Ways to Increase Your Influence at Work
12 Ways to Increase Your Influence at Work12 Ways to Increase Your Influence at Work
12 Ways to Increase Your Influence at Work
 
ChatGPT webinar slides
ChatGPT webinar slidesChatGPT webinar slides
ChatGPT webinar slides
 
More than Just Lines on a Map: Best Practices for U.S Bike Routes
More than Just Lines on a Map: Best Practices for U.S Bike RoutesMore than Just Lines on a Map: Best Practices for U.S Bike Routes
More than Just Lines on a Map: Best Practices for U.S Bike Routes
 
Ride the Storm: Navigating Through Unstable Periods / Katerina Rudko (Belka G...
Ride the Storm: Navigating Through Unstable Periods / Katerina Rudko (Belka G...Ride the Storm: Navigating Through Unstable Periods / Katerina Rudko (Belka G...
Ride the Storm: Navigating Through Unstable Periods / Katerina Rudko (Belka G...
 
Barbie - Brand Strategy Presentation
Barbie - Brand Strategy PresentationBarbie - Brand Strategy Presentation
Barbie - Brand Strategy Presentation
 

Creating Online Tutorials with Byte-Syze Learning

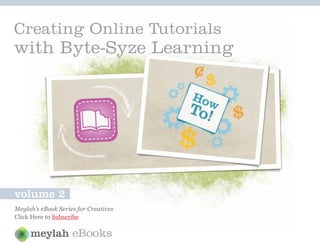
  • 1. Creating Online Tutorials with Byte-Syze Learning volume 2 Meylah’s eBook Series for Creatives Click Here to Subscribe eBooks
  • 2. subscribe to this Table of Contents free eBook series Byte-Syze Learning: How to Screencast What It Is All About Your Own Web Video Introduction Byte-Syze Learning How to Make Earrings How to Make Your Own by Wire Wrapping Briolettes Photography Drink Coasters Byte-Syze Learning Byte-Syze Learning How to Make Paper Cupcake Stands Byte-Syze Learning How to Make Chai (Indian Tea) Byte-Syze Learning eBooks 2
  • 3. Byte-Syze Learning: subscribe to this What It Is All About free eBook series Introduction / by Meylah > s talents with the world and get paid in easy for both the creator as well as the process with Meylah's incredibly the consumer. easy Byte-Syze Learning tool. You can also choose whether to sell What Is Byte-Syze Learning? your Byte-Syze Learning tutorials or A Byte-Syze Learning is a visual give them away for free to raise your online tutorial, displayed in a step- profile. The tool allows you to set by-step and easy to consume any price you’d like and you can elect format for your audience. We to provide PDF versions of your step- have built an easy to use Byte- by-step creative guides automatically Photo credit: Dot D Syze Learning tool that allows you so everyone wins! So, what do you know? Whatever to create beautiful step-by-step it is, we bet you can share some of tutorials with Images and Video. What do you think? Why don’t you your knowledge with others and And, you can even sell them!. check out some of the Byte-Syze maybe even sell some of it or as we Learning tutorials in this eBook and like to say - Monetize Your Brain! How Does It Work? see if it sparks an idea for your own You can create great looking, money- tutorial or just follow the steps and We have found that everyone has making tutorials in just a few steps... create something creative today! unique skills that people want and just like creating a blog post.  We And, don’t forget to have fun! now you can share those creative really wanted to build this so it was eBooks 3
  • 4. How to Make Earrings subscribe to this by Wire Wrapping Briolettes free eBook series Byte-Syze Learning / by Courtney Dirks > s how to hold or work with the pliers. • Make sure your briolettes are side After much practice, I mastered drilled, not drilled top to bottom the technique, but it would have (top to bottom drilling requires been much easier if I had watched headpins). someone else first. Good luck mastering this technique Here are a few tips you may want and please share your finished to consider if you’re just getting products with us! started: • Use a soft, high gauge of wire (26- Related Articles 28 mm), thinner wire will allow you – How To Make A Pair of Earrings more flexibility and control as you When I was getting started with work with the wire. – Handmade Wire Jewelry - wire jewelry, I had a difficult time Love at First Sight trying to learn how to wire wrap • You may want to start out with – Throwing a Home Jewelry Party side drilled briolette (pear or oval copper wire to master the shaped) gems. I bought a book technique since it’s less expensive to walk me through steps, but I than sterling silver or gold (I still struggled with the process wasted a lot of wire before I because I wasn’t comfortable with mastered this technique). share this view this post this on facebook on meylah on twitter eBooks Byte-Syze Learning 4
  • 5. How to Make Earrings subscribe to this by Wire Wrapping Briolettes free eBook series Byte-Syze Learning / by Courtney Dirks > s Step 1: Gather Your Supplies • Wire (Sterling silver round soft 28 mm gauge wire for this demo) • Side Drilled Briolette Gems or Beads (20x13 mm faceted green amethyst briolettes were used for this demo) • Ear Wires (Sterling silver leverback ear wires were used in this demo) • Needle Nose Pliers • Flat Nose Pliers • Curved Nose Pliers • Round Nose Pliers • Wire Cutters Video Tutorial: Click Here to Watch It eBooks Byte-Syze Learning 5
  • 6. How to Make Earrings subscribe to this by Wire Wrapping Briolettes free eBook series Byte-Syze Learning / by Courtney Dirks > s Step 2: Clip and String Wire Clip approximately 2 inches of wire using your wire cutters and string the wire through your briolette eBooks Byte-Syze Learning 6
  • 7. How to Make Earrings subscribe to this by Wire Wrapping Briolettes free eBook series Byte-Syze Learning / by Courtney Dirks > s Step 3: Prep Your Wire • With your flat nose pliers, leaving a small space above the tip of the briolette, bend one end of the wire at a 90 degree angle. • Repeat the process with the other end of the wire in the opposite direction. • The two wires should be crisscrossed once you’ve finished this step. Video Tutorial: Click Here to Watch It eBooks Byte-Syze Learning 7
  • 8. How to Make Earrings subscribe to this by Wire Wrapping Briolettes free eBook series Byte-Syze Learning / by Courtney Dirks > s Step 4: Clamp and Twist the Wires Using your flat nose pliers, clamp on to the wires you’ve crisscrossed and twist the pliers toward you until you’ve coiled the wires to the tip of the briolette. Video Tutorial: Click Here to Watch It eBooks Byte-Syze Learning 8
  • 9. How to Make Earrings subscribe to this by Wire Wrapping Briolettes free eBook series Byte-Syze Learning / by Courtney Dirks > s Step 5: Clip One of Your Wires Using your wire cutters, clip one of your wires at the top of the area that you’ve twisted, leaving only one end of wire to work with. eBooks Byte-Syze Learning 9
  • 10. How to Make Earrings subscribe to this by Wire Wrapping Briolettes free eBook series Byte-Syze Learning / by Courtney Dirks > s Step 6: Form a Circle with Your Wire • Using your round nose pliers, clamp onto your wire as close to the top of the twisted area as possible. • With your free hand, wrap the wire around the round nose pliers to create a circle. Video Tutorial: Click Here to Watch It eBooks Byte-Syze Learning 10
  • 11. How to Make Earrings subscribe to this by Wire Wrapping Briolettes free eBook series Byte-Syze Learning / by Courtney Dirks > s Step 7: Begin Wrapping your Wire Hold the clamped circle in your non-dominant hand using the round nose pliers. In your dominant hand hold the curved nose pliers, clamp on to the end of the loose wire and begin wrapping that wire until you reach the base of your briolette. Video Tutorial: Click Here to Watch It eBooks Byte-Syze Learning 11
  • 12. How to Make Earrings subscribe to this by Wire Wrapping Briolettes free eBook series Byte-Syze Learning / by Courtney Dirks > s Step 8: Clip Excess Wire • Using your wire cutters, clip any excess wire at the base of the area you’ve just wrapped. • If needed, use the needle nose pliers to tidy up the end of the wire. Video Tutorial: Click Here to Watch It eBooks Byte-Syze Learning 12
  • 13. How to Make Earrings subscribe to this by Wire Wrapping Briolettes free eBook series Byte-Syze Learning / by Courtney Dirks > s Step 9: Slip Finished Wire Wrapped Stone to the Earwire Open the ear wire with your needle nose pliers, slip the finished stone on, and close the ear wire. Video Tutorial: Click Here to Watch It eBooks Byte-Syze Learning 13
  • 14. How to Make Earrings subscribe to this by Wire Wrapping Briolettes free eBook series Byte-Syze Learning / by Courtney Dirks > s Step 10: Complete the Pair Repeat steps 2-9 to create a second earring to complete your pair! eBooks Byte-Syze Learning 14
  • 15. How to Make subscribe to this Paper Cupcake Stands free eBook series Byte-Syze Learning / by Dionne Christiansen > s These paper cupcake stands are great Related Articles because you can color-coordinate – Spring Craft Tutorial: How to Make a them with a themed party, and you Button Bouquet can make them any size you want. They’re also very cheap to make, so – How To Package Your Product you can make plenty of them without – How to Set up a Craft Booth that breaking the bank. Customers Can't Resist Who doesn’t love cupcakes? I love to entertain, and have a collection of pretty plates and cupcake stands to pretty up my presentation when I have friends over for baked goodies. But all that china and ceramic- ware can add up and get pricey, so I decided to make my own paper cupcake stands. share this view this post this on facebook on meylah on twitter eBooks Byte-Syze Learning 15
  • 16. How to Make subscribe to this Paper Cupcake Stands free eBook series Byte-Syze Learning / by Dionne Christiansen > s Step 1: What You Will Need Here is what you will need to get started: • 1 sheet of chipboard • 1 sheet of plain colored carstock • 1 sheet of pattered cardstock • 1 length of ribbon/lace to fit around your cupcake stand • Scissors • Glue • Ruler • Pen • Cup (if you don’t have a circle-drawing tool) eBooks Byte-Syze Learning 16
  • 17. How to Make subscribe to this Paper Cupcake Stands free eBook series Byte-Syze Learning / by Dionne Christiansen > s Step 2: Creating The Tray We are going to start by making the tray that your cupcake will sit on. Take your chipboard and use your cup to trace a circle on the chipboard. Then repeat this step on the plain colored cardstock. eBooks Byte-Syze Learning 17
  • 18. How to Make subscribe to this Paper Cupcake Stands free eBook series Byte-Syze Learning / by Dionne Christiansen > s Step 3: Creating The Support Next we will be making the support stands. Grab your chipboard and measure and rule a 3 inch x 2.75 inch rectangle on the corner of the sheet. eBooks Byte-Syze Learning 18
  • 19. How to Make subscribe to this Paper Cupcake Stands free eBook series Byte-Syze Learning / by Dionne Christiansen > s Step 4: Measure and Mark Your Support From there, measure in 5/8 of an inch in from the left and right sides along the 2.75 inch side. Mark these places with your pen. Then along the 3 inch side, measure and mark 1 inch down. eBooks Byte-Syze Learning 19
  • 20. How to Make subscribe to this Paper Cupcake Stands free eBook series Byte-Syze Learning / by Dionne Christiansen > s Step 5: Finish Measuring the Support Rule a line across the 2.75 length of the rectangle 1 inch down from the top where you marked at the end of Step 3, and then rule a line from the two marks you made at the start of Step 4 to the 1 inch line your just drew. Your rectangle should look like this image here. eBooks Byte-Syze Learning 20
  • 21. How to Make subscribe to this Paper Cupcake Stands free eBook series Byte-Syze Learning / by Dionne Christiansen > s Step 6: Cutting Your Pieces Cut along the lines your ruled to make the first support leg for the stand. Then cut a slit down the middle of the shape, but only half way. Repeat steps 3 through 6 to make another leg, but on this second leg, cut the slit on the opposite side, and again only half way down. eBooks Byte-Syze Learning 21
  • 22. How to Make subscribe to this Paper Cupcake Stands free eBook series Byte-Syze Learning / by Dionne Christiansen > s Step 7: Decorating Your Pieces Trace your two new leg pieces onto your patterned cardstock, but make them half an inch taller on the thin side of the shape. Cut slits on these patterned pieces in the same position you did on the chipboard. eBooks Byte-Syze Learning 22
  • 23. How to Make subscribe to this Paper Cupcake Stands free eBook series Byte-Syze Learning / by Dionne Christiansen > s Step 8: Gather Your Pieces These are the pieces you should have at this point. eBooks Byte-Syze Learning 23
  • 24. How to Make subscribe to this Paper Cupcake Stands free eBook series Byte-Syze Learning / by Dionne Christiansen > s Step 9: Glue Your Pieces Apply glue to the back of your chipboard leg pieces, and stick a patterned cardstock piece over one side. Then fold over the half inch flap so that it sits at a right angle. eBooks Byte-Syze Learning 24
  • 25. How to Make subscribe to this Paper Cupcake Stands free eBook series Byte-Syze Learning / by Dionne Christiansen > s Step 10: Stick The Pieces Together Stick the patterned cardstock to the other side and make sure that both top flaps are folded out at right angles. eBooks Byte-Syze Learning 25
  • 26. How to Make subscribe to this Paper Cupcake Stands free eBook series Byte-Syze Learning / by Dionne Christiansen > s Step 11: Cut Your Pieces Cut a slit in the middle of the folded flaps. eBooks Byte-Syze Learning 26
  • 27. How to Make subscribe to this Paper Cupcake Stands free eBook series Byte-Syze Learning / by Dionne Christiansen > s Step 12: Fit Together Base Legs Slot together the two legs by pushing them along the middle slits. It should end up looking like this. eBooks Byte-Syze Learning 27
  • 28. How to Make subscribe to this Paper Cupcake Stands free eBook series Byte-Syze Learning / by Dionne Christiansen > s Step 13: Add Trim To The Tray Apply glue around the rim of one side of the chipboard circle, and then take your ribbon/lace and stick it around the edges. Gather it every now and then so that it contours along the rim. eBooks Byte-Syze Learning 28
  • 29. How to Make subscribe to this Paper Cupcake Stands free eBook series Byte-Syze Learning / by Dionne Christiansen > s Step 14: Cover The Tray Apply glue to the rim of your plain colored circle on one side, and then adhere it to the other side of the tray (opposite to the side you applied the lace/ribbon to). eBooks Byte-Syze Learning 29
  • 30. How to Make subscribe to this Paper Cupcake Stands free eBook series Byte-Syze Learning / by Dionne Christiansen > s Step 15: Assemble The Stand Apply glue to the folded flaps on the top of the leg base. Then center it on the under-side of the tray (the side with the lace/ribbon) and press down firmly to secure. Hold still for a few minutes to allow glue to set. eBooks Byte-Syze Learning 30
  • 31. How to Make subscribe to this Paper Cupcake Stands free eBook series Byte-Syze Learning / by Dionne Christiansen > s Step 16: Ready To Go! Your cupcake stand is now complete. Now all you have to do is bake some cupcakes! eBooks Byte-Syze Learning 31
  • 32. Download This eBook! > > s If you enjoy this eBook, please You Can: consider sending it to your – Download This eBook friends and network! – Share This eBook by Email – Post or Embed This eBook on Your Blog – Post to Twitter Pssssst! Go to next page for more content! > eBooks 32
  • 33. How to Make Chai subscribe to this (Indian Tea) free eBook series Byte-Syze Learning / by Ram Dutt > s Chai is prepared with loose tea cardamom, ginger, cinnamon, bay leaves brewed in boiling water. leaves and more. Follow this step by There are several types of tea leaves step Byte-Syze Leaning tutorial to from all over the world…some of make your own Chai and enjoy…and, the more popular names of tea are don’t forget to share with us how from Assam, Darjeling and many you make your own Chai and the more. Each region’s tea leaves have special ingredients that you use! a different flavor and strength. Related Articles The most commonly used tea leaf is – Sweet Creativity: Handmade called Orange Peoke. This has mild Inspiration for Valentine's Day body in flavor and you can buy this The Indian subcontinent calls type of loose tea at any South Asian – Crafty Foodies: 9 Handmade Products it Chai and today you can find grocery store and some larger chains. for the Kitchen several versions of Chai at cafés In the absence of Orange Peoke, you – 10 Creative Ideas To Do With Your all around the world. Chai in can use Lipton tea bags as well. Kids the South East Asian countries is commonly a hot beverage of Based on your taste, you can add choice for breakfast, snack time or a spice or a combination of spices just anytime to relax. to add flavor to your Chai such as share this view this post this on facebook on meylah on twitter eBooks Byte-Syze Learning 33
  • 34. How to Make Chai subscribe to this (Indian Tea) free eBook series Byte-Syze Learning / by Ram Dutt > s Step 1: Ingredients You Will Need To make Chai you will need: • Loose Tea • Milk (Any type works great) • Sugar or sweetener • A Pot • A Strainer • A Cup (To Drink!) To add flavor you may want some of the following: • Ginger • Cardamom • Cinnamon • Bay Leaves eBooks Byte-Syze Learning 34
  • 35. How to Make Chai subscribe to this (Indian Tea) free eBook series Byte-Syze Learning / by Ram Dutt > s Step 2: Boil the Water For each cup of Chai, you will need 1/2 cup to 3/4 cup of water (depending on how much milk you want). Put your water in the pot and bring to a boil. Video Tutorial: Click Here to Watch It eBooks Byte-Syze Learning 35
  • 36. How to Make Chai subscribe to this (Indian Tea) free eBook series Byte-Syze Learning / by Ram Dutt > s Step 3: Add Tea and Spices Once the water is at a boil, add 1 tea spoon of loose tea (or 1 tea bag). You can add more or less based on the strength of the flavor you want. Also add your spices to the pot at this time. In this video, ginger and cardamom were added. Video Tutorial: Click Here to Watch It eBooks Byte-Syze Learning 36
  • 37. How to Make Chai subscribe to this (Indian Tea) free eBook series Byte-Syze Learning / by Ram Dutt > s Step 4: Add Milk Once the tea starts to brew, let the water boil for a few minutes based on how strong you want your Chai. Add 1/2 cup or 1/4 cup of milk as needed and bring the ingredients to boil. Video Tutorial: Click Here to Watch It eBooks Byte-Syze Learning 37
  • 38. How to Make Chai subscribe to this (Indian Tea) free eBook series Byte-Syze Learning / by Ram Dutt > s Step 5: Strain the Chai Let the Chai come to boil 2-3 times and reduce heat to keep from boiling over. Then pour the Chai through the strainer into your cup. Video Tutorial: Click Here to Watch It eBooks Byte-Syze Learning 38
  • 39. How to Make Chai subscribe to this (Indian Tea) free eBook series Byte-Syze Learning / by Ram Dutt > s Step 6: Add Sweeter and Enjoy your Chai! Add sweetener (sugar, brown sugar, agave nectar, honey) to your Chai and stir and enjoy a nice cup of hot Chai! eBooks Byte-Syze Learning 39
  • 40. How to Screencast subscribe to this Your Own Web Video free eBook series Byte-Syze Learning / by Justine Smith > s We've put together the following Byte-Syze Learning tutorial to show you exactly how quick it is to record, edit and produce your very first web video. Related Articles – How to Use Screencasting To Promote Your Business – How To Find and Source an Image Photo credit: Blakie with Creative Commons and Flickr As we've discussed on Meylah – 3 Favorite Pocket Video Cameras before, screencasting is a fun and unique way to increase your readership, fans and friends by offering useful web videos that help both your viewers and your business. share this view this post this on facebook on meylah on twitter eBooks Byte-Syze Learning 40
  • 41. How to Screencast subscribe to this Your Own Web Video free eBook series Byte-Syze Learning / by Justine Smith > s Step 1: Download Download your preferred screencasting software of choice. In this case, we've used the 30 day free trial of Camtasia, from TechSmith. eBooks Byte-Syze Learning 41
  • 42. How to Screencast subscribe to this Your Own Web Video free eBook series Byte-Syze Learning / by Justine Smith > s Step 2: Set Your Recording Size Once you have downloaded and installed the program, open it up and organize the screen size you'd like to capture by using your mouse. When you’re all finished, hit record. eBooks Byte-Syze Learning 42
  • 43. How to Screencast subscribe to this Your Own Web Video free eBook series Byte-Syze Learning / by Justine Smith > s Step 3: Record Your Video Once you hit record, you will see 4 green corners flashing which gives you a reminder of what your audience will see when they watch your video. Keep your navigational window within these frames to avoid cutting off information you'd like your viewers to obtain. When you have finished recording your first video, hit stop. Video Tutorial: Click Here to Watch It eBooks Byte-Syze Learning 43
  • 44. How to Screencast subscribe to this Your Own Web Video free eBook series Byte-Syze Learning / by Justine Smith > s Step 4: Hit Stop or Delete In the bottom right corner of your screen you will see a tiny camcorder icon. When you are finished recording your video, you will right click and hit 'stop'. *Alternatively, if you have made an error while recording your video, you can hit 'delete' and it will automatically allow you to start over without any additional steps.* eBooks Byte-Syze Learning 44
  • 45. How to Screencast subscribe to this Your Own Web Video free eBook series Byte-Syze Learning / by Justine Smith > s Step 5: Decide How to Proceed Once you hit stop, a preview of your video will pop up. Watch your video and then choose one of four options: Save: This will allow you to save the video as a Camtasia (or AVI) file. Delete: If you decide that you want to redo your video, simply hit ‘delete’ and try again. Edit: This option allows you to add graphics, music, audio and much more before publishing it. Produce: If you are happy with the video as is, simply hit ‘produce’ and follow the steps provided. eBooks Byte-Syze Learning 45
  • 46. How to Screencast subscribe to this Your Own Web Video free eBook series Byte-Syze Learning / by Justine Smith > s Step 6: Edit Your Video Should you decide to edit your video, you will be sent to Camtasia Studio where you can then edit your video by adding intro graphics, music, adjusting the audio and much more. Watch this short video walking you through where to find options for adding text, music and adjusting your audio. Video Tutorial: Click Here to Watch It eBooks Byte-Syze Learning 46
  • 47. How to Screencast subscribe to this Your Own Web Video free eBook series Byte-Syze Learning / by Justine Smith > s Step 7: Produce Your Video If the video is ready to go and you don't want to add any bells and whistles, simply hit ‘produce’ and follow the short series of options in order to export your file for uploading on various sites like YouTube. Go to file, select ‘produce’ and follow a simple step by step wizard to get your file ready for uploading to your blog, website or YouTube account. eBooks Byte-Syze Learning 47
  • 48. How to Screencast subscribe to this Your Own Web Video free eBook series Byte-Syze Learning / by Justine Smith > s Step 8: Video Rendering Once you have finished the wizard to produce your video, you will have to wait just a few moments for the video to render. That's it! It's extremely simple to screencast amazing videos for your audience and fan base by using software like Camtasia and we hope you liked this Byte-Size Learning tutorial. eBooks Byte-Syze Learning 48
  • 49. How to Make Your Own subscribe to this Photography Drink Coasters free eBook series Byte-Syze Learning / by Jason Dirks > s it doesn’t always happen. So in the Related Articles spirit of “trying a little extra” next time, – The Anatomy of a Great Product Shot here’s a way to make you want to use a drink coaster using your own pictures! – What I've Learned from Taking And, these make great gifts too! Thousands of Product Shots – Online Printing Solutions: More Perks Follow this simple step-by-step than Price and Quality tutorial on how to make your own photography drink coasters and the next time you’ll not only prevent unwanted water rings, you’ll be able to show off your pictures each time you Last week, I saw this Do-It-Yourself for grab a drink! making photo coasters on Photojojo and I wanted to replicate it using Byte- Syze Learning. I know in our house we “try” to use drink coasters to keep the water rings off the coffee table and desks, but share this view this post this on facebook on meylah on twitter eBooks Byte-Syze Learning 49
  • 50. How to Make Your Own subscribe to this Photography Drink Coasters free eBook series Byte-Syze Learning / by Jason Dirks > s Step 1: Gather Supplies The first thing you’ll need to do is gather the supplies you’ll need: • Printed Pictures (as many as you want!) • A Pencil or Pen • A Paint Brush • An X-ACTO Knife (this works best) or Pair of Scissors • Round or Square Object to Draw Around (cup, plate, old coaster, etc.) • Varnish to Waterproof your Coasters • Cork (Sheets or Tiles work great and can be found at any craft store) Video Tutorial: Click Here to Watch It • A Cutting Surface eBooks Byte-Syze Learning 50
  • 51. How to Make Your Own subscribe to this Photography Drink Coasters free eBook series Byte-Syze Learning / by Jason Dirks > s Step 2: Trace Your Cork Simply put your round or square object on top of your cork and take your pencil or pen and trace around it. Anything will work like a coffee cup, a small plate, or even an old drink coaster. eBooks Byte-Syze Learning 51
  • 52. How to Make Your Own subscribe to this Photography Drink Coasters free eBook series Byte-Syze Learning / by Jason Dirks > s Step 3: Trace Your Pictures Use the same round or square object that you used to shape your cork and take your pencil or pen and trace around your selected pictures. Choose any pictures you like or ones that someone else would enjoy if you’re giving these as a gift! eBooks Byte-Syze Learning 52
  • 53. How to Make Your Own subscribe to this Photography Drink Coasters free eBook series Byte-Syze Learning / by Jason Dirks > s Step 4: Cut Your Cork Now, that you have the shape drawn on your cork, it’s time to cut. The best is to use an X-ACTO knife although you can also use a box cutter or pair of scissors too…just remember to be careful. Place the cork on your cutting surface and cut around the line you traced earlier. eBooks Byte-Syze Learning 53
  • 54. How to Make Your Own subscribe to this Photography Drink Coasters free eBook series Byte-Syze Learning / by Jason Dirks > s Step 5: Cut Your Pictures The easiest way to cut your pictures is probably to use a pair of scissors, although you may not get the perfectly round edges as you would with an X-ACTO knife so you choose. Place picture on your cutting surface and cut around the line you traced earlier. eBooks Byte-Syze Learning 54
  • 55. How to Make Your Own subscribe to this Photography Drink Coasters free eBook series Byte-Syze Learning / by Jason Dirks > s Step 6: Stick them Together Using the varnish and your paint brush, apply a layer of varnish to the top of the cut piece of cork and then stick your picture to the top of that cork. Make sure to apply even pressure to the picture for about 30 seconds to make sure it’s not going anywhere…hey, it’s starting to look like a coaster! eBooks Byte-Syze Learning 55
  • 56. How to Make Your Own subscribe to this Photography Drink Coasters free eBook series Byte-Syze Learning / by Jason Dirks > s Step 7: Waterproof Your New Coaster You want to make sure these will hold up with all the drinks so apply at least 2 layers of varnish to the top and sides of the picture and cork to make it waterproof. And remember to wait for the first layer to dry before applying the second layer. eBooks Byte-Syze Learning 56
  • 57. How to Make Your Own subscribe to this Photography Drink Coasters free eBook series Byte-Syze Learning / by Jason Dirks > s Step 8: You’re Finished, Just Wait! You’re all finished! Now, all you have to do is wait for them to dry. The best thing to do is put them in a safe place overnight before testing them out with a drink. And that’s it! Good luck and enjoy your new coasters! eBooks Byte-Syze Learning 57
  • 58. Download This eBook! > > s If you enjoy this eBook, please You Can: consider sending it to your – Download This eBook friends and network! – Share This eBook by Email – Post or Embed This eBook on Your Blog – Post to Twitter Pssssst! Go to next page for more content! > eBooks 58
  • 59. subscribe to this free eBook series > s Contributors wildlife and nature, travel, sports and Justine Smith, an Etsy success Ram Dutt, an engineer by profession adventure. story who used her experience who comes from a family of selling online and turned it into a musicians and artists. He sees his Courtney Dirks, a recent escapee full-time wholesale business. Her own passion for music and art in his of the corporate world with a real passion is helping handmade nine year old son, who has already background in commercial real estate, sellers find success marketing their inspired many with his art and communications, and sales. She craft products. She offers tips on has led Ram to foster creativity in began alleviating her stress at work advertising, branding, social media many others. Ram and his family through creating handmade jewelry. and growth via email through her live in Seattle, which is full of life, After bouncing around the west coast blog Justine's Media. energy and an enthusiastic creative for years, she settled in Seattle and community. has found great joy traveling, playing Stay Tuned… sports and interacting with the local As part of the Meylah eBook Series, Jason Dirks, a business creative community. we will be releasing our next eBook management consultant by day and on building a successful online a passionate outdoor photographer Dionne Christiansen, a graphic storefront. We will cover topics by night (or any other hour he can designer based in Houston, Texas including blogging for your business, get outside and take pictures)! He and the face behind the Etsy store using social media to build your and his wife live in beautiful Seattle, City of Dionne and her blog, Notes brand, and all the important things which provides the ideal landscape From Dionne. that go into building a successful for his photographic interests: online storefront so stay tuned! eBooks 59
  • 60. subscribe to this free eBook series > s About Meylah Meylah is devoted to building an online creative community for individuals to learn, share and support each other’s business growth online. We know how difficult and time consuming being an entrepreneur can be, but with the proper skills at hand and togetherness (the theme of our logo), we believe anyone can succeed! Our Values • Be Committed to Helping Each • Together We Create a Great Other Experience • Live and Breathe Creativity • Foster Dynamic Learning • Smile and Have Fun • Be Humble and Honest • Show Passion in All That You Do • Do More with Less • Give Before You Take • Embrace Change eBooks 60
  • 61. subscribe to this free eBook series > s License Warning and Disclaimer This work is licensed under the Every effort has been made to Creative Commons Attribution Non- make this book as complete and as commercial No Derivative Works accurate as possible, but no warranty 3.0 United States License. To view of fitness is implied. The information a copy of this license, visit http:// provided is on an “as is” basis. The creativecommons.org/licenses/ authors shall have neither liability nor byncnd/3.0/us/ or send a letter responsibility to any person or entity to Creative Commons, 171 Second with respect to loss or damages Street, Suite 300, San Francisco, arising from the information California, 94105, USA contained in this eBook. Trademarks All terms mentioned in this book that are known to be trademarks or service marks have been appropriately capitalized. Use of a term in this book should not be regarded as affecting the validity of any trademark or service mark. eBooks 61