

Recommandé
Recommandé
Contenu connexe
En vedette
Plus de mireille 30100
Plus de mireille 30100 (20)
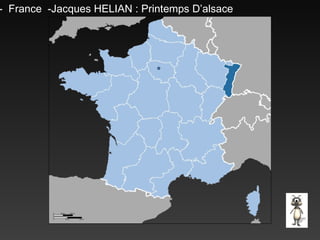
132-Alsace France
- 1. ALSACE - France -Jacques HELIAN : Printemps D’alsace
- 4. Petite France - Strasbourg
- 6. COLMAR La petite Venise
- 20. GUTEMBERG
- 23. : Time for a short break 10 09 08 07 06 05 04 03 02 01 00
- 25. Sur la route des vins
Notes de l'éditeur
- Picture-filled text with reflection (Basic) To reproduce the text effects on this slide, do the following: On the Home tab, in the Slides group, click Layout , and then click Blank . On the Insert tab, in the Text group, click Text Box , and then on the slide, drag to draw the text box. Enter text in the text box, select the text, and then on the Home tab, in the Font group, select Franklin Gothic Heavy from the Font list, select 36 from the Font Size list, and then click Bold . On the Home tab, in the Paragraph group, click Center to center the text in the text box. On the Home tab, in the Font group, click Character Spacing , and then click More Spacing . In the Font dialog box, on the Character Spacing tab, in the Spacing list, select Expanded . In the By box, enter 2 . Under Drawing Tools , on the Format tab, in the WordArt Styles group, click the arrow next to Text Fill , and then click Picture . In the Insert Picture dialog box, select a picture and then click Insert . Under Drawing Tools , on the Format tab, in the WordArt Styles group, click Text Effects , point to Reflection , and then under Reflection Variations select Tight Reflection, touching (first row, first option from the left). Under Drawing Tools , on the Format tab, in the WordArt Styles group, click Text Effects , point to Bevel , and then under Bevel click Angle (second row, first option from the left). To reproduce the background on this slide, do the following: Right-click the slide background area, then click Format Background . In the Format Background dialog box, click Fill in the left pane, select Gradient fill in the right pane, and then do the following: In the Type list, select Linear . Click the button next to Direction , and then click Linear Down (first row, second option from the left). In the Angle box, enter 90% . Under Gradient stops , click Add or Remove until three stops appear in the drop-down list. Also under Gradient stops , customize the gradient stops that you added as follows: Select Stop 1 from the list, and then do the following: In the Stop position box, enter 64% . Click the button next to Color , and then under Theme Colors click Black, Text 1, Lighter 5% (sixth row, second option from the left). Select Stop 2 from the list, and then do the following: In the Stop position box, enter 65% . Click the button next to Color , and then under Theme Colors click Black, Text 1, Lighter 5% (sixth row, second option from the left). Select Stop 3 from the list, and then do the following: In the Stop position box, enter 100% . Click the button next to Color , and then under Theme Colors click Black, Text 1, Lighter 25% (fourth row, second option from the left).
- Custom animation effects: line sweeps in picture and text (Basic) To reproduce the shape effects on this slide, do the following: On the Home tab, in the Slides group, click Layout , and then click Blank . On the Home tab, in the Drawing group, click Shapes , and then under Lines click Line (first option from the left). On the slide, press and hold SHIFT, and then drag to draw a straight, vertical line. Select the line. Under Drawing Tools , on the Format tab, in the Size group, in the Shape Width box, enter 7.5” . Under Drawing Tools , on the Format tab, in the Shape Styles group, click the Format Shape dialog box launcher. In the Format Shape dialog box, click Line Color in the left pane. In the Line Color pane, select Solid line , click the button next to Color , and then under Theme Colors click Black, Text 1 (first row, second option from the left). Also in the Format Shape dialog box, click Line Style in the left pane. In the Line Style pane, in the Weight box, enter 2 pt . Under Drawing Tools , on the Format tab, in the Shape Styles group, click Shape Effects , point to Glow , and then under Glow Variations click Accent color 1, 5 pt glow (first row, first option from the left). Under Drawing Tools , on the Format tab, in the Shape Styles group, click Shape Effects , point to Glow , point to More Glow Colors , and then under Theme Colors click White, Background 1 (first row, first option from the left). On the Home tab, in the Drawing group, click Arrange , point to Align , and then do the following: Click Align to Slide . Click Align Center . Click Align Middle . On the slide, select the line. On the Home tab, in the Clipboard group, click the arrow under Paste , and then click Duplicate . Drag the duplicate line slightly off the right edge of the slide. With the duplicate line still selected, on the Home tab, in the Drawing group, click Arrange , point to Align , and then do the following: Click Align to Slide . Click Align Middle . On the Insert tab, in the Illustrations group, click Picture . In the Insert Picture dialog box, select a picture, and then click Insert . On the slide, select the picture. Under Picture Tools , on the Format tab, in the bottom right corner of the Size group, click the Size and Position dialog box launcher. In the Size and Position dialog box, on the Size tab, resize or crop the picture as needed so that under Size and rotate , the Height box is set to 7.5” and the Width box is set to 5” . Resize the picture under Size and rotate by entering values into the Height and Width boxes. Crop the picture under Crop from by entering values into the Left , Right , Top , and Bottom boxes. On the Home tab, in the Drawing group, click Arrange , point to Align , and then do the following: Click Align to Slide . Click Align Right . Click Align Middle . To reproduce the text effects on this slide, do the following: On the Insert tab, in the Illustrations group, click Text Box . On the slide, drag to draw a text box. Enter text in the text box, and then select the text. On the Home tab, in the Font group, do the following: In the Font list, select Arial . In the Font Size list, select 28 . Click Bold . Click the button next to Font Color , and then under Theme Colors click White, Background 1 (first row, first option from the left). On the Home tab, in the Paragraph group, click Align Text Right to align the text right in the text box. Drag the text box onto the left half of the slide. To reproduce the background effects on this slide, do the following: Right-click the slide background area, and then click Format Background . In the Format Background dialog box, click Fill in the left pane, select Gradient fill in the Fill pane, and then do the following: In the Type list, select Linear . Click the button next to Direction , and then click Linear Down (first row, second option from the left). Under Gradient stops , click Add or Remove until two stops appear in the drop-down list. Also under Gradient stops , customize the gradient stops that you added as follows: Select Stop 1 from the list, and then do the following: In the Stop position box, enter 40% . Click the button next to Color , and then click Black, Text 1 (first row, second option from the left). Select Stop 2 from the list, and then do the following: In the Stop position box, enter 100% . Click the button next to Color , and then click Black, Text 1, Lighter 50% (second row, second option from the left). To reproduce the animation effects on this slide, do the following: On the Animations tab, in the Animations group, click Custom Animation . Select the line off the right edge of the slide. In the Custom Animation task pane, do the following: Click Add Effect , point to Entrance , and then click More Effects . In the Add Entrance Effect dialog box, under Basic , click Fly In . Select the animation effect (fly-in effect for the second line). Under Modify: Fly In , do the following: In the Start list, select After Previous . In the Direction list, select From Left . In the Speed list, select Fast . On the Home tab, in the Editing group, click Select , and then click Selection Pane . In the Selection and Visibility pane, select the first line you created (in the middle of the slide). In the Custom Animation task pane, do the following: Click Add Effect , point to Entrance , and then click More Effects . In the Add Entrance Effect dialog box, under Basic , click Fly In . Select the second animation effect (fly-in effect for the first line). Under Modify: Fly In , do the following: In the Start list, select After Previous . In the Direction list, select From Right . In the Speed list, select Fast . On the slide, select the picture. In the Custom Animation task pane, do the following: Click Add Effect , point to Entrance , and then click More Effects . In the Add Entrance Effect dialog box, under Basic , click Wipe . Select the third animation effect (wipe effect for the picture). Under Modify: Wipe , do the following: In the Start list, select With Previous . In the Direction list, select From Right . In the Speed list, select Fast . On the slide, select the text box. In the Custom Animation task pane, do the following: Click Add Effect , point to Entrance , and then click More Effects . In the Add Entrance Effect dialog box, under Basic , click Fly In . Select the fourth animation effect (fly-in effect for the text box). Under Modify: Fly In , do the following: In the Start list, select With Previous . In the Direction list, select From Right . In the Speed list, select Fast .
- Custom animation effects: shrink picture circle with text (Intermediate) To reproduce the picture effects on this slide, do the following: On the Home tab, in the Slides group, click Layout , and then click Blank . On the Insert tab, in the Illustrations group, click Picture . In the Insert Picture dialog box, select a picture, and then click Insert . On the slide, select the picture. Under Picture Tools , on the Format tab, in the Picture Styles group, click Picture Shape , and then under Basic Shapes click Oval (first row, first option from the left). Select the picture-filled oval. Under Picture Tools , on the Format tab, in the bottom right corner of the Size group, click the Size and Position dialog box launcher. In the Size and Position dialog box, on the Size tab, resize or crop the picture as needed so that under Size and rotate , the Height box is set to 6” and the Width box is set to 6” . Resize the picture under Size and rotate by entering values into the Height and Width boxes. Crop the picture under Crop from by entering values into the Left , Right , Top , and Bottom boxes. Under Picture Tools , on the Format tab, in the Picture Styles group, click Picture Effects , point to Glow , and then under Glow Variations click Accent color 1, 18 pt glow (fourth row, first option from the left). Under Picture Tools , on the Format tab, in the Picture Styles group, click Picture Effects , point to Glow , point to More Glow Colors , and then under Theme Colors click White, Background 1 (first row, first option from the left). On the Home tab, in the Drawing group, click the Format Shape dialog box launcher. In the Format Picture dialog box, click Shadow in the left pane. In the Shadow pane, click the button next to Presets , under Inner click Inside Diagonal Bottom Left (third row, first option from the left), and then do the following: In the Transparency box, enter 50% . In the Blur box, enter 8 pt . In the Angle box, enter 135° . In the Distance box, enter 8 pt . On the Insert tab, in the Text group, click Text Box . On the slide, drag to draw a text box. Enter text, and then select the text. On the Home tab, in the Font group, do the following: In the Font list, select Candara . In the Font Size box, enter 30 . Click the arrow next to Font Color , and then click Black, Text 1, Lighter 25% (fourth row, second option from the left). On the Home tab, in the Paragraph group, click Align Text Left . On the slide, select the text box. Under Drawing Tools , on the Format tab, in the WordArt Styles group, click Text Effects , point to Reflection , and then under Reflection Variations click Tight Reflection, touching (first row, first option from the left). Drag the text box onto the right half of the slide. With the text box still selected, on the Home tab, in the Drawing group, click Arrange , and then do the following: Point to Align , and then click Align to Slide . Point to Align , and then click Align Right . Point to Align , and then click Align Middle . Click Send to Back . To reproduce the animation effects on this slide, do the following: On the Animations tab, in the Animations group, click Custom Animation . On the slide, select the picture. In Custom Animation task pane, do the following: Click Add Effect , point to Entrance , and then click More Effects . In the Add Entrance Effect dialog box, under Basic , click Wheel . Select the animation effect (wheel effect for the picture). Under Modify: Wheel , do the following: In the Start list, select With Previous . In the Spokes list, select 1 Spoke . In the Speed list, select Medium . On the slide, select the picture. In Custom Animation task pane, do the following: Click Add Effect , point to Entrance , and then click More Effects . In the Add Entrance Effect dialog box, under Subtle , click Faded Zoom . Select the second animation effect (faded zoom effect for the picture). Under Modify: Faded Zoom , do the following: In the Start list, select With Previous . In the Speed list, select Medium . On the slide, select the picture. In Custom Animation task pane, do the following: Click Add Effect , point to Emphasis , and then click More Effects . In the Add Emphasis Effect dialog box, under Basic , click Grow/Shrink . Select the third animation effect (grow/shrink effect for the picture). Click the arrow to the right of the selected effect, and then click Effect Options . In the Grow/Shrink dialog box, do the following: On the Effect tab, under Settings , do the following: In the Size list, in the Custom box, enter 95% , and then press ENTER. Select Smooth Start . Select Smooth End . Select Auto-reverse . On the Timing tab, do the following: In the Start list, select After Previous . In the Speed box, enter 0.3 seconds . On the slide, select the picture. In Custom Animation task pane, do the following: Click Add Effect , point to Emphasis , and then click More Effects . In the Add Emphasis Effect dialog box, under Basic , click Grow/Shrink . Select the fourth animation effect (grow/shrink effect for the picture). Under Grow/Shrink , do the following: In the Start list, select After Previous . In the Size list, select Smaller . In the Speed list, select Medium . On the slide, select the picture. In Custom Animation task pane, do the following: Click Add Effect , point to Motion Paths , and then click Left . Select the fifth animation effect (left motion path for the picture). Under Modify: Left , do the following: In the Start list, select With Previous . In the Speed list, select Medium . On the slide, select the text box. In the Custom Animation task pane, do the following: Click Add Effect , point to Entrance , and then click More Effects . In the Add Entrance Effect dialog box, under Subtle , select Fade . Select the sixth animation effect (fade effect for the text box). Click the arrow to the right of the selected effect, and then click Timing . In the Fade dialog box, on the Timing tab, do the following: In the Start list, select With Previous . In the Delay box, enter 1.5 . In the Speed list, select 1 seconds ( Fast) . On the slide, select the text box. In Custom Animation task pane, do the following: Click Add Effect , point to Motion Paths , and then click Left . Select the seventh animation effect (left motion path for the text box). Under Modify: Left , do the following: In the Start list, select With Previous . In the Speed list, select Fast . On the slide, right–click the selected motion path for the text box, and then click Reverse Path Direction . To reproduce the rectangle on this slide, do the following: On the Home tab, in the Drawing group, click Shapes , and then under Rectangles click Rectangle (first option from the left). On the slide, drag to draw a rectangle. Select the rectangle. Under Drawing Tools , on the Format tab, in the Size group, do the following: In the Shape Height box, enter 1.54” . In the Shape Width box, enter 10” . Under Drawing Tools , on the Format tab, in the Shape Styles group, click the arrow next to Shape Outline , and then click No Outline . Under Drawing Tools , on the Format tab, in the bottom right corner of the Shape Styles group, click the Format Shape dialog box launcher. In the Format Shape dialog box, click Fill in the left pane, select Gradient fill in the Fill pane, and then do the following: In the Type list, select Linear . Click the button next to Direction , and then click Linear Right (first row, fourth option from the left). Under Gradient stops , click Add or Remove until two stops appear in the drop-down list. Also under Gradient stops , customize the gradient stops that you added as follows: Select Stop 1 from the list, and then do the following: In the Stop position box, enter 0% . Click the button next to Color , and then under Theme Colors click White, Background 1 (first row, first option from the left). In the Transparency box, enter 88% . Select Stop 2 from the list, and then do the following: In the Stop position box, enter 100% . Click the button next to Color , and then under Theme Colors click White, Background 1 (first row, first option from the left). In the Transparency box, enter 43% . On the Home tab, in the Drawing group, click Arrange , and then do the following: Point to Align , and then click Align to Slide . Point to Align , and then click Align Middle . Point to Align , and then click Align Center . Click Send to Back . To reproduce the background effects on this slide, do the following: Right-click the slide background area, and then click Format Background . In the Format Background dialog box, click Fill in the left pane, select Gradient fill in the Fill pane, and then do the following: In the Type list, select Radial . Click the button next to Direction , and then click From Center (third option from the left). Under Gradient stops , click Add or Remove until two stops appear in the drop-down list. Also under Gradient stops , customize the gradient stops that you added as follows: Select Stop 1 from the list, and then do the following: In the Stop position box, enter 0% . Click the button next to Color , and then under Theme Colors click White, Background 1 (first row, first option from the left). Select Stop 2 from the list, and then do the following: In the Stop position box, enter 100% . Click the button next to Color , and then under Theme Colors click Black, Text 1, Lighter 50% (second row, second option from the left).
- Custom animation effects: title fade-in on path and text fade by letter (Intermediate) Tip: For the effects on this slide, use a picture that measures 7.5” high (the height of the slide) and 2.61” wide. To reproduce the shape effects on this slide, do the following: On the Home tab, in the Drawing group, click Shapes , and then under Rectangles click Rectangle (first option from the left). On the slide, drag to draw a rectangle. Select the rectangle. Under Drawing Tools , on the Format tab, in the Size group, do the following: In the Shape Height box, enter 3.17” . In the Shape Width box, enter 9.5” . Drag the rectangle slightly above the middle of the slide. Select the rectangle. On the Home tab, in the Drawing group, click Arrange , point to Align , and then do the following: Click Align to Slide . Click Align Left . Under Drawing Tools , on the Format tab, in the Shape Styles group, click the next to Shape Outline , and then click No Outline . Under Drawing Tools , on the Format tab, in the bottom right corner of the Shape Styles group, click the Format Shape dialog box launcher. In the Format Shape dialog box, click Fill in the left pane, select Gradient fill in the Fill pane, and then do the following: In the Type list, select Linear . Click the button next to Direction , and then click Linear Right (first row, fourth option from the left). Under Gradient stops , click Add or Remove until two stops appear in the drop-down list. Also under Gradient stops , customize the gradient stops that you added as follows: Select Stop 1 from the list, and then do the following: In the Stop position box, enter 0% . Click the button next to Color , and then under Theme Colors click Orange, Accent 6, Darker 50% (fifth row, 10 th option from the left). Select Stop 2 from the list, and then do the following: In the Stop position box, enter 100% . Click the button next to Color , and then under Theme Colors click Orange, Accent 6, Darker 25% (fourth row, 10 th option from the left). To reproduce the “heading” text box on this slide, do the following: On the Insert tab, in the Text group, select Text Box . On the slide, drag to draw a text box. Enter the heading text, and then select text. On the Home tab, in the Font group, do the following: In the Font list, select Calibri . In the Font Size box, enter 38 . Click Bold . Click the arrow next to Font Color , and then under Theme Colors click Orange, Accent 6, Darker 25% (fourth row, 10 th option from the left). On the Home tab, in the Paragraph group, click Align Text Left . Drag the text box just above the rectangle, in the right half of the slide. To reproduce the second text box on this slide, do the following: On the Insert tab, in the Text group, click Text Box . On the slide, drag to draw a text box. Enter three lines of text with paragraph breaks, and then select the text. On the Home tab, in the Font group, do the following: In the Font list, select Calibri . In the Font Size list, select 28 . Click Bold . Click the arrow next to Font Color , and then under Theme Colors click White, Background 1 (first row, first option from the left). On the Home tab, in the Paragraph group, click Align Text Left . Drag the second text box onto the rectangle, below the “heading” text box. To reproduce the full-color picture on this slide, do the following: On the Home tab, in the Slides group, click Layout , and then click Blank . On the Insert tab, in the Illustrations group, click Picture . In the Insert Picture dialog box, select the 7.5” x 2.61” picture, and then click Insert . On the slide, select the picture. Under Picture Tools , on the Format tab, in the bottom right corner of the Size group, click the Size and Position dialog box launcher. In the Size and Position dialog box, on the Size tab, under Crop from , in the Bottom box, enter 2.43” . ( Note: Under Size and rotate , the Height should now be 5.08” .) On the slide, select the picture. Under Picture Tools , on the Format tab, in the Picture Styles group, click Picture Effects , point to Glow , and then under Glow Variations click Accent color 1, 5 pt glow (first row, first option from the left). Also under Picture Tools , on the Format tab, in the Picture Styles group, click Picture Effects , point to Glow , point to More Glow Colors , and then under Theme Colors click White, Background 1 (first row, first option from the left). Drag the full-color picture on top of the rectangle, to the left of the text boxes. On the Home tab, in the Drawing group, click Arrange , point to Align , and then do the following: Click Align to Slide . Click Align Top . To reproduce the second picture on this slide, do the following: On the Insert tab, in the Illustrations group, click Picture . In the Insert Picture dialog box, select the same 7.5” x 2.61” picture, and then click Insert . On the slide, select the picture. Under Picture Tools , on the Format tab, in the bottom right corner of the Size group, click the Size and Position dialog box launcher. In the Size and Position dialog box, on the Size tab, under Crop from , in the Top box, enter 5.08” . ( Note: Under Size and rotate , the Height should now be 2.43” .) On the slide, select the second, smaller picture. Under Picture Tools , on the Format tab, in the Picture Styles group, click the Format Shape dialog box launcher. In the Format Picture dialog box, click Picture in the left pane, and in the Picture pane do the following: In the Brightness box, enter 70% . In the Contrast box, enter -70% . On the slide, drag the smaller picture until it is directly underneath the larger full-color picture. Select the smaller picture. On the Home tab, in the Drawing group, click Arrange , point to Align , and then do the following: Click Align to Slide . Click Align Bottom . Press and hold CTRL, and then select both pictures. On the Home tab, in the Drawing group, click Arrange , point to Align , and then do the following: Click Align Selected Objects . Click Align Center . To reproduce the animation effects on this slide, do the following: On the Animations tab, in the Animations group, click Custom Animation . On the slide, select the “heading” text box. In the Custom Animation task pane, do the following: Click Add Effect , point to Entrance , and then click More Effects . In the Add Entrance Effect dialog box, under Subtle , click Fade . Select the animation effect (fade effect for the “heading” text box). Click the arrow to the right of the selected text box, and then click Timing . In the Fade dialog box, on the Timing tab, do the following: In the Start list, select With Previous . In the Delay box, enter 1.5 . In the Speed list, select 2 seconds ( Medium) . On the slide, select the “heading” text box. In the Custom Animation task pane, do the following: Click Add Effect , point to Motion Paths , and then click Left . Select the second animation effect (left motion path for the “heading” text box). Under Modify: Left , do the following: In the Start list, select With Previous . In the Speed list, select Medium . On the slide, right-click the left motion path and click Reverse Path Direction . With the motion path still selected, point to the starting point (green arrow) of the motion path until the cursor becomes a two-headed arrow. Press and hold SHIFT, and then drag the starting point about 1.5” off the left edge of the slide. ( Note: It may help to display the ruler. On the View tab, in the Show/Hide group, select Ruler . If your lines of text are longer than in the example above, you may need to further increase the length of the motion path. ) On the slide, select the second text box. In the Custom Animation task pane, do the following: Click Add Effect , point to Entrance , and then click More Effects . In the Add Entrance Effect dialog box, under Subtle , click Fade . Select the third animation effect (fade effect for the second text box). Click the arrow to the right of the selected effect, and then click Effect Options . In the Fade dialog box, do the following: On the Effect tab, do the following: In the Animate text list, select By Letter . In the % delay between letters box, enter 5 . On the Timing tab, do the following: In the Start list, select After Previous . In the Speed list, select 0.5 seconds ( Very Fast) . On the Text Animation tab, in the Group text list, select By 1 st Level Paragraphs . To reproduce the background on this slide, do the following: Right-click the slide background area, and then click Format Background . In the Format Background dialog box, click Fill in the left pane, select Gradient fill in the Fill pane, and then do the following: In the Type list, select Radial . Click the button next to Direction , and then click From Center (third option from the left). Under Gradient stops , click Add or Remove until three stops appear in the drop-down list. Also under Gradient stops , customize the gradient stops that you added as follows: Select Stop 1 from the list, and then do the following: In the Stop position box, enter 0% . Click the button next to Color , and then under Theme Colors click White, Background 1 (first row, first option from the left). Select Stop 2 from the list, and then do the following: In the Stop position box, enter 40% . Click the button next to Color , and then under Theme Colors click White, Background 1 (first row, first option from the left). Select Stop 3 from the list, and then do the following: In the Stop position box, enter 100% . Click the button next to Color , click More Colors , and then in the Colors dialog box, on the Custom tab, enter values for Red: 232 , Green: 227 , and Blue: 216 .
- Custom animation effects: shrink picture circle with text (Intermediate) To reproduce the picture effects on this slide, do the following: On the Home tab, in the Slides group, click Layout , and then click Blank . On the Insert tab, in the Illustrations group, click Picture . In the Insert Picture dialog box, select a picture, and then click Insert . On the slide, select the picture. Under Picture Tools , on the Format tab, in the Picture Styles group, click Picture Shape , and then under Basic Shapes click Oval (first row, first option from the left). Select the picture-filled oval. Under Picture Tools , on the Format tab, in the bottom right corner of the Size group, click the Size and Position dialog box launcher. In the Size and Position dialog box, on the Size tab, resize or crop the picture as needed so that under Size and rotate , the Height box is set to 6” and the Width box is set to 6” . Resize the picture under Size and rotate by entering values into the Height and Width boxes. Crop the picture under Crop from by entering values into the Left , Right , Top , and Bottom boxes. Under Picture Tools , on the Format tab, in the Picture Styles group, click Picture Effects , point to Glow , and then under Glow Variations click Accent color 1, 18 pt glow (fourth row, first option from the left). Under Picture Tools , on the Format tab, in the Picture Styles group, click Picture Effects , point to Glow , point to More Glow Colors , and then under Theme Colors click White, Background 1 (first row, first option from the left). On the Home tab, in the Drawing group, click the Format Shape dialog box launcher. In the Format Picture dialog box, click Shadow in the left pane. In the Shadow pane, click the button next to Presets , under Inner click Inside Diagonal Bottom Left (third row, first option from the left), and then do the following: In the Transparency box, enter 50% . In the Blur box, enter 8 pt . In the Angle box, enter 135° . In the Distance box, enter 8 pt . On the Insert tab, in the Text group, click Text Box . On the slide, drag to draw a text box. Enter text, and then select the text. On the Home tab, in the Font group, do the following: In the Font list, select Candara . In the Font Size box, enter 30 . Click the arrow next to Font Color , and then click Black, Text 1, Lighter 25% (fourth row, second option from the left). On the Home tab, in the Paragraph group, click Align Text Left . On the slide, select the text box. Under Drawing Tools , on the Format tab, in the WordArt Styles group, click Text Effects , point to Reflection , and then under Reflection Variations click Tight Reflection, touching (first row, first option from the left). Drag the text box onto the right half of the slide. With the text box still selected, on the Home tab, in the Drawing group, click Arrange , and then do the following: Point to Align , and then click Align to Slide . Point to Align , and then click Align Right . Point to Align , and then click Align Middle . Click Send to Back . To reproduce the animation effects on this slide, do the following: On the Animations tab, in the Animations group, click Custom Animation . On the slide, select the picture. In Custom Animation task pane, do the following: Click Add Effect , point to Entrance , and then click More Effects . In the Add Entrance Effect dialog box, under Basic , click Wheel . Select the animation effect (wheel effect for the picture). Under Modify: Wheel , do the following: In the Start list, select With Previous . In the Spokes list, select 1 Spoke . In the Speed list, select Medium . On the slide, select the picture. In Custom Animation task pane, do the following: Click Add Effect , point to Entrance , and then click More Effects . In the Add Entrance Effect dialog box, under Subtle , click Faded Zoom . Select the second animation effect (faded zoom effect for the picture). Under Modify: Faded Zoom , do the following: In the Start list, select With Previous . In the Speed list, select Medium . On the slide, select the picture. In Custom Animation task pane, do the following: Click Add Effect , point to Emphasis , and then click More Effects . In the Add Emphasis Effect dialog box, under Basic , click Grow/Shrink . Select the third animation effect (grow/shrink effect for the picture). Click the arrow to the right of the selected effect, and then click Effect Options . In the Grow/Shrink dialog box, do the following: On the Effect tab, under Settings , do the following: In the Size list, in the Custom box, enter 95% , and then press ENTER. Select Smooth Start . Select Smooth End . Select Auto-reverse . On the Timing tab, do the following: In the Start list, select After Previous . In the Speed box, enter 0.3 seconds . On the slide, select the picture. In Custom Animation task pane, do the following: Click Add Effect , point to Emphasis , and then click More Effects . In the Add Emphasis Effect dialog box, under Basic , click Grow/Shrink . Select the fourth animation effect (grow/shrink effect for the picture). Under Grow/Shrink , do the following: In the Start list, select After Previous . In the Size list, select Smaller . In the Speed list, select Medium . On the slide, select the picture. In Custom Animation task pane, do the following: Click Add Effect , point to Motion Paths , and then click Left . Select the fifth animation effect (left motion path for the picture). Under Modify: Left , do the following: In the Start list, select With Previous . In the Speed list, select Medium . On the slide, select the text box. In the Custom Animation task pane, do the following: Click Add Effect , point to Entrance , and then click More Effects . In the Add Entrance Effect dialog box, under Subtle , select Fade . Select the sixth animation effect (fade effect for the text box). Click the arrow to the right of the selected effect, and then click Timing . In the Fade dialog box, on the Timing tab, do the following: In the Start list, select With Previous . In the Delay box, enter 1.5 . In the Speed list, select 1 seconds ( Fast) . On the slide, select the text box. In Custom Animation task pane, do the following: Click Add Effect , point to Motion Paths , and then click Left . Select the seventh animation effect (left motion path for the text box). Under Modify: Left , do the following: In the Start list, select With Previous . In the Speed list, select Fast . On the slide, right–click the selected motion path for the text box, and then click Reverse Path Direction . To reproduce the rectangle on this slide, do the following: On the Home tab, in the Drawing group, click Shapes , and then under Rectangles click Rectangle (first option from the left). On the slide, drag to draw a rectangle. Select the rectangle. Under Drawing Tools , on the Format tab, in the Size group, do the following: In the Shape Height box, enter 1.54” . In the Shape Width box, enter 10” . Under Drawing Tools , on the Format tab, in the Shape Styles group, click the arrow next to Shape Outline , and then click No Outline . Under Drawing Tools , on the Format tab, in the bottom right corner of the Shape Styles group, click the Format Shape dialog box launcher. In the Format Shape dialog box, click Fill in the left pane, select Gradient fill in the Fill pane, and then do the following: In the Type list, select Linear . Click the button next to Direction , and then click Linear Right (first row, fourth option from the left). Under Gradient stops , click Add or Remove until two stops appear in the drop-down list. Also under Gradient stops , customize the gradient stops that you added as follows: Select Stop 1 from the list, and then do the following: In the Stop position box, enter 0% . Click the button next to Color , and then under Theme Colors click White, Background 1 (first row, first option from the left). In the Transparency box, enter 88% . Select Stop 2 from the list, and then do the following: In the Stop position box, enter 100% . Click the button next to Color , and then under Theme Colors click White, Background 1 (first row, first option from the left). In the Transparency box, enter 43% . On the Home tab, in the Drawing group, click Arrange , and then do the following: Point to Align , and then click Align to Slide . Point to Align , and then click Align Middle . Point to Align , and then click Align Center . Click Send to Back . To reproduce the background effects on this slide, do the following: Right-click the slide background area, and then click Format Background . In the Format Background dialog box, click Fill in the left pane, select Gradient fill in the Fill pane, and then do the following: In the Type list, select Radial . Click the button next to Direction , and then click From Center (third option from the left). Under Gradient stops , click Add or Remove until two stops appear in the drop-down list. Also under Gradient stops , customize the gradient stops that you added as follows: Select Stop 1 from the list, and then do the following: In the Stop position box, enter 0% . Click the button next to Color , and then under Theme Colors click White, Background 1 (first row, first option from the left). Select Stop 2 from the list, and then do the following: In the Stop position box, enter 100% . Click the button next to Color , and then under Theme Colors click Black, Text 1, Lighter 50% (second row, second option from the left).
- Custom animation effects: countdown (Advanced) Tip: For the effects on this slide, use a large picture that measures 7.5” high and 10” wide (the dimensions of the slide). To reproduce the animated picture effects on this slide, do the following: On the Home tab, in the Slides group, click Layout , and then click Blank . On the Insert tab, in the Illustrations group, click Picture . In the Insert Picture dialog box, select the 7.5” x 10” picture, and then click Insert . On the slide, select the picture. Under Picture Tools , on the Format tab, in the bottom right corner of the Size group, click the Size and Position dialog box launcher. In the Size and Position dialog box, on the Size tab, under Crop from , in the Right box, enter 5.33” . ( Note: Under Size and rotate , the Height should now be 7.5” and the Width should now be 5” .) On the Home tab, in the Drawing group, click Arrange , point to Align , and then do the following: Click Align to Slide . Click Align Left . Click Align Middle . On the Insert tab, in the Illustrations group, click Picture . In the Insert Picture dialog box, select the same 7.5” x 10” picture, and then click Insert . On the slide, select the second picture. Under Picture Tools , on the Format tab, in the bottom right corner of the Size group, click the Size and Position dialog box launcher. In the Size and Position dialog box, on the Size tab, under Crop from , in the Left box, enter 5.33” . ( Note: Under Size and rotate , the Height should be 7.5” and the Width should now be 5” .) On the Home tab, in the Drawing group, click Arrange , point to Align , and then do the following: Click Align to Slide . Click Align Right . Click Align Middle . On the Home tab, in the Drawing group, click Shapes , and then under Rectangle click Rectangle (first option from the left). On the slide, drag to draw a rectangle. Select the rectangle. On the Home tab, in the Drawing group, click Arrange , point to Align , and then do the following: Click Align to Slide . Click Align Right . Click Align Middle . With the rectangle still selected, on the Home tab, in the bottom right corner of the Drawing group, click the Format Shape dialog box launcher. In the Format Shape dialog box, click Fill in the left pane. In the Fill pane, select Solid fill , and then do the following: Click the button next to Color , and then under Theme Colors click White, Background 1 (first row, first option from the left). In the Transparency box, enter 10% . On the Animations tab, in the Animations group, click Custom Animation . On the slide, select the left picture. In the Custom Animation task pane, do the following: Click Add Effect , point to Entrance , and then click More Effects . In the Add Entrance Effect dialog box, under Basic , click Peek In . Select the animation effect (peek-in effect for the left picture). Under Modify: Peek In , do the following: In the Start list, select With Previous . In the Direction list, select From Right . In the Speed list, select Medium . On the slide, select the second (right) picture. In the Custom Animation task pane, do the following: Click Add Effect , point to Entrance , and then click More Effects . In the Add Entrance Effect dialog box, under Basic , click Peek In . Select the second animation effect (peek-in effect for the right picture). Under Modify: Peek In , do the following: In the Start list, select With Previous . In the Direction list, select From Left . In the Speed list, select Medium . To reproduce the first animated text effects on this slide, do the following: On the Insert tab, in the Text group, click Text Box . On the slide, drag to draw a text box. Enter Time for a short break in the text box. Select the text. On the Home tab, in the Font group, do the following: In the Font list, select TW Cen MT . In the Font Size list, select 40 . Click Bold . Click the arrow next to Font Color , and then under Theme Colors click White, Background 1 (first row, first option from the left). On the Home tab, in the Paragraph group, click Align Text Right to align the text right in the text box. On the text box, drag the adjustment handles to adjust the size of the text box so that the text wraps onto two lines, as in the example above. Drag the text box onto the lower half of the slide, to the left of the middle. On the slide, select the text box. In the Custom Animation task pane, do the following: Click Add Effect , point to Entrance , and then click More Effects . In the Add Entrance Effect dialog box, under Moderate , click Ascend . Select the third animation effect (ascend effect for the first text box). Click the arrow to the right of the selected effect, and then click Timing . In the Ascend dialog box, do the following: In the Start list, select With Previous . In the Delay box, enter 1 . In the Speed list, select 1 seconds (Fast) . To reproduce the other animated text effects on this slide, do the following: On the Insert tab, in the Text group, click Text Box . On the slide, drag to draw a text box. Enter : in the second text box. Select the text in the second text box. On the Home tab, in the Font group, do the following: In the Font list, select TW Cen MT . In the Font Size list, select 90 . Click Bold . Click the arrow next to Font Color , and then under Theme Colors click Black, Text 1 (first row, second option from the left). On the Home tab, in the Paragraph group, click Align Text Left to align the colon left in the second text box. Drag the second text box into the upper half of the slide, to the right of the middle. On the slide, select the second text box. In the Custom Animation task pane, do the following: Click Add Effect , point to Entrance , and then click More Effects . In the Add Entrance Effect dialog box, under Moderate , click Descend . Select the fourth animation effect (descend effect for the second text box). Under Modify: Descend , do the following: In the Start list, select With Previous . In the Speed list, select Fast . On the slide, select the second text box. On the Home tab, in the Clipboard group, click the arrow under Paste , and then click Duplicate . Click in the third text box, delete the colon, and then enter 10 . Drag the 10 text box on top of the second text box, until the number is positioned to the right of the colon. On the Home tab, in the Editing group, click Select , and then click Selection Pane . In the Selection and Visibility pane, select the 10 text box. In the Custom Animation task pane, do the following: Click Add Effect , point to Exit , and then click More Effects . In the Add Exit Effect dialog box, under Basic , click Disappear . Select the sixth animation effect (disappear effect for the second text box). Click the arrow to the right of the selected effect, and then click Timing . In the Disappear dialog box, on the Timing tab, do the following: In the Start list, select After Previous . In the Delay box, enter 1 . In the Selection and Visibility pane, select the 10 text box. On the Home tab, in the Clipboard group, click the arrow under Paste , and then click Duplicate . Click in the fourth text box, delete 10 , and then enter 09 (the content of the previous text box, minus one second). In the Selection and Visibility pane, select the 09 text box. On the slide, drag the selected text box on top of the other text boxes. In the Custom Animation task pane, do the following: Select the seventh animation effect (descend effect for the 09 text box). Click Change , point to Entrance , and then click More Effects . In the Change Entrance Effect dialog box, under Basic , click Appear . Select the seventh animation effect (appear effect for the 09 text box). Click the arrow to the right of the selected effect, and then click Timing . In the Appear dialog box, on the Timing tab, in the Delay box, enter 1 . In the Selection and Visibility pane, select the 09 text box. On the Home tab, in the Clipboard group, click the arrow under Paste , and then click Duplicate . On the slide, click in the duplicate text box, delete 09 , and enter 08 (the content of the previous text box, minus one second). In the Selection and Visibility pane, select the 08 text box. On the slide, drag the selected text box on top of the other text boxes. On the slide, continue to duplicate, edit, and drag the text boxes as in steps 16-18, entering a number in each new text box that is one second less than the previous text box, until there is a total of 11 numbered text boxes. ( Note: The final text box will contain 00 ). In the Custom Animation task pane, select the last animation effect (disappear effect for the 00 text box), and then click Remove .
- Custom animation effects: spinning clip art with text (Intermediate) To reproduce the clip art on this slide, do the following: On the Home tab, in the Slides group, click Layout , and then click Blank . On the Insert tab, in the Illustrations group, click Clip Art . In the Clip Art pane, in the Search for box, enter j0435540 . In the Search in list, select Everywhere , and then click Go . Select the clip art file in the pane to insert it into the slide. ( Note: If you choose another clip art file, the clip art must be in the Windows Metafile format [.wmf].) On the slide, select the clip art. Under Drawing Tools , on the Format tab, in the Size group, do the following: In the Shape Height box, enter 5.83” . In the Shape Width box, enter 8.12” . On the Home tab, in the Drawing group, click Arrange , and then click Ungroup . In the Microsoft Office PowerPoint dialog box, click Yes . On the slide, select the converted clip art. On the Home tab, in the Editing group, click Select , and then click Selection Pane . In the Selection and Visibility pane , select the top-level group. On the Home tab, in the Drawing group, click Arrange , and then click Ungroup . Also in the Selection and Visibility pane, select the Autoshape object, and then press DELETE. Press CTRL+A to select all of the objects on the slide. On the Home tab, in the Drawing group, click Arrange , and then click Group . Select the group. On the Home tab, in the Drawing group, click Shape Effects , point to Preset , and then under Presets click Preset 8 (second row, fourth option from the left). With the group still selected, under Drawing Tools , on the Format tab, in the bottom right corner of the Size group, click the Size and Position dialog box launcher, and do the following: On the Size tab, in the Height box, enter 6.27” . On the Size tab, in the Width box, enter 6.27” . On the Position tab, in the Horizontal box, enter 3.89 ”. On the Position tab, in the Vertical box, enter 1.55 ” To reproduce the text on this slide, do the following: On the Insert tab, in the Text group, click Text Box . Drag to draw a text box on the slide. In the text box, enter text and select it. On the Home tab, in the Font group do the following: In the Font list, select Candara . In the Font Size box, enter 32 pt . In the Font Color list, under Standard Colors select Orange (third option from the left). Click Italic . Select the text box on the slide, and then under Drawing Tools , on the Format tab, in the Size group, do the following: In the Shape Height box, enter 7.29” . In the Shape Width box, enter 7.29” . Under Drawing Tools , on the Format tab, in the WordArt Styles group, click Text Effects , point to Transform , and under Follow Path select Arch Up (first option from the left). To wrap the text upside down, at the bottom of the text box, drag the pink adjustment diamond from the center left position in the text box to the lower right corner of the text box. With the text box still selected, under Drawing Tools , on the Format tab, in the bottom right corner of the Size group, click the Size and Position dialog box launcher, and then on the Position tab do the following: In the Horizontal box, enter 3.38 ”. In the Vertical box, enter 1.04 ”. To reproduce the animation effects on this slide, do the following: On the Animation tab, in the Animations group, click Custom Animation . Select the circle clip art on the slide, and then in the Custom Animation task pane, do the following: Click Add Effect , point to Emphasis effect and select More Effects . In the Add Emphasis Effect dialog box, under Basic select Spin , and then click OK . Click the arrow to the right of the spin emphasis effect, select Effect Options , and do the following: On the Effect tab, under Settings , in the Amount list, select Quarter Spin . On the Effect tab, under Settings , in the Amount list, select Counterclockwise . On the Timing tab, in the Start list, select With Previous . On the Timing tab, in the Speed box enter 4.0 seconds . Click OK . On the slide, select the text box, and then in the Custom Animation task pane, do the following: Click the Add Effect , point to Entrance and select More Effects . In the Add Entrance Effect dialog box, under Subtle select Fade , and then click OK . Select the fade entrance effect (second effect), and under Modify: Fade do the following: In the Start list, select With Previous . In the Speed list, select Slow . With the text box still selected, click Add Effect , point to Emphasis and select More Effects . In the Add Emphasis Effect dialog box, under Basic select Spin , and then click OK . Select the spin emphasis effect (third effect), and under Modify: Spin do the following: In the Start list, select With Previous . In the Amount list, select Half Spin . In the Speed list select Slow . With the text box still selected, click Add Effect , point to Emphasis and select More Effects . In the Add Emphasis Effect dialog box, under Basic select Spin , and then click OK . Click the arrow to the right of the spin emphasis effect (fourth effect), select Effect Options , and do the following: On the Effect tab, under Settings , in the Amount list, in the Custom box enter 30° , and then press ENTER. On the Effect tab, under Settings , in the Amount list, select Counterclockwise . On the Timing tab, in the Start list, select With Previous . On the Timing tab, in the Delay box enter 3.0 seconds . On the Timing tab, in the Speed box enter 1 seconds (Fast) . Click OK . To reproduce the background on this slide, do the following: Right-click the slide background area, and then click Format Background . In the Format Background dialog box, click Fill in the left pane, select Gradient fill in the Fill pane, and then do the following: In the Type list, select Linear . In the Direction , list click Linear Down (first row, second option from the left) Under Gradient stops , click Add or Remove until two stops appear in the drop-down list. Also under Gradient stops , customize the gradient stops as follows: Select Stop 1 from the list, and then do the following: In the Stop position box, enter 0% . Click the button next to Color , and then under Theme Colors click Black, Text 1 (first row, second option from the left). Select Stop 2 from the list, and then do the following: In the Stop position box, enter 100% . Click the button next to Color , and then under Theme Colors click Black, Text 1, Lighter 50% (second row, second option from the left).
- Custom animation effects: spinning clip art with text (Intermediate) To reproduce the clip art on this slide, do the following: On the Home tab, in the Slides group, click Layout , and then click Blank . On the Insert tab, in the Illustrations group, click Clip Art . In the Clip Art pane, in the Search for box, enter j0435540 . In the Search in list, select Everywhere , and then click Go . Select the clip art file in the pane to insert it into the slide. ( Note: If you choose another clip art file, the clip art must be in the Windows Metafile format [.wmf].) On the slide, select the clip art. Under Drawing Tools , on the Format tab, in the Size group, do the following: In the Shape Height box, enter 5.83” . In the Shape Width box, enter 8.12” . On the Home tab, in the Drawing group, click Arrange , and then click Ungroup . In the Microsoft Office PowerPoint dialog box, click Yes . On the slide, select the converted clip art. On the Home tab, in the Editing group, click Select , and then click Selection Pane . In the Selection and Visibility pane , select the top-level group. On the Home tab, in the Drawing group, click Arrange , and then click Ungroup . Also in the Selection and Visibility pane, select the Autoshape object, and then press DELETE. Press CTRL+A to select all of the objects on the slide. On the Home tab, in the Drawing group, click Arrange , and then click Group . Select the group. On the Home tab, in the Drawing group, click Shape Effects , point to Preset , and then under Presets click Preset 8 (second row, fourth option from the left). With the group still selected, under Drawing Tools , on the Format tab, in the bottom right corner of the Size group, click the Size and Position dialog box launcher, and do the following: On the Size tab, in the Height box, enter 6.27” . On the Size tab, in the Width box, enter 6.27” . On the Position tab, in the Horizontal box, enter 3.89 ”. On the Position tab, in the Vertical box, enter 1.55 ” To reproduce the text on this slide, do the following: On the Insert tab, in the Text group, click Text Box . Drag to draw a text box on the slide. In the text box, enter text and select it. On the Home tab, in the Font group do the following: In the Font list, select Candara . In the Font Size box, enter 32 pt . In the Font Color list, under Standard Colors select Orange (third option from the left). Click Italic . Select the text box on the slide, and then under Drawing Tools , on the Format tab, in the Size group, do the following: In the Shape Height box, enter 7.29” . In the Shape Width box, enter 7.29” . Under Drawing Tools , on the Format tab, in the WordArt Styles group, click Text Effects , point to Transform , and under Follow Path select Arch Up (first option from the left). To wrap the text upside down, at the bottom of the text box, drag the pink adjustment diamond from the center left position in the text box to the lower right corner of the text box. With the text box still selected, under Drawing Tools , on the Format tab, in the bottom right corner of the Size group, click the Size and Position dialog box launcher, and then on the Position tab do the following: In the Horizontal box, enter 3.38 ”. In the Vertical box, enter 1.04 ”. To reproduce the animation effects on this slide, do the following: On the Animation tab, in the Animations group, click Custom Animation . Select the circle clip art on the slide, and then in the Custom Animation task pane, do the following: Click Add Effect , point to Emphasis effect and select More Effects . In the Add Emphasis Effect dialog box, under Basic select Spin , and then click OK . Click the arrow to the right of the spin emphasis effect, select Effect Options , and do the following: On the Effect tab, under Settings , in the Amount list, select Quarter Spin . On the Effect tab, under Settings , in the Amount list, select Counterclockwise . On the Timing tab, in the Start list, select With Previous . On the Timing tab, in the Speed box enter 4.0 seconds . Click OK . On the slide, select the text box, and then in the Custom Animation task pane, do the following: Click the Add Effect , point to Entrance and select More Effects . In the Add Entrance Effect dialog box, under Subtle select Fade , and then click OK . Select the fade entrance effect (second effect), and under Modify: Fade do the following: In the Start list, select With Previous . In the Speed list, select Slow . With the text box still selected, click Add Effect , point to Emphasis and select More Effects . In the Add Emphasis Effect dialog box, under Basic select Spin , and then click OK . Select the spin emphasis effect (third effect), and under Modify: Spin do the following: In the Start list, select With Previous . In the Amount list, select Half Spin . In the Speed list select Slow . With the text box still selected, click Add Effect , point to Emphasis and select More Effects . In the Add Emphasis Effect dialog box, under Basic select Spin , and then click OK . Click the arrow to the right of the spin emphasis effect (fourth effect), select Effect Options , and do the following: On the Effect tab, under Settings , in the Amount list, in the Custom box enter 30° , and then press ENTER. On the Effect tab, under Settings , in the Amount list, select Counterclockwise . On the Timing tab, in the Start list, select With Previous . On the Timing tab, in the Delay box enter 3.0 seconds . On the Timing tab, in the Speed box enter 1 seconds (Fast) . Click OK . To reproduce the background on this slide, do the following: Right-click the slide background area, and then click Format Background . In the Format Background dialog box, click Fill in the left pane, select Gradient fill in the Fill pane, and then do the following: In the Type list, select Linear . In the Direction , list click Linear Down (first row, second option from the left) Under Gradient stops , click Add or Remove until two stops appear in the drop-down list. Also under Gradient stops , customize the gradient stops as follows: Select Stop 1 from the list, and then do the following: In the Stop position box, enter 0% . Click the button next to Color , and then under Theme Colors click Black, Text 1 (first row, second option from the left). Select Stop 2 from the list, and then do the following: In the Stop position box, enter 100% . Click the button next to Color , and then under Theme Colors click Black, Text 1, Lighter 50% (second row, second option from the left).
- Custom animation effects: spinning clip art with text (Intermediate) To reproduce the clip art on this slide, do the following: On the Home tab, in the Slides group, click Layout , and then click Blank . On the Insert tab, in the Illustrations group, click Clip Art . In the Clip Art pane, in the Search for box, enter j0435540 . In the Search in list, select Everywhere , and then click Go . Select the clip art file in the pane to insert it into the slide. ( Note: If you choose another clip art file, the clip art must be in the Windows Metafile format [.wmf].) On the slide, select the clip art. Under Drawing Tools , on the Format tab, in the Size group, do the following: In the Shape Height box, enter 5.83” . In the Shape Width box, enter 8.12” . On the Home tab, in the Drawing group, click Arrange , and then click Ungroup . In the Microsoft Office PowerPoint dialog box, click Yes . On the slide, select the converted clip art. On the Home tab, in the Editing group, click Select , and then click Selection Pane . In the Selection and Visibility pane , select the top-level group. On the Home tab, in the Drawing group, click Arrange , and then click Ungroup . Also in the Selection and Visibility pane, select the Autoshape object, and then press DELETE. Press CTRL+A to select all of the objects on the slide. On the Home tab, in the Drawing group, click Arrange , and then click Group . Select the group. On the Home tab, in the Drawing group, click Shape Effects , point to Preset , and then under Presets click Preset 8 (second row, fourth option from the left). With the group still selected, under Drawing Tools , on the Format tab, in the bottom right corner of the Size group, click the Size and Position dialog box launcher, and do the following: On the Size tab, in the Height box, enter 6.27” . On the Size tab, in the Width box, enter 6.27” . On the Position tab, in the Horizontal box, enter 3.89 ”. On the Position tab, in the Vertical box, enter 1.55 ” To reproduce the text on this slide, do the following: On the Insert tab, in the Text group, click Text Box . Drag to draw a text box on the slide. In the text box, enter text and select it. On the Home tab, in the Font group do the following: In the Font list, select Candara . In the Font Size box, enter 32 pt . In the Font Color list, under Standard Colors select Orange (third option from the left). Click Italic . Select the text box on the slide, and then under Drawing Tools , on the Format tab, in the Size group, do the following: In the Shape Height box, enter 7.29” . In the Shape Width box, enter 7.29” . Under Drawing Tools , on the Format tab, in the WordArt Styles group, click Text Effects , point to Transform , and under Follow Path select Arch Up (first option from the left). To wrap the text upside down, at the bottom of the text box, drag the pink adjustment diamond from the center left position in the text box to the lower right corner of the text box. With the text box still selected, under Drawing Tools , on the Format tab, in the bottom right corner of the Size group, click the Size and Position dialog box launcher, and then on the Position tab do the following: In the Horizontal box, enter 3.38 ”. In the Vertical box, enter 1.04 ”. To reproduce the animation effects on this slide, do the following: On the Animation tab, in the Animations group, click Custom Animation . Select the circle clip art on the slide, and then in the Custom Animation task pane, do the following: Click Add Effect , point to Emphasis effect and select More Effects . In the Add Emphasis Effect dialog box, under Basic select Spin , and then click OK . Click the arrow to the right of the spin emphasis effect, select Effect Options , and do the following: On the Effect tab, under Settings , in the Amount list, select Quarter Spin . On the Effect tab, under Settings , in the Amount list, select Counterclockwise . On the Timing tab, in the Start list, select With Previous . On the Timing tab, in the Speed box enter 4.0 seconds . Click OK . On the slide, select the text box, and then in the Custom Animation task pane, do the following: Click the Add Effect , point to Entrance and select More Effects . In the Add Entrance Effect dialog box, under Subtle select Fade , and then click OK . Select the fade entrance effect (second effect), and under Modify: Fade do the following: In the Start list, select With Previous . In the Speed list, select Slow . With the text box still selected, click Add Effect , point to Emphasis and select More Effects . In the Add Emphasis Effect dialog box, under Basic select Spin , and then click OK . Select the spin emphasis effect (third effect), and under Modify: Spin do the following: In the Start list, select With Previous . In the Amount list, select Half Spin . In the Speed list select Slow . With the text box still selected, click Add Effect , point to Emphasis and select More Effects . In the Add Emphasis Effect dialog box, under Basic select Spin , and then click OK . Click the arrow to the right of the spin emphasis effect (fourth effect), select Effect Options , and do the following: On the Effect tab, under Settings , in the Amount list, in the Custom box enter 30° , and then press ENTER. On the Effect tab, under Settings , in the Amount list, select Counterclockwise . On the Timing tab, in the Start list, select With Previous . On the Timing tab, in the Delay box enter 3.0 seconds . On the Timing tab, in the Speed box enter 1 seconds (Fast) . Click OK . To reproduce the background on this slide, do the following: Right-click the slide background area, and then click Format Background . In the Format Background dialog box, click Fill in the left pane, select Gradient fill in the Fill pane, and then do the following: In the Type list, select Linear . In the Direction , list click Linear Down (first row, second option from the left) Under Gradient stops , click Add or Remove until two stops appear in the drop-down list. Also under Gradient stops , customize the gradient stops as follows: Select Stop 1 from the list, and then do the following: In the Stop position box, enter 0% . Click the button next to Color , and then under Theme Colors click Black, Text 1 (first row, second option from the left). Select Stop 2 from the list, and then do the following: In the Stop position box, enter 100% . Click the button next to Color , and then under Theme Colors click Black, Text 1, Lighter 50% (second row, second option from the left).
- Custom animation effects: spinning clip art with text (Intermediate) To reproduce the clip art on this slide, do the following: On the Home tab, in the Slides group, click Layout , and then click Blank . On the Insert tab, in the Illustrations group, click Clip Art . In the Clip Art pane, in the Search for box, enter j0435540 . In the Search in list, select Everywhere , and then click Go . Select the clip art file in the pane to insert it into the slide. ( Note: If you choose another clip art file, the clip art must be in the Windows Metafile format [.wmf].) On the slide, select the clip art. Under Drawing Tools , on the Format tab, in the Size group, do the following: In the Shape Height box, enter 5.83” . In the Shape Width box, enter 8.12” . On the Home tab, in the Drawing group, click Arrange , and then click Ungroup . In the Microsoft Office PowerPoint dialog box, click Yes . On the slide, select the converted clip art. On the Home tab, in the Editing group, click Select , and then click Selection Pane . In the Selection and Visibility pane , select the top-level group. On the Home tab, in the Drawing group, click Arrange , and then click Ungroup . Also in the Selection and Visibility pane, select the Autoshape object, and then press DELETE. Press CTRL+A to select all of the objects on the slide. On the Home tab, in the Drawing group, click Arrange , and then click Group . Select the group. On the Home tab, in the Drawing group, click Shape Effects , point to Preset , and then under Presets click Preset 8 (second row, fourth option from the left). With the group still selected, under Drawing Tools , on the Format tab, in the bottom right corner of the Size group, click the Size and Position dialog box launcher, and do the following: On the Size tab, in the Height box, enter 6.27” . On the Size tab, in the Width box, enter 6.27” . On the Position tab, in the Horizontal box, enter 3.89 ”. On the Position tab, in the Vertical box, enter 1.55 ” To reproduce the text on this slide, do the following: On the Insert tab, in the Text group, click Text Box . Drag to draw a text box on the slide. In the text box, enter text and select it. On the Home tab, in the Font group do the following: In the Font list, select Candara . In the Font Size box, enter 32 pt . In the Font Color list, under Standard Colors select Orange (third option from the left). Click Italic . Select the text box on the slide, and then under Drawing Tools , on the Format tab, in the Size group, do the following: In the Shape Height box, enter 7.29” . In the Shape Width box, enter 7.29” . Under Drawing Tools , on the Format tab, in the WordArt Styles group, click Text Effects , point to Transform , and under Follow Path select Arch Up (first option from the left). To wrap the text upside down, at the bottom of the text box, drag the pink adjustment diamond from the center left position in the text box to the lower right corner of the text box. With the text box still selected, under Drawing Tools , on the Format tab, in the bottom right corner of the Size group, click the Size and Position dialog box launcher, and then on the Position tab do the following: In the Horizontal box, enter 3.38 ”. In the Vertical box, enter 1.04 ”. To reproduce the animation effects on this slide, do the following: On the Animation tab, in the Animations group, click Custom Animation . Select the circle clip art on the slide, and then in the Custom Animation task pane, do the following: Click Add Effect , point to Emphasis effect and select More Effects . In the Add Emphasis Effect dialog box, under Basic select Spin , and then click OK . Click the arrow to the right of the spin emphasis effect, select Effect Options , and do the following: On the Effect tab, under Settings , in the Amount list, select Quarter Spin . On the Effect tab, under Settings , in the Amount list, select Counterclockwise . On the Timing tab, in the Start list, select With Previous . On the Timing tab, in the Speed box enter 4.0 seconds . Click OK . On the slide, select the text box, and then in the Custom Animation task pane, do the following: Click the Add Effect , point to Entrance and select More Effects . In the Add Entrance Effect dialog box, under Subtle select Fade , and then click OK . Select the fade entrance effect (second effect), and under Modify: Fade do the following: In the Start list, select With Previous . In the Speed list, select Slow . With the text box still selected, click Add Effect , point to Emphasis and select More Effects . In the Add Emphasis Effect dialog box, under Basic select Spin , and then click OK . Select the spin emphasis effect (third effect), and under Modify: Spin do the following: In the Start list, select With Previous . In the Amount list, select Half Spin . In the Speed list select Slow . With the text box still selected, click Add Effect , point to Emphasis and select More Effects . In the Add Emphasis Effect dialog box, under Basic select Spin , and then click OK . Click the arrow to the right of the spin emphasis effect (fourth effect), select Effect Options , and do the following: On the Effect tab, under Settings , in the Amount list, in the Custom box enter 30° , and then press ENTER. On the Effect tab, under Settings , in the Amount list, select Counterclockwise . On the Timing tab, in the Start list, select With Previous . On the Timing tab, in the Delay box enter 3.0 seconds . On the Timing tab, in the Speed box enter 1 seconds (Fast) . Click OK . To reproduce the background on this slide, do the following: Right-click the slide background area, and then click Format Background . In the Format Background dialog box, click Fill in the left pane, select Gradient fill in the Fill pane, and then do the following: In the Type list, select Linear . In the Direction , list click Linear Down (first row, second option from the left) Under Gradient stops , click Add or Remove until two stops appear in the drop-down list. Also under Gradient stops , customize the gradient stops as follows: Select Stop 1 from the list, and then do the following: In the Stop position box, enter 0% . Click the button next to Color , and then under Theme Colors click Black, Text 1 (first row, second option from the left). Select Stop 2 from the list, and then do the following: In the Stop position box, enter 100% . Click the button next to Color , and then under Theme Colors click Black, Text 1, Lighter 50% (second row, second option from the left).
- Custom animation effects: spinning clip art with text (Intermediate) To reproduce the clip art on this slide, do the following: On the Home tab, in the Slides group, click Layout , and then click Blank . On the Insert tab, in the Illustrations group, click Clip Art . In the Clip Art pane, in the Search for box, enter j0435540 . In the Search in list, select Everywhere , and then click Go . Select the clip art file in the pane to insert it into the slide. ( Note: If you choose another clip art file, the clip art must be in the Windows Metafile format [.wmf].) On the slide, select the clip art. Under Drawing Tools , on the Format tab, in the Size group, do the following: In the Shape Height box, enter 5.83” . In the Shape Width box, enter 8.12” . On the Home tab, in the Drawing group, click Arrange , and then click Ungroup . In the Microsoft Office PowerPoint dialog box, click Yes . On the slide, select the converted clip art. On the Home tab, in the Editing group, click Select , and then click Selection Pane . In the Selection and Visibility pane , select the top-level group. On the Home tab, in the Drawing group, click Arrange , and then click Ungroup . Also in the Selection and Visibility pane, select the Autoshape object, and then press DELETE. Press CTRL+A to select all of the objects on the slide. On the Home tab, in the Drawing group, click Arrange , and then click Group . Select the group. On the Home tab, in the Drawing group, click Shape Effects , point to Preset , and then under Presets click Preset 8 (second row, fourth option from the left). With the group still selected, under Drawing Tools , on the Format tab, in the bottom right corner of the Size group, click the Size and Position dialog box launcher, and do the following: On the Size tab, in the Height box, enter 6.27” . On the Size tab, in the Width box, enter 6.27” . On the Position tab, in the Horizontal box, enter 3.89 ”. On the Position tab, in the Vertical box, enter 1.55 ” To reproduce the text on this slide, do the following: On the Insert tab, in the Text group, click Text Box . Drag to draw a text box on the slide. In the text box, enter text and select it. On the Home tab, in the Font group do the following: In the Font list, select Candara . In the Font Size box, enter 32 pt . In the Font Color list, under Standard Colors select Orange (third option from the left). Click Italic . Select the text box on the slide, and then under Drawing Tools , on the Format tab, in the Size group, do the following: In the Shape Height box, enter 7.29” . In the Shape Width box, enter 7.29” . Under Drawing Tools , on the Format tab, in the WordArt Styles group, click Text Effects , point to Transform , and under Follow Path select Arch Up (first option from the left). To wrap the text upside down, at the bottom of the text box, drag the pink adjustment diamond from the center left position in the text box to the lower right corner of the text box. With the text box still selected, under Drawing Tools , on the Format tab, in the bottom right corner of the Size group, click the Size and Position dialog box launcher, and then on the Position tab do the following: In the Horizontal box, enter 3.38 ”. In the Vertical box, enter 1.04 ”. To reproduce the animation effects on this slide, do the following: On the Animation tab, in the Animations group, click Custom Animation . Select the circle clip art on the slide, and then in the Custom Animation task pane, do the following: Click Add Effect , point to Emphasis effect and select More Effects . In the Add Emphasis Effect dialog box, under Basic select Spin , and then click OK . Click the arrow to the right of the spin emphasis effect, select Effect Options , and do the following: On the Effect tab, under Settings , in the Amount list, select Quarter Spin . On the Effect tab, under Settings , in the Amount list, select Counterclockwise . On the Timing tab, in the Start list, select With Previous . On the Timing tab, in the Speed box enter 4.0 seconds . Click OK . On the slide, select the text box, and then in the Custom Animation task pane, do the following: Click the Add Effect , point to Entrance and select More Effects . In the Add Entrance Effect dialog box, under Subtle select Fade , and then click OK . Select the fade entrance effect (second effect), and under Modify: Fade do the following: In the Start list, select With Previous . In the Speed list, select Slow . With the text box still selected, click Add Effect , point to Emphasis and select More Effects . In the Add Emphasis Effect dialog box, under Basic select Spin , and then click OK . Select the spin emphasis effect (third effect), and under Modify: Spin do the following: In the Start list, select With Previous . In the Amount list, select Half Spin . In the Speed list select Slow . With the text box still selected, click Add Effect , point to Emphasis and select More Effects . In the Add Emphasis Effect dialog box, under Basic select Spin , and then click OK . Click the arrow to the right of the spin emphasis effect (fourth effect), select Effect Options , and do the following: On the Effect tab, under Settings , in the Amount list, in the Custom box enter 30° , and then press ENTER. On the Effect tab, under Settings , in the Amount list, select Counterclockwise . On the Timing tab, in the Start list, select With Previous . On the Timing tab, in the Delay box enter 3.0 seconds . On the Timing tab, in the Speed box enter 1 seconds (Fast) . Click OK . To reproduce the background on this slide, do the following: Right-click the slide background area, and then click Format Background . In the Format Background dialog box, click Fill in the left pane, select Gradient fill in the Fill pane, and then do the following: In the Type list, select Linear . In the Direction , list click Linear Down (first row, second option from the left) Under Gradient stops , click Add or Remove until two stops appear in the drop-down list. Also under Gradient stops , customize the gradient stops as follows: Select Stop 1 from the list, and then do the following: In the Stop position box, enter 0% . Click the button next to Color , and then under Theme Colors click Black, Text 1 (first row, second option from the left). Select Stop 2 from the list, and then do the following: In the Stop position box, enter 100% . Click the button next to Color , and then under Theme Colors click Black, Text 1, Lighter 50% (second row, second option from the left).