1. MVC :: Creating Custom HTML Helpers
The goal of this tutorial is to demonstrate how you can create custom HTML Helpers that
you can use within your MVC views. By taking advantage of HTML Helpers, you can reduce
the amount of tedious typing of HTML tags that you must perform to create a standard
HTML page.
In the first part of this tutorial, I describe some of the existing HTML Helpers included with
the ASP.NET MVC framework. Next, I describe two methods of creating custom HTML
Helpers: I explain how to create custom HTML Helpers by creating a static method and by
creating an extension method.
Understanding HTML Helpers
An HTML Helper is just a method that returns a string. The string can represent any type of
content that you want. For example, you can use HTML Helpers to render standard HTML
tags like HTML <input> and <img> tags. You also can use HTML Helpers to render more
complex content such as a tab strip or an HTML table of database data.
The ASP.NET MVC framework includes the following set of standard HTML Helpers (this is
not a complete list):
• Html.ActionLink()
• Html.BeginForm()
• Html.CheckBox()
• Html.DropDownList()
• Html.EndForm()
• Html.Hidden()
• Html.ListBox()
• Html.Password()
• Html.RadioButton()
• Html.TextArea()
• Html.TextBox()
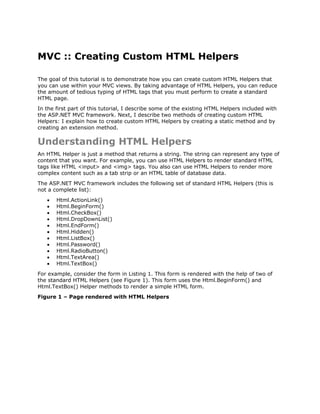
For example, consider the form in Listing 1. This form is rendered with the help of two of
the standard HTML Helpers (see Figure 1). This form uses the Html.BeginForm() and
Html.TextBox() Helper methods to render a simple HTML form.
Figure 1 – Page rendered with HTML Helpers
3. <br /><br />
<label for="lastName">Last Name:</label>
<br />
<%= Html.TextBox("lastName")%>
<br /><br />
<input type="submit" value="Register" />
<% } %>
</div>
</body>
</html>
The Html.BeginForm() Helper method is used to create the opening and closing HTML
<form> tags. Notice that the Html.BeginForm() method is called within a using statement.
The using statement ensures that the <form> tag gets closed at the end of the using block.
If you prefer, instead of creating a using block, you can call the Html.EndForm() Helper
method to close the <form> tag. Use whichever approach to creating an opening and
closing <form> tag that seems most intuitive to you.
The Html.TextBox() Helper methods are used in Listing 1 to render HTML <input> tags. If
you select view source in your browser then you see the HTML source in Listing 2. Notice
that the source contains standard HTML tags.
Important: notice that the Html.TextBox() HTML Helper is
rendered with <%= %> tags instead of <% %> tags. If you
don’t include the equal sign, then nothing gets rendered to the
browser.
The ASP.NET MVC framework contains a small set of helpers. Most likely, you will need to
extend the MVC framework with custom HTML Helpers. In the remainder of this tutorial, you
learn two methods of creating custom HTML Helpers.
Listing 2 – Index.aspx Source
<!DOCTYPE html PUBLIC "-//W3C//DTD XHTML 1.0 Transitional//EN"
"http://www.w3.org/TR/xhtml1/DTD/xhtml1-transitional.dtd">
<html xmlns="http://www.w3.org/1999/xhtml" >
<head><title>
Index
4. </title></head>
<body>
<div>
<form action="http://localhost:33102/" method="post">
<label for="firstName">First Name:</label>
<br />
<input id="firstName" name="firstName" type="text" value="" />
<br /><br />
<label for="lastName">Last Name:</label>
<br />
<input id="lastName" name="lastName" type="text" value="" />
<br /><br />
<input id="btnRegister" name="btnRegister" type="submit"
value="Register" />
</form>
</div>
</body>
</html>
Creating HTML Helpers with Static Methods
The easiest way to create a new HTML Helper is to create a static method that returns a
string. Imagine, for example, that you decide to create a new HTML Helper that renders an
HTML <label> tag. You can use the class in Listing 2 to render a <label>.
Listing 2 – HelpersLabelHelper.cs
using System;
namespace MvcApplication1.Helpers
{
public class LabelHelper
5. {
public static string Label(string target, string text)
{
return String.Format("<label for='{0}'>{1}</label>",
target, text);
}
}
}
There is nothing special about the class in Listing 2. The Label() method simply returns a
string.
The modified Index view in Listing 3 uses the LabelHelper to render HTML <label> tags.
Notice that the view includes an <%@ Imports %> directive that imports the
Application1.Helpers namespace.
Listing 2 – ViewsHomeIndex2.aspx
<%@ Page Language="C#" AutoEventWireup="true"
CodeBehind="Index2.aspx.cs"
Inherits="MvcApplication1.Views.Home.Index2" %>
<%@ Import Namespace="MvcApplication1.Helpers" %>
<!DOCTYPE html PUBLIC "-//W3C//DTD XHTML 1.0 Transitional//EN"
"http://www.w3.org/TR/xhtml1/DTD/xhtml1-transitional.dtd">
<html xmlns="http://www.w3.org/1999/xhtml" >
<head id="Head1" runat="server">
<title>Index2</title>
</head>
<body>
<div>
<% using (Html.BeginForm())
{ %>
<%= LabelHelper.Label("firstName", "First Name:") %>
<br />
<%= Html.TextBox("firstName")%>
6. <br /><br />
<%= LabelHelper.Label("lastName", "Last Name:") %>
<br />
<%= Html.TextBox("lastName")%>
<br /><br />
<input type="submit" value="Register" />
<% } %>
</div>
</body>
</html>
Creating HTML Helpers with Extension
Methods
If you want to create HTML Helpers that work just like the standard HTML Helpers included
in the ASP.NET MVC framework then you need to create extension methods. Extension
methods enable you to add new methods to an existing class. When creating an HTML
Helper method, you add new methods to the HtmlHelper class represented by a view’s Html
property.
The class in Listing 3 adds an extension method to the HtmlHelper class named Label().
There are a couple of things that you should notice about this class. First, notice that the
class is a static class. You must define an extension method with a static class.
Second, notice that the first parameter of the Label() method is preceded by the keyword
this. The first parameter of an extension method indicates the class that the extension
method extends.
Listing 3 – HelpersLabelExtensions.cs
using System;
using System.Web.Mvc;
namespace MvcApplication1.Helpers
{
public static class LabelExtensions
{
7. public static string Label(this HtmlHelper helper, string
target, string text)
{
return String.Format("<label for='{0}'>{1}</label>",
target, text);
}
}
}
After you create an extension method, and build your application successfully, the extension
method appears in Visual Studio Intellisense like all of the other methods of a class (see
Figure 2). The only difference is that extension methods appear with a special symbol next
to them (an icon of a downward arrow).
Figure 2 – Using the Html.Label() extension method
The modified Index view in Listing 4 uses the Html.Label() extension method to render all of
its <label> tags.
Listing 4 – ViewsHomeIndex3.aspx
<%@ Page Language="C#" AutoEventWireup="true"
CodeBehind="Index3.aspx.cs"
Inherits="MvcApplication1.Views.Home.Index3" %>
<%@ Import Namespace="MvcApplication1.Helpers" %>
<!DOCTYPE html PUBLIC "-//W3C//DTD XHTML 1.0 Transitional//EN"
"http://www.w3.org/TR/xhtml1/DTD/xhtml1-transitional.dtd">
8. <html xmlns="http://www.w3.org/1999/xhtml" >
<head id="Head1" runat="server">
<title>Index3</title>
</head>
<body>
<div>
<% using (Html.BeginForm())
{ %>
<%= Html.Label("firstName", "First Name:") %>
<br />
<%= Html.TextBox("firstName")%>
<br /><br />
<%= Html.Label("lastName", "Last Name:") %>
<br />
<%= Html.TextBox("lastName")%>
<br /><br />
<input type="submit" value="Register" />
<% } %>
</div>
</body>
</html>
Summary
In this tutorial, you learned two methods of creating custom HTML Helpers. First, you
learned how to create a custom Label() HTML Helper by creating a static method that
returns a string. Next, you learned how to create a custom Label() HTML Helper method by
creating an extension method on the HtmlHelper class.
9. In this tutorial, I focused on building an extremely simple HTML Helper method. Realize that
an HTML Helper can be as complicated as you want. You can build HTML Helpers that render
rich content such as tree views, menus, or tables of database data.