Simple and Collaborative Slideshow for
Adding Headers and Footers to a Presentation 2013
If the video does not work,Please download and check (Sorry if the inconvenience is caused)
Hope you like it,
Free to download and share,
Check our Other Tutorials onto other Microsoft Office Softwares and further more into miscellaneous slideshows.
Generative AI on Enterprise Cloud with NiFi and Milvus
Microsoft Office Powerpoint 2013 Tutorial- Adding Headers and Footers
1. Add headers and footers to a presentation
j
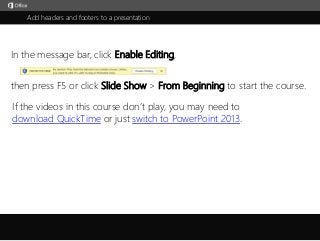
then press F5 or click Slide Show > From Beginning to start the course.
In the message bar, click Enable Editing,
If the videos in this course don’t play, you may need to
download QuickTime or just switch to PowerPoint 2013.
2. 5 61 2 3 4
Course summary Help
1/3 videos
Add headers and footers to a presentation Closed captions
Summary Feedback HelpIntroduction Add to slides Use slide masters
4:572:53 3:53
Press F5 to start, Esc to stop
When we talk about headers and footers in a presentation, we mean the small details near the top or
bottom of your slides.
These include the slide number, a text footer, and the date.Headers and footers appear in various positions, depending on the theme and slide layout.You choose which headers and footers to show and what the text footer says.To insert headers and footers, you click Insert > Header & Footer,make sure Slide is selected, and choose your options.These include date and time, a date and time format, and whether to show the current date or a fixed one.You decide if you want to show slide numbers and include a text footer.Importantly, this option, Don’t show on title slide, allows you to keep headers and footers off that slide.When you click Apply to All, the headers and footers show everywhere except the title slide.If you want unique settings for one slide, select it, reopen the dialog box,check what you want, and click Apply, which affects only the selected slide.For more control over headers and footers, click View > Slide Master,and edit them on the slide master or on any master layout.Selecting the footer placeholders, use Home and the Font options to change things such as font color or
font size.
If you right-click a placeholder and click Format Shape, you get all the same formatting options as for any
placeholder.
If you only want to change one layout, click the layout, and make the change, such as resizing a placeholder.Ultimately, you want to control how headers and footers look and where they appear.Up next: Add headers and footers to slides.
3. 5 61 2 3 4
Course summary Help
2/3 videos
Add headers and footers to a presentation Closed captions
Summary Feedback Help
Press F5 to start, Esc to stop
In our Contoso Pharmaceuticals presentation, we’re ready to add headers and footers.We want slide numbers everywhere but on the title slide, and we want the date only on the title slide. How
do we do that?
To review our options, let’s click Insert, Header & Footer. In the Header and Footer dialog box, the Slide tab
is selected.
Note this option: Don’t show on title slide. This allows me to make an exception for the title slide.So, I’ll check everything I want for all the other slides: Slide number and Footer, where I’ll type the company’s
web address.
I’ll click Don’t show on title slide, and then Apply to All, to apply these choices everywhere else.The title slide is unaffected, and the slide number and footer appear on the other slides.Let’s zoom in for a better view. I don’t really like the green color for the footer—it’s hard to see.But that’s a formatting issue, and we’ll deal with that in Movie 3.I’ll zoom back out.To apply what we want on the title slide, we’ll select that slide, and click Header & Footer.Now, the effect of the option Don’t show on title slide is to clear all the check boxes for the title slide.A way around that is to choose what I want for the title slide and click Apply, which affects only the selected
slide.
So, I’ll check Date and time, leave it set to Update Automatically, and select a date format.The formats include just the date, the date and time, or just the time. I’ll choose a simple date.I’d also like to include the text footer, the web address, on the title slide. So, I’ll check Footer.Last, we’ll uncheck Don’t show on title slide and click Apply.The date and the text footer appear, but not the slide number. That’s what we want.Note that the vertical formatting here is determined by the layout for this title slide.The other slides are unaffected by my choices for the title slide.We now have two sets of options applied. When I select the title slide and click Header & Footer to open the
dialog box…,
…I see the selections I made for this slide, the date and footer.As long as I click Apply, rather than Apply to All, the settings here affect only the title slide.When I select slide 2 and click Header & Footer,I see the selections I applied to all the other slides—the slide number and footer.If I make a change here, such as unchecking the Footer box, and click Apply to All……the footer disappears from the slides,and the change also applies to the title slide, which now shows a slide number and nothing else.I’ll need to reopen the Header and Footer dialog box for the title slide,reselect what I want for that slide, and click Apply.Up next: Edit headers and footers on the slide master.
Introduction Add to slides Use slide masters
4:572:53 3:53
4. 5 61 2 3 4
Course summary Help
3/3 videos
Add headers and footers to a presentation Closed captions
Summary Feedback Help
Press F5 to start, Esc to stop
I’ve applied headers and footers to this presentation, and there are a couple of things I want to change.I’ll zoom in for a closer look.On the title slide, the date appears, but it’s broken into two lines; I want it to sit on one line.My other concern is with the text footer for the rest of the slides: the light green font color is hard to see.I’ll zoom back out.For formatting issues like these, related to the look, size, or position of headers and footers, edit the slide
master.
To open the slide master, click View > Slide Master.The slide master is the top slide thumbnail; you make changes to it that you want to apply to all slides.You can also make changes to specific layouts—any of these slides below the slide master.One of our formatting issues is with the date on the title slide. I’ve selected the title slide master layout.I’ll zoom in a little.With the date format I chose, the placeholder is too small.This is what the date looks like on the title slide—see how it runs onto a second line?You can’t see that in slide master view on this layout; we just see the default date format, which does fit.In any case, we need to enlarge the date placeholder.I’ll select it, point to a corner sizing handle,click the two-headed arrow cursor, and drag down to lengthen the placeholder.The longer date format should now fit on one line. We’ll check that in a minute.To change the color for the text footer, I’ll click the slide master.This change needs to apply to all the relevant layouts.The footers that appear on the slide master are the text footer and date.(The date shows on the slide master even though I've chosen not to show it on the slides.)First, let’s press Ctrl and click to select both footer placeholders.Then, we’ll click Home > Font Color, and change the font color to dark blue.And let’s click Bold to turn off the bold formatting.Also, let’s center the footer placeholder. To do so, select it; under Drawing Tools, click Format, and click Align
Objects.
Make sure Align to Slide is selected, and click Align Center.To center the text inside the placeholder, I’ll leave the box selected, click Home, and click Center.Let’s click Normal to see the effect of these changes on the slides.The text footer is now centered and is blue instead of green.On the title slide, the date fits on one line. But, the text footer, the web address, looks like it slid down.This is because I centered the text within the footer placeholder on the slide master.That centered the text everywhere, including on the title slide.When I select the placeholder, think of it in a horizontal orientation, and you can see the text is centered.Let’s go back to the slide master—View > Slide Master—to fix the title slide.The title slide master layout is selected.This layout gives me a way to correct the problem. I’ll select the footer placeholder on the layout.And I’ll click Home, Align Left to move the footer text back up (think of Align Left as if this box were
horizontal).
This change will apply only to this layout.I’ll click Normal to switch back to that view. The text footer is correctly placed now on the title slide.By using the various options in the Header and Footer dialog box,and going to the slide master to make formatting and layout changes,I’ve got the headers and footers exactly as I want them.For more information, see the Course Summary, and experiment on your own.
Introduction Add to slides Use slide masters
4:572:53 3:53
5. Help Course summary
Press F5 to start, Esc to stop
Course summary—Add headers and footers to a presentation
Summary Feedback Help
5 61 2 3 4
Introduction Add to slides Use slide masters
4:572:53 3:53
Show footer information on
your slides
You can add information like a presentation title or the
words ‘Company Confidential’ to the bottom of your
slides. You can also add things like the date and time,
and slide numbers.
1. Click Insert > Header & Footer.
2. On the Slide tab, check Footer.
3. In the box below Footer, type the text that you
want, such as the presentation title.
4. Check Date and Time to add that to your slides.
5. Check Slide number to add that to your slides.
6. To stop the footer from appearing on the title
slide, check Don't show on title slide.
7. Click Apply to All. Or, if you want the footer
information only on the selected slide, click Apply
instead of Apply to All.
Change the footer
1. Click View > Normal, and click the slide you want
to change. To select more than one slide, click the
first slide you want to change, then press and hold
Ctrl while you click the other slides.
2. Click Insert > Header & Footer.
3. Click the Slide tab, make the changes you want,
and click either Apply to apply the changes to
the selected slides, or Apply to All to make the
changes to all the slides. If you don’t want the
footer to appear in the title slide, check the
Don't show on title slide box.
Keyboard shortcut for opening
Slide Master view
Press Shift and click the Normal button at the
bottom of PowerPoint (next to the Slide Sorter and
Reading View buttons).
See also
• Work with handout masters
• Print slides, notes, or handouts
• Use slide masters to customize a
presentation
• More training courses
• Office Compatibility Pack
6. Check out more courses
Help Course summary
Press F5 to start, Esc to stop
Rating and comments
Thank you for viewing this course!
Please tell us what you think
Summary Feedback Help
5 61 2 3 4
Introduction Add to slides Use slide masters
4:572:53 3:53
7. Help Course summary
Press F5 to start, Esc to stop
Help
Summary Feedback Help
5 61 2 3 4
Using PowerPoint’s video controls
Going places
Stopping a course
If you download a course and the videos don’t play
get the PowerPoint Viewer. the QuickTime
player upgrade to PowerPoint 2013
Introduction Add to slides Use slide masters
4:572:53 3:53