Fastback 9 - Using Image Strips
•Télécharger en tant que PPT, PDF•
1 j'aime•279 vues

http://www.MyBinding.com brings you this demonstration of the Powis Parker Fastback 9. The Fastback 9 is an excellent thermal binding system that leaves your documents looking crisp and professional. For more details and product specifications, please visit: http://www.mybinding.com/.sc/ms/dd/ee/26663/Fastback-Model-9-Binding-Machine Take a look and if you have any questions feel free to give us a call toll-free at 1-800-944-4573. We have a huge selection of binding machines, supplies, and more from Fastback. You can also find us online on Twitter, Facebook, and our blog. Twitter - http://twitter.com/mybinding Facebook - http://www.facebook.com/MyBinding Blog - http://www.mybindingblog.com

Recommandé
Contenu connexe
En vedette
En vedette (9)
Dernier
Dernier (20)
Fastback 9 - Using Image Strips
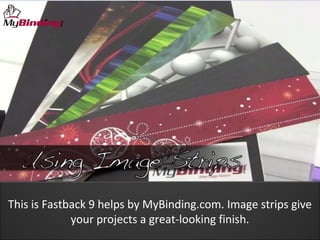
- 1. This is Fastback 9 helps by MyBinding.com. Image strips give your projects a great-looking finish.
- 2. Custom created image strips can help brand your company the way that you need. This presentation is designed to help you understand how the image strip works and how to use it properly.
- 3. All super strips for the Fastback 9 have grooves on the bottom that are adhesive,
- 4. the largest of the grooves is where you make your crease. Pinch on the natural fold and slide your fingers all the way down.
- 5. When you first get started, some people like to place it on a flat table to find your groove.
- 6. Using the top orange menu button, scroll through your selections until you find "Image Strip". Then hit the green button for save.
- 7. With the larger flap of the folded image strip, place it flat against the back of the machine.
- 8. Keep in mind that your finished project will have the large flap on the front side of the book.
- 9. So be sure to turn the book around with the front side toward the back as you load it onto the table. Press green for go,
- 10. wait for the binding cycle to end and the screen to display "Remove Book",
- 11. and you're all done, just wait for the book to cool.
- 12. Because of the custom factor, image strips are a little more expensive to use but they make your projects look great. Happy binding! This is the Fastback 9.
- 13. For more demos, reviews, and how-tos, check out MyBinding.com.
Notes de l'éditeur
- Welcome to Fastback helps by MyBinding.com. Image strips give your projects a great-looking finish.
- Custom created image strips can help brand your company the way that you need. This presentation is designed to help you understand how the image strip works and how to use it properly.
- All super strips for the Fastback 9 have grooves on the bottom that are adhesive,
- the largest of the grooves is where you make your crease. Pinch on the natural fold and slide your fingers all the way down.
- When you first get started, some people like to place it on a flat table to find your groove.
- Using the top orange menu button, scroll through your selections until you find "Image Strip". Then hit the green button for save.
- With the larger flap of the folded image strip, place it flat against the back of the machine.
- Keep in mind that your finished project will have the large flap on the front side of the book.
- So be sure to turn the book around with the front side toward the back as you load it onto the table. Press green for go,
- wait for the binding cycle to end and the screen to display "Remove Book",
- and you're all done, just wait for the book to cool.
- Because of the custom factor, image strips are a little more expensive to use but they make your projects look great. Happy binding! This is the Fastback 9.
- For more demos, reviews, and how-tos, check out MyBinding.com.