Beginners Guide to TikTok for Search - Rachel Pearson - We are Tilt __ Bright...
Photo Story 3 Handouts
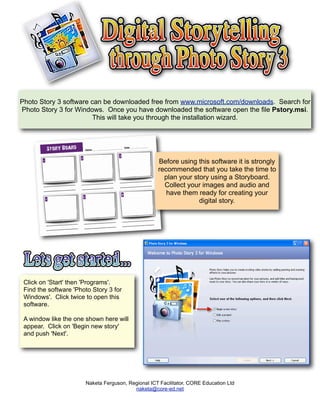
1. Photo Story 3 software can be downloaded free from www.microsoft.com/downloads. Search for
Photo Story 3 for Windows. Once you have downloaded the software open the file Pstory.msi.
This will take you through the installation wizard.
Before using this software it is strongly
recommended that you take the time to
plan your story using a Storyboard.
Collect your images and audio and
have them ready for creating your
digital story.
Click on 'Start' then 'Programs'.
Find the software 'Photo Story 3 for
Windows'. Click twice to open this
software.
A window like the one shown here will
appear. Click on 'Begin new story'
and push 'Next'.
Naketa Ferguson, Regional ICT Facilitator, CORE Education Ltd
naketa@core-ed.net
2. Click ‘Import Pictures’. This will open a
window like the one shown below. Locate
the folder with the images you want to use
for your story. The folder I am using here
is titled ‘Photo4DST’. Click to open.
If you want to select the entire
folder, click on your first image.
Hold the shift key down and
click on the last image.
To select different images hold
the control key down and
select each image you want to
use. Click OK once selected.
Naketa Ferguson, Regional ICT Facilitator, CORE Education Ltd
naketa@core-ed.net
3. Once you have selected
your images they will
appear in a timeline at
the bottom of the window.
You can rearrange the
images by dragging them
or by clicking on an
image and using the
buttons on the right hand
side of the window.
To move right
To move left
X To delete an image
To edit images click on the
‘Edit’ button below the
large preview window.
In this section you can
rotate images or crop
images.
Rotate: Click on the
directional arrows to rotate
image around.
Crop: Align the box by
hovering over the corners
to reveal arrows. These
will allow you to move the
box to the section you
want. When you push
save your cropped image
will be saved.
Naketa Ferguson, Regional ICT Facilitator, CORE Education Ltd
naketa@core-ed.net
4. You can add text to images by
clicking on an image and
typing into the text box
towards the right hand side of
the window. Click on another
image to add text to a different
image.
You can left justify, right justify
or centre text. Text can also
sit at the top, middle or bottom
of the page.
REMEMBER TO SAVE
PROJECT REGULARLY!!!
To change font click on the
AA icon. Here you can
change font, size, style and
colour.
Naketa Ferguson, Regional ICT Facilitator, CORE Education Ltd
naketa@core-ed.net
5. Before you start recording voice it is a good idea to plan what you are going to say. Preparing
your story before you start to create your story will reduce the time it takes to complete your story.
The first step to recording your voice in your Photo Story 3 is to check that your
microphone function is working. Use the microphone symbol to check that everything
works. The software will take your through a testing wizard. Once this is done its time
to record.
This is the record button. Press this button to start recording. To check what your
voice sounds like click the ‘Preview’ button. Each voice recording is attached to the
image you have clicked. You will need to click on another image to continue
recording.
This button is to delete voice recordings that you are not happy with. You will see a
small speech bubble icon on top of each image that has a voice recording. Delete by
clicking on the image and clicking this button.
Naketa Ferguson, Regional ICT Facilitator, CORE Education Ltd
naketa@core-ed.net
6. Below the preview
window you will see the
‘Customize Motion’
button. This is useful for
zooming into one object/
person in an image or
giving the illusion of a
moving still..
Click ‘Preview’ to review
your motion and
remember to save your
work.
You can insert transitions
between each image.
Click on ‘the Transition’
tab behind the ‘customize
motion tab. Click on a
transition and preview on
the middle window
above. If you like the
transition push ‘save’ and
use the small arrows to
move to the next one.
Please note: Having too
many types of transitions
in one story can be quite
distracting. Try and stick
to one or two per story.
Naketa Ferguson, Regional ICT Facilitator, CORE Education Ltd
naketa@core-ed.net
7. You can add music to
your story. The software
has a ‘create music’
facility which allows users
to use copyright free
samples.
To add other music click
on ‘select music’ This will
open your folders
window. You will need to
locate your music with
your computer
Please note: Consider
Copyright laws when
adding music to Photo
Story 3 creations.
You can preview your project
at any time to review your
project by pushing the
‘preview’ button.
Naketa Ferguson, Regional ICT Facilitator, CORE Education Ltd
naketa@core-ed.net
8. You can save your story in several formats.
Playback on computer will turn your story
into a .wmv format that can be played in
Windows Media Player.
Email option will turn your story into a
small file that can be emailed to another
email address. The file will still be a .wmv.
Browse: Click on the browse button to
locate the folder you want to save your
story in. Please rename your story
otherwise you will end up with 10 versions
of Photo Story 1.
Once this is complete click ‘Next’.
A window will appear showing the progress
of your Photo Story 3 turning into a Video
file.
Naketa Ferguson, Regional ICT Facilitator, CORE Education Ltd
naketa@core-ed.net
9. Once your story has turned into a video file a window like the one
shown above will appear. Note the File name and location of your
movie for future reference. You can save your project at this point.
The Photo Story 3 Project can be saved for future editing and
rearranging of content at a later date.
The Windows Media Video (.wmv) format is the complete and
finished product. This can not be re-edited at a later date but can
be uploaded to blogs, emailed and put on CDs for others to view.
Naketa Ferguson, Regional ICT Facilitator, CORE Education Ltd
naketa@core-ed.net