
Recommandé
Recommandé
Contenu connexe
Similaire à Apperson benchmark tm 3000
Similaire à Apperson benchmark tm 3000 (19)
Apperson benchmark tm 3000
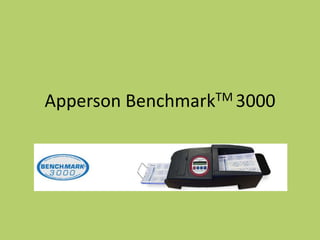
- 1. Apperson Benchmark TM 3000
- 2. Purpose • Benchmarks • Class Tests • School wide Mock Tests (Standardized Tests)
- 3. First Steps • Everyone must install or update your DataLink software on your computer. https://portal.hcbe.net/Testing/Benchmarks/default.aspx • Create a key. – Scanning in the answers – Typing the answers in DataLink • Download Student Database
- 4. Student Database Before scanning the Benchmark answer documents, we need to make sure that we have a current and up-to-date student database loaded. The DataLink software will use the student database to assign names to each test scored and will show the score associated with a student name in the reports generated. The software can also “kick out” the answer documents that do not have a valid student ID. The test will not be scored until the ID has been corrected. In order to upload a student database, you will need to pull a list of your kids along with their student ID numbers from Infinite Campus or you can create a list by typing in the names Into an excel spreadsheet. If you are typing the list, make sure that you do not use the leading 4 zeros. This list should be in CSV or excel format. The list should look like this: Your excel file should have the student information listed in the following order: 1 - Student ID 2 – First Name 3 – Last Name 4
- 5. Creating Your Key • Scanning in Your Answers – Make sure you indicate that it is the key by marking the key bubble. – Open up the DataLink Software and scan the key • Typing in Your Answers – Open the DataLink program, Click “File” and “Create Key” – Select the form number then “Key responses” and select “Send to Grid”
- 6. Next Steps • Add standards to the test • You must remember that after you add the standards to the test, you must assign the standards to the questions.
- 7. Reports • On the top right, you can click reports. That will pull a list of reports for you to preview. • New Report: Class Proficiency Item Analysis Report
- 8. Update: No More Leading Zeros! The four leading zeros are no longer needed. In fact if you use the Infinite Campus Data Export there will be no zeros. Make sure that the student number DOES NOT includes the leading 4 zeros. There will be empty columns at the end. 8
- 9. Viewing and Understanding Your Reports Apperson BenchMark™ 3000 9
- 10. Here is a list of the reports that are available to you. You can print these out, print them to PDF to post or save the reports in Excel format. Let’s review these reports. 10
- 11. Open the file that contains your test results. You will see a “Reports” icon. Click on that icon. 11
- 12. A “Reports” Window will open. You will see a list of available reports. When you have chosen a report When you have chosen a report under the “Excel” section, you will under the “Reports” section, you see a “Save as” icon that can be will see a printer icon that can be used to save your Excel report to used to print the report to your your computer or your school’s printer or a PDF icon to print to Sresource drive. (note the students adobe if you have adobe installed. in the preview are examples not the actual students.) By clicking on the “Settings”, you can change the way that your reports are sorted. You can sort by Last name, ID Number, Score, Order Scanned and several other options12 depending on the report.
- 13. Score Card The Score Card report is a quarter page report that shows individual student performance on a test Sections in the Score Card report 1. Header - General information about the test is shown here. 2. Results - Test results are shown here. If a question was answered correctly a + is shown next to the question number. If a question was answered incorrectly the correct answer is shown. Additionally incorrect answers are shown in italic bold font. 13
- 14. Big Score Card The Big Score Card report shows each students response for each test question. Sections in the Big Score Card report 1. Header - General test information is shown here. 2. Results - The students results are shown here. If the question was answered correctly a + is shown next to the question number along with the points awarded for the question. If the question was answered incorrectly the correct response is shown along with the points awarded for the question. 14
- 15. Sections in the Item Analysis report Item Analysis This report provides summary and statistical 1. Report Header - General information about data about the test, as well as detailed the test is shown in this section of the report. information about each question on the test. 2. Counts - The count of the number of students that bubbled in each response is shown here. Correct responses are shown in red italics. 3. Blanks - If any responses were left blank a check mark is shown. 4. Multiple Marks - If any forms contained multiple mark a check is shown here. A multiple mark is counted when more than one bubble is filled in for a question. 5. Point Biserial - The point biserial value for the question is displayed. 6. Correct Count - A count of the number of times this question was answered correctly is shown. 7. Percent Incorrect - The number of students that answered this question incorrectly is shown in a bar graph. 15
- 16. Test Results The test results report generates a page for each test scanned that shows the bubbled in responses. You can configure the report to show the correct responses and the points awarded for each question. Sections in the Test Results report 1. Student Name - The student’s name and ID number are shown at the top of the form. 2. Header - General information about the test is shown. 3. Question Number - The question number is shown. 4. Response - The bubbled-in response is shown. Incorrect responses are highlighted. 5. Correct Response - The correct response for the question is displayed in this column. 6. Points - The points awarded for each question are shown. 16
- 17. Class Roster The Class Roster Report shows how each student did on an exam. Sections in the Class Roster report 1. Header - General information about the test is shown at the top of the form. 2. Name Column - The student's name is shown. 3. ID Number - The student's ID number is shown. 4. Score - The student's score on the test is displayed. 17
- 18. Histogram This reports shows a histogram for the currently scored test. Settings include the number of bars displayed as well as the color of the bars. 18
- 19. Student Proficiency The Student Proficiency report shows each student's proficiency levels on each group and standard. This report is available only when scanning tests with a standards aligned key. Sections in the Student Proficiency report 1. Header - General information about the test is shown. 2. Student Name - The name of the student is displayed. 3. Student ID Number - The student's ID number is shown. 4. Group Name and Text - The name and description of the group is shown here. Additionally the proficiency level for this group as assigned in the Standards Window is displayed. 5. Standard Name and Text - The name and description of the standard is shown. The proficiency level used for the standard is adopted from the group. 6. Number Correct and Total Possible - The number of questions that the student answered correctly is shown along with the number of questions assigned to the standard. 7. Overall Proficiency - The Overall Proficiency is shown. This value is the value of all of the questions assigned to the Standards that are included in the Group. 8. Proficiency Level - This shows the student's overall proficiency level for the test. Color Key - Green bars show that the student reached proficiency levels for the Group or Standard. Orange bars show that the student is proficient but within 5% of the proficiency level for the Group or Standard. Red bars show that the student did not meet proficiency levels on the Group or Standard. 19
- 20. Class Proficiency The Class Proficiency Report shows how well a class did on a Standards aligned test. This report is only available on tests with Standards aligned questions. Sections in the Class Proficiency report 1. Header - General information about the test is shown. 2. Group Name and Text - The name and description of the group is shown. Additionally the proficiency level for this group as assigned in the Standards Window is displayed. 3. Standard Name - The name of the standard is shown. The proficiency level used for the standard is adopted from the group. 4. Standard Text - The text describing the standard is shown. 5. Count of Proficient Students - The number of students that met or exceeded the proficiency level is shown. 6. Exceeded Proficiency - The green bar shows that the students in this class exceeded the proficiency level for this standard. 7. Did not Meet Proficiency - The red bar shows that the students in this class did not meet the proficiency level for this standard. 8. Met Proficiency - The orange bar shows that the students met the proficiency level for this standard. Color Key - Green bars show that the student reached proficiency levels for the Group or Standard. Orange bars show that the student is proficient but within 5% of the proficiency level for the Group or Standard. Red bars show that the student did not meet proficiency levels on the Group or Standard. 20
- 21. Class Proficiency Item Analysis Report The Class Proficiency Item Analysis Report shows how well a class did on a Standards aligned test and breaks the standard down by question. This report is only available on tests with Standards aligned questions. Class Proficiency Item Analysis Report 1. 1. Group Name and Text - The name and description of the group is shown. Additionally the proficiency level for this group as assigned in the Standards Window is displayed. 2. Standard Name And Text - The name of the standard is shown. The 2. 3. proficiency level used for the standard is adopted from the group. 3. Count of Proficient Students - The number of students that met or exceeded 4. the proficiency level is shown. 4. Items Analysis – Break down of how the class did by question, by standard. Color Key - Green bars show that the student reached proficiency levels for the Group or Standard. Orange bars show that the student is proficient but within 5% of the proficiency level for the Group or Standard. Red bars show that the student did not meet proficiency levels on the Group or Standard. 21
- 22. Standard Alignment The Standards Question Alignment report shows which questions are aligned to the standards contained on the test. Sections in the Standards Question Alignment report 1. Title - The title of the standard is shown. 2. Standard Text - The text of the standard is displayed. 3. Questions - A listing of the questions that have been assigned to the standards is presented. 22
- 23. Non-Proficient Students by Standard Sections in the Non-Proficient Students by Standard report 1. Header - General information about the test is shown. 2. Group Name - The group name and description are shown here. Additionally the proficiency level for the group is displayed. 3. Standard Name - The standard name and description are displayed. 4. Student Name Listing - The names of students that did not meet proficiency levels are shown. 5. ID Number Listing - The ID numbers of students that did not meet proficiency levels are shown. 6. Score - The score achieved in the standard is shown. The proficiency level for the standard is inherited from the group. 23
- 24. Non-Proficient Students by Group The Non-Proficient Students by Group Report shows students that failed to achieve the proficiency rating for each group. This report is available when scanning tests using a standards aligned test key. Sections in the Non-Proficient Students by Group report: 1. Group Name - The group name and description are shown. Additionally the proficiency level for the group is displayed. 2. Student Name Listing - The names of students that did not meet proficiency levels are shown. 3. ID Number Listing - The ID numbers of students that did not meet proficiency levels are shown. 4. Score - The score achieved in the group is shown . 24
- 25. Grid Export – Excel Report This report will give you a complete listing of all the students, their scores, and show you which questions they missed. 25
- 26. Class Roster Export – Excel Report A basic report showing each student's raw and percentile score. This report also presents test statistics that are helpful to the instructor, such as the class average and score ranges. 26
- 27. Item Analysis – Excel Report A detailed report showing the number of questions and the percentage of all answers selected for each question within a given exam. The correct answers are highlighted and a bar graph with the percentage of incorrect answers is displayed to indicate validity of the questions and material coverage. 27
- 28. Detailed Item Analysis – Excel Report A more detailed report showing the number of questions and the number of students and percentage of all answers selected for each question within a given exam. 28
- 29. Survey Analysis – Excel Report This report lists the details of each question as far as the number of students that chose each response for each question, the percentage of students that chose each response along with the Mean Statistic for each question. 29
- 30. Full Report – Excel Report This is a report that is in Excel format which contains all the excel reports in one workbook with different tabs for each report. 30
Notes de l'éditeur
- The Apperson Benchmark Machine is located in the Teacher’s Lounge (Room 500) right beside the desktop computer. It is usually connected already. At this point, we only have 1 machine for Crossroads, but most schools have 2 (based on FTE count).
- -This machine was originally purchased to score the county-wide Benchmark tests that are given in each content area. The good news is that it can be used for things like classroom tests and school wide mock tests. Some of the home schools are giving mock tests before they give the CRCT and possibly the EOCT, so they are using the Apperson Benchmark Machine to score the tests. One thing to remember is that you must use the brown and white scantrons for this machine. The regular green and white scantrons will not work.
- -Datalink is the software on your computer that connects to the Apperson Benchmark Machine. Datalink was last updated to Version 4.2.2 on January 28th, 2013, so everyone needs to update your software on your computer using this link shown on the screen.-In order to score your tests or assessments, you must create an answer key and load them into the computer. You can load them by filling out a scantron and using the machine to scan in the answers OR typing the answers directly into Datalink.
- You can also add standards to your assessments so that you can determine if students mastered certain standards. This helps to determine who needs remediation or acceleration. You will only get the mastery information through the reports which I will show you soon.Adding the standards is as simple as clicking on Session then Standards. If you don’t see your standards there, there is a one time process of downloading the standards, and that process is found in the manual which is located next to the Benchmark Machine.You must remember that after you add the standards to the test, you must assign the standards to the questions.
- On the top right, you can click reports. That will pull a list of reports for you to preview.New Report: Class Proficiency Item Analysis Report- This report shows how well a class did on a Standards aligned test and breaks the standard down by question. This report is only available on tests with Standards aligned questions.
- When students are completing scantrons, they do not need to put any leading zeros. The student only need to use his/her lunch number, and there will be empty columns at the end.Students need to complete the top of the scantron completely and neatly. Treat it as if it is a standardized test. Perfect practice makes perfect.