7 qc toools LEARN and KNOW how to BUILD IN EXCEL
•Download as PPTX, PDF•
31 likes•7,295 views

learn about 7QC TOOLS ((STRATIFICATION, CHECK SHEET, TALLY SHEET, HISTOGRAM, PARETOGRAM, CAUSE AND EFFECT DIAGRAM, SCATTER DIAGRAM, CONTOL CHARTS, QUALITY CONTROL, X BAR AND R CHART, X BAR AND MR CHART, P CHART, C CHART, LEARN IN EXCEL, HOW TO BUILD IN EXCEL, X BAR CHART, )) AND ALSO LEARN HOW TO BUILD THEM IN EXCEL.

Recommended
More Related Content
What's hot
What's hot (20)
Viewers also liked
Viewers also liked (20)
Similar to 7 qc toools LEARN and KNOW how to BUILD IN EXCEL
Similar to 7 qc toools LEARN and KNOW how to BUILD IN EXCEL (20)
Recently uploaded
Recently uploaded (20)
7 qc toools LEARN and KNOW how to BUILD IN EXCEL
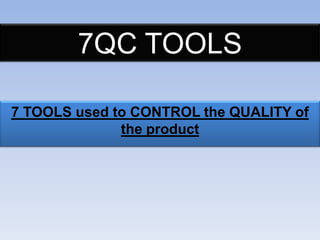
- 1. 7QC TOOLS 7 TOOLS used to CONTROL the QUALITY of the product
- 2. 7QC TOOLS 1.) STRATIFICATION 2.) CHECK SHEET/TELLY SHEET 3.) HISTOGRAM 4.) PARETOGRAM 5.) CAUSE AND EFFECT DIAGRAM 6.) SCATTER DIAGRAM 7.) CONTROL CHARTS
- 3. 1). STRATIFICATION • It simply mean the GROUPS of considerations. • Or give a GROUP NAME, to considerations, on which study is based. Before to study any process , you must have to make some GROUPS on which your study will depends. like:- time, type, reason, machine, shift, person, effects…..etc
- 4. 2.) CHECK SHEET/ TELLY SHEET • A check sheet is a FORM/TABLE, on which data is recorded systematically. Like---below DATE 5/11/2013 6/11/2013 7/11/2013 8/11/2013 9/11/2013 SHIFT st 1 OPERATOR Sam 1 st mack arun Sam 1st mack arun Sam 1st mack arun Sam st mack arun Sam 1 mack arun DEFECTED PRODUCT 20 0 12 18 1 14 9 2 18 24 0 12 11 1 17 Stratification Here, in this Form we are trying to find number of Defected Product made by Operators in 1st shift of each day. You just have to build a FORM, with taking GROUPS (stratification), on which you want to make investigation.
- 5. 3). HISTOGRAM It is used to observe that , how is the process going. Or we can say, use to predict future performance of a process. Any change in process. It is simply a bar chart, from which we get, info of the process- how its going, it is in limits or not. 10 Lower limit Upper limit HISTOGRAM 8 6 4 Trend line 2 0 3 4 5 6 7 8 9 10 11 2 3 4 5 6 7 8 9 10
- 6. 8 Lower limit Lower limit 8 dia dia 6 10 Upper limit 4 2 Upper limit 6 4 2 0 0 3 4 5 6 7 8 9 10 11 3 4 5 6 7 8 9 10 11 2 3 4 5 6 7 8 9 10 2 3 4 5 6 7 8 9 10 Process is varying all over in/out of range Process is Within Limits Different Histograms showing different Processes 8 10 Lower limit 8 dia dia 6 Upper limit 4 Lower limit Upper limit 6 4 2 2 0 0 3 4 5 6 7 8 9 10 11 12 13 14 15 1 2 3 4 5 6 7 8 9 10 11 2 3 4 5 6 7 8 9 0 1 2 3 4 5 6 7 8 9 10 10 11 12 13 14 Process is moving towards Upper Limit Process is moving towards Lower Limit
- 7. How to build HISTOGRAM in Excel.(with example) 1.) 1st we have to Study/Collect specifications like -diameter (Data) for 24 products. 1 2 3 4 5 6 7 8 9 10 11 12 13 14 15 16 17 18 19 20 21 22 23 24 D DIA 6 5 7 10 9 8 4 7 5 6 7 7 8 6 8 7 5 7 8 6 7 7 8 8 2.) Calculate RANGE. RANGE= Maximum value - Minimum value So here , maximum value= 10, Minimum value = 4 So RANGE = 10- 4 =6 3.) Now decide the NUMBER OF CELLS. We have 24 data points , and it fall in 1st group , so- No of cells = 6 Data Points 20 -50 51-100 101-200 201-500 501-1000 Over 1000 Number of Cells 6 7 8 9 10 11-20 4.) Calculate the approximately cell width. Cell width= RANGE/ NO OF CELLS = 6/6 =1 5.) Round Off the cell width. If cell width come in a complicated manner, like 0.34, 0.89 or else , then round off it to , one you want, like : 0.50 or 1 or else.
- 8. 6.) Now construct the Cell Groups with keep in mind cell width( cell width=1) 2 3 4 5 6 7 8 9 10 11 3 4 5 6 7 8 9 10 11 12 Cell width=1 Cell width same for all cell groups =1 7.) Now find number of data values/ Frequencies in each Cell Group. You can do this manually , by counting itself or by using formula .(frequency formula) Mean how many values fall in each group. A B C cell groups frequency 1 2 3 0 2 3 4 1 3 4 5 3 4 5 6 4 5 6 7 8 6 7 8 6 7 8 9 1 8 9 10 1 9 10 11 0 10 11 12 0 (D1:D24) values are on previous page) Go to yellow block, type, =frequency( D1:D24, B1:B10), and press Enter. Then select yellow block and all sky blue blocks, press F2, and press CTRL , SHIFT, ENTER. ( frequency formula will get implement in all sky blue blocks as in yellow block ) And you will get frequency of data values in each group, As in group (7 – 8) , frequency is 6.
- 9. 8.) Now we got frequency data in each group, now we can build Histogram. frequency data is our final data. now select this data a build a bar chart. That’s it. 10 Frequency 8 6 4 2 0 3 4 5 6 7 8 9 10 11 2 3 4 5 6 7 8 9 10 Dia (mm) Group 4 - 5, show values from 4.1 to 5 Group 5 - 6, show values from 5.1 to 6 So this rule for all groups. Trend line – also give an visual idea of moving process.
- 10. In short how to build histogram 1. Study / collect data. 2. Find Range.( range =max value - min value) 3. Find Number of cells. 4. Calculate Cell width ( cell width= range/no of cells) 5. Round off , if needed. 6. Create cell groups, using cell width 7. Find frequency. 8. Plot bar chart.
- 11. 4). PARETOGRAM • By this we can separate , most important causes from less important causes for a problem. Example- you have a high waste , and you have many causes for that, so you have to work, first on those causes, which are most responsible for the waste. So Paretogram help us to find these, most responsible causes for a problem.
- 12. A 1 2 3 4 5 6 7 8 9 10 11 12 13 B C D waste in cumulative kg percentage percentage Waste types cal wrinkle ply 400 roll end 320 /coat off 234 angle change 140 splice press 90 passenger short pices 87 damaged bands 65 mechanical waste 60 bead wrap edges 45 scorchy 23 short piece 11 chaffer 9 passenger ply 7 TOTAL 1491 26.83 26.8 21.46 48.3 15.69 64.0 9.39 73.4 6.04 5.84 79.4 85.2 4.36 89.6 4.02 93.6 3.02 96.6 1.54 0.74 98.2 98.9 0.60 99.5 0.47 100.0 So from this Paretogram, we got that by working on first 3 causes, we can reduce waste up to 64%. So first work on these causes, and after that go for other 10 causes, which are less responsible, for waste generation (36%). So paretogram, give us a clean view, of most important area, where we have to work first to solve the current problem.
- 13. How to build a Paretogram in Excel For a problem. Example- waste problem, so collect what are causes, and how much waste is coming because of each cause. ((its down in table)) 2.) Sum Up(Total) Sum all wastes from all causes. ((its down in table) 1.) Collect data 3.) Calculate The Percentage of each individual Find individual percentage of waste by each cause contributing in all total waste. (Individual waste/total)*100 ((its down in table)) A 1 2 3 4 5 6 7 8 9 10 11 12 13 B C D waste in cumulative kg percentage percentage Waste types cal wrinkle ply 400 roll end 320 /coat off 234 angle change 140 splice press 90 passenger short pices 87 damaged bands 65 mechanical waste 60 bead wrap edges 45 scorchy 23 short piece 11 chaffer 9 passenger ply 7 TOTAL 1491 26.83 26.8 21.46 48.3 15.69 64.0 9.39 73.4 6.04 5.84 79.4 85.2 4.36 89.6 4.02 93.6 3.02 96.6 1.54 0.74 98.2 98.9 0.60 99.5 0.47 100.0 4.)Calculate the cumulative percentage. ( mean take 1st percentage, and add 1-by-1, all percentage to that) mean :- D1=C1, D2=D1+C2, D3=D2+C3 D4=D3+C4 D5=D4+C5, D6=D5+C6, D7=D6+C7, D8=D7+C8, D9=D8+C9, D10=D9+C10, D11=D10+C11, D12=D11+C12, D13=D12+C13,
- 14. 5.) That’s it now let build paretogram. 6.) Insert a bar chart ( taking data, B1:B13 and D1:D13) ( from previous page) you will get below chart. 400 300 200 100 waste (Kg) 0 cumulative % 7.) Now click on cumulative bars (Red bars), right click and go to change chart type, and select a line chart , and you will get below chart. 400 300 200 100 waste (Kg) 0 cumulative %
- 15. 8.) Now select line chart (Red line), right click , go to format data series, and you got two option primary axis and secondary axis, click on secondary axis, and you will get below graph. 120.0 400 300 200 paretogram 100.0 80.0 60.0 40.0 100 0 20.0 0.0 waste (Kg) cumulative % 9.) that’s it , now study this graph , and make some decisions about , on which area you have to work first, to solve a problem. ( like if you work on 1st cause – you can reduce waste up to 26 % if you work on 1st and 2nd causes – you can reduce waste up to 48% if you work on 1st ,2nd and 3rd causes – you can reduce waste up to 64 %) So from 13 causes, if you work on first three causes you can reduce waste up to 64 %.
- 16. 5). CAUSE AND EFFECT DIAGRAM • It give us relationship between Effects and its Possible Causes with M-approach- ( man, method, material, machine)
- 17. 6). SCATTER DIAGRAM Y-axis 7 6 5 4 3 2 1 0 0 1 2 3 4 5 7 6 5 4 3 2 1 0 6 0 X-axis 1 2 3 X-axis 4 5 6 +ve relationship (Y-increase as X- -ve relationship (Y- decrease as X- increase ) increase ) Y-axis Y-axis It is used to study relationship between two variables. 7 6 5 4 3 2 1 0 0 1 2 3 4 5 X-axis No -Relationship 6 7
- 18. Example • Let we have a product , and we have to study its life cycle with respect to temperature. life 25 23 20 16 10 4 20 18 15 12 30 LIFE (YEARS) temp 40 45 50 55 60 65 35 30 25 20 25 20 15 10 5 0 0 10 20 30 40 50 60 70 TEMP (DEGREE CELSICUS) CONCULSION- product has maximum life at 400 C, and after on increasing or decreasing of temperature , Life of product get decrease.
- 19. 7). CONTROL CHARTS Control charts are Trend Chards, for Analysis and Presentation of data. • • Control charts in itself a big topic. Many Calculations. Type of Control Charts Variable attribute defects X and σ chart X and S chart X and R chart X and MR chart C - chart U - chart defective nP- chart We will study here only these important charts P - chart
- 20. (X - bar) and R chart. It Simply tell us where the process is going. Is the process under control ? Are we have to increase the no of inspections ? R chart 1 R 0.8 0.6 UCL 0.4 LCL 0.2 center line 0 1 2 3 4 5 6 7 8 9 10 11 12 13 14 15 X-bar Chart 5.5 5.4 X-bar 5.3 5.2 UCL 5.1 LCL 5 center line 4.9 1 2 3 4 5 6 7 8 9 10 11 12 13 14 15
- 21. Lets build it. Formulas for -- R chart UCLR = D4 x R LCLR = D3 x R UCLX = X + A2 R LCLX = X - A2 R In these formulas, we have constants, D4, D3, A2, values of these constants we will get from table 1.1 ( last slide) But 1st learn below things . -- X bar ( average) -- X double bar (average of average) (its also center line of X-bar chart) R – Average of Range (its also center line for R-bar chart) UCLR – upper control limit for R chart LCLR – lower control limit for R chart UCLX – upper control limit for X-bar chart LCLX – lower control limit for X-bar chart Lets take an example- in which we will took a lot from, running line, after every 30 minute for inspection of weight of product. In each lot we take 5 samples.
- 22. 1.) Collect data. sample sample sample sample sample sample lot 1 2 3 4 5 ( as in figure below). 1 2 3 5.5 5 5.4 5.1 5 5 5 5 5.1 5.2 5.5 5.3 5.4 5.1 5.4 sample lot 5 5.1 5 5 5.1 5.1 6 7 5.1 5.4 5.2 5 5 5 5.2 5.5 5.5 5 8 5.5 5.1 5 5.4 5.2 9 5 5 5.5 5.1 5.2 10 5 5.1 5.1 5 5 11 12 13 5.2 5.7 5.4 5.4 5 5 5 5.2 5.4 5.3 5.5 5.2 5.1 5.4 5.4 14 5.2 5.2 5 5 5.1 15 5.2 5 5 5.1 5.4 (average) and R(range) for each lot. (as in figure below) 2.) Now Calculate the As like for lot 1. 4 5.2 5.2 5.4 5.5 5.4 R (range)= max- min = (5.5+5.1+5+5.2+5.4)/5 =5.24 1 sample 1 5.5 sample 2 5.1 sample 3 5 sample 4 5.2 sample 5 5.4 Average(X bar) 5.24 Range(R ) 0.5 2 5 5 5 5.5 5.1 5.1 0.5 3 5.4 5 5.1 5.3 5.4 5.2 0.4 4 5.2 5.2 5.4 5.5 5.4 5.3 0.3 5 5.1 5 5 5.1 5.1 5.1 0.1 6 5.1 5.2 5 5.2 5.5 5.2 0.5 7 5.4 5 5 5.5 5 5.2 0.5 = 5.5 - 5 = 0.5 8 5.5 5.1 5 5.4 5.2 5.2 0.5 9 10 5 5 5.5 5.1 5.2 5.2 0.5 5 5.1 5.1 5 5 5.04 0.1 11 12 13 5.2 5.7 5.4 5.4 5 5 5 5.2 5.4 5.3 5.5 5.2 5.1 5.4 5.4 5.2 5.4 5.28 0.4 0.7 0.4 14 5.2 5.2 5 5 5.1 5.1 0.2 15 5.2 5 5 5.1 5.4 5.1 0.4
- 23. 3.) Now Calculate . (average of average for X) (as in figure below) 4.) Now Calculate . R ( average of Range) ( as in figure below) sample lot 1 sample 1 5.5 sample 2 5.1 sample 3 5 sample 4 5.2 sample 5 5.4 Average(X bar) 5.24 Range(R ) 0.5 2 5 5 5 5.5 5.1 5.1 0.5 3 5.4 5 5.1 5.3 5.4 5.2 0.4 4 5.2 5.2 5.4 5.5 5.4 5.3 0.3 5 5.1 5 5 5.1 5.1 5.1 0.1 6 5.1 5.2 5 5.2 5.5 5.2 0.5 7 5.4 5 5 5.5 5 5.2 0.5 So, 8 5.5 5.1 5 5.4 5.2 5.2 0.5 9 10 5 5 5.5 5.1 5.2 5.2 0.5 5 5.1 5.1 5 5 5.04 0.1 5.19 11 12 13 5.2 5.7 5.4 5.4 5 5 5 5.2 5.4 5.3 5.5 5.2 5.1 5.4 5.4 5.2 5.4 5.28 0.4 0.7 0.4 R 14 5.2 5.2 5 5 5.1 5.1 0.2 15 5.2 5 5 5.1 5.4 5.1 5.19 0.4 0.4 average 0.4 5.) Now Calculate , limits. as below UCLR = D4 x R LCLR = D3 x R UCLX = X + A2 R LCLX = X – A2 R =2.114 x 0.4 = 0.8456 Find constants values From table 1.1 for 5 samples, in a lot. ( last slide) = 0 x 0.4 = 0 =5.19 + 0.577x 0.4 = 5.420 =5.19 – 0.577x 0.4 = 4.969 D4 = 2.114 D3 = 0 A2 = 0.577
- 24. 6.) Calculations are now over, so plot the graph. 1 2 3 4 5 6 7 8 9 10 11 12 13 14 15 Average(X bar) 5.24 5.12 5.24 5.34 5.06 5.2 5.18 5.24 5.16 5.04 5.2 5.36 5.28 5.1 5.14 Range(R ) 0.5 0.5 0.4 0.3 0.1 0.5 0.5 0.5 0.5 0.1 0.4 0.7 0.4 0.2 0.4 UCLR = 0.8456 LCLR = 0 R = 0.4 R chart 1 R 0.8 0.6 UCL 0.4 LCL 0.2 center line 0 1 2 3 4 5 6 7 9 10 11 12 13 14 15 X-bar Chart 5.5 UCLX = 5.420 LCLX = 4.969 8 5.4 X-bar 5.3 UCL 5.1 = 5.19 5.2 LCL 5 center line 4.9 1 2 3 4 5 6 7 8 9 10 11 12 13 14 15
- 25. X-bar and MR chart When we can’t take multiple samples, in a lot. We use X-bar and MR chart. Processes like- chemical process, where the cost of test is so high, that we can’t get, multiple samples. Here UCL MR = MR x D4 LCLMR = MR x 0 = 0 UCL X = X + 3( MR / 1.13) LCLX = X – 3( MR / 1.13) Central line = X MR = difference between the value and value immediately proceeding. As we have only 1 sample in each lot, so mean n=1 , for X bar chart. But for MR chart , as MR is comes out, by differencing two samples, mean in each lot we have 2 samples, mean n=2, for MR chart. D4 = 3.267 , for 2 samples, for MR chart, from table 1.1 (last slide).
- 26. X 5.5 5 5.4 5.2 5.1 5.1 5.4 5.5 5 5 5.2 5.7 5.4 5.2 5.2 5.26 1 2 3 4 5 6 7 8 9 10 11 12 13 14 15 AVERAGE Make all values of MR +ve IN TABLE MR MR -0.5 0.4 -0.2 -0.1 0 0.3 0.1 -0.5 0 0.2 0.5 -0.3 -0.2 0 0.5 0.4 0.2 0.1 0 0.3 0.1 0.5 0 0.2 0.5 0.3 0.2 0 0.2357 X = 5.26 MR = 0.235 UCL MR = MR x D4 = 0.235 x 3.267 = 0.767 LCLMR = MR x 0 = 0.235 x 0 = 0 UCL X = X + 3( MR / 1.13) = 5.26 + 3(0.235 / 1.13)= 5.883 LCLX = X – 3( MR / 1.13) = 5.26 – 3(0.235 / 1.13)= 4.636 Central line = X = 5.26 Central line = MR = 0.235 0.9 MR -chart 0.7 MR LCL 0.3 UCL 0.1 MR X 0.5 -0.1 6 1 2 3 4 5 6 7 8 9 10 11 12 13 14 15 X-bar chart 5.5 X 5 LCL 4.5 UCL central line 4 1 2 3 4 5 6 7 8 9 10 11 12 13 14 15 center line
- 27. P-Chart (fraction defective) • Ratio of number of items rejected to the number of items inspected is known as fraction defective. P= Total Number of Defected Samples Total Number of Samples Inspected UCL = P + 3 P( 1- P )/n LCL = P - 3 P( 1- P )/n n= sample size Lets take an example of studying n=100 samples each day for 10 days. days (100 sample each day) 1 2 No. of defected items 11 10 fraction defective each day 0.11 0.10 3 4 5 6 7 8 12 15 7 11 10 14 0.12 0.15 0.07 Total number of defected samples = 110 Total number of samples inspected = 100x10 =1000 So, P = 110/1000 = 0.11 UCL = 0.203866 ( after calculation) LCL =0.016134 (after calculation) 0.11 0.10 9 10 10 10 0.14 0.10 0.10 110
- 28. We calculated everything , so just build it. 0.25 0.2 0.15 0.1 0.05 0 P-Chart fraction defective UCL LCL center line 1 2 3 4 5 6 7 8 9 10
- 29. C- Chart • We use it when , a defected product , is also accepted. • It depends on how many defects are there in the defected product. C= Total number of defects in all . Total Number of Samples Inspected UCL = C + 3 LCL = C - 3 If LCL, comes –ve, take it zero. C C Lets take an example, of studying GALASS ITEM, having number of bubbles, in that as defects. We studied 10 items. No. of defects in each item 1 3 2 21 3 5 4 3 5 7 6 8 7 10 8 0 9 14 10 9 80 So , C = 80/10 = 8 UCL = 16.484 LCL = - 0.484 = 0 ( so if any defected item, has defects below 16.484, that item will we be accepted.)
- 30. Now we calculated everything, so just build C-chart Item Rejected ( because number of defects, in that item are more than UCL= 16.484 ) 22 C - Chart 16.484 17 12 Series 1 UCL 7 8.00 LCL 2 0.00 center line -3 1 2 3 4 5 6 7 8 9 10 Don’t get confuse between P chart, and C chart. P- chart, use C- chart use for DEFECTED ITEMS. for NUBER OF DEFECTS, IN EACH ITEM.
- 31. Table 1.1 X-bar Chart Sample Size = N for sigma R Chart Constants LCL UPL S Chart Constants LCL UCL A2 A3 dn D3 D4 B3 B4 2 3 4 1.88 1.023 0.729 2.659 1.954 1.628 1.128 1.693 2.059 0 0 0 3.267 2.574 2.282 0 0 0 3.267 2.568 2.266 5 0.577 1.427 2.326 0 2.114 0 2.089 6 7 8 9 10 11 12 13 14 15 16 17 18 19 20 21 22 23 24 25 0.483 0.419 0.373 0.337 0.308 0.285 0.266 0.249 0.235 0.223 0.212 0.203 0.194 0.187 0.18 0.173 0.167 0.162 0.157 0.153 1.287 1.182 1.099 1.032 0.975 0.927 0.886 0.85 0.817 0.789 0.763 0.739 0.718 0.698 0.68 0.663 0.647 0.633 0.619 0.606 2.534 2.704 2.847 2.97 3.078 3.173 3.258 3.336 3.407 3.472 3.532 3.588 3.64 3.689 3.735 3.778 3.819 3.858 3.895 3.931 0 0.076 0.136 0.184 0.223 0.256 0.283 0.307 0.328 0.347 0.363 0.378 0.391 0.403 0.415 0.425 0.434 0.443 0.451 0.459 2.004 1.924 1.864 1.816 1.777 1.744 1.717 1.693 1.672 1.653 1.637 1.622 1.608 1.597 1.585 1.575 1.566 1.557 1.548 1.541 0.03 0.118 0.185 0.239 0.284 0.321 0.354 0.382 0.406 0.428 0.448 0.466 0.482 0.497 0.51 0.523 0.534 0.545 0.555 0.565 1.97 1.882 1.815 1.761 1.716 1.679 1.646 1.618 1.594 1.572 1.552 1.534 1.518 1.503 1.49 1.477 1.466 1.455 1.445 1.435
- 32. • • • • • • 6SIGMA http://www.youtube.com/watch?v=kiUXCezYFTM 7QC TOOL http://www.youtube.com/watch?v=2OdGNLEXtlI HOW TO UPLOAD POWER POINT ON YOUTUBE https://www.youtube.com/watch?v=WbSTsG2klWQ That’s it . • I Hope you got it. • Have any question, please let me know.