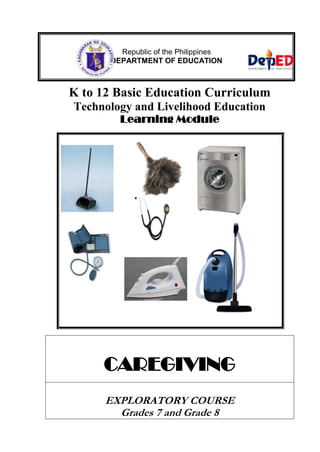
K to 12 caregiving learning modules
•
32 j'aime•26,871 vues

K to 12 caregiving learning modules

Recommandé
Recommandé
Contenu connexe
Tendances
Tendances (20)
En vedette
En vedette (11)
Similaire à K to 12 caregiving learning modules
Similaire à K to 12 caregiving learning modules (20)
Plus de Tactical Foundation - Research and Extension Program
Plus de Tactical Foundation - Research and Extension Program (20)
Dernier
Dernier (20)
K to 12 caregiving learning modules
- 1. Republic of the Philippines DEPARTMENT OF EDUCATION K to 12 Basic Education Curriculum Technology and Livelihood Education Learning Module CAREGIVING EXPLORATORY COURSE Grades 7 and Grade 8
- 2. TABLE OF CONTENTS Page What Is This Module About ? .................................................................................................. 2 How Do You Use This Module ............................................................................................... 3 LESSON 1 – Use and Maintenance of Tools, Equipment, and Paraphernalia…..4 LESSON 2 – Perform Calculations .................................................................................33 LESSON 3 – Practice Occupational Health and Safety Procedures ........................60 LESSON 4 – Maintain Tools, Equipment, and Paraphernalia..................................83 Answer Keys ...........................................................................................................................99 Acknowledgment ................................................................................................................... 107 CAREGIVING K to 12 – Technology and Livelihood Education 1
- 3. What Is This Module About? Welcome to the world of Caregiving! This Module is an exploratory and introductory course which leads you to Caregiving National Certificate Level II ( NC II)1. It covers four common competencies that a Grade 7/Grade 8 Technology and Livelihood Education (TLE) student like you ought to possess, namely: 1). 2). 3). 4). Use Tools, Equipment, and Paraphernalia Perform Calculations Practice Occupational Health and Safety Procedures Maintain Tools, Equipment, and Paraphernalia These four common competencies are covered separately in four lessons. As shown below, each Lesson is directed to the attainment of one, two, or three learning outcomes: Lesson 1 – Use Tools, Equipment, and Paraphernalia LO1. Identify caregiving tools, equipment, and paraphernalia applicable to a specific job. LO2. Use caregiving tools, equipment, and paraphernalia properly. Lesson 2 – Perform Calculations LO1. Perform simple calculations Lesson 3 – Practice Occupational Health and Safety Procedures LO1. Identify hazards and risks LO2. Evaluate and control hazards and risks Lesson 4 – Maintain Tools, Equipment, and Paraphernalia LO1.Perform aftercare activities for tools, equipment, and paraphernalia. Your success in this exploratory course on Caregiving is shown in your ability to perform the following at the end of this Module: 1NATIONAL CERTIFICATE (NC) is a certification issued to individuals who achieved all the required units of competency for a national qualification as defined under the Training Regulations. NCs are aligned to specific levels within the PTQF. (TESDA Board Resolution No. 2004-13, Training Regulations Framework) NATIONAL CERTIFICATE LEVEL refers to the four (4) qualification levels defined in the Philippine TVET Qualifications Framework (PTQF) Where the worker in: a. NC I performs a routine and predictable tasks; has little judgment; and, works under supervision; b. NC II performs prescribe range of functions involving known routines and procedures; has limited choice and complexity of functions, and has little accountability; CAREGIVING K to 12 – Technology and Livelihood Education 2
- 4. How Do You Use This Module? This Module has 4 Lessons. Each Lesson has the following: Learning Outcomes Performance Standards Materials Definition of Terms What Do You Already Know? What Do You Need to Know? How Much Have You Learned? How Do You Apply What You Learned? How Well Did You Perform? How Do You Extend Your Learning? References To get the most from this Module, you’ve got to do the following: 1. Begin by reading and understanding the Learning Outcome/s and Performance Standards. These tell you what you should know and be able to do at the end of this Module. 2. Find out what you already know by taking the Pretest then check your answer against the Answer Key. If you get 99 to 100% of the items correctly, you may proceed to the next Lesson. This means that you do not have to go through the Lesson because you already know what it is supposed to teach you. If you failed to get 99 to 100% of the items correctly, repeat the Lesson and review especially those items which you failed to get. 3. Do the required Learning Activities. It begins with one or more Information Sheets. An Information Sheet contains important notes or basic information that you need to know. After reading the Information Sheet, test yourself on how much you have learned by way of the Self-check. Refer to the Answer Key for correction. Do not hesitate to go back to the Information Sheet when you do not get all test items correctly. This will ensure your mastery of basic information. 4. It is not enough that you acquire content or information. You must be able to demonstrate what you have learned by doing what the Activity / Operation /Job Sheet directs you to do. In other words, you must be able to apply what you learned in real life. 5. How well did you perform? Accomplish the Scoring Rubrics. Each Lesson also provides you with references and definition of key terms for your guide. They can be of great help. Use them fully. If you have questions, ask your teacher for assistance. CAREGIVING K to 12 – Technology and Livelihood Education 3
- 5. LESSON 1 Use Tools, Equipment, and Paraphernalia LEARNING OUTCOMES: At the end of this Lesson, you are expected to do the following: LO 1. Identify caregiving tools, equipment, and paraphernalia applicable to specific job LO 2. Use caregiving tools,equipment and paraphernalia properly LO 3. perform preventive maintenance. CAREGIVING K to 12 – Technology and Livelihood Education 4
- 6. PERFORMANCE STANDARDS Tools and equipment are cleaned immediately after use in line with farm procedures. Routine check-up and maintenance are performed. Tools and equipment are stored in designated areas in line with farm procedures. Farm tools and equipment are regularly sharpened and oiled from time to time. Definition of Terms Bulb – a rubber which is squeezed to inflate the cuff Carafe – a glass pot with a pouring spout Caregiver – a worker who is qualified to provide personal care independently or with minimal supervision, to children, elderly or people with special needs (disabilities) Chestpiece – also called the head, contains the diaphragm or bell that vibrates with sound Child – an individual with age ranging from 0-13 years old Countertop – a flat surface on top of a cabinet or display case as in a kitchen Cuff – a fabric that is wrapped around a patient’s arm Ear Tubes – attach the earpieces to the main body of the stethoscope Earpieces – part of the stethoscope which are placed into the ears and transmit sounds directly into them Elderly – an individual with age ranging from sixty (60) years old and above Emulsify – the process of combining two liquids that do not normally mix easily Infant – an individual with age ranging from 0- 12 months (1 yr. old) Lever – a projecting handle used to adjust or operate a function People with special needs (Disabilities) – person incapable of performing specific tasks either physically, mentally, and/or behaviorally. Rectum – the end part of the large intestine Reservoir – a receptacle for storing fluid Suction – a force that causes a fluid or solid to be drawn into an interior space or to stick on to a surface because of the difference between the external and internal pressures. Toddlers – individuals with age ranging from 1-3 years old Tubing – also called acoustic tubes which connect two ear tubes to the chestpiece (diaphragm or bell) Valve – allows air in to inflate the cuff when the bulb is squeezed, then can be unscrewed to release the air and remove the cuff. Vessel – is a hollow container used to hold liquid Whip – is the process of striking something with continual, repetitive strokes CAREGIVING K to 12 – Technology and Livelihood Education 5
- 7. LEARNING OUTCOME 1 Identify caregiving tools, equipment and paraphernalia applicable to the specific job PERFORMANCE STANDARDS 1. Equipment, tools, and paraphernalia are identified according to their types, functions and classifications. 2. Equipment, tools, and paraphernalia are determined based on the specified task. Materials LCD projector or OHP Computer desktop or laptop Pictures of tools, equipment, and paraphernalia CAREGIVING K to 12 – Technology and Livelihood Education 6
- 8. What Do You Already Know? Let us determine how much you already know about the tools, equipment, and paraphernalia used in caregiving Take this test. Pretest LO 1 I. Directions: Match the pictures in Column A with the descriptions in Column B. Write the letter of your choice in the space provided before each item. Column A Column B 1 A. It destructs microorganisms in containers. 2 B. It is a multi-tasking tool used in preparing food. 3 C. It removes moisture through ventilation. 4 D. It is used for listening to the action of the heart, lungs etc. 5 E. It is an instrument for grasping and holding. II. Directions: Identify the tool, equipment, or paraphernalia used in the given specific tasks. 1. 2. 3. 4. 5. Cleans the dishes without doing it manually Presses clothes or draperies Reheats food for the client Emulsifies food ingredients Hangs garments on CAREGIVING K to 12 – Technology and Livelihood Education 7
- 9. What Do You Need To Know? Read the Information Sheet 1.1 very well then find out how much you can remember and how much you learned by doing Self-check 1.1. Information Sheet 1.1 Caregiving Tools, Equipment, and Paraphernalia One of the most important tasks of a caregiver is to make sure that he/she uses the right equipment, tool, or paraphernalia that is applicable to a specific job. You, as a future caregiver, therefore, should be well versed with the different tools and equipment that you will use when you are already in the health care profession. Tools, Equipment, and Paraphernalia Used in Meal Preparation Airpot An air pot is a vessel usually rounded which is used for holding liquid to maintain heat or coldness. Blender A blender is a kitchen and laboratory appliance which is used to mix, puree, or emulsify food and other substances Coffee Maker A coffee maker is an electric countertop appliance that brews hot coffee automatically. CAREGIVING K to 12 – Technology and Livelihood Education 8
- 10. Chopping Board A chopping board is a flat, wooden, or plastic board where meats or vegetables can be cut. Electric Knife An electric knife is a kitchen device which is used for slicing food. It requires less physical effort than an ordinary knife and makes neater slices. Electric Can Opener An electric can opener is a very useful device which is used to open canned goods with ease and accuracy. Food Processor A food processor is a multi-tasking tool which is used to slice, dice, or whip food ingredients. Food Tongs A food tongs is an instrument with two hinged or sprung arms for grasping and holding. Ladle A ladle is a long-handled spoon with a deep bowl at the end for serving food specially broth or soup. CAREGIVING K to 12 – Technology and Livelihood Education 9
- 11. Microwave Oven A microwave oven is an oven that uses microwave to cook or heat food. Stove A stove is an appliance in which electricity/gas is utilized to supply heat to be used for cooking or reheating. Tools, Equipment, and Paraphernalia for Cleaning, Washing, and Ironing Bottle Sterilizer A bottle sterilizer is an apparatus which is used in destructing microorganisms in containers like feeding bottle through boiling. Broom A broom is a tool which is used for sweeping dirt. It consists of twigs and bristles bound together and attached to a handle. Clothes Hanger A hanger resembles the shape of a person’s shoulders and is used to hang garments on. CAREGIVING K to 12 – Technology and Livelihood Education 10
- 12. Dishwasher A dishwasher is a mechanical device for cleaning dishes, eating utensils and pots. Dryer A dryer is a machine or apparatus that removes moisture through ventilation or heat. Dustpan A dustpan is a handled pan or scoop into which dust is swept. Duster A duster is a cloth or brush which is used in removing dirt and dust. Flat Iron A clothes iron is an electric appliance which is used along with an ironing board, to iron or press clothing, fabric or draperies. Ironing Board An ironing board is a long, narrow padded board, often with collapsible supporting legs, used as a working surface for ironing. CAREGIVING K to 12 – Technology and Livelihood Education 11
- 13. Laundry/Sorting Basket A laundry basket is a hamper that is used for holding dirty clothes for washing or wet clothes for drying. It may also be used for sorting clean clothes to be folded. Vacuum Cleaner A vacuum cleaner is an electrical appliance which is used for cleaning floors, carpets, and furniture by suction. Washing Machine A washing machine is an electric appliance which is used for washing clothes and linen. Tools, Equipment, and Paraphernalia for Taking Vital Signs BP Apparatus Aneroid (sphygmomanometer) An aneroid unit is mercury free and consists of a cuff that can be applied with one hand for self-testing; a stethoscope that is built in or attached; and a valve that inflates and deflates automatically with the data displayed on an easy-to-read gauge that will function in any position. CAREGIVING K to 12 – Technology and Livelihood Education 12
- 14. BP Apparatus Mercurial (sphygmomanometer) A mercury-based unit has a manually inflatable cuff attached by tubing to the unit that is calibrated in millimeters of mercury. During blood pressure measurement, the unit must be kept upright on a flat surface and the gauge read at eye level. BP Apparatus Digital (sphygmomanometer) A digital unit is mercury free and consists of a cuff that can be applied with one hand for self-testing; a stethoscope that is built in or attached; and a valve that inflates and deflates automatically with the data displayed on the LCD Stethoscope A stethoscope is an instrument which is used for listening to the action of the heart, lungs, etc., usually consisting of a circular piece placed against the chest, with tubes leading to earpieces. Thermometer A thermometer is an instrument for measuring temperature. CAREGIVING K to 12 – Technology and Livelihood Education 13
- 15. How Much Have You Learned? Self-Check 1.1 Self-Check 1.1 I. Directions: Search for the ten (10) different caregiving equipment, tools or paraphernalia found in this puzzle. Encircle the word/words vertically, horizontally, backward, upward or downward. A Q T Q A D A Q Q I W D Y U I O P N S N M R E W S D T Y A S I Q C U I D R I K O P L R T O P K L J E R Q I S D S W V I I F Y W Q A S D F E G H J K T V J Q A L F H C N O O G E H J K L D F R R R R T Y U K Q Q S T W V B P P H R Q W E R T Y I A S D F G H I E W C V A B H H H H H H J K L N M L R T Y Q W S O R E V G S N J I O P Q W E R A S D I R T D D F F P B R B T H W G P A S S S D F S R T Z Y H J K L O A N X N Y E U K S T Q R T Y U G O P E I J K M N G S G C R H R I I T K G F S A A N L K R J J H B T Y S J V E N G O U Y Q I U I O P O L K J H T G L Y N S I B T J Y O O U E S L C Q A T Z R F V U O E P K T O N E I U P P U R D Q L K J D H G G F F F N D S E P M M K N K R I T G S V E E O M Z Q F X M D Q Y T A A O A J L E Q Y H D B L T O N X W G M H E W G H Q W M S Z J T W U J F N K F F B C E H N H R E V O W T R W A H S E I K G X J G T V V R J B J S R T S C Y E C G H U R O L H C H H Y V B T K H L D T F C V U H V H Y D V P J J B G J U C N Y L G P F Y C O B I T B I U B F P A Q N Y H N U J I I F D F U T P N O N N O I N G P O P I J H Y T G R F T G G B E E M P J J P R E T E M O N A M O M G Y H P S F G H X K A K K M E M H H U J M K Q A Z W S X E D C R V II. Directions: Identify the tool, equipment, or paraphernalia used in the given specific tasks. 1. 2. 3. 4. 5. For sorting clean clothes For sweeping dirt on the floor For measuring blood pressure For removing dirt from the surface of a television For scooping dust on the floor CAREGIVING K to 12 – Technology and Livelihood Education 14 C L S L L K R K J J W S S X R F V T G B Y H N U J V G D O P L T L K K M N B D R A O B G N I N O R I
- 16. III. Directions: Group the following tools, equipment, and paraphernalia according to their classifications. Write each word in the appropriate box. Dryer Electric knife Sphygmomanometer Food Processor Ironing board Stethoscope Used for meal preparation Used for cleaning, laundry, and ironing Iron Ladle Thermometer Used for taking vital signs Refer to the Answer Key. What is your score? How Do You Apply What You Have Learned? Show that you learned something by doing this activity Activity sheet 1.1 Directions: Compile pictures of the different caregiving equipment, tools, and paraphernalia. Make a handbook that will be useful for a future caregiver like you. Provide a summary which presents the equipment, tools, and paraphernalia according to its classification, use and function. A sample guide is provided for you. Name Sample picture of duster Classification Equipment, tools and paraphernalia for cleaning, washing, laundry and ironing Use Used for cleaning Function Removes dust Submitted by: Submitted to: ___________________ Name of Student _________________________ TLE Teacher Date: ______________ CAREGIVING K to 12 – Technology and Livelihood Education 15
- 17. How Do You Extend Your Learning? Assignment Sheet 1.1 Directions: Make a list of the different tools, equipment and paraphernalia that may be found in your home. Identify the function of each and determine whether or not this can be used in a health care environment. Tools, equipment, and paraphernalia Functions CAREGIVING K to 12 – Technology and Livelihood Education Can these be used in a health care environment? 16
- 18. LEARNING OUTCOME 2 Use caregiving tools, equipment, and paraphernalia properly PERFORMANCE STANDARDS . Equipment, tools, and paraphernalia are used properly. Equipment, tools, and paraphernalia are used based on the task requirement. Materials LCD projector or OHP Computer desktop or laptop Pictures of tools, equipment, and paraphernalia DVD player Blender Coffee maker Electric can opener Food processor Microwave oven Electric bottle sterilizer Iron Washing machine Clinical thermometer Digital thermometer Ear digital thermometer Infrared thermometer with laser pointer Sphygmomanometer (mercurial and aneroid) Stethoscope CAREGIVING K to 12 – Technology and Livelihood Education 17
- 19. What Do You Already Know? Let us determine how much you already know about the proper way of using tools,equipment, and paraphernalia used on Caregiving. Take this test. Pretest LO 2 I. Directions: Write True if the statement is correct, or False if it is incorrect. ___________1. Infrared thermometers are commonly called laser thermometers. ___________2. Temperatures are bodily functions that reflect the body’s state of health and are easily measurable. ___________3. The first step in washing clothes is sorting them according to color and type of garment. ___________4. Iron should cool down before storing. ___________5. When measuring the client’s temperature, it is not important for the caregiver to wash his/her hands because he/she does not come in contact with the client’s bodily fluid. II. Directions: Encircle the letter of the best answer. 1. What is the balance between heat produced and heat lost in the body? a. b. c. d. pulse rate body temperature respiratory rate blood pressure 2. This type of thermometer uses mercury and, therefore, is considered unsafe to use. a. ear thermometer b. infrared thermometer c. digital thermometer d. clinical thermometer 3. Which of the following is not proper when operating a blender? a. b. c. d. operating a blender in a dry, flat surface plugging the blender first before putting the pitcher onto the base choosing the setting appropriate for the specified task placing all the parts of the blender in their appropriate places before operating it CAREGIVING K to 12 – Technology and Livelihood Education 18
- 20. 4. The kind of temperature when the thermometer is placed under the armpit. a. b. c. d. oral temperature rectal temperature axillary temperature none of the above 5. These should be checked before ironing as some fabrics need special care instructions. a. b. c. d. labels of the garments to be ironed pleats and pockets of skirts collars and sleeves of shirts pants’ waistbands What Do You Need To Know? Read the Information Sheet 2.1 very well then find out how much you can remember and how much you learned by doing Self-check 2.1. Information Sheet 2.1 Operating Caregiving Equipment, Tools and Paraphernalia Now that you have successfully identified the different equipment, tools, and paraphernalia used in providing health care, it is a must that you master the proper utilization of each. As an efficient and dependable caregiver, you must learn the procedures in operating them, since you will be expected to use them in your particular job. Common Equipment in Meal Preparation Blender 1. Choose a flat, dry surface on which to operate your blender. 2. Make sure that all the parts are placed in their appropriate places before operating. 3. Put the pitcher onto the base and plug the blender. 4. Place the ingredients in the pitcher and put the lid on firmly. CAREGIVING K to 12 – Technology and Livelihood Education 19
- 21. 5. Start operating by choosing the setting appropriate for the task you are going to do. 6. You may add food or ingredients through the secondary lid while the blender is running. 7. Clean the blender after use. Coffee Maker 1. Fill the carafe with water according to the number of cups of coffee you need to make. 2. Pour the water from the carafe into the reservoir of the coffee maker, and place the carafe back into position. 3. Place a coffee filter into the filter basket. The amount of coffee you'll need to add depends on how strong or weak your clients like it. Then, add the coffee into the filter using a spoon. 4. Turn on the coffee maker and wait for your coffee to brew. Electric Can Opener 1. Plug the electric can opener into an outlet. 2. Lift up the lever that raises the cutting wheel into the air. Place the lip of the can under the wheel. Put the lever down and press hard enough so that the wheel gets into the can. 3. Turn on the opener while holding the bottom of the can and it will automatically turn as the wheel slices through the can. 4. Remove the can from the opener when it reaches the end and you feel a slight drop of the can. The lid will remain attached to the magnet on the opener and the can is ready to dump. 5. Unplug the opener from the outlet. Food Processor 1. Remove the food processor from its box container. 2. Place it on a stable, flat surface. 3. Plug it on the electrical outlet safely. 4. Remove the cover and put the food ingredients to be processed. CAREGIVING K to 12 – Technology and Livelihood Education 20
- 22. 5. Put back the cover and turn on the processor to start with the procedure. 6. As soon as you have reached the desired size or texture for your food ingredients, remove the cover and pour the ingredients into your bowl or plate. 7. Unplug the food processor and clean it based on the manufacturer’s instructions. Microwave Oven Microwave oven is a very useful tool specially during mealtime, but you should exercise special care when using it to cook or reheat food to ensure that it is prepared safely. Microwave Oven Cooking Position evenly the food items in a covered dish. You may add some liquid if necessary. Cover the dish with a lid or plastic wrap, but make sure not to cover it completely to let steam come out. The moist heat that is created will help destroy harmful bacteria and ensure uniform cooking. It is better to cook large cuts of meat on medium power for longer periods than on high power. This way, heat reaches the center without overcooking outer areas. Mix or rotate food midway through the microwaving time. This is important so as to eliminate cold spots where harmful bacteria can survive, and for more even cooking. When partially cooking food in the microwave oven to finish cooking on the grill or in a conventional oven, it is important to transfer the microwaved food to the other heat source immediately. Never partially cook food and store it for later use. Use a food thermometer or the oven's temperature probe to verify the food has reached a safe minimum internal temperature. Cooking times may vary because ovens vary in power and efficiency. Always allow standing time, which completes the cooking, before checking the internal temperature with a food thermometer. Microwave Defrosting Remove food from the package before defrosting. Do not use foam trays and plastic wraps because they are not heat stable at high temperatures. Melting or warping may cause harmful chemicals to migrate into food. Immediately after defrosting meat and poultry in microwave oven, they should be cooked since some areas of the frozen food may begin to cook during the defrosting time. CAREGIVING K to 12 – Technology and Livelihood Education 21
- 23. Bottle Sterilizer 1. Place the recommended amount of water as specified in the manufacturer’s instructional manual. Then, plug in the unit. 2. Place the bottle upside down (use the prongs to support them individually). Place the nipples, nipple rings and caps in such a way that they do not touch each other. Either prop them between the lower prongs, or place them on the supplied surface. 3. Cover the sterilizer and turn on the unit. Sterilization typically takes about 10 minutes with an automatic cycle that raises water temperature to a sufficient level to kill off any bacteria (212 degrees Fahrenheit). Once this cycle ends, the unit automatically begins to cool. Some models or units will not allow you to open the cover until the cooling cycle is completed. 4. Unplug the unit. 5. Remove the feeding bottles from the sterilizer. 6. Clean the sterilizer based on the manufacturer’s specifications. Common Equipment in Cleaning, Laundry, and Ironing Flat Iron 1. Check the label of every garment before ironing. This is necessary as some fabrics need special care instructions. 2. Unfold your ironing board near the outlet. Plug in your iron and choose the appropriate setting based on the material of the clothes you are ironing. 3. Preheating the flat iron should be done before starting. You will have to wait about 2-5 minutes to let the iron warm up. 4. Stretch the garment across the ironing board to make sure it is flat. 5. Run the iron over one part of the garment such as the hem just to be sure that it is not too hot. 6. Move the iron over the pants, blouse, or shirt and take note of pleats and pockets. For the shirts, start with the collar next to the sleeves, and then the shirt itself. For pants and shorts, start with the inside then the outside of the pants starting from the waistband CAREGIVING K to 12 – Technology and Livelihood Education 22
- 24. down. Generally, skirts and dresses are ironed from the top to the hem. If there are pleats, iron from the bottom and work upward with fast strokes. Each pleat should be pressed individually. Hang each garment that you have ironed to keep it from wrinkling again. 7. Unplug the iron and allow the unit to cool before storing it. Washing Machine 1. The very first step in washing is sorting the clothes of your client. Separate white and light-colored from dark-colored clothes. Also, they should be sorted according to their material. Wash clothes with heavy fabrics together and clothes with light fabrics together. 2. Put detergent into the washing machine. Let the detergent go to the bottom of the washing machine. 3. Put the clothes loosely into the washing machine. 4. Load the laundry as high as the manufacturer specifies or to the top row of holes in the tub. 5. Close the lid and choose the setting of the washing machine according to what you are washing. 6. Turn on the machine. Let the unit work through all of the cycles. Wait for the machine to turn off before you unload the washed laundry. 7. Load the next batch of clothes and do steps 5 and 6 again until you are done with the laundry. 8. Turn off and unplug the unit. Common Equipment in Taking the Vital Signs When caring for an infant, toddler, child, elderly or person with special needs, measuring the vital signs is of utmost concern. This is also a concern of your client. Hence, he/she has the right to know her vital signs. This module will walk you through the basics of taking two of the important measurements. As you learn the different processes, you will also get your hands on the crucial pointers necessary in obtaining an accurate reading. But first, let us talk about vital signs. Vital signs are bodily functions that reflect the body’s state of health and are easily measurable: body temperature, pulse rate, respiratory rate, and blood pressure. In some cases, the fifth vital sign is considered to be the pain that a person experiences. CAREGIVING K to 12 – Technology and Livelihood Education 23
- 25. Thermometer Body temperature is a measurement of the amount of heat in the body. The balance between heat produced and heat lost is the body temperature. The normal adult body temperature is 37 degrees Celsius. There is a normal range in which a person’s body temperature may vary and still be considered normal. Take a look at these normal ranges of body temperature: Oral Rectal Axillary : : : 36.4 to 37.2 degrees Celsius 37 to 37.8 degrees Celsius 35.9 to 36.7 degrees Celsius The following are the different types of thermometers: Clinical thermometer may be inserted either into the rectum through the anus (rectal temperature), into the mouth under the tongue (oral or sub-lingual) or armpit (axillary temperature). It is made of glass with a narrowing above the bulb so that the mercury column stays in position even when the instrument is removed. The use of this type is now being eradicated as the mercury content is dangerous to people. Digital thermometer may be inserted into the mouth under the tongue, under the armpit or into the anus. This thermometer displays the reading in the LCD. This type of thermometer does not use mercury which is hazardous to humans. That is why more and more people are using it now. Also, using this is simple, quick and effective. Ear digital thermometer measures the heat coming from the eardrum. This release of heat is converted into a temperature and displayed on an LCD. It is very easy to use this. You just have to place the tip in the ear of a person, press the button and in a few seconds, the measurement is seen on the LCD. CAREGIVING K to 12 – Technology and Livelihood Education 24
- 26. Infrared thermometer with laser pointer measures temperature using thermal radiation emitted by the body. It is also called laser thermometer if a laser is utilized to aid in aiming the thermometer. Others call it non-contact thermometer because of its ability to measure temperature from a distance. It provides temperature reading without physically touching the object. All you have to do is aim at the object (as in the forehead), pull the trigger and immediately, you can see the temperature reading on the LCD. Using a Digital Thermometer (rectum through the anus) 1. Wash your hands and take the thermometer out of its holder. 2. Clean the probe (pointed end) of the thermometer with rubbing alcohol or soap and then rinse it in cool water. 3. Put a probe cover over the pointed end of the thermometer. If your thermometer did not come with a probe cover then you can use it without one. 4. Lubricate the end of the probe with a small amount of lubricating jelly. 5. Place your child (taking the temperature through the rectum is usually done on children) on his stomach across a firm surface or your lap before taking his temperature. 6. Gently slide the probe of the thermometer into the rectum about a half inch. Stop inserting the thermometer if it becomes difficult to insert. Never force the thermometer into the rectum. 7. Continue to hold the thermometer the entire time you are taking the temperature. Always stay with your client while taking the temperature. 8. Keep the thermometer in place until it beeps then remove the thermometer 9. Read the numbers on the LCD. These numbers are your client's temperature. 10. 11. If you used a probe cover, remove it and throw it away. 12. Wash the probe of the thermometer with soap, water and rubbing alcohol when you are done. Put the thermometer’s tip cover. Place the thermometer in its holder/container. 13. Record the reading 14. Wash your hands. Using a Digital Thermometer (mouth) 1. Wash your hands and take the thermometer from its holder. 2. Clean the probe (pointed end) of the thermometer with rubbing alcohol or soap and then rinse it in cool water. CAREGIVING K to 12 – Technology and Livelihood Education 25
- 27. 3. Inform the client that you are going to take his temperature orally. 4. Ask the client to wet his/her lips and pick up his tongue. 5. Place the thermometer under the client’s tongue on one side of his/her mouth. Ask him/her to close his/her lips. (You may have to hold the thermometer specially if your client is sick and weak enough to even hold the thermometer with his/her lips.) 6. Leave the thermometer in place until the thermometer signals it is finished. When it beeps, it signifies that it can be removed. 7. Remove the thermometer carefully and read the temperature on the digital display. Clean the tip of the thermometer with a cotton ball soaked in alcohol. Put the thermometer’s tip cover. Place the thermometer in its container. 8. Record the reading and wash your hands. Using a Digital Thermometer (armpit) 1. Wash your hands and take the thermometer from its holder. 2. Clean the probe (pointed end) of the thermometer with rubbing alcohol or soap and then rinse it in cool water. 3. Inform the client that you are going to take his temperature under the armpit. 4. Place the thermometer under the client’s armpit. (You may have to hold the thermometer specially if your client is very sick and weak that he/she cannot even hold the thermometer with his/her armpit.) 5. Leave the thermometer in place until the thermometer signals it is finished. When the thermometer beeps, it means that it can be removed. 6. Remove the thermometer carefully and read the temperature on the digital display. Clean the tip of the thermometer with a cotton ball soaked in alcohol. Put the thermometer’s tip cover. Place the thermometer in its container. 7. Record the reading and wash your hands. BP Apparatus Another important measurement that you should learn to take is the blood pressure. Blood pressure is the force of the blood pushing against the walls of the blood vessels. The heart contracts as it pumps the blood into the arteries. When the heart is contracting, the pressure is highest. This pressure is what we know as the systolic pressure. Now, as the heart relaxes between each contraction, the pressure decreases. When the heart is at its most relaxed state, the pressure is lowest. And we call this diastolic pressure. The following steps will help you measure blood pressure accurately. CAREGIVING K to 12 – Technology and Livelihood Education 26
- 28. 1. 2. 3. 4. Wash your hands and prepare the equipment you will use. Introduce yourself and let the patient/client know the procedure to be done. Sanitize the earpieces of the stethoscope with an antiseptic pad. Ask your client to rest quietly. Have him/her lie down or sit on a chair whichever is more comfortable for him/her. 5. If you are using a mercurial apparatus, the measuring scale should be within the level of your eyes. 6. Expose the arm of your client by rolling the sleeves up. Have your client’s arm from the elbow down to rest fully extended on the bed or the arm of a chair. 7. Unroll the cuff, loosen the screw and squeeze the cuff with your hands to remove air completely. 8. Wrap the cuff around your client’s arm above the elbow, not too tight or too loose. 9. Find your client’s brachial pulse at the inside of the elbow. Hold the diaphragm there and inflate the cuff until the pulse disappears. Take note of the reading and immediately deflate the cuff. This is the client’s approximate systolic reading and is called the palpated systolic pressure. 10. Place the stethoscope’s earpieces into your ears and place the diaphragm on the brachial pulse. 11. Turn the screw to close it. Inflate the cuff until the dial points to 30 mm above the palpated systolic pressure. 12. Turn the screw to open it. Let the air escape slowly until the sound of the pulse comes back. Take note of the calibration that the pointer passes as you hear the first sound. This indicates the systolic pressure. 13. You have to continue releasing the air from the cuff. When you hear the sounds change to something softer and faster and disappear, take note of the calibration. This is now the diastolic pressure 14. Deflate the cuff complete. Remove it from the arm of your client and record the reading on the client’s chart. 15. Wipe the earpieces of the stethoscope with an antiseptic pad and place the equipment back to their proper place and wash your hands. CAREGIVING K to 12 – Technology and Livelihood Education 27
- 29. How Much Have You Learned? Self-Check 2.1 Directions: Encircle the letter of the best answer. 1. When an adult client asks you about his/her vital signs, your best answer would be: A. ―I am only allowed to report them to my superior.‖ B. ―Your temperature is 37 degrees orally; your blood pressure is 128/70, and your respirations are 24. Is there anything more that you would like to know sir/ma’am?‖ C. ―Oh, they are not that important. There is no need for you to know about it.‖ D. ―Even if I tell you sir/ma’am, you will not understand them.‖ 2. The fifth vital sign is A. blood pressure B. pain C. temperature D. respiration 3. This appliance is useful especially at mealtime. A. blender B. food processor C. microwave oven D. electric can opener 4. This uses a magnet so that the lid will remain attached to it. A. blender B. coffee maker C. microwave oven D. electric can opener 5. When the heart is contracting, the pressure is highest. This is called the A. blood pressure. B. systolic pressure. C. heart pressure. D. diastolic pressure. Refer to the Answer Key. What is your score? CAREGIVING K to 12 – Technology and Livelihood Education 28
- 30. How Do You Apply What You Have Learned? Show that you learned something by doing this activity Activity Sheet 2.1 Directions: Watch the following videos by following the links provided. Work with a partner and answer the questions that follow. Video No. 1 1. What is the video all about? 2. What are the three most important steps you have seen in the video? Explain your answer. 3. Do you think the caregiver handled her client well? Why do you think so? Can you cite situations that would prove that the caregiver handled her client well? Video No. 2 1. What is the video all about? 2. What are the three most important steps you have seen in the video? Explain your answer. 3. What are the advantages of using the equipment shown in the video? Cite three (3) advantages. http://www.youtube.com/watch?v=S648xZDK7b0&feature=fvsr http://www.youtube.com/watch?v=HHosKND-kZk&feature=fvsr Activity Sheet 2.2 Directions: You will be provided with five (5) equipment, tools or paraphernalia. Prepare them for use by identifying and demonstrating the function of each. You must get 100% accuracy. Students with the score of 9 and below are required to perform again the activity. Complete the table below in a separate sheet of paper. Task to be undertaken Equipment, tool or paraphernali a to be used Function of the equipment, tool or paraphernalia Prepare apple and banana smoothie Blender Sterilize feeding bottles Sterilizer For mixing, puree or emulsifying food and other substances For destroying microorganism s in containers CAREGIVING K to 12 – Technology and Livelihood Education Functionality Functional Defective Remarks 29
- 31. Iron shirt and pants of the client Take temperature reading Open a canned good for the client Iron and ironing board For pressing clothes Thermom eter For measuring temperature Electric can opener For opening a canned good How Well Did You Perform? Find out by accomplishing the Scoring Rubric honestly and sincerely. Remember it is your learning at stake! ACCURACY (100%) Identified and demonstrated the function of 5 equipment, tools, or paraphernalia Identified and demonstrated the function of 4 equipment, tools, or paraphernalia Identified and demonstrated the function of 3 equipment, tools, or paraphernalia Identified and demonstrated the function of 2 equipment, tools, or paraphernalia Identified and demonstrated the function of 1 equipment, tools, or paraphernalia Failed to identify and demonstrate the function of any of the given equipment, tools, or paraphernalia ACCURACY (100%) SCORING CRITERIA 10 9 7 5 3 1 STUDENT’S SCORE Identified and demonstrated the function of 5 equipment, tools, or paraphernalia Identified and demonstrated the function of 4 equipment, tools, or paraphernalia Identified and demonstrated the function of 3 equipment, tools, or paraphernalia Identified and demonstrated the function of 2 equipment, tools, or paraphernalia Identified and demonstrated the function of 1 equipment, tools, or paraphernalia Failed to identify and demonstrate the function of any of the given equipment, tools, or paraphernalia CAREGIVING K to 12 – Technology and Livelihood Education 30
- 32. Congratulations! You did a great job! Rest and relax a while then move on to the next lesson. Good luck! REFERENCES LO1 Elana D. Zucker. The Caregiver’s Resourcebook 6th Edition Pearson Education South Asia PTE. LTD. 2009. National League of Philippine Government Nurses, Inc. Public Health Nursing in the Philippines 10th Edition National League of Philippine Government Nurses, Inc. Online Resources: http://www.ehow.com/how_7719401_clean-air-pot.html http://www.aptkitchen.com/kitchen-accessories-articles/electric-knife-cleaning.php http://home.howstuffworks.com/how-to-repair-small-appliances6.htm http://howtoeasy.blogspot.com/2010/01/clean-your-microwave-oven-with-vinegar.html http://navyadministration.tpub.com/14163/css/14163_78.htm http://www.goodhousekeeping.com/home/heloise/heloise-spring-cleaning-dishwashergrime http://housekeeping.about.com/od/laundry/ht/ironcleaning.htm http://blog.lydiasuniforms.com/blog/uniforms-and-scrubs-qanda/caring-for-yourstethoscope http://www.geratherm.com/wp-content/uploads/2011/03/user-manual-Gerathermclinic.pdf http://www.healthaidindia.com/digital-thermometers/maintenance-of-digitalthermometers.html http://www.dableducational.org/pdfs/spring07/Chapter4_Measurement_of_blood_pressur e_Part2.pdf http://www.sooperarticles.com/health-fitness-articles/medical-equipment-articles/medicalinstruments-maintenance-how-clean-sphygmomanometer-269087.html http://www.adctoday.com/images/PDF/IB/93-7001-00.pdf http://www.thefreedictionary.com CAREGIVING K to 12 – Technology and Livelihood Education 31
- 33. LO2 Elana D. Zucker. The Caregiver’s Resourcebook 6th Edition Pearson Education South Asia PTE. LTD. 2009. National League of Philippine Government Nurses, Inc. Public Health Nursing in the Philippines 10th Edition National League of Philippine Government Nurses, Inc. Online Resources: http://www.ehow.com/how_7719401_clean-air-pot.html http://www.aptkitchen.com/kitchen-accessories-articles/electric-knife-cleaning.php http://home.howstuffworks.com/how-to-repair-small-appliances6.htm http://howtoeasy.blogspot.com/2010/01/clean-your-microwave-oven-with-vinegar.html http://navyadministration.tpub.com/14163/css/14163_78.htm http://www.goodhousekeeping.com/home/heloise/heloise-spring-cleaning-dishwashergrime http://housekeeping.about.com/od/laundry/ht/ironcleaning.htm http://blog.lydiasuniforms.com/blog/uniforms-and-scrubs-qanda/caring-for-yourstethoscope http://www.geratherm.com/wp-content/uploads/2011/03/user-manual-Gerathermclinic.pdf http://www.healthaidindia.com/digital-thermometers/maintenance-of-digitalthermometers.html http://www.dableducational.org/pdfs/spring07/Chapter4_Measurement_of_blood_pressu re_Part2.pdf http://www.sooperarticles.com/health-fitness-articles/medical-equipmentarticles/medical-instruments-maintenance-how-clean-sphygmomanometer-269087.html http://www.adctoday.com/images/PDF/IB/93-7001-00.pdf http://www.ehow.com/how_2063587_use-washing-machine.html www.google.com http://www.ehow.com/how_8162704_use-clothes-iron.html http://en.wikipedia.org/wiki/Infrared_thermometer http://www.digitalthermometers.net/digitalthermometers.aspx http://en.wikipedia.org/wiki/Infrared_thermometer http://www.youtube.com/watch?v=S648xZDK7b0&feature=fvsr http://www.drugs.com/cg/taking-a-rectal-temperature.html http://www.ehow.com/facts_5048247_parts-stethoscope.html http://www.ehow.com/how_7416851_identify-parts-stethoscopesphygmomanometer.html http://jproffcomm.tripod.com/id4.html http://www.thefreedictionary.com CAREGIVING K to 12 – Technology and Livelihood Education 32
- 34. LESSON 2 Perform Calculations LEARNING OUTCOME: At the end of this Lesson you are expected to: LO 1. Perform simple calculations CAREGIVING K to 12 – Technology and Livelihood Education 33
- 35. Definition of Terms Dosage – the measured quantity of a medicine Equation – a statement of equivalence in mathematical expressions Equivalent – the same in number, value or meaning Intravenous Injection – a means of administering medicine or feeding a patient through injection Substernal – situated below or behind the sternum or breastbone Vial – a small, closable vessel for fluids Suppository – small piece medicine designed to melt within a body opening other than the mouth, especially the rectum or vagina. CAREGIVING K to 12 – Technology and Livelihood Education 34
- 36. LEARNING OUTCOME 1 Perform simple calculations PERFORMANCE STANDARDS . Computations involving ratios, fractions, proportions and conversions are performed. Oral drug dosages are computed. Rectal dosages are determined. Pediatric dosages are calculated. Materials LCD projector or OHP Computer desktop or laptop Suppository Vial Syringe Sample drug labels Measuring cup for syrups Dropper Hollow-handle spoon CAREGIVING K to 12 – Technology and Livelihood Education 35
- 37. What Do You Already Know? Pretest LO 1 Pretest LO1 I. Directions: True or False. Write an O if the statement is true, or write an X if the statement is false. 1. _____ Oral drugs can be in tablet, capsule, or suppository form. 2. _____ Reading carefully the drug labels is very important in administering medicines to the patients. 3. _____ Medicines of the same brand name and generic name always has the same dosage strength. 4. _____ The unknown value in calculation is usually represented by a "?". 5. _____ The adult's average Body Surface Area (BSA) is 1.73 m². II. Directions: Choose the letter of the correct answer by encircling the letter of your choice. 1. A patient who weighs 65 kg is scheduled to receive 75 mg / kg of her medicine. How much mg should the patient receive? a. 487.5 mg b. 4875 mg c. 86.67 mg d. 75mg 2. Determine the weight of your patient in kilograms who weighs125 lbs. a. 65.8 kg b. 68.5 kg c. 58.6 kg d. 56.8 kg 3. How many milligrams of a medicine are in 3 tablets if 2 contain 10mg? a. 5 mg b. 10 mg c. 15 mg d. 20 mg 4. Each nurse station at the hospital requires 8 nurses every shift schedule. If there are 3 shifts in one day, how many nurses are required to be at the hospital each shift if it has a total of 48 nurse stations? a. 1,152 nurses b. 248 nurses c. 1,248 nurses d. 384 nurses CAREGIVING K to 12 – Technology and Livelihood Education 36
- 38. 5. 3,600 ml / day is equal to ___________ a. 150 ml / hr or 2.5 ml / min b. 120 ml / hr or 2.2 ml / min c. 120 ml / hr or 2.0 ml / min d. 100 ml / hr or 1.7 ml / min Directions: Convert the following as indicated 6. 7.5 ml = _____ tsp 7. 5 in = _____ cm 8. 440 lbs = _____ kg 9. 2.5 cc = _____ ml 10. 3 hr = _____ min What Do You Need To Know? Read the Information Sheet 1.1 very well then find out how much you can remember and how much you learned by doing Self-check 1.1. Information Sheet 1.1 CALCULATIONS THAT COUNT A glance at numerical relationships Ratios, fractions, and proportions describe relationships between numbers. Ratio is a quick way to compare numbers. It uses a colon between the numbers in relationship. Ex.: 3:5 8:12 4:7 Fraction, as we all know, is a part of a whole or a portion of a certain number. It uses a slash between numbers in the relationship. Ex.: 2/3 4/5 6/8 A proportion is an equation written in the form stating that two ratios are equivalent. For instance, to show that 3:6 is equal to 9:18, we would write: 3:6::9:18 or 3/6 = 9/18 2:3::4:6 or 2/3 = 4/6 5:8::10:16 or 5/8 = 10/16 CAREGIVING K to 12 – Technology and Livelihood Education 37
- 39. Major problem solvers For dosages computation, we use ratios, fractions, and proportions most of the time. We will be using them in calculating I.V. infusion rates, administering medication, converting weights between systems of measurement, and in performing many other related tasks. RATIOS AND FRACTIONS Ratios and fractions are numerical ways to compare anything. We can’t simply ignore them. We use them every day, whether we realize it or not. Bring it on! Do the comparison! If 1 pad has 20 tablets, then the number of pads compared to the number of tablets is 1 to 20. In ratio, it is written as: 1:20 In fraction, it is written as: 1/20 Want more? Just go on! If there are 5 nurses for every 35 patients in a hospital, what would be the ratio? What would be the fraction? In ratio, it is written as: 5:35 In fraction, it is written as: 5/35 or 1/7 MATH TIP! The terms of a ratio are the numerator (always to the left of the colon) and the denominator (always to the right of the colon) of a fraction. Like fractions, ratios should always be in lowest term. PROPORTIONS A proportion is an equation of two ratios which can also be expressed as two fractions. Using ratios in proportions When using ratios in a proportion, a double colon serves as a separator. Double colon shows equality between the two ratios. In the example previously given, the ratio of pads with the tablets is 1:20, then 2 pads have 40 tablets. In proportion, it is written as: 1 pad : 20 tablets :: 2 pads : 40 tablets or 1:20 :: 2:40 Go marathon using ratios in proportions! On the second example, there are 5 nurses for every 35 patients and the ratio is 5:35. We can therefore say that there are 10 nurses for 70 patients. In a proportion, we can express the comparison as: 5 nurses : 35 patients :: 10 nurses :: 70 patients or 5:35 :: 10:70 CAREGIVING K to 12 – Technology and Livelihood Education 38
- 40. Using fractions in proportions A proportion that can be expressed using ratios can also be expressed using fractions. Let’s refer to the examples given before. 1 pad has 20 tablets which means that 2 pads have 40 tablets. Using fractions, we can write the proportion as: Or Enjoy using fractions in proportions There are 5 nurses for every 35 patients which equals to 10 nurses for 70 patients. We can express this in fraction as: Or Math Tip: We use colon for ratios while we use forward slash or horizontal bar for fractions. Double colon (::) used for ratios also means equal (=) used for fractions. WHAT IS AN “X”? Finding the value of X is very important in dosage calculations. X is the unknown amount or quantity we are going to compute so we can identify what is being asked for in an equation. Steps in Solving the Value of X Using Ratios in Proportion 1. Prepare the equation. 2. Start with the solution by doing a multiplication. Note: The product of the means is equivalent to the product of the extremes. Means are the middle quantities while the extremes are the external quantities 3. Solve for the value of X. 4. Double check your work by completing the equation. Example 1: How many nurses will take charge of 15 patients if 6 nurses handle 30 patients? Step 1. Prepare the equation. X : 15 patients :: 6 nurses : 30 patients CAREGIVING K to 12 – Technology and Livelihood Education 39
- 41. Step 2. Start with the solution by doing a multiplication. Multiply the means (middle) using the left side and multiply the extremes (external items) using the right side. Put an equal sign between both sides. 15 patients x 6 nurses = X x 30 patients Step 3: Solve for the value of X. In the given problem, the value of X refers to 15 patients x 6 nurses = X x 30 patients 90 = 30 X 90 / 30 = X or X = 3 nurses Therefore, 3 nurses will take charge of 15 patients while 6 nurses handle 30 patients. Step 4: Double check your work by completing the equation. 3 nurses : 15 patients :: 6 nurses : 30 patients Example 2: Find the value of X using the equation given below: 2500 mg : 10 tablets :: X : 3 tablets To compute, 10 tablets x X = 2500 mg x 3 tablets 10 X = 7500 mg X = 7500 / 10 X = 750 mg Check and complete the equation 2500 mg : 10 tablets :: 750 mg : 3 tablets Steps in Solving the Value of X Using Fractions in Proportion 1. 2. 3. 4. Prepare the equation. Start with the solution by doing cross multiplication. Solve for the value of X. Double check your work by completing the equation. Example 1: How many nurses will take charge of 15 patients if 6 nurses handle 30 patients? Step 1. Prepare the equation. CAREGIVING K to 12 – Technology and Livelihood Education 40
- 42. Step 2. Start with the solution by doing a cross multiplication. 15 patients x 6 nurses = X x 30 patients Step 3: Solve for the value of X. In the given problem, the value of X refers to 15 patients x 6 nurses = X x 30 patients 90 = 30 X 90 / 30 = X or X = 3 nurses Therefore, 3 nurses will take charge of 15 patients while 6 nurses handle 30 patients. Step 4: Double check your work by completing the equation. Example 2: Find the value of X using the equation given below: To compute, cross multiply first. 10 tablets x X = 2500 mg x 3 tablets 10 X = 7500 mg X = 7500 / 10 X = 750 mg Check and complete the equation CAREGIVING K to 12 – Technology and Livelihood Education 41
- 43. We use a colon ( : ) or a double colon ( :: ) in ratios We use a forward slash ( / ) or a horizontal bar ( -------- ) in fractions Proportion is an equation showing 2 sets of equal ratios The middle items in a proportion is called ―means‖ The external items in a proportion are called ―extremes‖ X in an equation which stands for the missing or unknown value A GLANCE AT MEASUREMENTS AND CONVERSIONS Dosage calculations involve measurements and conversions of the formulation, ingredients, and components of drugs. Measurements and conversions must be calculated accurately to ensure that we will be able to give the correct dosage to our patients. Below is a table of most commonly used measurements with its corresponding conversions. DOSAGE CALCULATION CONVERSIONS 1 liter (L) 1 ounce (oz) 1 ounce (oz) 1 milliliter (ml) 1 gram (g) 1 pint 1 milligram (mg) 1 kilogram (kg) 1 kilogram (kg) 1 inch (in) (") CAREGIVING K to 12 – Technology and Livelihood Education 1000 milliliters (ml) 30 milliliters (ml) 2 tablespoons (tbsp) 1 cubic centimeter (cc) 1000 milligrams (mg) 500 milligrams (mg) 1000 micrograms (mcg) 1000 grams (g) 2.2 pounds (lb) 2.5 centimeters (cm) 42
- 44. 8 ounces (oz) 8 ounces (oz) grains (gr) X 240 milliliters (ml) 1 coffee cup 1 cup 1 quart 1 quart 1 centimeter 1 glass Convert Celsius to Fahrenheit 1 cup (c) 240 milliliters (ml) 650 milligrams (mg) 1 cup (c) 6 ounces 8 ounces 1 liter 2 pints 10 millimeters 12 ounces Convert Fahrenheit to Celsius subtract 32 then divide by 1.8 multiply by 1.8 then add 32 DRUG DOSE CALCULATION USING MEASUREMENTS / CONVERSIONS Formula: Example 1. Doctor orders 5 mg of morphine to be administered intravenously to a patient with substernal chest pain. You have 1 ml vial that contains 10mg of morphine (10 mg/ml). How many milliliters are you going to have to draw up into a syringe and push IV into your patient’s IV line port? What are given? Desired Dose – 5 mg of morphine IV Concentration – 10 mg Volume on Hand – 1 ml What is asked? Dosage to be given to the patient, in ml Formula: CAREGIVING K to 12 – Technology and Livelihood Education 43
- 45. METRIC CONVERSIONS There are instances when we need to convert a unit of measurement to another when calculating for drug dosages. The metric system of measurements is based on a number of basic measures or units. Take a quick look at the table below. QUANTITY length mass volume time UNIT metre gram litre second SYMBOL m g l s Large and small amounts of these units often have a prefix. Also, some common units of measurement are prefix symbol multiplication factor. PREFIX SYMBOL mega kilo hector deka unit deci centi milli micro m k h da g, m, l, or s d c m mcg or µ MULTIPLICATION FACTOR 1,000,000 1,000 100 10 1 .1 0.01 0.001 0.000001 For conversion of one metric unit to another will require us to move the decimal place to the left or to the right. To know how many decimal places to move, follow these steps: 1. Write the metric scale. 2. Find out what the two units in the problem are. 3. Count the number of units from the given one to the desired one. Example 1. Convert .1 decigrams to micrograms The decimal place is moved 3 places to the right using mg -- kg -- hg -- dag -- g -- dg -- cg -- mg -- mcg Therefore, 0.1 dg = 1000 mg CAREGIVING K to 12 – Technology and Livelihood Education 44
- 46. Example 2. Convert 250 millilitres to litres The decimal place is moved 3 places to the left ml -- kl -- hl -- dal -- l -- dl -- cl -- ml -- mcl Therefore, 250 ml = 0.250 l Still a lot of health professionals are having difficulty with drug calculations. Is it because they don’t like Math? Before administration, some drugs require some sort of calculation and some of which requires simple to complex conversion. Don’t make life complicated. Look for the best alternative measurement system which could make all the difference and make things easy for you. CALCULATING ORAL DRUG DOSAGES A Glance at Oral Drugs These substances which are administered orally can be in the form of tablet, capsule, or liquid. Oral drugs are mostly available in a limited number of strengths or concentrations. It is, therefore, very important that you have the skill to calculate prescribed dosages for different drug forms. Interpreting Oral Drug Labels For you to administer an oral drug safely, you must make sure that it is the correct drug with the right dosage. Therefore, it is very vital that you would be able to read and interpret oral drug labels. 1. Identify the Drug Name Know the difference between the brand name and generic name. Verify the generic name first. If the drug has two names, the generic name usually appears in lowercase print and sometimes in parentheses. The generic names are the active ingredients in the medicine. Whether the brand name of generic name is used, be very careful when reading the label to avoid errors. Important: Pay attention to the active, or generic name, since too much of an active ingredient can be harmful if you take more than one product with the same active ingredient without knowing it. 2. See the Dosage Strength CAREGIVING K to 12 – Technology and Livelihood Education 45
- 47. After identifying the drug name, look for the dose strength on the label. Important: Pay close attention to the labels of two same drugs which may look exactly alike aside from that of the dose strength. One of them might indicate 125mg and the other one is 250mg. Be keen in checking the dose strength because it forms part of the dosage calculation. 3. Check the Expiration Date You also have to check the expiry date. It is a vital information which is sometimes overlooked. Tip: For best shelf life, store all medications in a cool, dry place. Calculating Drug Dosages Most of the time, you will use ratios in proportion to compute for drug dosages. At this point in time, you should already be familiar in dealing with the equation using ratios in proportions. Rules in Calculating Drug Dosages Remember the rules to accurately calculate drug dosages and eliminate errors as well. 1. Use the correct units of measure to avoid errors in calculating doses. 2. Be careful in placing decimal and zero. 3. Double-check strange answers. Steps in Calculating Drug Dosages Using Ratios in Proportion 1. Prepare the equation by using ratios in proportion. CAREGIVING K to 12 – Technology and Livelihood Education 46
- 48. 2. Start with the solution by considering that the product of the means is equivalent to the product of the extremes. Means being the middle items and extremes being the external items. 3. Solve for the value of X. 4. Double check your work by completing the equation using ratios in proportion. Example 1: How many ml of a medicine are in two bottles if one bottle has 60 ml? Step 1. Prepare the equation by using ratios in proportion. 1 bottle : 60 ml :: 2 bottles : X Step 2: Start with the solution by considering that the product of the means is equivalent to the product of the extremes. Means being the inner items and extremes being the external items. 60 ml x 2 bottles = 1 bottle x X Step 3: Solve for the value of X. In the given problem, the value of X refers to 60 ml x 2 bottles = 1 bottle x X 120 ml = 1 X or X = 120 ml Therefore, the 2 bottles contain 20ml of medicine. Step 4: Double check your work by completing the equation using ratios in proportion. 1 bottle : 60 ml :: 2 bottles : 120 ml Example 2: How many mg of a drug are in 4 capsules if 3 capsules contain 1500 mg? Equation: 3 capsules : 1500 mg :: 4 capsules : X Solution: 1500 mg x 4 capsules = 3 capsules x X 6000 mg = 3 X X = 6000 mg / 3 X = 2000 mg Complete Equation: 3 capsules : 1500 mg :: 4 capsules : 2000 mg CAREGIVING K to 12 – Technology and Livelihood Education 47
- 49. Always read the drug labels carefully. Identify the difference between the brand and generic name. Paying close attention to the dosage strength is very vital in calculating the dosage for oral drugs Expiry date is an important information as well in interpreting the drug labels. A GLANCE AT RECTAL DRUGS Rectal drugs are medications prepared specifically for insertion into the rectum. They could be in the form of cream, lotion, or ointment. Administering the drugs rectally is best for patients who cannot take drugs orally. Rectal drugs include enemas and suppositories. Interpret Rectal Drug Labels As we administer medicines to our patients, it is vital to read drug labels at all times. Paying close attention to the drug labels helps us calculate the dosage we will give to our patients. - identify the drug name / generic name check for the dose strength expiration date Types of Rectal Drugs 1. Enema - the injection of liquid into the rectum through the anus for cleansing, for stimulating evacuation of the bowels, or for other therapeutic or diagnostic purposes 2. Suppository - a small piece of medicated substance, usually conical, ovoid, or cylindrical, introduced into a body passage, as the rectum or vagina, where body heat causes it to melt Dosage Calculation for Rectal Drugs Suppository is considered to be the most used form of rectal medicine. By calculating the number of suppositories we give to the patient, we will use the ratios in proportion method. Example 1: Calculate for a suppository dosage supposing a patient needs 250 mg of a suppository and the package label says 125 mg. Using ratios in proportion, we will find the value of X (number of suppository needed) and our equation will be written as follows: 1 suppository : 125 mg :: X ( # of suppository needed) : 250 mg CAREGIVING K to 12 – Technology and Livelihood Education 48
- 50. Let us compute… 125 mg x X ( # of suppository needed ) = 1 suppository x 250 mg 125 mg ( X ) = 1 x 250 mg 125 mg ( X ) = 250 mg X = 250 mg / 125 mg X = 2 suppositories To sum it up, we will have to give 2 suppositories to the patient since 2 suppositories equal 250 mg. Example 2: A doctor asked the nurse to give the patient 20 mg of suppository. The suppositories on the shelf show 10 mg each. How many pieces of suppository should you give to the patient? This is how to solve it using ratios in proportion method. Let our equation be read as: 1 suppository : 10 mg :: X ( # of suppository needed ) : 20 mg Let us compute for X which is the number of suppository needed 10 mg x X = 1 suppository x 20 mg 10 mg ( X ) = 1 x 20 mg X = 20 mg / 10 mg X = 2 suppositories Since the patient needs 20 mg of suppository, we will give him / her 2 suppositories with 10 mg each. To check, 2 suppositories multiplied to 10 mg will give us 20 mg of suppository. Make sure to read or interpret the labels carefully. The two types of rectal drugs are enema and suppository. Suppository is the most commonly used rectal drug. Using ratios in proportion method is the best way to calculate the dosage for rectal drugs. CAREGIVING K to 12 – Technology and Livelihood Education 49
- 51. A GLANCE AT CALCULATING PEDIATRIC DOSAGES FOR ORAL DRUGS In calculating drug dosages for pediatric patients, we have to bear in mind that children are completely different from adults. An inaccurate dosage is more likely to harm a child than that of an adult. Administering Pediatric Oral Drugs Infants and young children who can hardly take tablets or capsules are given oral drugs in the form of liquid. In some cases wherein liquid medicines are not available, you may crush a tablet and mix it with a little amount of liquid. If the medication is mixed in a large amount of liquid (full bottle), the child will not get the entire dose if he is unable to finish the liquid. Important: Do not mix crushed tablet with breast milk and infant formula because it may lead to feeding refusal in the future. Devices Used in Giving Out Pediatric Oral Drugs cup - can be used by bigger children dropper - usually used for infants syringe - usually used for infants hollow-handle spoon - usually used for toddlers Safety Key Points in Giving Medications to Children Check the child's mouth to ensure that he has swallowed the oral drugs. Carefully mix oral drugs that come in suspension form. Tips in Calculating Safe Pediatric Drug Dosages Use a calculator in solving equations. Ask advice from a formulary or consult a drug handbook to verify a drug dose. If still in doubt, call a pharmacist. Keep a record of your patient's weight in kilograms so you do not have to estimate it or weigh him all the time. Methods Used in Calculating Pediatric Doses 1. Body Surface Area (BSA) Method - also called the dosage-per-kilogram-of-body-weight method; considered to be the most accurate and safest method in calculating pediatric doses 2. Clark's Rule - uses child's weight to calculate approximate dosage 3. Young's Rule - normally used for children who are two years of age or more 4. Fried's Rule - normally used for children who are two years of age or less CAREGIVING K to 12 – Technology and Livelihood Education 50
- 52. Body Surface Area (BSA) Method We will have to use the nomogram to determine a child's BSA then setup an equation using the formula. Here is the formula: Average adult dose ( child's BSA in m² ÷ average adult BSA ) = Child's dose in mg Note: Average adult BSA = 1.73 m² CAREGIVING K to 12 – Technology and Livelihood Education 51
- 53. Sample: We have to compute for a child's dose who weighs 40 lbs. and 36" tall. What is the safe drug dose if the average adult dose is 500mg. Using the nomogram, the child's BSA is 0.72 m². Computation Based on BSA Method 500mg ( 0.72 m² ÷ 1.73 m² ) = child's dose in mg 500mg ( .42 ) = child's dose 500mg ( .42 ) = 210mg child's dose = 210mg Clark’s Rule Clark's Rule uses Weight in lbs., NEVER in kg. Here is the formula: Adult dose (child's weight ÷ 150) = Approximate child's dose Simple Sample: We have to compute for a 2-year old child's dose who weighs 28 lbs. wherein the adult dose is 500mg. Computation Based on Clark's Rule 500mg ( 28 ÷ 150 ) = approximate child's dose 500mg ( .19 ) = approximate child's dose 500mg ( .19 ) = 95mg approximate child's dose = 95mg Young’s Rule for Children from 1 to 12 years old Young’s Rule uses age in years. (which makes it easier to remember, the word young refers to age) Here is the formula: Adult dose [ child's age in year ÷ ( child's age in year +12 ) ] = Approximate child's dose Same Simple Sample: We have to compute for a 2-year old child's dose who weighs 28 lbs. Wherein the adult dose is 500mg. Note that the weight has no bearing using Young's Rule. CAREGIVING K to 12 – Technology and Livelihood Education 52
- 54. Computation Based on Young's Rule 500mg [ 2 ÷ ( 2 + 12 ) ] = approximate child's dose 500mg ( 2 ÷ 14 ) = approximate child's dose 500mg ( .14 ) = approximate child's dose 500mg ( .14 ) = 70 mg Approximate child's dose = 70 mg Fried’s Rule for Infants and Children up to 2 years Fried's Rule uses age in months. Here is the formula: Adult dose ( child's age in months ÷ 150 ) = Approximate child's dose Still the Same Simple Sample: We have to compute for a 2-year old child's dose who weighs 28 lbs. wherein the adult dose is 500mg. Note that the weight has no bearing using Fried's Rule. Computation Based on Fried's Rule 500mg [ ( 2 x 12 months ) ÷ 150 ] = approximate child's dose 500mg ( 24 ÷ 150 ) = approximate child's dose 500mg ( .16 ) = approximate child's dose 500mg ( .16 ) = 80 mg Approximate child's dose = 80 mg Important: Every medical caregiver, including the medical assistant needs to be familiar with these rules. Children need special medication and require special care because of their size, metabolism, and other factors. Choose the best device for administering pediatric oral drugs Be familiar with all the methods used in calculating pediatric doses - Body Surface Area (BSA) Method - Clark's Rule - Young's Rule - Fried's Rule CAREGIVING K to 12 – Technology and Livelihood Education 53
- 55. How Much Have You Learned? Self-Check 1.1 A I. Directions: Match the items in Column A with their descriptions in Column B. Write the letter of your choice in the space provided for each item. Column A Column B _____ 1. dosage calculations a. medication prepared for insertion into the rectum _____ 2. ratio b. a part of a whole _____ 3. rectal drugs c. comparison of two numbers _____ 4. Body Surface Area (BSA) Method d. used in writing fractions _____ 5. proportion e. an equation stating that two ratios or two fractions are equal _____ 6. nomogram f. missing or unknown value _____ 7. fraction g. the middle numbers in two ratios _____ 8. x in an equation h. dosage-per-kilogram-of-body weight _____ 9. colon i. used to determine a child's BSA _____ 10. slash j. used in writing ratios k. conversion of the formulation, ingredients and components of drugs II. Directions: Convert the following as stated. Write your answer on the space provided for each item. 1. 15 ml = _____ tsps. 2. 5 kgs = _____ lbs. 3. 36 °C = _____ °F 4. 2.5 ft = _____ in 5. 60 cc = _____ ml CAREGIVING K to 12 – Technology and Livelihood Education 54
- 56. III. Directions: Write an O, if the statement is true and an X, if the statement is false. 1. _____ Oral drugs can be in tablet, capsule, or liquid form. 2. _____ Reading carefully the drug labels is useless in administering medicines to the patients. 3. _____ Medicines of the same brand name and generic name do not necessarily have the same dosage strength. 4. _____ The unknown value in calculation is usually represented by a " ___ ". 5. _____ The adult's average Body Surface Area (BSA) is 1.68 m². 6. _____ An inaccurate dosage can more likely harm an adult than a child. 7. _____ Body Surface Area (BSA) Method is considered to be the most accurate and safest method in calculating pedriatic dosages. 8. _____ A suppository is the most common form of rectal drugs. 9. _____ Administering the drugs rectally is also best for patients who are unable to take drugs orally. 10. ____ Generic name in a drug label is usually written in uppercase and in parentheses. Self-Check 1.1 B I. Directions: Encircle the letter of the best answer. 1. Gwyneth weighs 15 kg and scheduled to receive .5 ml / kg of her medicine. How much ml should the patient receive? a. 7.5 ml b. 75 ml c. 86.67 ml d. 7 ml 2. Determine the weight of your patient in kilograms who weighs105 lbs. a. 47.2 kg b. 47.7 kg c. 42.7 kg d. 42.2 kg 3. How many milligrams of a medicine are in 5 capsules if 3 contain 15 mg? a. 10 mg b. 15 mg c. 20 mg d. 25 mg 4. 3,600 ml / day is equal to ___________ a. 2.5 ml / min b. 2.2 ml / min CAREGIVING K to 12 – Technology and Livelihood Education 55
- 57. c. 2.0 ml / min d. 1.7 ml / min 5. Marion was ordered by the doctor to take 500 mg of a paracetamol every 6 hours. Each paracetamol contains 250 mg. How many paracetamol will be taken in a day? a. 8 pcs b. 6 pcs c. 4 pcs d. 2 pcs II. Directions: List down what is/are being asked in each item. Enumeration: 1-4. Enumerate the four methods in calculating drug dosages for pediatric patients. 5-6. Give the 2 types of rectal drugs. 7-10 What devices can be used in administering oral drugs to children? Refer to the Answer Key. What is your score? How Do You Apply What You Have Learned? Show that you learned something by doing this activity ACTIVITY 1.1 Directions: Work with your group mates and come up with a good script covering the topics in ratios, proportions, fractions, conversions and dosage calculations. Submit a hardcopy of your script to your teacher, and present your role play to the class making sure that your computations are 100% accurate. CAREGIVING K to 12 – Technology and Livelihood Education 56
- 58. ACTIVITY 1.2 Directions: Prepare yourself for a gallery walk. You will notice that your classroom setup looks like a gallery of dosage calculations. Five big cards (where sample computations on dosages are written) are displayed in the different parts of the room. Imagine these cards as exhibits. You will be divided into five groups, but it does not necessarily mean that you will work as a team. Your groupings will be used to facilitate this activity making sure that you do the gallery walk properly. You can, however, share your work with your groupmates. Do the following steps in performing the gallery walk: 1. Together with your groupmates, physically roam around the room starting from the first card to the fifth card. Make sure that you have your notebook and ballpen with you. 2. Every time you stop by a card, read and study the computation given. Check whether or not the given answer is correct. If it is not right, compute for the correct answer. You may share your work with any of your groupmates or you may ask questions from them. If you believe the answers written on the cards are correct, then show the solutions to prove that they are indeed correct. 3. Wait for your teacher’s instructions or announcement on when your group should move to the next card or exhibit. Never go to the next card unless your teacher tells you so. 4. As soon as you have studied all the cards, you may go back to your seat and wait for the next instructions from your teacher. Congratulations! You did a great job! Rest and relax a while then move on to the next lesson. Good luck! REFERENCES LO1 th Elana D. Zucker. The Caregiver’s Resourcebook 6 Edition Pearson Education South Asia PTE. LTD. 2009. Workbook for International Nursing Seminars 2007 Kaplan Inc. rd Karen Gahan Tarnow. Dosage Calculations Made Incredibly Easy! 3 Edition Lippincott Williams and Wilkins 2005 Mildred O. Hogstel and Linda Cox Curry Practical Guide to Health Assessment Through the Life Span rd 3 Edition F. A. Davs Company 2001 Assessment Technologies Institute Fundamentals of Nursing Practice 2004 Online Resources: http://www.mathleague.com http://www.icoachmath.com http://www.mathsisfun.com http://mathcentral.uregina.ca CAREGIVING K to 12 – Technology and Livelihood Education 57
- 60. LESSON 3 Practice Occupational Health and Safety Procedures LEARNING OUTCOMES: At the end of this Lesson you are expected to do the following: LO 1. Identify hazards and risks LO 2. Evaluate and control hazards and risks CAREGIVING K to 12 – Technology and Livelihood Education 59
- 61. Definition of Terms Assess – to determine the value or extent of something Contaminate – to make unclean through contact Crucial – significant to the solution of a problem Discard – to put away or throw away Double-bagged– a technique of putting contaminated items/things in a plastic bag and then placing the closed bag into another plastic bag Fuse – a device used for protecting an electric circuit Potential – capable of growth, development and coming into being Respirator – an instrument that supplies oxygen for breathing CAREGIVING K to 12 – Technology and Livelihood Education 60
- 62. LEARNING OUTCOME 1 Identify Hazards and Risks PERFORMANCE STANDARDS Workplace hazards and risks are identified. Hazards, risks and their corresponding indicators are identified in the workplace. Effects of hazards are determined. Materials LCD projector or OHP Computer desktop or laptop DVD player Video clips CAREGIVING K to 12 – Technology and Livelihood Education 61
- 63. What Do You Already Know? Let us determine how much you already know about different hazards and risks. Take this test. Pretest LO 1 I. Directions: Write True, if the statement is correct, or False, if it is incorrect. 1. __________Too much bending and reaching is an example of physical hazard. 2. __________Psychological hazards happen when a worker’s environment becomes stressful. 3. __________Observing the nursing home environment is one of the ways in determining health problems in the workplace. 4. __________Accidents happen because people are not mindful of their environment. 5. __________Too much lifting of heavy loads does not result in injury. II. Directions: Determine the type of hazard a worker is exposed to based on the description given in each item. Unscramble the letter by placing the correct letter sequence in the shaded boxes to come up with the correct answer for each number. 1. 2. 3. 4. 5. repetitive and forceful movements R O G I M C E N spillages of toxic materials H A L E C M C I bacteria and viruses L O B G I I O C twisted extension cords H I Y S C A P L stress from night shifts P C O S Y H O L O CAREGIVING K to 12 – Technology and Livelihood Education L A A G I C L 62
- 64. What Do You Need To Know? Read the Information Sheet 1.1 very well then find out how much you can remember and how much you learned by doing Self-check 1.1. Information Sheet 1.1 HAZARDS AND RISKS Hazard is anything that may cause harm to an individual, such as chemicals, electricity, open drawers, and inadequate ventilation. Risk is the possibility that somebody could be harmed by these and other hazards and the indication of how serious the harm can be. Occupational Health and Safety Occupational Health and Safety is the campaign and maintenance of the well-being of workers in every occupation. It talks about providing a safe working environment to achieve an injury-free workplace and a healthy atmosphere that protects every worker against illness. As an effect, it may also protect co-workers, family members, clients, and other members of the community who are affected by the workplace environment. Types of Hazards Physical hazards are the most normal occurrences in workplaces. They are usually easy to detect, however, very often are neglected because people are too accustomed to them. Another reason may be due to lack of knowledge or people do not see situations as hazards. Examples of physical hazards that a caregiver may be exposed to: Electrical hazards: Even in day care institutions or nursing homes where care should be of utmost concern, improper wiring and frayed cords may still go unnoticed. Misuse of electrical equipment also happens in any type of work environment. Endless loud noise: If one is going to work in a nursing home, frequent noise from patients who are suffering from depression is definitely a hazard. Spills on floors or tripping hazards: There are times when even the caregivers themselves do not mind spills on floors. This, definitely, poses hazard to everyone. Some of the Effects of Physical Hazards Fire Decreased efficiency Annoyance Falls CAREGIVING K to 12 – Technology and Livelihood Education 63
- 65. Biological hazards come from working with animals, people or infectious materials. This is, therefore, one of the most common hazards that a caregiver faces. If one is working in a day care, hospital, hotel laundry, nursing home, laboratories, he/she may be exposed to biological hazards. Examples of physical hazards that a caregiver may be exposed to: blood or other body fluids fungi bacteria and viruses contaminated wastes Some of the Effects of Biological Hazards infections skin irritations allergy Tuberculosis AIDS Ergonomic hazards occur when a caregiver’s nature of work, body position and working conditions put pressure on his/her body. It is difficult to spot this type of hazard, because caregivers do not immediately notice the effect to their bodies. At first, sore muscles may be experienced. But long term exposure to this type of hazard can cause musculoskeletal problems. Examples of ergonomic hazards that a caregiver may be exposed to: performing tasks that require lifting heavy loads too much bending and reaching standing for long periods of time holding body parts for long period of time awkward movements, especially if they are repetitive repeating the same movements over and over Some of the Effects of Ergonomic Hazards pain in the shoulders back injury too much impact on wrist and hands numbness in some parts of the body muscle cramps Chemical hazards are present when a worker is exposed to any chemical preparation in the workplace in any form (solid, liquid or gas). There may be chemicals which are safe, but some caregivers who are sensitive to solutions may cause skin irritation, illness or breathing problems. CAREGIVING K to 12 – Technology and Livelihood Education 64
- 66. Examples of chemical hazards that a caregiver may be exposed to: liquids like cleaning products disinfecting solutions Effects of Chemical Hazards Lung diseases Difficulty in breathing Allergy Psychological Hazards take place when a caregiver’s work environment becomes stressful or demanding. Examples of psychological hazards that a caregiver may be exposed to: ―Burn out‖, fatigue and on call duty Unreasonable expectations from patients or clients Verbal abuse form dissatisfied clients Unreasonable expectations from supervisors and management. Some of the Effects of Psychological Hazards Depression Anxiety Loss of confidence Loss of concentration at work Deterioration of performance at work Recognizing Hazards and Risks in the Workplace Hazards and risks vary from one workplace to another. Even in day care or nursing homes where work routines may be the same, hazards will differ depending on the type of building the establishment is situated, and the attitudes of caregivers, clients, or employers. The good news is hazards and risks can be prevented! However, before thinking about what control measures are needed, first a caregiver has to know whether there are health and safety problems in his/her workplace. So, how can someone identify the hazards in the workplace? The following are some ways for a caregiver to determine health and safety problems: 1. A caregiver should observe the workplace. 2. A caregiver may examine complaints from his/her co-workers. CAREGIVING K to 12 – Technology and Livelihood Education 65
- 67. 3. A caregiver should check accident records. 4. A caregiver should examine chart on results of inspections done by the employers or private organizations. 5. A caregiver may use checklists and inspect the workplace. 6. A caregiver may study reports or any other vital information about the nursing home. Nursing home and day care institution services are of great value to everyone. As such, owners of these establishments are highly reliant on their staff, particularly the caregivers, for the delivery of safe, efficient and responsive service. It is, therefore, the responsibility of the management to ensure a safe and healthy work environment. Every caregiver, on the other hand, should also take part in determining the hazards and risks in the workplace in the attainment of a conducive organizational climate within the nursing home or day care he/she is working for. How Much Have You Learned? Self-Check 1.1 A Directions: Write True if the statement is correct, or False if it is incorrect. 1. __________Occupational hazards and risks can be prevented. 2. __________Hazard is the possibility that somebody could be harmed by these and other hazards and the indication of how serious the harm can be. 3. __________Performing repeated movements in the workplace are an example of biological hazard. 4. __________Occupational health and safety is the promotion of health and safety of every working man. 5. __________Every caregiver should take part in determining the hazards and risks in the workplace. CAREGIVING K to 12 – Technology and Livelihood Education 66
- 68. Self-Check 1.1 B I. Directions: Match the word in Column A with that of the description in Column B. Write the letter of your choice in the space provided in each item. Column A 1 2 3 4 5 Biological hazard Hazard Risk Occupational health and safety Physical hazard Column B A. B. C. D. It is anything that may cause harm to an individual. The type of hazard that is usually the easiest to spot. It comes from working with infectious materials. The indication of how serious the harm can be. E. The promotion and maintenance of the well-being of workers. Refer to the Answer Key. What is your score? How Do You Apply What You Have Learned? Show that you learned something by doing this activity Activity sheet 1.1 A Directions: For you to be able to understand more the concepts about hazards and risks, do this interactive online activity by following the link below: http://www.safework.sa.gov.au/contentPages/EducationAndTraining/ActivitiesAndTests/Hunt TheHazards/hunt.htm Try to identify the hazards in every scene by dragging the given solution situated at the right side of the scene. If in case you will find it difficult to find the hazards, you can ask for help by using the ―indicate hazards‖ button. You will definitely enjoy this as you go through each scene. Also, you will acquire additional knowledge about hazards and risks. So what are you waiting for? Take pleasure in searching for the different hazards that may be seen in the workplace. CAREGIVING K to 12 – Technology and Livelihood Education 67
- 69. Activity sheet 1.1 B Directions: Watch these videos by following the links that follow. Then, answer the questions direct to the point. Write your answers on a sheet of paper. Use additional sheet if necessary. A. http://www.youtube.com/watch?v=UWSPIHGiuFs&feature=related 1. What is the video all about? 2. Have you seen any hazard or risk in the video? What are these? 3. Do you believe the caregiver handled her task well as seen in the video? Defend your answer. B. http://www.youtube.com/watch?v=nvldyOyv--0 1. What does the video tell about the potential threats of chemotherapy drugs to health care workers? 2. What will be the role of a caregiver or a health care worker in this type of possible hazard? How Do You Extend Your Learning? Find out by accomplishing the Assignment sheet below Assignment sheet 1.1 Directions: Walk around your house and list down 10 possible hazards and risks that you may find. Explain why these things that you have identified or listed pose danger to the members of your family. Follow the format given. Possible hazard/risk CAREGIVING K to 12 – Technology and Livelihood Education Reason/s why it poses danger to me and my family 68
- 70. LEARNING OUTCOME 2 Evaluate and control hazards and risks PERFORMANCE STANDARDS . 1. OHS procedures for controlling hazards and risk are strictly followed. 2. Procedures in dealing with workplace accidents, fire and emergencies are followed in accordance with the organization’s OHS policies. 3. Personal protective equipment (PPE) is correctly used in accordance with organization’s OHS procedures and practices. Procedures in providing appropriate assistance in the event of workplace emergencies are identified in line with the established organizational protocol 4. Procedures in providing appropriate assistance in the event of workplace emergencies are identified in line with the established organizational protocol. Materials LCD projector or OHP Computer desktop or laptop DVD player PPE (Personal Protective Equipment) - Surgical apron - Surgical gown - Medical mask - Gloves Paper towel CAREGIVING K to 12 – Technology and Livelihood Education 69
- 71. What Do You Already Know? Let us determine how much you already know about evaluating and controlling hazards and risks. Take this test. Pretest LO 2 I. Directions: Write True if the statement is correct, or False if it is incorrect. 1. __________Human wastes should be discarded in the street. 2. __________Every time a risk assessment is done, details should be recorded. 3. __________Engineering control is the best control measure for hazards and risks. 4. __________Appliances may be turned on at the same time to save time and effort on the part of the caregiver. 5. __________A wet mask is not considered contaminated. II. Directions: Match the picture in Column A with that of the description in Column B. Write the letter of your choice in the space provided in each item. Column A Column B 1 A. It protects a caregiver’s clothing from contamination. 2 B. It is used to protect the hands from contamination. 3 C. This may be used when gown is not available. 4 D. It is used to avoid droplets of saliva from reaching other people. CAREGIVING K to 12 – Technology and Livelihood Education 70
- 72. What Do You Need To Know? Read the Information Sheet 2.1 very well then find out how much you can remember and how much you learned by doing Self-check 2.1. Information Sheet 2.1 EVALUATING AND CONTROLLING HAZARDS AND RISKS Once you recognize a hazard in the workplace, then you can proceed with risk assessment, that is focusing on the risks that really matter in the workplace. Evaluating hazards and risks is the process of determining the level of risk created by the hazard and the likelihood of injury or illness occurring. Most of the time, simple measures can be done, with no trouble, to control risks. An example of this is making sure that cabinet drawers are kept closed so that people do not trip. Needless to say, the concern for control increases as the recognized level of risk increases. A person identifying the risk of harm or injury from a hazard in a nursing home or day care should consider these questions: how likely it is that a hazard will cause harm; how serious that harm is likely to be; how often (and how many) workers are exposed. It is a must that you have a record of every risk assessment done. If a certain accident or damage happens again, it might be that you will trace back the original records to check if the assessment overlooked a potential hazard. Assessing or evaluating the hazards and risks is crucial in making a decision on the mode of control to be used. CONTROL HAZARDS AND RISKS It is possible that workplace hazards can be controlled by a variety of methods. Of course, the very reason why hazards should be controlled is to prevent workers from being exposed to occupational hazards. Hazard control comes in different processes. But one method may be more effective than the others. When we speak of controlling hazards and risks, it means settling on the measure that will solve the trouble most successfully. There are five major categories of control measures: elimination, substitution, engineering controls, administrative controls and personal protective equipment. 1. Eliminating a hazard means removing it completely. 2. Substitution is replacing or substituting a hazardous agent or work process with a less dangerous one. CAREGIVING K to 12 – Technology and Livelihood Education 71
- 73. 3. An engineering control may mean changing a piece of machinery (for example, using proper machine guards) or a work process to reduce exposure to a hazard. 4. An administrative control may mean working a limited number of hours in a hazardous area is an example of an administrative control (for example, job rotation) 5. Personal Protective Equipment includes ear and eye protection, respirators and protective clothing. Obviously, the best method of controlling hazards and risks is through elimination. That is to take away or to get rid of the hazard. However, more often than not, this is not possible. So, employers make use of any of the remaining control measures. The general rule is that the use of personal protective equipment (PPE) should be the last alternative in controlling hazards and risks in a workplace. Although it is said that the best method of control measure is through elimination of hazards, a very good technique for a safe and healthy environment is through the utilization of a combination of methods. PRACTICAL WAYS TO PREVENT HAZARDS AND RISKS A Closer Look at Electricity As common sense dictates, you have to ensure that all electrical equipment you use is in good condition. Check electrical cords and make sure they are not frayed. Your hands should be dry before attempting to use any electrical equipment. Do not attempt to change fuses unless you know what you are doing. Do not turn on all appliances at the same time just because you want to save time. Use of Personal Protective Equipment Caregivers should religiously abide by the following to prevent biological hazards from happening: Wear gown that is long enough to cover your clothing. Because the outside of the gown is considered contaminated, this should not be touched when it is removed. A gown that is wet is, of course, considered contaminated also. A caregiver should wear a clean gown every client care. In case the gown is not available, apron should be worn to mask clothing during client contact. Masks should fit comfortably over the nose and mouth. The same with a gown or apron, a wet mask is considered contaminated. The front of the mask is also contaminated. Masks should not be worn around the neck. For each client contact, a clean mask should be used. Gloves should be used when issue on contamination is present. Also, when a caregiver has open wound on the hands, it is a must that he/she use gloves. The outside of the gloves should not be touched when removed as this is considered contaminated. CAREGIVING K to 12 – Technology and Livelihood Education 72