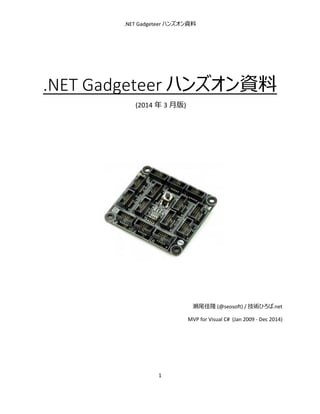
.NET Gadgeteer のハンズオン資料 (2014年3月版)
•
3 j'aime•1,759 vues

.NET Gadgeteer のハンズオン資料 (2014年3月15日(土) 開催の組み込み勉強会で使用)

Recommandé
Contenu connexe
Similaire à .NET Gadgeteer のハンズオン資料 (2014年3月版)
Similaire à .NET Gadgeteer のハンズオン資料 (2014年3月版) (20)
Plus de Yoshitaka Seo
Plus de Yoshitaka Seo (20)
Dernier
Dernier (8)
.NET Gadgeteer のハンズオン資料 (2014年3月版)
- 1. .NET Gadgeteer ハンズオン資料 .NET Gadgeteer ハンズオン資料 (2014 年 3 月版) 瀬尾佳隆 (@seosoft) / 技術ひろば.net MVP for Visual C# (Jan 2009 - Dec 2014) 1
- 2. .NET Gadgeteer ハンズオン資料 目次 1 .NET Gadgeteer 開発のリファレンス......................................................................................................... 4 1.1 1.2 2 モジュールのカタログ ......................................................................................................................... 4 各モジュールのリファレンス ................................................................................................................ 4 開発の基本的な手順 ............................................................................................................................ 5 2.1 プロジェクトの作成方法 ................................................................................................................... 5 2.2 基本的な操作方法 ........................................................................................................................ 7 2.2.1 2.2.2 結線方法................................................................................................................................ 8 2.2.3 USB クライアントモジュールの接続 .......................................................................................... 10 2.2.4 3 モジュールの配置 ..................................................................................................................... 7 初期化コード ......................................................................................................................... 11 .NET Gadgeteer プログラミングの第一歩 ............................................................................................... 12 3.1 3.2 4 ハンズオン:環境構築の成功を確認する ..................................................................................... 12 ハンズオン:メインボード上の LED を操作する ............................................................................... 14 組み込みの基本 ~ 定期的に処理を繰り返す..................................................................................... 16 4.1 4.2 繰り返しの方法 4 種類 ................................................................................................................. 17 4.3 ハンズオン:タイマーでポーリング .................................................................................................... 18 4.4 5 組み込みアプリケーションの基本的な処理の流れ .......................................................................... 16 ハンズオン:スレッドでポーリング .................................................................................................... 21 センサーモジュールからのデータ取得と出力方法の検討 ........................................................................ 24 5.1 センサーモジュールからのデータ取得............................................................................................... 24 5.2 ハンズオン:ジョイスティックの位置情報を取得する........................................................................ 24 2
- 3. .NET Gadgeteer ハンズオン資料 5.3 5.4 ハンズオン:取得データをよりわかりやすく視覚化 .......................................................................... 33 5.5 6 ハンズオン:照度センサーの利用 .................................................................................................. 30 ハンズオン:取得データをキャラクターディスプレイに出力................................................................ 37 カメラと液晶ディスプレイの利用 ............................................................................................................. 41 6.1 6.2 7 ハンズオン:カメラモジュールと液晶ディスプレイの利用(簡単版) ............................................... 41 ハンズオン:カメラモジュールと液晶ディスプレイの利用(高速版) ............................................... 45 ネットワークに接続する.......................................................................................................................... 49 7.1 8 ハンズオン:ウェザーステーション .................................................................................................... 49 最後に ................................................................................................................................................. 56 3
- 4. .NET Gadgeteer ハンズオン資料 1 .NET GADGETEER 開発のリファレンス 1.1 モジュールのカタログ .NET Gadgeteer のモジュールは以下のページに一覧があります。 https://www.ghielectronics.com/catalog/category/275 1.2 各モジュールのリファレンス 各モジュールのリファレンス(モジュールの機能やコード例)は以下のページからリンクされています。 https://www.ghielectronics.com/docs ただし ABC 順に並んでいるので、モジュールの名前を覚えるまでは見つけづらいかもしれません。その場合は、各 モジュールの詳細ページから遷移することもできます。 4
- 5. .NET Gadgeteer ハンズオン資料 2 開発の基本的な手順 この章の目的:この章では .NET GADGETEER プログラミングをする上での前提知識を理解します。 2.1 プロジェクトの作成方法 1. プロジェクト新規作成 Visual Studio 2012 を起動して ”新しいプロジェクト” ダイアログで [言語]-[Gadgeteer]-[.NET Gadgeteer Application] を選択します。 2. メインボードの選択 これから開発に使用するメインボードを選択します。 5
- 6. .NET Gadgeteer ハンズオン資料 3. デザイン画面にメインボードとコメントが表示されればプロジェクト作成は完了です。 メインボードの選択を間違えた場合、またはプロジェクト作成後にメインボードを変更したい場合は、デザイ ン画面のメインボードを削除して、ツールボックスから新しいボードをデザイン画面にドロップします。 6
- 7. .NET Gadgeteer ハンズオン資料 2.2 基本的な操作方法 2.2.1 モジュールの配置 プログラムでモジュールを使うには、そのモジュールをツールボックスからデザイン画面にドロップします。Visual Studio の一般的な操作と同じです。 7
- 8. .NET Gadgeteer ハンズオン資料 2.2.2 結線方法 画面に配置したメインボードとモジュールとを結線するにはデザイン画面上で右クリックします。[Connect All Modules] を選択すると、自動的に全モジュールを結線してくれます。 8
- 10. .NET Gadgeteer ハンズオン資料 2.2.3 USB クライアントモジュールの接続 ボードにもよりますが、メインボードを PC と接続するには USB クライアントモジュールが必要です。 USB クライアントが必要なメインモジュールの例 FEZ Spider, FEZ Hydra, FEZ Cerberus など USB クライアントが不要なメインモジュールの例 FEZ Cerbuino NET, FEZ Cobra II など USB クライアントが不要なメインモジュールは USB mini コネクタを持っているのですぐに分かります。 10
- 11. .NET Gadgeteer ハンズオン資料 USB クライアントモジュールはデザイン画面には配置されません。実機ではソケットタイプ “D” のソケットに接続し てください。例えば Spider の場合はソケット 1、Cerberus の場合はソケット 8 がタイプ D のソケットです。各ソケッ トにはソケットタイプが印字されているので、実物で確認してください。 2.2.4 初期化コード モジュールを配置して結線することで、自動的にハードウェアの初期化コードが生成されています。普通は開発 者が初期化コードを記述したり変更したりする必要はありません。 初期化コードは “Program.generated.cs” に記述されています。興味がある方は一度覗いてみるといいかもしれ ません。 11
- 12. .NET Gadgeteer ハンズオン資料 3 .NET GADGETEER プログラミングの第一歩 3.1 ハンズオン:環境構築の成功を確認する このプログラムの目的:環境構築とデバイスドライバーのインストールとが成功したかを確認します。 このハンズオンでは以下のボードとモジュールを使用します。 任意のメインボード USB Client モジュール (メインボードによっては不要) ・・・これ以降のハンズオンでは USB Client については 明記しません。 “Hello,World” に相当するプログラムは、組み込み開発では “L チカ” (=LED チカチカ) です。 全てのメインボードにはデバッグ用の LED が乗っています。開発環境構築とデバイスドライバーのインストールとが 成功したことを確認するために L チカしてみます。 1. 任意のメインボードで新しいプロジェクトを新規作成します。プロジェクト名はここでは “DebugLedTest” とし ます。 2. “Program.cs” を開きます。 12
- 13. .NET Gadgeteer ハンズオン資料 3. 以下のコードを記述します。 using Microsoft.SPOT; using GT = Gadgeteer; namespace DebugLedTest { public partial class Program { // This method is run when the mainboard is powered up or reset. void ProgramStarted() { var timer = new GT.Timer(1000); timer.Tick += timer_Tick; timer.Start(); // Use Debug.Print to show messages in Visual Studio's "Output" window during debugging. Debug.Print("Program Started"); } void timer_Tick(GT.Timer timer) { PulseDebugLED(); } } } 4. PC とボード(USB クライアントモジュール)とを USB ケーブルで接続します。 5. Visual Studio で F5 キーを押す、または [開始] ボタンを押します。 6. 1000 ミリ秒 (= 1 秒) ごとにメインボード上の LED が点滅します。また Visual Studio の [出力] タブにメッセー ジが表示されます。 13
- 14. .NET Gadgeteer ハンズオン資料 3.2 ハンズオン:メインボード上の LED を操作する このプログラムの目的:メインボード上の LED はデバッグ用途以外にも利用できることを理解します。 このハンズオンでは以下のボードとモジュールを使用します。 任意のメインボード メインボード上の LED はデバッグ用途の DebugPulseLED メソッド以外にも利用できます。例えばハードウェアの 初期化終了や不定期な処理の実行を確認する用途などに利用できます。 1. 任意のメインボードで新しいプロジェクトを新規作成します。プロジェクト名はここでは “BoardLedDemo” とし ます。 2. “Program.cs” を開いて以下のコードを記述します。 14
- 15. .NET Gadgeteer ハンズオン資料 using Microsoft.SPOT; using GT = Gadgeteer; using GTM = Gadgeteer.Modules; namespace BoardLedDemo { public partial class Program { // This method is run when the mainboard is powered up or reset. void ProgramStarted() { var timer = new GT.Timer(1000); timer.Tick += timer_Tick; timer.Start(); // Use Debug.Print to show messages in Visual Studio's "Output" window during debugging. Debug.Print("Program Started"); } private bool _isLightOn = false; void timer_Tick(GT.Timer timer) { _isLightOn = !_isLightOn; Mainboard.SetDebugLED(_isLightOn); } } } 15
- 16. .NET Gadgeteer ハンズオン資料 4 組み込みの基本 ~ 定期的に処理を繰り返す 4.1 組み込みアプリケーションの基本的な処理の流れ 組み込みでは、以下の順番で処理を繰り返すアプリケーションを作ることが多いです。 1. センサーモジュール(入力モジュール)からデータを取得する 2. 取得したデータを要求に合わせた処理をする 3. 処理結果に応じて出力モジュールに出力する 4. 1~3 を繰り返す システムによっては、複数のセンサーモジュールを組み合わせたり複数の出力を行うこともあります。しかし、アプリ ケーションの処理の大きな流れとしては上のようになると考えていいでしょう。 16
- 17. .NET Gadgeteer ハンズオン資料 4.2 繰り返しの方法 4 種類 処理を繰り返して実行するには、きっかけとなる条件が必要です。上記の基本的な処理で出力を行った後は、 センサー値の入力などを始める次のきっかけを待つことになります。 このようなきっかけとなる条件には以下の 4 種類の方法があります。 モジュール自体が定期的にイベントでデータを通知してくる モジュール自体があらかじめ設定した条件に合致した時にイベントでデータを通知してくる タイマーでポーリング データ取得用のスレッドで定期的にループ 上の 1 つ目と 2 つ目はどちらもモジュールが自発的に通知してくるものであり、アプリケーションでは Windows 開 発と同様にイベントハンドラーを定義することで処理することができます。 それに対して 3 つ目の方法と 4 つ目の方法は、アプリケーションが定期的にモジュールに対してデータを問い合 わせる方法です。タイマーを使うとイベントが発行されてくるので Windows 開発の経験があれば直感的で分か りやすい方法です。ただしスレッドを使う方がパフォーマンスやシステムへの負荷の面でメリットが高いことがありま す。 どの方法で処理するかは 入力モジュールによります。モジュールがデータを通知してくる機能を持っている場合 は、イベントハンドラーを定義してそこで実行するといいでしょう。モジュールがデータを返す機能を持っていない場 合は、タイマーかスレッドかでアプリケーションが明示的にポーリングして繰り返し実行を行います。 17
- 18. .NET Gadgeteer ハンズオン資料 4.3 ハンズオン:タイマーでポーリング このプログラムの目的:タイマーで定期的にポーリングする方法を理解します。 このハンズオンではメインボードの他に以下のモジュールを使用します。 LED7R ・・・6 個の LED が円形に等間隔に並び、中央にもう 1 個の LED が置かれたモジュール 最初にタイマーでポーリングして処理を繰り返すアプリケーションを作ってみます。 なお本書ですでに実施した、メインボード上のデバッグ用 LED を点滅させるコードも実際にはタイマーでポーリン グする方法で繰り返し処理を実現していました。 1. Visual Studio で新しいプロジェクトを作成します。プロジェクト名はここでは “LedBlinkTimer” とします。メイ ンボードは本書では Spider を使用します。モジュールは以下のように配置します。 18
- 19. .NET Gadgeteer ハンズオン資料 2. “Program.cs” を開いて、以下のコードを記述します。 using Microsoft.SPOT; using GT = Gadgeteer; namespace LedBlinkTimer { public partial class Program { // This method is run when the mainboard is powered up or reset. void ProgramStarted() { var timer = new GT.Timer(1000); timer.Tick += timer_Tick; timer.Start(); // Use Debug.Print to show messages in Visual Studio's "Output" window during debugging. Debug.Print("Program Started"); } private bool _isLightOn = false; void timer_Tick(GT.Timer timer) { _isLightOn = !_isLightOn; if (_isLightOn) led7r.TurnLightOn(7); else led7r.TurnLightOff(7); } } } 3. デバイスを接続して実行します。LED7R の中央の LED が 1 秒間隔で点滅します。 19
- 20. .NET Gadgeteer ハンズオン資料 タイマーでポーリングする際には以下のコードが定石です。 var timer = new GT.Timer(1000); timer.Tick += timer_Tick; timer.Start(); 20
- 21. .NET Gadgeteer ハンズオン資料 4.4 ハンズオン:スレッドでポーリング このプログラムの目的:専用のスレッドで定期的にポーリングする方法を理解します。 このハンズオンではメインボードの他に以下のモジュールを使用します。一つ前の “タイマーでポーリング” のハンズ オンと同じ構成です。 LED7R タイマーでポーリングする例と同じデバイス構成で、スレッドでループしながら処理を繰り返すアプリケーションを作 ってみます。定型的なコードで “マルチスレッド” を実現できます。 1. Visual Studio で新しいプロジェクトを作成します。プロジェクト名はここでは “LedBlinkThread” とします。メイ ンボードは本書では Spider を使用します。モジュールは以下のように配置します。一つ前の ”タイマーでポー リング” のハンズオンを試した方は、モジュールをつなぎ替える必要はありません。 21
- 22. .NET Gadgeteer ハンズオン資料 2. “Program.cs” を開いて、以下のコードを記述します。 using System.Threading; using Microsoft.SPOT; namespace LedBlinkThread { public partial class Program { // This method is run when the mainboard is powered up or reset. void ProgramStarted() { new Thread(Blink).Start(); // Use Debug.Print to show messages in Visual Studio's "Output" window during debugging. Debug.Print("Program Started"); } private void Blink() { bool isLightOn = false; while (true) { isLightOn = !isLightOn; if (isLightOn) led7r.TurnLightOn(7); else led7r.TurnLightOff(7); Thread.Sleep(1000); } } } } 22
- 23. .NET Gadgeteer ハンズオン資料 3. デバイスを接続して実行します。LED7R の中央の LED が 1 秒間隔で点滅します。 ポーリング用のスレッドは以下のコードが定石です。 new Thread(<メソッド名>).Start(); private void <メソッド名>() { while (true) // 無限ループ { // 処理をここに記述 Thread.Sleep(1000); // 次回の実行までの待ち時間 } } 23
- 24. .NET Gadgeteer ハンズオン資料 5 センサーモジュールからのデータ取得と出力方法の検討 5.1 センサーモジュールからのデータ取得 組み込みの基本的な処理の流れを理解する上で LED 点滅を試してみるのはいい方法です。 ただし現実のシステムでは LED を点滅するだけのものは当然少なく、普通はセンサーデバイスからデータを取得 して、その値によって適切な処理を行うことが多いでしょう。 まずは入力値を自由に操作しやすいジョイスティックからデータを取得してみます。続いてこれも比較的簡単な 照度センサーからセンサー値を取得してみます。 5.2 ハンズオン:ジョイスティックの位置情報を取得する このプログラムの目的:センサーモジュールから値を取得する方法の基本を理解します。 センサーモジュールのからデータを取得する最初の例として、ジョイスティックの位置情報の取得を行ってみます。 ジョイスティックは x 方向, y 方向それぞれの位置情報 -1.0~1.0 を返してきます。2 値の入力値の組み合わせ で LED を点灯する位置を変えてみます。 このハンズオンではメインボードの他に以下のモジュールを使用します。 Joystick LED7R 24
- 25. .NET Gadgeteer ハンズオン資料 1. Visual Studio で新しいプロジェクトを作成します。プロジェクト名はここでは “JoystickLed” とします。メインボ ードは本書では Spider を使用します。モジュールは以下のように配置します。 25
- 26. .NET Gadgeteer ハンズオン資料 2. “Program.cs” を開いて、以下のコードを記述します。 using Microsoft.SPOT; using GT = Gadgeteer; using GTM = Gadgeteer.Modules; namespace JoystickLed { public partial class Program { private const double MinRadius = 0.5; private const double Tan60 = 1.7320508075; // This method is run when the mainboard is powered up or reset. void ProgramStarted() { var timer = new GT.Timer(100); timer.Tick += new GT.Timer.TickEventHandler(timer_Tick); timer.Start(); // Use Debug.Print to show messages in Visual Studio's "Output" window during debugging. Debug.Print("Program Started"); } void timer_Tick(GT.Timer timer) { var pos = joystick.GetPosition(); double x = pos.X; double y = pos.Y; TurnLightOn(x, y); Debug.Print("x=" + x.ToString() + ", y=" + y.ToString()); } 26
- 27. .NET Gadgeteer ハンズオン資料 void TurnLightOn(double x, double y) { if (x * x + y * y < MinRadius * MinRadius) { led7r.TurnLightOn(7, true); } else { if (x == 0) led7r.TurnLightOn(y > 0 ? 1 : 4, true); else if (x > 0 && y >= 0) led7r.TurnLightOn(y / x <= Tan60 ? 2 : 1, else if (x < 0 && y >= 0) led7r.TurnLightOn(y / -x > Tan60 ? 1 : 6, else if (x < 0 && y < 0) led7r.TurnLightOn(y / x <= Tan60 ? 5 : 4, else /* x > 0 && y < 0 */ led7r.TurnLightOn(-y / x > Tan60 ? 4 : 3, } } true); true); true); true); } } 3. デバイスを接続して実行します。ジョイスティックの位置に応じて LED7R モジュールの周囲の LED が点灯しま す。 27
- 28. .NET Gadgeteer ハンズオン資料 ジョイスティックモジュールは GetPosition メソッドで位置情報を返します。x 方向、y 方向とも -1.0~1.0 の値を 返します。ジョイスティックはイベントを発行しないためタイマーでポーリングします。今回は 100 ミリ秒のタイマーに しましたが用途に応じて間隔を調整するといいでしょう。 LED7R モジュールは 12 時の方向の LED が 1 番で、時計回りに 2 番, 3 番, ・・・ と 6 番まで並んでいます。中 央が 7 番 LED です。今回は 2, 3, 5, 6 番 LED を点灯する条件として tan 60 (=ルート 3) が分かればいいだけな ので、毎回三角関数で計算することはせずに tan 60 を定数で持ちます。 ジョイスティックモジュールはボタンの役割も持っています。クリックして確かめてみてください。 ボタンクリックについては JoystickPressed イベントおよび JoystickReleased イベントがありますので、余裕のある 方は ボタンが押された時の処理を追加してみてください。 例えば、ProgramStarted メソッドは以下のように変更してみます。網掛けの部分が追加するコードです。 void ProgramStarted() { joystick.JoystickPressed += joystick_JoystickPressed; joystick.JoystickReleased += joystick_JoystickReleased; var timer = new GT.Timer(100); timer.Tick += new GT.Timer.TickEventHandler(timer_Tick); timer.Start(); // Use Debug.Print to show messages in Visual Studio's "Output" window during debugging. Debug.Print("Program Started"); } 28
- 29. .NET Gadgeteer ハンズオン資料 timer_Tick イベントハンドラーは以下のように変更します。(※TurnLightOn に変更はありません。) void timer_Tick(GT.Timer timer) { if (joystick.IsPressed) return; var pos = joystick.GetPosition(); double x = pos.X; double y = pos.Y; TurnLightOn(x, y); Debug.Print("x=" + x.ToString() + ", y=" + y.ToString()); } 最後にジョイスティックのイベントハンドラーを追加します。 void joystick_JoystickPressed(GTM.GHIElectronics.Joystick sender, GTM.GHIElectronics.Joystick.JoystickState state) { led7r.Animate(100, true, true, true); } void joystick_JoystickReleased(GTM.GHIElectronics.Joystick sender, GTM.GHIElectronics.Joystick.JoystickState state) { led7r.Animate(100, true, false, false); } 29
- 30. .NET Gadgeteer ハンズオン資料 5.3 ハンズオン:照度センサーの利用 このプログラムの目的:センサーモジュールの種類によらず決まったプログラミングモデルになることを理解し ます。 照度センサーでは明るさに応じた値を取得できます。このモジュールはもイベントを発行しないため、アプリケーシ ョンからタイマーまたはスレッドを使って明示的にデータを取りに行く必要があります。 このハンズオンではメインボードの他に以下のモジュールを使用します。 LightSense ・・・照度センサー、明るさに応じたアナログ値を返すモジュール LED7R 1. Visual Studio で新しいプロジェクトを作成します。プロジェクト名はここでは “LightSensorLed” とします。メイ ンボードは本書では Spider を使用します。モジュールは以下のように配置します。 30
- 31. .NET Gadgeteer ハンズオン資料 2. “Program.cs” を開いて、以下のコードを記述します。 using Microsoft.SPOT; using GT = Gadgeteer; using GTM = Gadgeteer.Modules; namespace LightSensorLed { public partial class Program { // This method is run when the mainboard is powered up or reset. void ProgramStarted() { var timer = new GT.Timer(100); timer.Tick += timer_Tick; timer.Start(); // Use Debug.Print to show messages in Visual Studio's "Output" window during debugging. Debug.Print("Program Started"); } void timer_Tick(GT.Timer timer) { var light = lightSensor.ReadLightSensorPercentage(); SetLight(light < 50); } private void SetLight(bool lightOn) { if (lightOn) led7r.TurnLightOn(7); else led7r.TurnLightOff(7); } } } 31
- 32. .NET Gadgeteer ハンズオン資料 3. デバイスを接続して実行します。周囲が暗くなると LED が点灯します。動作確認の際は、照度センサーを 手で覆ったり室内照明に向けたりして動作確認してください。 ReadLightSensorPercengate メソッドは、(センサーで取得できる) もっとも明るい状態の状態で 100 を、もっ とも暗い状態で 0 を返します。読み取ったデータに応じて LED を点けたり消したりする様子が分かると思い ます。 これを応用すると、暗くなると自動的に点灯する照明を実現することができます。ハンズオンでは小さな LED なので照明の代わりにはなりませんが、出力を変えることでより明るい照明を点けられます。 32
- 33. .NET Gadgeteer ハンズオン資料 5.4 ハンズオン:取得データをよりわかりやすく視覚化 このプログラムの目的:シンプルなデバイスでも工夫することで視覚的な効果を得られることを理解します。 センサーからデータを取得してその値に応じた処理を行う場合、LED 1 個の点滅で処理の実行を見せることはで きますが、よりわかりやすく視覚化したい場合もあると思います。しかし、それ以外に必要が無いのに液晶ディス プレイを接続するというのも大げさです。 出力方法の検討の一つ目として、LED の光らせ方で視覚効果を高める方法を見てみます。 LED の点滅は printf でのメッセージ表示、このハンズオンでの方法は PC の画面にメッセージボックスを表示する ことに相当すると考えると、直感的に理解できるかもしれません。 システムが動作していることをよりわかりやすく視覚化するために、単に LED を点滅するだけではなくアニメーション 表示することも試してみます。 このハンズオンではメインボードの他に以下のモジュールを使用します。一つ前の “照度センサーの利用” のハン ズオンと同じ構成です。 LightSense LED7R 33
- 34. .NET Gadgeteer ハンズオン資料 1. Visual Studio で新しいプロジェクトを作成します。プロジェクト名はここでは “AnimationLed” とします。メイン ボードは本書では Spider を使用します。モジュールは以下のように配置します。 2. “Program.cs” を開いて、以下のコードを記述します。 using using using using System.Threading; Microsoft.SPOT; GT = Gadgeteer; GTM = Gadgeteer.Modules; namespace AnimationLed { public partial class Program { // This method is run when the mainboard is powered up or reset. void ProgramStarted() { new Thread(ReadSense).Start(); // Use Debug.Print to show messages in Visual Studio's "Output" window during debugging. Debug.Print("Program Started"); } 34
- 35. .NET Gadgeteer ハンズオン資料 private void ReadSense() { var th = new Thread(AnimateLed); th.Start(); th.Suspend(); var animated = false; while (true) { var light = lightSensor.ReadLightSensorPercentage(); if (light < 50 && !animated) { animated = true; th.Resume(); } else if (light >= 50 && animated) { th.Suspend(); animated = false; for (int i = 1; i <= 6; i++) { led7r.TurnLightOff(i); } } Thread.Sleep(100); } } private void AnimateLed() { while (true) { led7r.Animate(100, true, true, true); led7r.Animate(100, true, false, false); } } } } 35
- 36. .NET Gadgeteer ハンズオン資料 3. デバイスを接続して実行します。周囲が暗くなると(または照度センサーを手で塞ぐと) LED がアニメーショ ン表示します。 LED7R の Animate メソッドを利用すると、.NET Gadgeteer 開発で非常に簡単に見栄えのする出力になり ます。 36
- 37. .NET Gadgeteer ハンズオン資料 5.5 ハンズオン:取得データをキャラクターディスプレイに出力 このプログラムの目的:組み込み開発で大事なキャラクターディスプレイへの出力方法を理解します。 ここまでのハンズオンでは出力は全て LED でした。 LED は非常に安価であることと、組み込みデバイスでは LED の点灯や点滅だけでも “充分に用が足りる” ことが あることから、組み込みでは非常に大事なデバイスです。前のハンズオンのように、LED だけでも比較的見栄えの する出力にすることもできます。 しかしデータやメッセージを文字で見たいケースはあります。また、あとで紹介するカメラモジュールを使うデバイス ではカラー液晶が必要です。 まずキャラクターディスプレイに出力する方法を学んでいきます。”少しチープな感じで組み込みっぽい” デバイスで す。 さらに入力、出力とも 2 つのモジュールを接続して、少しだけ複雑なデバイスにしてみます。 このハンズオンではメインボードの他に以下のモジュールを使用します。一つ前の “照度センサーの利用” のハン ズオンと同じ構成です。 LightSense Potentiometer ・・・いわゆる “ボリューム” LED7R Character Display ・・・16 文字×2 行の英数字表示用 37
- 38. .NET Gadgeteer ハンズオン資料 1. Visual Studio で新しいプロジェクトを作成します。プロジェクト名はここでは “SensorToCharDisp” とします。 メインボードは本書では Spider を使用します。モジュールは以下のように配置します。 2. “Program.cs” を開いて、以下のコードを記述します。 using using using using System.Threading; Microsoft.SPOT; GT = Gadgeteer; GTM = Gadgeteer.Modules; namespace SensorToCharDisp { public partial class Program { // This method is run when the mainboard is powered up or reset. private void ProgramStarted() { char_Display.SetBacklight(true); new Thread(ReadSense).Start(); // Use Debug.Print to show messages in Visual Studio's "Output" window during debugging. Debug.Print("Program Started"); } 38
- 39. .NET Gadgeteer ハンズオン資料 private void ReadSense() { var th = new Thread(AnimateLed); th.Start(); th.Suspend(); var animated = false; while (true) { var light = lightSensor.ReadLightSensorPercentage(); var threshold = potentiometer.ReadPotentiometerPercentage() * 100; DisplayValues(light, threshold); if (light < threshold && !animated) { animated = true; th.Resume(); } else if (light >= threshold && animated) { th.Suspend(); animated = false; for (int i = 1; i <= 6; i++) { led7r.TurnLightOff(i); } } Thread.Sleep(100); } } 39
- 40. .NET Gadgeteer ハンズオン資料 private void DisplayValues(double light, double threshold) { char_Display.CursorHome(); char_Display.PrintString("Light=" + light.ToString()); char_Display.SetCursor(1, 0); char_Display.PrintString("Threshold=" + threshold.ToString()); } private void AnimateLed() { while (true) { led7r.Animate(100, true, true, true); led7r.Animate(100, true, false, false); } } } } 3. デバイスを接続して実行します。周囲が暗くなると(または照度センサーを手で塞ぐと) LED がアニメーショ ン表示します。さらにボリュームを操作すると LED が点く暗さを調整できます。現在の明るさと LED を点ける 設定値とはキャラクターディスプレイに表示されます。 40
- 41. .NET Gadgeteer ハンズオン資料 6 カメラと液晶ディスプレイの利用 6.1 ハンズオン:カメラモジュールと液晶ディスプレイの利用(簡単版) このプログラムの目的:カメラと液晶ディスプレイを使うと簡単に監視カメラ(もどき)が作れることを理解 します。 カメラモジュールと液晶ディスプレイを使うとデジカメや監視カメラのようなデバイスを作れそうだけど、難しそうと思う かもしれません。.NET Gadgeteer ならばとても簡単に実現できます。 専用のハードウェア設計を行っていないので一般の商品には及びませんが、数行から数十行で基本的な監視 カメラが作れます。まずはソースコードが非常に簡単なものを作ってみます。 このハンズオンでは以下のモジュールを使用します。 Display TE35 / T35 ・・・T35 は販売終了、後継の TE35 が入手できます。使い方は同じです Camera メインボードは Spider, Hydra, Cobra II, Raptor を使います。これは液晶ディスプレイ T-35 / TE-35 がソケット R, G, B を必要とするためです。Cerberus 系のメインボードは使用できません。 41
- 42. .NET Gadgeteer ハンズオン資料 1. Visual Studio で新しいプロジェクトを作成します。プロジェクト名はここでは “MonitorCamera” とします。メイ ンボードは本書では Spider を使用します。モジュールは以下のように配置します。 42
- 43. .NET Gadgeteer ハンズオン資料 2. “Program.cs” を開いて、以下のコードを記述します。 using using using using Microsoft.SPOT; GT = Gadgeteer; GTM = Gadgeteer.Modules; Gadgeteer.Modules.GHIElectronics; namespace MonitorCamera { public partial class Program { // This method is run when the mainboard is powered up or reset. void ProgramStarted() { camera.PictureCaptured += camera_PictureCaptured; var timer = new GT.Timer(200); timer.Tick += timer_Tick; timer.Start(); // Use Debug.Print to show messages in Visual Studio's "Output" window during debugging. Debug.Print("Program Started"); } void timer_Tick(GT.Timer timer) { if (camera.CameraReady) camera.TakePicture(); } void camera_PictureCaptured(Camera sender, GT.Picture picture) { display_T35.SimpleGraphics.DisplayImage(picture, 0, 0); } } } 43
- 44. .NET Gadgeteer ハンズオン資料 3. デバイスを接続して実行します。カメラで撮影した画像が液晶ディスプレイに表示されます。今回のロジック では写真撮影可能かどうかを定期的に問い合わせます。(CameraReady プロパティ) 実行してみると毎秒 2 コマ程度の撮影でパフォーマンスは高くないのですが、非常に簡単なコードで監視カ メラができます。実用的にするには撮影した画像をファイルに保存する、転送するなどの機能が必要です が、基本的な入出力の方法は今回のハンズオンの通りです。 44
- 45. .NET Gadgeteer ハンズオン資料 6.2 ハンズオン:カメラモジュールと液晶ディスプレイの利用(高速版) このプログラムの目的:よりパフォーマンスの高い監視カメラの作り方を理解します。 前のハンズオンはパフォーマンスは十分ではないものの、コードは数行と非常に簡単でした。(とはいえ、用途に よっては充分な撮影間隔です) 同じモジュールを使ってよりパフォーマンスの高いカメラを作ってみます。と言ってもコードは簡単です。画像が用意 でき次第、カメラモジュールからイベントが発行されるのでそのタイミングで液晶ディスプレイに表示します。ポーリン グに比べるとループの待ち時間が少なく、パフォーマンスが上がります。 このハンズオンではメインボードの他に以下のモジュールを使用します。一つ前のハンズオンと同じ構成です。 Display TE35 / T35 Camera メインボードは Spider, Hydra, Cobra II, Raptor を使います。 45
- 46. .NET Gadgeteer ハンズオン資料 1. Visual Studio で新しいプロジェクトを作成します。プロジェクト名はここでは “MonitorCamera2” とします。メ インボードは本書では Spider を使用します。モジュールは以下のように配置します。一つ前のハンズオンを 試した方は、モジュールをつなぎ替える必要はありません。 46
- 47. .NET Gadgeteer ハンズオン資料 2. “Program.cs” を開いて、以下のコードを記述します。 using using using using using using using System.Threading; Microsoft.SPOT; Microsoft.SPOT.Presentation.Media; Microsoft.SPOT.Presentation.Shapes; GT = Gadgeteer; GTM = Gadgeteer.Modules; Gadgeteer.Modules.GHIElectronics; namespace MonitorCamera2 { public partial class Program { private Bitmap _cameraBitmap; private Rectangle _rectangle; // This method is run when the mainboard is powered up or reset. void ProgramStarted() { InitCamera(); InitWindow(); camera.StartStreamingBitmaps(_cameraBitmap); // Use Debug.Print to show messages in Visual Studio's "Output" window during debugging. Debug.Print("Program Started"); } 47
- 48. .NET Gadgeteer ハンズオン資料 private void InitCamera() { _cameraBitmap = new Bitmap(camera.CurrentPictureResolution.Width, camera.CurrentPictureResolution.Height); camera.BitmapStreamed += camera_BitmapStreamed; } private void InitWindow() { _rectangle = new Rectangle(320, 240); display_T35.WPFWindow.Child = _rectangle; Thread.Sleep(3000); } void camera_BitmapStreamed(Camera sender, Bitmap bitmap) { var brush = new ImageBrush(bitmap); _rectangle.Fill = brush; } } } 3. デバイスを接続して実行します。カメラで撮影した画像が液晶ディスプレイに表示されます。表示用の画像 ができ次第 “BitmapStreamd” イベントが発行されるので ImageBrush で描画しています。 一つ前のハンズオンに比べると高速に動作するのがわかると思います。 48
- 49. .NET Gadgeteer ハンズオン資料 7 ネットワークに接続する 7.1 ハンズオン:ウェザーステーション このプログラムの目的:デバイスをネットワークに接続して、センサー値を WEB サーバーで公開する方法を 理解します。 組み込み機器がネットワークに繋がることでシステムの可能性が広がります。本書の最後に、組み込み機器を ネットワークに接続してみます。簡易 Web サーバー機能でセンサー値をネットワークに公開します。 このハンズオンでは以下のモジュールを使用します。 Barometer ・・・気温と気圧を取得するモジュール WiFi RS21 ・・・ Spider 用の WiFI モジュール Character Display LED7R 49
- 50. .NET Gadgeteer ハンズオン資料 メインボードは Spider のみ使用可能です。WiFi モジュールが乗った Corba II では多少コードを変更することで 同様のデバイスが作れます。有線 LAN が乗ったメインボードや有線 LAN モジュール を使用してもいいでしょう。 1. Visual Studio で新しいプロジェクトを作成します。プロジェクト名はここでは “WeatherStation” とします。メイ ンボードは本書では Spider を使用します。モジュールは以下のように配置します。一つ前のハンズオンを試 した方は、モジュールをつなぎ替える必要はありません。 50
- 51. .NET Gadgeteer ハンズオン資料 2. “Program.cs” を開いて、以下のコードを記述します。 using using using using using using using using using System; System.Threading; Microsoft.SPOT; Gadgeteer.Networking; GT = Gadgeteer; GTM = Gadgeteer.Modules; Gadgeteer.Modules.Seeed; GHINET = GHI.Premium.Net; System.Text; namespace WeatherStation { public partial class Program { private WebEvent _barometerEvent; private double _pressure; private double _temperature; // This method is run when the mainboard is powered up or reset. void ProgramStarted() { var timer = new GT.Timer(5000); timer.Tick += timer_Tick; timer.Start(); // Use Debug.Print to show messages in Visual Studio's "Output" window during debugging. Debug.Print("Program Started"); } 51
- 52. .NET Gadgeteer ハンズオン資料 void timer_Tick(GT.Timer timer) { timer.Stop(); char_Display.Clear(); char_Display.SetBacklight(true); char_Display.PrintString("Initializing ..."); SetupBarometer(); InitWifi(); if (wifi_RS21.Interface.IsOpen) { barometer.StartContinuousMeasurements(); _barometerEvent = WebServer.SetupWebEvent("GetValues"); _barometerEvent.WebEventReceived += _barometerEvent_WebEventReceived; WebServer.StartLocalServer(wifi_RS21.Interface.NetworkInterface.IPAddress, 80); led7r.Animate(100, true, true, true); led7r.Animate(100, true, false, true); char_Display.SetCursor(1, 0); char_Display.PrintString("WebSvr Started"); Debug.Print("WebServer Started"); } } 52
- 53. .NET Gadgeteer ハンズオン資料 private void InitWifi() { wifi_RS21.Interface.NetworkAddressChanged += Interface_NetworkAddressChanged; if (!wifi_RS21.Interface.IsOpen) wifi_RS21.Interface.Open(); if (!wifi_RS21.Interface.NetworkInterface.IsDhcpEnabled) wifi_RS21.Interface.NetworkInterface.EnableDhcp(); GHINET.NetworkInterfaceExtension.AssignNetworkingStackTo(wifi_RS21.Interface); GHINET.WiFiNetworkInfo[] scanResults = wifi_RS21.Interface.Scan("<WiFiの SSID>"); if (scanResults.Length == 0) { char_Display.Clear(); char_Display.PrintString("No Network"); Debug.Print("No Network Available"); return; } try { wifi_RS21.Interface.Join(scanResults[0], "<WiFiのパスフレーズ>"); GHINET.NetworkInterfaceExtension.AssignNetworkingStackTo(wifi_RS21.Interface); Thread.Sleep(5000); } catch (Exception ex) { Debug.Print(ex.Message); } } 53
- 54. .NET Gadgeteer ハンズオン資料 void _barometerEvent_WebEventReceived(string path, WebServer.HttpMethod method, Responder responder) { var str = "<html><head><title>Barometer</title><body><h1>Barometer</h1>" + "<p>Pressure = " + _pressure.ToString() + "</p>" + "<p>Temperature = " + _temperature.ToString() + "</p>" + "</body></html>"; var outBuffer = Encoding.UTF8.GetBytes(str); responder.Respond(outBuffer, "text/html"); led7r.Animate(50, led7r.Animate(50, led7r.Animate(50, led7r.Animate(50, true, true, true, true, true, true); false, true); true, true); false, true); } void barometer_MeasurementComplete(Barometer sender, Barometer.SensorData sensorData) { _pressure = sensorData.Pressure; _temperature = sensorData.Temperature; } private void SetupBarometer() { barometer.ContinuousMeasurementInterval = new TimeSpan(0, 0, 1); barometer.MeasurementComplete += barometer_MeasurementComplete; } void Interface_NetworkAddressChanged(object sender, EventArgs e) { char_Display.Clear(); char_Display.PrintString(wifi_RS21.Interface.NetworkInterface.IPAddress); Debug.Print(wifi_RS21.Interface.NetworkInterface.IPAddress); } } } 54
- 55. .NET Gadgeteer ハンズオン資料 3. デバイスを接続して実行します。デバイスの初期化が終わると、キャラクターディスプレイに IP アドレスと “WebSvr Started” というメッセージが表示されます。同じネットワークに接続した PC などを使って、ブラウザ ーで “http://<IP アドレス>/GetValues” にアクセスしてみます。ブラウザーに現在の温度と気圧が表示され ます。センサーに軽く触れて、少し時間をおいてから同じアドレスに接続すると値が変わることを確認してくだ さい。 一つ前のハンズオンに比べると高速に動作するのがわかると思います。 55
- 56. .NET Gadgeteer ハンズオン資料 8 最後に .NET Gadgeteer を使うと、想像よりも簡単に組み込み開発ができます。またカタログページ (https://www.ghielectronics.com/catalog/category/275)を見ながら作りたいデバイスを想像して、少しず つモジュールを増やしながら複雑なデバイスへとステップアップしていくことができます。 これを機に、ぜひ .NET Gadgeteer 開発を本格的に楽しんでください。 以上 56