SlideShare une entreprise Scribd logo
1  sur  22
User Friendly?!?!?! A step by step guide on writing a news letter using Word 2007.
A basic step by step guide for all of us who find that common sense is not all you need to operate Word 2007. This tutorial will guide through you some of the applications used to write news letters, which will hopefully give you a better understanding of how Word 2007 works.For this tutorial you will need: a computer(of course), Word 2007, basic typing skills. I have purposely made this tutorial very basic for those of us who have had little or no experience using a computer prior to enrolling in college.
1. Open up Word 2007 If you do not see the Word 2007 icon on your desk top(Your computer screen once it is turned on), click start button in your lower left hand screen. It will open up a screen this screen ; click on Microsoft Word 2007.
a. Word 2007  Your screen should look something like this once you have clicked on the Word 2007 icon as shown on the previous slide. If you are using Word 2007 on campus a dialogue box will appear on top of this page asking for your initials; type them in and press OK. After you press OK your screen will look like this .
2. SETTING MARGINS Go to page layout. It is on upper left hand screen( as indicated by the red arrow above.) Click on it.
a. Page layout   Once you have clicked on page layout, click on margins as indicated by red arrow. It will pull down a box of choices as shown above. Click on normal(1 inch margins all around).
3.Center justify Now go to home. It is a few spaces to the left  of page layout. Click on it. Move your cursor to the icon indicated by the red arrow (the second of the paragraph icons). Click on it. It will move your cursor to the center of the screen as indicated by the black arrow.
ADDING WORD ART FOR THE TITLE OF YOU NEWS LETTER. Go to insert(between home and page layout; on upper left hand screen). Click on it. Then move your cursor to word art as indicated by  red arrow. Click on it. It pulls down the box of choices  shown above (indicated by the black  arrow). Click on your choice.
a. Typing out your title Once you  have clicked on your choice, a dialogue box like the one shown above will appear on your screen(Indicated by the red arrow). Press down your space bar to begin typing your title. It will make the high lighted “YOUR TEXT HERE” disappear and leave the cursor for you to begin typing your title(Indicated by the black arrow).
Typing out your title(continued from previous page) Once you have typed out your title it will look like the image above. It will not reflect the word art you chose until you move your cursor to “OK” and click on it (as indicated by the red arrow.)
b. Adjusting your title Once you have pressed “OK” your choice of word art will be applied to your document. To enlarge your title to fit the page simply move your cursor to one of the little blue squares along the blue outline around your title(as indicated by the red arrow) and click and hold it down while you drag it to your desired size and release click. . Once you have done that, the title should resemble the second image indicated by the black arrow.
5. UNDER LINING YOUR TITLE Leave your title highlighted(with the blue outline around it) then move your cursor to “Home” on the upper left hand corner and click on it. Then click on the icon indicated by the red arrow(icon is the letter “u” with a line under it.
Under lining text (continued from previous slide) Your title should have an underline as shown above. Press enter on your key board twice. This will give you some space between your title and the actual body of your news letter. Now left align by clicking on icon as  indicated by red arrow(the 1st of the paragraph icons). This will move your typing cursor to left side of the page(as indicated by the black arrow).
6. Inserting columns Now go to page layout and click on it. Then go to columns and click on it. It will pull down a box like the one shown above(indicated by the red arrow) click on More Columns(last choice). After clicking on “More Columns” another dialogue will appear(indicated by the black arrow). In this dialogue box, you have several choices.  Choose one by clicking on it. In this same box there is a section that says “Apply to” on the lower left hand of the dialogue box. It will most likely display “Whole Document”. To the right of this is an arrow pointing down. Click on this arrow to pull down more choices. MAKE SURE YOU CLICK ON “FROM THIS POINT FORWARD” or it will cut your title in half. On this same dialogue box there is  a little square with the words “Line between” underneath the column choices. Click on the little square. There should be a check mark in little square after clicking on it( this will put a line between your columns if you chose more than one)  . Then press on  “OK” to apply the columns to your document.
7. Inserting drop text to your document Type in the first letter of you’re your document as shown above. Now go to insert. Click on it. Now find the Drop cap icon on the right upper screen. Click on it. This should drop down a dialogue box like the one shown  above(indicated by the red arrow). Make your selection. (For this tutorial I have chosen the center option.) Once you have clicked on the Drop Cap of your choice it should be applied to your document apply the Drop Cap. (Indicated by the black arrow.) Leave as is for the next step.
8. Text wrapping Now that you have your Drop Cap in place, it is best that you apply “Text Wrapping” so that when you begin typing your news letter it will automatically wrap around your text. To do this, double click on one of the little blue squares along the outline around your Drop Cap. Once you have done this a dialogue box with your choices should appear like the one shown above.(Indicated by the red arrow.) For the purpose of this tutorial I have chosen the “Around” option. Click on OK. Now, you can begin typing. Click on the upper right side of your Drop Cap. This will appropriately set your typing cursor in place for optimal results using the “Text Wrapping” option. Begin typing. Once you have typed in a few sentences you should start to see the text wrapping taking effect as shown above.(Indicated by the black arrow.) The line between the columns should appear as well.( You set the “Line Between Columns” in step 6)
9.Adding a bullet list to your document Press on Enter on your keyboard to move your typing cursor to a new line on your document. Click on “Home” on your upper left hand screen. Go to the paragraph section on the upper center of screen. You will see several choices in the “Paragraph” section. Click on the icon right underneath “Review”.(When you place the cursor on the icon without clicking, a box that says “Bullets; Start a Bulleted List” should appear.) Once you click on the “Bullet” icon a dialogue box should appear like the one shown above. (Indicated by the red arrow.) Click on your selection.
Adding a bulleted list to your document(continued from previous slide) Once you have selected your bullet type you can begin listing your subject matter. Each time you hit enter on your keyboard it will automatically go to the next line of your document with a new bullet in place. Do not press enter on your keyboard until you are ready for the next bullet. Once you are done with your list  use the arrow keys on your keyboard to move your typing cursor to the left to begin typing more text. Once you have completed the steps above, your document should resemble  the above image. Your typing cursor should be in place to begin the next paragraph of your news letter. (As indicated by red arrow.)
10.Inserting clip art	 Click on insert (right next to home on your upper left hand screen). Click on Clip Art(indicated by the red arrow). This will bring up the “Clip Art” box on your right side of the screen(indicated by the black arrow). Type in what kind of clip art you want in the “Search  for” area and click on “Go”. (For the purpose of this tutorial  type in music.)
Adding clip art to your news letter(continued from previous slide) Once have clicked on “Go”, you will see your choices in the “Clip Art” dialogue box on your right hand screen. Click on the picture of your choice. Once you have made your selection it will appear on your  news letter(indicated by the red arrow). You can make it smaller or larger by clicking on one the little squares along the outline of the picture and holding it down while you drag  in or outward.
a. Text wrapping around the “CLIP ART” Once you have sized the picture to fit your news letter, right click on your picture and a dialogue box will appear(indicated by the red arrow). Click on “Text Wrapping” it will bring up another box with your choices(indicated by the black arrow). Click on your choice.(For this tutorial I have chosen the “Square” Text wrap; you will have to center your Clip Art to get the best results.) Now, you can begin typing.
Finished product  Now that you have learned how to navigate through some Word 2007 basic functions, I am confident that you can figure out how to use the rest of the functions on your own. You can use the information in this tutorial to set MLA format for your English Composition  papers, or use it in every day life to design you own flyers or invitation. As with any newly acquired  knowledge, practice is essential. I encourage you to save this tutorial to use as reference. I am confident that you now have a better understanding of how  Word 2007 funtions.

Contenu connexe

Tendances

Seminar on ms powerpoint
Seminar on ms powerpointSeminar on ms powerpoint
Seminar on ms powerpointMohit Panchal
 
Publisher 2007 tutorial
Publisher 2007 tutorialPublisher 2007 tutorial
Publisher 2007 tutorialFadel Abbas
 
Microsoft Publisher Overview
Microsoft Publisher OverviewMicrosoft Publisher Overview
Microsoft Publisher OverviewGregory Donaghy
 
Microsoft Powerpoint
Microsoft PowerpointMicrosoft Powerpoint
Microsoft PowerpointJack Frost
 
How to Make a Powerpoint Presentation for Newbie
How to Make a Powerpoint Presentation for NewbieHow to Make a Powerpoint Presentation for Newbie
How to Make a Powerpoint Presentation for NewbieAlma Reynaldo
 
OpenOffice.Org Impress Tutorial
OpenOffice.Org Impress TutorialOpenOffice.Org Impress Tutorial
OpenOffice.Org Impress Tutorialvargy
 
How to make a tarpapel
How to make a tarpapelHow to make a tarpapel
How to make a tarpapelWynner Elba
 
How to make a powerpoint presentation
How to make a powerpoint presentationHow to make a powerpoint presentation
How to make a powerpoint presentationvarsha singh
 
Microsoft Paint
Microsoft PaintMicrosoft Paint
Microsoft PaintS C
 
MS Word tips and tricks
MS Word tips and tricksMS Word tips and tricks
MS Word tips and trickssutrainer
 
Microsoft Office PowerPoint 2007 - Lesson 1
Microsoft Office PowerPoint 2007 - Lesson 1Microsoft Office PowerPoint 2007 - Lesson 1
Microsoft Office PowerPoint 2007 - Lesson 1Samantha TerBeest
 
Learning Illustrator CS6 with 100 practical exercises
Learning Illustrator CS6 with 100 practical exercisesLearning Illustrator CS6 with 100 practical exercises
Learning Illustrator CS6 with 100 practical exercisesMCB Press
 
Microsoft Power Point 2010
Microsoft Power Point 2010Microsoft Power Point 2010
Microsoft Power Point 2010home
 
Lecture 06 insert tab word 2007
Lecture 06  insert  tab  word 2007Lecture 06  insert  tab  word 2007
Lecture 06 insert tab word 2007VTC
 
How to create a power point presentation
How to create a power point presentationHow to create a power point presentation
How to create a power point presentationJchadwell
 
Openoffice writer
Openoffice writerOpenoffice writer
Openoffice writerSisapardo
 
OpenOffice.org Writer: The Basics
OpenOffice.org Writer: The BasicsOpenOffice.org Writer: The Basics
OpenOffice.org Writer: The BasicsCzarli Evangelista
 
PowerPoint facts with the Word Paperclip
PowerPoint facts with the Word PaperclipPowerPoint facts with the Word Paperclip
PowerPoint facts with the Word Paperclipmariomegaman50
 

Tendances (20)

Seminar on ms powerpoint
Seminar on ms powerpointSeminar on ms powerpoint
Seminar on ms powerpoint
 
Publisher 2007 tutorial
Publisher 2007 tutorialPublisher 2007 tutorial
Publisher 2007 tutorial
 
Microsoft Publisher Overview
Microsoft Publisher OverviewMicrosoft Publisher Overview
Microsoft Publisher Overview
 
Microsoft Powerpoint
Microsoft PowerpointMicrosoft Powerpoint
Microsoft Powerpoint
 
How to Make a Powerpoint Presentation for Newbie
How to Make a Powerpoint Presentation for NewbieHow to Make a Powerpoint Presentation for Newbie
How to Make a Powerpoint Presentation for Newbie
 
OpenOffice.Org Impress Tutorial
OpenOffice.Org Impress TutorialOpenOffice.Org Impress Tutorial
OpenOffice.Org Impress Tutorial
 
How to make a tarpapel
How to make a tarpapelHow to make a tarpapel
How to make a tarpapel
 
How to make a powerpoint presentation
How to make a powerpoint presentationHow to make a powerpoint presentation
How to make a powerpoint presentation
 
Microsoft Paint
Microsoft PaintMicrosoft Paint
Microsoft Paint
 
MS Word tips and tricks
MS Word tips and tricksMS Word tips and tricks
MS Word tips and tricks
 
Microsoft Office PowerPoint 2007 - Lesson 1
Microsoft Office PowerPoint 2007 - Lesson 1Microsoft Office PowerPoint 2007 - Lesson 1
Microsoft Office PowerPoint 2007 - Lesson 1
 
Learning Illustrator CS6 with 100 practical exercises
Learning Illustrator CS6 with 100 practical exercisesLearning Illustrator CS6 with 100 practical exercises
Learning Illustrator CS6 with 100 practical exercises
 
Microsoft Power Point 2010
Microsoft Power Point 2010Microsoft Power Point 2010
Microsoft Power Point 2010
 
Lecture 06 insert tab word 2007
Lecture 06  insert  tab  word 2007Lecture 06  insert  tab  word 2007
Lecture 06 insert tab word 2007
 
Introduction to ms power point Grade 9
Introduction to ms power point Grade 9Introduction to ms power point Grade 9
Introduction to ms power point Grade 9
 
How to create a power point presentation
How to create a power point presentationHow to create a power point presentation
How to create a power point presentation
 
Openoffice writer
Openoffice writerOpenoffice writer
Openoffice writer
 
Power Point Basics
Power Point BasicsPower Point Basics
Power Point Basics
 
OpenOffice.org Writer: The Basics
OpenOffice.org Writer: The BasicsOpenOffice.org Writer: The Basics
OpenOffice.org Writer: The Basics
 
PowerPoint facts with the Word Paperclip
PowerPoint facts with the Word PaperclipPowerPoint facts with the Word Paperclip
PowerPoint facts with the Word Paperclip
 

En vedette

Pages from bdc workshop 101 v1b participant
Pages from bdc workshop 101 v1b participantPages from bdc workshop 101 v1b participant
Pages from bdc workshop 101 v1b participantRalph Paglia
 
Automotive technician-resume-template
Automotive technician-resume-templateAutomotive technician-resume-template
Automotive technician-resume-templategilraffy
 
Automotive Social Media Marketing Presentation from 2010 NADA Convention
Automotive Social Media Marketing Presentation from 2010 NADA ConventionAutomotive Social Media Marketing Presentation from 2010 NADA Convention
Automotive Social Media Marketing Presentation from 2010 NADA ConventionRalph Paglia
 
CRM Process Implementation For Car Dealers
CRM Process Implementation For Car DealersCRM Process Implementation For Car Dealers
CRM Process Implementation For Car DealersRalph Paglia
 
SMART DESIGN - icon fonts, svg, and the mobile influence
SMART DESIGN - icon fonts, svg, and the mobile influenceSMART DESIGN - icon fonts, svg, and the mobile influence
SMART DESIGN - icon fonts, svg, and the mobile influenceSara Cannon
 
Icons and Stencils for Hadoop
Icons and Stencils for HadoopIcons and Stencils for Hadoop
Icons and Stencils for HadoopHortonworks
 
3 hard facts shaping higher education thinking and behavior
3 hard facts shaping higher education thinking and behavior3 hard facts shaping higher education thinking and behavior
3 hard facts shaping higher education thinking and behaviorGrant Thornton LLP
 
2015 Upload Campaigns Calendar - SlideShare
2015 Upload Campaigns Calendar - SlideShare2015 Upload Campaigns Calendar - SlideShare
2015 Upload Campaigns Calendar - SlideShareSlideShare
 
What to Upload to SlideShare
What to Upload to SlideShareWhat to Upload to SlideShare
What to Upload to SlideShareSlideShare
 
Getting Started With SlideShare
Getting Started With SlideShareGetting Started With SlideShare
Getting Started With SlideShareSlideShare
 

En vedette (12)

Letter Parts
Letter PartsLetter Parts
Letter Parts
 
Pages from bdc workshop 101 v1b participant
Pages from bdc workshop 101 v1b participantPages from bdc workshop 101 v1b participant
Pages from bdc workshop 101 v1b participant
 
Automotive technician-resume-template
Automotive technician-resume-templateAutomotive technician-resume-template
Automotive technician-resume-template
 
Automotive Social Media Marketing Presentation from 2010 NADA Convention
Automotive Social Media Marketing Presentation from 2010 NADA ConventionAutomotive Social Media Marketing Presentation from 2010 NADA Convention
Automotive Social Media Marketing Presentation from 2010 NADA Convention
 
96 bdc operations-manual_template
96 bdc operations-manual_template96 bdc operations-manual_template
96 bdc operations-manual_template
 
CRM Process Implementation For Car Dealers
CRM Process Implementation For Car DealersCRM Process Implementation For Car Dealers
CRM Process Implementation For Car Dealers
 
SMART DESIGN - icon fonts, svg, and the mobile influence
SMART DESIGN - icon fonts, svg, and the mobile influenceSMART DESIGN - icon fonts, svg, and the mobile influence
SMART DESIGN - icon fonts, svg, and the mobile influence
 
Icons and Stencils for Hadoop
Icons and Stencils for HadoopIcons and Stencils for Hadoop
Icons and Stencils for Hadoop
 
3 hard facts shaping higher education thinking and behavior
3 hard facts shaping higher education thinking and behavior3 hard facts shaping higher education thinking and behavior
3 hard facts shaping higher education thinking and behavior
 
2015 Upload Campaigns Calendar - SlideShare
2015 Upload Campaigns Calendar - SlideShare2015 Upload Campaigns Calendar - SlideShare
2015 Upload Campaigns Calendar - SlideShare
 
What to Upload to SlideShare
What to Upload to SlideShareWhat to Upload to SlideShare
What to Upload to SlideShare
 
Getting Started With SlideShare
Getting Started With SlideShareGetting Started With SlideShare
Getting Started With SlideShare
 

Similaire à User Friendly

Excel 2007 tutorial
Excel 2007 tutorialExcel 2007 tutorial
Excel 2007 tutorialsumatipuri
 
TUTorial By chad neuman in InDesign,Tutorial AT Vishal Dawdy .docx
TUTorial By chad neuman in InDesign,Tutorial AT Vishal Dawdy .docxTUTorial By chad neuman in InDesign,Tutorial AT Vishal Dawdy .docx
TUTorial By chad neuman in InDesign,Tutorial AT Vishal Dawdy .docxwillcoxjanay
 
How to use a spreadsheet
How to use a spreadsheetHow to use a spreadsheet
How to use a spreadsheetSwarnima Tiwari
 
Using microsoft word
Using microsoft wordUsing microsoft word
Using microsoft wordArchana Rai
 
How to use in design powerpoint
How to use in design powerpointHow to use in design powerpoint
How to use in design powerpointAS Media Column E
 
Using microsoft-publisher-for-story-boards-07316
Using microsoft-publisher-for-story-boards-07316Using microsoft-publisher-for-story-boards-07316
Using microsoft-publisher-for-story-boards-07316Anjetta Thackeray
 
MS Publisher Tutorial
MS Publisher TutorialMS Publisher Tutorial
MS Publisher TutorialvirtualMaryam
 
Film magazine photoshop screenshots
Film magazine photoshop screenshotsFilm magazine photoshop screenshots
Film magazine photoshop screenshotscc05000041
 
APA Formatting in a Word Document
APA Formatting in a Word DocumentAPA Formatting in a Word Document
APA Formatting in a Word DocumentAmanda M Richards
 
Gaming magazine photograph screenshots
Gaming magazine photograph screenshotsGaming magazine photograph screenshots
Gaming magazine photograph screenshotscc05000041
 
Microsoft word 2007_tutorial
Microsoft word 2007_tutorialMicrosoft word 2007_tutorial
Microsoft word 2007_tutorialRasika Kumbhar
 
Cdocumentsandsettingscdixionmydocumentsseminarsppppublisherseminar 1005131557...
Cdocumentsandsettingscdixionmydocumentsseminarsppppublisherseminar 1005131557...Cdocumentsandsettingscdixionmydocumentsseminarsppppublisherseminar 1005131557...
Cdocumentsandsettingscdixionmydocumentsseminarsppppublisherseminar 1005131557...Jean Ulpindo
 

Similaire à User Friendly (20)

Excel 2007 tutorial
Excel 2007 tutorialExcel 2007 tutorial
Excel 2007 tutorial
 
TUTorial By chad neuman in InDesign,Tutorial AT Vishal Dawdy .docx
TUTorial By chad neuman in InDesign,Tutorial AT Vishal Dawdy .docxTUTorial By chad neuman in InDesign,Tutorial AT Vishal Dawdy .docx
TUTorial By chad neuman in InDesign,Tutorial AT Vishal Dawdy .docx
 
Text and Extrude
Text and ExtrudeText and Extrude
Text and Extrude
 
How to use in design
How to use in designHow to use in design
How to use in design
 
Powerpoint class 1
Powerpoint class 1Powerpoint class 1
Powerpoint class 1
 
How to use a spreadsheet
How to use a spreadsheetHow to use a spreadsheet
How to use a spreadsheet
 
Using microsoft word
Using microsoft wordUsing microsoft word
Using microsoft word
 
Word
WordWord
Word
 
How to use in design powerpoint
How to use in design powerpointHow to use in design powerpoint
How to use in design powerpoint
 
Using microsoft-publisher-for-story-boards-07316
Using microsoft-publisher-for-story-boards-07316Using microsoft-publisher-for-story-boards-07316
Using microsoft-publisher-for-story-boards-07316
 
Publisher Seminar
Publisher SeminarPublisher Seminar
Publisher Seminar
 
How to use indesign
How to use indesignHow to use indesign
How to use indesign
 
Scientific Poster Making Using Adobe Illustrator -hmftj
Scientific Poster Making Using Adobe Illustrator -hmftjScientific Poster Making Using Adobe Illustrator -hmftj
Scientific Poster Making Using Adobe Illustrator -hmftj
 
MS Publisher Tutorial
MS Publisher TutorialMS Publisher Tutorial
MS Publisher Tutorial
 
Film magazine photoshop screenshots
Film magazine photoshop screenshotsFilm magazine photoshop screenshots
Film magazine photoshop screenshots
 
APA Formatting in a Word Document
APA Formatting in a Word DocumentAPA Formatting in a Word Document
APA Formatting in a Word Document
 
Gaming magazine photograph screenshots
Gaming magazine photograph screenshotsGaming magazine photograph screenshots
Gaming magazine photograph screenshots
 
Beginner word class_4
Beginner word class_4Beginner word class_4
Beginner word class_4
 
Microsoft word 2007_tutorial
Microsoft word 2007_tutorialMicrosoft word 2007_tutorial
Microsoft word 2007_tutorial
 
Cdocumentsandsettingscdixionmydocumentsseminarsppppublisherseminar 1005131557...
Cdocumentsandsettingscdixionmydocumentsseminarsppppublisherseminar 1005131557...Cdocumentsandsettingscdixionmydocumentsseminarsppppublisherseminar 1005131557...
Cdocumentsandsettingscdixionmydocumentsseminarsppppublisherseminar 1005131557...
 

Dernier

Quantitative Analysis of Retail Sector Companies
Quantitative Analysis of Retail Sector CompaniesQuantitative Analysis of Retail Sector Companies
Quantitative Analysis of Retail Sector Companiesprashantbhati354
 
Call Girls Near Me WhatsApp:+91-9833363713
Call Girls Near Me WhatsApp:+91-9833363713Call Girls Near Me WhatsApp:+91-9833363713
Call Girls Near Me WhatsApp:+91-9833363713Sonam Pathan
 
《加拿大本地办假证-寻找办理Dalhousie毕业证和达尔豪斯大学毕业证书的中介代理》
《加拿大本地办假证-寻找办理Dalhousie毕业证和达尔豪斯大学毕业证书的中介代理》《加拿大本地办假证-寻找办理Dalhousie毕业证和达尔豪斯大学毕业证书的中介代理》
《加拿大本地办假证-寻找办理Dalhousie毕业证和达尔豪斯大学毕业证书的中介代理》rnrncn29
 
Monthly Market Risk Update: April 2024 [SlideShare]
Monthly Market Risk Update: April 2024 [SlideShare]Monthly Market Risk Update: April 2024 [SlideShare]
Monthly Market Risk Update: April 2024 [SlideShare]Commonwealth
 
Economic Risk Factor Update: April 2024 [SlideShare]
Economic Risk Factor Update: April 2024 [SlideShare]Economic Risk Factor Update: April 2024 [SlideShare]
Economic Risk Factor Update: April 2024 [SlideShare]Commonwealth
 
SBP-Market-Operations and market managment
SBP-Market-Operations and market managmentSBP-Market-Operations and market managment
SBP-Market-Operations and market managmentfactical
 
(中央兰开夏大学毕业证学位证成绩单-案例)
(中央兰开夏大学毕业证学位证成绩单-案例)(中央兰开夏大学毕业证学位证成绩单-案例)
(中央兰开夏大学毕业证学位证成绩单-案例)twfkn8xj
 
Classical Theory of Macroeconomics by Adam Smith
Classical Theory of Macroeconomics by Adam SmithClassical Theory of Macroeconomics by Adam Smith
Classical Theory of Macroeconomics by Adam SmithAdamYassin2
 
Tenets of Physiocracy History of Economic
Tenets of Physiocracy History of EconomicTenets of Physiocracy History of Economic
Tenets of Physiocracy History of Economiccinemoviesu
 
House of Commons ; CDC schemes overview document
House of Commons ; CDC schemes overview documentHouse of Commons ; CDC schemes overview document
House of Commons ; CDC schemes overview documentHenry Tapper
 
Call Girls Near Delhi Pride Hotel, New Delhi|9873777170
Call Girls Near Delhi Pride Hotel, New Delhi|9873777170Call Girls Near Delhi Pride Hotel, New Delhi|9873777170
Call Girls Near Delhi Pride Hotel, New Delhi|9873777170Sonam Pathan
 
原版1:1复刻堪萨斯大学毕业证KU毕业证留信学历认证
原版1:1复刻堪萨斯大学毕业证KU毕业证留信学历认证原版1:1复刻堪萨斯大学毕业证KU毕业证留信学历认证
原版1:1复刻堪萨斯大学毕业证KU毕业证留信学历认证jdkhjh
 
Call Girls Near Golden Tulip Essential Hotel, New Delhi 9873777170
Call Girls Near Golden Tulip Essential Hotel, New Delhi 9873777170Call Girls Near Golden Tulip Essential Hotel, New Delhi 9873777170
Call Girls Near Golden Tulip Essential Hotel, New Delhi 9873777170Sonam Pathan
 
Ch 4 investment Intermediate financial Accounting
Ch 4 investment Intermediate financial AccountingCh 4 investment Intermediate financial Accounting
Ch 4 investment Intermediate financial AccountingAbdi118682
 
NO1 WorldWide online istikhara for love marriage vashikaran specialist love p...
NO1 WorldWide online istikhara for love marriage vashikaran specialist love p...NO1 WorldWide online istikhara for love marriage vashikaran specialist love p...
NO1 WorldWide online istikhara for love marriage vashikaran specialist love p...Amil Baba Dawood bangali
 
(办理原版一样)QUT毕业证昆士兰科技大学毕业证学位证留信学历认证成绩单补办
(办理原版一样)QUT毕业证昆士兰科技大学毕业证学位证留信学历认证成绩单补办(办理原版一样)QUT毕业证昆士兰科技大学毕业证学位证留信学历认证成绩单补办
(办理原版一样)QUT毕业证昆士兰科技大学毕业证学位证留信学历认证成绩单补办fqiuho152
 
(办理学位证)加拿大萨省大学毕业证成绩单原版一比一
(办理学位证)加拿大萨省大学毕业证成绩单原版一比一(办理学位证)加拿大萨省大学毕业证成绩单原版一比一
(办理学位证)加拿大萨省大学毕业证成绩单原版一比一S SDS
 
Stock Market Brief Deck FOR 4/17 video.pdf
Stock Market Brief Deck FOR 4/17 video.pdfStock Market Brief Deck FOR 4/17 video.pdf
Stock Market Brief Deck FOR 4/17 video.pdfMichael Silva
 
BPPG response - Options for Defined Benefit schemes - 19Apr24.pdf
BPPG response - Options for Defined Benefit schemes - 19Apr24.pdfBPPG response - Options for Defined Benefit schemes - 19Apr24.pdf
BPPG response - Options for Defined Benefit schemes - 19Apr24.pdfHenry Tapper
 
Lundin Gold April 2024 Corporate Presentation v4.pdf
Lundin Gold April 2024 Corporate Presentation v4.pdfLundin Gold April 2024 Corporate Presentation v4.pdf
Lundin Gold April 2024 Corporate Presentation v4.pdfAdnet Communications
 

Dernier (20)

Quantitative Analysis of Retail Sector Companies
Quantitative Analysis of Retail Sector CompaniesQuantitative Analysis of Retail Sector Companies
Quantitative Analysis of Retail Sector Companies
 
Call Girls Near Me WhatsApp:+91-9833363713
Call Girls Near Me WhatsApp:+91-9833363713Call Girls Near Me WhatsApp:+91-9833363713
Call Girls Near Me WhatsApp:+91-9833363713
 
《加拿大本地办假证-寻找办理Dalhousie毕业证和达尔豪斯大学毕业证书的中介代理》
《加拿大本地办假证-寻找办理Dalhousie毕业证和达尔豪斯大学毕业证书的中介代理》《加拿大本地办假证-寻找办理Dalhousie毕业证和达尔豪斯大学毕业证书的中介代理》
《加拿大本地办假证-寻找办理Dalhousie毕业证和达尔豪斯大学毕业证书的中介代理》
 
Monthly Market Risk Update: April 2024 [SlideShare]
Monthly Market Risk Update: April 2024 [SlideShare]Monthly Market Risk Update: April 2024 [SlideShare]
Monthly Market Risk Update: April 2024 [SlideShare]
 
Economic Risk Factor Update: April 2024 [SlideShare]
Economic Risk Factor Update: April 2024 [SlideShare]Economic Risk Factor Update: April 2024 [SlideShare]
Economic Risk Factor Update: April 2024 [SlideShare]
 
SBP-Market-Operations and market managment
SBP-Market-Operations and market managmentSBP-Market-Operations and market managment
SBP-Market-Operations and market managment
 
(中央兰开夏大学毕业证学位证成绩单-案例)
(中央兰开夏大学毕业证学位证成绩单-案例)(中央兰开夏大学毕业证学位证成绩单-案例)
(中央兰开夏大学毕业证学位证成绩单-案例)
 
Classical Theory of Macroeconomics by Adam Smith
Classical Theory of Macroeconomics by Adam SmithClassical Theory of Macroeconomics by Adam Smith
Classical Theory of Macroeconomics by Adam Smith
 
Tenets of Physiocracy History of Economic
Tenets of Physiocracy History of EconomicTenets of Physiocracy History of Economic
Tenets of Physiocracy History of Economic
 
House of Commons ; CDC schemes overview document
House of Commons ; CDC schemes overview documentHouse of Commons ; CDC schemes overview document
House of Commons ; CDC schemes overview document
 
Call Girls Near Delhi Pride Hotel, New Delhi|9873777170
Call Girls Near Delhi Pride Hotel, New Delhi|9873777170Call Girls Near Delhi Pride Hotel, New Delhi|9873777170
Call Girls Near Delhi Pride Hotel, New Delhi|9873777170
 
原版1:1复刻堪萨斯大学毕业证KU毕业证留信学历认证
原版1:1复刻堪萨斯大学毕业证KU毕业证留信学历认证原版1:1复刻堪萨斯大学毕业证KU毕业证留信学历认证
原版1:1复刻堪萨斯大学毕业证KU毕业证留信学历认证
 
Call Girls Near Golden Tulip Essential Hotel, New Delhi 9873777170
Call Girls Near Golden Tulip Essential Hotel, New Delhi 9873777170Call Girls Near Golden Tulip Essential Hotel, New Delhi 9873777170
Call Girls Near Golden Tulip Essential Hotel, New Delhi 9873777170
 
Ch 4 investment Intermediate financial Accounting
Ch 4 investment Intermediate financial AccountingCh 4 investment Intermediate financial Accounting
Ch 4 investment Intermediate financial Accounting
 
NO1 WorldWide online istikhara for love marriage vashikaran specialist love p...
NO1 WorldWide online istikhara for love marriage vashikaran specialist love p...NO1 WorldWide online istikhara for love marriage vashikaran specialist love p...
NO1 WorldWide online istikhara for love marriage vashikaran specialist love p...
 
(办理原版一样)QUT毕业证昆士兰科技大学毕业证学位证留信学历认证成绩单补办
(办理原版一样)QUT毕业证昆士兰科技大学毕业证学位证留信学历认证成绩单补办(办理原版一样)QUT毕业证昆士兰科技大学毕业证学位证留信学历认证成绩单补办
(办理原版一样)QUT毕业证昆士兰科技大学毕业证学位证留信学历认证成绩单补办
 
(办理学位证)加拿大萨省大学毕业证成绩单原版一比一
(办理学位证)加拿大萨省大学毕业证成绩单原版一比一(办理学位证)加拿大萨省大学毕业证成绩单原版一比一
(办理学位证)加拿大萨省大学毕业证成绩单原版一比一
 
Stock Market Brief Deck FOR 4/17 video.pdf
Stock Market Brief Deck FOR 4/17 video.pdfStock Market Brief Deck FOR 4/17 video.pdf
Stock Market Brief Deck FOR 4/17 video.pdf
 
BPPG response - Options for Defined Benefit schemes - 19Apr24.pdf
BPPG response - Options for Defined Benefit schemes - 19Apr24.pdfBPPG response - Options for Defined Benefit schemes - 19Apr24.pdf
BPPG response - Options for Defined Benefit schemes - 19Apr24.pdf
 
Lundin Gold April 2024 Corporate Presentation v4.pdf
Lundin Gold April 2024 Corporate Presentation v4.pdfLundin Gold April 2024 Corporate Presentation v4.pdf
Lundin Gold April 2024 Corporate Presentation v4.pdf
 

User Friendly

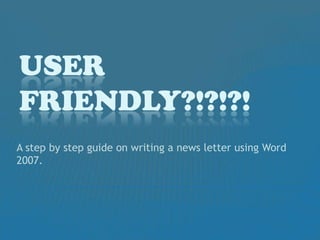
  • 1. User Friendly?!?!?! A step by step guide on writing a news letter using Word 2007.
  • 2. A basic step by step guide for all of us who find that common sense is not all you need to operate Word 2007. This tutorial will guide through you some of the applications used to write news letters, which will hopefully give you a better understanding of how Word 2007 works.For this tutorial you will need: a computer(of course), Word 2007, basic typing skills. I have purposely made this tutorial very basic for those of us who have had little or no experience using a computer prior to enrolling in college.
  • 3. 1. Open up Word 2007 If you do not see the Word 2007 icon on your desk top(Your computer screen once it is turned on), click start button in your lower left hand screen. It will open up a screen this screen ; click on Microsoft Word 2007.
  • 4. a. Word 2007 Your screen should look something like this once you have clicked on the Word 2007 icon as shown on the previous slide. If you are using Word 2007 on campus a dialogue box will appear on top of this page asking for your initials; type them in and press OK. After you press OK your screen will look like this .
  • 5. 2. SETTING MARGINS Go to page layout. It is on upper left hand screen( as indicated by the red arrow above.) Click on it.
  • 6. a. Page layout Once you have clicked on page layout, click on margins as indicated by red arrow. It will pull down a box of choices as shown above. Click on normal(1 inch margins all around).
  • 7. 3.Center justify Now go to home. It is a few spaces to the left of page layout. Click on it. Move your cursor to the icon indicated by the red arrow (the second of the paragraph icons). Click on it. It will move your cursor to the center of the screen as indicated by the black arrow.
  • 8. ADDING WORD ART FOR THE TITLE OF YOU NEWS LETTER. Go to insert(between home and page layout; on upper left hand screen). Click on it. Then move your cursor to word art as indicated by red arrow. Click on it. It pulls down the box of choices shown above (indicated by the black arrow). Click on your choice.
  • 9. a. Typing out your title Once you have clicked on your choice, a dialogue box like the one shown above will appear on your screen(Indicated by the red arrow). Press down your space bar to begin typing your title. It will make the high lighted “YOUR TEXT HERE” disappear and leave the cursor for you to begin typing your title(Indicated by the black arrow).
  • 10. Typing out your title(continued from previous page) Once you have typed out your title it will look like the image above. It will not reflect the word art you chose until you move your cursor to “OK” and click on it (as indicated by the red arrow.)
  • 11. b. Adjusting your title Once you have pressed “OK” your choice of word art will be applied to your document. To enlarge your title to fit the page simply move your cursor to one of the little blue squares along the blue outline around your title(as indicated by the red arrow) and click and hold it down while you drag it to your desired size and release click. . Once you have done that, the title should resemble the second image indicated by the black arrow.
  • 12. 5. UNDER LINING YOUR TITLE Leave your title highlighted(with the blue outline around it) then move your cursor to “Home” on the upper left hand corner and click on it. Then click on the icon indicated by the red arrow(icon is the letter “u” with a line under it.
  • 13. Under lining text (continued from previous slide) Your title should have an underline as shown above. Press enter on your key board twice. This will give you some space between your title and the actual body of your news letter. Now left align by clicking on icon as indicated by red arrow(the 1st of the paragraph icons). This will move your typing cursor to left side of the page(as indicated by the black arrow).
  • 14. 6. Inserting columns Now go to page layout and click on it. Then go to columns and click on it. It will pull down a box like the one shown above(indicated by the red arrow) click on More Columns(last choice). After clicking on “More Columns” another dialogue will appear(indicated by the black arrow). In this dialogue box, you have several choices. Choose one by clicking on it. In this same box there is a section that says “Apply to” on the lower left hand of the dialogue box. It will most likely display “Whole Document”. To the right of this is an arrow pointing down. Click on this arrow to pull down more choices. MAKE SURE YOU CLICK ON “FROM THIS POINT FORWARD” or it will cut your title in half. On this same dialogue box there is a little square with the words “Line between” underneath the column choices. Click on the little square. There should be a check mark in little square after clicking on it( this will put a line between your columns if you chose more than one) . Then press on “OK” to apply the columns to your document.
  • 15. 7. Inserting drop text to your document Type in the first letter of you’re your document as shown above. Now go to insert. Click on it. Now find the Drop cap icon on the right upper screen. Click on it. This should drop down a dialogue box like the one shown above(indicated by the red arrow). Make your selection. (For this tutorial I have chosen the center option.) Once you have clicked on the Drop Cap of your choice it should be applied to your document apply the Drop Cap. (Indicated by the black arrow.) Leave as is for the next step.
  • 16. 8. Text wrapping Now that you have your Drop Cap in place, it is best that you apply “Text Wrapping” so that when you begin typing your news letter it will automatically wrap around your text. To do this, double click on one of the little blue squares along the outline around your Drop Cap. Once you have done this a dialogue box with your choices should appear like the one shown above.(Indicated by the red arrow.) For the purpose of this tutorial I have chosen the “Around” option. Click on OK. Now, you can begin typing. Click on the upper right side of your Drop Cap. This will appropriately set your typing cursor in place for optimal results using the “Text Wrapping” option. Begin typing. Once you have typed in a few sentences you should start to see the text wrapping taking effect as shown above.(Indicated by the black arrow.) The line between the columns should appear as well.( You set the “Line Between Columns” in step 6)
  • 17. 9.Adding a bullet list to your document Press on Enter on your keyboard to move your typing cursor to a new line on your document. Click on “Home” on your upper left hand screen. Go to the paragraph section on the upper center of screen. You will see several choices in the “Paragraph” section. Click on the icon right underneath “Review”.(When you place the cursor on the icon without clicking, a box that says “Bullets; Start a Bulleted List” should appear.) Once you click on the “Bullet” icon a dialogue box should appear like the one shown above. (Indicated by the red arrow.) Click on your selection.
  • 18. Adding a bulleted list to your document(continued from previous slide) Once you have selected your bullet type you can begin listing your subject matter. Each time you hit enter on your keyboard it will automatically go to the next line of your document with a new bullet in place. Do not press enter on your keyboard until you are ready for the next bullet. Once you are done with your list use the arrow keys on your keyboard to move your typing cursor to the left to begin typing more text. Once you have completed the steps above, your document should resemble the above image. Your typing cursor should be in place to begin the next paragraph of your news letter. (As indicated by red arrow.)
  • 19. 10.Inserting clip art Click on insert (right next to home on your upper left hand screen). Click on Clip Art(indicated by the red arrow). This will bring up the “Clip Art” box on your right side of the screen(indicated by the black arrow). Type in what kind of clip art you want in the “Search for” area and click on “Go”. (For the purpose of this tutorial type in music.)
  • 20. Adding clip art to your news letter(continued from previous slide) Once have clicked on “Go”, you will see your choices in the “Clip Art” dialogue box on your right hand screen. Click on the picture of your choice. Once you have made your selection it will appear on your news letter(indicated by the red arrow). You can make it smaller or larger by clicking on one the little squares along the outline of the picture and holding it down while you drag in or outward.
  • 21. a. Text wrapping around the “CLIP ART” Once you have sized the picture to fit your news letter, right click on your picture and a dialogue box will appear(indicated by the red arrow). Click on “Text Wrapping” it will bring up another box with your choices(indicated by the black arrow). Click on your choice.(For this tutorial I have chosen the “Square” Text wrap; you will have to center your Clip Art to get the best results.) Now, you can begin typing.
  • 22. Finished product Now that you have learned how to navigate through some Word 2007 basic functions, I am confident that you can figure out how to use the rest of the functions on your own. You can use the information in this tutorial to set MLA format for your English Composition papers, or use it in every day life to design you own flyers or invitation. As with any newly acquired knowledge, practice is essential. I encourage you to save this tutorial to use as reference. I am confident that you now have a better understanding of how Word 2007 funtions.

Notes de l'éditeur

  1. Your screen should look something like this