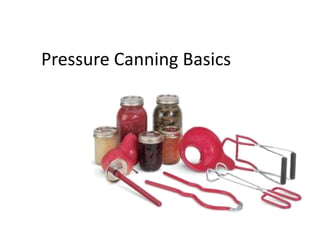
Pressure Canning Basics
•Download as PPTX, PDF•
1 like•1,038 views

A brief overview of pressure canning with specific directions for canning meats and beans.

Recommended
More Related Content
Viewers also liked
Similar to Pressure Canning Basics
Similar to Pressure Canning Basics (20)
More from Home Makers
More from Home Makers (20)
Recently uploaded
Recently uploaded (20)
Pressure Canning Basics
- 2. When is it necessary? • Preserve low-acid foods in mason jars that can be stored on the shelf • Foods include: vegetables, meats, dried beans • Provides protection against botulism – DEADLY toxin • Botulism toxin can develop in an anaerobic environment with moisture and low acid
- 3. Equipment – Accurate Pressure Gauge – Pressure Canner test periodically with County Extension agency Lid sealed with a rubber gasket - Replace gasket and over Metal on Metal pressure plug every two years With Clamps
- 4. Equipment – Mason Jars, Lids and Rims Clean Free of nicks and cracks Do not use mayonnaise jars Jars that have been stored for several years without use may be too brittle and will break in the canner
- 5. Safety Rules • Use Canner on a level surface with reliable heat source – where you can change temperature as necessary • Before each use – check vent pipe by holding up to light and making sure it is clear • If overpressure plug blows – turn off heat and allow pressure to return to zero on it’s own. Do not simply replace plug, but determine why pressure built up to a dangerous level
- 6. Step by Step Instructions • Fill jars with food product • Wipe rims and place lids on according to manufacturer’s directions • Place jars on rack in canner. If your canner is large enough, you can double stack the jars. • Pour 3 quarts boiling water over bottles and turn on heat source • Place on lid and keep on high until steam escapes from vent pipe • Allow steam to vent for 10 minutes before placing weight on vent pipe
- 7. Step by Step instructions • Pressure will climb after weight is on vent pipe. Keep on high heat until appropriate pressure is reached (13 lbs) • Begin processing time after pressure has been reached. • DO NOT LEAVE CANNER DURING PROCESSING. Adjust heat as necessary to maintain proper pressure. • At the end of processing time, turn off heat and allow pressure to drop to zero. DO NOT QUICK COOL • After canner has cooled, remove lid and jars. • Once jars are cool and lids are sealed, wash jars, label, and store on shelf.
- 8. Canned Chicken • Fresh, not frozen, boneless/skinless breasts are easy to work with • Cut raw chicken into pieces and put in jars within 1 inch of top • Add ½ tsp salt per pint • DO NOT ADD LIQUID • Place lid and rim on jar • Process in canner for 75 minutes and 13 lbs pressure
- 9. Raw Pack Beef • Boneless roasts are easy to work with • Trim raw meat and cut into pieces • Pack into mason jars to within one inch of rim • Add ½ tsp salt per pint • Put on lids and screw bands • Process in canner for 75 minutes at 13 lbs pressure • 90 minutes for quarts
- 10. Hamburger • Brown hamburger (large amounts of hamburger can be cooked in a steamer) • Pack hot into jars – gently press to fit more meat into jar. • Add 3 TB liquid per jar (water and meat drippings) • Add ½ tsp salt per pint • Wipe rims of jars and put on lid and screw band • Process for 75 minutes at 13 lbs pressure (90 minutes for quarts) • I could have packed more hamburger into this jar before canning
- 11. Sausage Links • Brown sausage in pan (it is not necessary to cook completely) • Add some water to meat drippings • Pack links in jar (12 per pint) • Add 3 TB liquid per pint • Put on lids and screw bands • Process for 75 minutes at 13 lbs pressure (90 minutes for quarts)
- 12. Canned Beans Before soaking • Wash and sort dry beans and canning • Put ½ cup dry beans in pint jar. Cover with water • Allow beans to soak for 12- 18 hours • Drain water, rinse beans and fill with fresh water • Add ½ tsp per pint • Put on lids and screw bands After • Process for 75 minutes at 13 Processing lbs pressure (90 minutes for quarts)