Anterior Direct Restorations
•Télécharger en tant que PPTX, PDF•
144 j'aime•39,061 vues

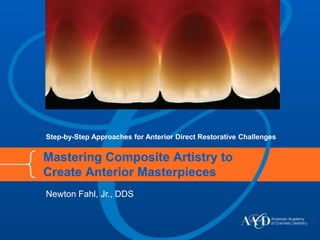
Mastering Composite Artistry to Create Anterior Masterpieces: Step-by-Step Approaches for Anterior Direct Restorative Challenges, with Newton Fahl, Jr., DDS

Recommandé
Contenu connexe
Tendances
Tendances (20)
Similaire à Anterior Direct Restorations
Similaire à Anterior Direct Restorations (20)
Plus de theaacd
Plus de theaacd (19)
Dernier
Dernier (20)
Anterior Direct Restorations
- 1. Step-by-Step Approaches for Anterior Direct Restorative Challenges Mastering Composite Artistry to Create Anterior Masterpieces Newton Fahl, Jr., DDS
- 2. This slide show presents a conservative, effective, and artistic philosophy for performing esthetic direct anterior composite restorations based on the principles of emulating the proper form, color, and function of natural dentition. This particular article outlines step-by-step procedural approaches to solving day-to-day anterior direct restorative challenges, including tooth preparation, artistic application, and how to create seamless transitions from tooth substance to the synthetic composite restoratives using correct finishing and polishing techniques. Adapted from the full article, which originally appeared in the AACD’s Journal of Cosmetic Dentistry, Winter 2011 issue. For more information, visit www.AACD.com. © 2011-2013 American Academy of Cosmetic Dentistry, All Rights Reserved
- 3. Color mock-ups were created for each tooth according to the achromatic and chromatic enamel techniques to verify the accuracy of the layering techniques. A properly trimmed silicone matrix made on a waxed-up model is key for establishing a three- dimensional blueprint for layering composite increments.
- 5. The lingual shelf must be an achromatic enamel no thicker than 0.3 mm. Once cured, the lingual shelves of both centrals denote amber-whitish nuances that replicate the opalescence present in natural enamel.
- 6. A fine-tipped dental instrument was used to gently create the dentin mamelons.
- 7. If correctly selected and applied, artificial dentins of different brands should provide nature- mimicking color and opacity. Translucent effect enamels were used on both teeth to create natural opalescence and deep translucency around and in between the mamelons.
- 8. A Vita-based chromatic enamel was applied beyond the bevel line and contoured to create a seamless transition between the tooth structure and composite.
- 9. The chromatic enamel was faded-out An achromatic enamel was placed toward the incisal third and cut back over the lobes to promote higher along the incisal and proximal areas opacity and color value. to allow room for value effect enamels.
- 10. After refinement and curing, the To render the proximal lobes, a higher value achromatic enamel microfill shade of the same optical blended in, replicating optical characteristics as those of the properties of natural enamel lobes. hybrid composite used on #8 was placed on #9.
- 11. A non-VITA, more translucent achromatic hybrid composite enamel was chosen for the middle lobes of both central incisors to allow more dentin show-through. After application and light-curing of chromatic and achromatic enamels, both centrals depict similar optical characteristics. [Right] To establish natural facial planes, the transitional line angles were evaluated and the facial planes worked with finishing discs to establish the primary anatomy.
- 12. The transitional line angles were worked and the embrasures opened until symmetry was achieved. Anatomy mapping was penciled in on the centrals to aid in attaining proper tooth morphology during finishing.
- 13. Secondary anatomy was achieved Tertiary anatomy was completed with with a flame-shaped, fine diamond a diamond bur at slow speed to create bur to reduce volume and arch-like horizontal lines. emphasize the proximal lobes.
- 14. [Left] Worn blunt rubber rotaries were used to eliminate undesired texture and to impart a smoother appearance. [Right] Specialized chamois and cotton wheels were used in the polishing steps to produce an enamel-like gloss. Felt disc and aluminum oxide paste finalized the polishing, bringing the restorations to a smooth and glossy surface.
- 15. The finished restorations presented identical color and optical characteristics and were indistinguishable from the surrounding dentition.
- 16. The optical properties of the dentin and enamel composites selected for the buildups replicate the lifelike qualities of natural tooth structures.
- 17. To receive the quarterly, peer-reviewed Journal of Cosmetic Dentistry, become an AACD member at www.AACD.com/join