SlideShare une entreprise Scribd logo
1  sur  56
Télécharger pour lire hors ligne
Potato Delivery Systems.com
POTATO GUNS
Advance Design Launchers
Catalog #1.2 2011-2012
• Potato/Tennis Ball Launchers
• High Quality and made in the U.S.A.
You’re going to like what you get!
Our quality potato guns come ready-to-
shoot and are made in the U.S.A. Many
of our designs allow you to easily
interchange barrels to shoot potatoes or
tennis balls with projectile speeds of up
to 400 mph and ranges of up to 200+
yards. They are available in two fueling
options - aerosol and MAPP gas. These
advanced design potato launchers are
powerful, easy to use and loads of FUN!
Designed for Performance . . .
To Order Call or Click: www.PotatoDeliverySystems.com
( 651) 488-0115
2
Launchers Page
MG-11 Carbine aerosol gun 4
VX-1 Stinger aerosol gun 5
VX-2 Stryker MAPP gas gun 6
VX-3 Sabre MAPP gas gun 7
Accessories
Quick Release barrels 9
Tennis Ball barrels 9
Cool Barrel Covers 10
Potato Gun Fuels 10
Order Form
What you’ll see in this catalog -
To Order Call or Click: www.PotatoDeliverySystems.com
(651) 488-0115
3
The MG-11 Carbine is our entry level potato
gun. It's smaller than our VX series guns but don't be
fooled by its size. It can put a potato downrange, up to
125+ yards, with some serious velocity! Powered by a
flammable aerosol spray, this combustion gun is easy to
use and a great bang for the buck. Features include a
breech loading barrel, electronic ignition and quick
fueling. The MG-11 Carbine comes ready to shoot.
NOTE: This gun is not designed to launch tennis balls.
The MG-11 Carbine potato gun includes:
 Powerful 175 cubic inch pressure rated combustion chamber
 1.5" x 30" breech loading standard potato barrel
 Ergonomic trigger grip with electronic ignition
 Spud cutter integrated into the barrel for fast loading
 One can of aerosol spray propellant (enough for 40+ shots)
 Eye catching candy apple red paint job
 User's manual
 Comes ready to shoot (you supply the potatoes)!
See the accessories page for optional quick release potato barrel and
other cool upgrades!
Specifications:
Projectile speed: Up to 300 mph (440 fps)
Range: 125+ yards.
Overall Length - 53" w/ potato barrel
(The gun breaks down for easy transport & storage)
Weight: Approximately 6.5 lbs.
The MG-11 is powerful and really easy to use. Just load the potato, fuel
with the aerosol propellant for 5-7 seconds, screw on the rear cap and
you're ready to fire!
Shoulder Fire Or Hip Shot Compact and just 6.5 lbs
$119.00
+ shipping and
handling
4
The VX-1 Stinger potato gun system is easy to
use and really packs a punch! With its lightweight design,
this powerful combustion gun uses an aerosol spray
as the propellant. Other features include electronic
ignition, interchangeable potato/optional tennis
ball barrels and quick fueling for lots of shooting fun.
The gun's two piece design makes it easy to transport
and store.
The VX-1 Stinger potato gun includes:
 Powerful 300 cubic inch pressure rated combustion chamber
 1.5" x 45" breech loading standard potato barrel
 Comfortable pistol grip with electronic ignition trigger
 Spud cutter integrated into the barrel for fast loading
 One can of aerosol spray propellant (enough for 40+ shots)
 Eye catching candy apple red paint job
 User's manual
 Comes ready to shoot (you supply the potatoes)!
See the accessories page for optional tennis ball barrels and other
cool upgrades!
Specifications:
Projectile speed: Up to 350 mph (500 fps)
Range: 150+ yards.
Length - 73" with potato barrel or 64" with tennis ball barrel
(the gun breaks down for easy transport & storage)
Weight - approximately 9 lbs.
You'll be amazed at how powerful & easy it is to use. Just
load, fuel with the aerosol spray for 5-7 seconds, screw on
the rear cap and you're ready for some high speed fun!
Load Fuel Shoot!
$179.00
+ shipping and
handling
5
The VX-2 Stryker potato gun system elevates
potato guns to a whole new level. With its self-contained
design, this combustion gun is powered by a MAPP gas
cylinder that is integrated into the body of the gun for
fast and easy fueling. Other features include electronic
ignition, interchangeable potato/optional tennis ball
barrel and an internal chamber fan for maximum power.
The VX-2 Stryker potato gun includes:
 Powerful 300 cubic inch pressure rated combustion chamber
 1.5" x 45" breech loading standard potato barrel
 Comfortable pistol grip with electronic ignition trigger
 Spud cutter integrated into the barrel for fast loading
 Internal chamber fan with control box for maximum power shots
 Electronic timer for improved fueling accuracy and reliability
 Easy fueling MAPP cylinder housing
 One MAPP fuel cylinder (enough for 60+ shots)
 Eye catching candy apple red paint job
 User's manual
 Comes ready to shoot (you supply the potatoes)!
See the accessories page for optional tennis ball barrels and other cool
upgrades!
Specifications:
Projectile speed: Up to 400 mph (600 fps)
Range: 200+ yards.
Length - 73" with potato barrel or 64" with tennis ball barrel
(The gun breaks down for easy transport & storage)
Weight - Approximately 13 lbs. (with fuel cylinder)
The self contained MAPP gas cylinder fuels the gun in 30-40 seconds.
There is even a countdown timer for accurately! The internal chamber
fan stirs the fuel/air mixture to provide maximum power. It also allows
for evacuation of the spent gas in the combustion chamber quickly so
you're ready for the next shot... fast! The fan is self-contained and
battery operated.
Self Contained Fuel Tank Accurate Fuel Timer Internal Chamber Fan
$299.00
+ shipping and
handling
6
The VX-3 Sabre potato gun system blows
the competition away! We’ve reduced the overall
length of the gun with the advanced over/under
design. This completely self-contained combustion
gun is powered by a MAPP gas cylinder that
is integrated into the body of the gun so fueling is
always quick & accurate. We’ve also simplified the
fueling process so you can be ready to shoot in
under 10 seconds. Add in the electronic ignition,
the two quick release interchangeable barrels plus
the high powered internal chamber fan and you’ve
got the power to launch a potato or tennis ball at
mach speeds with a squeeze of the trigger. We
designed the VX-3 for total versatility and ease of
operation.
The self contained MAPP gas cylinder coupled with the
QuickFuel™ metered fueling system is simple to operate and
lets you precisely fuel the gun in under 10 seconds. This means
faster shooting with less misfires. The integrated quick release
barrel system lets you switch from the breech loading potato
barrel to the tennis ball barrel with ease.
QuickFuel™ metered fueling system
Easy to use quick release barrels
The VX-3
shown with
quick release
potato barrel
7
The VX-3 Sabre potato gun includes:
 Compact over/under design makes the gun easy to handle
 Powerful 225 cubic inch pressure rated combustion chamber
 QuickFuel™ metered fueling system helps eliminate misfires
 Comfortable pistol grip with electronic ignition trigger
 One 1.5" x 45" quick release breech loading potato barrel
 One 2.5” x 30” quick release tennis ball barrel with ramrod
 Spud cutter integrated into the potato barrel for fast loading
 Internal chamber fan with control box for max power shots
 Integrated MAPP cylinder housing
 One MAPP fuel cylinder (enough for 60+ shots)
 Eye catching red and black paint job
 User's manual
 Comes ready to shoot (you supply the potatoes)!
Specifications:
Projectile speed: Up to 400 mph (600 fps)
Range: 200+ yards.
Length - 50" with potato barrel or 46" with tennis ball barrel
(The gun breaks down for easy transport & storage)
Weight - Approximately 16 lbs. (with fuel cylinder)
The built in chamber fan really
ramps up the power
The over/under design of the gun makes the
VX-3 Sabre easy to handle
The VX-3
shown with
quick release
tennis ball barrel
$489.00
+ shipping and
handling
With the gun’s internal chamber fan you can
really ramp up the power! Self-contained and
battery operated, it stirs the fuel/air mixture
during the shot for maximum power. It also
allows for the evacuation of the spent gas in the
combustion chamber in a matter of seconds so
you're ready for the next shot... fast!
8
Quick Release Potato Barrel - This upgrade allows super quick and
easy attachment and removal of a 1.5" diameter potato barrel so
loading is a cinch! The barrel is designed for breech loading so no ram
rod is necessary. Just flip up the locking levers, remove the barrel and
load your potato. Then insert the barrel into the quick release and lock
the levers in the down position and you're ready to go. It couldn't be
faster or easier! You get everything you need to upgrade your potato
gun including the locking collar, quick release potato barrel and easy
installation instructions.
*This product is compatible with the MG-11 Carbine, VX-1 Stinger
and VX-2 Stryker.
Quick Release Potato Barrel - $59.00
Part# B101
Tennis Ball Barrel (Standard Attachment) - With this
standard screw on 30" barrel you can send a tennis ball into orbit! The
barrel kit comes with everything you need and includes a ram rod for
muzzle loading the tennis ball.
*This product is compatible with the VX-1 Stinger and VX-2 Stryker.
Standard Tennis Ball Barrel - $39.00
Part# B104
Tennis Ball Barrel with Quick Release - Send that tennis ball into orbit with
this quick release tennis ball barrel. The barrel is 30" long and comes with our
unique quick release system so attaching and removing the barrel couldn't be
faster or easier! Just insert the barrel into the quick release, fold down the locking
arms and you're ready to go! You get everything you need to upgrade your potato
gun including the locking collar, quick release tennis ball barrel, ramrod and easy
installation instructions.
*This product is compatible with the VX-1 Stinger and VX-2 Stryker.
Quick Release Tennis Ball Barrel - $69.00
Part# B107
VX-1 Stinger shown with Standard Tennis Ball Barrel
VX-2 Stryker shown with Quick Release Tennis Ball Barrel
ACCESSORIES
9
Barrel Cover -
This super cool option is designed to fit our standard screw-on and optional quick release
1.5" diameter x 45" long potato barrels and is guaranteed to make your potato gun really
stand out! Modeled after the heat shield on the famous Browning .30 caliber machine
gun, this barrel cover is lightweight and easy to install. Now you can add to the look of
your already bad ass cannon! This accessory earns five out of five stars for cool factor!
*This product is compatible with the MG-11 Carbine, VX-1 Stinger and VX-2
Stryker.
Barrel Cover - $39.00
Part# BC109 (for the MG-11)
Part# BC110 (for the VX-1 and VX-2)
VX-2 Stryker shown with optional Quick Release Potato Barrel and Barrel Cover
Barrel Cover shown with optional Quick Release
MAPP Gas Fuel Cylinder -
A blend of propane and acetylene, this gas is used to fuel the VX-2 Stryker and VX-3 Sabre
potato gun. We have found it to produce superior combustion chamber pressures that can
propel a potato/tennis ball up to 200+ yards at impressive velocities. Each canister has had the
threaded nozzle carefully aligned so it easily screws into the gun’s fuel canister housing and
contains enough fuel for 60+ shots. It's always a good idea to have additional fuel around, so
pick up an extra cylinder or two and be ready for some shootin' good times!
*This product is compatible with the VX-2 Stryker and VX-3 Sabre.
MAPP Fuel Gas Cylinder - $15.00
Part# F201
Aerosol Fuel Canister -
Aqua Net hair spray, with its high ether content, has been a favorite fuel of potato gun shooters for
years. Highly flammable and able to generate considerable chamber pressure, we use it as
a propellant for the MG-11 Carbine and VX-1 Stinger potato gun. A short spray of 5-7 seconds is all
you need for a powerful shot which propels a potato/tennis ball up to 150+ yards. Each canister will
last for 40+ shots. Don't be caught short - stock up on a few cans today!
*This product is compatible with the MG-11 Carbine and VX-1 Stinger.
Aerosol Fuel Canister - $5.00
Part# F204
10
To Order Call or Click: www.PotatoDeliverySystems.com
(651) 488-0115
DISCLAIMER
It is expressly understood and agreed that by the use
hereof by the buyer or any subsequent user that the
manufacturer and/or seller shall in no way be
deemed or held liable or accountable upon or under
any guarantees or warranties, expressed or implied,
statutory, by operation of law or otherwise beyond
that expressed herein. This product is sold with all
faults and without any warranty of merchantability or
fitness for any particular purpose, expressed or
implied for the particular purpose for which the buyer
intends to use it.
IMPORTANT INFORMATION: You must be 18
years or older to purchase a potato gun. If you
are under 18 years of age, please, do not attempt
to order one. It is the buyer’s responsibility to
check with their local Law Ordinance for the use
and possession of these products. If these devices
are not legal in your county, country, providence
or state, please, do not buy them.
TEMPERATURE NOTE: For proper ignition the
potato gun and propellant should be at room
temperature (around 65 to 85 degrees). If you
store the gun and propellant in a cold or hot
place, let them come to room temperature before
shooting.
READ THE FOLLOWING INFORMATION BEFORE YOU ORDER!
Prices & specifications subject to change without notice.
This gun shoots a projectile up to 400
mph with a range of 200 yards+ and
can cause serious injury or death. DO
NOT point or shoot at people or
animals. THIS IS NOT A TOY. FOR
ADULT USE ONLY.
DANGER
11
Order Form
Part # Description Qty Price Subtotal
Order total:
Tax (7.25% MN only):
Shipping/ handling:
Call for
quote
Total:
Ship to:
Name
Address
Daytime phone
Method of Payment:
 Check  MasterCard
 Discover  American Express
 Visa
Credit Card # Exp.
Date3 or 4 digit security code:
Signature
Prices & specifications subject to change without notice.
Potato Delivery Systems
P.O. Box 131503
Roseville, MN 55113
Phone: (651) 488-0115
E-mail: sales@PotatoDeliverySystems.com
To Order Call or Click: www.PotatoDeliverySystems.com
(651) 488-0115
PLAN #1
Potato Gun
Introduction:
In about May '03 I was considering building a potato gun (also know as a potato canon or
spud launcher). I had witnessed one such canon at a family camp called Elim Lodge.
Some guys went out on a boat, shot potatoes straight in the air with tremendous force and
they'd land in the lake. It looked like lots of fun.
A friend of mine, informed me that he was going to be building one so I decided that
now was a good time to start building.
Note: This is the 'story' of Potato Gun I. I found out what worked and what didn't then I
created a much more powerful gun, Potato Gun II and created a how - to - build guide for
that gun. If interested, check that out as well. Also, don't forget to check out the many
other projects and articles on this site.
After doing some research I came up with a list of the basics:
- Every gun has a wider, shorter section called the combustion chamber and then a
longer, skinnier section for the barrel.
- Most guns are powered by WD40 or cheap hairspray.
- Most guns ignite the fuel using a BBQ igniter that creates a spark.
Basic Operation: Stick potato in top, push it down with a pole, unscrew cap, spray 3-6s
worth of WD40. Screw back on the cap. AIM and FIRE.
Caution: I contacted my local police department and they informed me that it was fine
to use the gun out in the country but did not recommend using it in the city. They are
VERY loud and VERY powerful. My gun shoots a potato over 300yds. Noise is also an
issue, so please don't use them in a residential neighbourhood.
The Igniter:
I used a basic BBQ igniter. They can be found for less than $20 at Home Hardware,
Canadian Tire or Home Depot. I have bought 3 igniters so far because they keep wearing
out on me. I'm currently looking for a battery powered model with no mechanical spark
mechanism.
I took the cable they provided, used a couple of wire ties to keep it from being too long
and glued the ends close together. The ends need to be close together for the spark to
travel from one wire to the other. Yes - that is a pen cap I used. It was the closest thing
around when I was gluing everything and it's working well.
The Gun:
The gun body can either be made of PVC or ABS piping. ABS is slightly more
expensive, but is less corrosive and stronger so I've heard. I went with ABS because they
sold it by the foot at Home Hardware and places around here only sold PVC pipe in 10ft
sections. The piping itself is quite cheap (couple dollars / ft) but it's the fittings that raise
the price of the project.
LEFT: This is the gun in
it's entirety. It has a barrel lenght of 4 ft and a combustion chambre length of 26". In
total, the gun is over 6 feet long and weighs about 9lbs.
RIGHT: Here's a closer look at the combustion chamber. It goes from 4" to 2" using a
4"to3" bushing and then a 3"to2" bushing. Each bushing piece cost about $6. The handle
portion is a T-pipe
A closer look at the trigger section is below. I drilled a hole using a spade bit and the size
required was coincidentally the same size as an RJ-45 network cable jack so I already
had the correct spade for the job. The trigger is secured using hot glue. All of the pipes
are held together using pipe glue (about $3.00). Be careful when using the glue because it
is corosive. It joins the pipes by corroding a bit of the plastic and "melts" them together.
One end of the T-pipe is threaded and I have a threaded cap that matches it. That it where
the fuel is sprayed in.
The Fuel:
My first shot with the gun was in my backyard. Anything in an aerosol can should
theoretically work. Take note: Lysol disinfective spray does not. I tried several times to
fire it with the spray to no avail. When I was building I was wondering if it would really
work and this seemed to confirm my fear that it would not. Next I tried hairspray. I
pulled the trigger and heard a thunk as the potato hit the brick of the house. I had some
fun with it that night with the hairspray. I shot it straight up in the air and it didn't come
down until about 5 seconds later. I fired it at trees and other stationary objects and had
lots of fun but I had no idea of the range or power capability. Later that week myself and
my friend headed out to the country by a river to try them out. At first I was dissapointed
by the range, but after a few trips we perfected the ammount of spray and the type of fuel
to get the best results.
My fuel of choice: WD40
Update: Upon Further Testing with POTATO GUN II, Right Guard Deoderant
Spray is now my fuel of choice.
It's a fair bit safer than propane, extremely cheap, doesn't leave a sticky residue (although
it does leave an oily one) and it's extremely powerful. Using WD40 my gun can launch a
standard potato about 300yds. Now that's what I call fun! These guns are extremely
powerful, so be careful. Hitting someone with one would surely hospitalize them.
Cost of Project:
Item: Cost:
ABS Pipe 15.00
Fittings: joints, caps, bushing,
glue
35.00
BBQ Igniter 15.00
Total: $65.00
PLAN #2
How-To Build a Potato Gun
Page 1: Design and Construction
This guide will show you exactly how to build a potato gun. These spud launchers are
quite powerful and I take absolutely no responsibility for what you do with this
information. In most places of the US it is legal to own these canons, and in my area of
Canada they are legal as well - but check with your local authorities before building to
make sure.
Step 1: Design and Planning
I really like the design of Spud Launcher I. I think it looks really cool, so I more or less
duplicated the design for Spud Launcher II. This time around instead of blindly building
I did a bit of research on the ideal combustion chamber volume to barrel volume ratio.
Information on this is hard to come by but one source said 1.5:1 was ideal. I measured
Spud Launcher I and it had a ratio of 2.1:1 and it was quite powerful. If I followed a
1.5:1 ratio the gun would totally loose the cool "canon" appearance so I decided to go
with a ratio of 1.8 : 1. This means that the barrel is a bit longer and the chamber is a bit
shorter than Potato Gun I.
I planned to use 4" ABS
for the chamber and 2"
ABS for the barrel.
Pi*4^2*21 / Pi*2^2*47
= 1.78 : 1
Step 2: Shopping
If you've got a basic gun design in mind, you can keep this in mind when you go to the
hardware store and see what's available. Here's a list of parts I bought for my gun:
- 13" of 4" ABS
- 48" of 2" ABS
- ABS Cement (the
glue)
- Increaser 3 " to 4 "
- 3" to 2" Bushing
- 4" Threaded Adapter
- 3" Threaded Adapter
- 4x4x3" ABS T-Pipe (the
handle)
- 4" Threaded
Plug
- 3" Threaded
Plug
- Electric BBQ
I went to both Home Hardware and Home Depot, compared prices then bought what I
needed. Most things were cheaper at Home Depot and they had better selection.
When doing your measurements, don't forget to include the length of the T-Pipe and
anything else you include in your design. If I bought 21" of 4" ABS - my combustion
chamber length would be closer to 3 ft.
Step 3: Getting Ready
Here's all the parts I bought laid out - basically how they'll be put together.
Here's a list of tools you may need:
- Drill - Glue Gun - Tape Measure -File
Step 4: Assembly
Warning: the ABS cement is corrosive. It won't burn your skin, but it's not a good idea to
spill it on your clothes. If you want to try something fun, the cement does eat through
Styrofoam.
Construct the Handle and Chamber Portion of the gun using the same technique.
If you have all the parts, to assemble the gun takes about 20 mins (not counting ignition
installation). Once you have the chamber assembled you should install the Ignition
System. It's much easier to work with a 2ft gun than a 6ft gun when installing the
ignition system.
Ignition System:
In Spud Launcher I, I used a standard push-button BBQ Igniter. (About $15cdn). I've
replaced it 3 times - they wear out fairly quickly and do not guarantee a spark every time.
This time around I went the more expensive but RELIABLE route of using an electric
BBQ igniter (about $25). These work with a battery and when the button is pushed, about
5 sparks / second are produced. Very effective.
Drilling and Filing:
Fitting the Ignition System:
The purpose of having the bottom of the handle be removable is because I wanted to
place the BBQ igniter inside it and also be able to unscrew it to replace the battery when
necessary. Also, by putting a threaded cap into the bottom - it creates a much sturdier fit
than just gluing the cap in like I did in Potato Gun I. This became problematic after a fair
bit of use.
The 3" with the electric igniter is screwed in and the ignition system is installed. When
you hit the switch you hear a "click-click-click..." of the spark going. Very nifty.
Attaching the Barrel:
This is just another glue-n-push and the gun is complete.
Project Cost:
Item: Cost: (cdn)
4" Threaded Adapter 5.98
3" Threaded Adapter 3.96
4" Threaded Plug 2.96
3" Threaded Plug 1.96
4x4x3" T-Pipe 11.86
3 to 2" Bushing 3.29
3 to 4" Increaser 5.99
13" of 4" ABS 2.68
48" of 2" ABS 3.56
ABS Pipe Cement (glue) 2.99
Electric BBQ Igniter 24.99
15% Tax (in Ontario) 10.52
Total $80.75
www.jbprojects.net/projects
PLAN #3
The Basics:
Build a modular ignition system.
We've found that most people don't want to buy another grill lighter for each gun they
make so we've designed a modular ignition system. This allows you to easily use one
grill lighter for all of you guns. (uses screw electrodes in the following plans)
What you need: 4" of 3/4" PVC pipe, 2 alligator clips, 4-8' of cable, one grill lighter,
some electrical tape
Take the wire and cut it in half.
Connect a alligator clip to the end of each wire.
Tape the two wires together.
Connect the other ends to the grill lighter (connecters should be included)
Slip the 3/4" PVC over the clips and over the wire to the trigger (the PVC should fit
perfectly around the trigger)
Build a modular ignition system Type 2.
INSTEAD of using the screws in the following gun plans use this setup!!
Another way to use the modular ignition system, is to permanently glue the ends of the
wires into a cap to use with all the guns.
What you need: 4" of 3/4" PVC pipe, a paper clip, 4-8' of cable, one grill lighter, some
electrical tape, cap to use in all of your guns, Quick Steel glue, soldering equipment.
Take the wire and cut it in half.
Drill 2 tiny holes in the cap (on either side of the square deal).
Insert the wires in the cap.
Use Quick Steel to secure the wires in place.
Solder a paper clip to the end of one wire.
Bend the paper clip so that is almost touches the other wire end.
Tape the two wires together on the outside.
Slip the 3/4" PVC over the clips and over the wire.
Connect the other ends to the grill lighter (connecters should be included)
Slip the 3/4" PVC over the trigger (the PVC should fit perfectly around the trigger)
Build a spud-shell cutter
After making a gun you need an easy way to make the cylindrical shells that you fire out
of your gun What you'll need: 3" of PVC pipe (it should be the same size of the gun's
barrel.)
Cut the piece of the barrel sized PVC
Spend some quality time sharpening one end of the PVC
To use the spud-shell cutter
Put a spud on the ground
Place the spud-shell cutter on top of the spud
Smack the top of the spud-shell cutter
Remove the shell form the spud-shell maker
Lock and load
Build a basic spud gun.
Refer to these instructions when build any of the other Spud Works designed guns below.
What you'll need: 6-10" of 3" PVC pipe, 1' to 2' of 1.5" PVC pipe, a 1.5" to 3" reducer, a
3" female converter (goes on the 3" pipe and has threads), cap for the 3" female
converter, PVC purple primer, PVC glue, one 2" screw, one 1.5" screw, and a modular
ignition system
Cut all the pieces to length.
Purple prime all the areas which will require glue.
Put the female converter to the 3" pipe, then glue the 3" to 1.5" converter, then the 1.5"
barrel to that. Only put glue on the pieces you are currently putting together.
Screw the 2" screw in to the center of the 3" pipe.
Screw the 1.5" screw in to the center of the 3" pipe a quarter turn.
LET IT DRY!
After you let it dry, let it dry some more.
Think about how glue fumes blow up, let it dry some more.
Take your new toy (ok, spud guns are not toys) outside.
Connect the modular ignition system (above) to the electrodes (those screws).
Have a friend stand 5 feet or so away from the gun and have him look in the rear leave
the cap off silly!. Click the igniter. Did he see a spark?
If he did, do it again.
Isn't that fun? Do it again, if your friend is not giddy, STOP.
You now have a spud gun! To figure out how to fire these damn things look at the "What
the?" pages.
Intermediate:
Build The Spudinator
What you'll need: 1' of 3" PVC pipe, 3' of 1.5" PVC pipe, two 1.5" to 3" reducers, a 3"
female converter (goes on the 3" pipe and has threads), cap for the 3" female converter,
PVC purple primer, PVC glue, one 2" screw, one 1.5" screw, and a modular ignition
system
This gun is built the same way as the basic gun but its a lot bigger and has a bigger
trajectory and a bigger boom. The second 1.5"-3" reducer goes on the end of the barrel
and is just for looks.
Build The Big Burtha
What you'll need: ~1' of 6" PVC pipe, 3' of 2" PVC pipe, a 6" to 2" reducer (you may
need more than one reducer to do this job), a 6" female converter (goes on the 6" pipe
and has threads), cap for the 6" female converter, PVC purple primer, PVC glue, two real
long screws, and a modular ignition system
This gun is built the same way as the basic gun but its a lot lot lot bigger and has a insane
trajectory and a bigger boom blast ka-boom. (We have not built one of these big
suckers...yet. If you do decide to build this bastard, tell us your experience with it, what
you blew away, etc.
Build The Zookenie (patent pending)
What you'll need: 6-8" of 3" PVC pipe, 1' of 3/4" PVC pipe, a 2" to 3/4" reducer (or
series of reducers), a 2" female converter (goes on the 2" pipe and has threads), cap for
the 2" female converter, PVC purple primer, PVC glue, 2 screws, and a modular ignition
system
This gun is built the same way as the basic gun but its a lot smaller and is VERY
portable.
More Advanced
Build The Silencer
(untested)
What you'll need: 6" of 3" PVC pipe, 8"-9" of 1 1/2" pipe, two 3" to 1 1/2" reducers,
some foam rubber.
Take the 1.5" Pipe and drill 1/8" holes in it each about 1" from
each other.
Take both of the reducers and file out the ridge that prevents the
1.5" pipe from going all the way through.
Slide the 1.5" through the reducer so that it looks like an
umbrella
Glue the pipe to the reducer so that it leaves room for the
silencer to be glued to the gun straight.
Glue the filed reducer, with the 1.5" pipe through it, to the end of
the 3" pipe
Stuff the gap between the 1.5" and the inside of the 3" pipe with
the foam rubber.
Glue the other reducer to the end of the 3" letting the 1.5" go
through it
Glue it to the end of your gun
Build The Lil' Bastard (patent pending)
What you'll need: 18",4",& 1 1/2" sections of 1 1/2" PVC pipe, 6" section of 2" PVC
pipe, a 2"X 2"X 1 1/2" 45 degree Tee, a 2" to 1 1/2" reducer, a 1 1/2" pipe cap, 2" female
converter (goes on the 2" pipe and has threads), a 2" threaded cap, two screws for the
electrodes.
The Lil' Bastard is a gun that a step ahead of the Zookenie. It still shoots a 1.5 inch, but
it's very portable and, spite the size, packs a punch.
Start with the 45 degree Tee piece, glue the 4" 1.5" section to the protruding 1.5" 45
degree part.
Glue the 1.5" pipe cap to the 4" 1.5 section. This is your handle.
Hold the components you've glued together, so that the handle is pointing up and out to
the side.
Glue the 6" 2" section to the top of the current components.
Glue the 2" female thread converter to the top of that.
Glue the 18" 1.5" section to the bottom of the current components.
Lastly install your electrodes.
You now have a Lil' Bastard (patent pending).
Build The Psycho Sniper
Still under development
Most Advanced
Build the All in One Spud Gun
Designed by: Allen Forsman
Assemble all PVC parts as shown in drawing.
C The igniter is your basic gas grill igniters.
C Take a small nail or cut a short piece of stiff wire
Run from the ground connection near the base of the unit
to the tip and epoxy in place with some 5 minute epoxy.
C You want to leave about 1/16" to 1/8" between
the tip of the wire and the tip of the sparker.
C After the epoxy is hard you can adjust the gap to get the best spark.
C Drill a hole is the PVC threaded plug and epoxy the spark unit into the plug.
C Use enough epoxy on the inside to fill the square hole about half-way up.
For can and ramrod attachments, use PVC glue.
You can make the attachments a lot sturdier by saving the PVC "sawdust" from cutting
the pieces and using it as filler around the gaps and soaking it with PVC glue.
Can Cradle-
Cut 1" long pieces of 1.5" PVS in half.
Glue both pieces upside down to top of the 3" tee.
Use rubber bands to hold the WD-40 can in place.
You can use just about any flammable spray stuff that has a tube.
Drill a small hole in the top of the 3" cleanout just big enough to stick the
tube into.
Cut the tube to leave about 1/2" inside the combustion chamber.
If you want you can seal around the spray tube with silicone or epoxy
(the small size will not make a noticeable drop in pressure even if it
leaks)
I used WD-40 because you can get it in small cans, but it tends to leave an oily residue.
Just about anything that uses butane or propane as a propellant will work.
If you use a big can of whatever, size your can cradles accordingly.
Ram Rod Clips-
Use two 1" pieces of 1" pipe or 3/4" flared parts.
Cut each piece a little more than half way around.
Glue the pieces to the bottom of the barrel.
The ramrod will clip into these when not in use.
A couple of notes:
Sharpen the inside of the tip of the barrel
with a file or some heavy sandpaper
to cut the potatoes cleanly and evenly.
Also, cut the ramrod long enough to leave the potato about
2 or 3 inches from the combustion chamber.
To fire the gun simply:
Ram a potato into the gun as far as the ramrod will go.
Close the ball valve and give a little shot from the spray can.
(You may have to experiment a few times to find out just the right amount.)
(Start with a very short squirt and work your way up.)
Take aim and press the igniter button to fire the cannon.
Whoop and holler. While this has absolutely no effect on the trajectory, it's really a lot of
fun!
Open the ball valve and blow lightly into the barrel a couple of times
(like in the John Wayne movies). This forces fresh air into the combustion chamber.
Go to step 1.
Build The Spudzooka (patent pending)
Bazooka type gun
Plans still being written
http://www.capital.net/~anker/plans.htm
PLAN # 4
Diagram
(I have my igniter in the end cap but it could be mounted on the side of the chamber to
make it safer)
(I also have a thread join between the chamber and the barrel, only for portability)
Parts
Equipment Specifications Quanti
ty
2 inch pvc pipe (barrel) 36 inches long 1x
4 inch pvc pipe (chamber) 12 inches long 1x
4 inch – 2 inch reducer - 1x
4 inch thread end for chamber Male (end cap screws on to this) 1x
4 inch end cap To screw on thread end 1x
Barbeque ignitor Push button type 1x
PVC glue Professional strong glue! -
Assembly
1. Cut all pieces to size.
2. Use sand paper to roughen surfaces to be glued (creates stronger
hold).
3. Glue all pieces together as shown in the diagram.
4. Drill hole for the ignitor, either in the end cap or on the side of the
chamber. Make sure it fits tight.
5. Leave over to dry (at least) before trying.
Operation
1. Slide a projectile down the barrel until it stops at the beginning of the
chamber (make sure it is not tight, loose projectiles fire better).
2. Open end cap, spray in something flammable (deodorant) for about 3
seconds and quickly replace end cap.
3. Press the ignitor button and hold tight.
If the gun is made correctly it should fire at least 400 meters. If
something goes wrong, I will not be held responsible. You made the gun
by your own choice.
PLAN # 5
Build Your Own Launcher
http://www.spudtech.com/content.asp?id=5
Alright, you want build your own potato launcher. These instructions will help you on
your way to an effective yet simple spudgun that should provide hours of enjoyment for
you, your friends, but probably not the old man down the street who gets mad when your
car backfires!
COPY AND PASTE THIS ENTIRE PAGE INTO WORD AND PRINT IT. No need to
keep running back to the computer while you are trying to build your launcher.
A few things to note before proceeding:
1. These instructions/procedures are provided as-is. No guarantee is made that this device
will function as well or better as I have experienced, intend, or describe it to operate. In
other words, your results may vary, and they may even be very undesirable results,
possibly resulting in personal injury or property damage. Please review the site
disclaimer for more information.
2. The wording and statements/nomenclature pertaining to the construction and operation
of this potato launcher are intended as such to help ensure one attempting to do this has a
basic understanding of the equipment and materials involved. If some of the statements
seem 'Greek' to you or you do not recognize some symbols or phrases, that is wholly my
intent, and you should obtain assistance from a trusted source or not proceed at all.
3. These instructions are intended for a beginner or someone that has never built a
spudgun before. The procedure outlined below is not necessarily the method myself or
another experienced spudgun builder uses. These instructions will help guide you in
building a "sound" piece of launching hardware. As you gain experience, you may find
that different things may work better for you....but start simple. Thanks, and happy
spudding!
4. The finished product should look something like the first picture on the "combustion
spudgun" page of the site.
Keep in mind that PVC pipe/fittings are not approved by the manufacturer to be used for
the purpose of constructing spudguns.
Here they are, in the recommended order to check them out:
Step 1: Getting stuff to build it
This materials list is to build a very simple starter model potato launcher, with the intent
to get the most bang from your buck (so to speak). By no means is this the only way to
build a launcher, or nearly the coolest, but still able to provide hours of fun.
MATERIALS:
Obtain the following items: (qty 1 unless so indicated in [])
10" of 4" SCH40 PVC water pipe (chamber body)
36" of 1 1/2" SCH40 PVC water pipe (barrel stock) Or get yourself a piece of SGTC
rifled barrel stock.
4" PVC coupler
4" x 1.5" PVC bushing (if not available combine two, like 4x3 and 3x1.5)
4" PVC FSxFNPT adapter (clean-out adapter)
4" PVC MNPT threaded plug
PVC primer, one with dye in it if possible (purple, blue)
PVC pipe cement, medium body is best
[2] #8x2 1/2" flat or round head allthread machine screws, drive not important
Two feet of 16g or lower stranded insulated wire
Electrical and Duct tape (of course!)
Red button BBQ ignitor/striker, a replacement found near new BBQ's (find one for a grill
w/side burner if possible)
EQUIPMENT/TOOLS:
Suggested tools for building the potato launcher:
Hand wood saw (or hacksaw, for cutting pipe, maybe you already got it cut at the store)
Pocket knife
Needle Nose Pliers
Soldering Iron w/PbSn or Pb free solder (or just use tape and hope it works)
Drill motor with bit 0.010" larger than machine screw shank
Appropriate driving tool for machine screw (probably Phillips)
Medium half round file for shaping pipe (or a lathe if you got one)
Rag for PVC cement clean up (disposable)
Step 2: Preparing the materials for assembly
To make sure everything goes together properly and smoothly, proper conditioning and
sizing of the materials is necessary. Pay particular attention to the shaping of the pipe
ends, as this is a major factor in proper solvent welding with the fittings.
PVC PIPE SIZING
Cut the two pipes to size, 10" and 36" with the saw unless you already did so in the store.
Using the file, take off the sharp corners on the inside AND outside of the pipe.
Radiusing the inside helps reduce the amount of potato scud that can build up in the
launcher, and breaking the outside corner ensures proper solvent welding, if this is not
done leak paths may result. Cut ends should be as square as possible. To one end of the 1
1/2" pipe it is suggested that the inside be chamfered about 0.020" and the outside filed
or turned down to almost meet the inner chamfer, creating a blunt knife to help size the
potato. It will work without out this step, but a lot messier!
PVC FITTINGS
Inspect the fitting for really bad weld lines or possible large dislocations that may result
in premature failure. Remove all paper tags or labels by peeling, scraping, even using a
bit of primer to clean off the last adhesive. File off any sharp sprues that may hamper
your ability to grip the fittings firmly when assembling.
IGNITION SYSTEM
Cut the wire into two equal lengths. Strip and twist each end about 3/4" back. Taking the
BBQ igniter, upon inspection you should find a plug on the tail end (one electrode site)
and close inspection should reveal a very fine wire embedded in the side body of the
igniter, close to the button lip.(if you have a 2 pole ignitor -- side burner type -- this step
will be much easier) This fine wire is attached to the igniter nearest the button, as the
wire is just pressed into this slot which might be about 3/4" long. Carefully extract the
other end of the wire with the knife, removing all but the last 1/4" or so from the slot.
Carefully twist this wire to one end of one electrode wire stripped previously.
Immediately solder this connection together taking care to not break or extricate the fine
wire from the plunger body. Cool with spit (really!), dry, and tape this joint back against
the body with electrical tape, using enough to immobilize the wire with gentle tension.
Take the wire supplied with the igniter, the one with the plug that fits on the base, and
cut leaving about 2" from the plug end that will fit into the base of the igniter. Strip and
twist this stub to the other electrode wire, soldering, and taping over the solder joint. You
now have an igniter to make a 'remote' spark. Try it holding the two free electrode wire
ends about 1/4" apart--don't touch them! (your BBQ igniter may be a bit different, the
idea is to get both electrodes away from the igniter, so you don't make a big hole in the
launcher combustion chamber.)
Step 3: Assembling the Launcher
Now you get to stick all the stuff together, using pipe glue and tape and more solder if
you like! Just don't breathe too much pipe glue solvent...it'll make you nuts!
I Chamber Assembly:
Prime both ends of the 4" pipe, also priming the 4" bushing, both 4" coupler sockets, and
4" slip on the adapter. DO NOT get any primer on the adapter threads! Immediately
apply pipe cement to the three primed 4" fittings, then LIBERALLY to both ends of the
4" pipe. Start both the coupler and adapter fittings on the pipe, start the bushing in the
coupler, then right the assembly with the threads up, pressing it together with body
weight while twisting about 1/2 turn. Hold this position for at least 30 seconds. The pipe
ends should bottom each about 1 1/2" inside the fitting socket. If they both do not
bottom, either apply more force IMMEDIATELY somehow to get it to, or you are
screwed and have to throw it out--start over with that. If the fittings and pipe are properly
conditioned this should not be a problem. Wipe up any spilled glue with the rag, but
leave a good bead at the external pipe/fittings line. If any glue got on the threads get it
out of there as fast as possible! Any glue on your hands should just be left to dry and then
peel it off. Using solvent to remove it will just increase your exposure to it.
II Electrode Installation:
Wait about 10 minutes for the glue to set. Using the proper size drill bit, put two radial
holes 90deg apart about 1/2" back from the front edge of the adapter fitting--the plastic
here is about 1/2" thick as well. Drive in the two machine screws nearly all the way,
leaving about 1/8" between the screw head base and the plastic. The ends may touch or
be far apart--the electrode gap will be calibrated after the electrode wires are connected.
III Barrel Introduction:
Prime one end of the barrel and the 1.5" socket on the bushing. If one end of the barrel
was chamfered to a knide, prime the square 'regular' end of the pipe. Apply glue,
liberally to the pipe, and press together, again using a 1/4 turn motion to bottom. Hold
for 30+ seconds. After releasing place the unit upright for several minutes, to let the glue
set a little more. Solvent welding is more of a curing than a drying process. Solvent is
lost, hence the term drying, but the action of the solvent effectively cures all those
individual plastic parts into one continuous physically joined piece of plastic. Properly
done, solvent welds are always stronger than bulk pipe.
IV Wire it Up:
Tin the two free ends of the electrode wires if possible. With each end bend it around the
screw shank, just below the head, in a clockwise manner (you may need needle-nose
pliers if the wire is heavy). After the wire is at least 3/4 turn around the shank, tighten the
screw, pretty good, biting the wire into the plastic a little. Liberally apply electrical tape,
rubber tape, or silicone RTV to the exposed metal areas, as they will shock you all day
long if not insulated properly. Before taping tug on the wires a little to make sure they
are firmly gripped by the screw head.
V Electrode Calibration:
Setting the gap is next. The two screws may be in a variety of relative positions,
depending on how straight and aligned the holes were drilled. Wearing leather gloves,
you now want to somehow create about a 1/4" gap between the screws. This gap does not
have to be measured from the very tip of the screw, and the spark will find the shortest
route possible. Bend only one screw if possible, and don’t bend it around a whole bunch
back and forth, or it will get work hardened and break sometime. DO NOT test the spark
device yet, as there are still PVC solvent fumes all over the place. Just wind sufficient
tape around the ignitor body to fully insulate all metal parts from your hand when you
grip it. Lash it to the side of the chamber if you like with electrical or duct tape, just don't
press the button yet!
Step 4: All put together...now you wait
IT IS HIGHLY RECCOMMENDED THAT YOU WAIT AT LEAST 24 HOURS FOR
THE GLUE TO FULLY CURE AND SOLVENT TO DISSIPATE.
Many of the unfortunate potato launching accidents occur due to over anxious
constructors/operators getting a little trigger happy a little too early. Keep in mind that
the solvent fumes are extremely flammable. A few notable events include people
chemically/thermally removing a majority of the hair on their head, or rapidly separating
the supposedly single piece of PVC plastic back into its purchased components (or even
smaller pieces!) Just wait...it'll be worth it.
In the mean time this is a great opportunity to gather what you may need when you do
start running this device. On the top of this list is certainly a bag (or two...or three...) of
good fresh potatoes. Never use old sprouting, skunky potatoes, this is just bad form! Buy
a bag for $2 and relish in their crispness! Also a fuel, probably starting with hairspray,
the old mainstay. Traditionally the 'Aqua-Net' brand has yielded to best results, but it will
be mighty hard to find those folks who grew up on that. Once you get more experience
you might graduate to propane...but wait a bit. A good location is also required...don't
use this device in the middle of your subdivision out of your garage or you are
guaranteeing that old grandpa down the way will call the cops!
Step 5: Using the launcher
Again, find a suitable location to deploy your potatoes, as the device can get quite loud
with a good fuel load. Out in the sticks is best, but just not downtown!
1. After waiting the necessary time for the solvent vapors to dissipate, now you can test
the ignition device. Depressing the plunger briskly should produce a good spark to jump
across the screw threads. If all connections were made correctly and the gap is about 1/4"
it should spark every time (or at least 9 times out of 10). If it doesn't check your
connections, maybe set the gap a little closer (never less than 1/8") but get it to work, or
potatoes are going nowhere (unless you throw them--boring!)
2. When a reliable spark is verified, test fit the threaded plug into the adapter. It should
engage the threads at LEAST TWO TURNS. If not, check for crud in the threads, and if
clear, obtain a 60deg triangle diamond file, and size down the plug threads a little. The
threads are at a 60deg angle, so careful filing about the first few threads is ok.
3. With the cap off, load a potato! With the chamber on the ground, place a potato over
the muzzle of the launcher, and press it down with your palm, shaving off the excess,
creating a cylindrical potato plug. Make sure the potato contacts the wall firmly all
around, or it will not fire or not that well. Loading the potato sideways is acceptable, as it
creates a more stable projectile anyway. Ram the potato down to within 2" of the breech
of the barrel, using a smaller diameter PVC pipe or broomstick. Don't push it too far or it
will fall out into the chamber...and just be subject to a short baking cycle.
4. With the spud firmly seated in the breech, pick up the launcher and holding with one
hand, dispense a few seconds of hairspray directly into the chamber. Don't use too much;
it will just make a mess. Quickly close by screwing on the end cap hand tight, do not use
a tool to tighten to two turns or you will likely never get it off again.
5. Call out "Fire in the hole!", point the launcher in a safe direction, and depress the BBQ
plunger. That potato you rammed down there should exit at a quite rapid rate with a
sizable report, and depending on where you aimed and at what angle you pointed, it went
anywhere from 6 inches to ~200 yards from the muzzle. Pretty cool. If you clicked the
ignitor a few times and it didn't work, you are not alone, check out my next section.
6. If it worked, great! Remove the end cap (this may require a tool), vent the spent gasses
getting a fresh load of air, and repeat as necessary!
Step 6: Debugging the Launcher
There are a lot of reasons why your launcher may not be working. First and foremost
NEVER take off the cap and start clicking away at the igniter. This again has led to
human fires and that chemical thermal hair removal thing again....
Hairspray in cold weather just does not go well. Too much of the burnable stuff in the
spray condenses on the chamber walls, making it very difficult to burn. You might try
warming the chamber by the fire if you are camping or graduate to a lighter, hotter fuel
(propane....)
To 'defuse' a misfire you need to take off the cap, while pointing it in a safe direction.
Allow the chamber to air out for several minutes, perhaps longer, to get the fuel load out.
After you are certain the fuel has been vented, again verify the spark, just by turning the
chamber enough so you can see where the spark should be. Never point the chamber bore
directly at your face, or body, or anybody else. If it sparks then it is a fuel mixture
problem.
One of the most common fuel problems leading to misfire is too much fuel! Not usually
a problem with hairspray, other richer fuels can be overloaded above their UEL value,
and they wont work. Always try less fuel rather than more fuel.
If you still can't get it to work I invite you to peruse the many other web sites that talk
about how to troubleshoot your combustion launcher. Again I have made a partial list,
and sadly just don't have the time to address every specific person to person launcher
complication. I hope you do in fact figure it out and experience many hours of safe
spudding.
PLAN # 6
How to build a basic potato gun
The simple instructions
SCROLL DOWN
Not exactly to scale
Like so many other potato gun sites have, I'm not going to tell you EXACTLY
what kind of materials to get to make a potato gun. I will tell you though, what I
have used, that will work for sure but really, just find the right sizes you want at
your local hardware store. If you know what needs to fit into what, then put the
stupid thing together at the store! I did.
All you need to do is:
1) Find the size end cap you want.
2) Find the same size adapter that fits into that end cap. (Both threaded of course.)
3) Find a short piece of PVC that fits into the adapter you found. Or you can just
take a big piece home and cut it down to the right size you want. Then you can
use the rest to make another one!
4) Find a reducer that fits into that PVC pipe and at the other end of the reducer,
the size barrel you want to use fits into it.
5) Make sure the barrel fits into the reducer! Get it? Good!
Other materials and tools you need:
1) A saw for cutting the pieces of PVC.
2) PVC glue. Use the right stuff! Very important! And remember to sand
wherever you use this glue!
3) Electric drill.
4) Electrical tape
5) Epoxy or hot glue.
6) Solder and iron, if you solder the wires to the screws.
7) Wires, speaker or phone wire works fine. Thinner the better, I think.
Instructions:
Now just take a look at the pictures I drew up at the top of the page and glue it
together. Make sure you sand all the surfaces you glue together! If you don't this
might happen to YOU!
What do I do with the BBQ ignitor??
This is what you need to do: Take the ignitor, do you see the metal tip on the very
end of it? If you bought it new, you should have a little wire that came with it. It
fits right onto that little metal tip on the end of the sparker. Now take some thin
wire like speaker wire or maybe even tellephone wire (two single strands) and
tape or solder one piece of that wire to the end of the other wire that is stuck onto
the metal tip thing on the ignitor, to make the whole thing as long as you need it.
If you look at the side of the ignitor you will see a small hole with a copper piece
of metal flush with the side running up to the top where the red push-botton is.
Now take the other piece of wire and tape and solder (make sure to use LOTS of
tape because you can get shocked by it and then it will not fire) and stick it into
the little hole so that it is touching that little copper strand inside it (just stick it in
there and tape it down real good). So now you have two long pieces of wire
hanging off this ignitor thing. If you put the two wires close to eachother and
click the red button on top, it should give you a nice big spark. If for some reason
you don't get a spark and the wire ends are very very close to eachother, you must
have a bad connection somewhere or maybe the sparker is bad if you think you
did everything right.
When you see that it works, this is what you need to do now. Screw two large
screws (or if you only have nails, that's ok too) through the middle part of your
chamber so that the screw ends are very close to eachother. Make sure you drill a
small hole so that the screws fit snuggly and stay strong. Now tape, solder, glue,
whatever, the two wires from the ignitor to the end of those screws on the outside
of the chamber. Now you will see that when you click the sparker, a blue spark
will jump between the two screws. You may have to tinker with how far apart the
screws are from eachother to get the best possible spark. Once this is all done,
you are ready to go! Just cram a potato down the barrel, spray about a second or
two of hairspray into the chamber, screw the endcap on and click the button!
Pow! You may have to experiment with how much hair spray you need to use
because of the size of the gun. That should be about it!
Now how you make the trigger is simple. Since you connected the BBQ ignitor
with wires going to the nails, you can put it just about anywhere. You could even
do it from a distance! I tried for myself (I didn't shoot anything, I just put the
BBQ ignitor to a long piece of wire), but you could use about 5-6 feet of wire and
still get a spark. Probably not as strong as if it was shorter but it would still work
probably. Or you could make a handle with a hole in it like I did for the 01 and
taF models. And the easiest way yet is to do what we did with the 00 model and
tatter tosser. Just take some electrical or duck tape and tape the ignitor to the
barrel wherever it feels right. This gives you a real 'gun like' feeling and so that
you don't rip the wires off by accident. That works great.
If you still need help with the directions, e-mail me!
Click here for plans and measurements of a high powered combustion cannon.
WARNING! Remember, The author accepts NO resposibility for the actions or
results of the person or persons that read or choose to employ this information!!!.
Potato guns CAN be dangerous! Please be careful!
PLAN # 7
SG-200
Directions:
Start by gathering all materials. In addition to materials listed in the diagram you will
also need a hack-saw (A power band saw will also work), drill, drill bits, PVC Cleaner,
and PVC glue.
Step 1: Cut PVC to correct length. PVC comes in 5 and 10 foot chunks, so you may not
need to cut the barrel.
Step 2: Drill holes. Drill small holes on top half of barrel. This helps to reduce pressure
needed for launch (which will increase power) and keep accuracy at the same time. This
is an optional step. You will also need a whole in the end of the end cap for the igniter.
Step 3:Glue connections. Begin on one end of the gun and work towards the other end.
First apply the PVC Cleaner to the outside of the pipe and to inside of the fitting. Now
apply the glue to the pipe and fittings.
Step 4: Insert igniter into end cap.
Step 5: Watch the movie "Titanic " at least 4 times, or If you aren't a big Leo fan you can
just let the glue dry for 12 hours and do what you want.
Step 6: Load Potato, load fuel, shoot. Laugh historically, repeat step 6.
PLAN # 8
SG-100
Directions:
Start by gathering all supplies and cutting pieces to size. You can use a hack saw to cut
the pipe. Be sure to use ABS pipe instead of PVC. This makes the gun last longer
because hair spray and other chemicals do not eat away at ABS pipe. ABS is also not
affected by heat.
Take the 1 foot piece of 3 inch diameter pipe and glue on the 3 inch to 1 inch
reduction fitting with ABS or PVC glue (be sure the glue matches the type of pipe you
are using). Now you should take the 3 foot piece of 1.5 inch pipe and glue it to fitting.
Now move on to the igniter. I recommend you go to wal-mart and get a lantern lighter
from the camping supplies, they are about $3.00. Drill the appropriate size whole, slip it
in, and tighten the nuts. You may need to put some hot glue or caulk around it to make it
air tight.
Next take the 3 in threaded female fitting (Is that what you call it) and glue it in place
in the back of the gun. Let all the glue dry completely for at least 6 hours. (I recommend
24.)
The last step is shooting spuds! Take a potato and twist on the top of the barrel so the
excess is beginning to be cut away. Now flip the gun upside down and ram it into the
ground driving the potato into the barrel. Take a broom stick, golf club, or hockey stick
and ram the potato 3 quarters of the way down the barrel. Take a bottle of hair spray (I
recommend this for the first launch) and spray it into the combustion chamber for a few
seconds. Replace the cap and now your gun is loaded. Be very careful! These guns are
very powerful and could really hurt someone! Aim the gun into a large field, flick the
lantern flint and laugh for hours.
Finished Product:
PLAN # 9
http://potatocannon.nodice.org/index.html
POTATO CANNON V2
MUCH MORE COMPLICATED, BUT WORTH IT
Here's a materials list for the chamber:
Part Qty
2" PVC Pipe ~2 1/2'
3" PVC Pipe ~2"
4" PVC Pipe ~1 1/2'
2" - 3" PVC Adapter 1
3" - 4" Adapter 1
2" Female Cleanout Adapter 1
4" Female PVC Adapter 1
4" End Cap 1
Grill Ignitor 1
PVC Cement 1
PVC Primer 1
Hot glue A few sticks
The Chamber of the cannon looks like this. As you can see I’ve painted it chrome to
make it look cooler. Putting this together is a breeze. The 4" female adapter fits on the
end of the 4" PVC pipe. First prime both surfaces to be cemented with PVC Purple
Primer. Then place PVC Cement on both sides, put them together quickly (it sets fast)
and hold until bond is set. On the other end you put the 4"-3" adapter, cementing it in a
similar fashion. Between the 3"-2" adapter you need to place a short (1"-2") piece of 3"
PVC. Start by cementing the short piece to the 3" end of the 4"-3" adapter, then cement
on the 3"-2" adapter. Cement the 2" female adapter on the 3"-2" adapter. Before using
make sure that all bonds are secure and set. Do this by tugging on each piece and
checking for movement.
Here's a materials list for the barrels:
Part Qty
1 1/2" Barrel
1 1/2" PVC Pipe ~2 1/2'
2" PVC Pipe ~2"
1 1/2" - 2" Adapter 1
2" Male Adapter 1
2" Barrel
2" PVC Pipe ~2 1/2'
2" Male Adapter 1
3" Barrel
2" PVC Pipe ~2"
3" PVC Pipe ~2 1/2'
2" - 3" Adapter 1
2" Male Adapter 1
4" Barrel (not pictured)
4" PVC Pipe ~2 1/2'
2" - 4" Flush Adapter 1
2" Male Cleanout Adapter* 1
*-not in visual parts reference
Once completed the set will look like this.
Now all you have left is the end cap. The end cap contains the ignitor.
This part is pretty self explanatory. You have to drill a 3/4" hole in the center of the end
cap. The ignitor should be able to fit in the hole, you may have to file down the parts that
are intended for mounting to a grill. You need to take the cord provided with the ignitor
and cut it off and solder it to the wire along the side of the ignitor. Then hot glue the cord
down so the exposed metal tip is close enough for a spark to jump across. Once the
ignitor is prepared simply hot glue it into place. Let it set for a while before use. If you
wish you may use silicon sealer instead of hot glue.
Additionally you can make a Y-adapter (Double barrel) that will enable you to launch
two potatoes at the same time.
All you need is a 2X2X2 45° y-junction pipe, a 45° elbow, two 2" female adapters, and a
2" male adapter. Follow the same cementing procedures as you did for the rest of the
cannon.
WARNINGS
When using hairspray as a propellant avoid spraying it directly on the threads of the
screws. The screws will stick together and may cause the barrel to break if you force it
too much. If your barrel does get stuck DO NOT force it, instead you can use channel
locks or a pipe grip which may be bought at a hardware store. These tools will give you
much better leverage and will unscrew them with minimal force. Trust me, I learned
from experience. You should also wash out your cannon when you're done, gunk tends to
build up in it.
PLAN# 10
POTATO CANNON V1
This cannon is very simple to build and is cost effective for the beginning hobbyist.
It is very easy to build and costs about $20 Here is a materials list:
Part Qty
1-1/2" PVC Pipe 5'
3" PVC Pipe 2'
1-1/2" - 3" PVC Adapter 1
3" Female PVC Adapter 1
3" End Cap 1
Grill Ignitor 1
PVC Cement 1
PVC Primer 1
Hot glue A few sticks
Once you get all the parts all you need to do is take the 1-1/2" pipe and cement one end
to the adapter and the 3" pipe to that. Then cement the female adapter to the end of the 3"
pipe. The only part left is the ignitor. You will have to drill a hole in the end cap about
the size of the ignitor. Then all you have to do is hot glue it into place, this will provide
an adequate seal (A picture of this is in the works). Let everything set for a while before
using.
WARNING
When using hairspray as propellant you should avoid spraying it on the threads of the
screws. The hairspray may cause the end cap to stick and will be difficult to remove. If it
does get stuck you can use channel-locks to remove it. When you are done using your
cannon you should wash it out so gunk doesn't build up.
PLAN #11
Potato Cannon - V3
This is the best cannon I've come up with to date. Receiving some inspirado during a trip
to the hardware store, this design was conceived on the spot, assembled and tested in
about 3hrs. It takes the versatility of interchangeable barrels and adds an ergonomic
design to the chamber. It also gets a better punch and takes less saw work to assemble.
A nice patriotic backdrop for the cannon.
Here's a materials list:
Part Qty
2" PVC Pipe ~5"
4" PVC Pipe ~2"
2" Female Cleanout Adapter 2
4" Female Cleanout Adapter 1
4"x2" Flush Adapter 1
4" End Plug 1
2" End Cap 2
2" Male Adapter 1
4"x4"x2" Y-Adapter 1
4"x4"x2" T-Adapter 1
Grill Ignitor 1
PVC Cement 1
PVC Primer 1
Hot glue A few sticks
As you can see, this cannon is not too much more difficult to construct than the previous
model. In fact, it is in a few ways easier. The chamber is made of two primary pieces, the
4-2 inch y-adapter sections. The one towards the end is a 45degree y-splitter. The one on
top is a 4X4X2 T-adapter (I don't remember the exact names from the hardware store,
you'll know them when you see them.) These pieces are cemented together. Do some dry
fitting before hand to get a comfortable angle for the handles. Notice that the handle with
the ignitor points straight up when in use, and the handle on the side points downward
slightly. This is the best angle we came up with. To find a good angle for you, put your
right hand out in front of you as if you were holding the trigger assembly. Put your left
hand out in front and act as if you were holding the handle. Figure out how your hand
naturally rests when extended out and which angle is the most comfortable. When you
figure out the angles, cement the two pieces together.
Next cement in the 4 inch female adapter into the end of the chamber and the 4-2 inch
flush adapter into the top. Cement a 2 inch female adapter into the 4-2 inch flush adapter.
When that is complete, cut to length a piece of 2 inch pipe to be used for the handle (the
exact length is not important, just make it a comfortable size for your hand.) Then
cement that into place and cement a 2 inch end cap on the end.
To make the igniter assembly (sorry there are not detail pictures of it, I may get some
cross-sectional drawings up eventually) You need to get a 2 inch end cap and a 2 inch
male adapter. Drill a hole in the end cap to fit the ignitor as you would for the previous
cannons. You need to do a little bit of jury-rigging on the ignitor. Get a couple of long
wires and solder them onto the two wires coming from the ignitor. This will allow the
sparker to reach into the chamber. Next, place the rigged ignitor assembly through the
hole in the endcap. Hot glue it into place. This will be a little tricky, all you have to do is
start squirting the hot glue down towards the hole. You don't have to get close to the
hole, just be very liberal with your hot glue use, the more you use now, the less you'll
have to use later if it comes loose. After the igniter is glued into place and the glue has
cooled, you may cement on the 2 inch male adapter. Now you need to fix the end of the
wires from the ignitor so that they stay apart so a spark may jump between. I used a cable
staple to accomplish this. A cable staple is essentially a piece of plastic with two nails in
it on opposite sides. I soldered the two wires to the two nails, then bent the nails so they
were close enough to spark. After that, I hotglued it all in place so the nails wouldn't
change position. After this, on the 45 degree y-adapter piece, cement on the 2 inch
female adapter to the end, allowing a port to accept the igniter assembly. You can now
feed the wires through the hole and screw the assembly into place.
The wires should now hang down into the chamber. To prevent it from rattling around
tape it down inside the chamber.
You can use the same barrels that you used for the previous model. They are all
interchangeable because we're using a 2 inch standard. Load the cannon the same way.
Put a potato or other ammunition into the barrel. Then screw the barrel into place.
Fuel this cannon the same way as the previous model as well. Load the fuel in through
the end, screw the cap on, then...
... take aim and fire.
Here's a comparison shot with both the model version 2 and 3. You can see how version
3 is superior.
WARNINGS
When using hairspray as a propelent avoid spraying it directly on the threads of the
screws. The screws will stick together and may cause the barrel to break if you force it
too much. If your barrel does get stuck DO NOT force it, instead you can use channel
locks or a pipe grip which may be bought at a hardware store. These tools will give you
much better leverage and will unscrew them with minimal force. Trust me, I learned
from experience. You should also wash out your cannon when you're done, gunk tends to
build up in it.
Potato Gun Silencer Plans
It took me a while to make these plans. They do help silence the gun, but only to
a certain extent, you can still hear the boom. I would like to warn you that after a
lot or use, this silencer may get potato pieces in it and need to be cleaned. Don't
be discouraged though, it doesn't need cleaned out very often.
Here is a list of materials needed:
Materials
Item
Le
ngt
h
Where to
buy
Approximate Price
Each
3" Schedule 40 PVC ** 12"
Hardware
Store
$.50
1 1/2" Schedule 40 PVC
3'4
"
Hardware
Store
$1.50
Two 1/2" to 3" Converter N/A
Hardware
Store
$3.00
1/2" Threaded Female Adapter N/A
Hardware
Store
$1.50
cotton or furnace filter material N/A
Hardware
Store
$1.00
** All PVC, including fittings, Must be Schedule 40
These Instructions are somewhat vague, since it is not feasible to write every
step. For better instructions look at my other guns and barrels.
The first thing you need to do is examine the 3 1/2" to 1 1/2" adapters. Notice
there is a lip inside of the fitting, this lip will need to be removed, I suggest a
Dremel Tool, or a Round File. The reason it needs filed away is to allow the fitting
to slide over the 1 1/2" barrel.
Next test fit all parts, this will give you an idea of how the finished product will
look, you will not use glue on this project.
(As a side note leave about 6" of 1 1/2" PVC near the muzzle so you can still cut
the potato easily.)
Close-up Picture
This picture will give you a good idea of what to do. Both the barrel and the
silencer need holes drilled in them, the holes wouldn't be as big as the ones in
the picture, it was drawn that way for emphasis.
Next you will need to stuff the space between the barrel and the outside of the
silencer with a sound absorbent material. A good material would be cotton, or
furnace filter material.
Note, do not glue the 3" to 1 1/2" adapters to the 3" pipe. This is to allow you to
clean the material if it should become dirty.
DO NOT USE GLUE!!!
This if for when you will need to clean out the silencer, and it must not be glued
to do so..

Contenu connexe

En vedette

Diy knive drawings
Diy knive drawingsDiy knive drawings
Diy knive drawingsToz Koparan
 
Sling shot patent drawings
Sling shot patent drawingsSling shot patent drawings
Sling shot patent drawingsToz Koparan
 
Book of Wind Generators
Book of Wind GeneratorsBook of Wind Generators
Book of Wind GeneratorsToz Koparan
 
Silencer patent-drawings
Silencer patent-drawingsSilencer patent-drawings
Silencer patent-drawingsToz Koparan
 
كتاب تنويع التدريس في الفصل دليل المعلم
كتاب تنويع التدريس في الفصل دليل المعلمكتاب تنويع التدريس في الفصل دليل المعلم
كتاب تنويع التدريس في الفصل دليل المعلمwedad111
 
Asos revenue model
Asos revenue modelAsos revenue model
Asos revenue modelDiwash Thapa
 
Azure仮想マシンと仮想ネットワークの基本 2016 ComCamp Fukuoka
Azure仮想マシンと仮想ネットワークの基本 2016 ComCamp FukuokaAzure仮想マシンと仮想ネットワークの基本 2016 ComCamp Fukuoka
Azure仮想マシンと仮想ネットワークの基本 2016 ComCamp Fukuokawintechq
 
SEBRAE RJ | Negociação em Feiras e Eventos Oportunidades para as MPE do RJ
SEBRAE RJ | Negociação em Feiras e Eventos Oportunidades para as MPE do RJSEBRAE RJ | Negociação em Feiras e Eventos Oportunidades para as MPE do RJ
SEBRAE RJ | Negociação em Feiras e Eventos Oportunidades para as MPE do RJAlinesilva.in
 
Saito2017icassp
Saito2017icasspSaito2017icassp
Saito2017icasspYuki Saito
 

En vedette (11)

Diy knive drawings
Diy knive drawingsDiy knive drawings
Diy knive drawings
 
Sling shot patent drawings
Sling shot patent drawingsSling shot patent drawings
Sling shot patent drawings
 
Book of Wind Generators
Book of Wind GeneratorsBook of Wind Generators
Book of Wind Generators
 
Silencer patent-drawings
Silencer patent-drawingsSilencer patent-drawings
Silencer patent-drawings
 
Deuses e mitos
Deuses e mitosDeuses e mitos
Deuses e mitos
 
كتاب تنويع التدريس في الفصل دليل المعلم
كتاب تنويع التدريس في الفصل دليل المعلمكتاب تنويع التدريس في الفصل دليل المعلم
كتاب تنويع التدريس في الفصل دليل المعلم
 
Learner Engagement Cards
Learner Engagement CardsLearner Engagement Cards
Learner Engagement Cards
 
Asos revenue model
Asos revenue modelAsos revenue model
Asos revenue model
 
Azure仮想マシンと仮想ネットワークの基本 2016 ComCamp Fukuoka
Azure仮想マシンと仮想ネットワークの基本 2016 ComCamp FukuokaAzure仮想マシンと仮想ネットワークの基本 2016 ComCamp Fukuoka
Azure仮想マシンと仮想ネットワークの基本 2016 ComCamp Fukuoka
 
SEBRAE RJ | Negociação em Feiras e Eventos Oportunidades para as MPE do RJ
SEBRAE RJ | Negociação em Feiras e Eventos Oportunidades para as MPE do RJSEBRAE RJ | Negociação em Feiras e Eventos Oportunidades para as MPE do RJ
SEBRAE RJ | Negociação em Feiras e Eventos Oportunidades para as MPE do RJ
 
Saito2017icassp
Saito2017icasspSaito2017icassp
Saito2017icassp
 

Plus de Toz Koparan

Deadfalls and Snares
Deadfalls and SnaresDeadfalls and Snares
Deadfalls and SnaresToz Koparan
 
Instruction for heavy artillery 1862
Instruction for heavy artillery 1862Instruction for heavy artillery 1862
Instruction for heavy artillery 1862Toz Koparan
 
Compendium in small hydro
Compendium in small hydroCompendium in small hydro
Compendium in small hydroToz Koparan
 
Small michell turbine
Small michell turbineSmall michell turbine
Small michell turbineToz Koparan
 
Small scale-water-current-turbines-for-river-applications
Small scale-water-current-turbines-for-river-applicationsSmall scale-water-current-turbines-for-river-applications
Small scale-water-current-turbines-for-river-applicationsToz Koparan
 
Water turbine appendix
Water turbine appendixWater turbine appendix
Water turbine appendixToz Koparan
 
Book of shooting toys patent drawings
Book of shooting toys patent drawingsBook of shooting toys patent drawings
Book of shooting toys patent drawingsToz Koparan
 
Diy electric vest
Diy electric vestDiy electric vest
Diy electric vestToz Koparan
 
Designing your own model rocket
Designing your own model rocketDesigning your own model rocket
Designing your own model rocketToz Koparan
 
Book of gun patent drawings 1
Book of gun patent drawings 1Book of gun patent drawings 1
Book of gun patent drawings 1Toz Koparan
 
The mechanics of the bow and arrow
The mechanics of the bow and arrowThe mechanics of the bow and arrow
The mechanics of the bow and arrowToz Koparan
 
The design of the bow
The design of the bowThe design of the bow
The design of the bowToz Koparan
 
Anatomy of wooden core of ottoman composite archery bows
Anatomy of wooden core of ottoman composite archery bowsAnatomy of wooden core of ottoman composite archery bows
Anatomy of wooden core of ottoman composite archery bowsToz Koparan
 
Mini Gun Diillonaero catalog online_feb_2008_2
Mini Gun Diillonaero catalog online_feb_2008_2Mini Gun Diillonaero catalog online_feb_2008_2
Mini Gun Diillonaero catalog online_feb_2008_2Toz Koparan
 
30.led .projects
30.led .projects30.led .projects
30.led .projectsToz Koparan
 

Plus de Toz Koparan (16)

Deadfalls and Snares
Deadfalls and SnaresDeadfalls and Snares
Deadfalls and Snares
 
Instruction for heavy artillery 1862
Instruction for heavy artillery 1862Instruction for heavy artillery 1862
Instruction for heavy artillery 1862
 
Compendium in small hydro
Compendium in small hydroCompendium in small hydro
Compendium in small hydro
 
Small michell turbine
Small michell turbineSmall michell turbine
Small michell turbine
 
Small scale-water-current-turbines-for-river-applications
Small scale-water-current-turbines-for-river-applicationsSmall scale-water-current-turbines-for-river-applications
Small scale-water-current-turbines-for-river-applications
 
Water turbine appendix
Water turbine appendixWater turbine appendix
Water turbine appendix
 
Book of shooting toys patent drawings
Book of shooting toys patent drawingsBook of shooting toys patent drawings
Book of shooting toys patent drawings
 
Diy electric vest
Diy electric vestDiy electric vest
Diy electric vest
 
Designing your own model rocket
Designing your own model rocketDesigning your own model rocket
Designing your own model rocket
 
Book of gun patent drawings 1
Book of gun patent drawings 1Book of gun patent drawings 1
Book of gun patent drawings 1
 
The mechanics of the bow and arrow
The mechanics of the bow and arrowThe mechanics of the bow and arrow
The mechanics of the bow and arrow
 
The design of the bow
The design of the bowThe design of the bow
The design of the bow
 
Break down bow
Break down bowBreak down bow
Break down bow
 
Anatomy of wooden core of ottoman composite archery bows
Anatomy of wooden core of ottoman composite archery bowsAnatomy of wooden core of ottoman composite archery bows
Anatomy of wooden core of ottoman composite archery bows
 
Mini Gun Diillonaero catalog online_feb_2008_2
Mini Gun Diillonaero catalog online_feb_2008_2Mini Gun Diillonaero catalog online_feb_2008_2
Mini Gun Diillonaero catalog online_feb_2008_2
 
30.led .projects
30.led .projects30.led .projects
30.led .projects
 

Dernier

Developer Data Modeling Mistakes: From Postgres to NoSQL
Developer Data Modeling Mistakes: From Postgres to NoSQLDeveloper Data Modeling Mistakes: From Postgres to NoSQL
Developer Data Modeling Mistakes: From Postgres to NoSQLScyllaDB
 
Hyperautomation and AI/ML: A Strategy for Digital Transformation Success.pdf
Hyperautomation and AI/ML: A Strategy for Digital Transformation Success.pdfHyperautomation and AI/ML: A Strategy for Digital Transformation Success.pdf
Hyperautomation and AI/ML: A Strategy for Digital Transformation Success.pdfPrecisely
 
Transcript: New from BookNet Canada for 2024: Loan Stars - Tech Forum 2024
Transcript: New from BookNet Canada for 2024: Loan Stars - Tech Forum 2024Transcript: New from BookNet Canada for 2024: Loan Stars - Tech Forum 2024
Transcript: New from BookNet Canada for 2024: Loan Stars - Tech Forum 2024BookNet Canada
 
Generative AI for Technical Writer or Information Developers
Generative AI for Technical Writer or Information DevelopersGenerative AI for Technical Writer or Information Developers
Generative AI for Technical Writer or Information DevelopersRaghuram Pandurangan
 
The Fit for Passkeys for Employee and Consumer Sign-ins: FIDO Paris Seminar.pptx
The Fit for Passkeys for Employee and Consumer Sign-ins: FIDO Paris Seminar.pptxThe Fit for Passkeys for Employee and Consumer Sign-ins: FIDO Paris Seminar.pptx
The Fit for Passkeys for Employee and Consumer Sign-ins: FIDO Paris Seminar.pptxLoriGlavin3
 
Are Multi-Cloud and Serverless Good or Bad?
Are Multi-Cloud and Serverless Good or Bad?Are Multi-Cloud and Serverless Good or Bad?
Are Multi-Cloud and Serverless Good or Bad?Mattias Andersson
 
The Ultimate Guide to Choosing WordPress Pros and Cons
The Ultimate Guide to Choosing WordPress Pros and ConsThe Ultimate Guide to Choosing WordPress Pros and Cons
The Ultimate Guide to Choosing WordPress Pros and ConsPixlogix Infotech
 
SAP Build Work Zone - Overview L2-L3.pptx
SAP Build Work Zone - Overview L2-L3.pptxSAP Build Work Zone - Overview L2-L3.pptx
SAP Build Work Zone - Overview L2-L3.pptxNavinnSomaal
 
DSPy a system for AI to Write Prompts and Do Fine Tuning
DSPy a system for AI to Write Prompts and Do Fine TuningDSPy a system for AI to Write Prompts and Do Fine Tuning
DSPy a system for AI to Write Prompts and Do Fine TuningLars Bell
 
Gen AI in Business - Global Trends Report 2024.pdf
Gen AI in Business - Global Trends Report 2024.pdfGen AI in Business - Global Trends Report 2024.pdf
Gen AI in Business - Global Trends Report 2024.pdfAddepto
 
From Family Reminiscence to Scholarly Archive .
From Family Reminiscence to Scholarly Archive .From Family Reminiscence to Scholarly Archive .
From Family Reminiscence to Scholarly Archive .Alan Dix
 
SALESFORCE EDUCATION CLOUD | FEXLE SERVICES
SALESFORCE EDUCATION CLOUD | FEXLE SERVICESSALESFORCE EDUCATION CLOUD | FEXLE SERVICES
SALESFORCE EDUCATION CLOUD | FEXLE SERVICESmohitsingh558521
 
TeamStation AI System Report LATAM IT Salaries 2024
TeamStation AI System Report LATAM IT Salaries 2024TeamStation AI System Report LATAM IT Salaries 2024
TeamStation AI System Report LATAM IT Salaries 2024Lonnie McRorey
 
Unraveling Multimodality with Large Language Models.pdf
Unraveling Multimodality with Large Language Models.pdfUnraveling Multimodality with Large Language Models.pdf
Unraveling Multimodality with Large Language Models.pdfAlex Barbosa Coqueiro
 
DevoxxFR 2024 Reproducible Builds with Apache Maven
DevoxxFR 2024 Reproducible Builds with Apache MavenDevoxxFR 2024 Reproducible Builds with Apache Maven
DevoxxFR 2024 Reproducible Builds with Apache MavenHervé Boutemy
 
Unleash Your Potential - Namagunga Girls Coding Club
Unleash Your Potential - Namagunga Girls Coding ClubUnleash Your Potential - Namagunga Girls Coding Club
Unleash Your Potential - Namagunga Girls Coding ClubKalema Edgar
 
New from BookNet Canada for 2024: Loan Stars - Tech Forum 2024
New from BookNet Canada for 2024: Loan Stars - Tech Forum 2024New from BookNet Canada for 2024: Loan Stars - Tech Forum 2024
New from BookNet Canada for 2024: Loan Stars - Tech Forum 2024BookNet Canada
 
New from BookNet Canada for 2024: BNC CataList - Tech Forum 2024
New from BookNet Canada for 2024: BNC CataList - Tech Forum 2024New from BookNet Canada for 2024: BNC CataList - Tech Forum 2024
New from BookNet Canada for 2024: BNC CataList - Tech Forum 2024BookNet Canada
 
Scanning the Internet for External Cloud Exposures via SSL Certs
Scanning the Internet for External Cloud Exposures via SSL CertsScanning the Internet for External Cloud Exposures via SSL Certs
Scanning the Internet for External Cloud Exposures via SSL CertsRizwan Syed
 
Take control of your SAP testing with UiPath Test Suite
Take control of your SAP testing with UiPath Test SuiteTake control of your SAP testing with UiPath Test Suite
Take control of your SAP testing with UiPath Test SuiteDianaGray10
 

Dernier (20)

Developer Data Modeling Mistakes: From Postgres to NoSQL
Developer Data Modeling Mistakes: From Postgres to NoSQLDeveloper Data Modeling Mistakes: From Postgres to NoSQL
Developer Data Modeling Mistakes: From Postgres to NoSQL
 
Hyperautomation and AI/ML: A Strategy for Digital Transformation Success.pdf
Hyperautomation and AI/ML: A Strategy for Digital Transformation Success.pdfHyperautomation and AI/ML: A Strategy for Digital Transformation Success.pdf
Hyperautomation and AI/ML: A Strategy for Digital Transformation Success.pdf
 
Transcript: New from BookNet Canada for 2024: Loan Stars - Tech Forum 2024
Transcript: New from BookNet Canada for 2024: Loan Stars - Tech Forum 2024Transcript: New from BookNet Canada for 2024: Loan Stars - Tech Forum 2024
Transcript: New from BookNet Canada for 2024: Loan Stars - Tech Forum 2024
 
Generative AI for Technical Writer or Information Developers
Generative AI for Technical Writer or Information DevelopersGenerative AI for Technical Writer or Information Developers
Generative AI for Technical Writer or Information Developers
 
The Fit for Passkeys for Employee and Consumer Sign-ins: FIDO Paris Seminar.pptx
The Fit for Passkeys for Employee and Consumer Sign-ins: FIDO Paris Seminar.pptxThe Fit for Passkeys for Employee and Consumer Sign-ins: FIDO Paris Seminar.pptx
The Fit for Passkeys for Employee and Consumer Sign-ins: FIDO Paris Seminar.pptx
 
Are Multi-Cloud and Serverless Good or Bad?
Are Multi-Cloud and Serverless Good or Bad?Are Multi-Cloud and Serverless Good or Bad?
Are Multi-Cloud and Serverless Good or Bad?
 
The Ultimate Guide to Choosing WordPress Pros and Cons
The Ultimate Guide to Choosing WordPress Pros and ConsThe Ultimate Guide to Choosing WordPress Pros and Cons
The Ultimate Guide to Choosing WordPress Pros and Cons
 
SAP Build Work Zone - Overview L2-L3.pptx
SAP Build Work Zone - Overview L2-L3.pptxSAP Build Work Zone - Overview L2-L3.pptx
SAP Build Work Zone - Overview L2-L3.pptx
 
DSPy a system for AI to Write Prompts and Do Fine Tuning
DSPy a system for AI to Write Prompts and Do Fine TuningDSPy a system for AI to Write Prompts and Do Fine Tuning
DSPy a system for AI to Write Prompts and Do Fine Tuning
 
Gen AI in Business - Global Trends Report 2024.pdf
Gen AI in Business - Global Trends Report 2024.pdfGen AI in Business - Global Trends Report 2024.pdf
Gen AI in Business - Global Trends Report 2024.pdf
 
From Family Reminiscence to Scholarly Archive .
From Family Reminiscence to Scholarly Archive .From Family Reminiscence to Scholarly Archive .
From Family Reminiscence to Scholarly Archive .
 
SALESFORCE EDUCATION CLOUD | FEXLE SERVICES
SALESFORCE EDUCATION CLOUD | FEXLE SERVICESSALESFORCE EDUCATION CLOUD | FEXLE SERVICES
SALESFORCE EDUCATION CLOUD | FEXLE SERVICES
 
TeamStation AI System Report LATAM IT Salaries 2024
TeamStation AI System Report LATAM IT Salaries 2024TeamStation AI System Report LATAM IT Salaries 2024
TeamStation AI System Report LATAM IT Salaries 2024
 
Unraveling Multimodality with Large Language Models.pdf
Unraveling Multimodality with Large Language Models.pdfUnraveling Multimodality with Large Language Models.pdf
Unraveling Multimodality with Large Language Models.pdf
 
DevoxxFR 2024 Reproducible Builds with Apache Maven
DevoxxFR 2024 Reproducible Builds with Apache MavenDevoxxFR 2024 Reproducible Builds with Apache Maven
DevoxxFR 2024 Reproducible Builds with Apache Maven
 
Unleash Your Potential - Namagunga Girls Coding Club
Unleash Your Potential - Namagunga Girls Coding ClubUnleash Your Potential - Namagunga Girls Coding Club
Unleash Your Potential - Namagunga Girls Coding Club
 
New from BookNet Canada for 2024: Loan Stars - Tech Forum 2024
New from BookNet Canada for 2024: Loan Stars - Tech Forum 2024New from BookNet Canada for 2024: Loan Stars - Tech Forum 2024
New from BookNet Canada for 2024: Loan Stars - Tech Forum 2024
 
New from BookNet Canada for 2024: BNC CataList - Tech Forum 2024
New from BookNet Canada for 2024: BNC CataList - Tech Forum 2024New from BookNet Canada for 2024: BNC CataList - Tech Forum 2024
New from BookNet Canada for 2024: BNC CataList - Tech Forum 2024
 
Scanning the Internet for External Cloud Exposures via SSL Certs
Scanning the Internet for External Cloud Exposures via SSL CertsScanning the Internet for External Cloud Exposures via SSL Certs
Scanning the Internet for External Cloud Exposures via SSL Certs
 
Take control of your SAP testing with UiPath Test Suite
Take control of your SAP testing with UiPath Test SuiteTake control of your SAP testing with UiPath Test Suite
Take control of your SAP testing with UiPath Test Suite
 

Potato guns

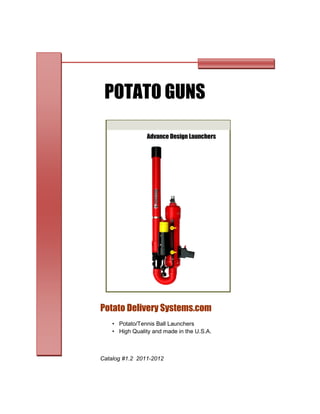
  • 1. Potato Delivery Systems.com POTATO GUNS Advance Design Launchers Catalog #1.2 2011-2012 • Potato/Tennis Ball Launchers • High Quality and made in the U.S.A.
  • 2. You’re going to like what you get! Our quality potato guns come ready-to- shoot and are made in the U.S.A. Many of our designs allow you to easily interchange barrels to shoot potatoes or tennis balls with projectile speeds of up to 400 mph and ranges of up to 200+ yards. They are available in two fueling options - aerosol and MAPP gas. These advanced design potato launchers are powerful, easy to use and loads of FUN! Designed for Performance . . . To Order Call or Click: www.PotatoDeliverySystems.com ( 651) 488-0115 2
  • 3. Launchers Page MG-11 Carbine aerosol gun 4 VX-1 Stinger aerosol gun 5 VX-2 Stryker MAPP gas gun 6 VX-3 Sabre MAPP gas gun 7 Accessories Quick Release barrels 9 Tennis Ball barrels 9 Cool Barrel Covers 10 Potato Gun Fuels 10 Order Form What you’ll see in this catalog - To Order Call or Click: www.PotatoDeliverySystems.com (651) 488-0115 3
  • 4. The MG-11 Carbine is our entry level potato gun. It's smaller than our VX series guns but don't be fooled by its size. It can put a potato downrange, up to 125+ yards, with some serious velocity! Powered by a flammable aerosol spray, this combustion gun is easy to use and a great bang for the buck. Features include a breech loading barrel, electronic ignition and quick fueling. The MG-11 Carbine comes ready to shoot. NOTE: This gun is not designed to launch tennis balls. The MG-11 Carbine potato gun includes:  Powerful 175 cubic inch pressure rated combustion chamber  1.5" x 30" breech loading standard potato barrel  Ergonomic trigger grip with electronic ignition  Spud cutter integrated into the barrel for fast loading  One can of aerosol spray propellant (enough for 40+ shots)  Eye catching candy apple red paint job  User's manual  Comes ready to shoot (you supply the potatoes)! See the accessories page for optional quick release potato barrel and other cool upgrades! Specifications: Projectile speed: Up to 300 mph (440 fps) Range: 125+ yards. Overall Length - 53" w/ potato barrel (The gun breaks down for easy transport & storage) Weight: Approximately 6.5 lbs. The MG-11 is powerful and really easy to use. Just load the potato, fuel with the aerosol propellant for 5-7 seconds, screw on the rear cap and you're ready to fire! Shoulder Fire Or Hip Shot Compact and just 6.5 lbs $119.00 + shipping and handling 4
  • 5. The VX-1 Stinger potato gun system is easy to use and really packs a punch! With its lightweight design, this powerful combustion gun uses an aerosol spray as the propellant. Other features include electronic ignition, interchangeable potato/optional tennis ball barrels and quick fueling for lots of shooting fun. The gun's two piece design makes it easy to transport and store. The VX-1 Stinger potato gun includes:  Powerful 300 cubic inch pressure rated combustion chamber  1.5" x 45" breech loading standard potato barrel  Comfortable pistol grip with electronic ignition trigger  Spud cutter integrated into the barrel for fast loading  One can of aerosol spray propellant (enough for 40+ shots)  Eye catching candy apple red paint job  User's manual  Comes ready to shoot (you supply the potatoes)! See the accessories page for optional tennis ball barrels and other cool upgrades! Specifications: Projectile speed: Up to 350 mph (500 fps) Range: 150+ yards. Length - 73" with potato barrel or 64" with tennis ball barrel (the gun breaks down for easy transport & storage) Weight - approximately 9 lbs. You'll be amazed at how powerful & easy it is to use. Just load, fuel with the aerosol spray for 5-7 seconds, screw on the rear cap and you're ready for some high speed fun! Load Fuel Shoot! $179.00 + shipping and handling 5
  • 6. The VX-2 Stryker potato gun system elevates potato guns to a whole new level. With its self-contained design, this combustion gun is powered by a MAPP gas cylinder that is integrated into the body of the gun for fast and easy fueling. Other features include electronic ignition, interchangeable potato/optional tennis ball barrel and an internal chamber fan for maximum power. The VX-2 Stryker potato gun includes:  Powerful 300 cubic inch pressure rated combustion chamber  1.5" x 45" breech loading standard potato barrel  Comfortable pistol grip with electronic ignition trigger  Spud cutter integrated into the barrel for fast loading  Internal chamber fan with control box for maximum power shots  Electronic timer for improved fueling accuracy and reliability  Easy fueling MAPP cylinder housing  One MAPP fuel cylinder (enough for 60+ shots)  Eye catching candy apple red paint job  User's manual  Comes ready to shoot (you supply the potatoes)! See the accessories page for optional tennis ball barrels and other cool upgrades! Specifications: Projectile speed: Up to 400 mph (600 fps) Range: 200+ yards. Length - 73" with potato barrel or 64" with tennis ball barrel (The gun breaks down for easy transport & storage) Weight - Approximately 13 lbs. (with fuel cylinder) The self contained MAPP gas cylinder fuels the gun in 30-40 seconds. There is even a countdown timer for accurately! The internal chamber fan stirs the fuel/air mixture to provide maximum power. It also allows for evacuation of the spent gas in the combustion chamber quickly so you're ready for the next shot... fast! The fan is self-contained and battery operated. Self Contained Fuel Tank Accurate Fuel Timer Internal Chamber Fan $299.00 + shipping and handling 6
  • 7. The VX-3 Sabre potato gun system blows the competition away! We’ve reduced the overall length of the gun with the advanced over/under design. This completely self-contained combustion gun is powered by a MAPP gas cylinder that is integrated into the body of the gun so fueling is always quick & accurate. We’ve also simplified the fueling process so you can be ready to shoot in under 10 seconds. Add in the electronic ignition, the two quick release interchangeable barrels plus the high powered internal chamber fan and you’ve got the power to launch a potato or tennis ball at mach speeds with a squeeze of the trigger. We designed the VX-3 for total versatility and ease of operation. The self contained MAPP gas cylinder coupled with the QuickFuel™ metered fueling system is simple to operate and lets you precisely fuel the gun in under 10 seconds. This means faster shooting with less misfires. The integrated quick release barrel system lets you switch from the breech loading potato barrel to the tennis ball barrel with ease. QuickFuel™ metered fueling system Easy to use quick release barrels The VX-3 shown with quick release potato barrel 7
  • 8. The VX-3 Sabre potato gun includes:  Compact over/under design makes the gun easy to handle  Powerful 225 cubic inch pressure rated combustion chamber  QuickFuel™ metered fueling system helps eliminate misfires  Comfortable pistol grip with electronic ignition trigger  One 1.5" x 45" quick release breech loading potato barrel  One 2.5” x 30” quick release tennis ball barrel with ramrod  Spud cutter integrated into the potato barrel for fast loading  Internal chamber fan with control box for max power shots  Integrated MAPP cylinder housing  One MAPP fuel cylinder (enough for 60+ shots)  Eye catching red and black paint job  User's manual  Comes ready to shoot (you supply the potatoes)! Specifications: Projectile speed: Up to 400 mph (600 fps) Range: 200+ yards. Length - 50" with potato barrel or 46" with tennis ball barrel (The gun breaks down for easy transport & storage) Weight - Approximately 16 lbs. (with fuel cylinder) The built in chamber fan really ramps up the power The over/under design of the gun makes the VX-3 Sabre easy to handle The VX-3 shown with quick release tennis ball barrel $489.00 + shipping and handling With the gun’s internal chamber fan you can really ramp up the power! Self-contained and battery operated, it stirs the fuel/air mixture during the shot for maximum power. It also allows for the evacuation of the spent gas in the combustion chamber in a matter of seconds so you're ready for the next shot... fast! 8
  • 9. Quick Release Potato Barrel - This upgrade allows super quick and easy attachment and removal of a 1.5" diameter potato barrel so loading is a cinch! The barrel is designed for breech loading so no ram rod is necessary. Just flip up the locking levers, remove the barrel and load your potato. Then insert the barrel into the quick release and lock the levers in the down position and you're ready to go. It couldn't be faster or easier! You get everything you need to upgrade your potato gun including the locking collar, quick release potato barrel and easy installation instructions. *This product is compatible with the MG-11 Carbine, VX-1 Stinger and VX-2 Stryker. Quick Release Potato Barrel - $59.00 Part# B101 Tennis Ball Barrel (Standard Attachment) - With this standard screw on 30" barrel you can send a tennis ball into orbit! The barrel kit comes with everything you need and includes a ram rod for muzzle loading the tennis ball. *This product is compatible with the VX-1 Stinger and VX-2 Stryker. Standard Tennis Ball Barrel - $39.00 Part# B104 Tennis Ball Barrel with Quick Release - Send that tennis ball into orbit with this quick release tennis ball barrel. The barrel is 30" long and comes with our unique quick release system so attaching and removing the barrel couldn't be faster or easier! Just insert the barrel into the quick release, fold down the locking arms and you're ready to go! You get everything you need to upgrade your potato gun including the locking collar, quick release tennis ball barrel, ramrod and easy installation instructions. *This product is compatible with the VX-1 Stinger and VX-2 Stryker. Quick Release Tennis Ball Barrel - $69.00 Part# B107 VX-1 Stinger shown with Standard Tennis Ball Barrel VX-2 Stryker shown with Quick Release Tennis Ball Barrel ACCESSORIES 9
  • 10. Barrel Cover - This super cool option is designed to fit our standard screw-on and optional quick release 1.5" diameter x 45" long potato barrels and is guaranteed to make your potato gun really stand out! Modeled after the heat shield on the famous Browning .30 caliber machine gun, this barrel cover is lightweight and easy to install. Now you can add to the look of your already bad ass cannon! This accessory earns five out of five stars for cool factor! *This product is compatible with the MG-11 Carbine, VX-1 Stinger and VX-2 Stryker. Barrel Cover - $39.00 Part# BC109 (for the MG-11) Part# BC110 (for the VX-1 and VX-2) VX-2 Stryker shown with optional Quick Release Potato Barrel and Barrel Cover Barrel Cover shown with optional Quick Release MAPP Gas Fuel Cylinder - A blend of propane and acetylene, this gas is used to fuel the VX-2 Stryker and VX-3 Sabre potato gun. We have found it to produce superior combustion chamber pressures that can propel a potato/tennis ball up to 200+ yards at impressive velocities. Each canister has had the threaded nozzle carefully aligned so it easily screws into the gun’s fuel canister housing and contains enough fuel for 60+ shots. It's always a good idea to have additional fuel around, so pick up an extra cylinder or two and be ready for some shootin' good times! *This product is compatible with the VX-2 Stryker and VX-3 Sabre. MAPP Fuel Gas Cylinder - $15.00 Part# F201 Aerosol Fuel Canister - Aqua Net hair spray, with its high ether content, has been a favorite fuel of potato gun shooters for years. Highly flammable and able to generate considerable chamber pressure, we use it as a propellant for the MG-11 Carbine and VX-1 Stinger potato gun. A short spray of 5-7 seconds is all you need for a powerful shot which propels a potato/tennis ball up to 150+ yards. Each canister will last for 40+ shots. Don't be caught short - stock up on a few cans today! *This product is compatible with the MG-11 Carbine and VX-1 Stinger. Aerosol Fuel Canister - $5.00 Part# F204 10
  • 11. To Order Call or Click: www.PotatoDeliverySystems.com (651) 488-0115 DISCLAIMER It is expressly understood and agreed that by the use hereof by the buyer or any subsequent user that the manufacturer and/or seller shall in no way be deemed or held liable or accountable upon or under any guarantees or warranties, expressed or implied, statutory, by operation of law or otherwise beyond that expressed herein. This product is sold with all faults and without any warranty of merchantability or fitness for any particular purpose, expressed or implied for the particular purpose for which the buyer intends to use it. IMPORTANT INFORMATION: You must be 18 years or older to purchase a potato gun. If you are under 18 years of age, please, do not attempt to order one. It is the buyer’s responsibility to check with their local Law Ordinance for the use and possession of these products. If these devices are not legal in your county, country, providence or state, please, do not buy them. TEMPERATURE NOTE: For proper ignition the potato gun and propellant should be at room temperature (around 65 to 85 degrees). If you store the gun and propellant in a cold or hot place, let them come to room temperature before shooting. READ THE FOLLOWING INFORMATION BEFORE YOU ORDER! Prices & specifications subject to change without notice. This gun shoots a projectile up to 400 mph with a range of 200 yards+ and can cause serious injury or death. DO NOT point or shoot at people or animals. THIS IS NOT A TOY. FOR ADULT USE ONLY. DANGER 11
  • 12. Order Form Part # Description Qty Price Subtotal Order total: Tax (7.25% MN only): Shipping/ handling: Call for quote Total: Ship to: Name Address Daytime phone Method of Payment:  Check  MasterCard  Discover  American Express  Visa Credit Card # Exp. Date3 or 4 digit security code: Signature Prices & specifications subject to change without notice. Potato Delivery Systems P.O. Box 131503 Roseville, MN 55113 Phone: (651) 488-0115 E-mail: sales@PotatoDeliverySystems.com To Order Call or Click: www.PotatoDeliverySystems.com (651) 488-0115
  • 13. PLAN #1 Potato Gun Introduction: In about May '03 I was considering building a potato gun (also know as a potato canon or spud launcher). I had witnessed one such canon at a family camp called Elim Lodge. Some guys went out on a boat, shot potatoes straight in the air with tremendous force and they'd land in the lake. It looked like lots of fun. A friend of mine, informed me that he was going to be building one so I decided that now was a good time to start building. Note: This is the 'story' of Potato Gun I. I found out what worked and what didn't then I created a much more powerful gun, Potato Gun II and created a how - to - build guide for that gun. If interested, check that out as well. Also, don't forget to check out the many other projects and articles on this site. After doing some research I came up with a list of the basics: - Every gun has a wider, shorter section called the combustion chamber and then a longer, skinnier section for the barrel. - Most guns are powered by WD40 or cheap hairspray. - Most guns ignite the fuel using a BBQ igniter that creates a spark. Basic Operation: Stick potato in top, push it down with a pole, unscrew cap, spray 3-6s worth of WD40. Screw back on the cap. AIM and FIRE. Caution: I contacted my local police department and they informed me that it was fine to use the gun out in the country but did not recommend using it in the city. They are VERY loud and VERY powerful. My gun shoots a potato over 300yds. Noise is also an issue, so please don't use them in a residential neighbourhood. The Igniter: I used a basic BBQ igniter. They can be found for less than $20 at Home Hardware, Canadian Tire or Home Depot. I have bought 3 igniters so far because they keep wearing out on me. I'm currently looking for a battery powered model with no mechanical spark mechanism. I took the cable they provided, used a couple of wire ties to keep it from being too long
  • 14. and glued the ends close together. The ends need to be close together for the spark to travel from one wire to the other. Yes - that is a pen cap I used. It was the closest thing around when I was gluing everything and it's working well. The Gun: The gun body can either be made of PVC or ABS piping. ABS is slightly more expensive, but is less corrosive and stronger so I've heard. I went with ABS because they sold it by the foot at Home Hardware and places around here only sold PVC pipe in 10ft sections. The piping itself is quite cheap (couple dollars / ft) but it's the fittings that raise the price of the project. LEFT: This is the gun in it's entirety. It has a barrel lenght of 4 ft and a combustion chambre length of 26". In total, the gun is over 6 feet long and weighs about 9lbs. RIGHT: Here's a closer look at the combustion chamber. It goes from 4" to 2" using a 4"to3" bushing and then a 3"to2" bushing. Each bushing piece cost about $6. The handle portion is a T-pipe A closer look at the trigger section is below. I drilled a hole using a spade bit and the size required was coincidentally the same size as an RJ-45 network cable jack so I already had the correct spade for the job. The trigger is secured using hot glue. All of the pipes are held together using pipe glue (about $3.00). Be careful when using the glue because it is corosive. It joins the pipes by corroding a bit of the plastic and "melts" them together. One end of the T-pipe is threaded and I have a threaded cap that matches it. That it where the fuel is sprayed in.
  • 15. The Fuel: My first shot with the gun was in my backyard. Anything in an aerosol can should theoretically work. Take note: Lysol disinfective spray does not. I tried several times to fire it with the spray to no avail. When I was building I was wondering if it would really work and this seemed to confirm my fear that it would not. Next I tried hairspray. I pulled the trigger and heard a thunk as the potato hit the brick of the house. I had some fun with it that night with the hairspray. I shot it straight up in the air and it didn't come down until about 5 seconds later. I fired it at trees and other stationary objects and had lots of fun but I had no idea of the range or power capability. Later that week myself and my friend headed out to the country by a river to try them out. At first I was dissapointed by the range, but after a few trips we perfected the ammount of spray and the type of fuel to get the best results. My fuel of choice: WD40 Update: Upon Further Testing with POTATO GUN II, Right Guard Deoderant Spray is now my fuel of choice. It's a fair bit safer than propane, extremely cheap, doesn't leave a sticky residue (although it does leave an oily one) and it's extremely powerful. Using WD40 my gun can launch a standard potato about 300yds. Now that's what I call fun! These guns are extremely powerful, so be careful. Hitting someone with one would surely hospitalize them. Cost of Project: Item: Cost: ABS Pipe 15.00 Fittings: joints, caps, bushing, glue 35.00 BBQ Igniter 15.00 Total: $65.00
  • 16. PLAN #2 How-To Build a Potato Gun Page 1: Design and Construction This guide will show you exactly how to build a potato gun. These spud launchers are quite powerful and I take absolutely no responsibility for what you do with this information. In most places of the US it is legal to own these canons, and in my area of Canada they are legal as well - but check with your local authorities before building to make sure. Step 1: Design and Planning I really like the design of Spud Launcher I. I think it looks really cool, so I more or less duplicated the design for Spud Launcher II. This time around instead of blindly building I did a bit of research on the ideal combustion chamber volume to barrel volume ratio. Information on this is hard to come by but one source said 1.5:1 was ideal. I measured Spud Launcher I and it had a ratio of 2.1:1 and it was quite powerful. If I followed a 1.5:1 ratio the gun would totally loose the cool "canon" appearance so I decided to go with a ratio of 1.8 : 1. This means that the barrel is a bit longer and the chamber is a bit shorter than Potato Gun I. I planned to use 4" ABS for the chamber and 2" ABS for the barrel. Pi*4^2*21 / Pi*2^2*47 = 1.78 : 1 Step 2: Shopping If you've got a basic gun design in mind, you can keep this in mind when you go to the hardware store and see what's available. Here's a list of parts I bought for my gun: - 13" of 4" ABS - 48" of 2" ABS - ABS Cement (the glue) - Increaser 3 " to 4 " - 3" to 2" Bushing - 4" Threaded Adapter - 3" Threaded Adapter - 4x4x3" ABS T-Pipe (the handle) - 4" Threaded Plug - 3" Threaded Plug - Electric BBQ I went to both Home Hardware and Home Depot, compared prices then bought what I needed. Most things were cheaper at Home Depot and they had better selection. When doing your measurements, don't forget to include the length of the T-Pipe and anything else you include in your design. If I bought 21" of 4" ABS - my combustion chamber length would be closer to 3 ft. Step 3: Getting Ready
  • 17. Here's all the parts I bought laid out - basically how they'll be put together. Here's a list of tools you may need: - Drill - Glue Gun - Tape Measure -File Step 4: Assembly Warning: the ABS cement is corrosive. It won't burn your skin, but it's not a good idea to spill it on your clothes. If you want to try something fun, the cement does eat through Styrofoam.
  • 18. Construct the Handle and Chamber Portion of the gun using the same technique. If you have all the parts, to assemble the gun takes about 20 mins (not counting ignition installation). Once you have the chamber assembled you should install the Ignition System. It's much easier to work with a 2ft gun than a 6ft gun when installing the ignition system.
  • 19. Ignition System: In Spud Launcher I, I used a standard push-button BBQ Igniter. (About $15cdn). I've replaced it 3 times - they wear out fairly quickly and do not guarantee a spark every time. This time around I went the more expensive but RELIABLE route of using an electric BBQ igniter (about $25). These work with a battery and when the button is pushed, about 5 sparks / second are produced. Very effective. Drilling and Filing:
  • 20. Fitting the Ignition System: The purpose of having the bottom of the handle be removable is because I wanted to place the BBQ igniter inside it and also be able to unscrew it to replace the battery when necessary. Also, by putting a threaded cap into the bottom - it creates a much sturdier fit than just gluing the cap in like I did in Potato Gun I. This became problematic after a fair bit of use. The 3" with the electric igniter is screwed in and the ignition system is installed. When you hit the switch you hear a "click-click-click..." of the spark going. Very nifty. Attaching the Barrel:
  • 21. This is just another glue-n-push and the gun is complete. Project Cost: Item: Cost: (cdn) 4" Threaded Adapter 5.98 3" Threaded Adapter 3.96 4" Threaded Plug 2.96 3" Threaded Plug 1.96 4x4x3" T-Pipe 11.86 3 to 2" Bushing 3.29 3 to 4" Increaser 5.99 13" of 4" ABS 2.68 48" of 2" ABS 3.56 ABS Pipe Cement (glue) 2.99 Electric BBQ Igniter 24.99 15% Tax (in Ontario) 10.52 Total $80.75 www.jbprojects.net/projects
  • 22. PLAN #3 The Basics: Build a modular ignition system. We've found that most people don't want to buy another grill lighter for each gun they make so we've designed a modular ignition system. This allows you to easily use one grill lighter for all of you guns. (uses screw electrodes in the following plans) What you need: 4" of 3/4" PVC pipe, 2 alligator clips, 4-8' of cable, one grill lighter, some electrical tape Take the wire and cut it in half. Connect a alligator clip to the end of each wire. Tape the two wires together. Connect the other ends to the grill lighter (connecters should be included) Slip the 3/4" PVC over the clips and over the wire to the trigger (the PVC should fit perfectly around the trigger) Build a modular ignition system Type 2. INSTEAD of using the screws in the following gun plans use this setup!! Another way to use the modular ignition system, is to permanently glue the ends of the wires into a cap to use with all the guns. What you need: 4" of 3/4" PVC pipe, a paper clip, 4-8' of cable, one grill lighter, some electrical tape, cap to use in all of your guns, Quick Steel glue, soldering equipment. Take the wire and cut it in half. Drill 2 tiny holes in the cap (on either side of the square deal). Insert the wires in the cap. Use Quick Steel to secure the wires in place. Solder a paper clip to the end of one wire. Bend the paper clip so that is almost touches the other wire end. Tape the two wires together on the outside. Slip the 3/4" PVC over the clips and over the wire. Connect the other ends to the grill lighter (connecters should be included) Slip the 3/4" PVC over the trigger (the PVC should fit perfectly around the trigger) Build a spud-shell cutter After making a gun you need an easy way to make the cylindrical shells that you fire out of your gun What you'll need: 3" of PVC pipe (it should be the same size of the gun's barrel.)
  • 23. Cut the piece of the barrel sized PVC Spend some quality time sharpening one end of the PVC To use the spud-shell cutter Put a spud on the ground Place the spud-shell cutter on top of the spud Smack the top of the spud-shell cutter Remove the shell form the spud-shell maker Lock and load Build a basic spud gun. Refer to these instructions when build any of the other Spud Works designed guns below. What you'll need: 6-10" of 3" PVC pipe, 1' to 2' of 1.5" PVC pipe, a 1.5" to 3" reducer, a 3" female converter (goes on the 3" pipe and has threads), cap for the 3" female converter, PVC purple primer, PVC glue, one 2" screw, one 1.5" screw, and a modular ignition system Cut all the pieces to length. Purple prime all the areas which will require glue. Put the female converter to the 3" pipe, then glue the 3" to 1.5" converter, then the 1.5" barrel to that. Only put glue on the pieces you are currently putting together. Screw the 2" screw in to the center of the 3" pipe. Screw the 1.5" screw in to the center of the 3" pipe a quarter turn. LET IT DRY! After you let it dry, let it dry some more. Think about how glue fumes blow up, let it dry some more. Take your new toy (ok, spud guns are not toys) outside. Connect the modular ignition system (above) to the electrodes (those screws). Have a friend stand 5 feet or so away from the gun and have him look in the rear leave the cap off silly!. Click the igniter. Did he see a spark? If he did, do it again. Isn't that fun? Do it again, if your friend is not giddy, STOP. You now have a spud gun! To figure out how to fire these damn things look at the "What the?" pages.
  • 24. Intermediate: Build The Spudinator What you'll need: 1' of 3" PVC pipe, 3' of 1.5" PVC pipe, two 1.5" to 3" reducers, a 3" female converter (goes on the 3" pipe and has threads), cap for the 3" female converter, PVC purple primer, PVC glue, one 2" screw, one 1.5" screw, and a modular ignition system This gun is built the same way as the basic gun but its a lot bigger and has a bigger trajectory and a bigger boom. The second 1.5"-3" reducer goes on the end of the barrel and is just for looks. Build The Big Burtha What you'll need: ~1' of 6" PVC pipe, 3' of 2" PVC pipe, a 6" to 2" reducer (you may need more than one reducer to do this job), a 6" female converter (goes on the 6" pipe and has threads), cap for the 6" female converter, PVC purple primer, PVC glue, two real long screws, and a modular ignition system This gun is built the same way as the basic gun but its a lot lot lot bigger and has a insane trajectory and a bigger boom blast ka-boom. (We have not built one of these big suckers...yet. If you do decide to build this bastard, tell us your experience with it, what you blew away, etc. Build The Zookenie (patent pending) What you'll need: 6-8" of 3" PVC pipe, 1' of 3/4" PVC pipe, a 2" to 3/4" reducer (or series of reducers), a 2" female converter (goes on the 2" pipe and has threads), cap for the 2" female converter, PVC purple primer, PVC glue, 2 screws, and a modular ignition system This gun is built the same way as the basic gun but its a lot smaller and is VERY portable. More Advanced Build The Silencer (untested) What you'll need: 6" of 3" PVC pipe, 8"-9" of 1 1/2" pipe, two 3" to 1 1/2" reducers, some foam rubber.
  • 25. Take the 1.5" Pipe and drill 1/8" holes in it each about 1" from each other. Take both of the reducers and file out the ridge that prevents the 1.5" pipe from going all the way through. Slide the 1.5" through the reducer so that it looks like an umbrella Glue the pipe to the reducer so that it leaves room for the silencer to be glued to the gun straight. Glue the filed reducer, with the 1.5" pipe through it, to the end of the 3" pipe Stuff the gap between the 1.5" and the inside of the 3" pipe with the foam rubber. Glue the other reducer to the end of the 3" letting the 1.5" go through it Glue it to the end of your gun Build The Lil' Bastard (patent pending) What you'll need: 18",4",& 1 1/2" sections of 1 1/2" PVC pipe, 6" section of 2" PVC pipe, a 2"X 2"X 1 1/2" 45 degree Tee, a 2" to 1 1/2" reducer, a 1 1/2" pipe cap, 2" female converter (goes on the 2" pipe and has threads), a 2" threaded cap, two screws for the electrodes. The Lil' Bastard is a gun that a step ahead of the Zookenie. It still shoots a 1.5 inch, but it's very portable and, spite the size, packs a punch. Start with the 45 degree Tee piece, glue the 4" 1.5" section to the protruding 1.5" 45 degree part. Glue the 1.5" pipe cap to the 4" 1.5 section. This is your handle. Hold the components you've glued together, so that the handle is pointing up and out to the side. Glue the 6" 2" section to the top of the current components. Glue the 2" female thread converter to the top of that. Glue the 18" 1.5" section to the bottom of the current components. Lastly install your electrodes. You now have a Lil' Bastard (patent pending). Build The Psycho Sniper Still under development
  • 26. Most Advanced Build the All in One Spud Gun Designed by: Allen Forsman Assemble all PVC parts as shown in drawing. C The igniter is your basic gas grill igniters. C Take a small nail or cut a short piece of stiff wire Run from the ground connection near the base of the unit to the tip and epoxy in place with some 5 minute epoxy. C You want to leave about 1/16" to 1/8" between the tip of the wire and the tip of the sparker. C After the epoxy is hard you can adjust the gap to get the best spark. C Drill a hole is the PVC threaded plug and epoxy the spark unit into the plug. C Use enough epoxy on the inside to fill the square hole about half-way up. For can and ramrod attachments, use PVC glue. You can make the attachments a lot sturdier by saving the PVC "sawdust" from cutting the pieces and using it as filler around the gaps and soaking it with PVC glue. Can Cradle- Cut 1" long pieces of 1.5" PVS in half. Glue both pieces upside down to top of the 3" tee. Use rubber bands to hold the WD-40 can in place. You can use just about any flammable spray stuff that has a tube. Drill a small hole in the top of the 3" cleanout just big enough to stick the tube into. Cut the tube to leave about 1/2" inside the combustion chamber. If you want you can seal around the spray tube with silicone or epoxy (the small size will not make a noticeable drop in pressure even if it leaks) I used WD-40 because you can get it in small cans, but it tends to leave an oily residue. Just about anything that uses butane or propane as a propellant will work. If you use a big can of whatever, size your can cradles accordingly.
  • 27. Ram Rod Clips- Use two 1" pieces of 1" pipe or 3/4" flared parts. Cut each piece a little more than half way around. Glue the pieces to the bottom of the barrel. The ramrod will clip into these when not in use. A couple of notes: Sharpen the inside of the tip of the barrel with a file or some heavy sandpaper to cut the potatoes cleanly and evenly. Also, cut the ramrod long enough to leave the potato about 2 or 3 inches from the combustion chamber. To fire the gun simply: Ram a potato into the gun as far as the ramrod will go. Close the ball valve and give a little shot from the spray can. (You may have to experiment a few times to find out just the right amount.) (Start with a very short squirt and work your way up.) Take aim and press the igniter button to fire the cannon. Whoop and holler. While this has absolutely no effect on the trajectory, it's really a lot of fun! Open the ball valve and blow lightly into the barrel a couple of times (like in the John Wayne movies). This forces fresh air into the combustion chamber. Go to step 1. Build The Spudzooka (patent pending) Bazooka type gun Plans still being written http://www.capital.net/~anker/plans.htm PLAN # 4
  • 28. Diagram (I have my igniter in the end cap but it could be mounted on the side of the chamber to make it safer) (I also have a thread join between the chamber and the barrel, only for portability) Parts Equipment Specifications Quanti ty 2 inch pvc pipe (barrel) 36 inches long 1x 4 inch pvc pipe (chamber) 12 inches long 1x 4 inch – 2 inch reducer - 1x 4 inch thread end for chamber Male (end cap screws on to this) 1x 4 inch end cap To screw on thread end 1x Barbeque ignitor Push button type 1x PVC glue Professional strong glue! - Assembly 1. Cut all pieces to size. 2. Use sand paper to roughen surfaces to be glued (creates stronger hold). 3. Glue all pieces together as shown in the diagram. 4. Drill hole for the ignitor, either in the end cap or on the side of the chamber. Make sure it fits tight. 5. Leave over to dry (at least) before trying. Operation 1. Slide a projectile down the barrel until it stops at the beginning of the chamber (make sure it is not tight, loose projectiles fire better). 2. Open end cap, spray in something flammable (deodorant) for about 3
  • 29. seconds and quickly replace end cap. 3. Press the ignitor button and hold tight. If the gun is made correctly it should fire at least 400 meters. If something goes wrong, I will not be held responsible. You made the gun by your own choice. PLAN # 5 Build Your Own Launcher http://www.spudtech.com/content.asp?id=5 Alright, you want build your own potato launcher. These instructions will help you on your way to an effective yet simple spudgun that should provide hours of enjoyment for you, your friends, but probably not the old man down the street who gets mad when your car backfires! COPY AND PASTE THIS ENTIRE PAGE INTO WORD AND PRINT IT. No need to keep running back to the computer while you are trying to build your launcher. A few things to note before proceeding: 1. These instructions/procedures are provided as-is. No guarantee is made that this device will function as well or better as I have experienced, intend, or describe it to operate. In other words, your results may vary, and they may even be very undesirable results, possibly resulting in personal injury or property damage. Please review the site disclaimer for more information. 2. The wording and statements/nomenclature pertaining to the construction and operation of this potato launcher are intended as such to help ensure one attempting to do this has a basic understanding of the equipment and materials involved. If some of the statements seem 'Greek' to you or you do not recognize some symbols or phrases, that is wholly my intent, and you should obtain assistance from a trusted source or not proceed at all. 3. These instructions are intended for a beginner or someone that has never built a spudgun before. The procedure outlined below is not necessarily the method myself or another experienced spudgun builder uses. These instructions will help guide you in building a "sound" piece of launching hardware. As you gain experience, you may find that different things may work better for you....but start simple. Thanks, and happy spudding! 4. The finished product should look something like the first picture on the "combustion spudgun" page of the site. Keep in mind that PVC pipe/fittings are not approved by the manufacturer to be used for the purpose of constructing spudguns.
  • 30. Here they are, in the recommended order to check them out: Step 1: Getting stuff to build it This materials list is to build a very simple starter model potato launcher, with the intent to get the most bang from your buck (so to speak). By no means is this the only way to build a launcher, or nearly the coolest, but still able to provide hours of fun. MATERIALS: Obtain the following items: (qty 1 unless so indicated in []) 10" of 4" SCH40 PVC water pipe (chamber body) 36" of 1 1/2" SCH40 PVC water pipe (barrel stock) Or get yourself a piece of SGTC rifled barrel stock. 4" PVC coupler 4" x 1.5" PVC bushing (if not available combine two, like 4x3 and 3x1.5) 4" PVC FSxFNPT adapter (clean-out adapter) 4" PVC MNPT threaded plug PVC primer, one with dye in it if possible (purple, blue) PVC pipe cement, medium body is best [2] #8x2 1/2" flat or round head allthread machine screws, drive not important Two feet of 16g or lower stranded insulated wire Electrical and Duct tape (of course!) Red button BBQ ignitor/striker, a replacement found near new BBQ's (find one for a grill w/side burner if possible) EQUIPMENT/TOOLS: Suggested tools for building the potato launcher: Hand wood saw (or hacksaw, for cutting pipe, maybe you already got it cut at the store) Pocket knife Needle Nose Pliers Soldering Iron w/PbSn or Pb free solder (or just use tape and hope it works) Drill motor with bit 0.010" larger than machine screw shank Appropriate driving tool for machine screw (probably Phillips) Medium half round file for shaping pipe (or a lathe if you got one) Rag for PVC cement clean up (disposable) Step 2: Preparing the materials for assembly To make sure everything goes together properly and smoothly, proper conditioning and sizing of the materials is necessary. Pay particular attention to the shaping of the pipe ends, as this is a major factor in proper solvent welding with the fittings. PVC PIPE SIZING
  • 31. Cut the two pipes to size, 10" and 36" with the saw unless you already did so in the store. Using the file, take off the sharp corners on the inside AND outside of the pipe. Radiusing the inside helps reduce the amount of potato scud that can build up in the launcher, and breaking the outside corner ensures proper solvent welding, if this is not done leak paths may result. Cut ends should be as square as possible. To one end of the 1 1/2" pipe it is suggested that the inside be chamfered about 0.020" and the outside filed or turned down to almost meet the inner chamfer, creating a blunt knife to help size the potato. It will work without out this step, but a lot messier! PVC FITTINGS Inspect the fitting for really bad weld lines or possible large dislocations that may result in premature failure. Remove all paper tags or labels by peeling, scraping, even using a bit of primer to clean off the last adhesive. File off any sharp sprues that may hamper your ability to grip the fittings firmly when assembling. IGNITION SYSTEM Cut the wire into two equal lengths. Strip and twist each end about 3/4" back. Taking the BBQ igniter, upon inspection you should find a plug on the tail end (one electrode site) and close inspection should reveal a very fine wire embedded in the side body of the igniter, close to the button lip.(if you have a 2 pole ignitor -- side burner type -- this step will be much easier) This fine wire is attached to the igniter nearest the button, as the wire is just pressed into this slot which might be about 3/4" long. Carefully extract the other end of the wire with the knife, removing all but the last 1/4" or so from the slot. Carefully twist this wire to one end of one electrode wire stripped previously. Immediately solder this connection together taking care to not break or extricate the fine wire from the plunger body. Cool with spit (really!), dry, and tape this joint back against the body with electrical tape, using enough to immobilize the wire with gentle tension. Take the wire supplied with the igniter, the one with the plug that fits on the base, and cut leaving about 2" from the plug end that will fit into the base of the igniter. Strip and twist this stub to the other electrode wire, soldering, and taping over the solder joint. You now have an igniter to make a 'remote' spark. Try it holding the two free electrode wire ends about 1/4" apart--don't touch them! (your BBQ igniter may be a bit different, the idea is to get both electrodes away from the igniter, so you don't make a big hole in the launcher combustion chamber.) Step 3: Assembling the Launcher Now you get to stick all the stuff together, using pipe glue and tape and more solder if you like! Just don't breathe too much pipe glue solvent...it'll make you nuts! I Chamber Assembly: Prime both ends of the 4" pipe, also priming the 4" bushing, both 4" coupler sockets, and
  • 32. 4" slip on the adapter. DO NOT get any primer on the adapter threads! Immediately apply pipe cement to the three primed 4" fittings, then LIBERALLY to both ends of the 4" pipe. Start both the coupler and adapter fittings on the pipe, start the bushing in the coupler, then right the assembly with the threads up, pressing it together with body weight while twisting about 1/2 turn. Hold this position for at least 30 seconds. The pipe ends should bottom each about 1 1/2" inside the fitting socket. If they both do not bottom, either apply more force IMMEDIATELY somehow to get it to, or you are screwed and have to throw it out--start over with that. If the fittings and pipe are properly conditioned this should not be a problem. Wipe up any spilled glue with the rag, but leave a good bead at the external pipe/fittings line. If any glue got on the threads get it out of there as fast as possible! Any glue on your hands should just be left to dry and then peel it off. Using solvent to remove it will just increase your exposure to it. II Electrode Installation: Wait about 10 minutes for the glue to set. Using the proper size drill bit, put two radial holes 90deg apart about 1/2" back from the front edge of the adapter fitting--the plastic here is about 1/2" thick as well. Drive in the two machine screws nearly all the way, leaving about 1/8" between the screw head base and the plastic. The ends may touch or be far apart--the electrode gap will be calibrated after the electrode wires are connected. III Barrel Introduction: Prime one end of the barrel and the 1.5" socket on the bushing. If one end of the barrel was chamfered to a knide, prime the square 'regular' end of the pipe. Apply glue, liberally to the pipe, and press together, again using a 1/4 turn motion to bottom. Hold for 30+ seconds. After releasing place the unit upright for several minutes, to let the glue set a little more. Solvent welding is more of a curing than a drying process. Solvent is lost, hence the term drying, but the action of the solvent effectively cures all those individual plastic parts into one continuous physically joined piece of plastic. Properly done, solvent welds are always stronger than bulk pipe. IV Wire it Up: Tin the two free ends of the electrode wires if possible. With each end bend it around the screw shank, just below the head, in a clockwise manner (you may need needle-nose pliers if the wire is heavy). After the wire is at least 3/4 turn around the shank, tighten the screw, pretty good, biting the wire into the plastic a little. Liberally apply electrical tape, rubber tape, or silicone RTV to the exposed metal areas, as they will shock you all day long if not insulated properly. Before taping tug on the wires a little to make sure they are firmly gripped by the screw head. V Electrode Calibration: Setting the gap is next. The two screws may be in a variety of relative positions, depending on how straight and aligned the holes were drilled. Wearing leather gloves,
  • 33. you now want to somehow create about a 1/4" gap between the screws. This gap does not have to be measured from the very tip of the screw, and the spark will find the shortest route possible. Bend only one screw if possible, and don’t bend it around a whole bunch back and forth, or it will get work hardened and break sometime. DO NOT test the spark device yet, as there are still PVC solvent fumes all over the place. Just wind sufficient tape around the ignitor body to fully insulate all metal parts from your hand when you grip it. Lash it to the side of the chamber if you like with electrical or duct tape, just don't press the button yet! Step 4: All put together...now you wait IT IS HIGHLY RECCOMMENDED THAT YOU WAIT AT LEAST 24 HOURS FOR THE GLUE TO FULLY CURE AND SOLVENT TO DISSIPATE. Many of the unfortunate potato launching accidents occur due to over anxious constructors/operators getting a little trigger happy a little too early. Keep in mind that the solvent fumes are extremely flammable. A few notable events include people chemically/thermally removing a majority of the hair on their head, or rapidly separating the supposedly single piece of PVC plastic back into its purchased components (or even smaller pieces!) Just wait...it'll be worth it. In the mean time this is a great opportunity to gather what you may need when you do start running this device. On the top of this list is certainly a bag (or two...or three...) of good fresh potatoes. Never use old sprouting, skunky potatoes, this is just bad form! Buy a bag for $2 and relish in their crispness! Also a fuel, probably starting with hairspray, the old mainstay. Traditionally the 'Aqua-Net' brand has yielded to best results, but it will be mighty hard to find those folks who grew up on that. Once you get more experience you might graduate to propane...but wait a bit. A good location is also required...don't use this device in the middle of your subdivision out of your garage or you are guaranteeing that old grandpa down the way will call the cops! Step 5: Using the launcher Again, find a suitable location to deploy your potatoes, as the device can get quite loud with a good fuel load. Out in the sticks is best, but just not downtown! 1. After waiting the necessary time for the solvent vapors to dissipate, now you can test the ignition device. Depressing the plunger briskly should produce a good spark to jump across the screw threads. If all connections were made correctly and the gap is about 1/4" it should spark every time (or at least 9 times out of 10). If it doesn't check your connections, maybe set the gap a little closer (never less than 1/8") but get it to work, or potatoes are going nowhere (unless you throw them--boring!) 2. When a reliable spark is verified, test fit the threaded plug into the adapter. It should engage the threads at LEAST TWO TURNS. If not, check for crud in the threads, and if clear, obtain a 60deg triangle diamond file, and size down the plug threads a little. The threads are at a 60deg angle, so careful filing about the first few threads is ok.
  • 34. 3. With the cap off, load a potato! With the chamber on the ground, place a potato over the muzzle of the launcher, and press it down with your palm, shaving off the excess, creating a cylindrical potato plug. Make sure the potato contacts the wall firmly all around, or it will not fire or not that well. Loading the potato sideways is acceptable, as it creates a more stable projectile anyway. Ram the potato down to within 2" of the breech of the barrel, using a smaller diameter PVC pipe or broomstick. Don't push it too far or it will fall out into the chamber...and just be subject to a short baking cycle. 4. With the spud firmly seated in the breech, pick up the launcher and holding with one hand, dispense a few seconds of hairspray directly into the chamber. Don't use too much; it will just make a mess. Quickly close by screwing on the end cap hand tight, do not use a tool to tighten to two turns or you will likely never get it off again. 5. Call out "Fire in the hole!", point the launcher in a safe direction, and depress the BBQ plunger. That potato you rammed down there should exit at a quite rapid rate with a sizable report, and depending on where you aimed and at what angle you pointed, it went anywhere from 6 inches to ~200 yards from the muzzle. Pretty cool. If you clicked the ignitor a few times and it didn't work, you are not alone, check out my next section. 6. If it worked, great! Remove the end cap (this may require a tool), vent the spent gasses getting a fresh load of air, and repeat as necessary! Step 6: Debugging the Launcher There are a lot of reasons why your launcher may not be working. First and foremost NEVER take off the cap and start clicking away at the igniter. This again has led to human fires and that chemical thermal hair removal thing again.... Hairspray in cold weather just does not go well. Too much of the burnable stuff in the spray condenses on the chamber walls, making it very difficult to burn. You might try warming the chamber by the fire if you are camping or graduate to a lighter, hotter fuel (propane....) To 'defuse' a misfire you need to take off the cap, while pointing it in a safe direction. Allow the chamber to air out for several minutes, perhaps longer, to get the fuel load out. After you are certain the fuel has been vented, again verify the spark, just by turning the chamber enough so you can see where the spark should be. Never point the chamber bore directly at your face, or body, or anybody else. If it sparks then it is a fuel mixture problem. One of the most common fuel problems leading to misfire is too much fuel! Not usually a problem with hairspray, other richer fuels can be overloaded above their UEL value, and they wont work. Always try less fuel rather than more fuel. If you still can't get it to work I invite you to peruse the many other web sites that talk about how to troubleshoot your combustion launcher. Again I have made a partial list, and sadly just don't have the time to address every specific person to person launcher complication. I hope you do in fact figure it out and experience many hours of safe spudding.
  • 35. PLAN # 6 How to build a basic potato gun The simple instructions SCROLL DOWN
  • 36. Not exactly to scale Like so many other potato gun sites have, I'm not going to tell you EXACTLY what kind of materials to get to make a potato gun. I will tell you though, what I have used, that will work for sure but really, just find the right sizes you want at your local hardware store. If you know what needs to fit into what, then put the stupid thing together at the store! I did.
  • 37. All you need to do is: 1) Find the size end cap you want. 2) Find the same size adapter that fits into that end cap. (Both threaded of course.) 3) Find a short piece of PVC that fits into the adapter you found. Or you can just take a big piece home and cut it down to the right size you want. Then you can use the rest to make another one! 4) Find a reducer that fits into that PVC pipe and at the other end of the reducer, the size barrel you want to use fits into it. 5) Make sure the barrel fits into the reducer! Get it? Good! Other materials and tools you need: 1) A saw for cutting the pieces of PVC. 2) PVC glue. Use the right stuff! Very important! And remember to sand wherever you use this glue! 3) Electric drill. 4) Electrical tape 5) Epoxy or hot glue. 6) Solder and iron, if you solder the wires to the screws. 7) Wires, speaker or phone wire works fine. Thinner the better, I think. Instructions: Now just take a look at the pictures I drew up at the top of the page and glue it together. Make sure you sand all the surfaces you glue together! If you don't this might happen to YOU! What do I do with the BBQ ignitor?? This is what you need to do: Take the ignitor, do you see the metal tip on the very end of it? If you bought it new, you should have a little wire that came with it. It fits right onto that little metal tip on the end of the sparker. Now take some thin wire like speaker wire or maybe even tellephone wire (two single strands) and tape or solder one piece of that wire to the end of the other wire that is stuck onto the metal tip thing on the ignitor, to make the whole thing as long as you need it. If you look at the side of the ignitor you will see a small hole with a copper piece of metal flush with the side running up to the top where the red push-botton is. Now take the other piece of wire and tape and solder (make sure to use LOTS of tape because you can get shocked by it and then it will not fire) and stick it into the little hole so that it is touching that little copper strand inside it (just stick it in there and tape it down real good). So now you have two long pieces of wire hanging off this ignitor thing. If you put the two wires close to eachother and click the red button on top, it should give you a nice big spark. If for some reason you don't get a spark and the wire ends are very very close to eachother, you must have a bad connection somewhere or maybe the sparker is bad if you think you did everything right. When you see that it works, this is what you need to do now. Screw two large screws (or if you only have nails, that's ok too) through the middle part of your
  • 38. chamber so that the screw ends are very close to eachother. Make sure you drill a small hole so that the screws fit snuggly and stay strong. Now tape, solder, glue, whatever, the two wires from the ignitor to the end of those screws on the outside of the chamber. Now you will see that when you click the sparker, a blue spark will jump between the two screws. You may have to tinker with how far apart the screws are from eachother to get the best possible spark. Once this is all done, you are ready to go! Just cram a potato down the barrel, spray about a second or two of hairspray into the chamber, screw the endcap on and click the button! Pow! You may have to experiment with how much hair spray you need to use because of the size of the gun. That should be about it! Now how you make the trigger is simple. Since you connected the BBQ ignitor with wires going to the nails, you can put it just about anywhere. You could even do it from a distance! I tried for myself (I didn't shoot anything, I just put the BBQ ignitor to a long piece of wire), but you could use about 5-6 feet of wire and still get a spark. Probably not as strong as if it was shorter but it would still work probably. Or you could make a handle with a hole in it like I did for the 01 and taF models. And the easiest way yet is to do what we did with the 00 model and tatter tosser. Just take some electrical or duck tape and tape the ignitor to the barrel wherever it feels right. This gives you a real 'gun like' feeling and so that you don't rip the wires off by accident. That works great. If you still need help with the directions, e-mail me!
  • 39. Click here for plans and measurements of a high powered combustion cannon. WARNING! Remember, The author accepts NO resposibility for the actions or results of the person or persons that read or choose to employ this information!!!. Potato guns CAN be dangerous! Please be careful!
  • 40. PLAN # 7 SG-200 Directions: Start by gathering all materials. In addition to materials listed in the diagram you will also need a hack-saw (A power band saw will also work), drill, drill bits, PVC Cleaner, and PVC glue. Step 1: Cut PVC to correct length. PVC comes in 5 and 10 foot chunks, so you may not need to cut the barrel. Step 2: Drill holes. Drill small holes on top half of barrel. This helps to reduce pressure needed for launch (which will increase power) and keep accuracy at the same time. This is an optional step. You will also need a whole in the end of the end cap for the igniter. Step 3:Glue connections. Begin on one end of the gun and work towards the other end. First apply the PVC Cleaner to the outside of the pipe and to inside of the fitting. Now apply the glue to the pipe and fittings. Step 4: Insert igniter into end cap. Step 5: Watch the movie "Titanic " at least 4 times, or If you aren't a big Leo fan you can just let the glue dry for 12 hours and do what you want. Step 6: Load Potato, load fuel, shoot. Laugh historically, repeat step 6.
  • 41. PLAN # 8 SG-100 Directions: Start by gathering all supplies and cutting pieces to size. You can use a hack saw to cut the pipe. Be sure to use ABS pipe instead of PVC. This makes the gun last longer because hair spray and other chemicals do not eat away at ABS pipe. ABS is also not affected by heat. Take the 1 foot piece of 3 inch diameter pipe and glue on the 3 inch to 1 inch reduction fitting with ABS or PVC glue (be sure the glue matches the type of pipe you are using). Now you should take the 3 foot piece of 1.5 inch pipe and glue it to fitting. Now move on to the igniter. I recommend you go to wal-mart and get a lantern lighter from the camping supplies, they are about $3.00. Drill the appropriate size whole, slip it in, and tighten the nuts. You may need to put some hot glue or caulk around it to make it air tight. Next take the 3 in threaded female fitting (Is that what you call it) and glue it in place in the back of the gun. Let all the glue dry completely for at least 6 hours. (I recommend 24.) The last step is shooting spuds! Take a potato and twist on the top of the barrel so the excess is beginning to be cut away. Now flip the gun upside down and ram it into the ground driving the potato into the barrel. Take a broom stick, golf club, or hockey stick and ram the potato 3 quarters of the way down the barrel. Take a bottle of hair spray (I recommend this for the first launch) and spray it into the combustion chamber for a few seconds. Replace the cap and now your gun is loaded. Be very careful! These guns are very powerful and could really hurt someone! Aim the gun into a large field, flick the lantern flint and laugh for hours.
  • 42. Finished Product: PLAN # 9 http://potatocannon.nodice.org/index.html POTATO CANNON V2 MUCH MORE COMPLICATED, BUT WORTH IT
  • 43. Here's a materials list for the chamber: Part Qty 2" PVC Pipe ~2 1/2' 3" PVC Pipe ~2" 4" PVC Pipe ~1 1/2' 2" - 3" PVC Adapter 1 3" - 4" Adapter 1 2" Female Cleanout Adapter 1 4" Female PVC Adapter 1 4" End Cap 1 Grill Ignitor 1 PVC Cement 1 PVC Primer 1 Hot glue A few sticks
  • 44. The Chamber of the cannon looks like this. As you can see I’ve painted it chrome to make it look cooler. Putting this together is a breeze. The 4" female adapter fits on the end of the 4" PVC pipe. First prime both surfaces to be cemented with PVC Purple Primer. Then place PVC Cement on both sides, put them together quickly (it sets fast) and hold until bond is set. On the other end you put the 4"-3" adapter, cementing it in a similar fashion. Between the 3"-2" adapter you need to place a short (1"-2") piece of 3" PVC. Start by cementing the short piece to the 3" end of the 4"-3" adapter, then cement on the 3"-2" adapter. Cement the 2" female adapter on the 3"-2" adapter. Before using make sure that all bonds are secure and set. Do this by tugging on each piece and checking for movement. Here's a materials list for the barrels: Part Qty 1 1/2" Barrel 1 1/2" PVC Pipe ~2 1/2' 2" PVC Pipe ~2" 1 1/2" - 2" Adapter 1 2" Male Adapter 1 2" Barrel
  • 45. 2" PVC Pipe ~2 1/2' 2" Male Adapter 1 3" Barrel 2" PVC Pipe ~2" 3" PVC Pipe ~2 1/2' 2" - 3" Adapter 1 2" Male Adapter 1 4" Barrel (not pictured) 4" PVC Pipe ~2 1/2' 2" - 4" Flush Adapter 1 2" Male Cleanout Adapter* 1 *-not in visual parts reference Once completed the set will look like this. Now all you have left is the end cap. The end cap contains the ignitor.
  • 46.
  • 47. This part is pretty self explanatory. You have to drill a 3/4" hole in the center of the end cap. The ignitor should be able to fit in the hole, you may have to file down the parts that are intended for mounting to a grill. You need to take the cord provided with the ignitor and cut it off and solder it to the wire along the side of the ignitor. Then hot glue the cord down so the exposed metal tip is close enough for a spark to jump across. Once the ignitor is prepared simply hot glue it into place. Let it set for a while before use. If you wish you may use silicon sealer instead of hot glue. Additionally you can make a Y-adapter (Double barrel) that will enable you to launch two potatoes at the same time. All you need is a 2X2X2 45° y-junction pipe, a 45° elbow, two 2" female adapters, and a 2" male adapter. Follow the same cementing procedures as you did for the rest of the cannon. WARNINGS When using hairspray as a propellant avoid spraying it directly on the threads of the screws. The screws will stick together and may cause the barrel to break if you force it too much. If your barrel does get stuck DO NOT force it, instead you can use channel locks or a pipe grip which may be bought at a hardware store. These tools will give you much better leverage and will unscrew them with minimal force. Trust me, I learned from experience. You should also wash out your cannon when you're done, gunk tends to build up in it.
  • 48. PLAN# 10 POTATO CANNON V1 This cannon is very simple to build and is cost effective for the beginning hobbyist. It is very easy to build and costs about $20 Here is a materials list: Part Qty 1-1/2" PVC Pipe 5' 3" PVC Pipe 2' 1-1/2" - 3" PVC Adapter 1 3" Female PVC Adapter 1 3" End Cap 1 Grill Ignitor 1 PVC Cement 1 PVC Primer 1 Hot glue A few sticks Once you get all the parts all you need to do is take the 1-1/2" pipe and cement one end
  • 49. to the adapter and the 3" pipe to that. Then cement the female adapter to the end of the 3" pipe. The only part left is the ignitor. You will have to drill a hole in the end cap about the size of the ignitor. Then all you have to do is hot glue it into place, this will provide an adequate seal (A picture of this is in the works). Let everything set for a while before using. WARNING When using hairspray as propellant you should avoid spraying it on the threads of the screws. The hairspray may cause the end cap to stick and will be difficult to remove. If it does get stuck you can use channel-locks to remove it. When you are done using your cannon you should wash it out so gunk doesn't build up. PLAN #11 Potato Cannon - V3 This is the best cannon I've come up with to date. Receiving some inspirado during a trip to the hardware store, this design was conceived on the spot, assembled and tested in about 3hrs. It takes the versatility of interchangeable barrels and adds an ergonomic design to the chamber. It also gets a better punch and takes less saw work to assemble. A nice patriotic backdrop for the cannon.
  • 50. Here's a materials list: Part Qty 2" PVC Pipe ~5" 4" PVC Pipe ~2" 2" Female Cleanout Adapter 2 4" Female Cleanout Adapter 1 4"x2" Flush Adapter 1 4" End Plug 1 2" End Cap 2 2" Male Adapter 1 4"x4"x2" Y-Adapter 1 4"x4"x2" T-Adapter 1 Grill Ignitor 1 PVC Cement 1 PVC Primer 1 Hot glue A few sticks As you can see, this cannon is not too much more difficult to construct than the previous model. In fact, it is in a few ways easier. The chamber is made of two primary pieces, the 4-2 inch y-adapter sections. The one towards the end is a 45degree y-splitter. The one on top is a 4X4X2 T-adapter (I don't remember the exact names from the hardware store,
  • 51. you'll know them when you see them.) These pieces are cemented together. Do some dry fitting before hand to get a comfortable angle for the handles. Notice that the handle with the ignitor points straight up when in use, and the handle on the side points downward slightly. This is the best angle we came up with. To find a good angle for you, put your right hand out in front of you as if you were holding the trigger assembly. Put your left hand out in front and act as if you were holding the handle. Figure out how your hand naturally rests when extended out and which angle is the most comfortable. When you figure out the angles, cement the two pieces together. Next cement in the 4 inch female adapter into the end of the chamber and the 4-2 inch flush adapter into the top. Cement a 2 inch female adapter into the 4-2 inch flush adapter. When that is complete, cut to length a piece of 2 inch pipe to be used for the handle (the exact length is not important, just make it a comfortable size for your hand.) Then cement that into place and cement a 2 inch end cap on the end. To make the igniter assembly (sorry there are not detail pictures of it, I may get some cross-sectional drawings up eventually) You need to get a 2 inch end cap and a 2 inch male adapter. Drill a hole in the end cap to fit the ignitor as you would for the previous cannons. You need to do a little bit of jury-rigging on the ignitor. Get a couple of long wires and solder them onto the two wires coming from the ignitor. This will allow the sparker to reach into the chamber. Next, place the rigged ignitor assembly through the hole in the endcap. Hot glue it into place. This will be a little tricky, all you have to do is start squirting the hot glue down towards the hole. You don't have to get close to the hole, just be very liberal with your hot glue use, the more you use now, the less you'll have to use later if it comes loose. After the igniter is glued into place and the glue has cooled, you may cement on the 2 inch male adapter. Now you need to fix the end of the wires from the ignitor so that they stay apart so a spark may jump between. I used a cable staple to accomplish this. A cable staple is essentially a piece of plastic with two nails in it on opposite sides. I soldered the two wires to the two nails, then bent the nails so they were close enough to spark. After that, I hotglued it all in place so the nails wouldn't change position. After this, on the 45 degree y-adapter piece, cement on the 2 inch female adapter to the end, allowing a port to accept the igniter assembly. You can now feed the wires through the hole and screw the assembly into place.
  • 52. The wires should now hang down into the chamber. To prevent it from rattling around tape it down inside the chamber. You can use the same barrels that you used for the previous model. They are all interchangeable because we're using a 2 inch standard. Load the cannon the same way. Put a potato or other ammunition into the barrel. Then screw the barrel into place.
  • 53. Fuel this cannon the same way as the previous model as well. Load the fuel in through the end, screw the cap on, then... ... take aim and fire.
  • 54. Here's a comparison shot with both the model version 2 and 3. You can see how version 3 is superior. WARNINGS When using hairspray as a propelent avoid spraying it directly on the threads of the screws. The screws will stick together and may cause the barrel to break if you force it too much. If your barrel does get stuck DO NOT force it, instead you can use channel locks or a pipe grip which may be bought at a hardware store. These tools will give you much better leverage and will unscrew them with minimal force. Trust me, I learned from experience. You should also wash out your cannon when you're done, gunk tends to build up in it.
  • 55. Potato Gun Silencer Plans It took me a while to make these plans. They do help silence the gun, but only to a certain extent, you can still hear the boom. I would like to warn you that after a lot or use, this silencer may get potato pieces in it and need to be cleaned. Don't be discouraged though, it doesn't need cleaned out very often. Here is a list of materials needed: Materials Item Le ngt h Where to buy Approximate Price Each 3" Schedule 40 PVC ** 12" Hardware Store $.50 1 1/2" Schedule 40 PVC 3'4 " Hardware Store $1.50 Two 1/2" to 3" Converter N/A Hardware Store $3.00 1/2" Threaded Female Adapter N/A Hardware Store $1.50 cotton or furnace filter material N/A Hardware Store $1.00 ** All PVC, including fittings, Must be Schedule 40 These Instructions are somewhat vague, since it is not feasible to write every step. For better instructions look at my other guns and barrels. The first thing you need to do is examine the 3 1/2" to 1 1/2" adapters. Notice there is a lip inside of the fitting, this lip will need to be removed, I suggest a Dremel Tool, or a Round File. The reason it needs filed away is to allow the fitting to slide over the 1 1/2" barrel. Next test fit all parts, this will give you an idea of how the finished product will look, you will not use glue on this project. (As a side note leave about 6" of 1 1/2" PVC near the muzzle so you can still cut the potato easily.)
  • 56. Close-up Picture This picture will give you a good idea of what to do. Both the barrel and the silencer need holes drilled in them, the holes wouldn't be as big as the ones in the picture, it was drawn that way for emphasis. Next you will need to stuff the space between the barrel and the outside of the silencer with a sound absorbent material. A good material would be cotton, or furnace filter material. Note, do not glue the 3" to 1 1/2" adapters to the 3" pipe. This is to allow you to clean the material if it should become dirty. DO NOT USE GLUE!!! This if for when you will need to clean out the silencer, and it must not be glued to do so..