
Recommandé
Contenu connexe
Tendances
Tendances (12)
Similaire à Digital Monet paintings created using MS Paint
Similaire à Digital Monet paintings created using MS Paint (20)
Dernier
Dernier (20)
Digital Monet paintings created using MS Paint
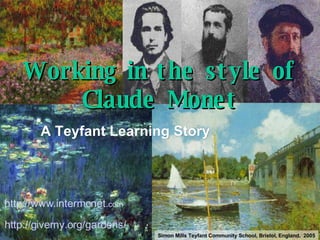
- 1. A Teyfant Learning Story Working in the style of Claude Monet http://www.intermonet. com http://giverny.org/gardens/ Simon Mills Teyfant Community School, Bristol, England. 2005
- 2. What time of year is it in this painting? Where is the sun in the sky? What clues are there in the painting? Where was Monet when he painted, or sketched this scene?
- 3. Is this painting upside down? Why is the sky at the bottom of the painting? What clues can you see in the image?
- 4. Is it a warm or cool day to be walking by the river? Why do you think this?
- 5. What time is it? How do you know?
- 6. Does this scene seem familiar to you? How and why?
- 7. When was this painting made? What clues can you find to help you decide?
- 8. How does this painting make you feel? Why?
- 9. What colour is a tree? How does this tree make you feel?
- 10. REFLECTIONS Using Microsoft Paint to work in the style of Monet Term 1 2005
- 11. We used the airbrush tool in MS Paint a create the background layer for our landscape .
- 12. We used the airbrush tool to make a tree stamp . Before we could copy and use our stamp we needed to select it We used the rectangle select tool Turned on the transparency tool
- 13. We pasted copies of our tree onto the background layer , and while they were selected , dragged them to where we thought they would look best.
- 14. We used the resize handles on our image canvas , to crop our paintings.
- 25. Making Our Digital Monet’s
- 26. To make a reflection, we pasted a copy of our entire graphic, then used the flip and rotate tool, to flip our image vertically.
- 27. We dragged our reflection Until we were happy with the look and feel of the graphic, And then deselected our Reflection to paste it in place. We cropped our graphic to size and saved our final draft for publishing.
- 28. Some of us added ripples to the water with the ellipse tool, and even added characters, flowers and creatures to our graphics, by making and saving other stamps to help .
- 29. In Publisher we made IKEA Prints . We inserted our finished graphic. Gave our painting a name. Added our own names. And framed our Print with a border.
- 30. Our Digital Art Gallery
- 31. Hannah and Holly
- 32. Sophie, Porscha and Georgia
- 33. Aimee and Ashley
- 35. Shayla and Aiofe Lea
- 38. Chelsea and Anne Marie
- 39. Kurtis and Chloe
- 42. Heidi and Zack